Pioneer DEH-200MP: Installation
Installation: Pioneer DEH-200MP
Section
Installation
04
English
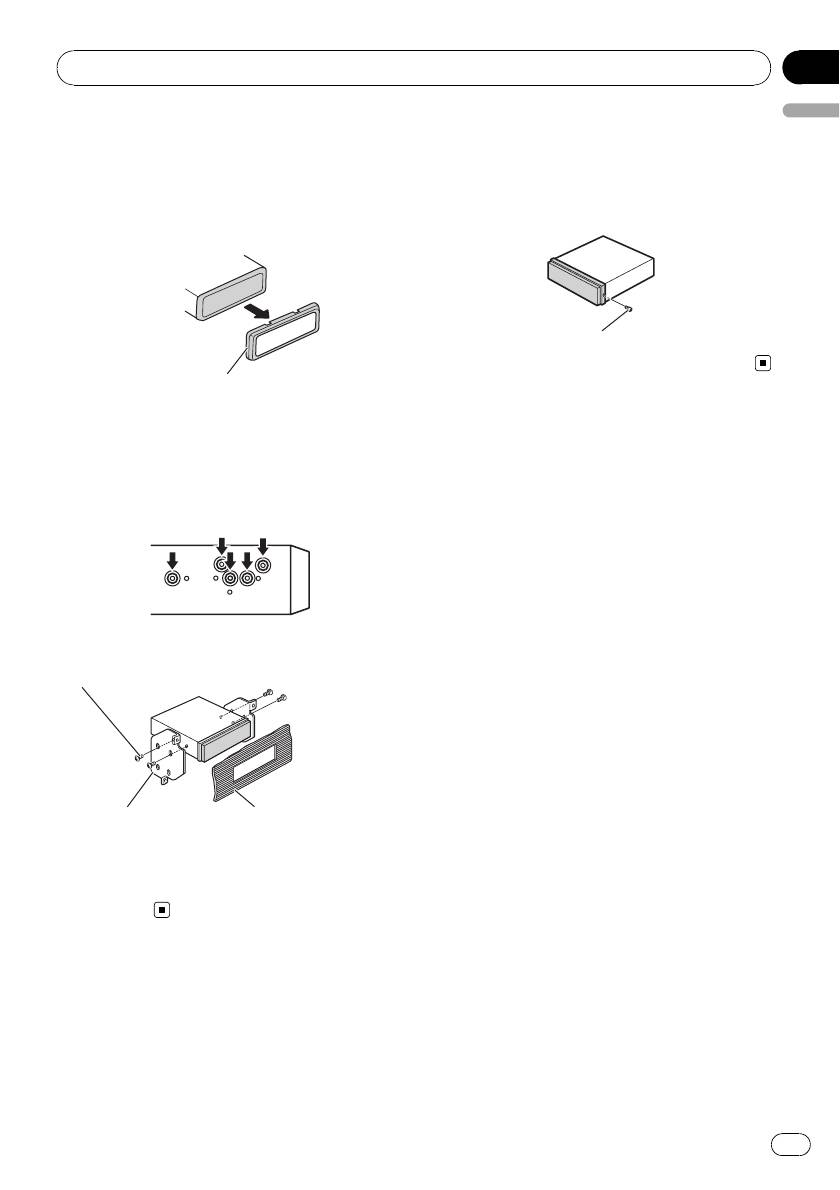
DIN Rear-mount
Fastening the front panel
1 Extend top and bottom of the trim ring
If you do not plan to detach the front panel,
outwards to remove the trim ring. (When
the front panel can be fastened with supplied
reattaching the trim ring, point the side
screw.
with a groove downwards and attach it.)
Screw
Trim ring
! It becomes easy to remove the trim ring if
the front panel is released.
2 Determine the appropriate position
where the holes on the bracket and the
side of the unit match.
3 Tighten two screws on each side.
Screw
Mounting bracket Dashboard or console
! Use either truss screws (5 mm × 8 mm) or
flush surface screws (5 mm × 9 mm), de-
pending on the shape of screw holes in the
bracket.
17
En
Оглавление
- Contents
- Before You Start
- Operating this unit
- Operating this unit
- Operating this unit
- Operating this unit
- Operating this unit
- Operating this unit
- Operating this unit
- Operating this unit
- Operating this unit
- Connections
- Installation
- Installation
- Additional Information
- Compressed audio files
- Additional Information
- Содержание
- Перед началом эксплуатации
- Перед началом эксплуатации
- Описание элементов
- Управление данным устройством
- Управление данным устройством
- Управление данным устройством
- Управление данным устройством
- Управление данным устройством
- Управление данным устройством
- Управление данным устройством
- Управление данным устройством
- Управление данным устройством Регулировки
- Управление данным устройством
- Управление данным устройством
- Соединения
- Соединения Схема подключения
- Установка
- Установка
- Дополнительная информация Сообщения об ошибках Рекомендации по обращению
- Дополнительная информация
- Дополнительная информация
Топ 10 инструкций
100.00
MB QUART DSG 21399.98
Skil 0790 RA99.98
Bosch KGN39VW2199.97
Sony CDX-CA750X RU99.97
Braun 310 Series 399.96
Asus P3-PE599.96
Siemens MQ 5 N 29899.96
YUKON EXTEND LRS-1000


