Pioneer X-SMC00 – страница 2
Инструкция к Музыкальному Центру Pioneer X-SMC00
Disc playback 06
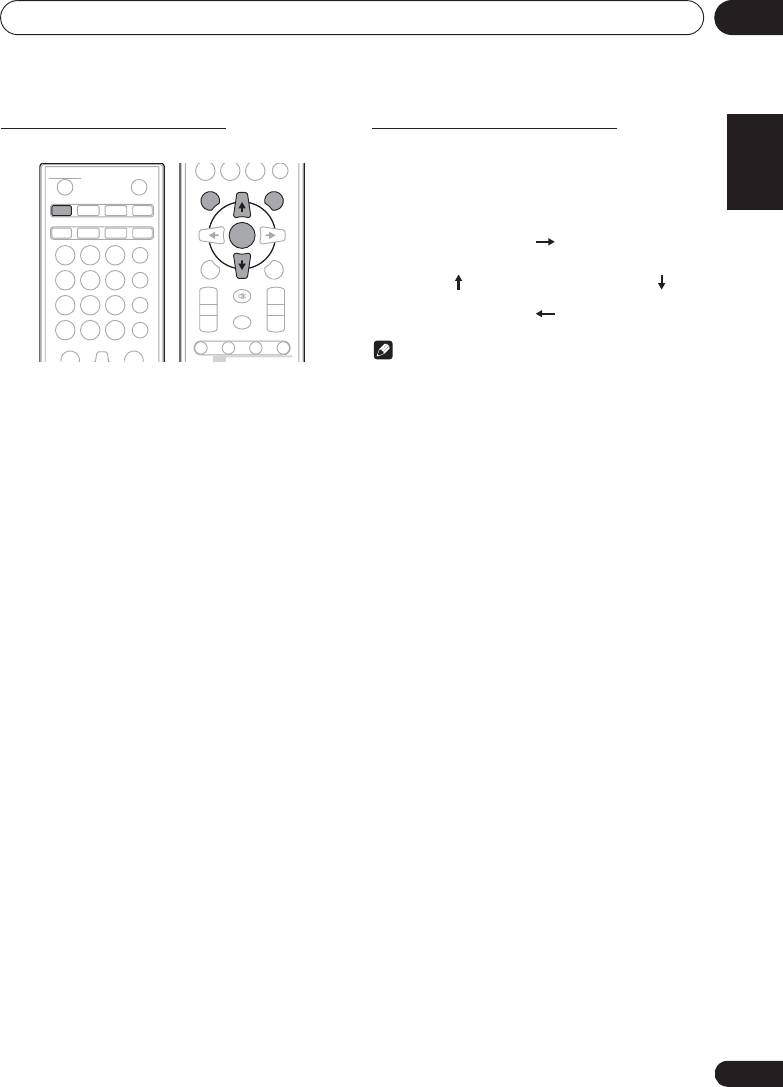
Specify the folder to play
Switch the display contents
English Français Español
To specify the folder to play, perform the following steps.
1 Press
DISPLAY
.
If the title, artist and album name has been written to the file,
that information will be displayed. (The unit can only display
alphanumeric characters. Non-alphanumeric character are
displayed as ”*”.)
Note
• “Copyright protected WMA files” or “Unsupported files”
1 Press
CD
, and load an MP3/WMA disc.
cannot be played back. In these case the files will be
skipped automatically.
2 Press FOLDER, and press
FG
to select
• There may be cases where no information can be
desired playback folder.
displayed.
• Displaying title, artist and album name is only supported
3 Press ENTER.
for MP3 files.
Playback will start from the first song of the selected folder.
• Even if it is stopped, it is possible to press FG, to select
a folder.
21
En
STANDBY/ON
OPEN/CLOSE
0
DISPLAY FOLDER
TUNE+
CD USB TUNER AUDIO IN
iPod
BT AUDIO
CLOCK/TIMER
SLEEP
ENTER
EQUALIZER
MEMORY
123
MENU
/PROGRAM
P. BA S S
456
PRESET VOLUME
TUNE–
BASS/TREBLE
+
+
789
MUTE
CLEAR REPEAT
RANDOM
–
–
0
DIMMER
DISPLAY FOLDER
TUNE+
ST/MONO ASPM PTY DISPLAY
RDS
Number of track, playback
Title/Artist/Album display
time display
Number of folder/track
File type display
display
;60&B6<;(B(QERRN࣮࣌ࢪ㸰㸮㸯㸱ᖺ㸯᭶㸰㸯᪥ࠉ᭶᭙᪥ࠉ༗ᚋ㸳㸯㸴ศ

;60&B6<;(B(QERRN࣮࣌ࢪ㸰㸮㸯㸱ᖺ㸯᭶㸰㸯᪥ࠉ᭶᭙᪥ࠉ༗ᚋ㸳㸯㸴ศ
USB playback07
Chapter 7:
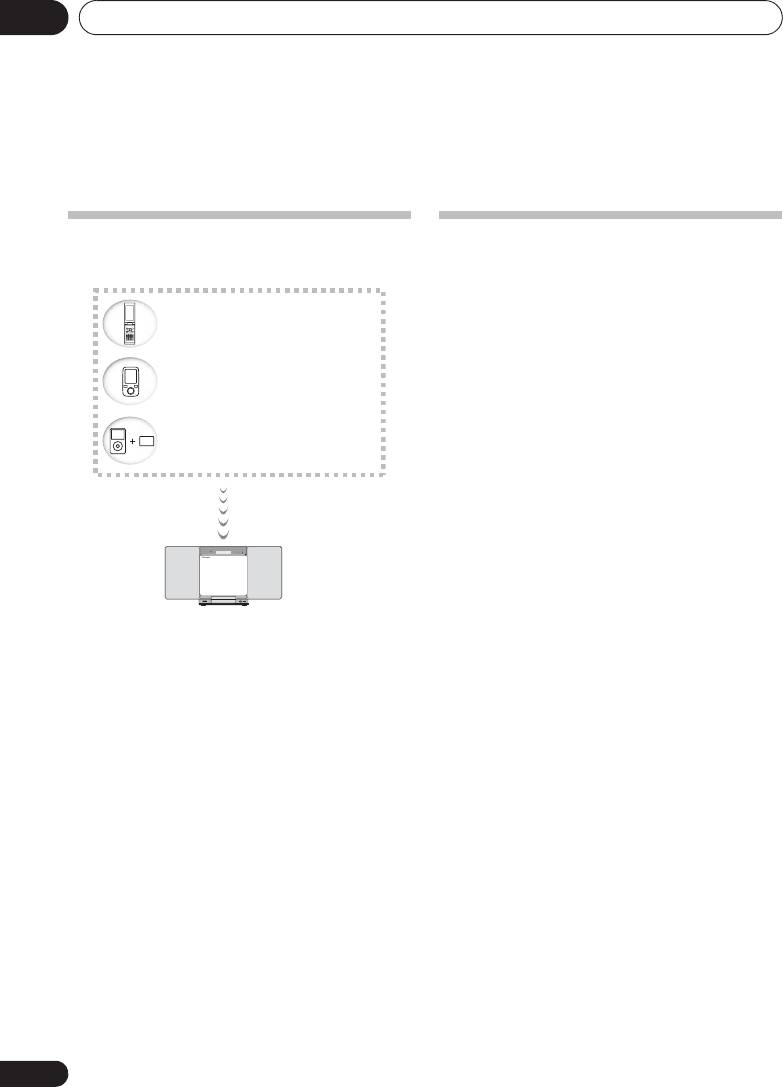
USB playback
Repeat play
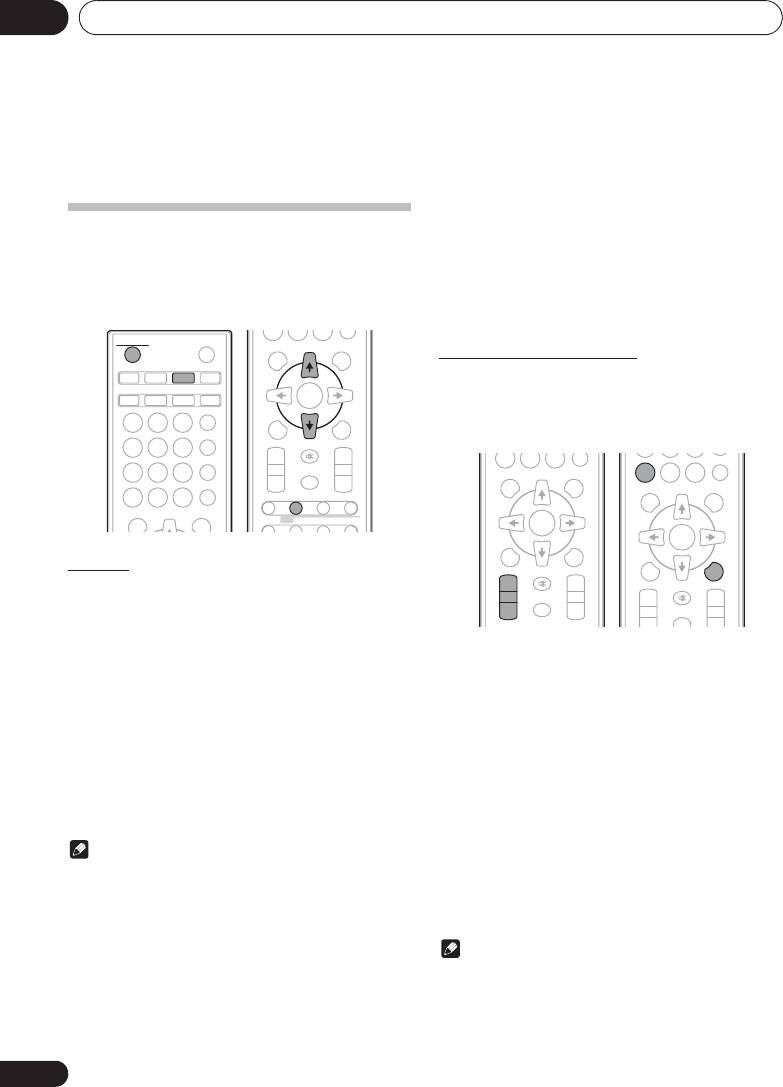
Repeat play can play one track, all tracks or a programmed
Playing USB storage devices
sequence continuously.
It is possible to listen to two-channel audio using the USB
interface on the front of this receiver.
To repeat one track:
• Pioneer does not guarantee that any file recorded on a
Press REPEAT repeatedly until “RPT ONE” appears. Press
USB storage device will play or that power will be
ENTER.
supplied to a USB storage device. Also note that Pioneer
will accept no responsibility whatsoever for loss of files
To repeat all tracks:
on USB storage devices caused by connection to this
Press REPEAT repeatedly until “RPT ALL” appears. Press
unit.
ENTER.
1 Press
USB
as the input source.
To repeat desired tracks:
“USB/IPOD” is shown on the main display.
Perform steps 1 to 5 in “Programmed play (CD or MP3/WMA)”
section on next page and then press REPEAT repeatedly until
2 Connect the USB storage device.
“RPT ALL” appears. Press ENTER.
The number of folders or files stored on the connected USB
storage device appear on the main display automatically.
To cancel repeat play:
• This receiver does not support a USB hub.
Press REPEAT repeatedly until “RPT OFF” appears. Press
• If an iPod/iPhone/iPad mini is connected to the unit, the
ENTER.
unit will automatically begin charging it.
Note
• After performing repeat play, be sure to press #.
Otherwise, the file of USB storage device will play
continuously.
• During repeat play, random play is not possible.
Random play
The file of USB storage device can be played in random order
automatically.
USB storage device
To random play all tracks:
(commercially available)
Press RANDOM repeatedly until “RDM ON” appears. Press
ENTER.
To cancel random play:
3 When the recognition is completed, press
Press RANDOM repeatedly until “RDM OFF” appears. Press
!
to start playback.
ENTER.
• When changing to a different input source, stop the USB
memory playback first, before changing.
Note
4 Disconnect USB storage device from the
• If you press the , during random play, you can move
iPod/iPhone terminal.
to the track selected next by the random operation. On
Turn the power off before removing the USB storage device.
the other hand, the + does not allow you to move to
the previous track. The beginning of the track being
Note
played will be located.
• USB flash drive that supports USB 2.0 can be used.
• In random play, the unit will select and play tracks
• This unit may not recognize a USB storage device, play
automatically. (You cannot select the order of the
files or supply power to a USB storage device. For
tracks.)
details, see When a USB storage device is connected on
• During random play, repeat play is not possible.
page 32.
• When a USB storage device is not playing and no
operations have been performed for more than 30
minutes, the unit will automatically power off.
22
En

;60&B6<;(B(QERRN࣮࣌ࢪ㸰㸮㸯㸱ᖺ㸯᭶㸰㸯᪥ࠉ᭶᭙᪥ࠉ༗ᚋ㸳㸯㸴ศ
USB playback 07
Specify the folder to play
English
To specify the folder to play, perform the following steps.
Playing in the desired order
1 Press
USB
, and connect the USB storage
(Programmed Play)
device.
The unit can play folders stored on a USB storage device in
the desired order. For details, see Programmed play (CD or
2 Press
FOLDER
, and press
FG
to select
MP3/WMA) on page 20.
desired playback folder.
Français Español
3 Press
ENTER
.
Playback will start from the first song of the selected folder.
• Even if it is stopped, it is possible to press FG, to select
a folder.
Switch the display contents
The unit can display the information recorded in the USB
storage device. For details, see Switch the display contents on
page 21.
23
En
Using the tuner08
Chapter 8:
Using the tuner
To receive an FM stereo transmission:
Listening to the radio broadcasts
•Press ST/MONO to select stereo mode and “AUTO” will
be displayed.
The following steps show you how to tune in to FM radio
broadcasts using the automatic (search) and manual (step)
Improving poor FM reception:
tuning functions. Once you are tuned to a station you can
1 Press ST/MONO repeatedly to select MONO.
memorize the frequency for recall later. See Saving station
This will change the tuner from stereo to mono and usually
presets below for more on how to do this.
improve the reception.
STANDBY/ON
OPEN/CLOSE
DISPLAY FOLDER
TUNE+
Saving station presets
CD USB TUNER AUDIO IN
If you often listen to a particular radio station, it’s convenient
iPod
BT AUDIO
CLOCK/TIMER
SLEEP
to have the receiver store the frequency for easy recall
whenever you want to listen to that station (Preset tuning).
EQUALIZER
MEMORY
MENU
/PROGRAM
This saves the effort of manually tuning in each time. This unit
123
P. BA S S
can memorize up to 30 stations.
PRESET VOLUME
TUNE–
456
+
+
BASS/TREBLE
MUTE
789
CLEAR REPEAT
RANDOM
–
–
0
DIMMER
DISPLAY FOLDER
TUNE+
ST/MONO ASPM PTY DISPLAY
Tuning
1 Press the
1 STANDBY/ON
to turn the power
on.
2 Press
TUNER
.
1 Tune to a station you want to memorize.
3 Press TUNE +/– on the remote control to
See Tuning above for more on this.
tune in to the desired station.
2Press
MEMORY
/
PROGRAM
.
Automatic tuning:
The preset number will flash.
Press and hold TUNE +/–, scanning will start automatically
3Press
PRESET +/–
to select the preset
and the tuner will stop at the first receivable broadcast
station.
channel number.
Manual tuning:
4Press
MEMORY
/
PROGRAM
to store that
Press the TUNE +/– repeatedly to tune in to the desired
station in memory.
station.
If the preset number has changed from flashing to lighting,
before the station is memorised, repeat the operation from
Note
step 2.
• When radio interference occurs, automatic tuning may
• Repeat steps 1 to 4 to set other stations, or to change a
stop automatically at that point.
preset station. When a new station is stored in the
• Automatic tuning will skip weak signal stations.
memory, the station previously memorised for that
preset channel number will be erased.
• To stop the automatic tuning, press #.
• When an RDS (Radio Data System) station is tuned in,
the frequency will be displayed first. Finally, the station
Note
name will appear.
• The backup function protects the memorised stations for
• Full auto tuning can be achieved for RDS stations using
a few hours should there be a power failure or the AC
Auto Station Program Memory (ASPM) mode, see
power cord become disconnected.
page 26.
24
En
0
;60&B6<;(B(QERRN࣮࣌ࢪ㸰㸮㸯㸱ᖺ㸯᭶㸰㸯᪥ࠉ᭶᭙᪥ࠉ༗ᚋ㸳㸯㸴ศ
ENTER
0
CLEAR
REPEAT
RANDOM
DISPLAY FOLDER
TUNE+
0
DISPLAY FOLDER
TUNE+
RDS
ENTER
MEMORY
ENTER
MENU
/PROGRAM
MEMORY
MENU
/PROGRAM
PRESET
TUNE–
VOLUM E
+
+
PRESET VOLUME
TUNE–
MUTE
+
+
–
–
MUTE
DIMMER
–
–

;60&B6<;(B(QERRN࣮࣌ࢪ㸰㸮㸯㸱ᖺ㸯᭶㸰㸯᪥ࠉ᭶᭙᪥ࠉ༗ᚋ㸳㸯㸴ศ
Using the tuner 08
To recall a memorised station
You can search the following program types:
English Français Español
NEWS – News
SOCIAL – Social affairs
1 Press
PRESET +/–
to select the desired
AFFAIRS – Current Affairs
RELIGION – Programs
station.
INFO – General Information
concerning religion
SPORT – Sport
PHONE IN – Public expressing
EDUCATE – Educational
their views by Phone
To scan the preset stations
DRAMA – Radio plays, etc.
TRAVEL – Holiday-type travel
The stations saved in the memory can be scanned
CULTURE – National or
rather than traffic
automatically. (Preset memory scan)
regional culture, theater, etc.
announcements
SCIENCE – Science and
LEISURE – Leisure interests
1 Press and hold
PRESET +/–
.
technology
and hobbies
The preset number will appear and the programmed stations
VARIED – Usually talk-based
JAZZ – Jazz
will be tuned in sequentially, for 5 seconds each.
material, such as quiz shows
COUNTRY – Country music
or interviews.
NATION M – Popular music in
2 Press
PRESET +/–
again when the desired
POP M – Pop music
a language other than English
station is located.
ROCK M – Rock music
OLDIES – Popular music from
EASY M – Easy listening
the ‘50s and’ 60s
LIGHT M – ‘Light’ classical
FOLK M – Folk music
To erase entire preset memory
music
DOCUMENT – Documentary
CLASSICS – ‘Serious’ classical
TEST – Broadcasting when
1 Press
TUNER
on the remote control.
music
testing emergency broadcast
OTHER M – Music not fitting
equipment or receivers.
2 Press
CLEAR
until “MEM CLR” appears.
above categories
ALARM – Emergency
WEATHER – Weather reports
announcement made under
exceptional circumstances to
Note
FINANCE – Stock market
give warning of events causing
reports, commerce, trading,
• All stations will be erased.
danger of a general nature.
etc.
CHILDREN – Programs for
children
Using the Radio Data System (RDS)
Searching for RDS programs
An introduction to RDS
You can search a program type listed above.
Radio Data System (RDS) is a system used by most FM radio
stations to provide listeners with various kinds of
1 Press
TUNER
on the remote control.
information—the name of the station and the kind of show
• RDS is only possible in the FM.
they’re broadcasting, for example.
2 Press RDS
PTY
on the remote control.
One feature of RDS is that you can search by type of program.
For example, you can search for a station that’s broadcasting
“SELECT” will appear for about 6 seconds.
a show with the program type, JAZZ.
3 Press
HI
to select the program type you
want to hear.
Each time the button is pressed, the program type will appear.
If the button is held down, the program type will appear
continuously.
4 Whilst the selected program type is
displayed (within 6 seconds), Press RDS
PTY
again.
After the selected program type has been lit for 2 seconds,
“SEARCH” will appear, and the search operation will start.
Note
• If the display has stopped flashing, start again from step
2. If the unit finds a desired program type, the
corresponding channel number will be lit for about 8
seconds, and then the station name will be displayed.
• If you want to listen to the same program type of another
station, press the RDS PTY whilst the channel number or
station name is flashing. The unit will look for the next
station.
25
En
Using the tuner08
• If no station can be found, “NO FOUND” will appear for
Note
4 seconds.
• If the same station is broadcasting on different
frequencies, the strongest frequency will be stored in
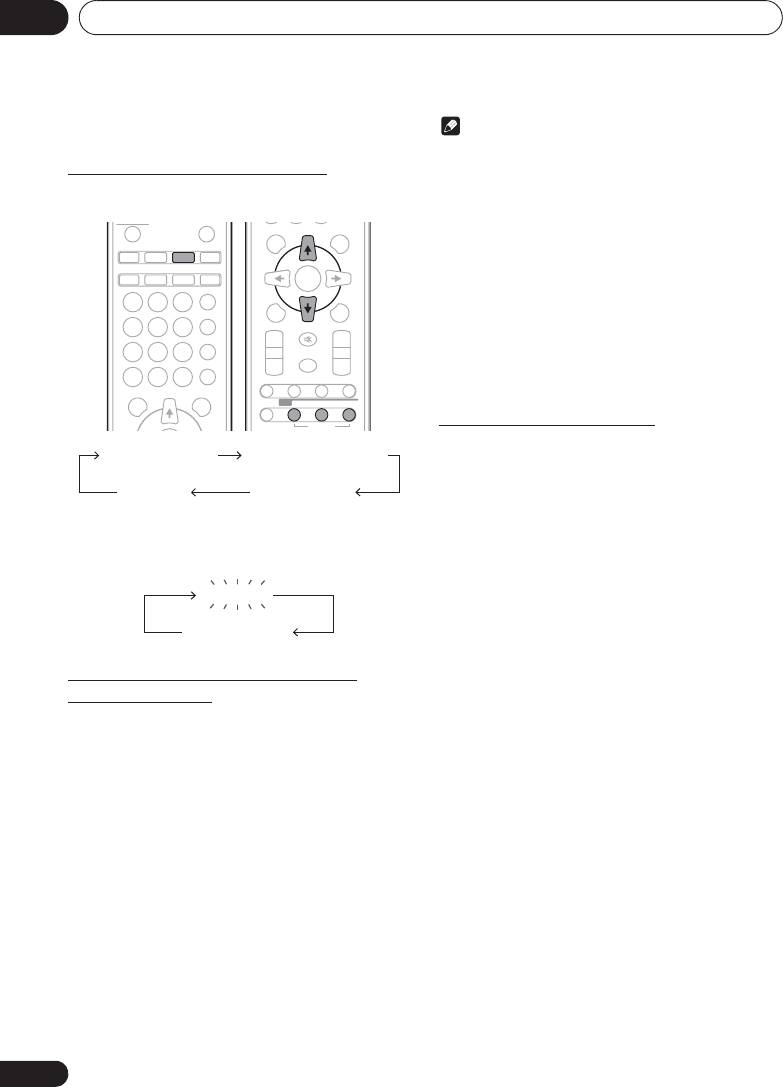
Information provided by RDS
memory.
Each time the
RDS
DISPLAY is pressed, the display will switch
• Any station which has the same frequency as the one
as follows:
stored in memory will not be stored.
• If 30 stations have already been stored in memory, the
scan will be aborted. If you want to redo the ASPM
operation, erase the preset memory.
• If no station have been stored in memory, “END” will
appear for about 4 seconds.
• If the RDS signals are very weak, station names may not
be stored in memory.
• The same station name can be stored in different
channels.
• In a certain area or during certain time periods, the
station names may temporarily be different.
Notes for RDS operation
If any of the following events occur, it does
not mean that the unit is faulty:
• “PS”, “No PS” and a station name appear alternately,
and properly.
• If a particular station is not broadcasting properly or a
When tuning in to a station other than an RDS station or to an
station is conducting tests, the RDS reception function
RDS station which sends weak signal, the display will change
may not work properly.
in the following order:
• When you receive an RDS station whose signal is too
weak, information like the station name may not be
displayed.
• “No PS”, “No PTY” or “No RT” will flash for about 5
seconds, and then the frequency will be displayed.
Notes for radio text:
• The first 8 characters of the radio text will appear and
Using the Auto Station Program
then they will scroll across the display.
Memory (ASPM)
• If you tune in to an RDS station which is not
broadcasting any radio text, “No RT” will be displayed
Whilst in the ASPM operation mode, the tuner will
when you switch to the radio text position.
automatically search for new RDS stations. Up to 30 stations
• Whilst radio text data is received or when the text
can be stored.
contents change, “RT” will be displayed.
If you have already stored some stations in memory, the
number of new stations you can store will be less.
1 Press
TUNER
on the remote control.
2 Press and hold down RDS ASPM on the
remote control.
After “ASPM” has flashed for about 4 seconds, scanning will
start (87.5 MHz to 108 MHz).
After scanning, the number of stations stored in memory will
be displayed for 4 seconds, and then “END” will appear for 4
seconds.
To stop the ASPM operation before it is
complete:
Press # whilst it is scanning for stations. The stations which
are already stored in memory will be kept there.
26
En
STANDBY/ON
CD USB TUNER AUDIO IN
iPod
BT AUDIO
CLOCK/TIMER
SLEEP
EQUALIZER
123
P. BA S S
456
BASS/TREBLE
789
CLEAR REPEAT
RANDOM
0
DISPLAY FOLDER
TUNE+
OPEN/CLOSE
DISPLAY FOLDER
TUNE+
ENTER
MEMORY
MENU
/PROGRAM
PRESET VOLUME
TUNE–
+
+
MUTE
–
–
DIMMER
ST/MONO ASPM PTY DISPLAY
RDS
OPTION
Station name (PS) Programme type (PTY)
Frequency Radio text (RT)
;60&B6<;(B(QERRN࣮࣌ࢪ㸰㸮㸯㸱ᖺ㸯᭶㸰㸯᪥ࠉ᭶᭙᪥ࠉ༗ᚋ㸳㸯㸴ศ
No RDS
FM 98.80 MHz
Other connections 09
Chapter 9:
English Français Español
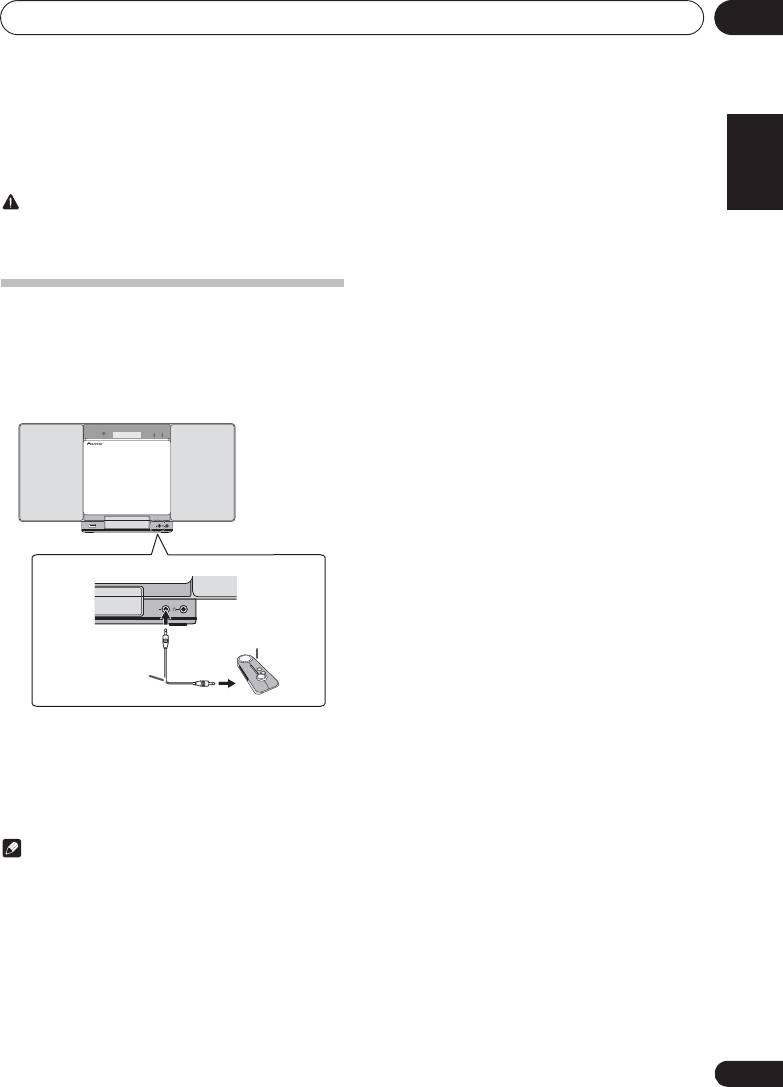
Other connections
CAUTION
• Before making or changing the connections, switch off
the power and disconnect the power cord from the AC
outlet.
Connecting auxiliary components
Connect the front panel AUDIO IN mini-plug jack to your
auxiliary playback component.
• This method can be used to play music on this unit from
iPod/iPhone/iPad mini that do not support use of an
iPod Dock and iPod/iPhone terminal.
1 Switch input by pressing the INPUT on the
main unit or the AUDIO IN on the remote
control.
When INPUT is selected “AUDIO IN” will be displayed on the
main display.
Note
•If the AUDIO IN mini-plug jack is connected to auxiliary
phones jack, the volume of the unit will be adjusted by
the volume on the playback component. If the sound is
distorted after you lower the volume of the unit, try
lowering the volume on the auxiliary playback
component.
27
En
POWER ON TIMER
PUSH OPEN
AUDIO IN
AUDIO IN
E
;60&B6<;(B(QERRN࣮࣌ࢪ㸰㸮㸯㸱ᖺ㸯᭶㸰㸯᪥ࠉ᭶᭙᪥ࠉ༗ᚋ㸳㸯㸴ศ
N
Portable audio player, etc.
Stereo mini-plug
cable (commercially
available)
10
Bluetooth
® Audio playback
Chapter 10:
®
Bluetooth
Audio playback
Music playback using
Bluetooth
wireless
Pairing with the unit (Initial registration)
In order for the unit to playback music stored on a Bluetooth
technology
capable device, pairing must first be performed. Pairing
should be performed when first using the unit with the
Bluetooth capable device, or when the pairing data on the
device has been erased for any reason.
Pairing is a step required to allow communication using
Bluetooth wireless technology to be carried out.
• Pairing is only performed the first time that you use the
unit and the Bluetooth capable device together.
• In order to allow communication using Bluetooth
wireless technology to take place, pairing must be
performed on both the unit and the Bluetooth capable
device.
• After pressing the BT AUDIO and switching to BT
AUDIO input, perform the pairing procedure on the
Bluetooth capable device. If pairing has been performed
correctly, you will not need to perform the pairing
procedures for the unit as shown below.
Please refer to the user’s manual for your Bluetooth capable
device for more details.
1
Press the 1STANDBY/ON and turn the
power to the unit on.
The unit is capable of playing back music stored on Bluetooth
2 Press the
BT AUDIO
.
capable devices (cell phones, digital music players etc.)
The unit switches to BT AUDIO and PAIRING will be
wirelessly. You can also use a Bluetooth audio transmitter
displayed.
(sold separately) to enjoy music from devices that do not have
Bluetooth functionality. Please refer to the user’s manual for
3 Turn on the power to the Bluetooth capable
your Bluetooth capable device for more details.
device that you wish to pair with, and perform
®
The Bluetooth
word mark and logos are registered
pairing procedure on it.
trademarks owned by Bluetooth SIG, Inc. and any use of such
Pairing will start.
marks by PIONEER CORPORATION is under license. Other
•Place the Bluetooth capable device close to the unit.
trademarks and trade names are those of their respective
• Please refer to the user’s manual for your Bluetooth
owners.
capable device for details on when pairing can be
performed and the procedures required for pairing.
• When PIN code entry is requested, enter “0000”. (This
unit does not accept any PIN code setting other than
“0000”.)
4 Confirm on the Bluetooth capable device
that pairing has been completed.
If pairing with the Bluetooth capable device has been
completed correctly, the name of the Bluetooth capable
device will be displayed on the front panel of the unit. (Only
single-byte alphanumeric characters can be displayed. Any
character that cannot be displayed will be indicated by a “*”.)
28
En
POWER ON TIMER
PUSH OPEN
AUDIO IN
;60&B6<;(B(QERRN࣮࣌ࢪ㸰㸮㸯㸱ᖺ㸯᭶㸰㸯᪥ࠉ᭶᭙᪥ࠉ༗ᚋ㸳㸯㸴ศ
Bluetooth wireless technology
enabled device:
Cell phone
Bluetooth wireless technology
enabled device:
Digital music player
Device not equipped with Bluetooth
wireless technology:
Digital music player
+
®
Bluetooth
audio transmitter
(commercially available)
Music data

;60&B6<;(B(QERRN࣮࣌ࢪ㸰㸮㸯㸱ᖺ㸯᭶㸰㸯᪥ࠉ᭶᭙᪥ࠉ༗ᚋ㸳㸯㸴ศ
Bluetooth
® Audio playback
10
English Français Español
Listen to music on the unit from a
Radio wave caution
This unit uses a 2.4 GHz radio wave frequency, which is a
Bluetooth
capable device
band used by other wireless systems (see list below). To
prevent noise or interrupted communication, do not use this
1 Press the
BT AUDIO
.
unit nearby such devices, or make sure these devices are
The unit will switch to BT AUDIO input.
switched off during use.
2A Bluetooth connection will be created
• Cordless phones
between the Bluetooth capable device and the
• Cordless facsimiles
• Microwave ovens
unit.
Procedures for connecting to the unit should be performed
• Wireless LAN devices (IEEE802.11b/g)
from the Bluetooth capable device.
• Wireless AV equipment
• Please refer to the user’s manual for your Bluetooth
• Wireless controllers for game systems
capable device for details of the connection procedures.
• Microwave-based health aids
•Some baby monitors
3 Playback music from the Bluet ooth capable
Other, less common, equipment that may operate on the
device.
same frequency:
• Anti-theft systems
• Amateur radio stations (HAM)
• Warehouse logistic management systems
• Discrimination systems for train or emergency vehicles
Note
• In the event noise appears in your television image, there
is the possibility that a Bluetooth wireless technology
enabled device or this unit (including products
supported by this unit) are causing signal interference
with the antenna input connector of your television,
video, satellite tuner, etc. In this event, increase the
distance between the antenna input connector and the
Bluetooth wireless technology enabled device or this
unit (including products supported by this unit).
• If there is something obstructing the path between this
unit (including devices supported by this unit) and the
device equipped with Bluetooth wireless technology
(such as a metal door, concrete wall, or insulation
containing tinfoil), you may need to change the location
of your system to prevent signal noise and interruptions.
Scope of operation
Use of this unit is limited to home use. (Transmission
distances may be reduced depending on communication
environment).
In the following locations, poor condition or inability to receive
radio waves may cause the audio to be interrupted or stopped:
• In reinforced concrete buildings or steel framed or iron-
framed buildings.
• Near large metallic furniture.
• In a crowd of people or near a building or obstacle.
• In a location exposed to the magnetic field, static
electricity or radio wave interference from radio
communication equipment using the same frequency
band (2.4 GHz) as this unit, such as a 2.4 GHz wireless
LAN device (IEEE802.11b/g) or microwave oven.
29
En

;60&B6<;(B(QERRN࣮࣌ࢪ㸰㸮㸯㸱ᖺ㸯᭶㸰㸯᪥ࠉ᭶᭙᪥ࠉ༗ᚋ㸳㸯㸴ศ
10
Bluetooth
® Audio playback
• If you live in a heavily populated residential area
(apartment, townhouse, etc.) and if your neighbor’s
microwave is placed near your system, you may
experience radio wave interference. If this occurs, move
your unit to a different place. When the microwave is not
in use, there will be no radio wave interference.
Radio wave reflections
The radio waves received by this unit include the radio wave
coming directly from the device equipped with Bluetooth
wireless technology (direct wave) and waves coming from
various directions due to reflections by walls, furniture and
building (reflected waves). The reflected waves (due to
obstacles and reflecting objects) further produce a variety of
reflected waves as well as variation in reception condition
depending on locations. If the audio cannot be received
properly due to this phenomenon, try moving the location of
the device equipped with Bluetooth wireless technology a
little. Also note that audio may be interrupted due to the
reflected waves when a person crosses or approaches the
space between this unit and the device equipped with
Bluetooth wireless technology.
Precautions regarding connections to
products supported by this unit
• Complete connections for all devices supported by this
unit, including all audio cords and power cables before
connecting them to this unit.
• After completing connections to this unit, check the
audio and power cables to confirm that they not twisted
together.
• When disconnecting this unit, confirm that you have
sufficient working space in the surrounding area.
• When changing connections of audio or other cables for
products supported by this unit, confirm that you have
sufficient working space in the surrounding area.
30
En

;60&B6<;(B(QERRN࣮࣌ࢪ㸰㸮㸯㸱ᖺ㸯᭶㸰㸯᪥ࠉ᭶᭙᪥ࠉ༗ᚋ㸳㸯㸴ศ
Additional information 11
Chapter 11:
English Français Español
Additional information
Troubleshooting
Incorrect operations are often mistaken for trouble and malfunctions. If you think that there is something wrong with this
component, check the points below. Sometimes the trouble may lie in another component. Investigate the other components
and electrical appliances being used. If the trouble cannot be rectified even after exercising the checks listed below, ask your
nearest Pioneer authorized service center or your dealer to carry out repair work.
• If the unit does not operate normally due to external effects such as static electricity disconnect the power plug from the
outlet and insert again to return to normal operating conditions.
General problem
Problem Check Remedy
Settings you have made have
Was the power cord unplugged? When power cord is unplugged, the settings you have made is
been cleared.
cleared. Please set the clock again. If you do not want to clear the
settings, do not unplug the power cord.
Difference in volume
This is not a problem with this unit. The volume may sound differently depending on the input source
between CDs, MP3, WMA,
and recording format.
iPod/iPhone/iPad mini, Tuner
and
AUDIO IN
.
This unit cannot be operated
Are you operating from far away? Operate within 7 m,
30º
of the remote sensor on the front panel
with the remote control.
(page 6).
Is the remote control sensor exposed
The remote control signals may not be received properly if the
to direct sunlight or strong artificial
remote control sensor is exposed to direct sunlight or strong
light from a fluorescent bulb, etc.?
artificial light from a fluorescent bulb, etc.
Are the batteries dead? Replace the batteries (page 5).
Disc cannot be played. Is the disc scratched? Scratched discs may not play.
Is the disc dirty? Wipe the dirt off the disc (page 35).
Is the disc inserted correctly? Make sure that the printed label is facing outward, visible to you
(page 18).
Is this unit placed in a humid
There could be condensation inside. Wait a while for the
location?
condensation to evaporate. Do not place this unit near an air-
conditioner, etc. (page 35).
Sound skips when the disc is
Is the playback volume too loud? If the sound skips when played back at a loud volume, reduce the
played back.
playback volume (page 13).
Folder or file names are not
Have you exceeded the maximum
Up to 255 folders can be recognized on one disc. Up to 999 files can
recognized.
number of folder or file names this
be recognized within one folder. Depending on the folder structure,
unit can recognize?
however, this unit may not be able to recognize certain folders or
files.
The unit turns off
If no play back and no operation has done for 30 minutes or more,
automatically.
the unit turns off automatically.
31
En

;60&B6<;(B(QERRN࣮࣌ࢪ㸰㸮㸯㸱ᖺ㸯᭶㸰㸯᪥ࠉ᭶᭙᪥ࠉ༗ᚋ㸳㸯㸴ศ
Additional information11
Problem Check Remedy
Unable to connect to a
Are there any devices nearby that
If so, either move these devices away from the unit, or stop using
Bluetooth
capable device, no
emit electromagnetic waves in the
other devices that emit electromagnetic waves.
sound comes out at all or
2.4 GHz band (microwaves, wireless
sound cuts out when
LAN devices, other
Bluetooth
capable
connected.
devices etc.)?
Is the
Bluetooth
capable device too
Place the
Bluetooth
capable device inside the same room, with no
far away from the unit, or is there
obstacles between them, and within a range of 10 m *.
something between them?
* Only a suggested range. The actual possible communication
range may change depending upon the surrounding environment.
Is the
Bluetooth
capable device set to
Check the settings on the
Bluetooth
capable device.
a mode that allows for
Bluetooth
wireless communication?
Has pairing not been completed
Perform the pairing operation again.
successfully, or has either the unit or
the
Bluetooth
capable device erased
the previous pairing setting?
Does the device you are trying to
Please use a
Bluetooth
capable device that supports A2DP.
connect have a supported profile?
When a USB storage device is connected
Problem Check Remedy
USB storage device is not
Is the USB storage device properly
Connect the device securely (all the way in).
recognized.
connected?
Is the USB storage device connected
This unit does not support USB hubs. Connect the USB storage
via a USB hub?
device directly.
Is the USB storage device supported
This unit only supports USB mass storage class devices.
by this unit?
This unit supports portable flash memory and digital audio
playback devices.
Only the FAT16 and FAT32 file systems are supported. Other file
systems (exFAT, NTFS, HFS etc.) are not supported.
USB flash drive that supports USB 2.0 can be used.
This device does not support the use of external hard disc drives.
This is not a problem with this unit. Turn the power off then back on.
Some USB storage devices may not be recognized properly.
File cannot be played. Is the file copyright-protected (by
Copyright-protected files cannot be played.
DRM)?
This is not a problem with this unit. Files stored on a computer cannot be played.
It may not be possible to play some files.
Folder or file names are not
Do the folder or file names contain
The maximum number of characters displayable for the folder and
displayed or are not properly
more than 30 characters?
file names is 30.
displayed.
Folder or file names are not
This is not a problem with this unit. The order in which the folder and file names are displayed depends
displayed in alphabetical
on the order in which the folders or files were recorded on the USB
order.
storage device.
Much time is required to
What is the USB storage devices
Some time may be required to load the data when large capacity
recognize the USB storage
capacity?
USB storage devices are connected (this could take several
device.
minutes).
32
En

;60&B6<;(B(QERRN࣮࣌ࢪ㸰㸮㸯㸱ᖺ㸯᭶㸰㸯᪥ࠉ᭶᭙᪥ࠉ༗ᚋ㸳㸯㸴ศ
Additional information 11
Problem Check Remedy
English Français Español
Power is not supplied to the
Is
AUTH ERR
displayed on the front
Turn the power off then back on.
USB storage device.
panel display? No power is supplied if
Turn the power off, then disconnect and reconnect the USB storage
the power consumption is too high.
device.
Press
INPUT
to switch to the other mode, then switch again to the
USB mode.
When an iPod/iPhone/iPad mini is connected
Problem Remedy
Can’t operate the iPod/iPhone/iPad mini by the remote control. Make sure the iPod/iPhone/iPad mini is connected correctly (refer
to
Connecting your iPod/iPhone
on page 16).
Can’t operate the iPod/iPhone/iPad mini. Make sure the iPod/iPhone/iPad mini is connected correctly (refer
to
Connecting your iPod/iPhone
on page 16).
If the iPod/iPhone/iPad mini is experiencing a hangup, try resetting
the iPod/iPhone/iPad mini, and reconnect it to the unit.
33
En
;60&B6<;(B(QERRN࣮࣌ࢪ㸰㸮㸯㸱ᖺ㸯᭶㸰㸯᪥ࠉ᭶᭙᪥ࠉ༗ᚋ㸳㸯㸴ศ
Additional information11
Playable discs and formats
• Commercially available audio CDs
Audio CD
• CD-R/ -RW/ -ROM discs containing music recorded in the CD-DA format
WMA
WMA files recorded on CD-R/ -RW/ -ROM discs or USB storage devices
MP3
MP3 files recorded on CD-R/ -RW/ -ROM discs or USB storage devices
• Only the discs that have been finalized can be
played.
Cautions on use
• Discs recorded in packet write mode (UDF format) are
not compatible with this unit.
• Corporation and product names mentioned herein are
When moving this unit
trademarks or registered trademarks of the respective
When moving this unit, be sure to first check that there is no
corporations.
disc loaded and disconnect the iPod/iPhone/iPad mini. Then
• Only discs recorded in ISO9660 Level 1, Level 2 and Joliet
press 1STANDBY/ON, wait for “STANDBY” disappears on
can be played.
main display to turn off, then unplug the power cord. Damage
• Files protected by DRM (Digital Rights Management)
may occur if the unit is transported or moved with a disc
cannot be played.
inserted, or when another device is connected to the iPod/
iPhone connector port, iPod/iPhone terminal, or AUDIO IN
Note
mini-plug jack.
• This unit does not support multisession discs or
Place of installation
multiborder recording.
• Multisession/multiborder recording is a method in
• Choose a stable place near the TV or stereo system being
which data is recorded on a single disc in two or more
used with this unit.
sessions/borders. A “session” or “border” is one
• Do not place this unit on top of a TV or color monitor. Also
recording unit, consisting of a complete set of data from
install it away from cassette decks and other devices
lead-in to lead-out.
easily affected by magnetic forces.
Avoid the following locations:
Regarding copy protected CDs
• Places exposed to direct sunlight
This unit is designed to conform to the specifications of the
• Humid or poorly ventilated places
audio CD format. This unit does not support the playback or
• Extremely hot places
function of discs that do not conform to these specifications.
• Places exposed to vibrations
• Places in which there is much dust or cigarette smoke
Supported audio file formats
• Places exposed to soot, steam or heat (kitchens, etc.)
• This unit does not support lossless encoding.
34
En
;60&B6<;(B(QERRN࣮࣌ࢪ㸰㸮㸯㸱ᖺ㸯᭶㸰㸯᪥ࠉ᭶᭙᪥ࠉ༗ᚋ㸳㸯㸴ศ
Additional information 11
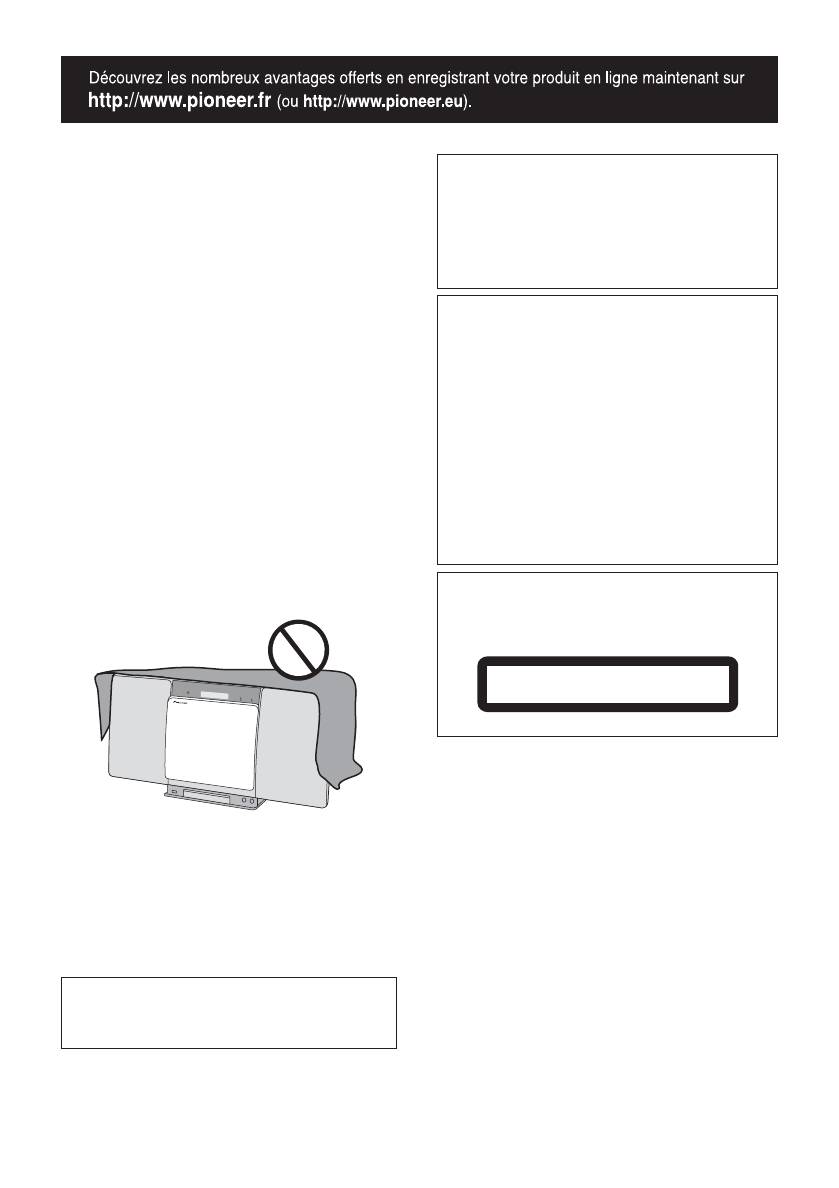
Do not place objects on this unit
English Français Español
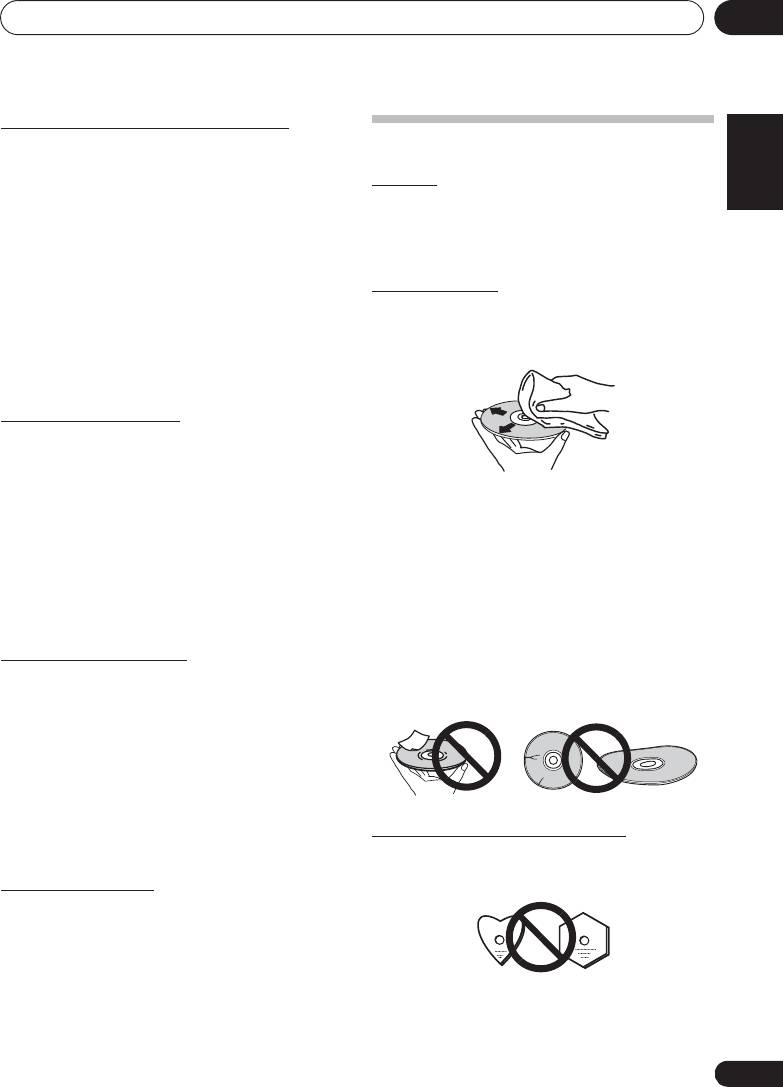
Handling discs
Do not place any objects on top of this unit.
Do not obstruct the ventilation holes.
Storing
Do not use this unit on shaggy rugs, beds, sofas, etc., or
wrapped in cloth, etc. Doing so will prevent the heat from
• Always place discs in their cases and store them
dispersing, leading to damage.
vertically, avoiding hot, humid places, places exposed to
Do not expose to heat.
direct sunlight and extremely cold places.
• Be sure to read the cautions included with the disc.
Do not place this unit on top of an amplifier or other
component that generates heat. When rack mounting it, to
avoid the heat given off by the amplifier or other audio
Cleaning discs
component, place it on a shelf below the amplifier.
• Discs may not play if there are fingerprints or dust on
• Turn off the unit’s power when not using it.
them. In this case, use a cleaning cloth, etc., to gently
• Depending on signal conditions, striped patterns may
wipe the disc from the inside towards the outside. Do not
appear on a TV screen and noise may enter the sound of
use dirty cleaning cloths.
radio broadcasts when the unit’s power is on. If this
happens, turn the unit’s power off.
About condensation
If this unit is moved suddenly from a cold place into a warm
room (in winter, for example) or if the temperature in the room
in which this unit is installed rises suddenly due to heater
operation, etc., water droplets (condensation) may form
inside (on operating parts and the lens). When condensation
• Do not use benzene, thinner or other volatile chemicals.
is present, this unit will not operate properly and playback is
Also do not use record spray or antistatic agents.
not possible. Let this unit stand at room temperature for 1 or
• For tough dirt, apply some water to a soft cloth, wring out
2 hours with the power turned on (the time depends on the
thoroughly, wipe off the dirt, then wipe off the moisture
extent of condensation). The water droplets will dissipate and
with a dry cloth.
playback will become possible. Condensation can also occur
• Do not use damaged (cracked or warped) discs.
in the summer if this unit is directly exposed to the air flow
• Do not let the signal surface of discs get scratched or
from an air-conditioner. If this happens, move this unit to a
dirty.
different place.
• Do not attach pieces of paper or stickers to discs. Doing
so could warp discs, making it impossible to play them.
Cleaning the product
Also note that rental discs often have labels attached to
• Unplug the power cord from the power outlet when
them, and the label’s glue may have oozed out. Check
cleaning this unit.
that there is no glue around the edges of such labels
before using rented discs.
• Clean this unit using a soft cloth. For tough dirt, apply
some neutral detergent diluted in 5 to 6 parts water to a
soft cloth, wring out thoroughly, wipe off the dirt, then
wipe again with a soft, dry cloth.
• Alcohol, thinner, benzene, insecticides, etc., could cause
the print or paint to peel off. Also, leaving rubber or vinyl
products in contact with this unit for long periods of time
could mar the cabinet.
About specially shaped discs
• When using chemical-impregnated wipes, etc., read the
cautions included with the wipes carefully.
Specially shaped discs (heart-shaped, hexagonal, etc.)
cannot be played on this unit. Do not attempt to play such
Cleaning the lens
discs, as they could damage this unit.
• This unit’s lens should not become dirty in normal use,
but if for some reason it should malfunction due to dust
or dirt, consult your nearest Pioneer authorized service
center. Although lens cleaners for players are
commercially available, we advise against using them
since some may damage the lens.
35
En

;60&B6<;(B(QERRN࣮࣌ࢪ㸰㸮㸯㸱ᖺ㸯᭶㸰㸯᪥ࠉ᭶᭙᪥ࠉ༗ᚋ㸳㸯㸴ศ
Additional information11
About iPod/iPhone
“Made for iPod” and “Made for iPhone” mean that an
electronic accessory has been designed to connect
specifically to iPod or iPhone, respectively, and has been
certified by the developer to meet Apple performance
standards. Apple is not responsible for the operation of this
device or its compliance with safety and regulatory standards.
Please note that the use of this accessory with iPod or iPhone
may affect wireless performance.
iPhone, iPod, iPod nano and iPod touch are trademarks of Apple
Inc., registered in the U.S. and other countries.
Restoring all the settings to the
defaults
Use the steps below to restore the all settings to their defaults.
1 Press
1STANDBY/ON
to turn the power on.
2 Press
CD
on the remote control or
INPUT
repeatedly on the main unit to select CD input.
3 Press
$ OPEN/CLOSE
to open the
electric
slide CD door
.
4 Press
1
STANDBY/ON while pressing
#
.
Use the buttons on this unit’s top panel. “DEFAULT” is
displayed while the settings are being restored. Power is
turned off.
36
En

;60&B6<;(B(QERRN࣮࣌ࢪ㸰㸮㸯㸱ᖺ㸱᭶㸰㸳᪥ࠉ᭶᭙᪥ࠉ༗ᚋ㸵㸰㸲ศ
Additional information 11
English Français Español
Specifications
• Amplifier section
RMS Power Output: . . . . . . . . . . . . . . . . . . . . . . . 10 W + 10 W
(1 kHz, 10 %, T.H.D., 8 :)
• Tuner section
Frequency Range (FM). . . . . . . . . . . . . . 87.5 MHz to 108 MHz
Antenna Input (FM) . . . . . . . . . . . . . . . . . . . . 75 : unbalanced
• Miscellaneous
iPod/iPhone connector port . . . . . . . . . . . . . . . . . . . . . 5 V, 1 A
iPod/iPhone terminal. . . . . . . . . . . . . . . . . . . . . . . . . . . 5 V, 1 A
Power source . . . . . . . . . . . . . AC 100 V to 240 V, 50 Hz/60 Hz
Power consumption
Power on. . . . . . . . . . . . . . . . . . . . . . . . . . . . . . . . . . . . . 25 W
Power stand-by. . . . . . . . . . . . . . . . . . . . . . . . . .0.5 W or less
Dimensions. . . . . . . 430 mm (W) x 218 mm (H) x 114 mm (D)
Weight (without package) . . . . . . . . . . . . . . . . . . . . . . . . 2.9 kg
• Speaker
Type
Passive radiator
Fullrange . . . . . . . . . . . . . . . . . . . . . . . . . . . . . . . . . 6.6 cm cone
Passive radiator . . . . . . . . . . . . . . . . . . . . . . . . . . . 7.7 cm cone
Playback frequency range . . . . . . . . . . . . . . . . 60 Hz to 20 kHz
• Accessories
Remote control. . . . . . . . . . . . . . . . . . . . . . . . . . . . . . . . . . . . . 1
AC adapter . . . . . . . . . . . . . . . . . . . . . . . . . . . . . . . . . . . . . . . . 1
Changeable panel
(X-SMC00-W and X-SMC00BT-W do not have an
interchangeable panel in the box) . . . . . . . . . . . . . . . . . . . . . 2
AAA batteries (R03) . . . . . . . . . . . . . . . . . . . . . . . . . . . . . . . . . 2
FM wire antenna. . . . . . . . . . . . . . . . . . . . . . . . . . . . . . . . . . . . 1
iPhone stand. . . . . . . . . . . . . . . . . . . . . . . . . . . . . . . . . . . . . . . 1
Warranty card
Operating instructions (This document)
Note
• Specifications and the design are subject to possible
modifications without notice, due to improvements.
© 2013 PIONEER CORPORATION.
All rights reserved.
37
En
ATTENTION
Ce produit est destiné à une utilisation domestique
POUR ÉVITER TOUT RISQUE D’ÉLECTROCUTION, NE
générale. Toute panne due à une utilisation autre qu'à
PAS ENLEVER LE COUVERCLE (NI LE PANNEAU
des fins privées (comme une utilisation à des fins
ARRIÈRE). AUCUNE PIÈCE RÉPARABLE PAR
commerciales dans un restaurant, dans un autocar
L’UTILISATEUR NE SE TROUVE À L’INTÉRIEUR.
ou sur un bateau) et qui nécessite une réparation sera
CONFIER TOUT ENTRETIEN À UN PERSONNEL
aux frais du client, même pendant la période de
QUALIFIÉ UNIQUEMENT.
garantie.
D3-4-2-1-1_B1_Fr
K041_A1_Fr
AVERTISSEMENT
Cet appareil n’est pas étanche. Pour éviter les risques
ATTENTION
d’incendie et de décharge électrique, ne placez près de
L’interrupteur STANDBY/ON de cet appareil ne
lui un récipient rempli d’eau, tel qu’un vase ou un pot
coupe pas complètement celui-ci de sa prise secteur.
de fleurs, et ne l’exposez pas à des gouttes d’eau, des
Comme le cordon d’alimentation fait office de
éclaboussures, de la pluie ou de l’humidité.
dispositif de déconnexion du secteur, il devra être
D3-4-2-1-3_A1_Fr
débranché au niveau de la prise secteur pour que
AVERTISSEMENT
l’appareil soit complètement hors tension. Par
Pour éviter les risques d’incendie, ne placez aucune
conséquent, veillez à installer l’appareil de telle
flamme nue (telle qu’une bougie allumée) sur
manière que son cordon d’alimentation puisse être
l’appareil.
facilement débranché de la prise secteur en cas
D3-4-2-1-7a_A1_Fr
d’accident. Pour éviter tout risque d’incendie, le
AVERTISSEMENT
cordon d’alimentation sera débranché au niveau de la
Les fentes et ouvertures du coffret sont prévues pour la
prise secteur si vous prévoyez une période prolongée
ventilation, pour assurer un fonctionnement stable de
de non utilisation (par exemple avant un départ en
l’appareil et pour éviter sa surchauffe. Pour éviter les
vacances).
risques d’incendie, ne bouchez jamais les ouvertures et
D3-4-2-2-2a*_A1_Fr
ne les recouvrez pas d’objets, tels que journaux,
nappes ou rideaux, et n’utilisez pas l’appareil posé sur
ATTENTION
un tapis épais ou un lit.
D3-4-2-1-7b*_A1_Fr
Cet appareil est un produit laser de Classe 1, classé
selon l’article IEC 60825-1:2007 relatif à la Sécurité
des produits laser.
APPAREIL À LASER DE CLASSE 1
D58-5-2-2a_A2_Fr
AVERTISSEMENT
Gardez les pièces de petite taille hors de la portée des
bébés et des enfants. En cas d’ingestion accidentelle,
veuillez contacter immédiatement un médecin.
D41-6-4_A1_Fr
Milieu de fonctionnement
Température et humidité du milieu de fonctionnement :
De +5 °C à +35 °C (de +41 °F à +95 °F) ; Humidité
relative inférieure à 85 % (orifices de ventilation non
obstrués)
N’installez pas l’appareil dans un endroit mal ventilé ou
un lieu soumis à une forte humidité ou en plein soleil
(ou à une forte lumière artificielle).
D3-4-2-1-7c*_A1_Fr
Avant d’employer cet appareil, vérifiez les
informations de sécurité indiquées sur le fond de
l’appareil et sur l’étiquette de l’adaptateur secteur.
D3-4-2-2-4_B1_Fr
;60&B6<;(B)UERRN࣮࣌ࢪ㸰㸮㸯㸱ᖺ㸱᭶㸰㸳᪥ࠉ᭶᭙᪥ࠉ༗ᚋ㸵㸰㸳ศ
Information à destination des utilisateurs sur la collecte et l’élimination des
équipements et batteries usagés
Ces symboles qui figurent sur les produits, les emballages et/ou les documents
Marquage pour les
d’accompagnement signifient que les équipements électriques et électroniques et
équipements
batteries usagés ne doivent pas être jetés avec les déchets ménagers et font l’objet
d’une collecte sélective.
Pour assurer l’enlèvement et le traitement appropriés des produits et batteries
usagés, merci de les retourner dans les points de collecte sélective habilités
conformément à la législation locale en vigueur.
Exemples de marquage
En respectant les circuits de collecte sélective mis en place pour ces produits, vous
pour les batteries
contribuerez à économiser des ressources précieuses et à prévenir les impacts
négatifs éventuels sur la santé humaine et l’environnement qui pourraient résulter
d’une mauvaise gestion des déchets.
Pour plus d’information sur la collecte et le traitement des produits et batteries
usagés, veuillez contacter votre municipalité, votre service de gestion des déchets
ou le point de vente chez qui vous avez acheté ces produits.
Ces symboles ne sont valables que dans les pays de l’Union Européenne.
Pour les pays n’appartenant pas à l’Union Européenne :
Si vous souhaitez jeter ces articles, veuillez contacter les autorités ou revendeurs
Pb
locaux pour connaître les méthodes d’élimination appropriées.
K058a_A1_Fr
Précaution concernant les ondes radio
Avertissement au sujet de l’adaptateur secteur
Cet appareil utilise comme onde radio une fréquence de
• Pour débrancher l’adaptateur secteur de la prise
2,4 GHz, c’est-à-dire une bande utilisée par d’autres
d’alimentation, veillez à bien saisir l’adaptateur
par son boîtier. Si vous tirez sur le cordon
systèmes sans fil (Fours à micro-ondes, téléphones sans
d’alimentation, celui-ci peut s’endommager et
fil, etc.).
présenter un risque d’un incendie, de choc
Si des parasites apparaissent sur les images télévisées,
électrique, et/ou d’électrocution.
il est possible que cet appareil (y compris ceux qu’il
• N’essayez pas de brancher ou de débrancher
prend en charge) provoquent des interférences sur le
l’adaptateur secteur avec des mains humides.
Ceci constitue un risque de choc électrique ou de
connecteur d’entrée de votre téléviseur, les images
mort par électrocution.
vidéo, le tuner satellite, etc.
• Introduisez les broches de l’adaptateur secteur à
Dans ce cas, augmentez la distance entre la prise
fond dans la prise d’alimentation. Dans le cas où
d’entrée d’antenne et cet appareil (y compris les
les broches de l’adaptateur secteur ne seraient
produits pris en charge par cet appareil).
pas introduites correctement, il pourrait se
• Pioneer n’est pas responsable d’un mauvais
produire un dégagement de chaleur au niveau de
la prise, avec un risque d’incendie. En outre,
fonctionnement du produit Pioneer compatible due à
lorsque l’adaptateur secteur est branché à la
une erreur/défaillance de la connexion réseau et/ou
prise d’alimentation, tout contact avec les
de l’appareil raccordé. Veuillez contacter votre
broches constitue un risque d’électrocution.
fournisseur de service Internet ou le fabricant du
• Ne branchez pas l’adaptateur secteur à une prise
périphérique du réseau.
dans laquelle les broches ne seraient pas
correctement maintenues bien qu’elles soient
• Un abonnement payant auprès d’un fournisseur
insérées à fond dans la prise. Il pourrait se
d’accès Internet est nécessaire pour utiliser Internet.
produire un dégagement de chaleur au niveau de
NOTE IMPORTANTE SUR LE CABLE
la prise, avec un risque d’incendie. Pour le
remplacement d’une prise d’alimentation de votre
D’ALIMENTATION
installation domestique, veuillez contacter votre
Tenir le câble d’alimentation par la fiche. Ne pas
revendeur ou un technicien qualifié.
débrancher la prise en tirant sur le câble et ne pas
• Ne posez pas l’appareil, un meuble ou tout autre
toucher le câble avec les mains mouillées. Cela risque
objet, sur le câble, et ne pincez pas le câble. Ne
faites pas de nœud avec le cordon d’alimentation
de provoquer un court-circuit ou un choc électrique. Ne
et ne l’attachez pas avec d’autres cordons ou
pas poser l’appareil ou un meuble sur le câble. Ne pas
câbles. Les câbles d’alimentation doivent être
pincer le câble. Ne pas faire de noeud avec le câble ou
installés de façon à ce que l’on ne puisse pas
l’attacher à d’autres câbles. Les câbles d’alimentation
marcher dessus. Un adaptateur secteur et/ou un
doivent être posés de façon à ne pas être écrasés. Un
cordon d’alimentation endommagé peut
provoquer un risque d’incendie ou un choc
câble abîmé peut provoquer un risque d’incendie ou un
électrique. Vérifier l’adaptateur secteur et le
choc électrique. Vérifier le câble d’alimentation de
cordon d’alimentation de temps en temps. En cas
temps en temps. Contacter le service après-vente
d’endommagement, contactez le service
PIONEER le plus proche ou le revendeur pour un
après-vente PIONEER le plus proche ou votre
remplacement.
revendeur local, pour remplacement.
S002*_A1_Fr
;60&B6<;(B)UERRN࣮࣌ࢪ㸰㸮㸯㸱ᖺ㸯᭶㸰㸯᪥ࠉ᭶᭙᪥ࠉ༗ᚋ㸳㸴ศ

;60&B6<;(B)UERRN࣮࣌ࢪ㸰㸮㸯㸱ᖺ㸯᭶㸰㸯᪥ࠉ᭶᭙᪥ࠉ༗ᚋ㸳㸴ศ
Nous vous remercions d’avoir acheté ce produit Pioneer.
Veuillez lire attentivement ce mode d’emploi afin d’apprendre à manipuler votre modèle correctement. Lorsque vous
avez terminé, rangez ces instructions en lieu sûr afin de pouvoir vous y référer à l’avenir.
Table des matières
01 Préparatifs
07 Lecture USB
Contenu de l’emballage . . . . . . . . . . . . . . . . . . . . . . . . . 5
Lecture à partir de contenu stocké sur un
Mise en place des piles dans la télécommande . . . . . . 5
périphérique USB . . . . . . . . . . . . . . . . . . . . . . . . . . . . . 22
Utilisation de la télécommande . . . . . . . . . . . . . . . . . . . . 6
Lecture répétée . . . . . . . . . . . . . . . . . . . . . . . . . . . . . . . . 22
Lecture aléatoire . . . . . . . . . . . . . . . . . . . . . . . . . . . . . . . 23
02 Les organes et leurs fonctions
Spécifiez le dossier de lecture souhaité . . . . . . . . . . . . 23
Télécommande . . . . . . . . . . . . . . . . . . . . . . . . . . . . . . . . 7
Sélection des informations affichées . . . . . . . . . . . . . . 23
Fixation pour une utilisation murale . . . . . . . . . . . . . . . 8
Lecture dans l’ordre souhaité
Panneau avant . . . . . . . . . . . . . . . . . . . . . . . . . . . . . . . . . 9
(Lecture programmée) . . . . . . . . . . . . . . . . . . . . . . . . . 23
Face supérieure/Face arrière . . . . . . . . . . . . . . . . . . . . 10
08 Utilisation du tuner
Remplacez le panneau modulable . . . . . . . . . . . . . . . . 11
Écoute d’émissions de radio . . . . . . . . . . . . . . . . . . . . 24
03 Connexions
Accord . . . . . . . . . . . . . . . . . . . . . . . . . . . . . . . . . . . . . . . 24
Raccordement de l’antenne . . . . . . . . . . . . . . . . . . . . . 12
Mémorisation des stations . . . . . . . . . . . . . . . . . . . . . . . 24
Utilisation des antennes externes . . . . . . . . . . . . . . . . . 12
Rappel d’une station mémorisée. . . . . . . . . . . . . . . . . . 25
Connexion au secteur . . . . . . . . . . . . . . . . . . . . . . . . . . 12
Pour balayer les stations préréglées . . . . . . . . . . . . . . . 25
Pour effacer toute la mémoire . . . . . . . . . . . . . . . . . . . . 25
04 Pour commencer
Utilisation du système RDS (Radio Data System) . . . 25
Pour allumer l’appareil . . . . . . . . . . . . . . . . . . . . . . . . . 13
Présentation du système RDS . . . . . . . . . . . . . . . . . . . . 25
Réglage de l’horloge . . . . . . . . . . . . . . . . . . . . . . . . . . . 13
Recherche de programmes RDS. . . . . . . . . . . . . . . . . . 25
Commandes générales . . . . . . . . . . . . . . . . . . . . . . . . . 13
Informations données par RDS . . . . . . . . . . . . . . . . . . . 26
Fonction d’entrée. . . . . . . . . . . . . . . . . . . . . . . . . . . . . . . 13
Utilisation de la fonction de mémorisation automatique
Contrôle de la luminosité de l’affichage . . . . . . . . . . . . 13
des stations de radio (ASPM). . . . . . . . . . . . . . . . . . . . . 26
Réglage automatique du volume . . . . . . . . . . . . . . . . . . 13
Remarques au sujet du fonctionnement RDS . . . . . . . 26
Commande de volume . . . . . . . . . . . . . . . . . . . . . . . . . . 13
Sourdine . . . . . . . . . . . . . . . . . . . . . . . . . . . . . . . . . . . . . . 14
09 Autres raccordements
Commandes de son . . . . . . . . . . . . . . . . . . . . . . . . . . . 14
Connexion de composants auxiliaires . . . . . . . . . . . . . 27
Equalizer. . . . . . . . . . . . . . . . . . . . . . . . . . . . . . . . . . . . . . 14
®
10 Lecture audio
Bluetooth
Touche P.BASS . . . . . . . . . . . . . . . . . . . . . . . . . . . . . . . . 14
Lecture de musique par la technologie sans fil
Touche de réglage grave/aigu . . . . . . . . . . . . . . . . . . . . 14
Bluetooth . . . . . . . . . . . . . . . . . . . . . . . . . . . . . . . . . . . . 28
Réglage de l’alarme de réveil . . . . . . . . . . . . . . . . . . . . 14
Association avec l’appareil
Rappel de l’alarme de réveil . . . . . . . . . . . . . . . . . . . . . . 15
Annulation de l’alarme de réveil. . . . . . . . . . . . . . . . . . . 15
(enregistrement initial) . . . . . . . . . . . . . . . . . . . . . . . . . 28
Utilisation du réveil . . . . . . . . . . . . . . . . . . . . . . . . . . . . . 15
Écouter de la musique sur l’appareil à partir d’un
Utilisation du minuteur de mise en veille . . . . . . . . . . 15
périphérique sans fil Bluetooth . . . . . . . . . . . . . . . . . . 29
Utilisation avec un casque . . . . . . . . . . . . . . . . . . . . . . 15
Précaution concernant les ondes radio . . . . . . . . . . . 29
Limite de fonctionnement. . . . . . . . . . . . . . . . . . . . . . . . 29
05 Lecture d’une source iPod/iPhone/iPad
Réflexions des ondes radio. . . . . . . . . . . . . . . . . . . . . . . 30
mini
Précautions relatives aux connexions à des produits pris
Vérification des modèles d’iPod/iPhone/iPad mini pris
en compte par cet appareil. . . . . . . . . . . . . . . . . . . . . . . 30
en charge . . . . . . . . . . . . . . . . . . . . . . . . . . . . . . . . . . . . 16
11 Informations supplémentaires
Connexion de votre iPod/iPhone . . . . . . . . . . . . . . . . . 16
Guide de dépannage . . . . . . . . . . . . . . . . . . . . . . . . . . . 31
Connexion d’un iPod/iPhone/iPad mini à l’aide du
Types de disque et formats de fichier lisibles . . . . . . . 34
support iPhone fourni . . . . . . . . . . . . . . . . . . . . . . . . . . . 17
À propos des CD protégés contre la copie . . . . . . . . . . 34
Lecture à partir d’un iPod/iPhone/iPad mini . . . . . . . 17
Formats de fichiers audio pris en charge . . . . . . . . . . . 34
06 Lecture de disque
Précautions d’utilisation . . . . . . . . . . . . . . . . . . . . . . . . 34
Lecture de disques ou de fichiers . . . . . . . . . . . . . . . . 18
Lors d’un déplacement de l’appareil . . . . . . . . . . . . . . . 34
Lecture avancée de disques MP3/WMA ou CD . . . . . 19
Emplacement d’installation . . . . . . . . . . . . . . . . . . . . . . 34
Ne posez pas d’objets sur cet appareil . . . . . . . . . . . . . 35
Recherche directe de morceaux . . . . . . . . . . . . . . . . . . 19
À propos de la condensation . . . . . . . . . . . . . . . . . . . . . 35
Lecture répétée . . . . . . . . . . . . . . . . . . . . . . . . . . . . . . . . 19
Nettoyage de l’appareil . . . . . . . . . . . . . . . . . . . . . . . . . . 35
Lecture aléatoire . . . . . . . . . . . . . . . . . . . . . . . . . . . . . . . 19
Nettoyage de la lentille . . . . . . . . . . . . . . . . . . . . . . . . . . 35
Lecture des morceaux programmés
(CD ou MP3/WMA) . . . . . . . . . . . . . . . . . . . . . . . . . . . . . 20
Manipulation d’un disque . . . . . . . . . . . . . . . . . . . . . . 35
À propos du téléchargement de fichiers
Rangement. . . . . . . . . . . . . . . . . . . . . . . . . . . . . . . . . . . . 35
MP3/WMA . . . . . . . . . . . . . . . . . . . . . . . . . . . . . . . . . . . . 20
Nettoyage des disques . . . . . . . . . . . . . . . . . . . . . . . . . . 35
Sur l’ordre de lecture des dossiers . . . . . . . . . . . . . . . . 20
À propos des disques de forme particulière . . . . . . . . . 36
Spécifiez le dossier de lecture souhaité . . . . . . . . . . . . 21
À propos de l’iPod/iPhone . . . . . . . . . . . . . . . . . . . . . . 36
Sélection des informations affichées. . . . . . . . . . . . . . . 21
Rétablissement de tous les réglages à leur valeur par
défaut . . . . . . . . . . . . . . . . . . . . . . . . . . . . . . . . . . . . . . . 36
Spécifications . . . . . . . . . . . . . . . . . . . . . . . . . . . . . . . . 37
4
Fr


