Pioneer MVH-07UB: Before You Start Getting Started
Before You Start Getting Started: Pioneer MVH-07UB
Before You Start
Getting Started
Thank you for purchasing this PIONEER product
To ensure proper use, please read through this manual before using this product. It is especially
Basic operation
important that you read and observe WARNINGs and CAUTIONs in this manual. Please keep the
manual in a safe and accessible place for future reference.
English
MVH-07UBG/07UB
If you want to dispose this product, do not mix it with general household waste. There is a separate
collection system for used electronic products in accordance with legislation that requires proper
treatment, recovery and recycling.
Private households in the member states of the EU, in Switzerland and Norway may return their used
electronic products free of charge to designated collection facilities or to a retailer (if you purchase a
similar new one).
For countries not mentioned above, please contact your local authorities for the correct method of
disposal.
By doing so you will ensure that your disposed product undergoes the necessary treatment, recovery
and recycling and thus prevent potential negative effects on the environment and human health.
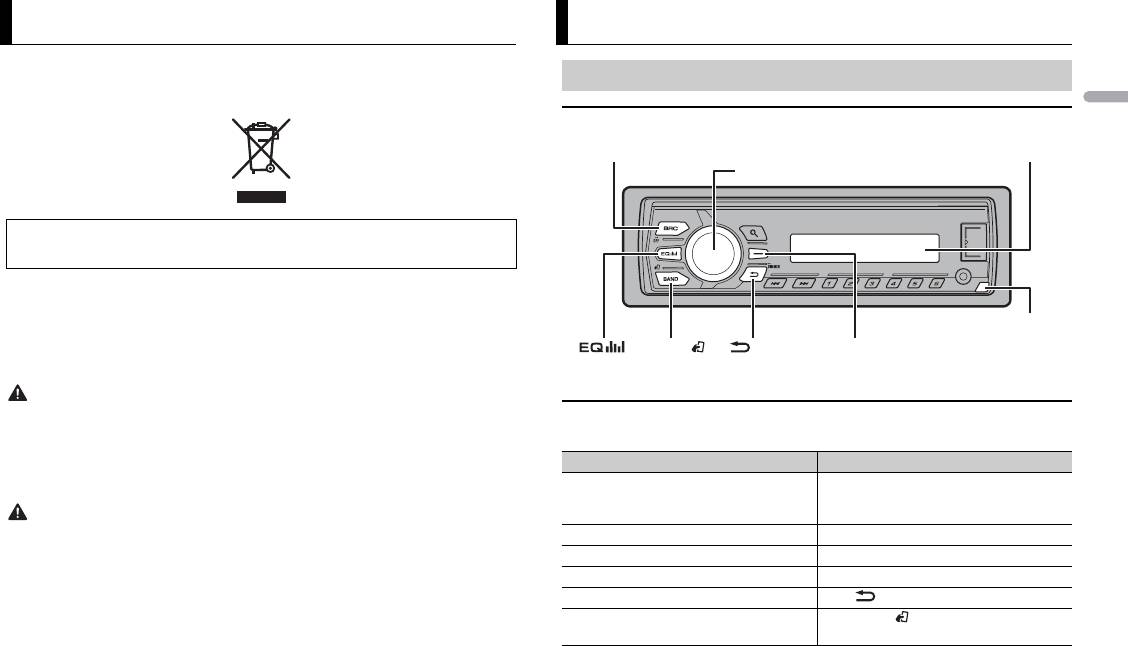
* This button is referred to as DISP in this manual.
WARNING
•Do not attempt to install or service this product by yourself. Installation or servicing of this
Frequently used operations
product by persons without training and experience in electronic equipment and automotive
The available buttons vary depending on the unit.
accessories may be dangerous and could expose you to the risk of electric shock, injury or other
hazards.
Purpose Operation
• Do not attempt to operate the unit while driving. Make sure to pull off the road and park your vehicle
in a safe location before attempting to use the controls on the device.
Turn on the power* Press SRC
/OFF to turn on the power.
Press and hold SR
C/OFF to turn off the
CAUTION
power.
• Do not allow this unit to come into contact with moisture and/or liquids. Electrical shock could result.
Adjust the volume Turn the M.
C. dial.
Also, damage to this unit, smoke, and overheating could result from contact with liquids.
Select a source Press SRC
/OFF repeatedly.
• Always keep the volume low enough to hear outside sounds.
• The Pioneer CarStereo-Pass is for use only in Germany.
Change the display information Press DISP re
peatedly.
Return to the previous display/list Press /DIM
MER.
If you experience problems
Return to the normal display from the
Press BAND/ .
Should this unit fail to work properly, please contact your dealer or nearest authorized PIONEER Service
me
nu.
Station.
* When this unit’s blue/white lead is connected to the vehicle’s auto-antenna relay control terminal,
the vehicle’s antenna extends when this unit’s source is turned on. To retract the antenna, turn the
source off.
3En
SRC (source)/OFF
Display window
M.C. (multi-control) dial
Detach button
BAND/
/DIMMER Display button*
2 Turn the M.C. dial to select the options, then press to confirm.
Display indication
To proceed to the next menu option, you need to confirm your selection.
Indication Description
Appears when a lower tier of the menu or folder exists.
Appears when the button is pressed.
Appears when the local seek tuning function is set (page 7).
Appears when a traffic program is received.
Appears when traffic announcements are received (page 7).
Appears when the sound retriever function is set (page 7).
Appears when random/shuffle play is set.
Appears when repeat play is set.
3 [QUIT :YES] appears when all the settings have been made.
To return to the first item of the setup menu, turn the M.
C. dial to select [QUIT :NO],
then press to confirm.
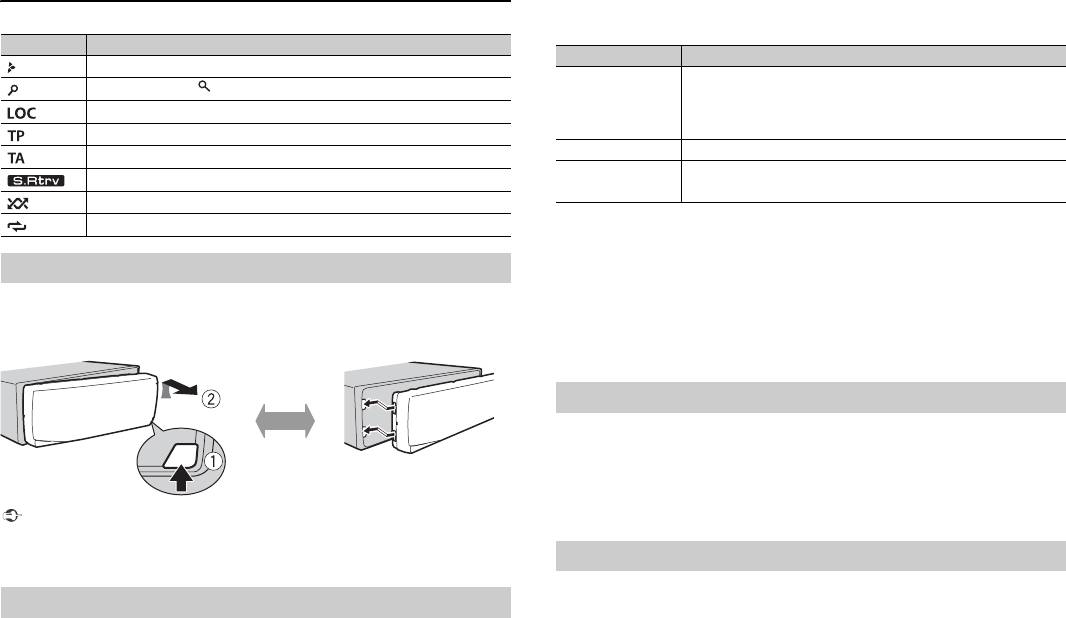
Detaching the front panel
4 Press the M.C. dial to confirm the settings.
Detach the front panel to prevent theft. Remove any cables and devices attached to the
front panel and turn off the unit before detaching it.
NOTES
• You can cancel the menu setting by pressing SRC/OFF.
• These settings can be made at any time from the SYSTEM settings (page 8) and INITIAL settings
(page 4).
1 Press the M.C. dial to display the main menu.
2 Turn the M.C. dial to select [SYSTEM], then press to confirm.
3 Turn the M.C. dial to select [DEMO OFF], then press to confirm.
4 Turn the M.C. dial to select [YES], then press to confirm.
Important
• Avoid subjecting the front panel to excessive shock.
• Keep the front panel out of direct sunlight and high temperatures.
• Always store the detached front panel in a protective case or bag.
1 Press and hold SRC/OFF until the unit turns off.
Setup menu
2 Press and hold SRC/OFF to display the main menu.
When you turn the ignition switch to ON after installation, [SET UP :YES] appears in the
display.
3 Turn the M.C. dial to select [INITIAL], then press to confirm.
1 Press the M.C. dial.
4 Turn the M.C. dial to select an option, then press to confirm.
The setup menu disappears after 30 seconds of no operation. If you prefer not to set
at
this time, turn the M.C. dial to select [NO], then press to confirm.
4En
Detach Attach
Menu Item Description
LANGUAGE Select the language to display the text information from a
co
mpressed audio file.
[ENG](English),
[РУС
](Russian),
[TUR](Turkish)
CLOCK SET Set the clock.
FM STEP Select the FM tuning step from 100 kHz or 50 kHz.
[100], [50]
Canceling the demonstration display (DEMO OFF)
INITIAL settings


