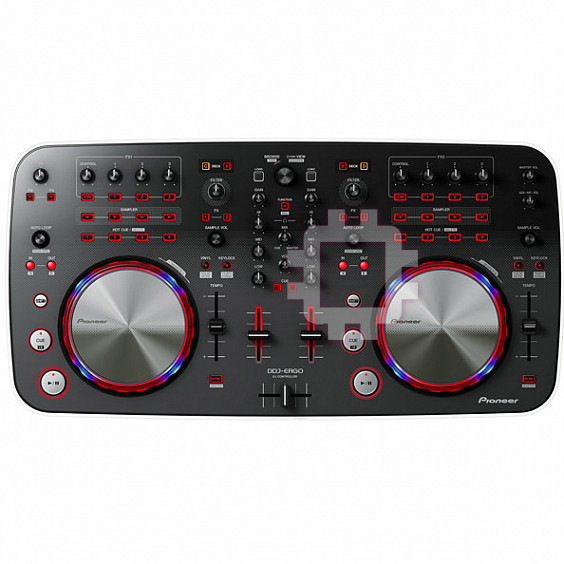
Pioneer DDJ-ERGO-V: инструкция
Раздел: Музыкальное Оборудование
Тип: Dj Контроллер
Характеристики, спецификации
Инструкция к Dj Контроллеру Pioneer DDJ-ERGO-V
Оглавление
- До начала О торговых марках и зарегистрированных торговых марках Комплект поставки Установка програмного обеспечения О программном обеспечении VIRTUAL DJ LE
- О процедуре установки (Mac OS X) Проверка самой свежей информации о программном обеспечении VIRTUAL DJ LE
- О программном драйвере (Windows) Подключения Запуск системы Запуск данного аппарата
- Запуск VIRTUAL DJ LE Запуск VIRTUAL DJ LE (Mac OS X)
- Управление Загрузка дорожек и их Вывод звучания воспроизведение Выход из системы
- Дополнительная информация Технические характеристики

DJ Controller
Console DJ
DJ Controller
Controller DJ
DJ Controller
Controlador DJ
Controlador de DJ
Ņŋښโԓ
DJコントローラー
DJ Контроллер
Quick Start Guide
Guide de démarrage rapide
Kurzanleitung
Guida di avvio veloce
Snelstartgids
Guía de inicio rápido
Guia de início rápido
ץഁΤߟࡿࠓ
クイックスタートガイド
Краткое руководство пользователя
Before start
How to read this manual
Supported operating systems CPU and required memory
®
™
™
! Be sure to read both this leaflet and the Operating Instructions con-
Intel
Core
2 or AMD Athlon
X2
®
Windows
7
tained on the CD-ROM accompanying this product! Both documents
32-bit version
processor
Professional
include important information that you must understand before
1 GB or more of RAM
using this product.
! In this manual, names of screens and menus displayed on the
Others
computer screen, as well as names of buttons and terminals on the
Hard disk Free space of 200 MB or greater
product, etc., are indicated within brackets. (e.g.: [RECORD] panel,
Resolution of 1 280 x 1 024 or greater (Windows)
[CONFIG] menu, [CUE] button, [VINYL] mode, [AUX IN] terminals)
Display resolution
Resolution of 1 440 x 900 or greater (Mac)
About trademarks and registered
Installing the VIRTUAL DJ LE software
trademarks
! Cautions when the included software involves an Internet
environment
! Pioneer is a registered trademark of PIONEER CORPORATION.
A separate contract with and payment to a provider offering Internet
! The names of companies and products mentioned herein are the
services is required.
trademarks of their respective owners.
About the installation procedure (Windows)
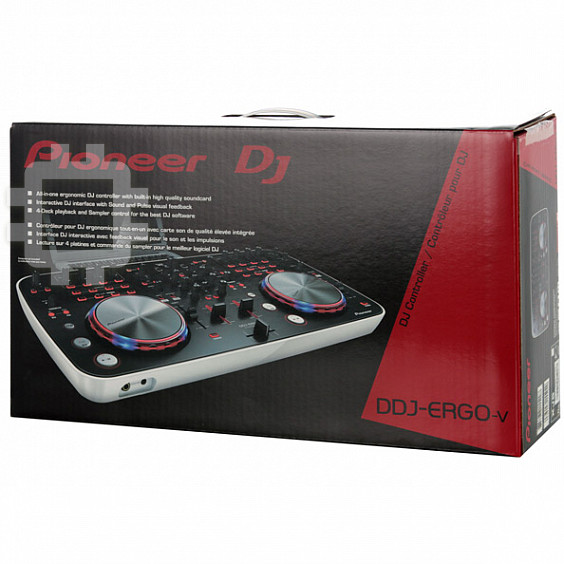
What’s in the box
1 Insert the included VIRTUAL DJ LE software CD-ROM
! VIRTUAL DJ LE software CD-ROM
in the computer’s CD drive.
! Driver software/operating instructions CD-ROM
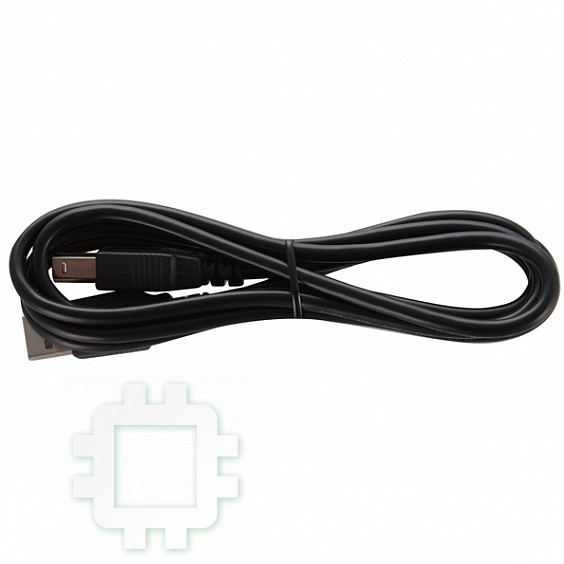
! USB cable
2 From the Windows [Start] menu, double-click the
! Read Before Use (Important)
[Computer (or My Computer)] > [VirtualDJ_LE] icon.
! Quick Start Guide (this document)
The contents of the CD-ROM are displayed.
! Hardware Diagram for Virtual DJ (Table of Supported Functions)
! Service Center Guide (for Japanese customers)
3 Double-click [install_virtualdj_le_ergo_v7.x.x.msi].
! Warranty card
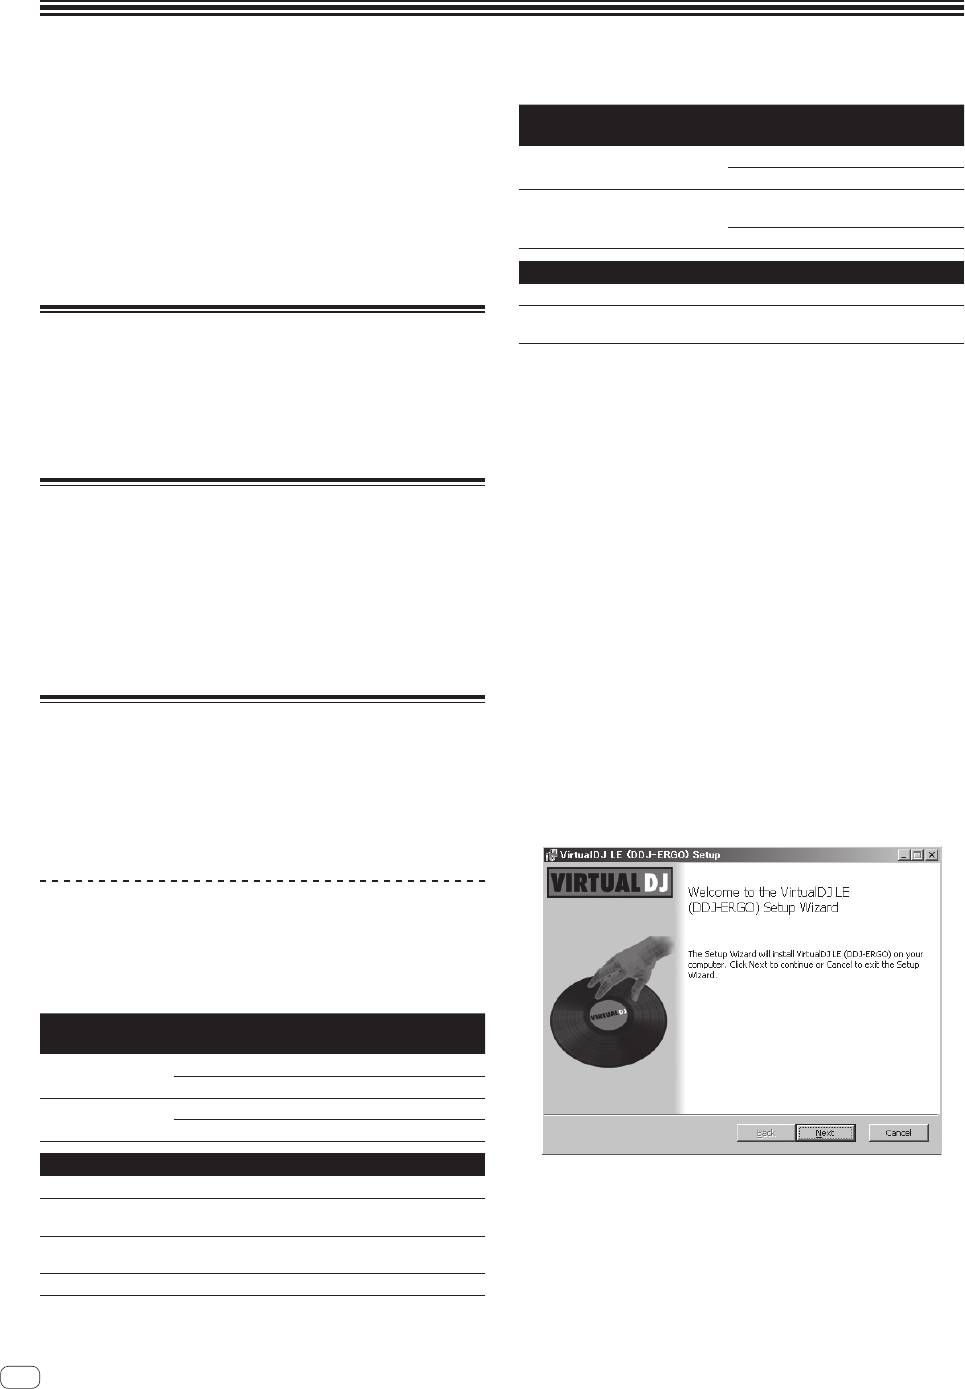
The VIRTUAL DJ LE installer is launched.
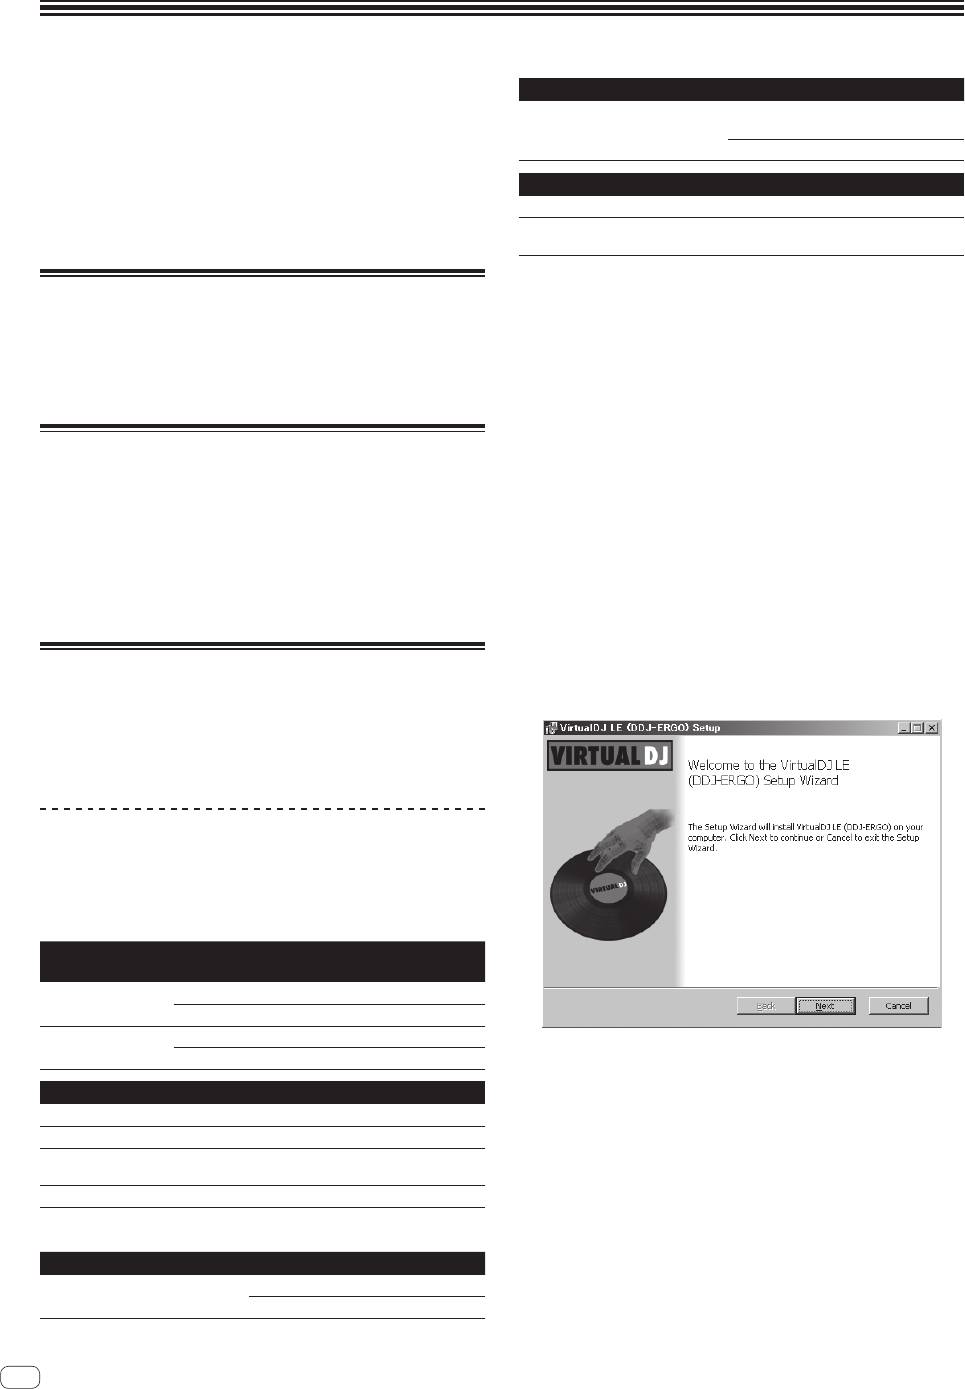
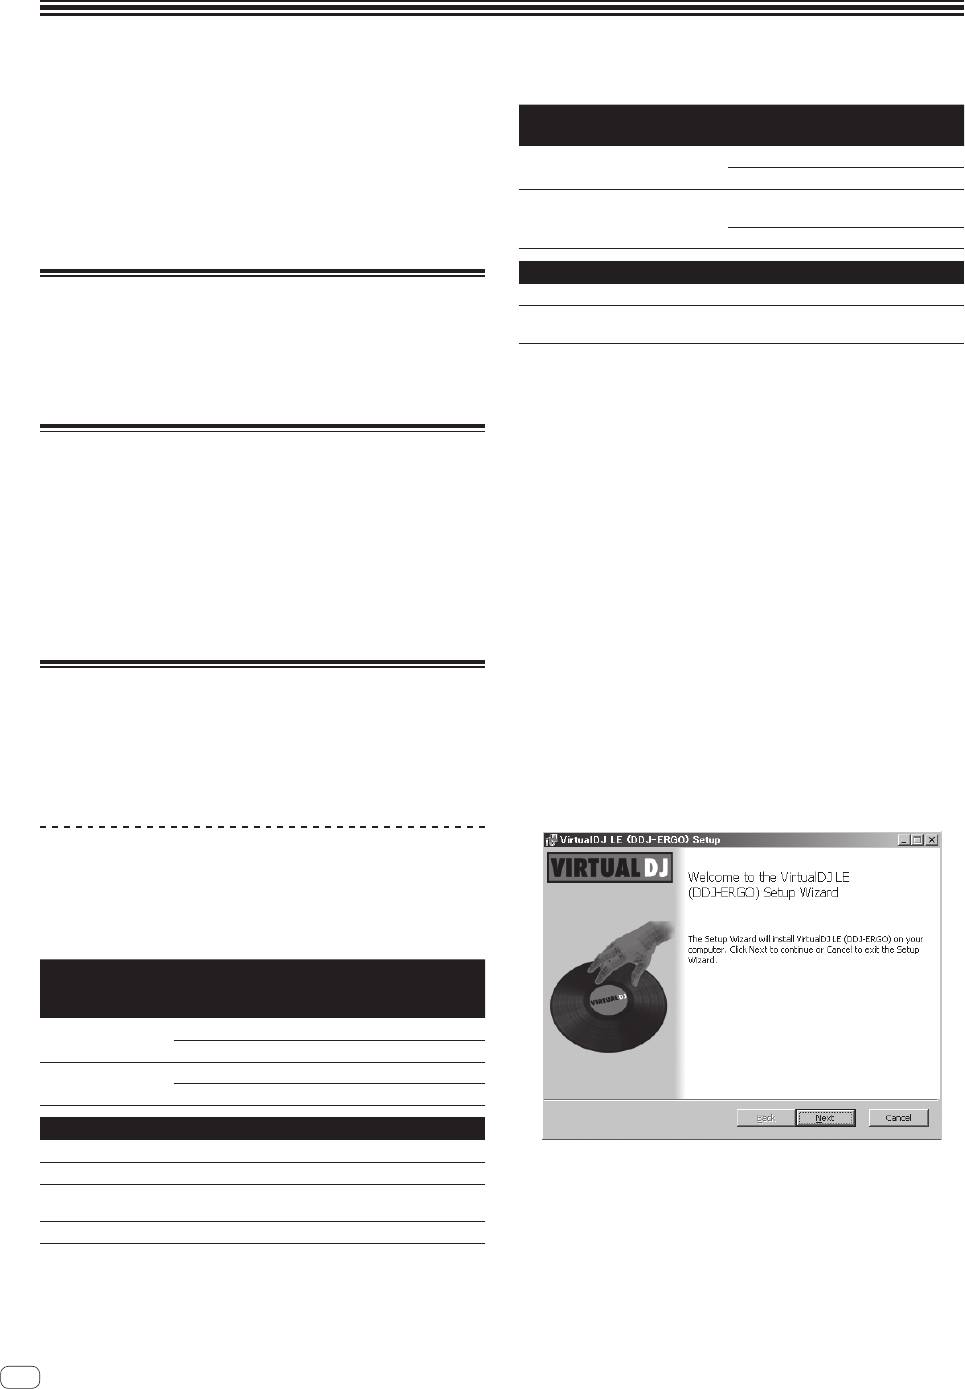
4 Once the VIRTUAL DJ LE installer is launched, click
[Next].
Installing the software
— To return to the previous screen, click [Back].
! Be sure to read the end-user license agreements that appear when
— To cancel installation, click [Cancel].
installing the software below. The software can only be used if you
accept the terms of the agreements.
— VIRTUAL DJ “End-User License Agreement”
— Pioneer DDJ ASIO Setup “Software end user license agreement”
About the VIRTUAL DJ LE software
VIRTUAL DJ LE is a DJ software application by Atomix productions. DJ
performances are possible by connecting the computer on which this
software is installed to this unit.
Minimum operating environment
Supported
CPU and required memory
operating systems
®
Intel
processor
Mac OS X 10.5.x
1 GB or more of RAM
®
®
®
™
Windows
XP (SP3
Intel
Pentium
4 or AMD Athlon
XP processor
or later)
512 MB or more of RAM
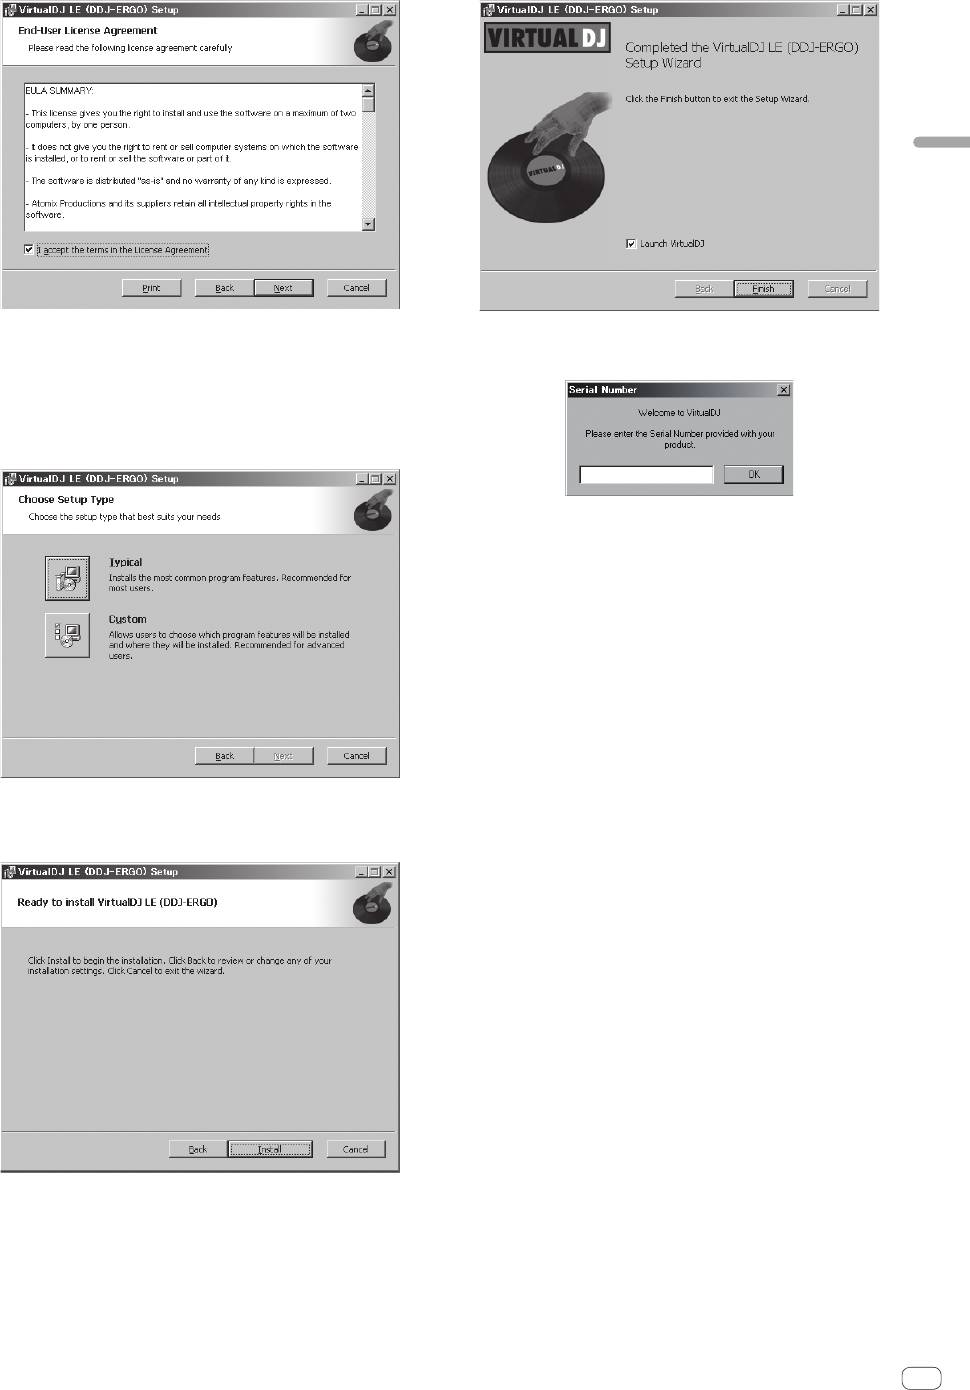
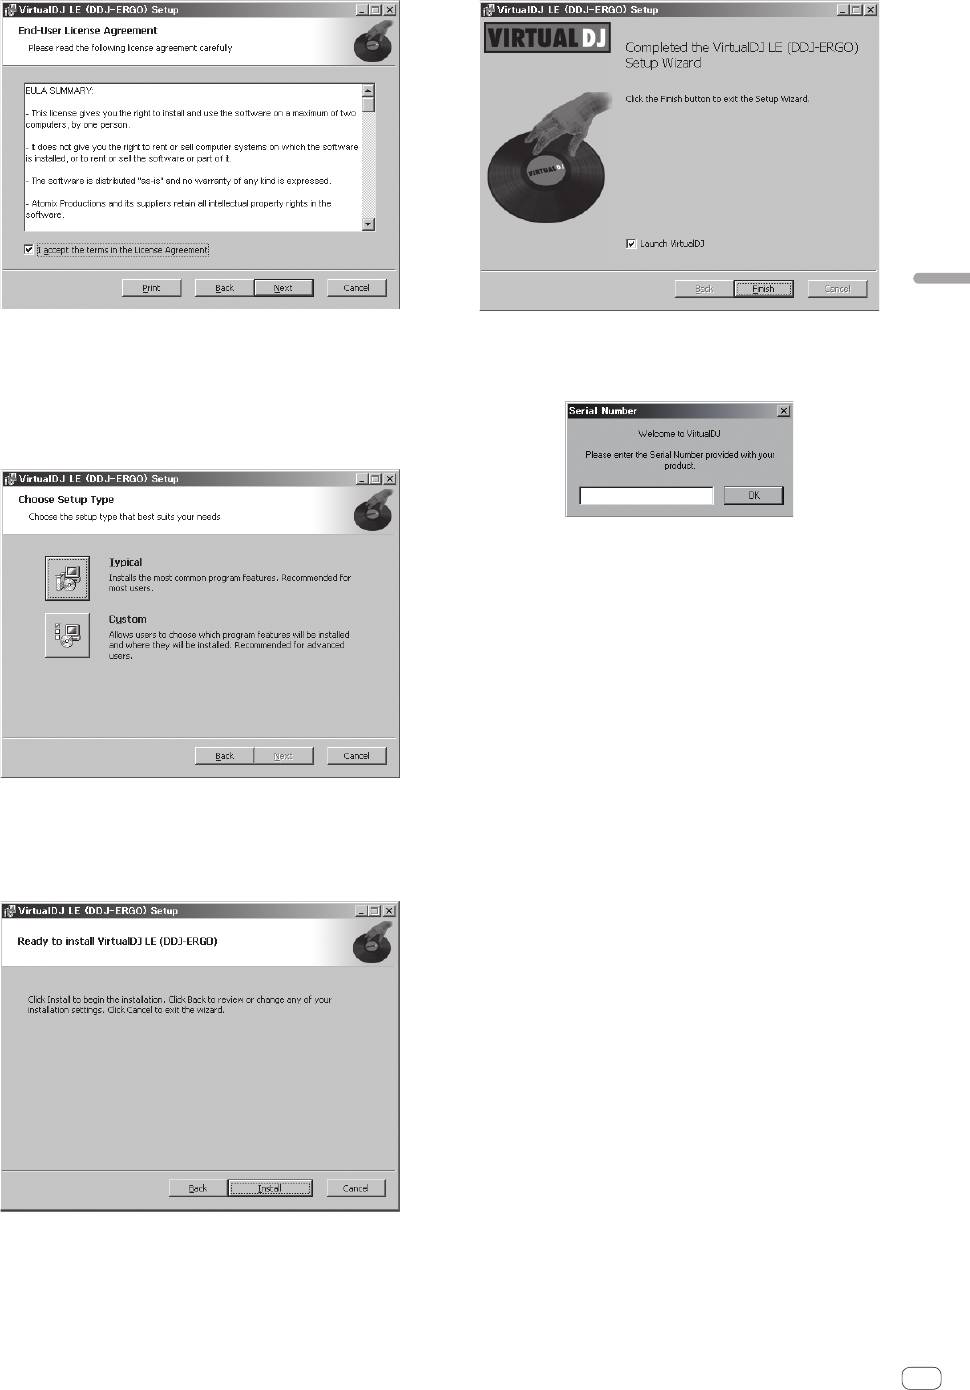
5 Read the contents of the [End-User License
Agreement] carefully, and if you agree, check [I accept
Others
the terms in the License Agreement], then click [Next].
Hard disk Free space of 50 MB or greater
If you do not agree to the terms of the [End-User License Agreement],
Optical drive Optical disc drive on which the CD-ROM can be read
click [Cancel] to cancel installation.
A USB 2.0 port is required to connect the computer
USB port
with this unit.
Display resolution Resolution of 1 024 x 768 or greater
Recomended operating environment
Supported operating systems CPU and required memory
®
Intel
processor
Mac OS X 10.6.x
2 GB or more of RAM
2
En

English
6 Select the type of installation for VIRTUAL DJ LE, then
9 Input the serial number attached to the VIRTUAL DJ
click [Next].
LE software CD-ROM’s package, then click [OK].
— When [Typical] is selected, plug-ins and other components are
installed simultaneously. Normally select [Typical].
— When [Custom] is selected, you can select which components to
install.
About the installation procedure (Mac OS X)
1 Insert the included VIRTUAL DJ LE software CD-ROM
in the computer’s CD drive.
The [VirtualDJ_LE] icon appears on the screen.
2 Double-click the [VirtualDJ_LE] icon.
The contents of the CD-ROM are displayed.
3 Double-click [install_virtualdj_le_ergo_v7.x.x.pkg].
The VIRTUAL DJ LE installer is launched.
4 Once the VirtualDJ LE (DDJ-ERGO) installer is
launched, click [Continue].
7 When the screen below is displayed, click [Install].
Installation begins.
5 Read the contents of the license agreement carefully,
The installation completed screen appears once installation is
click [Continue] and then click [Agree] to accept the
completed.
license agreement.
If you do not agree to the license agreement, click [Disagree] to cancel
installation.
6 Select the type of installation for VIRTUAL DJ LE, then
click [Install].
— Normally select standard installation to install.
— To install in a different location, click [Change Install
Location...] and choose the place of installation.
Installation begins.
The installation completed screen appears once installation is
completed.
7 Click [Close].
This completes the installation procedure.
Checking the latest information on the VIRTUAL
DJ LE software
For the latest information on the operating environment and compatibil-
8 Click [Finish].
ity, and to acquire the latest operating system, please visit the following
This completes the installation procedure.
Atomix productions website:
VIRTUAL DJ LE is launched if [Launch VirtualDJ] on the screen is
http://www.virtualdj.com
checked when [Finish] is clicked.
En
3

About the driver software (Windows)
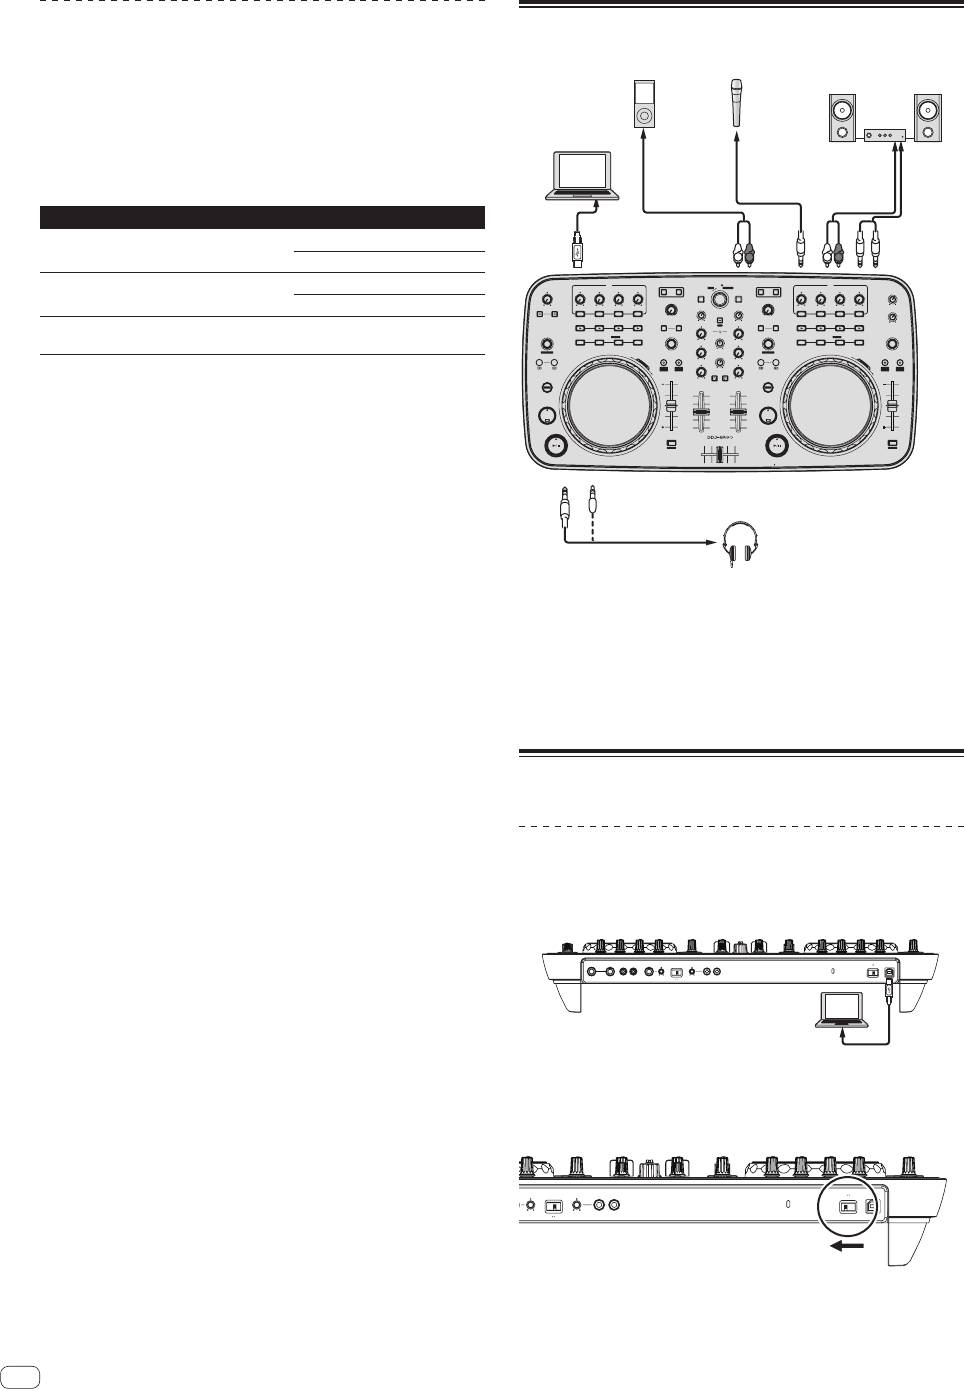
Connections
This driver software is an exclusive ASIO driver for outputting audio
signals from the computer.
Installing the driver software
! There is no need to install the driver software when using Mac OS X.
To audio input
terminals
Operating environment
Supported operating systems
®
Windows
7 Home Premium/Professional/
32-bit version
1
To audio output
Ultimate
1
64-bit version
1
terminals
L
R
L
R
®
Windows Vista
Home Basic/
32-bit version
1
Home Premium/Business/Ultimate
1
FX1
BROWSE VIEW
PUSH
FX2
64-bit version
1
F1
CONTROL1
23
TREE FLD OPEN
CA
DECK
LOAD
LOAD
BD
DECK
CONTROL1
23
MASTER VOL
FILTER FILTER
®
F2 F3
GAIN
GAIN
Windows
XP Home Edition/Professional
ON
123
ON
123
AUX / MIC VOL
FUNCTION
32-bit version
1
SAMPLER
FX
1
2
HI
REC
HI
FX
SAMPLER
(SP2 or later)
12
AUTO LOOP
HOT CUE /
DELETE
SAMPLE VOL
MIX
AUTO LOOP
HOT CUE /
DELETE
SAMPLE VOL
1234
MID
MID
1234
MOVE GRID
CUEMASTER
MOVE GRID
1 When using a 64-bit version of Windows, the driver software can only be used for
IN OUT
VOL
S
E
VINYLKEYLOCK
IN
OUT
VINYL KEYLOCK
A
R
C
S
H
LOW
LOW
E
A
R
PULSE
TEMPO
C
H
PULSE
TEMPO
32-bit applications.
MODE
PANGE
CUE
MODE
PANGE
TEMPO
TEMPO
SHIFT
SHIFT
Before installing the driver software
CUE
CUE
! Turn off this unit’s power switch, then disconnect the USB cable
connecting this unit and the computer.
SYNC
DJ CONTROLLER
SYNC
MASTER
MASTER
! If any other programs are running on the computer, quit them.
1 Turn on the computer’s power.
2 Insert the included driver software CD-ROM into the
computer’s CD drive.
3 Once the CD-ROM’s menu is displayed, double-click
[Pioneer_DDJ_Driver_XXXXX.exe].
4 Proceed with installation according to the instructions
on the screen.
If [Windows Security] appears on the screen while the installation is
in progress, click [Install this driver software anyway] and continue
with the installation.
! When installing on Windows XP
If [Hardware Installation] appears on the screen while the installa-
tion is in progress, click [Continue Anyway] and continue with the
installation.
! When the installation program is completed, a completion message
appears.
4
En
Portable
audio device
Microphone
Component, amplifier,
powered speaker, etc.
Computer
To microphone
Microphone
cable
To headphones
Headphones
Headphones cord
With this unit, the power is supplied by USB bus power. The unit can be
used simply by connecting it to a computer using the USB cable.
! Connect this unit and the computer directly using the included USB
cable.
! Connect the computer to which this unit is to be connected to an AC
power supply.
! A USB hub cannot be used.
Starting the system
Starting this unit
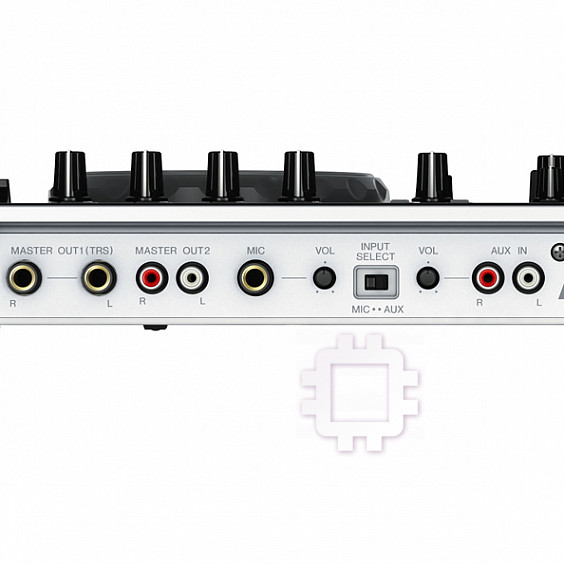
1 Connect this unit to your computer via a USB cable.
MASTER OUT1 (TRS)
MASTER OUT1 (TRS)
MASTER OUT2
MASTER OUT2
VOL
AUX INMICVOL INPUT SELECTVOL
AUX INMICVOL INPUT SELECT
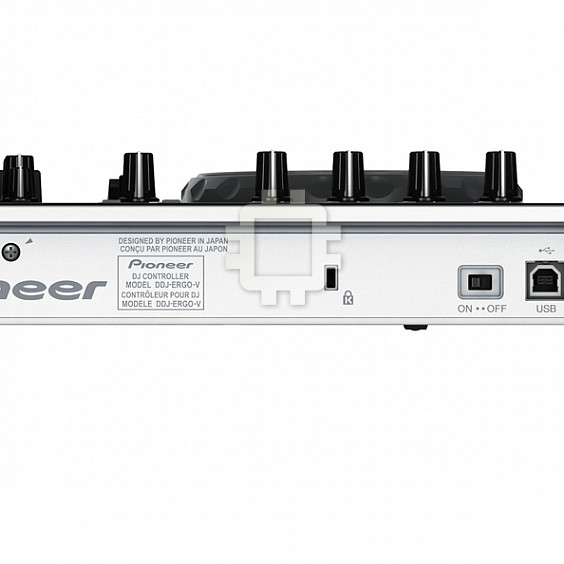
ON
OFFUSB
RLRL
RLRL
MIC
AUX
RL
RL
2 Boot up the connected computer.
3 Slide this unit’s [ON/OFF] switch to the [ON] position.
VOL
AUX INVOLINPUT SELECT
AUX INVOLINPUT SELECTVOL
ON OFFUSB
MIC
AUX
RL
RL
Turn on the power of this unit.
! The message [Installing device driver software] may appear when
this unit is first connected to the computer or when it is connected to
a different USB port on the computer. Wait a while until the message
English
[Your devices are ready for use] appears.
4 Turn on the connected microphone and external
equipment.
Launching VIRTUAL DJ LE
When this unit has just started, wait for the illumination to stop before
launching VIRTUAL DJ LE.
Launching VIRTUAL DJ LE (Windows)
1 From the Windows [Start] menu, click the [All
Programs] > [VIRTUAL DJ LE] > [VirtualDJ LE (DDJ-ERGO)]
icon.
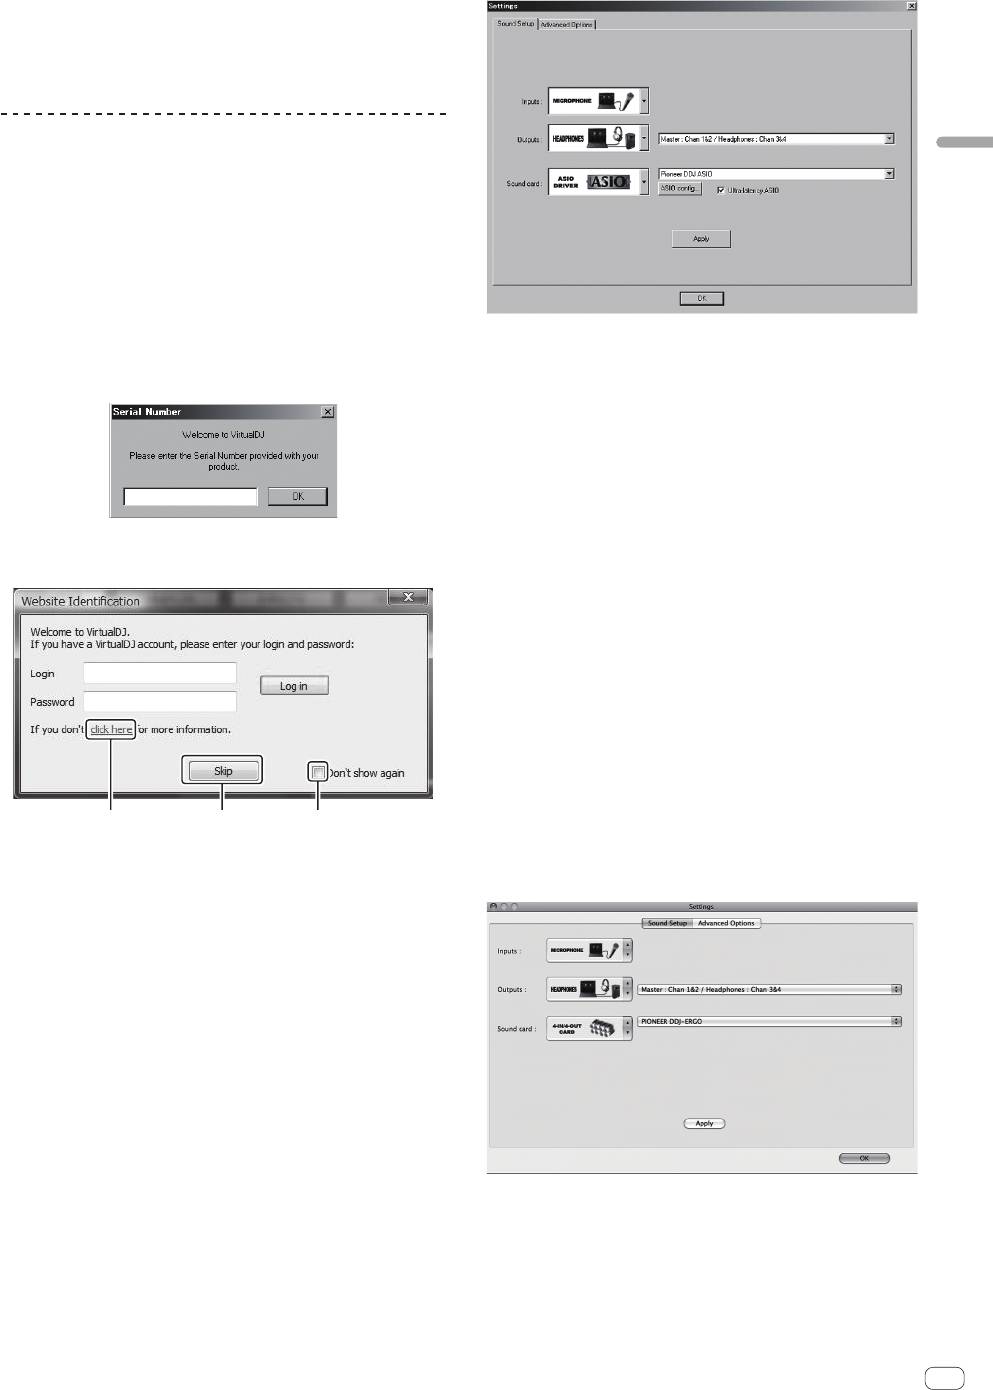
When VIRTUAL DJ LE is launched the first time, a screen for inputting
the serial number appears.
4 Click [Apply], then click [OK].
Input the serial number attached to the VIRTUAL DJ LE software
CD-ROM’s package, then click [OK].
Launching VIRTUAL DJ LE (Mac OS X)
1 In Finder, open the [Application] folder, then double-
click the [VIRTUAL DJ LE] icon.
When VIRTUAL DJ LE is launched the first time, a screen for inputting
the serial number appears.
Input the serial number attached to the VIRTUAL DJ LE software
CD-ROM’s package, then click [OK].
2 If the [Website Identification] screen appears, select
2 If the [Website Identification] screen appears, select
an icon and click.
an icon and click.
! For [VirtualDJ account], click [click here] to see the details.
! To skip the [Website Identification] screen, click [Skip].
! If you do not want the [Website Identification] screen to appear
when VirtualDJ is launched, check [Don’t show again].
VIRTUAL DJ LE is launched.
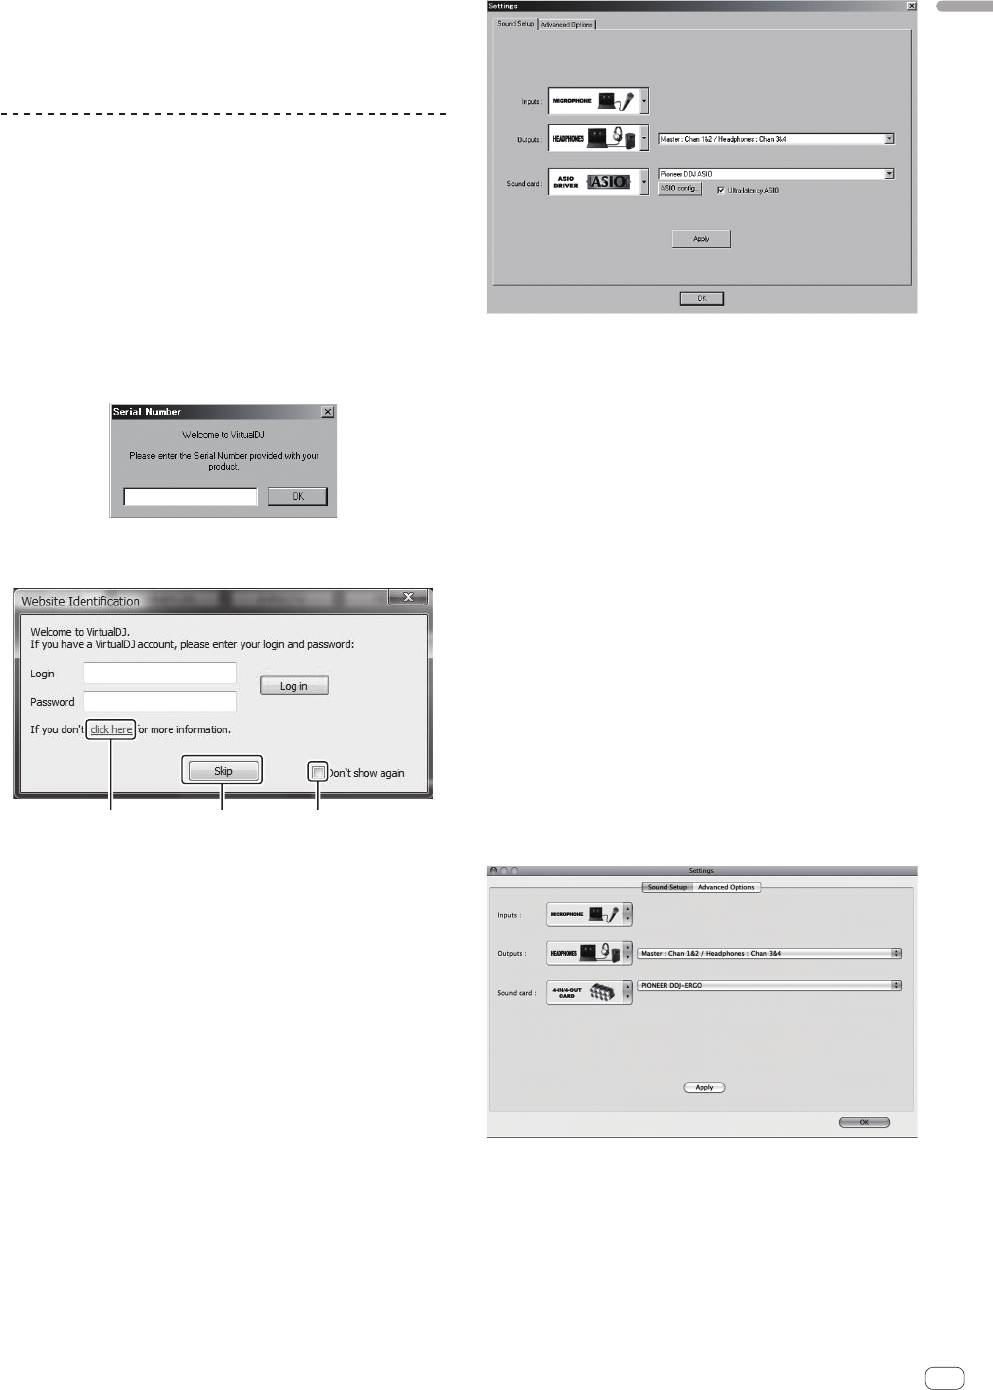
3 Click [CONFIG] in the top left of the computer’s
screen.
The [Settings] screen appears.
Set the various items on the [Sound Setup] tab in the following order:
1 [Inputs]: Select [MICROPHONE].
2 [Sound card]: Select [4-IN/4-OUT CARD] and
1 23
[PIONEER DDJ-ERGO].
3 [Outputs]: Select
1 For [VirtualDJ account], click [click here] to see the details.
[Master : Chan 1&2/Headphones: Chan 3&4].
2 To skip the [Website Identification] screen, click [Skip].
3 If you do not want the [Website Identification] screen to appear
when VirtualDJ is launched, check [Don’t show again].
VIRTUAL DJ LE is launched.
3 Click [CONFIG] in the top right of the computer’s
screen.
The [Settings] screen appears.
Set the various items on the [Sound Setup] tab in the following order:
1 [Inputs]: Select [MICROPHONE].
2 [Sound card]: Select [Pioneer DDJ ASIO].
3 [Outputs]: Select
[Master : Chan 1&2/Headphones: Chan 3&4].
4 Click [Apply], then click [OK].
En
5
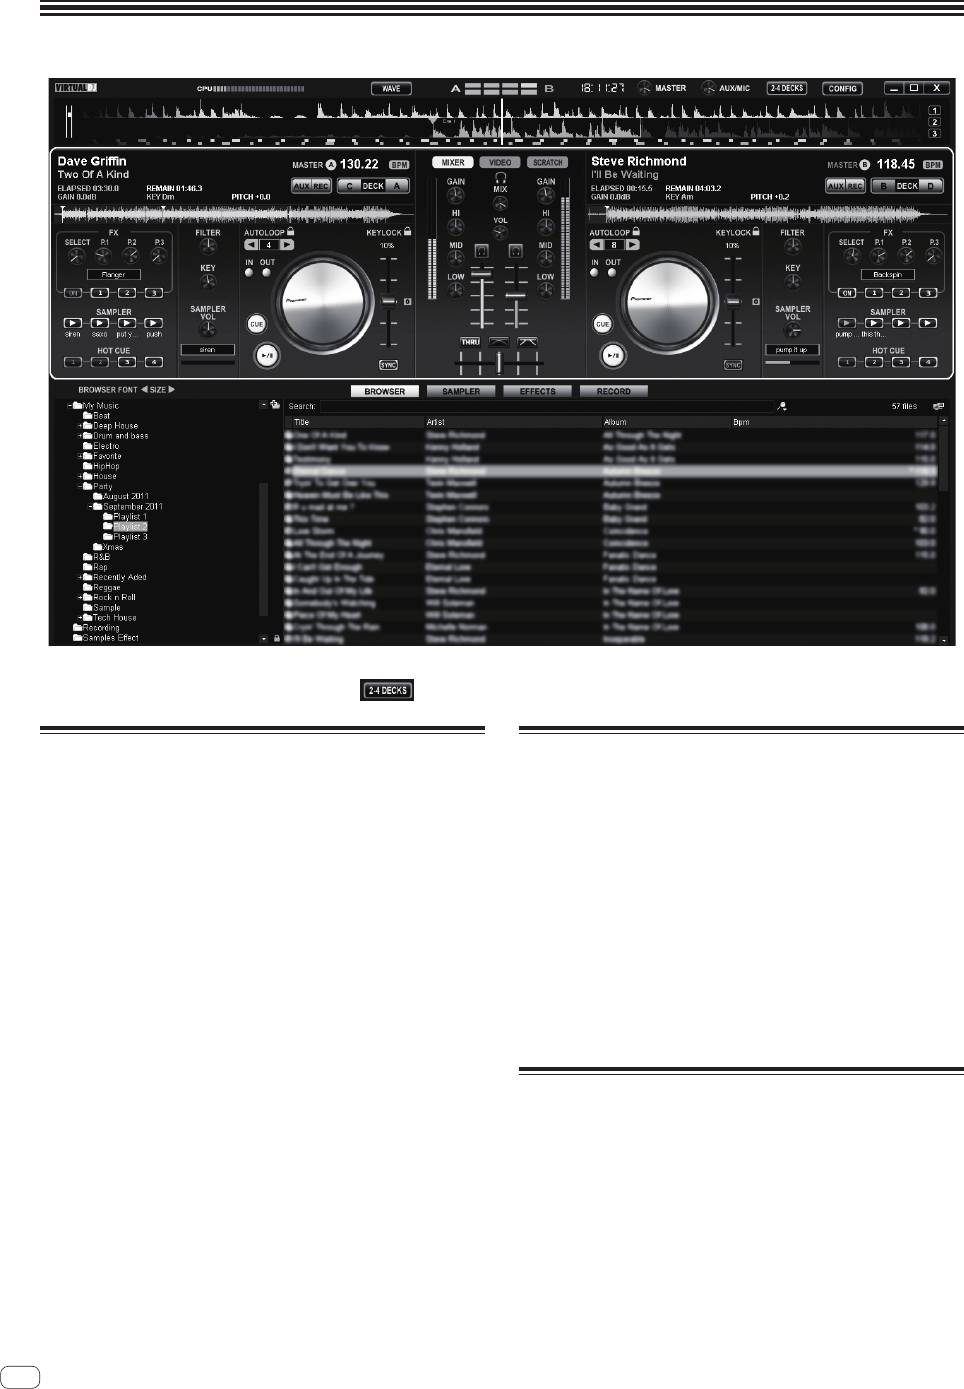
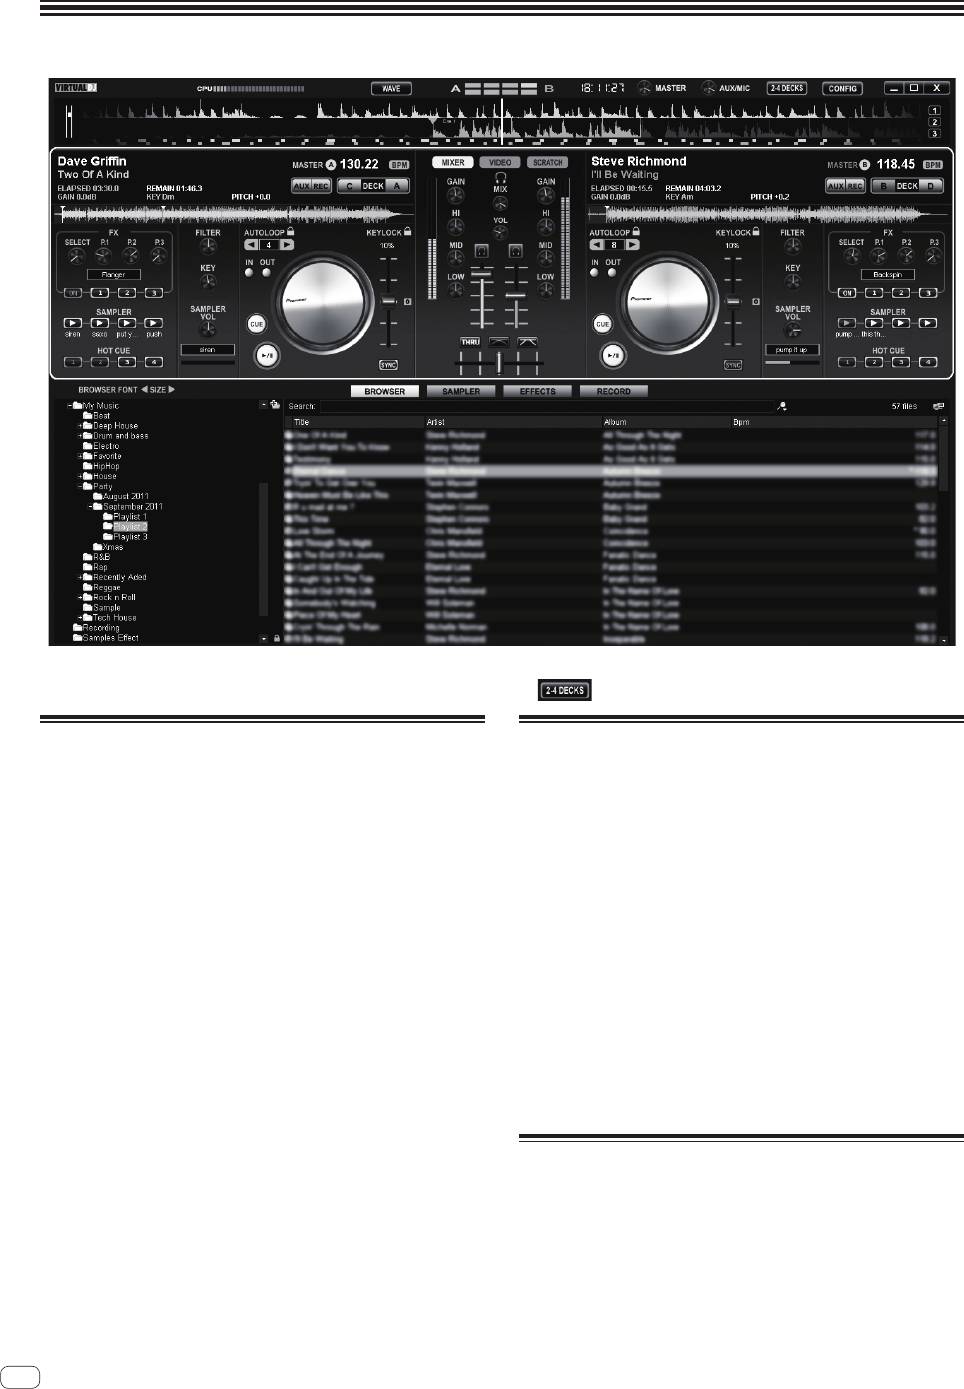
Operation
The screen above shows an example of 2-deck layout. The contents displayed on the screen differ according to the VIRTUAL DJ LE settings.
! The deck layout can be switched by clicking the [
] button on the computer’s screen.
Loading tracks and playing them
Outputting sound
The following example describes the procedure for playing tracks with a
Set the volume of the power amplifiers connected to the [MASTER OUT
2-deck layout.
1] and [MASTER OUT 2] terminals to an appropriate level. Note that if
the volume is set too high, the output sound could be very loud.
1 Turn the rotary selector while pressing the [SHIFT]
button to select a folder or item.
1 Operate the [GAIN] control and the channel faders to
! When a folder or item with the [+] mark is selected and the rotary
adjust the audio level output from the respective decks.
selector is pressed while pressing the [SHIFT] button, that folder or
item is opened or closed.
2 Operate the crossfader to switch the deck whose
sound is output from the speakers.
2 Release the [SHIFT] button then turn the rotary
— Left edge: Sound is output from deck [A] or [C].
selector to select the track.
— Center: The sound of all the decks is mixed and output.
— Right edge: Sound is output from deck [B] or [D].
3 Press the [LOAD] button to load the selected track
onto the deck.
3 Turn the [MASTER VOL] control to adjust the audio
level of the speakers.
4 Press the [f] button to play the track.
! When this button is pressed again during playback, playback
pauses.
Quitting the system
1 Quit VIRTUAL DJ LE.
2 Slide this unit’s [ON/OFF] switch to the [OFF] position.
3 Disconnect the USB cable from your computer.
4 Turn off the connected microphone and external
equipment.
6
En

English
Additional
information
Specifications
General – Main Unit
Power supply ........................................................................................DC 5 V
Power consumption ...........................................................................500 mA
Main unit weight .......................................................................2.9 kg (6.4 lb)
Max. dimensions ..............554.8 mm (W) × 103.2 mm (H) × 279.8 mm (D)
(21.8 in. (W) × 4.1 in. (H) × 11 in. (D))
Tolerable operating temperature .........+5 °C to +35 °C (+41 °F to +95 °F)
Tolerable operating humidity ...................... 5 % to 85 % (no condensation)
For improvement purposes, specifications and design of this unit and
the included software are subject to change without notice.
En
7
Informations préliminaires
Comment lire ce manuel
Environnement opérationnel recommandé
! Veillez à lire cette brochure et le mode d’emploi sur le CD-ROM livré
Systèmes d’exploitation pris
avec ce produit. Les deux documents contiennent des informations
Processeur et mémoire requise
en charge
importantes qui doivent être comprises avant d’utiliser ce produit.
®
Processeur
Intel
! Dans ce manuel, les noms d’écrans et de menus s’affichant sur
Mac OS X 10.6.x
2 Go ou plus de RAM
l’écran de l’ordinateur, de même que les noms de touches, boutons
®
™
et de prises sur le produit, etc. sont indiqués entre parenthèses. (ex. :
Processeur Intel
Core
2 ou AMD
®
Windows
7
Version à 32
™
Panneau [RECORD], Menu [CONFIG], Touche [CUE], Mode [VINYL],
Athlon
X2
Professionnel
bits
Prises [AUX IN])
1 Go ou plus de RAM
Divers
Disque dur Espace disponible de 200 Mo ou plus
À propos des marques commerciales
Résolution de 1 280 x 1 024 ou plus (Windows)
et des marques déposées
Résolution de l’écran
Résolution de 1 440 x 900 ou plus (Mac)
! Pioneer est une marque déposée de PIONEER CORPORATION.
! Les noms de sociétés et de produits mentionnés ici sont des
Installation du logiciel VIRTUAL DJ LE
marques commerciales de leurs détenteurs respectifs.
! Précautions à prendre lorsqu’une connexion Internet est nécessaire
Il est nécessaire de contracter un abonnement auprès d’un fournis-
Contenu du carton d’emballage
seur de services Internet.
! CD-ROM du logiciel VIRTUAL DJ LE
À propos de l’installation (Windows)
! CD-ROM avec pilote et mode d’emploi
! Câble USB
! A lire avant l’utilisation (Important)
1 Insérez le CD-ROM du logiciel VIRTUAL DJ LE fourni
! Guide de démarrage rapide (ce document)
dans le lecteur CD de l’ordinateur.
! Hardware Diagram for Virtual DJ (Tableau des fonctions prises en
charge)
2 Depuis le menu [Démarrer] de Windows, double-
! Guide du Centre de Service (pour la clientèle japonaise)
cliquez sur l’icône [Ordinateur (ou Poste de travail)] >
! Carte de garantie
[VirtualDJ_LE].
Le contenu du CD-ROM apparaît.
Installation du logiciel
3 Double-cliquez sur
[install_virtualdj_le_ergo_v7.x.x.msi].
! Veuillez lire les contrats de licence d’utilisation qui apparaissent lors
L’installateur de VIRTUAL DJ LE est lancé.
de l’installation du logiciel suivant. Le logiciel peut être utilisé si vous
acceptez les termes des contrats.
4 Lorsque l’installateur de VIRTUAL DJ LE a été lancé,
— VIRTUAL DJ “End-User License Agreement”
cliquez sur [Next].
— Pioneer DDJ ASIO Setup “Software end user license agreement”
— Pour revenir à l’écran précédent, cliquez sur [Back].
— Pour annuler l’installation, cliquez sur [Cancel].
À propos du logiciel VIRTUAL DJ LE
VIRTUAL DJ LE est une application logicielle DJ de Atomix productions.
En reliant l’ordinateur sur lequel ce logiciel est installé à cet appareil, il
est possible d’effectuer des performances DJ.
Environnement fonctionnel minimal
Systèmes
d’exploitation pris
Processeur et mémoire requise
en charge
®
Processeur
Intel
Mac OS X 10.5.x
1 Go ou plus de RAM
®
®
®
™
Windows
XP (SP3 ou
Processeur Intel
Pentium
4 ou AMD Athlon
XP
ultérieur)
512 Mo ou plus de RAM
Divers
Disque dur Espace disponible de 50 Mo ou plus
Lecteur optique Lecteur de disque optique pouvant lire le CD-ROM
5 Lisez attentivement le contenu de [End-User License
Un port USB 2.0 est indispensable pour raccorder cet
Agreement] et, si vous acceptez, cochez [I accept the
Port USB
ordinateur à cet appareil.
terms in the License Agreement] puis cliquez sur [Next].
Résolution de l’écran Résolution de 1 024 x 768 ou plus
Si vous n’acceptez pas les termes de [End-User License Agreement],
cliquez sur [Cancel] pour annuler l’installation.
2
Fr
Français
6 Sélectionnez le type d’installation de VIRTUAL DJ LE,
9 Entrez le numéro de série indiqué sur le carton du
puis cliquez sur [Next].
CD-ROM du logiciel VIRTUAL DJ LE, puis cliquez sur [OK].
— Lorsque [Typical] est sélectionné, les plugins et autres com-
posants sont également installés. Normalement sélectionnez
[Typical].
— Lorsque [Custom] est sélectionné, vous pouvez sélectionner les
composants qui doivent être installés.
À propos de l’installation (Mac OS X)
1 Insérez le CD-ROM du logiciel VIRTUAL DJ LE fourni
dans le lecteur CD de l’ordinateur.
L’icône [VirtualDJ_LE] apparaît à l’écran.
2 Double-cliquez sur l’icône [VirtualDJ_LE].
Le contenu du CD-ROM apparaît.
3 Double-cliquez sur
[install_virtualdj_le_ergo_v7.x.x.pkg].
L’installateur de VirtualDJ LE (DDJ-ERGO) est lancé.
4 Lorsque l’installateur de VirtualDJ LE (DDJ-ERGO) a
été lancé, cliquez sur [Continuer].
7 Lorsque l’écran suivant apparaît, cliquez sur [Install].
L’installation commence.
5 Lisez attentivement le contenu du contrat de licence,
Lorsqu’elle est terminée, l’écran de fin d’installation apparaît.
cliquez sur [Continuer] puis sur [Accepter] pour accepter
le contrat de licence.
Si vous n’acceptez pas le contrat de licence, cliquez sur [Refuser] pour
annuler l’installation.
6 Sélectionnez le type d’installation de VIRTUAL DJ LE,
puis cliquez sur [Installer].
— Normalement sélectionnez l’installation standard pour installer
le logiciel.
— Pour l’installer à un autre emplacement, cliquez sur
[Changer l'emplacement de l'installation...] et choisissez
l’emplacement.
L’installation commence.
Lorsqu’elle est terminée, l’écran de fin d’installation apparaît.
7 Cliquez sur [Fermer].
La procédure est alors terminée.
Vérification des toutes dernières informations
8 Cliquez sur [Finish].
sur le logiciel VIRTUAL DJ LE
La procédure est alors terminée.
Pour les toutes dernières informations sur l’environnement opérationnel
VIRTUAL DJ LE est lancé si [Launch VirtualDJ] est coché sur l’écran
et la compatibilité ainsi que pour acquérir le tout dernier système d’ex-
quand [Finish] est cliqué.
ploitation, veuillez consulter le site Atomix productions suivant :
http://www.virtualdj.com
Fr
3

À propos du pilote (Windows)
Raccordements
Ce logiciel est un pilote ASIO prévu exclusivement pour transmettre des
signaux audio de l’ordinateur.
Installation du pilote
! Il n’est pas nécessaire d’installer le pilote dans le cas de Mac OS X.
Aux prises
d’ entrée audio
Environnement opérationnel
Systèmes d’exploitation pris en charge
®
Windows
7 Édition Familiale Premium/
Version à 32 bits
1
Aux prises
Professionnel/Édition Intégrale
1
Version à 64 bits
1
d’ entrée audio
L
R
L
R
®
Windows Vista
Familiale Basique/
Version à 32 bits
1
Familiale Premium/Professionnel/Intégrale
1
FX1
BROWSE VIEW
PUSH
FX2
Version à 64 bits
1
F1
CONTROL1
23
CA
DECK
TREE FLD OPEN
LOAD
LOAD
BD
DECK
CONTROL1
23
MASTER VOL
FILTER FILTER
®
F2 F3
GAIN
GAIN
Windows
XP Édition Familiale/
ON
123
AUX / MIC VOL
FUNCTION
ON
123
Version à 32 bits
1
SAMPLER
FX
HI
REC
HI
FX
SAMPLER
Édition Professionnelle (SP2 ou ultérieur)
1
2
12
AUTO LOOP
HOT CUE /
DELETE
SAMPLE VOL
MIX
AUTO LOOP
HOT CUE /
DELETE
SAMPLE VOL
1234
MID
MID
1234
MOVE GRID
CUEMASTER
MOVE GRID
1 Si une version de Windows à 64 bits est utilisée, le pilote ne pourra être utilisé
IN OUT
S
E
VINYLKEYLOCK
VOL
IN
OUT
VINYL KEYLOCK
A
R
C
H
LOW
LOW
S
E
A
R
PULSE
TEMPO
C
H
PULSE
TEMPO
que pour les applications à 32 bits.
MODE
PANGE
CUE
MODE
PANGE
TEMPO
TEMPO
SHIFT
SHIFT
Avant d’installer le pilote
CUE
CUE
! Éteignez cet appareil, puis débranchez le câble USB raccordé à cet
appareil et à l’ordinateur.
SYNC
DJ CONTROLLER
SYNC
MASTER
MASTER
! Si des programmes sont ouverts sur l’ordinateur, fermez-les.
1 Allumez l’ordinateur.
2 Insérez le CD-ROM du pilote fourni dans le lecteur CD
de l’ordinateur.
3 Lorsque le menu du CD-ROM apparaît, double-cliquez
sur [Pioneer_DDJ_Driver_XXXXX.exe].
4 Procédez à l’installation en suivant les instructions qui
apparaissent à l’écran.
Si [Sécurité de Windows] apparaît à l’écran au cours de l’installation,
cliquez sur [Installer ce pilote quand même] et continuez l’installation.
! Installation sur Windows XP
Si [Installation matérielle] apparaît à l’écran au cours de l’installa-
tion, cliquez sur [Continuer] et continuez l’installation.
! Lorsque le programme d’installation est terminé, le message
Installation terminée apparaît.
4
Fr
Dispositif
audio portable
Microphone Composants, amplificateurs,
enceintes alimentées, etc.
Ordinateur
Au microphone
Câble de
microphone
Au casque
Casque
Au casque
L’alimentation de cet appareil est fournie par le bus USB. Cet appareil
peut être utilisé simplement après l’avoir raccordé à un ordinateur par
le câble USB.
! Raccordez cet appareil et l’ordinateur directement avec le câble USB
fourni.
! Raccordez l’ordinateur auquel cet appareil doit être raccordé à une
source d’alimentation secteur.
! Un concentrateur USB ne peut pas être utilisé.
Ouverture du système
Mise en service de cet appareil
1 Raccordez cet appareil à votre ordinateur avec un
câble USB.
MASTER OUT1 (TRS)
MASTER OUT1 (TRS)
MASTER OUT2
MASTER OUT2
VOL
AUX INMICVOL INPUT SELECTVOL
AUX INMICVOL INPUT SELECT
ON
OFFUSB
RLRL
RLRL
MIC
AUX
RL
RL
2 Allumez l’ordinateur raccordé.
3 Faites glisser le commutateur [ON/OFF] de cet
appareil vers [ON].
VOL
AUX INVOLINPUT SELECTVOL
AUX INVOLINPUT SELECT
ON OFFUSB
MIC
AUX
RL
RL
Allumez cet appareil.
! Le message [Installation du pilote logiciel de périphérique] peut
apparaître la première fois que cet appareil est raccordé à l’ordina-
teur ou lorsqu’il est raccordé à un autre port USB de l’ordinateur.
Attendez un instant que le message [Vos périphériques sont prêts
à être utilisés.] apparaisse.
4 Allumez le microphone raccordé et un appareil
externe.
Lancement de VIRTUAL DJ LE
Français
Juste après la mise en service de cet appareil, attendez que l’éclairage
s’éteigne avant de lancer VIRTUAL DJ LE.
Lancement de VIRTUAL DJ LE (Windows)
1 Depuis le menu [Démarrer] de Windows, cliquez
sur l’icône [Tous les programmes] > [VIRTUAL DJ LE] >
[VirtualDJ LE (DDJ-ERGO)].
La première fois que vous lancez VIRTUAL DJ LE, l’écran de saisie du
numéro de série apparaît.
4 Cliquez sur [Apply] puis sur [OK].
Entrez le numéro de série collé sur le carton d’emballage du CD-ROM du
logiciel VIRTUAL DJ LE, puis cliquez sur [OK].
Lancement de VIRTUAL DJ LE (Mac OS X)
1 Dans le Finder, ouvrez le dossier [Application], puis
double-cliquez sur l’icône [VIRTUAL DJ LE].
La première fois que vous lancez VIRTUAL DJ LE, l’écran de saisie du
numéro de série apparaît.
Entrez le numéro de série collé sur le carton d’emballage du CD-ROM du
logiciel VIRTUAL DJ LE, puis cliquez sur [OK].
2 Si l’écran [Website Identification] apparaît,
2 Si l’écran [Website Identification] apparaît,
sélectionnez une icône et cliquez dessus.
sélectionnez une icône et cliquez dessus.
! Pour voir les détails de [VirtualDJ account], cliquez sur
[click here].
! Pour sauter l’écran [Website Identification], cliquez sur [Skip].
! Si vous ne voulez pas voir l’écran [Website Identification] au
lancement de VirtualDJ, cochez [Don’t show again].
VIRTUAL DJ LE est lancé.
3 Cliquez sur [CONFIG] dans le coin supérieur gauche de
l’écran de l’ordinateur.
L’écran [Settings] apparaît.
Réglez les différents éléments sur l’onglet [Sound Setup] dans l’ordre
suivant :
1 23
1 [Inputs] : Sélectionnez [MICROPHONE].
2 [Sound card] : Sélectionnez [4-IN/4-OUT CARD] et
1 Pour voir les détails de [VirtualDJ account], cliquez sur
[PIONEER DDJ-ERGO].
[click here].
3 [Outputs] : Sélectionnez
2 Pour sauter l’écran [Website Identification], cliquez sur [Skip].
[Master : Chan 1&2/Headphones: Chan 3&4].
3 Si vous ne voulez pas voir l’écran [Website Identification] au
lancement de VirtualDJ, cochez [Don’t show again].
VIRTUAL DJ LE est lancé.
3 Cliquez sur [CONFIG] dans le coin supérieur droit de
l’écran de l’ordinateur.
L’écran [Settings] apparaît.
Réglez les différents éléments sur l’onglet [Sound Setup] dans l’ordre
suivant :
1 [Inputs] : Sélectionnez [MICROPHONE].
2 [Sound card] : Sélectionnez [Pioneer DDJ ASIO].
3 [Outputs] : Sélectionnez
[Master : Chan 1&2/Headphones: Chan 3&4].
4 Cliquez sur [Apply] puis sur [OK].
Fr
5

Fonctionnement
L’écran ci-dessus montre en exemple l’affichage de 2 platines. Ce qui apparaît sur l’écran dépend des réglages de VIRTUAL DJ LE.
! Le nombre de platines affichées peut être changé par un clic sur le bouton [
] sur l’écran de l’ordinateur.
Chargement et lecture de morceaux
Restitution du son
L’exemple suivant montre comment procéder à la lecture dans le cas de
Réglez le volume des amplificateurs de puissance raccordés aux prises
l’affichage de 2 platines.
[MASTER OUT 1] et [MASTER OUT 2] au niveau approprié. Notez que si
le volume est réglé trop haut, le son peut être très fort.
1 Tournez le sélecteur rotatif tout en appuyant sur
la touche [SHIFT] pour sélectionner un dossier ou un
1 Actionnez la commande [GAIN] et les faders de
élément.
canaux pour régler le niveau sonore à la sortie des
! Lorsqu’un dossier ou élément accompagné du signe [+] est sélec-
platines respectives.
tionné et le sélecteur rotatif est pressé en même temps que la touche
[SHIFT], le dossier ou l’élément s’ouvre ou se ferme.
2 Actionnez le crossfader pour changer la platine dont
le son est restitué par les enceintes.
2 Relâchez la touche [SHIFT] et tournez le sélecteur
— Côté gauche : Le son provient de la platine [A] ou [C].
rotatif pour sélectionner le morceau.
— Centre : Le son de toutes les platines est mixé avant sa sortie.
— Côté droit : Le son provient de la platine [B] ou [D].
3 Appuyez sur la touche [LOAD] pour charger le
morceau sélectionné sur la platine.
3 Tournez la commande [MASTER VOL] pour régler le
niveau sonore des enceintes.
4 Appuyez sur la touche [f] pour jouer le morceau.
! Une pression sur cette touche pendant la lecture interrompt la
lecture.
Fermeture du système
1 Fermez VIRTUAL DJ LE.
2 Faites glisser le commutateur [ON/OFF] de cet
appareil vers [OFF].
3 Débranchez le câble USB de l’ordinateur.
4 Éteignez le microphone raccordé et l’appareil externe.
6
Fr

Informations
supplémentaires
Français
Spécifications
Caractéristiques générales – Appareil principal
Alimentation ......................................................................................... CC 5 V
Consommation ...................................................................................500 mA
Poids de l’appareil principal .................................................................2,9 kg
Dimensions maximales ..... 554,8 mm (L) × 103,2 mm (H) × 279,8 mm (P)
Température de fonctionnement tolérée ............................. +5 °C à +35 °C
Humidité de fonctionnement tolérée .......5 % à 85 % (sans condensation)
En vue de l’amélioration du produit, les caractéristiques et la configura-
tion de cet appareil ainsi que le logiciel inclus sont susceptibles d’être
modifiés sans avis préalable.
Fr
7
Vor der Inbetriebnahme
Zum Lesen dieser Anleitung
Empfohlene Betriebsumgebung
! Lesen Sie immer sowohl dieses Infoblatt als auch die
CPU und erforderlicher
Bedienungsanleitung auf der dem Produkt beiliegenden CD-ROM
Unterstützte Betriebssysteme
Arbeitsspeicher
durch! Beide Dokumente enthalten wichtige Informationen, mit
®
Intel
Prozessor
denen Sie sich vor dem Gebrauch dieses Produktes vertraut machen
Mac OS X 10.6.x
Mindestens 2 GB RAM
müssen.
®
™
™
! In dieser Anleitung werden die Namen von auf dem
Intel
Core
2 oder AMD Athlon
X2
®
Windows
7
Computerbildschirm angezeigten Bildschirmen und Menüs, ebenso
32-Bit-Version
Prozessor
Professional
wie die Namen von Tasten und Buchsen auf dem Produkt usw.
Mindestens 1 GB RAM
in Klammern angegeben. (z.B.: [RECORD]-Feld, [CONFIG]-Menü,
[CUE]-Taste, [VINYL]-Modus, [AUX IN]-Buchsen)
Sonstiges
Festplatte Freier Speicherplatz von mindestens 200 MB
Auflösung von 1 280 x 1 024 oder höher (Windows)
Display-Auflösung
Über Markenzeichen und
Auflösung von 1 440 x 900 oder höher (Mac)
eingetragene Markenzeichen
Installieren der VIRTUAL DJ LE Software
! Pioneer ist ein eingetragenes Markenzeichen der PIONEER
CORPORATION.
! Vorsichtsmaßregeln, wenn die mitgelieferte Software eine Internet-
! Die hier erwähnten Produkt- oder Firmennamen sind Markenzeichen
Umgebung erfordert
der jeweiligen Eigentümer.
Ein separater Vertrag mit und Bezahlung an einen Internet-Provider
ist erforderlich.
Lieferumfang
Hinweise zum Installationsverfahren (Windows)
! VIRTUAL DJ LE Software CD-ROM
! Treibersoftware/Bedienungsanleitung CD-ROM
1 Setzen Sie die mitgelieferte VIRTUAL DJ LE Software
! USB-Kabel
CD-ROM in das CD-Laufwerk Ihres Computers ein.
! Vor Gebrauch lesen (wichtig)
! Kurzanleitung (dieses Dokument)
2 Doppelklicken Sie aus dem Windows [Start]-Menü auf
! Hardware Diagram for Virtual DJ (Tabelle unterstützter Funktionen)
das Icon [Computer (oder Arbeitsplatz)] > [VirtualDJ_LE].
! Service-Center Anleitung (für japanische Kunden)
Die Inhalte der CD-ROM werden angezeigt.
! Garantiekarte
3 Doppelklicken Sie
[install_virtualdj_le_ergo_v7.x.x.msi].
Installieren der Software
Das Installationsprogramm VIRTUAL DJ LE wird gestartet.
! Lesen Sie unbedingt die Software-Lizenzvereinbarungen für den
4 Wenn das Installationsprogramm VIRTUAL DJ LE
Endbenutzer, die beim Installieren der untenstehenden Software
gestartet ist, klicken Sie auf [Next].
erscheinen. Die Software darf nur Verwendung werden, wenn Sie
— Zum Zurückkehren zum vorherigen Bildschirm klicken Sie auf
den Bedingungen der Vereinbarung zustimmen.
[Back].
— VIRTUAL DJ “End-User License Agreement”
— Zum Abbrechen der Installation klicken Sie auf [Cancel].
— Pioneer DDJ ASIO Setup “Software end user license agreement”
Über die VIRTUAL DJ LE-Software
VIRTUAL DJ LE ist eine DJ-Software-Anwendung von Atomix produc-
tions. DJ-Auftritte sind möglich, indem ein Computer an dieses Gerät
angeschlossen wird, auf dem diese Software installiert ist.
Minimale Betriebsumgebung
Unterstützte
CPU und erforderlicher Arbeitsspeicher
Betriebssysteme
®
Intel
Prozessor
Mac OS X 10.5.x
Mindestens 1 GB RAM
®
®
®
™
Windows
XP (SP3
Intel
Pentium
4 oder AMD Athlon
XP Prozessor
oder höher)
512 MB RAM oder mehr
Sonstiges
Festplatte Freier Speicherplatz von mindestens 50 MB
5 Lesen Sie die Inhalte von [End-User License
Optisches Disc-Laufwerk, auf dem die CD-ROM gele-
Agreement] sorgfältig durch, und wenn Sie zustimmen
Optisches Laufwerk
sen werden kann
markieren Sie [I accept the terms in the License
Ein USB 2.0-Port ist zum Anschluss des Computers an
Agreement] und klicken dann auf [Next].
USB-Anschluss
dieses Gerät erforderlich.
Wenn Sie den Bedingungen der [End-User License Agreement] nicht
Display-Auflösung Auflösung von 1 024 x 768 oder höher
zustimmen, klicken Sie auf [Cancel], um die Installation abzubrechen.
2
De
Deutsch
6 Wählen Sie den Typ der Installation für VIRTUAL DJ
9 Geben Sie die Seriennummer ein, die an der
LE, und klicken Sie dann auf [Next].
Verpackung der VIRTUAL DJ LE Software CD-ROM
— Wenn [Typical] gewählt ist, werden Plug-ins und andere
angebracht ist, und klicken Sie auf [OK].
Komponenten gleichzeitig installiert. Normalerweise sollte
[Typical] gewählt werden.
— Wenn [Custom] gewählt ist, können Sie wählen, welche
Komponenten installiert werden.
Hinweise zum Installationsverfahren (Mac OS X)
1 Setzen Sie die mitgelieferte VIRTUAL DJ LE Software
CD-ROM in das CD-Laufwerk Ihres Computers ein.
Das Icon [VirtualDJ_LE] erscheint auf dem Bildschirm.
2 Doppelklicken Sie auf das [VirtualDJ_LE]-Icon.
Die Inhalte der CD-ROM werden angezeigt.
3 Doppelklicken Sie
[install_virtualdj_le_ergo_v7.x.x.pkg].
Das Installationsprogramm VirtualDJ LE (DDJ-ERGO) wird gestartet.
4 Wenn das Installationsprogramm VirtualDJ LE (DDJ-
7 Wenn der unten gezeigte Bildschirm angezeigt wird,
ERGO) gestartet ist, klicken Sie auf [Fortfahren].
klicken Sie auf [Install].
Die Installation beginnt.
5 Lesen Sie die Inhalte der Lizenzvereinbarung
Der Installation-Fertig-Bildschirm erscheint, wenn die Installation fertig
sorgfältig durch, klicken Sie auf [Fortfahren], klicken Sie
gestellt ist.
dann auf [Akzeptieren], um die Lizenzvereinbarung zu
akzeptieren.
Wenn Sie den Bedingungen der Lizenzvereinbarung nicht zustimmen,
klicken Sie auf [Ablehnen], um die Installation abzubrechen.
6 Wählen Sie den Typ der Installation für VIRTUAL DJ
LE, und klicken Sie dann auf [Installieren].
— Normalerweise wählen Sie die Standardinstallation.
— Zum Installieren an einem anderen Ort klicken Sie auf [Ort für
die Installation ändern ...] und wählen den Installationsort.
Die Installation beginnt.
Der Installation-Fertig-Bildschirm erscheint, wenn die Installation fertig
gestellt ist.
7 Klicken Sie auf [Beenden].
Damit ist das Installationsverfahren fertig gestellt.
Prüfen der neuesten Informationen über die
Software VIRTUAL DJ LE
8 Klicken Sie auf [Finish].
Für die neuesten Informationen über die Betriebsumgebung und
Damit ist das Installationsverfahren fertig gestellt.
Kompatibilität und zum Übernehmen des neuesten Betriebssystems
VIRTUAL DJ LE wird gestartet, wenn [Launch VirtualDJ] auf dem
gehen Sie bitter zur folgenden Website von Atomix productions:
Bildschirm markiert ist, wenn [Finish] geklickt wird.
http://www.virtualdj.com
De
3
Über die Treibersoftware (Windows)
Anschlüsse
Diese Treiber-Software ist ein exklusiver ASIO-Treiber für die Ausgabe
von Audio-Signalen vom Computer.
Installieren der Treibersoftware
! Bei Verwendung von Mac OS X ist es nicht nötig, die Treibersoftware
Zu den
zu installieren.
Audio-Eingangsbuchsen
Betriebsumgebung
Unterstützte Betriebssysteme
Zu den
®
Windows
7 Home Premium/Professional/
32-Bit-Version
1
Audio-Ausgangsbuchsen
1
L
R
L
Ultimate
R
64-Bit-Version
1
®
32-Bit-Version
1
FX1
BROWSE VIEW
FX2
CONTROL1
23
TREE FLD OPEN
PUSH
Windows Vista
Home Basic/
F1
CA
DECK
LOAD
LOAD
BD
DECK
CONTROL1
23
MASTER VOL
1
FILTER FILTER
Home Premium/Business/Ultimate
64-Bit-Version
1
F2 F3
GAIN
GAIN
ON
123
ON
123
AUX / MIC VOL
FUNCTION
®
SAMPLER
FX
HI
REC
HI
FX
SAMPLER
Windows
XP Home Edition/
1
2
12
32-Bit-Version
1
AUTO LOOP
HOT CUE /
DELETE
SAMPLE VOL
MIX
AUTO LOOP
HOT CUE /
DELETE
SAMPLE VOL
1234
Professional (SP2 oder höher)
MID
MID
1234
MOVE GRID
CUEMASTER
MOVE GRID
IN OUT
S
VINYLKEYLOCK
VOL
E
IN
OUT
VINYL KEYLOCK
A
R
C
S
H
LOW
LOW
E
A
R
MODE
PULSE
PANGE
TEMPO
C
H
PULSE
CUE
MODE
TEMPO
PANGE
1 Bei Verwendung einer 64-Bit-Version von Windows kann die Treibersoftware nur
TEMPO
TEMPO
für 32-Bit Anwendungen verwendet werden.
SHIFT
SHIFT
CUE
CUE
Vor dem Installieren der Treibersoftware
! Schalten Sie den Netzschalter des Geräts aus, und trennen Sie das
SYNC
DJ CONTROLLER
SYNC
MASTER
MASTER
USB-Kabel ab, das dieses Gerät mit dem Computer verbindet.
! Falls andere Programme auf dem Computer laufen, beenden Sie
diese.
1 Schalten Sie den Computer ein.
2 Setzen Sie die mitgelieferte CD-ROM mit
Treibersoftware in das CD-Laufwerk Ihres Computers
ein.
3 Sobald das CD-ROM-Menü angezeigt wird
doppelklicken Sie auf [Pioneer_DDJ_Driver_XXXXX.exe].
4 Fahren Sie mit der Installation entsprechend den
Anweisungen auf dem Bildschirm fort.
Wenn während der Installation [Windows-Sicherheit] auf dem
Bildschirm erscheint, klicken Sie auf [Diese Treibersoftware trotzdem
installieren] und fahren mit der Installation fort.
! Bei Installation unter Windows XP
Wenn während der Installation [Hardwareinstallation] auf dem
Bildschirm erscheint, klicken Sie auf [Installation fortsetzen] und
fahren mit der Installation fort.
! Wenn das Installationsprogramm fertiggestellt wird, erscheint eine
Fertigstellungsmeldung.
4
De
Tragbares
Audiogerät
Mikrofon
Komponenten, Verstärker,
aktive Lautsprecher usw.
Computer
Zum Mikrofon
Mikrofonkabel
An Kopfhörer
Kopfhörer
Kopfhörerkabel
Bei diesem Gerät wird der Betriebsstrom über USB-Bus zugeführt. Das
Gerät kann durch einfaches Anschließen an einen Computer über das
USB-Kabel verwendet werden.
! Verbinden Sie dieses Gerät und den Computer direkt mit dem mitge-
lieferten USB-Kabel.
! Schließen Sie den Computer, an den dieses Gerät angeschlossen
wird, an eine Netzstromversorgung an.
! Ein USB-Hub kann nicht verwendet werden.
Starten des Systems
Starten dieses Geräts
1 Schließen Sie dieses Gerät über ein USB-Kabel an
Ihren Computer an.
MASTER OUT1 (TRS)
MASTER OUT1 (TRS)
MASTER OUT2
MASTER OUT2
VOL
AUX INMICVOL INPUT SELECTVOL
AUX INMICVOL INPUT SELECT
ON
OFFUSB
RLRL
RLRL
MIC
AUX
RL
RL
2 Starten Sie den angeschlossenen Computer.
3 Schieben Sie den Schalter [ON/OFF] dieses Geräts in
die Position [ON].
VOL
AUX INVOLINPUT SELECTVOL
AUX INVOLINPUT SELECT
ON OFFUSB
MIC
AUX
RL
RL
Schalten Sie die Stromversorgung dieses Geräts ein.
! Die Meldung [Installieren von Gerätetreibersoftware] kann
erscheinen, wenn Sie dieses Gerät zuerst an dem Computer
anschließen oder wenn Sie die Verbindung zu einem anderen

USB-Anschluss am Computer herstellen. Warten Sie kurz, bis
die Meldung [Die Geräte können jetzt verwendet werden.]
erscheint.
4 Schalten Sie das angeschlossene Mikrofon und
externe Gerät ein.
Starten von VIRTUAL DJ LE
Wenn dieses Gerät gerade gestartet wurde, warten Sie vor dem Starten
von VIRTUAL DJ LE, bis die Beleuchtung erloschen ist.
Starten von VIRTUAL DJ LE (Windows)
1 Klicken Sie aus dem Windows [Start]-Menü auf das
Deutsch
Icon [Alle Programme] > [VIRTUAL DJ LE] > [VirtualDJ LE
(DDJ-ERGO)].
Wenn VIRTUAL DJ LE zum ersten Mal gestartet wird, erscheint ein
4 Klicken Sie auf [Apply], und klicken Sie dann auf [OK].
Bildschirm zur Eingabe der Seriennummer.
Geben Sie die Seriennummer ein, die an der Verpackung der VIRTUAL
Starten von VIRTUAL DJ LE (Mac OS X)
DJ LE Software CD-ROM angebracht ist, und klicken Sie auf [OK].
1 Im Finder öffnen Sie den Ordner [Anwendung], und
doppelklicken Sie dann auf das Icon [VIRTUAL DJ LE].
Wenn VIRTUAL DJ LE zum ersten Mal gestartet wird, erscheint ein
Bildschirm zur Eingabe der Seriennummer.
Geben Sie die Seriennummer ein, die an der Verpackung der VIRTUAL
DJ LE Software CD-ROM angebracht ist, und klicken Sie auf [OK].
2 Wenn der [Website Identification]-Bildschirm
2 Wenn der [Website Identification]-Bildschirm
erscheint, wählen Sie ein Icon und klicken darauf.
erscheint, wählen Sie ein Icon und klicken darauf.
! Für [VirtualDJ account] klicken Sie auf [click here], um die
Einzelheiten zu sehen.
! Zum Überspringen des [Website Identification]-Bildschirms
klicken Sie auf [Skip].
! Wenn Sie nicht wünschen, dass der [Website Identification]-
Bildschirm erscheint, wenn VirtualDJ gestartet wird, markieren
Sie [Don’t show again].
VIRTUAL DJ LE wird gestartet.
3 Klicken Sie auf [CONFIG] oben links im Bildschirm des
Computers.
Der Bildschirm [Settings] erscheint.
Stellen Sie die verschiedenen Elemente in der Registerkarte
1 23
[Sound Setup] in der folgenden Reihenfolge ein:
1 [Inputs]: Wählen Sie [MICROPHONE].
1 Für [VirtualDJ account] klicken Sie auf [click here], um die
2 [Sound card]: Wählen Sie [4-IN/4-OUT CARD] und
Einzelheiten zu sehen.
[PIONEER DDJ-ERGO].
2 Zum Überspringen des [Website Identification]-Bildschirms
3 [Outputs]: Wählen Sie
klicken Sie auf [Skip].
[Master : Chan 1&2/Headphones: Chan 3&4].
3 Wenn Sie nicht wünschen, dass der [Website Identification]-
Bildschirm erscheint, wenn VirtualDJ gestartet wird, markieren
Sie [Don’t show again].
VIRTUAL DJ LE wird gestartet.
3 Klicken Sie auf [CONFIG] oben rechts im Bildschirm
des Computers.
Der Bildschirm [Settings] erscheint.
Stellen Sie die verschiedenen Elemente in der Registerkarte
[Sound Setup] in der folgenden Reihenfolge ein:
1 [Inputs]: Wählen Sie [MICROPHONE].
2 [Sound card]: Wählen Sie [Pioneer DDJ ASIO].
3 [Outputs]: Wählen Sie
[Master : Chan 1&2/Headphones: Chan 3&4].
4 Klicken Sie auf [Apply], und klicken Sie dann auf [OK].
De
5
Bedienung
Der Bildschirm oben zeigt ein Beispiel für ein 2-Deck-Layout. Die auf dem Bildschirm angezeigten Inhalte sind je nach den Einstellungen von VIRTUAL DJ LE unterschiedlich.
! Das Deck-Layout kann umgeschaltet werden, indem Sie auf die Schaltfläche [ ] auf dem Computerbildschirm klicken.
Laden und Abspielen von Tracks
Tonausgabe
Das folgende Beispiel beschreibt das Verfahren zum Abspielen von
Stellen Sie die Lautstärke von Endstufenverstärkern, die an die Buchsen
Tracks mit einem 2-Deck-Layout.
[MASTER OUT 1] und [MASTER OUT 2] angeschlossen sind, auf einen
geeigneten Pegel ein. Beachten Sie dass bei zu hoch eingestellter
1 Drehen Sie den Drehregler, während Sie die Taste
Lautstärke der Ausgabesound extrem laut sein kann.
[SHIFT] drücken, um einen Ordner oder ein Element zu
1 Bedienen Sie den Regler [GAIN] und die Kanalfader
wählen.
! Wenn ein Ordner oder Element mit der Markierung [+] gewählt
zum Einstellen der Audiopegelausgabe von den
ist und der Drehregler gedrückt wird, während die Taste [SHIFT]
betreffenden Decks.
gedrückt gehalten wird, wird der Ordner bzw. das Element geöffnet
oder geschlossen.
2 Bedienen Sie den Crossfader zum Umschalten
des Decks, dessen Sound von den Lautsprechern
2 Lassen Sie die Taste [SHIFT] los und drehen Sie den
ausgegeben wird.
Drehregler zum Wählen des Tracks.
— Linker Rand: Sound wird von dem Deck [A] oder [C] ausgegeben.
— Center: Der Sound von allen Decks wird gemischt und ausgegeben.
3 Drücken Sie die Taste [LOAD] zum Laden des
— Rechter Rand: Sound wird von dem Deck [B] oder [D]
gewählten Tracks in das Deck.
ausgegeben.
4 Drücken Sie die Taste [f] zum Abspielen des
3 Drehen Sie Regler [MASTER VOL] zum Einstellen des
Tracks.
Audiopegels der Lautsprecher.
! Wenn diese Taste erneut während der Wiedergabe gedrückt wird,
pausiert die Wiedergabe.
Beenden des Systems
1 Beenden Sie VIRTUAL DJ LE.
2 Schieben Sie den Schalter [ON/OFF] dieses Geräts in
die Position [OFF].
3 Trennen Sie das USB-Kabel von Ihrem Computer ab.
4 Schalten Sie das angeschlossene Mikrofon und
externe Gerät aus.
6
De

Zusätzliche
Informationen
Technische Daten
Allgemein – Haupteinheit
Stromversorgung ................................................................. Gleichstrom 5 V
Leistungsaufnahme ...........................................................................500 mA
Gewicht des Hauptgeräts ..................................................................... 2,9 kg
Max. Abmessungen ........... 554,8 mm (B) × 103,2 mm (H) × 279,8 mm (T)
Deutsch
Betriebstemperatur ........................................................... +5 °C bis +35 °C
Betriebsluftfeuchtigkeit ........................5 % bis 85 % (keine Kondensation)
Änderungen der technischen Daten und des Designs dieses
Geräts sowie der mitgelieferten Software im Sinne der technischen
Verbesserung ohne vorherige Ankündigung bleiben vorbehalten.
De
7

Prima di cominciare
Come leggere questo manuale
Sistemi operativi supportati CPU e memoria richiesti
®
™
! Non mancare di leggere sia questo volantino sia le Istruzioni per
Processore Intel
Core
2 o AMD
®
Windows
7
Versione a
™
l’uso contenute nel CD-ROM che accompagna questo prodotto. I
Athlon
X2
Professional
32 bit
due documenti includono informazioni importanti che devono venire
1 GB o più di RAM
comprese prima di usare questo prodotto.
! In questo manuale, il nome delle schermate e dei menu visualizzati
Altri
dal prodotto, oltre ai nomi dei pulsanti e terminali e così via, sono fra
Disco fisso Almeno 200 MB di spazio libero
parentesi. (ad es.: pannello [RECORD], menu [CONFIG] , pulsante
Risoluzione da 1 280 x 1 024 pixel o più (Windows)
[CUE], modalità [VINYL], terminali [AUX IN])
Risoluzione del display
Risoluzione da 1 440 x 900 pixel o più (Mac)
A proposito del marchi di fabbrica o
Installazione del software VIRTUAL DJ LE
marchi di fabbrica depositati
! Avvertenze per quando l’uso del software accluso richiede una con-
nessione ad Internet
! Pioneer è un marchio di fabbrica depositato della PIONEER
Si richiede un contratto separato a proprie spese con un Internet
CORPORATION.
service provider.
! I nomi delle aziende e dei prodotti menzionati sono marchi di fab-
brica dei rispettivi proprietari.
Procedura di installazione (Windows)
Contenuto della confezione
1 Inserire il CD-ROM del software VIRTUAL DJ LE
accluso nell’unità disco del computer.
! CD-ROM del software VIRTUAL DJ LE
! CD-ROM del driver/istruzioni per l’uso
2 Nel menu [Start] di Windows, fare un doppio clic
! Cavo USB
sull’icona [Computer (o Risorse del computer)] >
! Da leggere prima dell’uso (Importante)
[VirtualDJ_LE].
! Guida di avvio veloce (questo documento)
Vengono visualizzati i contenuti del CD-ROM.
! Hardware Diagram for Virtual DJ (Tabella delle funzioni supportate)
! Guida ai centri assistenza (per i clienti in Giappone)
3 Fare doppio clic su
! Documento di garanzia
[install_virtualdj_le_ergo_v7.x.x.msi].
Il programma di installazione di VIRTUAL DJ LE si avvia.
Installazione del software
4 Una volta avviatosi il programma di installazione di
VIRTUAL DJ LE, fare clic su [Next].
! Non mancare di leggere l’accordo di licenza del software che appare
— Per tornare alla schermata precedente, fare clic su [Back].
all’atto di installazione del seguente software. Il software è utilizza-
— Per cancellare l’installazione, fare clic su [Cancel].
bile solo dopo avere accettato i termini dell’accordo.
— VIRTUAL DJ “End-User License Agreement”
— Pioneer DDJ ASIO Setup “Software end user license agreement”
Il software VIRTUAL DJ LE
VIRTUAL DJ LE è un software DJ di Atomix productions. Le prestazioni
DJ sono possibili collegando il computer che contiene questo software
a questa unità.
Ambiente operativo minimo richiesto
Sistemi operativi
CPU e memoria richiesti
supportati
®
Processore Intel
Mac OS X 10.5.x
1 GB o più di RAM
®
®
®
™
Windows
XP (SP3 o
Processore Intel
Pentium
4 o AMD Athlon
XP
successivo)
512 MB o più di RAM
5 Leggere attentamente [End-User License Agreement]
Altri
e, se si è d’accordo, fare clic su [I accept the terms in the
Disco fisso Almeno 50 MB di spazio libero
License Agreement], poi su [Next].
Unità disco ottica sulla quale è possibile la lettura del
Unità disco ottica
Se non si è d’accordo con il contenuto dell’[End-User License
CD-ROM
Agreement], fare clic su [Cancel] e fermare l’installazione.
Il collegamento del computer a questa unità richiede
Porta USB
una porta USB 2.0.
Risoluzione del display Risoluzione da 1 024 x 768 pixel o più
Ambiente operativo raccomandato
Sistemi operativi supportati CPU e memoria richiesti
®
Processore Intel
Mac OS X 10.6.x
2 GB o più di RAM
2
It


