Philips Grind & Brew Kaffeemaschine: 6 Cleaning and maintenance
6 Cleaning and maintenance: Philips Grind & Brew Kaffeemaschine
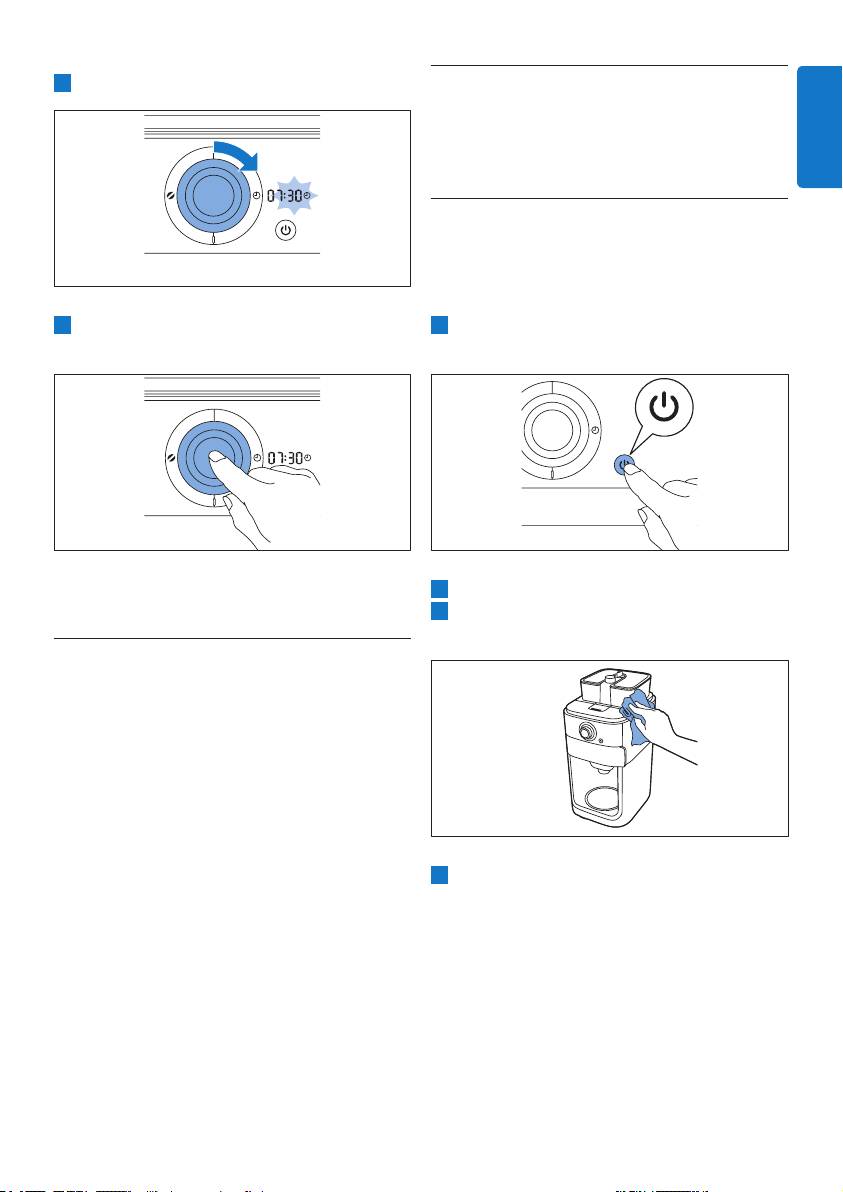
4 Turn the knob to set the minutes.
6 Cleaning and
maintenance
ENGLISH
6.1Cleaningaftereveryuse
B Warning:
Never immerse the appliance in water or any
otherliquid,norrinseitunderthetap.
5 Press in the centre of the knob to conrm
1 Press the on/off button on the front of the
the minutes.
appliance to switch off the appliance.
• The timer is set and the brewing process
2 Remove the mains plug from the wall socket.
will start at the preset time.
3 Wipe the outside of the coffeemaker with a
damp cloth.
5.5 Drip stop function
The drip stop function enables you to remove
the jug from the coffeemaker before the brewing
process is nished. When you remove the jug, the
drip stop stops the ow of coffee into the jug.
D
Note:
The brewing process does not stop when you
remove the jug. If you do not put the jug back
into the appliance within 20 seconds, the lter
basket overows.
4 Clean the lter basket and the jug in the
dishwasher or with hot water and some
washing-up liquid.
11
6.2 Cleaning the coffee bean
chute
Whenever you switch between coffee bean
containers or coffee beans, there will always be
traces left of the previously ground type of coffee
beans that can affect the taste of your coffee.
Clean the coffee bean chute every 1 to 2 weeks
or whenever you switch between coffee bean
containers to prevent freshly ground coffee and
traces in the coffee bean chute from mixing
4 Close the lter basket holder.
together. After you switch to a new type of
5 Insert the at end of the cleaning brush
coffee beans, follow the steps below to ensure
handle into the lock of the coffee bean chute
optimal taste.
and press it down.
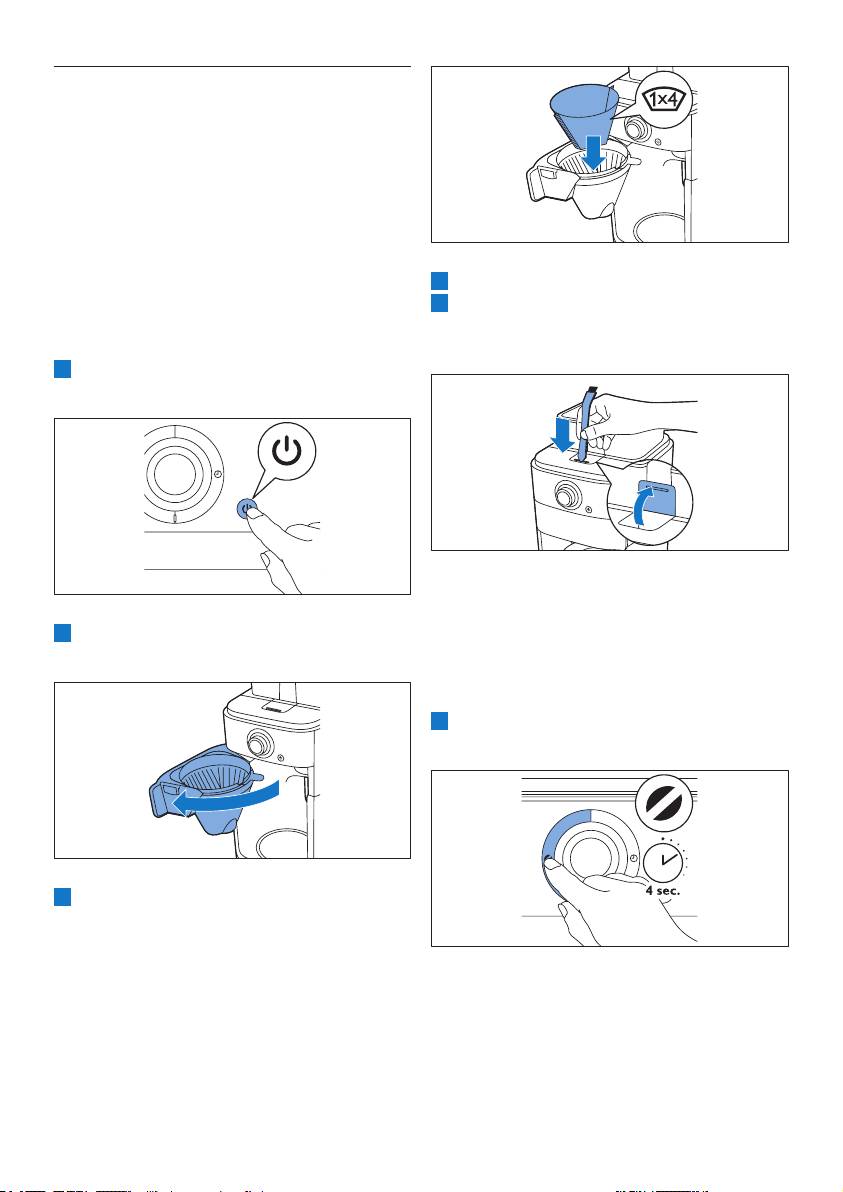
1 Press the on/off button on the front of the
appliance to switch off the appliance.
D
Note:
If you want to clean the coffee bean chute
2 To open the lter basket holder, pull at its tab
quickly by brush only, please continue with
on the right side of the coffeemaker.
step 7. If you want to prevent ground coffee
traces from affecting the taste of your new
coffee beans, please continue with step 6.
6 Press and hold the strength select button for
4 seconds.
3 T
ake a paper lter (type 1x4 or no. 4) and fold
the sealed edges to prevent tearing and folding.
Place the paper lter in the lter basket.
• The grinder starts cleaning itself.
12
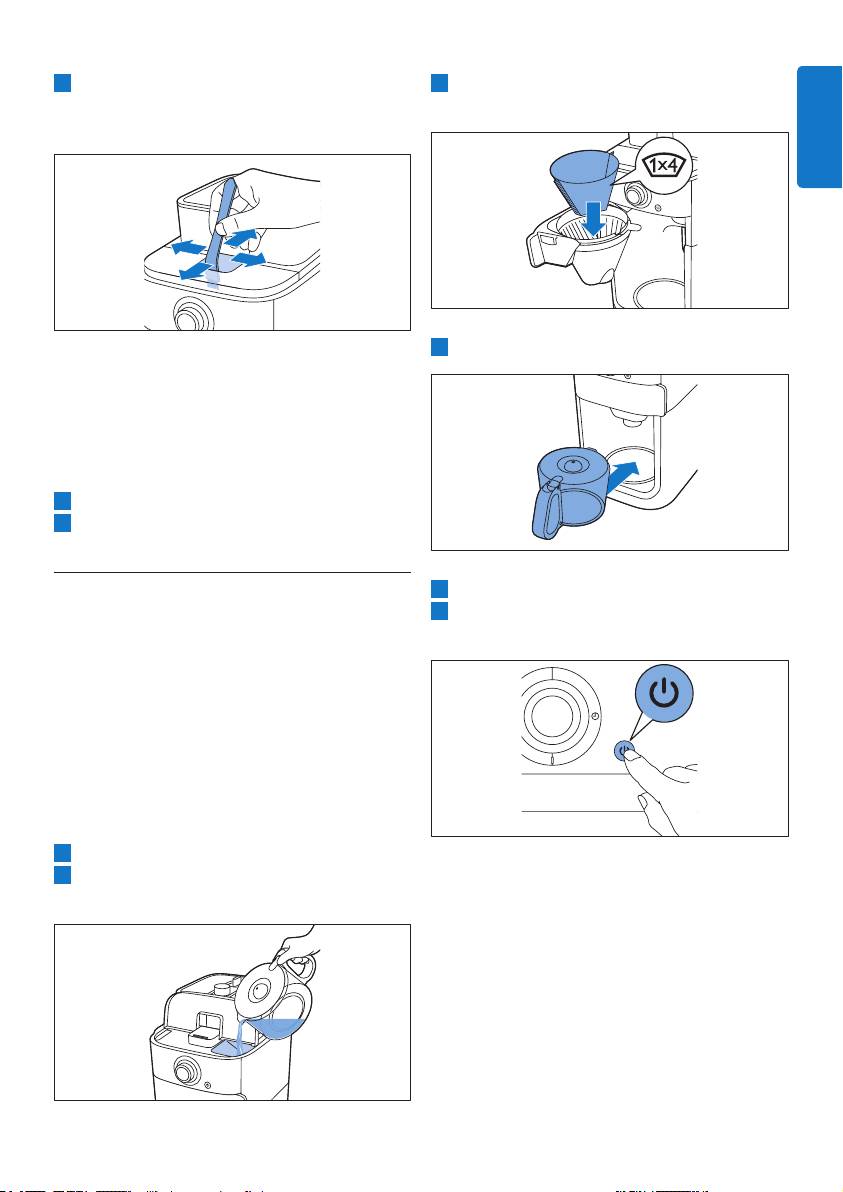
7 When the grinder has stopped cleaning, use
3 Place a paper lter (no. 4) in the lter basket
the cleaning brush to brush ground coffee
and close the lter basket holder.
residues into the lower part of the chute.
ENGLISH
4 Put the empty jug in the appliance.
• The ground coffee residues fall into the
lter basket.
B
Warning:
Donotdropthebrushinthecoffee
bean chute.
8 Close the lid of the coffee bean chute.
9 Remove the paper lter with the ground
coffee residues and throw it away.
6.3 Descaling the coffeemaker
5 Put the mains plug in the wall socket.
Descale the coffeemaker when you notice
6 Press the on/off button on the front of the
excessive steaming or when the brewing time
appliance to switch on the appliance.
increases. It is advisable to descale it every two
months. Only use white vinegar to descale, as other
products may cause damage to the coffeemaker.
B Warning:
Neverusevinegarwithanaceticacidcontentof
8%ormore,naturalvinegar,powderdescalers
ortabletdescalerstodescaletheappliance,
as this may cause damage.
1 Open the water reservoir lid.
2 Fill the water reservoir with 8 cups of white
• The display lights up.
vinegar (4% acetic acid) and 2 cups of water.
13
7 Press the strength select button and turn the
10 Press the on/off button to switch the
knob to choose the pre-ground coffee setting.
coffeemaker back on.
8 Press in the centre of the knob to conrm.
11 Press in the centre of the knob twice to let
Then press in the centre of the knob again to
the appliance complete the brewing process.
start the brewing process.
12 Empty the jug and throw away the paper lter.
9 Wait until half of the vinegar-water solution
13 Fill the water reservoir with cold water
has owed into the jug. Then press the on/off
and press in the centre of the knob twice
button to stop the brewing process and let
to start another brewing process. Let the
the solution act for at least 15 minutes.
coffeemaker complete the entire brewing
process and empty the jug.
14 Repeat step 13 until the water no longer
tastes or smells like vinegar.
15 Clean the lter basket and the jug in the
dishwasher or with hot water and some
washing-up liquid.
16 Press the on/off button on the front of the
appliance to switch off the appliance.
14
Оглавление
- 1 Introduction
- 4 Beforerstuse
- 5 Using the appliance
- 6 Cleaning and maintenance
- 7 Ordering accessories 10 Troubleshooting
- 1 Introduktion
- 4 Førapparatettages
- 5 Sådan bruges apparatet
- 6 Rengøringog
- 8 Miljøhensyn
- 1 Einführung 3 Wichtig
- 4 Vor dem ersten Gebrauch
- 5 Das Gerät benutzen
- 6 Reinigung und
- 7 Zubehör bestellen
- 8 Umwelt
- 1 Johdanto
- 4 Käyttöönotto
- 5 Käyttö
- 6 Puhdistusjahoito
- 9 Takuujatuki
- 1 Introduction
- 4 Avantlapremière
- 5 Utilisation de l’appareil
- 6 Nettoyageet
- 7 Commande d’accessoires
- 9 Garantie et
- 1 Introduzione
- 4 Primo utilizzo
- 5 Modalitàd’uso
- 6 Pulizia e manutenzione
- 7 Ordinazione degli 10 Risoluzione dei accessori problemi
- 1 Кіріспе
- 4 Алғашқолданар
- 5 Құрылғыны пайдалану
- 6 Тазалаужәне күтіпұстау
- 9 Кепілдікжәне
- 1 소개
- 4 처음사용전
- 5 제품사용
- 6 청소및유지관리
- 9 보증및지원
- 1 Introductie 3 Belangrijk
- 4 Voor het eerste
- 5 Het apparaat gebruiken
- 6 Reiniging en
- 7 Accessoires bestellen
- 9 Garantie en
- 1 Innledning
- 4 Førførstegangs
- 5 Bruke apparatet
- 6 Rengjøringog vedlikehold
- 7 Bestilletilbehør
- 8 Miljø
- 1 Введение 3 Важная
- 4 Передпервым использованием
- 5 Использование прибора
- 6 Очисткаиуход
- 7 Заказаксессуаров
- 8 Защита
- 1 Introduktion
- 4 Föreförsta
- 5 Användaapparaten
- 6 Rengöring och
- 7 Beställa tillbehör
- 10Felsökning
- 1 Вступ 3 Важлива
- 4 Передпершим
- 5 Застосування пристрою
- 6 Чищеннятадогляд
- 7 Замовлення приладь
- 8 Навколишнє
- 1 简介
- 4 首次使用之前
- 5 使用本产品
- 6 清洁和保养
- 7 订购附件
- 10故障种类和处理方法
