Philips FC 6067: инструкция
Раздел: Бытовая, кухонная техника, электроника и оборудование
Тип: Аккумуляторный Пылесос
Характеристики, спецификации
Инструкция к Аккумуляторному Пылесосу Philips FC 6067
FC6068, FC6067
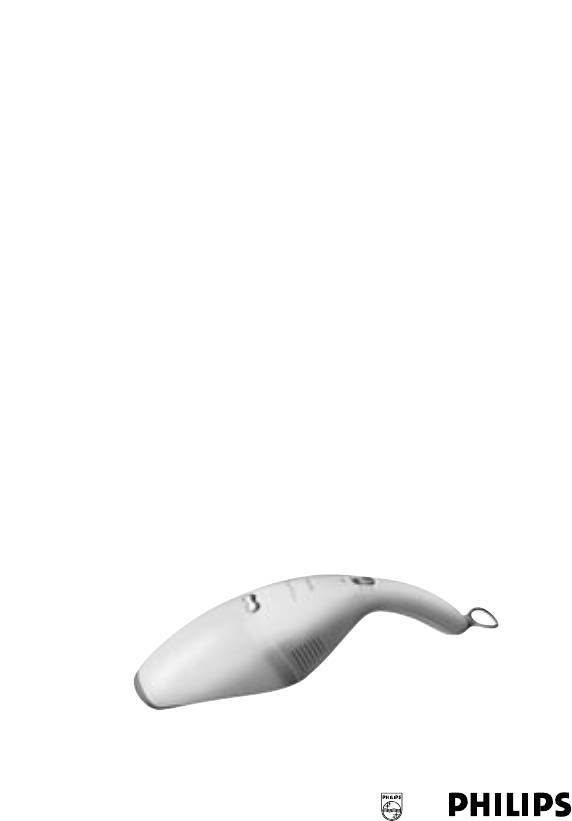
Daisy Deluxe Wet/Dry

2
3

4

5
ENGLISH 6
POLSKI 15
ROMÂNĂ 24
РУССКИЙ 33
ČESKY 43
MAGYAR 51
SLOVENSKY 59
УКРАЇНСЬКІЙ 68
HRVATSKI 77
EESTI 85
LATVISKI 93
LIETUVIŠKAI 101
SLOVENŠČINA 109
FC6068, FC6067
ENGLISH6
Important
◗ Read these instructions for use carefully and
look at the illustrations before you start using
the appliance.
◗ Always switch the vacuum cleaner off after
use.
◗ Never suck up ashes until they are cold.
◗ Do not suck up flammable or corrosive
liquids.
◗ Do not let water enter the vacuum cleaner or
the wall holder. Never immerse the vacuum
cleaner or the wall holder in water.
◗ The charger plug feels warm.This is normal.
◗ Only charge the vacuum cleaner with the
charger supplied.
◗ Do not use the appliance if it is damaged.Take
it to an authorised Philips service centre for
repair.
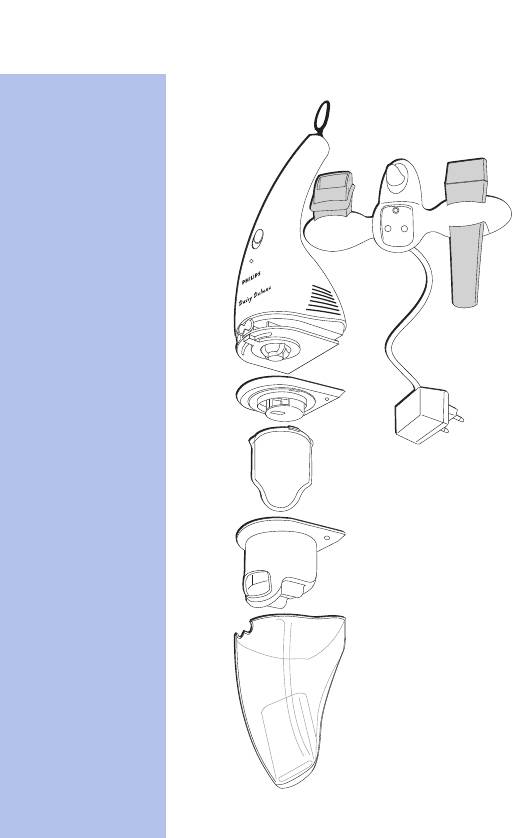
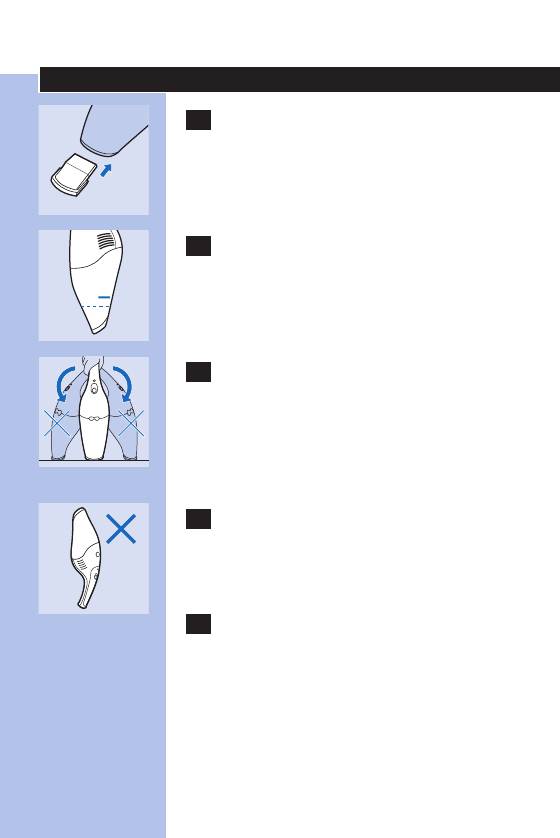
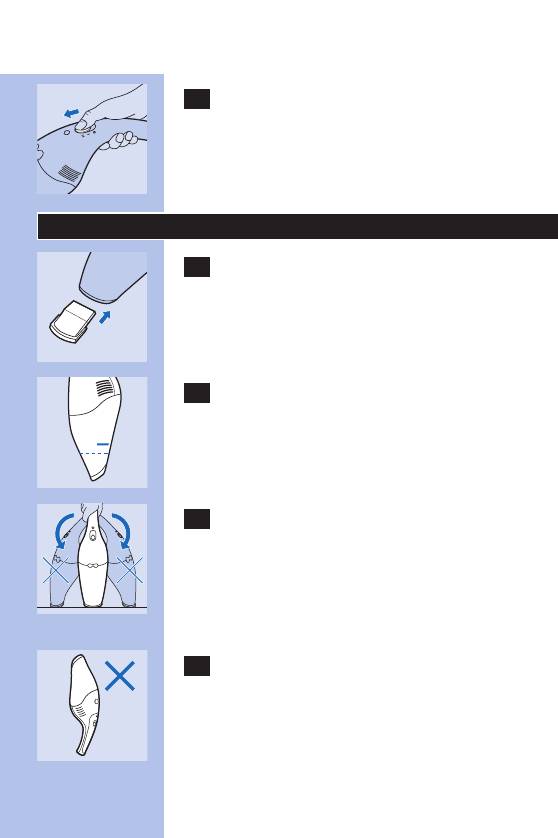
Preparing the appliance for use
◗ Wind and store excess mains cord in the wall
C
holder.
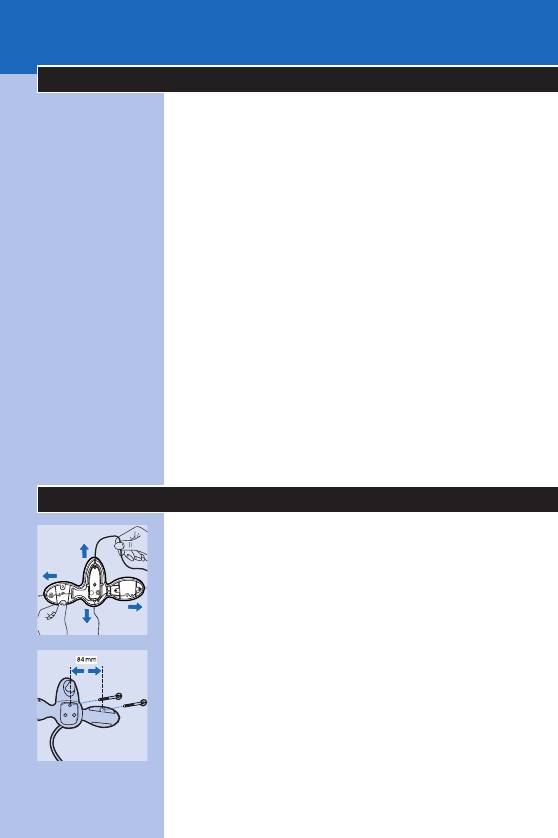
◗ Screw the wall holder to the wall.
C
◗ You can also place the vacuum cleaner and
the wall holder flat on a table during charging.
ENGLISH 7
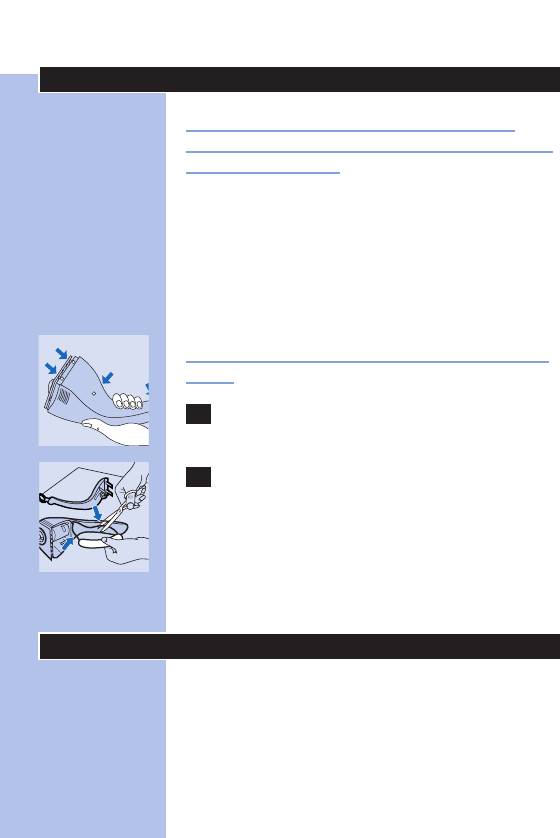
◗ The crevice tool and the squeegee can be
C
attached to the wall holder by pushing them
into the appropriate fastening slots.
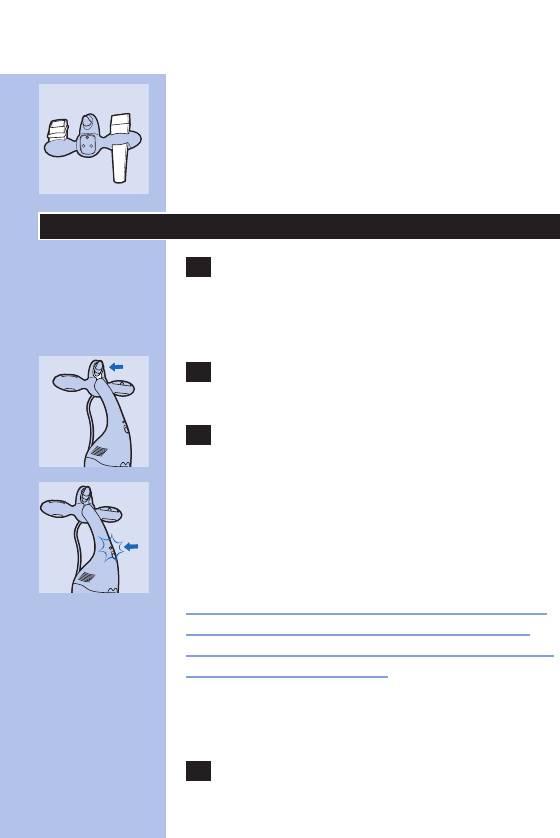
Charging the appliance
1 Make sure that the slide switch of the
vacuum cleaner is in off position (0) during
charging.The appliance will not charge if
the slide switch is in another position.
2 Insert the charger plug into the wall
socket.
3 Always put the vacuum cleaner back onto
C
the holder after use.
◗ The indicator light will come on to indicate
C
that the appliance is charging.
The indicator light will stay on as long as the
appliance is connected to the wall holder and the
plug is in the wall socket.
The indicator light does not give any information
about the charge level of the built-in batteries.
Charge the appliance for at least 16 hours before
you use it for the first time.
Recharge the appliance as soon as the motor
power decreases noticeably.
4 Leave the charger plug in the wall socket.
Always place the vacuum cleaner back
ENGLISH8
onto the holder (also when the built-in
batteries are fully charged).
Vacuum cleaning
1 Make sure the deflector and the filter have
been inserted into the dust compartment
before you start using the appliance.
Deflector and filter
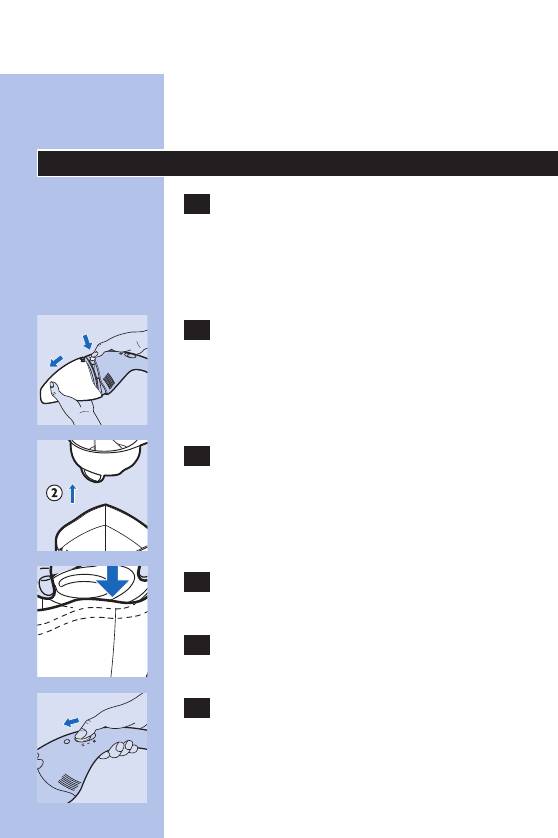
1 Press the break button and open the
C
vacuum cleaner.
2 Insert the deflector and the filter into the
C
dust compartment.
3 Push the filter firmly into the dust
C
compartment.
4 Close the vacuum cleaner again.
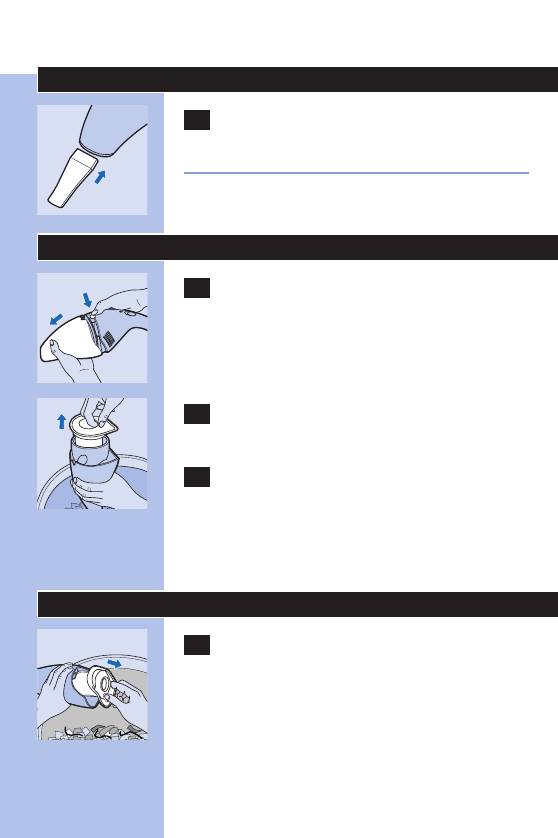
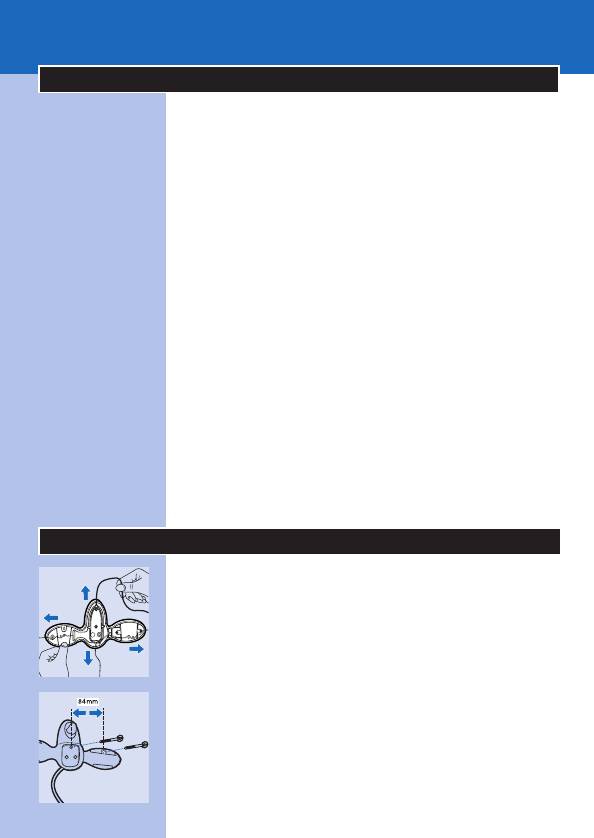
2 Set the slide switch to position I for
C
normal suction power. Set it to position II
for turbo suction power.
ENGLISH 9
Sucking up liquids
1 Connect the squeegee to the dust
C
compartment.
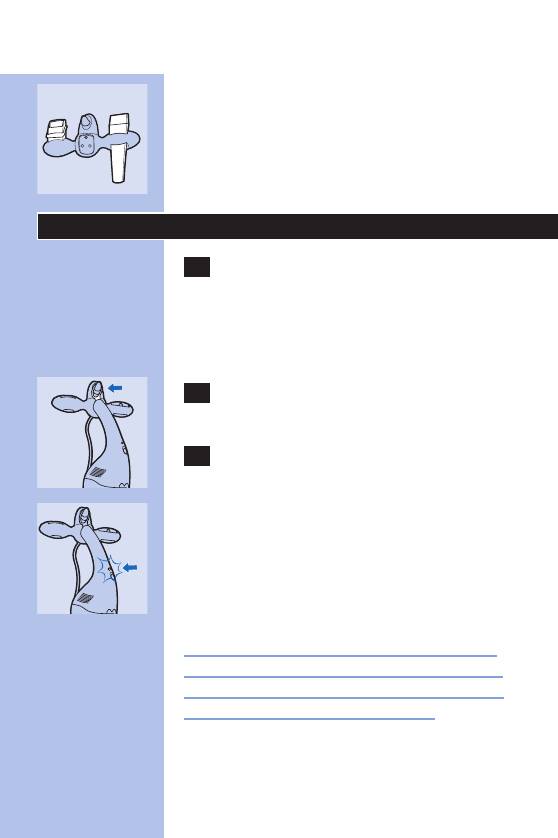
2 Stop sucking up liquids when the liquid
C
level inside the dust compartment has
reached the maximum indication line.
3 When sucking up liquids, hold the
C
appliance with the dust compartment
pointing downwards at an angle. Make sure
the squeegee touches the surfact to be
cleaned. Do not tilt the appliance to one
side.
4 Do not hold the appliance with its dust
C
compartment pointing upwards, as this
would cause liquid to enter the appliance
and damage the parts inside.
5 Empty the dust compartment each time
you have used the appliance to suck up a
liquid.
ENGLISH10
Connecting accessories
1 Use the crevice tool to vacuum clean
C
hard-to-reach places.
Do not use the crevice tool to suck up liquids.
Emptying the dust compartment
1 Press the break button and open the
C
vacuum cleaner over a dustbin.
2 Remove the filter and the deflector from
C
the dust compartment.
3 Clean the filter and empty the dust
compartment.
◗ Clean the filter with a brush or with a normal
vacuum cleaner if it is very dirty.
Replacing the filter
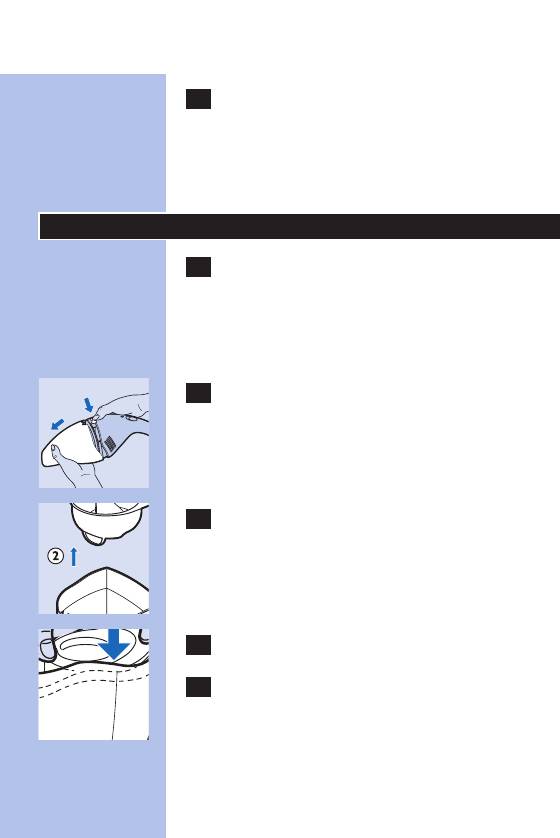
1 Remove the deflector and the filter frame
C
from the dust compartment.
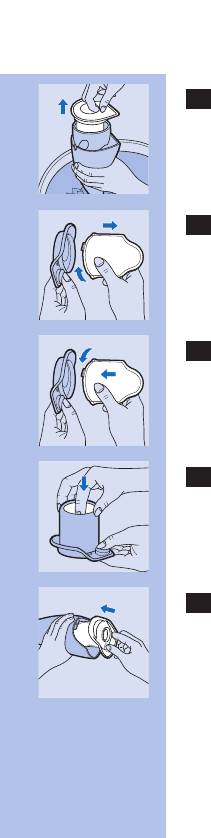
ENGLISH 11
2 Separate the filter from the deflector.
C
3 Gently turn the filter clockwise to detach
C
it from the frame.
4 Remove the old filter and replace it with a
C
new filter.
5 Push the tip of the filter inwards.
C
6 Put the filter and the deflector back into
C
the dust compartment.

ENGLISH12
Cleaning the appliance
◗ You can clean the appliance with a damp
cloth. Remove the mains plug from the wall
socket before cleaning the wall holder.
Do not let water enter the vacuum cleaner or the
wall holder. Never immerse the vacuum cleaner
or the wall holder in water.
◗ If necessary, clean the dust compartment, the
deflector and the filter with cold or lukewarm
water.The dust compartment and the
deflector may also be cleaned in a dishwasher.
Never use the vacuum cleaner when the filter
and/or the dust compartment is/are still wet.
Ordering filters
Replace the filter if it can no longer be cleaned
properly (usually after having been cleaned 50
times).
New (replacement) filters are available under
type no. FC8036. Contact your Philips dealer.
If you have any difficulties obtaining filters or other
accessories for this appliance, please contact the
Philips Customer Care Centre in your country or
consult the worldwide guarantee leaflet.
ENGLISH 13
Environment
NiCd/NiMH batteries can be harmful to the
environment and may explode if exposed to high
temperatures or fire.
Remove the batteries when you discard the
appliance. Do not throw the batteries away with
the normal household waste, but hand them in at
an official collection point.You can also take the
batteries to a Philips service centre, which will
dispose of them in an environmentally safe way.
Only remove the batteries if they are completely
empty.
1 Let the appliance run until it stops, undo
C
the screws and open the vacuum cleaner.
2 Cut the connecting wires one by one and
C
remove the batteries.
◗ If you are not going to use the appliance for a
longer period of time, we advise you to
remove the charger plug from the wall socket
to save energy.
Information & service
If you need information or if you have a problem,
please visit the Philips Web site at
www.philips.com or contact the Philips Customer
Care Centre in your country (you will find its
phone number in the worldwide guarantee

ENGLISH14
leaflet). If there is no Customer Care Centre in
your country, turn to your local Philips dealer or
contact the Service Department of Philips
Domestic Appliances and Personal Care BV.
POLSKI 15
Ważne
◗ Przed pierwszym użyciem urządzenia
przeczytaj poniższą instrukcję i zapoznaj się z
ilustracjami.
◗ Zawsze wyłączaj odkurzacz po zakończeniu
używania urządzenia.
◗ Nie wciągaj odkurzaczem gorącego popiołu.
◗ Nie wciągaj odkurzaczem łatwopalnych ani
powodujących korozję płynów.
◗ Nie dopuść do tego, by woda dostała się do
odkurzacza lub do uchwytu ściennego. Nigdy
nie zanurzaj odkurzacza, ani uchwytu
ściennego w wodzie.
◗ Wtyczka ładowarki nagrzewa się. Jest to
normalne zjawisko.
◗ Ładuj urządzenie wyłącznie za pomocą
załączonej oryginalnej ładowarki.
◗ Nie używaj uszkodzonego urządzenia. Zanieś
go w celu naprawy do autoryzowanego
punktu serwisowego firmy Philips.
Przygotowanie urządzenia do użycia
◗ Zwiń nadmiar przewodu zasilającego i
C
schowaj go w uchwycie ściennym.
◗ Przykręć uchwyt ścienny do ściany.
C
◗ Podczas ładowania możesz także położyć
odkurzacz i uchwyt ścienny płasko na stole.
POLSKI16
◗ Możesz wcisnąć szczelinówkę i wycieraczkę
C
gumową w uchwyt ścienny, wpasowując je w
odpowiednie zaczepy.
Ładowanie urządzenia
1 Upewnij się, czy włącznik odkurzacza jest
ustawiony w pozycji wyłączonej (0)
podczas ładowania. Urządzenie nie
naładuje się, jeśli włącznik będzie w innej
pozycji.
2 Włóż wtyczkę ładowarki do gniazdka
ściennego.
3 Po użyciu zawsze umieszczaj odkurzacz z
C
powrotem w uchwycie ściennym.
◗ Podczas ładowania urządzenia będzie świecić
C
się lampka kontrolna.
Lampka kontrolna będzie się świecić tak długo, jak
urządzenie będzie połączone z uchwytem, a
wtyczka ładowarki będzie znajdować się w
gniazdku ściennym.
Lampka kontrolna nie informuje o stopniu
naładowania wbudowanych akumulatorów.
Przed pierwszym użyciem odkurzacza ładuj
urządzenie co najmniej 16 godzin.
Naładuj urządzenie, gdy tylko zauważysz, że moc
silnika zmniejszyła się wyraźnie.
POLSKI 17
4 Zostaw wtyczkę ładowarki w gniazdku
ściennym. Zawsze umieszczaj odkurzacz z
powrotem w uchwycie (nawet wówczas,
gdy wbudowane baterie są w pełni
naładowane).
Odkurzanie
1 Zanim uruchomisz odkurzacz, upewnij się,
czy deflektor i filtr zostały zamontowane w
komorze na kurz.
Deflektor i filtr
1 Wciśnij przycisk otwierający i otwórz
C
odkurzacz.
2 Włóż deflektor i filtr do komory.
C
3 Wciśnij dokładnie filtr do komory.
C
4 Zamknij odkurzacz.
POLSKI18
2 Przesuń regulator na poziom I, aby uzyskać
C
normalną moc ssania. Przesuń regulator na
poziom II, jeśli chcesz uzyskać wyższą moc.
Wciąganie płynów
1 Podłącz wycieraczkę gumową do komory
C
na kurz.
2 Przerwij wciąganie płynów, gdy tylko
C
poziom płynu wewnątrz komory osiągnie
maksymalny poziom.
3 Wciągając odkurzaczem płyny, trzymaj
C
urządzenie pod kątem, komorą na kurz
skierowaną ku dołowi. Upewnij się, czy
zbierak gumowy przylega do powierzchni,
którą zamierzasz wyczyścić. Nie przechylaj
urządzenia na boki.
4 Nie trzymaj urządzenia w ten sposób, by
C
komora na kurz była skierowana ku górze,
ponieważ mogłoby to spowodować
dostanie się płynu do środka urządzenia i
uszkodzenia wewnętrznych elementów.
POLSKI 19
5 Opróżniaj komorę po każdym użyciu
odkurzacza polegającym na wciąganiu
płynów.
Podłączanie akcesoriów
1 Miejsca trudno dostępne czyść
C
szczelinówką.
Nie wciągaj płynów szczelinówką.
Opróżnianie komory na kurz
1 Wciśnij przycisk i otwórz odkurzacz nad
C
koszem.
2 Wyjmij deflektor i filtr z komory.
C
3 Wyczyść filtr i opróżnij komorę na kurz.
◗ Jeśli filtr jest bardzo brudny, wyczyść filtr
szczotką lub zwykłym odkurzaczem.
Wymiana filtra.
1 Wyjmij deflektor i ramę filtra z komory na
C
kurz.

POLSKI20
2 Oddziel deflektor od filtra.
C
3 Aby odłączyć filtr od ramy, delikatnie
C
przekręć go w kierunku zgodnym z
ruchem wskazówek zegara.
4 Wyjmij stary filtr i załóż nowy.
C
5 Wciśnij końcówkę filtra do środka.
C
6 Włóż filtr i deflektor z powrotem do
C
komory na kurz.

