Philips HQ 7830: инструкция
Раздел: Красота, здоровье, спорт. туризм, хобби
Тип: Электробритва
Характеристики, спецификации
Инструкция к Электробритве Philips HQ 7830

3
ENGLISH 4
POLSKI 15
ROMÂNĂ 26
РУССКИЙ 36
ČESKY 48
MAGYAR 59
SLOVENSKY 70
УКРАЇНСЬКІЙ 81
HRVATSKI 92
EESTI 102
LATVISKI 112
LIETUVIŠKAI 123
SLOVENŠČINA 133
БЪЛГАРСКИ 144
SRPSKI 156
HQ7830
ENGLISH4
Important
Read these instructions for use carefully before
using the appliance and save them for future
reference.
◗ Only use the powerplug supplied to charge
the appliance.
◗ The powerplug transforms 100-240 volts to a
safe low voltage of less than 24 volts.
◗ Only use the powerplug that comes with the
appliance to guarantee safe transformation.
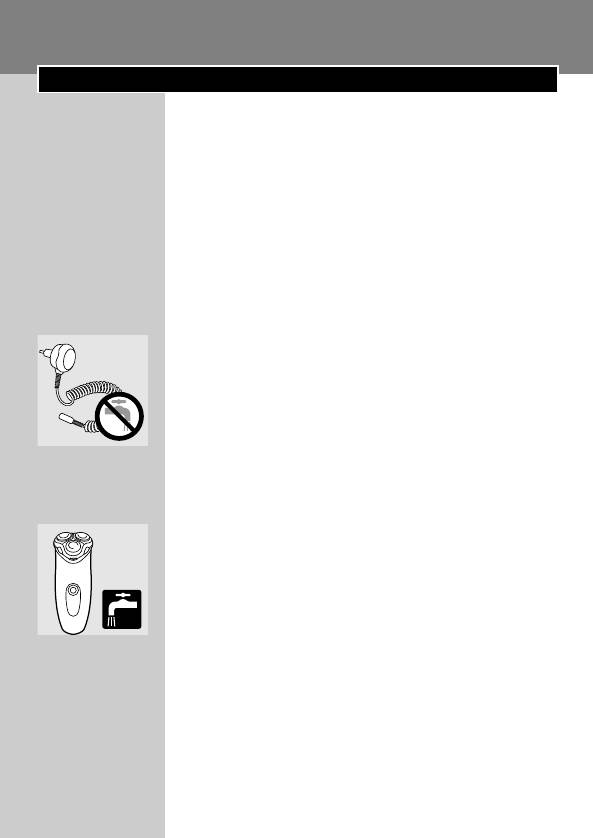
◗ The powerplug contains a transformer. Do
C
not cut off the powerplug to replace it with
another plug, as this will cause a hazardous
situation.
◗ Make sure the powerplug does not get wet.
◗ If the powerplug is damaged, always have it
replaced by one of the original type in order
to avoid a hazard.
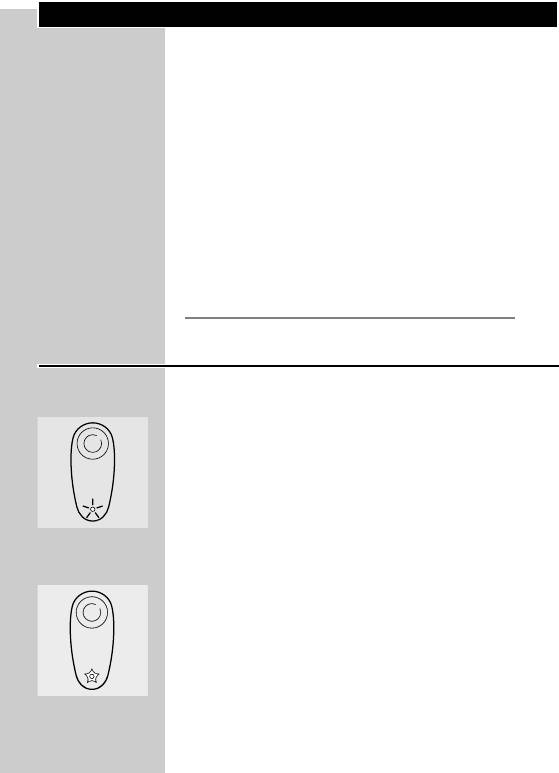
◗ The appliance complies with the
C
internationally approved IEC safety regulations
and can be safely cleaned under the tap.
Be careful with hot water. Always check if the
water is not too hot, to prevent your hands from
getting burnt.
◗ Always unplug the shaver before cleaning it
under the tap.
◗ Noise level: Lc = 60,8 dB [A]
ENGLISH 5
Charging
Charge the appliance when the motor stops or
starts running slower.
Charge, store and use the appliance at a
temperature between 5cC and 35cC.
When charging for the first time or after a long
period of disuse: leave the shaver to charge
continuously for 4 hours.
Charging normally takes approx. 1 hour.
Do not leave the appliance connected to the
mains for more than 24 hours.
If the motor stops during shaving, you can finish
your shave by connecting it to the mains.
Do not charge the shaver in a closed pouch.
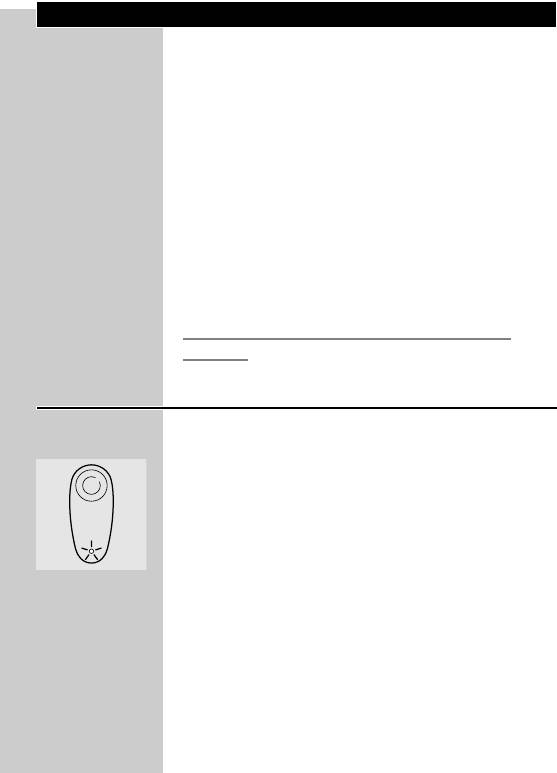
Charge indications
Charging
◗ As soon as you start charging the empty
C
shaver, the green pilot light goes on.
Batteries fully charged
◗ When the batteries have been fully charged,
C
the green pilot light starts blinking.
ENGLISH6
Charging the appliance
Charge the shaver before using it for the first time
and when the shaver indicates that the batteries
are running low.
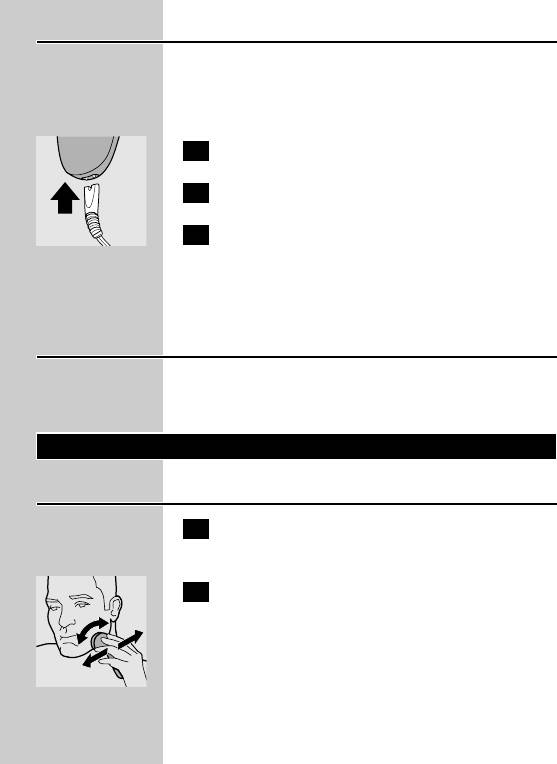
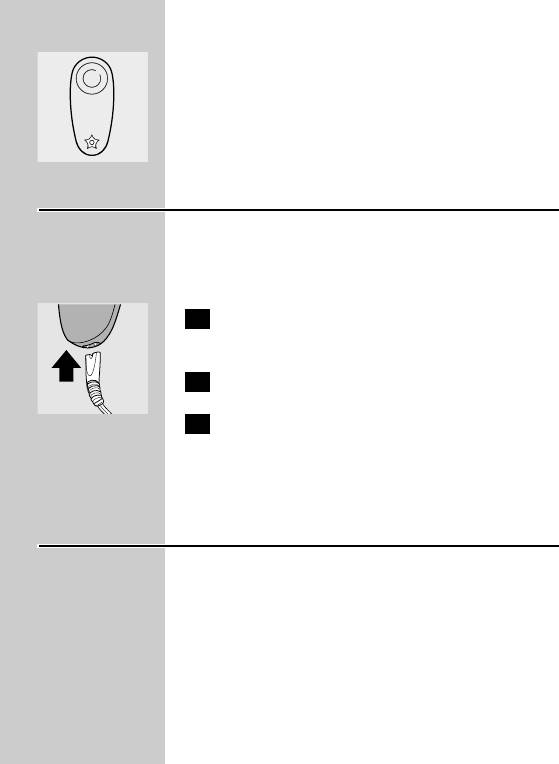
1 Put the appliance plug in the shaver.
C
2 Put the powerplug in the wall socket.
3 Remove the powerplug from the wall
socket and pull the appliance plug out of
the shaver when the batteries have been
fully charged.
Cordless shaving time
A fully charged shaver has a cordless shaving time
of up to 70 minutes.
Using the appliance
Shaving
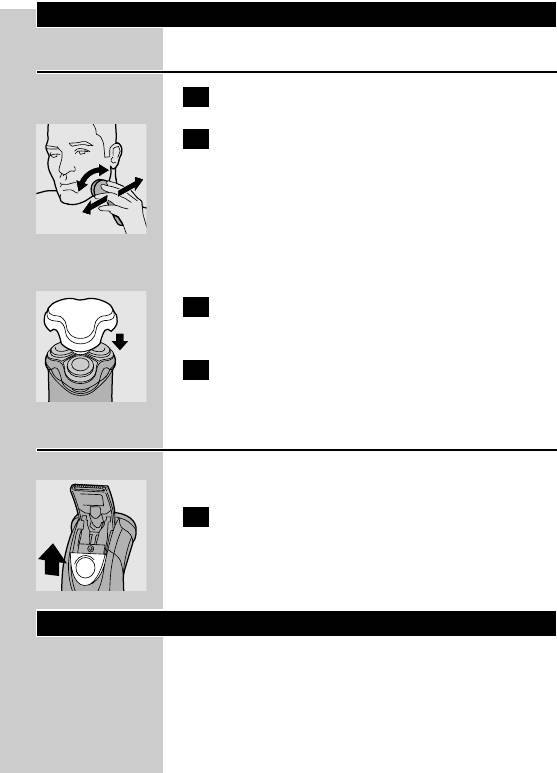
1 Switch the shaver on by pressing the on/off
button once.
2 Move the shaving heads quickly over your
C
skin, making both straight and circular
movements.
Shaving on a dry face gives the best results.
Your skin may need 2 or 3 weeks to get
accustomed to the Philishave system.
ENGLISH 7
3 Switch the shaver off by pressing the on/off
button once.
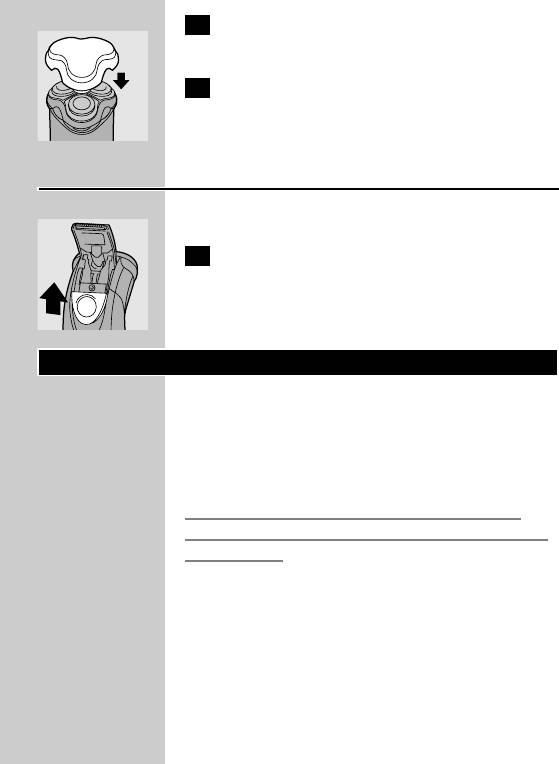
4 Put the protection cap on the shaver every
C
time you have used it in order to prevent
damage.
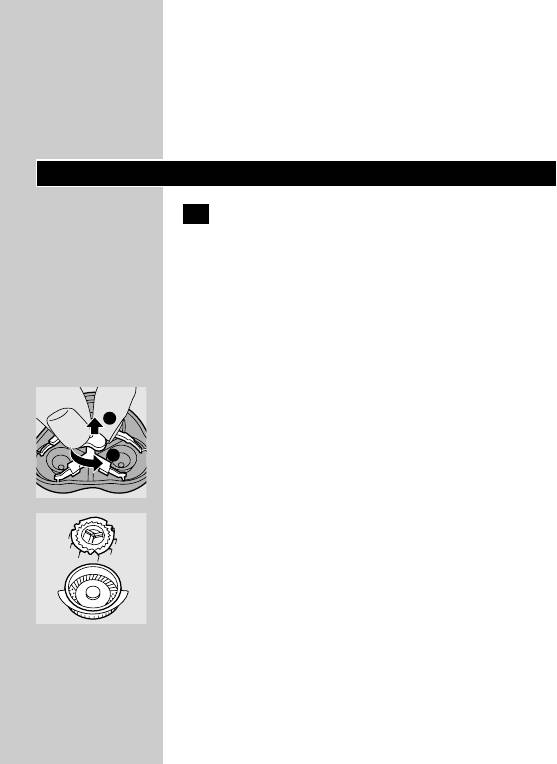
Trimming
For grooming sideburns and moustache.
1 Open the trimmer by pushing the slide
C
upwards.
The trimmer can be activated while the motor is
running.
Cleaning and maintenance
Regular cleaning guarantees better shaving
performance.
The easiest and most hygienic way to clean the
appliance is to rinse the shaving unit and the hair
chamber with hot water after every shave.
Be careful with hot water. Always check if the
water is not too hot to prevent your hands from
getting burnt.
When you clean the appliance, it is not necessary
to take the shaving heads (cutters and guards)
apart. If you want to take them apart, be sure not
to mix up the cutters and guards, since grinding of
the cutters in the guards only guarantees optimal
performance for each matching set. If you
accidentally mix up the sets, it could take several
ENGLISH8
weeks before optimal shaving performance is
restored.
Every day: shaving unit and hair chamber
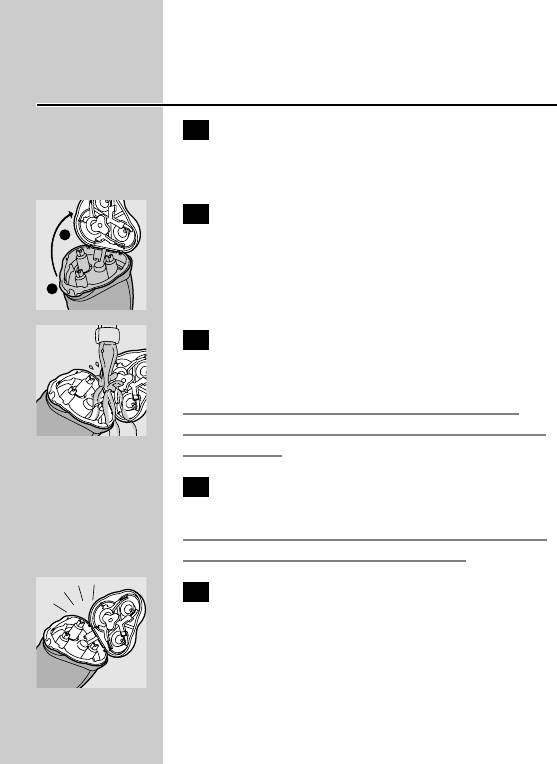
1 Switch the shaver off, remove the
powerplug from the wall socket and pull
the appliance plug out of the shaver.
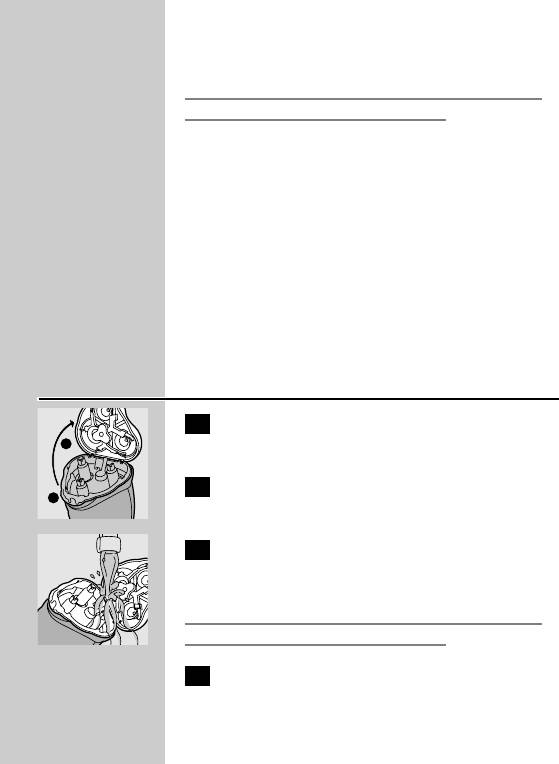
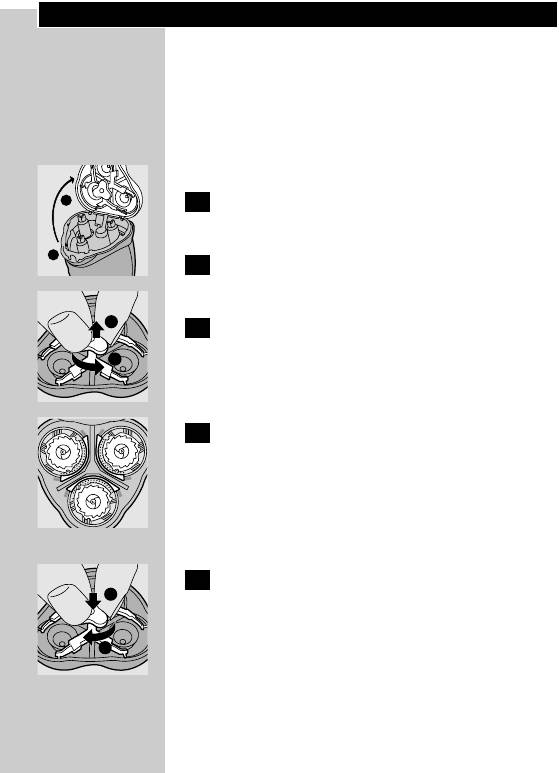
2 Press the release button (1) to open the
C
shaving unit (2).
3 Clean the shaving unit and the hair
C
chamber by rinsing them under a hot tap
for some time.
Be careful with hot water. Always check if the
water is not too hot to prevent your hands from
getting burnt.
4 Close the shaving unit and shake off excess
water.
Never dry the shaving unit with a towel or tissue
as this may damage the shaving heads.
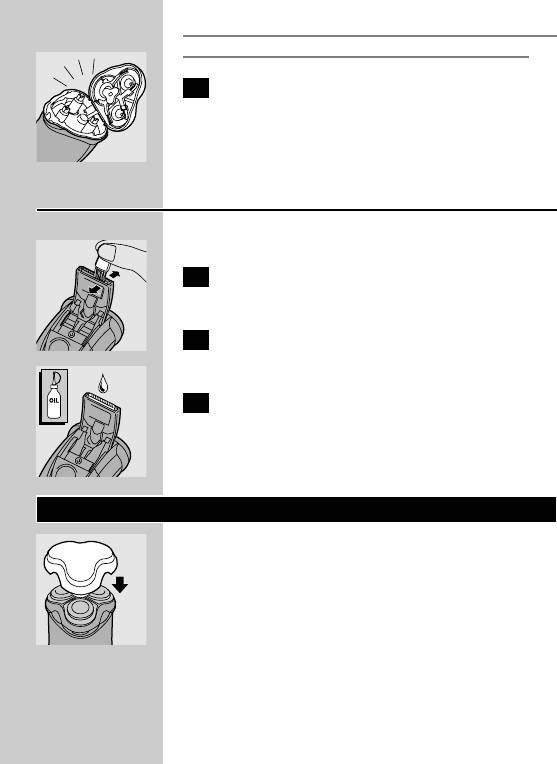
5 Open the shaving unit again and leave it
C
open to let the appliance dry completely.
You can also clean the hair chamber without
water by using the brush supplied.
2
1
ENGLISH 9
Trimmer
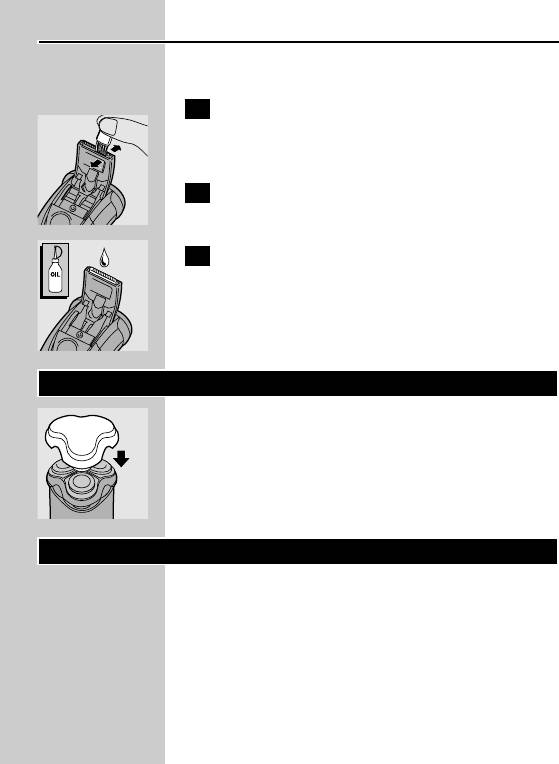
Clean the trimmer every time you have used it.
1 Switch the shaver off, remove the
powerplug from the wall socket and pull
the appliance plug out of the shaver.
2 Clean the trimmer with the brush
C
supplied.
3 Lubricate the trimmer teeth with a drop
C
of sewing machine oil every six months.
Storage
◗ Put the protection cap on the shaver to
C
prevent damage.
◗ The appliance can be stored in the pouch
supplied.
Replacement
Replace the shaving heads every 2 years for
optimal shaving results.
Replace damaged or worn shaving heads with
HQ6 Philishave Quadra shaving heads only.
ENGLISH10
1 Switch the shaver off, remove the
powerplug from the wall socket and pull
the appliance plug out of the shaver.
2 Press the release button (1) to open the
C
shaving unit (2).
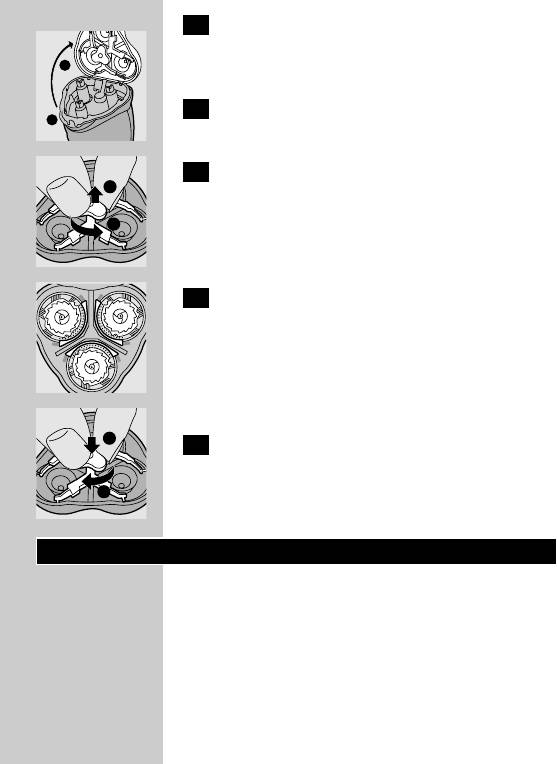
3 Turn the wheel anticlockwise (1) and
C
remove the retaining frame (2).
4 Remove the shaving heads and place new
C
ones in the shaving unit in such a way that
the parts with the small holes point
towards the centre of the shaving unit.
Make sure that the projections of the shaving
heads fit exactly into the recesses.
5 Put the retaining frame back into the
C
shaving unit, press the wheel (1) and turn it
clockwise (2).
Accessories
The following accessories are available:
- HQ6 Philishave Quadra shaving heads.
- HQ8000 powerplug.
- HQ110 Philishave shaving head cleaner
(shaving head cleaning spray).
2
1
2
1
1
2
ENGLISH 11
Environment
The built-in rechargeable batteries contain
substances that may pollute the environment.
Disposal of the batteries
Remove the batteries when you discard the
appliance. Do not throw the batteries away with
the normal household waste, but hand them in at
an official collection point.You can also take the
appliance to a Philips service centre, which will
remove the batteries for you and will dispose of
them in an environmentally safe way.
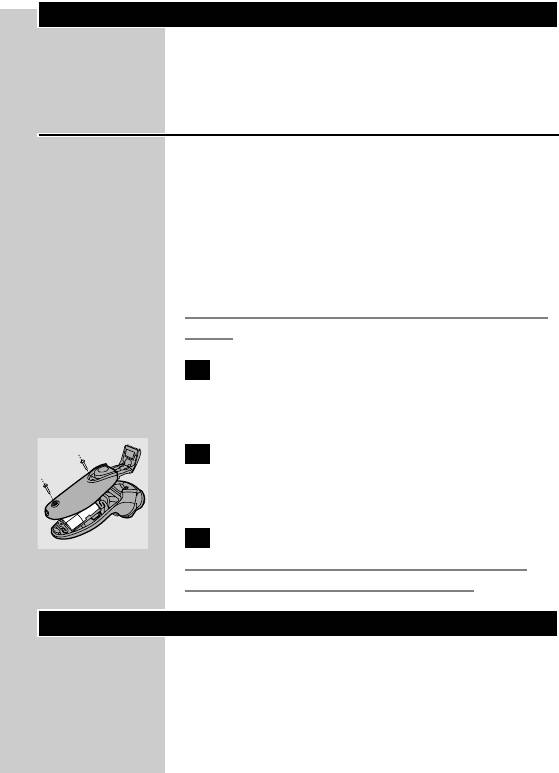
Only remove the batteries if they are completely
empty.
1 Remove the powerplug from the wall
socket and pull the appliance plug out of
the shaver.
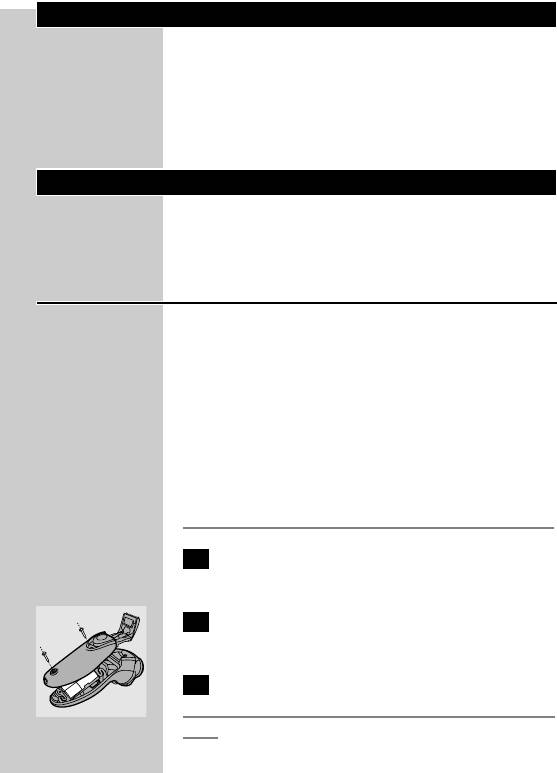
2 Let the shaver run until it stops, open the
C
trimmer, undo the screws and open the
shaver.
3 Remove the batteries.
Do not connect the shaver to the mains again
after the batteries have been removed.
Guarantee & service
If you need information or if you have a problem,
please visit the Philips Web site at
www.philips.com or contact the Philips Customer
ENGLISH12
Care Centre in your country (you will find its
phone number in the worldwide guarantee
leaflet). If there is no Customer Care Centre in
your country, turn to your local Philips dealer or
contact the Service Department of Philips
Domestic Appliances and Personal Care BV.
Troubleshooting
1 Reduced shaving performance
B
Cause 1: the shaving heads are dirty.
B
The shaver has not been rinsed long enough or
the water used was not hot enough.
◗ Clean the shaver thoroughly before you
continue shaving (see chapter 'Cleaning and
maintenance').
B
Cause 2: long hairs are obstructing the shaving
heads.
◗ Open the shaving unit, turn the wheel
C
anticlockwise (1) and remove the retaining
frame (2).
◗ Clean the cutters and guards.
C
Do not clean more than one cutter and guard at
a time, since they are all matching sets. If you
accidentally mix up the cutters and guards, it may
take several weeks before optimal shaving
performance is restored.
◗ Remove the hairs with the brush supplied.
2
1
ENGLISH 13
◗ Put the shaving heads back into the shaving
unit. Put the retaining frame back into the
shaving unit, press the wheel and turn it
clockwise.
B
Cause 3: the shaving heads are damaged or worn.
◗ Open the shaving unit, turn the wheel
anticlockwise and remove the retaining frame.
◗ Remove the old shaving heads from the
shaving unit and replace them with new ones.
Damaged or worn shaving heads (cutters and
guards) must only be replaced with original HQ6
Philishave Quadra shaving heads.
◗ Put the retaining frame back into the shaving
unit, press the wheel and turn it clockwise.
2 The shaver does not work when the on/off
button is pressed
B
Cause: the batteries are empty.
◗ Recharge the batteries. See chapter 'Charging'.
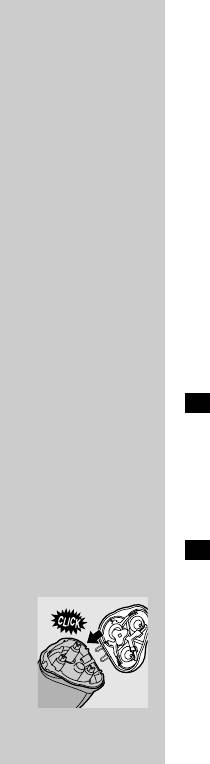
3 The shaving unit has become detached
from the shaver
◗ If the shaving unit becomes detached from the
C
shaver, check whether the hinge spring is still
properly attached, i.e. has not come loose and
does not show any cracks or damage. If the
hinge spring is still properly attached, the
shaving unit can be easily reattached to the

ENGLISH14
shaver. However, if the hinge spring has come
loose, is cracked or damaged, contact your
Philips dealer or the nearest Philips service
centre to have the hinge replaced, as a broken
hinge could damage the body of your shaver.
POLSKI 15
Ważne
Przed pierwszym użyciem urządzenia zapoznaj się
dokładnie z instrukcją jego obsługi i zachowaj ją na
przyszłość, do ewentualnej konsultacji.
◗ Do ładowania urządzenia używaj wyłącznie
dołączonego do niego zasilacza.
◗ Zasilacz przekształca napięcie 100-240 V na
bezpieczne niskie napięcie niższe niż 24 V.
◗ Dla zapewnienia bezpieczeństwa używaj
jedynie zasilacza nabytego wraz z
urządzeniem.
◗ Wtyczka zasilacza zawiera transformator.
C
Odcięcie wtyczki celem wymiany jej na nową
może spowodować niebezpieczeństwo.
◗ Upewnij się, że wtyczka przewodu zasilającego
nie jest wilgotna
◗ Jeśli uszkodzona jest wtyczka przewodu
zasilającego, wówczas, aby uniknąć
niebezpieczeństwa należy zawsze zastąpić ją
wtyczką oryginalną
◗ Niniejsze urządzenie spełnia międzynarodowe,
C
zatwierdzone normy bezpieczeństwa IEC i
można je myć pod kranem.
Postępuj ostrożnie z gorącą wodą. Zawsze
sprawdzaj, czy jej temperatura jest odpowiednia
dla kontaktu z rękami.
◗ Zanim zaczniesz czyścić golarkę pod kranem,
zawsze wyjmij wtyczkę z gniazdka sieciowego.
◗ Poziom hałasu: Lc= 60,8 dB [A]
POLSKI16
Ładowanie
Gdy urządzenie zacznie pracować wolniej lub
zatrzyma się, należy je naładować.
Ładuj, przechowuj i używaj urządzenie w
temperaturze pomiędzy 5c a 35cC.
Jeśli ładujesz golarkę po raz pierwszy lub po
długim okresie nieużywania, podłącz golarkę do
ładowarki na 4 godziny.
Normalne ładowanie trwa ok. 1 godziny.
Nie zostawiaj urządzenia podłączonego do sieci
na dłużej, niż 24 godziny.
Jeśli podczas golenia silnik zatrzyma się, wówczas
czynności golenia możesz dokończyć, podłączając
golarkę do sieci.
Nie ładuj golarki umieszczonej w zamkniętej
saszetce.
Wskaźniki ładowania
Ładowanie
◗ W momencie rozpoczęcia ładowania
C
rozładowanej golarki zaświeci się zielona
lampka kontrolna.
POLSKI 17
Akumulatory są całkowicie
naładowane.
◗ Z chwilą pełnego naładowania golarki zaczyna
C
migotać zielona lampka kontrolna.
Ładowanie urządzenia
Naładuj golarkę przed pierwszym jej użyciem oraz
wtedy, gdy wskaźnik golarki informuje o
rozładowaniu się akumulatorów.
1 Włóż małą wtyczkę przewodu zasilającego
C
do golarki.
2 Podłącz ładowarkę do sieci.
3 Po całkowitym naładowaniu akumulatorów
należy wyjąć wtyczkę zasilania z gniazdka
ściennego oraz wyjąć małą wtyczkę z
golarki.
Czas bezprzewodowej pracy
W pełni naładowana golarka gwarantuje do
70 minut beprzewodowej pracy.
POLSKI18
Korzystanie z urządzenia
Golenie
1 Włącz golarkę, wciskając włącznik.
2 Przesuwaj głowice po skórze, wykonując
C
zarówno proste, jak i okrężne ruchy.
Najlepsze efekty golenia osiąga się na skórze
suchej.
Skóra Twojej twarzy potrzebuje pewnego czasu
(2-3 tygodni), by przyzwyczaić się do nowego
systemu golenia.
3 Wyłącz golarkę przez jednokrotne
wciśnięcie przycisku off/on.
4 Po każdym użyciu golarki zakładaj na nią
C
pokrywkę ochronną.
Trymer
Służy do przystrzygania wąsów i bokobrodów.
1 Otwórz trymer przesuwając suwak do
C
góry.
Trymer może być używany po uprzednim
włączeniu urządzenia.
Czyszczenie i konserwacja
Regularne oczyszczanie golarki gwarantuje lepsze
efekty golenia.
Najprostszym i najbardziej higienicznym
POLSKI 19
sposobem czyszczenia urządzenia jest opłukanie
gorącą wodą modułu golącego i komory na ścięte
włosy - po każdym goleniu.
Sprawdzaj temperaturę wody. Uważaj, żeby zbyt
gorącą wodą nie oparzyć sobie rąk.
Podczas czyszczenia golarki nie trzeba zdejmować
części golących ( nożyków i osłonek). Jeśli je
wyjmiesz zwróć szczególną uwagę, żeby nie
pomieszać nożyków i osłonek. Jest to bardzo
ważne, ponieważ dopasowanie nożyków do
osłonek zapewnia optymalną skuteczność
działania każdego z zestawów. Jeżeli przypadkowo
osłonki i nożyki zostaną pomieszane, odzyskanie
przez golarkę dobrej jakości golenia może trwać
nawet kilka tygodni.
Codziennie: część goląca i komora na ścięty
zarost
1 Wyłącz golarkę, wyjmij ładowarkę z
gniazdka ściennego oraz wtyczkę z golarki.
2 Wciśnij przycisk blokujący (1) aby
C
otworzyć część golącą (2).
3 Przez jakiś czas płucz moduł golący i
C
komorę na ścięty zarost pod gorącą
bieżącą wodą.
Sprawdzaj temperaturę wody. Uważaj, żeby zbyt
gorącą wodą nie oparzyć sobie rąk.
4 Zamknij moduł golący i strząśnij pozostałą
wodę.
2
1
POLSKI20
Nidy nie wycieraj modułu golącego ręcznikiem lub
chusteczką - możesz uszkodzić głowice golące.
5 Otwórz ponownie część golącą i pozostaw
C
ją tak do wyschnięcia.
Komorę na ścięty zarost można też czyścić na
sucho, używając specjalnej załączonej szczoteczki.
Trymer
Oczyszczaj trymer po każdym użyciu.
1 Wyłącz golarkę, wyjmij ładowarkę z
gniazdka ściennego oraz wtyczkę z golarki.
2 Trymer oczyść dołączoną do golarki
C
szczoteczką.
3 Co 6 miesięcy należy naoliwić ząbki
C
trymera kroplą oleju maszynowego.
Przechowywanie
◗ Załóż na golarkę ochronną pokrywę, by
C
uniknąć uszkodzenia.
◗ Urządzenie może być przechowywane w
załączonym pokrowcu.
POLSKI 21
Wymiana
Aby uzyskać najlepsze rezultaty, wymieniaj co dwa
lata głowice golące.
Uszkodzone lub zużyte głowice wymieniaj
wyłącznie na głowice golące Philishave Quadra
HQ6.
1 Wyłącz golarkę, wyjmij zasilacz z gniazda
ściennego oraz wtyczkę z golarki.
2 Wciśnij przycisk blokujący (1) aby
C
otworzyć część golącą (2).
3 Obróć kółkiem w kierunku przeciwnym
C
do ruchu wskazówek zegara (1) i wyjmij
obsadę (2).
4 Zdejmij zużyte głowice golące i na część
C
golącą załóż nowe, tak aby elementy
zawierające małe otwory skierowane były
w kierunku środka części golącej.
Upewnij się, czy części wystające głowic pasują
dokładnie w zagłębienia.
5 Załóż obsadę na moduł golący, wciśnij
C
kółko (1) i obróć nim w kierunku zgodnym
z kierunkiem ruchu wskazówek zegara (2).
2
1
2
1
1
2
POLSKI22
Akcesoria
Dostępne są następujące akcesoria:
- Głowice golące HQ6 Philishave Quadra.
- HQ8000 Ładowarka
- HQ110 Philishave Head Cleaner
(spray do czyszczenia głowic golących).
Ochrona środowiska
Wbudowane akumulatory zawierają substancje,
które mogą zanieczyszczać środowisko.
Pozbywanie się akumulatorów
Przed wyrzuceniem urządzenia wyjmij z niego
akumulatory. Nie wyrzucaj zużytych
akumulatorów razem z innymi odpadami
gospodarstwa domowego, lecz oddaj je do
punktu skupu przyjmującego tego typu odpady.
Możesz również zanieść urządzenie do serwisu
Philipsa, gdzie personel pomoże ci wyjąć
akumulatory i pozbyć się ich w sposób przyjazny
dla środowiska.
Wyrzucaj tylko zupełnie wyczerpane akumulatory.
1 Wyjmij zasilacz z gniazdka ściennego oraz
wyjmij małą wtyczkę z golarki.
2 Uruchom golarkę i poczekaj, aż przestanie
C
pracować, odkręć śrubki i otwórz golarkę.
3 Wyjmij akumulatory.
Po wyjęciu akumulatorów nie podłączaj golarki do
sieci.

