Karcher Balayeuse KM 90-60 R G: Before Startup
Before Startup: Karcher Balayeuse KM 90-60 R G
-
5
Danger
Risk of injury and damage! Do not use a
forklift to unload the appliance.
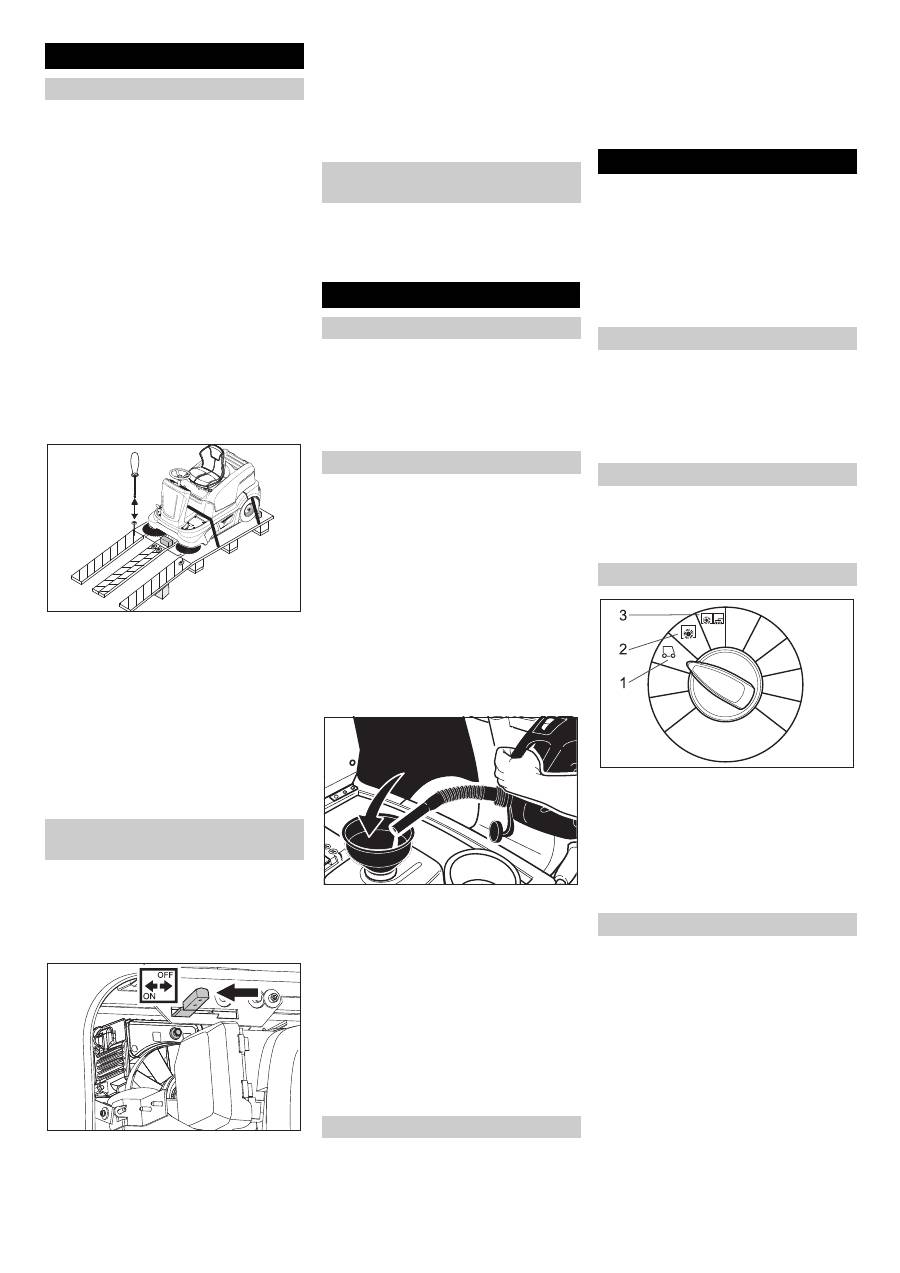
To unload the machine, proceed as follows:
Cut plastic packing belt and remove foil.
Fill battery with battery acid (see sec-
tion on Care and Maintenance).
Install the battery and connect it (see
section on Care and Maintenance).
Remove the elastic tape fasteners at
the stop points.
Four indicated floor boards of the pallet
are fastened with screws. Unscrew
these boards.
Place the boards on the edge of the pal-
let. Place the boards in such a way that
they lie in front of the four wheels of the
machine. Fasten the boards with
screws.
Slide the four support beams included
in the packaging under the ramp.
Remove the wooden blocks used for ar-
resting the wheels and slide them under
the ramp.
Slide the machine over the prepared
ramp from the pallet.
The machine can be moved in 2 ways:
(1) By pushing it (see Moving sweeper
without engaging self-propulsion).
(2) By driving it (see Moving sweeper by
engaging self-propulsion).
Danger
Risk of injury! Before engaging the free-
wheel operation, the machine must be se-
cured to prevent it rolling away.
Open the device hood.
Set the freewheel lever to OFF.
Note:
If the freewheel lever does not lock
in, then slightly move the machine forward
and backward.
– This blocks the travel drive function.
– Braking effect exists no more.
Close cover.
The machine can now be pushed.
Note:
Do not move the machine for long
distances without engaging self-propul-
sion, a speed of 6 km/h should not be ex-
ceeded.
Set the freewheel lever to ON.
The travel drive is now ready for operation.
Close cover.
The appliance can now be driven.
Note:
The machine has been fitted with an
automatic parking brake that is activated as
soon as the engine is switched off and the
driver leaves his seat.
Park the sweeper on an even surface.
Remove ignition key.
Danger
Risk of explosion!
–
Only use the fuels specified in the Op-
erations Manual.
–
Do not refuel the machine in enclosed
spaces.
–
Smoking and naked flames are strictly
prohibited.
–
Ensure that no fuel reaches the hot
open surfaces.
–
Overflown fuel can form an explosive
misture of fuel and air when it comes in
contact with the blower.
Switch off engine.
Open the device hood.
Open fuel filler cap.
Insert funnel.
Use "regular unleaded petrol".
Fill tank to max. 1 cm below the lower
edge of the filler nozzle.
Wipe off any spilt fuel, remove funnel
and close fuel filler cap.
Close cover.
Note:
The contents of the tank are suffi-
cient to operate the machine for about an
hour.
Check engine oil level.
Check fill level of fuel tank.
Check fill level of hydraulic oil.
Check side brush.
Check roller brush.
Shake off dust filter.
Empty waste container.
Check tyre pressure.
Note:
For description, see section on Care
and maintenance.
Caution
Risk of damage to the axle! Before each
drive, check and ensure that the free-run
lever is at ON position.
Caution
The air inlets next to the driver's seat must
not be covered. Do not store any objects
next to or behind the seat.
Pull seat adjustment lever inwards.
Slide seat, release lever and lock in
place.
Check that the seat is properly locked in
position by attempting to move it back-
wards and forwards.
Note:
The max. load of the storage area is
20 kg.
Fasten the load through appropriate
fasteners at the 4 eyelets.
1 Driving
Driving to the Place of Use.
2 Sweeping with sweep roller
Roller brush is lowered.
3 Sweeping using roller brush and side
brushes
Roller brush and side brushes are low-
ered.
Note:
The machine is equipped with a seat
contact switch If the driver's seat is vacat-
ed, the machine is switched off.
Note:
If the seat contact switch has
switched off the machine, then turn the ig-
nition key to "0" to prevent battery dis-
charge.
Open the device hood.
Before Startup
Unloading
Moving sweeper without engaging
self-propulsion
Moving sweeper by engaging self-
propulsion
Start up
General notes
Refuelling
Inspection and maintenance work
Operation
Adjusting driver's seat
Storage area
Programme selection
Starting the machine
Open fuel cock
21 EN
-
6
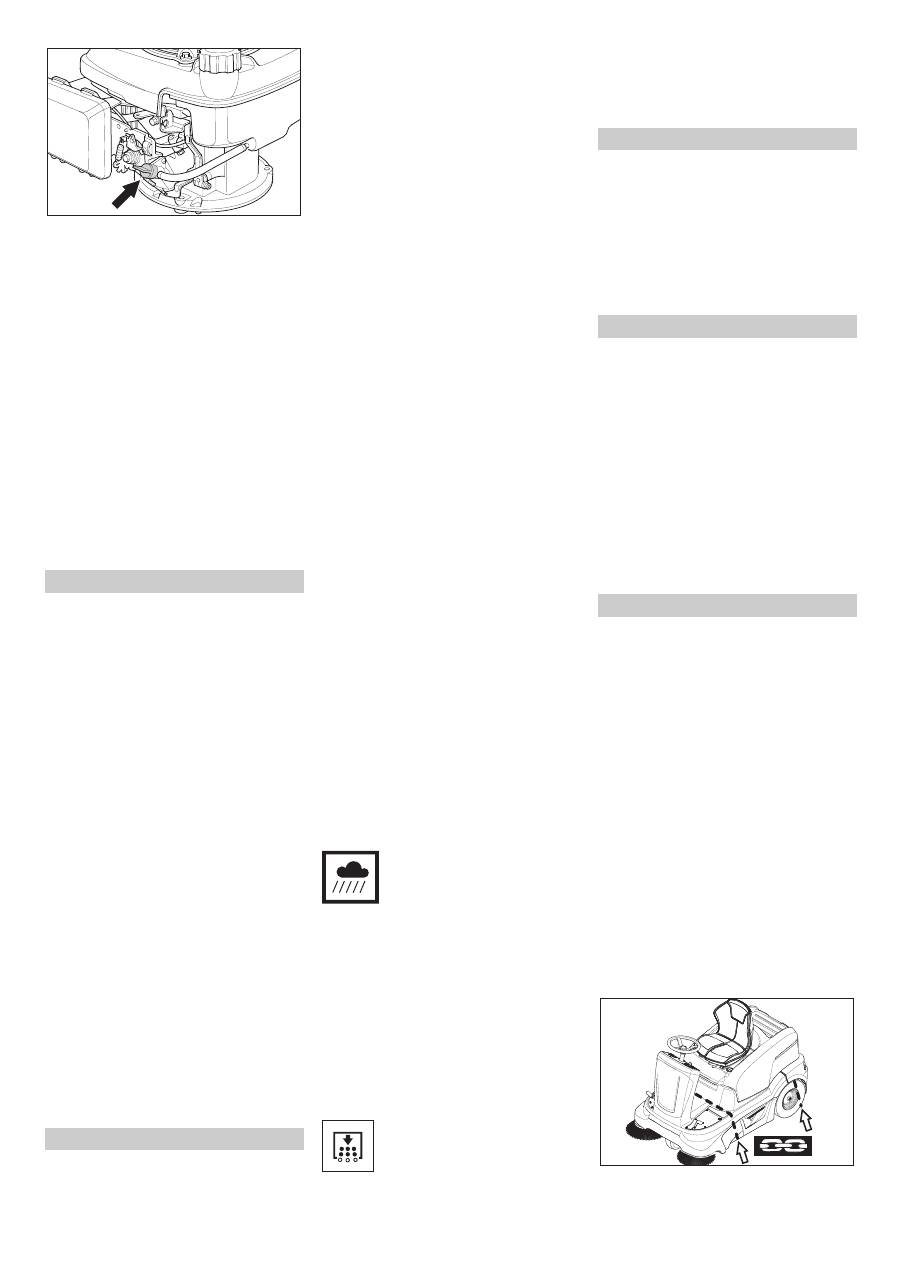
Open the fuel supply.
Turn the rotating knob parallel to the
hose of the fuel tap.
Close cover.
Sit on the driver's seat.
Do NOT press the accelerator pedal.
Set programme switch to step 1 (driv-
ing).
Only when is very cold or raining: Pull
choke lever upwards. Once the engine
is running, pressl choke lever down
again.
Turn ignition key past position 1.
If the machine starts, release the igni-
tion key.
Note:
Never operate the starter motor for
longer than 10 seconds. Wait at least 10
seconds before operating the starter motor
again.
Press slowly the accelerator pedal "for-
ward".
Danger
Risk of injury! While reversing, ensure that
there is nobody in the way, ask them to
move if somebody is around.
Press slowly the accelerator pedal "re-
verse".
– The accelerator pedal can be used to
vary the driving speed infinitely.
– Avoid pressing the pedal suddenly as
this may damage the hydraulic system.
– In the event of power loss on inclined
surfaces, slightly reduce the pressure
on the accelerator pedal.
Release the accelerator pedal, the ma-
chine brakes automatically and stops.
Driving over fixed obstacles which are 50
mm high or less:
Drive forwards slowly and carefully.
Driving over fixed obstacles which are
more than 50 mm high:
Only drive over these obstacles using a
suitable ramp.
Danger
Risk of injury! If the bulk waste flap is open,
stones or gravel may be flung forwards by
the roller brush. Make sure that this does
not endanger persons, animals or objects.
Caution
Do not sweep up packing strips, wire or
similar objects as this may damage the
sweeping mechanism.
Caution
To avoid damaging the floor, do not contin-
ue to operate the sweeping machine in the
same position.
Note:
To achieve an optimum cleaning re-
sult, the driving speed should be adjusted
to take specific situations into account.
Note:
During operation, the waste contain-
er should be emptied at regular intervals.
Note:
When cleaning surfaces, only lower
the roller brush.
Note:
Also lower side brush when cleaning
along edges.
Set programme switch to step 2. Roller
brush is lowered.
Note:
Roller brush starts operating auto-
matically.
Note:
To sweep up larger items up to a
height of 50 mm, e.g. cigarette packs, the
bulk waste flap must be raised briefly.
Raising bulk waste flap:
Press the pedal for the bulk waste flap
forwards and keep pressed down.
To lower it, take foot off pedal.
Note:
An optimum cleaning result can only
be achieved if the bulk waste flap has been
lowered completely.
Set programme switch to step 3. Side
brushes and roller brush are lowered.
Note:
Roller brush and side brush start op-
erating automatically.
Note:
During operation, the waste contain-
er should be emptied at regular intervals.
Note:
During operation, the dust filter
should be shaken off and cleaned at regu-
lar intervals.
Close wet/dry flap
Open wet/dry flap.
Note:
You can thus preven the filter system
from getting blocked.
Open wet/dry flap.
Note:
This protects the filter from moisture.
– Switch on manual filter shake off.
Press Filter shake off button. Filter
shake off starts after a delay of one sec-
ond.
Note:
The machine is set at the factory to
automatic filter shake off.
Note:
Wait until the automatic filter shaking
process is finished and the dust has settled
before you open or empty the waste con-
tainer.
Raise the waste container slightly and
pull it out.
Empty waste container.
Push in the waste container and lock it.
Empty opposite waste container.
Set programme switch to step 1 (driv-
ing). The side brush and roller brush are
raised.
Turn ignition key to "0" and remove it.
Note:
Once the machine has been switched
off, the dust filter is shaken automatically
for approx. 15 seconds. Do not open the
machine hood during this period.
Open the device hood.
Close the fuel supply.
Turn the rotating knob perpendicular to
the fuel tap.
Close cover.
Danger
Risk of injury and damage! Observe the
weight of the appliance when you transport
it.
Danger
In general, when shipping the machine, the
freewheel lever must be at the ON position.
Only once this has been done, will the trav-
el drive and parking brake be ready for op-
eration. The machine must always be
moved up or down slopes by engaging self-
propulsion.
Turn ignition key to "0" and remove it.
Empty fuel tank.
Secure the wheels of the machine with
wheel chocks.
Secure the machine with tensioning
straps or cables.
When transporting in vehicles, secure
the appliance according to the guide-
lines from slipping and tipping over.
Note:
Observe markings for fixing points on
base frame (chain symbols). When loading
Turning on the Appliance
Drive the machine
Drive forward
Reverse drive
Driving method
Brakes
Driving over obstacles
Sweeping mode
Sweeping with sweep roller
Sweeping with bulk waste flap raised
Sweeping with side brushes
Sweeping dry floors
Sweep in fibrous and dry waste (such as
dry grass, hay)
Sweeping damp or wet floors
Filter dedusting
Emptying waste container
Turn off the appliance.
Close fuel cock
Transport
22 EN
Оглавление
- Inhaltsverzeichnis
- Funktion Bestimmungsgemäße Ver- wendung
- Bedien- und Funktionselemente
- Vor Inbetriebnahme
- Stilllegung Pflege und Wartung
- Hilfe bei Störungen
- Technische Daten
- Zubehör
- Contents
- Function Proper use
- Operating and Functional Elements
- Before Startup
- Shutdown Maintenance and care
- Troubleshooting
- Technical specifications
- Accessories
- Table des matières
- Fonction Utilisation conforme
- Eléments de commande et de fonction
- Avant la mise en service
- Remisage Entretien et maintenance
- Assistance en cas de panne
- Caractéristiques techniques
- Accessoires
- Indice
- Funzione Uso conforme a destinazione
- Elementi di comando e di funzione
- Prima della messa in funzione
- Fermo dell'impianto Cura e manutenzione
- Guida alla risoluzione dei guasti
- Dati tecnici
- Accessori
- Inhoudsopgave
- Functie Reglementair gebruik
- Elementen voor de bediening en de functies
- Voor de inbedrijfstelling
- Stillegging Onderhoud
- Hulp bij storingen
- Technische gegevens
- Toebehoren
- Índice de contenidos
- Función Uso previsto
- Elementos de operación y funcionamiento
- Antes de la puesta en marcha
- Parada Cuidados y mantenimiento
- Ayuda en caso de avería
- Datos técnicos
- Accesorios
- Índice
- Funcionamento Utilização conforme o fim a que se destina a máquina
- Elementos de comando e de funcionamento
- Antes de colocar em funcio- namento
- Desactivação da máquina Conservação e manutenção
- Ajuda em caso de avarias
- Dados técnicos
- Acessórios
- Indholdsfortegnelse
- Funktion Bestemmelsesmæssig an- vendelse
- Betjenings- og funktionselementer
- Inden ibrugtagning
- Afbrydning/nedlæggelse
- Pleje og vedligeholdelse
- Hjælp ved fejl
- Tekniske data
- Tilbehør
- Innholdsfortegnelse
- Funksjon Forskriftsmessig bruk
- Betjenings- og funksjonelementer
- Før den tas i bruk
- Sette bort
- Pleie og vedlikehold
- Feilretting
- Tekniske data
- Tilbehør
- Innehållsförteckning
- Funktion Ändamålsenlig användning
- Manövrerings- och funktionselement
- Före ibruktagande
- Nedstängning
- Skötsel och underhåll
- Åtgärder vid störningar
- Tekniska data
- Tillbehör
- Sisällysluettelo
- Toiminta Käyttötarkoitus
- Ohjaus- ja käyttölaitteet
- Ennen käyttöönottoa
- Seisonta-aika Hoito ja huolto
- Häiriöapu
- Tekniset tiedot
- Tarvikkeet
- Πίνακας περιεχομένων
- Λειτουργία Χρήση σύμφωνα με τους κανονισμούς
- Στοιχεία χειρισμού και λειτουργίας
- Πριν τη θέση σε λειτουργία
- Διακοπή της λειτουργίας Φροντίδα και συντήρηση
- Αντιμετώπιση βλαβών
- Τεχνικά χαρακτηριστικά
- Εξαρτήματα
- İ çindekiler
- Fonksiyon Kurallara uygun kullan ı m
- Kullan ı m ve çal ı ş ma elemanlar ı
- Cihaz ı çal ı ş t ı rmaya ba ş lamadan önce
- Durdurma Koruma ve Bak ı m
- Ar ı zalarda yard ı m
- Teknik Bilgiler
- Aksesuar
- Оглавление
- Назначение Использование по назначению
- Описание элементов управления и рабочих узлов
- Перед началом работы
- Вывод из эксплуатации Уход и техническое обслуживание
- Помощь в случае неполадок
- Технические данные
- Принадлежности
- Tartalomjegyzék
- Funkció Rendeltetésszer ű használat
- Kezelési- és funkciós elemek
- Üzembevétel el ő tt
- Leállítás Ápolás és karbantartás
- Segítség üzemzavar esetén
- M ű szaki adatok
- Tartozékok
- Obsah
- Funkce Používání v souladu s ur č ením
- Ovládací a funk č ní prvky
- P ř ed uvedením do provozu
- Odstavení Ošet ř ování a údržba
- Pomoc p ř i poruchách
- Technické údaje
- P ř íslušenství
- Vsebinsko kazalo
- Delovanje Namenska uporaba
- Upravljalni in funkcijski elementi
- Pred zagonom
- Mirovanje naprave Nega in vzdrževanje
- Pomo č pri motnjah
- Tehni č ni podatki
- Pribor
- Spis tre ś ci
- Funkcja U ż ytkowanie zgodne z przeznaczeniem
- Elementy urz ą dzenia
- Przed pierwszym uruchomieniem
- Wy łą czenie z eksploatacji Czyszczenie i konserwacja
- Usuwanie usterek
- Dane techniczne
- Akcesoria
- Cuprins
- Func ţ ionarea Utilizarea corect ă
- Elemente de utilizare ş i func ţ ionale
- Înainte de punerea în func ţ iune
- Scoaterea din func ţ iune Îngrijirea ş i între ţ inerea
- Remedierea defec ţ iunilor
- Date tehnice
- Accesorii
- Obsah
- Funkcia Používanie výrobku v súlade s jeho ur č ením
- Ovládacie a funk č né prvky
- Pred uvedením do prevádzky
- Odstavenie Starostlivos ť a údržba
- Pomoc pri poruchách
- Technické údaje
- Príslušenstvo
- Pregled sadržaja
- Funkcija Namjensko korištenje
- Komandni i funkcijski elementi
- Prije prve uporabe
- Stavljanje ure đ aja van pogona Njega i održavanje
- Otklanjanje smetnji
- Tehni č ki podaci
- Pribor
- Pregled sadržaja
- Funkcija Namensko koriš ć enje
- Komandni i funkcioni elementi
- Pre upotrebe
- Stavljanje ure đ aja van pogona Nega i održavanje
- Otklanjanje smetnji
- Tehni č ki podaci
- Pribor
- Съдържание
- Функция Употреба по предназначение
- Обслужващи и функционални елементи
- Преди пускане в експлоатация
- Спиране от експлоатация Грижи и поддръжка
- Помощ при неизправности
- Технически данни
- Принадлежности
- Sisukord
- Funktsioon Sihipärane kasutamine
- Teenindus- ja funktsioonielemendid
- Enne seadme kasutuselevõttu
- Seismapanek Korrashoid ja tehnohooldus
- Abi häirete korral
- Tehnilised andmed
- Tarvikud
- Satura r ā d ī t ā js
- Darb ī ba Noteikumiem atbilstoša lietošana
- Vad ī bas un funkcijas elementi
- Pirms ekspluat ā cijas uzs ā kšanas
- Iekonserv ē šana Kopšana un tehnisk ā apkope
- Pal ī dz ī ba darb ī bas trauc ē jumu gad ī jum ā
- Tehniskie dati
- Piederumi
- Turinys
- Veikimas Naudojimas pagal paskirt į
- Valdymo ir funkciniai elementai
- Prieš pradedant naudoti
- Laikinas prietaiso nenaudojimas Prieži ū ra ir aptarnavimas
- Pagalba gedim ų atveju
- Techniniai duomenys
- Dalys
- Перелік
- Призначення Правильне застосування
- Елементи управління і функціональні вузли
- Перед початком роботи
- Зберігання Догляд та технічне обслуговування
- Допомога у випадку неполадок
- Технічні характеристики
- Аксесуари
