Karcher HD 9-50-4 Cage: инструкция
Раздел: Компьютерная техника, комплектующие, аксессуары
Тип: Система Водяного Охлаждения
Инструкция к Системе Водяного Охлаждения Karcher HD 9-50-4 Cage
Power Rotary Jet
Deutsch 3
English 4
Français 5
Italiano 6
Nederlands 7
Español 8
Português 9
Dansk 10
Norsk 11
Svenska 12
Suomi 13
Ελληνικά 14
Türkçe 15
Русский 16
Magyar 17
Čeština 18
Slovenščina 19
Polski 20
Româneşte 21
Slovenčina 22
Hrvatski 23
Srpski 24
Български 25
Eesti 26
Latviešu 27
Lietuviškai 28
Українська 29
中文 30
Register and win!
www.kaercher.com
59642320 03/11

2
Lesen Sie vor der ersten Benut-
Die kegelförmige Vertiefung des Sitzes
Reparatursatz einbauen, Sitz wech-
zung Ihres Gerätes diese Origi-
muss zum Griff des Spezialwerkzeugs
seln
nalbetriebsanleitung, handeln Sie danach
Deutsch
zeigen.
und bewahren Sie diese für späteren Ge-
Düse außen reinigen.
Sitz mit Silikonfett (Teilenummer 6.288-
brauch oder für Nachbesitzer auf.
044.0) einfetten.
Sitz in das Düsengehäuse eindrücken,
Sicherheitshinweise
nicht schlagen.
Gefahr!
Verletzungsgefahr durch defektes Gerät.
Vor Arbeitsbeginn Gerät auf ordnungsge-
mäßen Zustand überprüfen. Ist der Zu-
stand des Gerätes nicht einwandfrei darf es
nicht benutzt werden.
Am Gerät dürfen keine Veränderungen vor-
genommen werden.
Beachten Sie die Sicherheitshinweise Ihres
Beide Gewindestifte so weit herausdre-
Hochdruckreinigers.
hen, dass ca. 2 Gewindegänge aus
dem Düsengehäuse herausragen.
Bestimmungsgemäße Ver-
Rotor vorsichtig in das Düsengehäuse
wendung
einsetzen und auf den Sitz ausrichten.
Die Düse ist für die Verwendung an Hoch-
druckreinigern vorgesehen.
Der auf der Außenseite der Düse angege-
bene Wasserdruck darf nicht überschritten
werden.
Bedienung
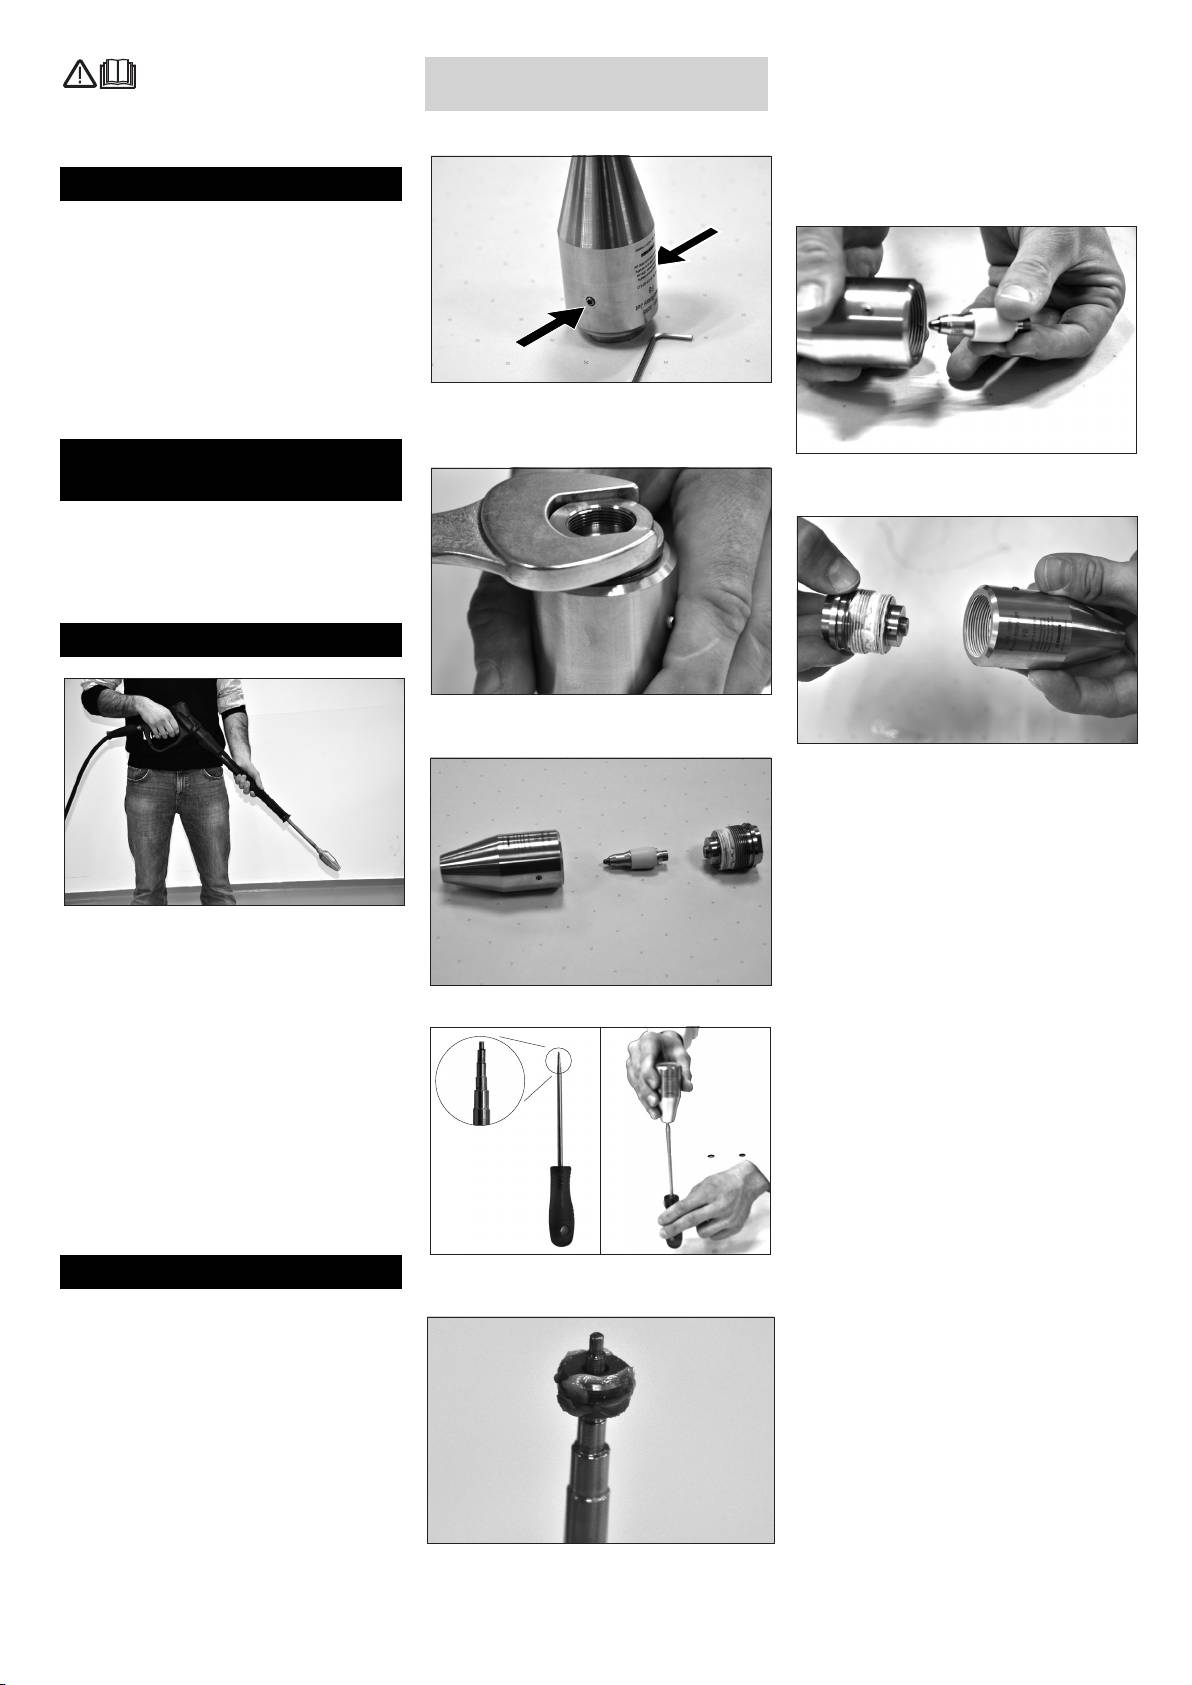
Düse nach unten richten und Gehäuse
öffnen (Schlüsselweite 27).
Gewinde des Treibdeckels mit Fett
(Teilenummer 6.288-079.0) einfetten.
Düse nach unten richten, Rotor im Sitz
ausrichten und Treibdeckel handfest
einschrauben.
Gewindestifte festziehen.
Beim Öffnen der Handspritzpitzpistole
Strahlrohr mit Düse nach unten richten
um Verschleiß an der Düse zu vermei-
den.
Rotor entnehmen.
Reinigungsarbeit mit einem Düsenab-
stand von 20 bis 30 cm beginnen.
Besten Düsenabstand durch langsa-
mes Annähern an das Reinigungsob-
jekt ermitteln.
Düse bei Arbeitspausen vor Ver-
schmutzung schützen und nicht im
Wasser liegen lassen.
Nach Arbeitsende Düse Innen und Au-
ßen reinigen, trocknen und einfetten.
Düse trocken lagern.
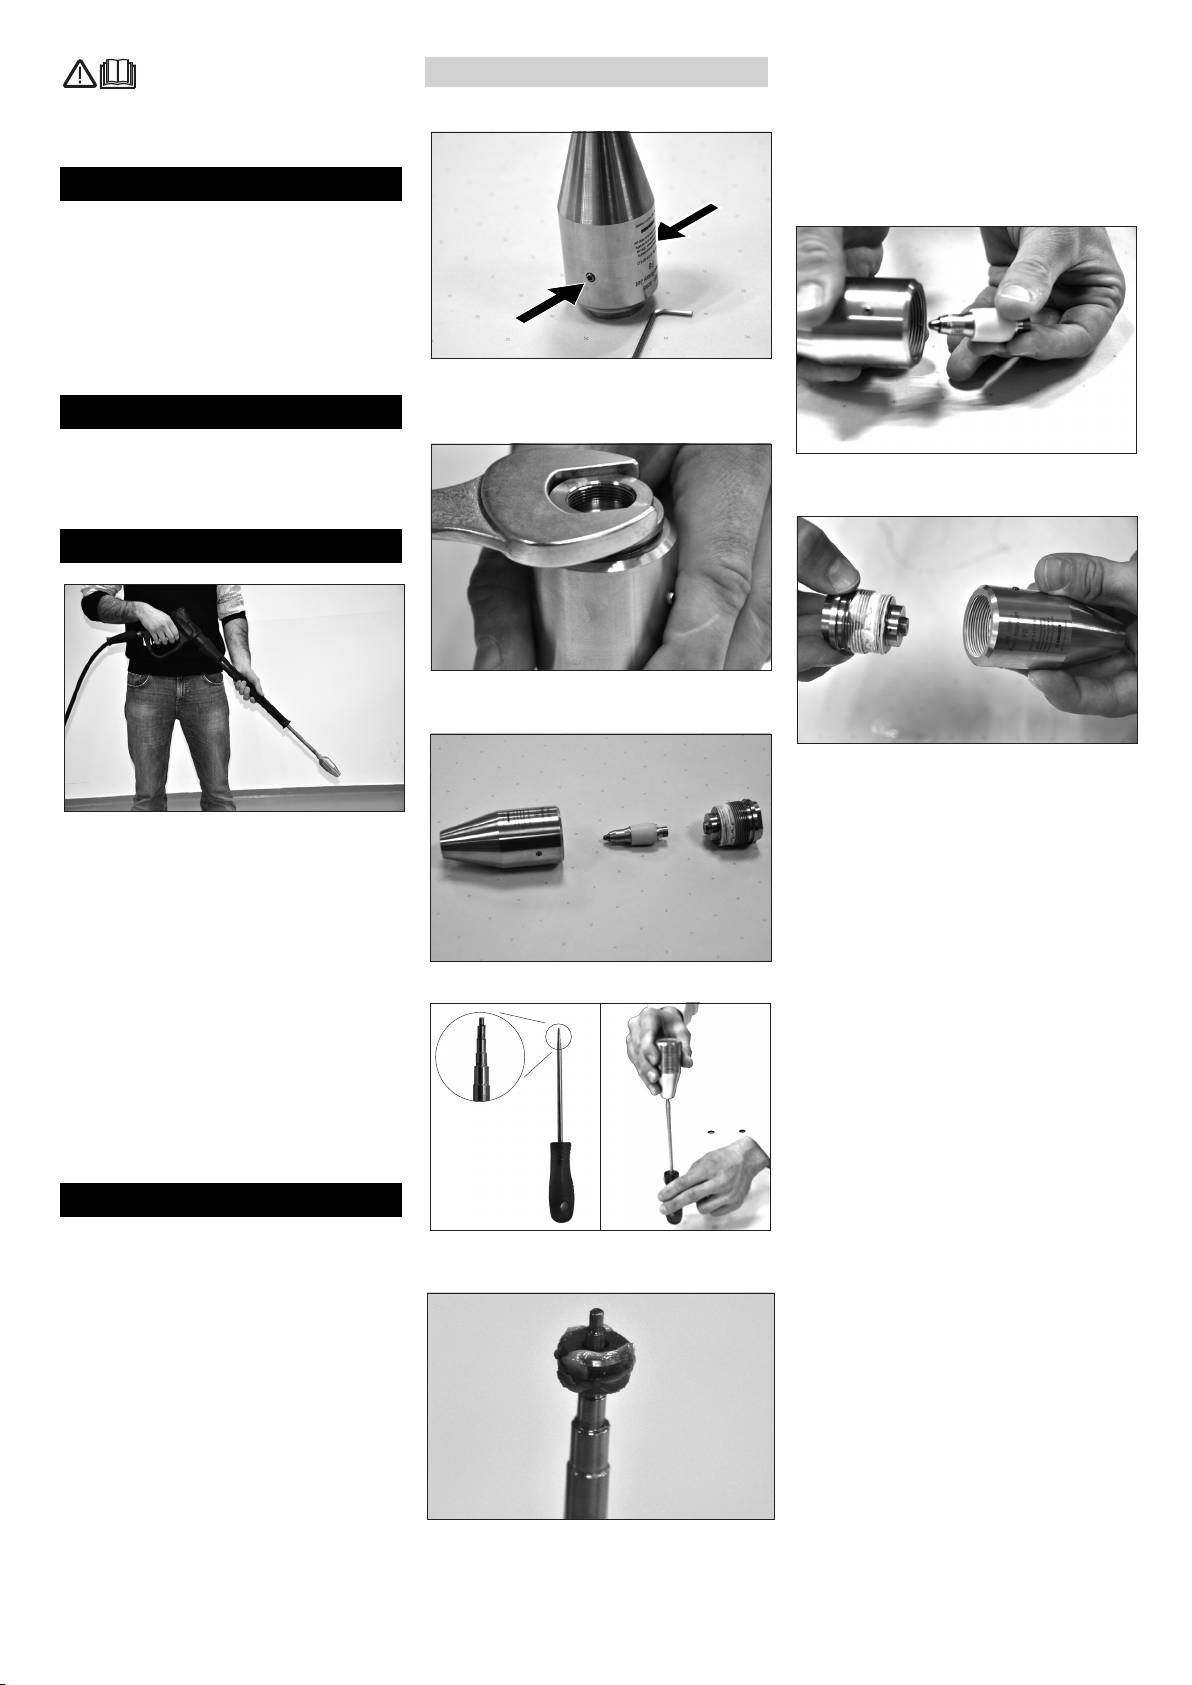
Sitz mit Spezialwerkzeug (Teilenum-
Wartung
mer 6.025-233.0) herausdrücken.
Wartungsarbeiten sind nötig bei:
– ungleichmäßiger oder keiner Rotation
– schlechtem Stralbild
Neuen Sitz auf das Spezialwerkzeug
setzen.
- 1
3DE
Please read and comply with
The tapered recess of the seat must
Install repair kit, replace seat
these original instructions prior
point toward the handle of the special
to the initial operation of your appliance and
English
Clean the outside of the nozzle.
tool.
store them for later use or subsequent own-
Grease the seat using silicone grease
ers.
(part no. 6.288-044.0).
Press the seat into the nozzle casing,
Safety instructions
do not pound in.
Danger!
Risk of injury due to defective appliance.
Check the faultless condition of the appli-
ance before using it. The appliance is not
fit for use if it is not in a faultless condition.
The appliance may not be modified.
Please observe the safety instructions of
Unscrew both threaded pins until about
your high-pressure cleaner.
2 thread lines protrude from the nozzle
Proper use
casing.
The nozzle is intended for use with high
pressure cleaners
Carefully insert the rotor into the nozzle
The water pressure indicated on the out-
casing and align with the seat.
side of the nozzle must not be exceeded.
Operation
Point the nozzle downward and open
the casing (key width 27).
Grease the thread on the drive cover
with grease (part no. 6.288-079.0).
Point the nozzle downward, align the
When opening the hand spray gun,
rotor in the seat and screw the drive
point the spray lance with the nozzle
cover in fingertight.
downward to prevent wear on the noz-
Tighten the threaded pins.
zle.
Begin the cleaning work with a nozzle
distance of 20 to 30 cm.
Determine the most favourable nozzle
Remove the rotor.
distance by slowing approaching the
cleaning object.
Protect the nozzle from contamination
during work breaks - do not leave it in
the water.
After your work is done, clean the noz-
zle on the inside and outside, dry and
grease it.
Store the nozzle in a dry place.
Maintenance
Maintenance tasks are required for:
Press the seat out using special tools
– uneven or no rotation
(part no. 6.025-233.0).
– poor spray pattern
Place the new seat on top of the special
tool.
