Samsung ITP5012L: GETTING STARTED
GETTING STARTED: Samsung ITP5012L
GETTING STARTED
This chapter describes the procedure for setting the user environment after installing and
booting the ITP-5012L IP phone.
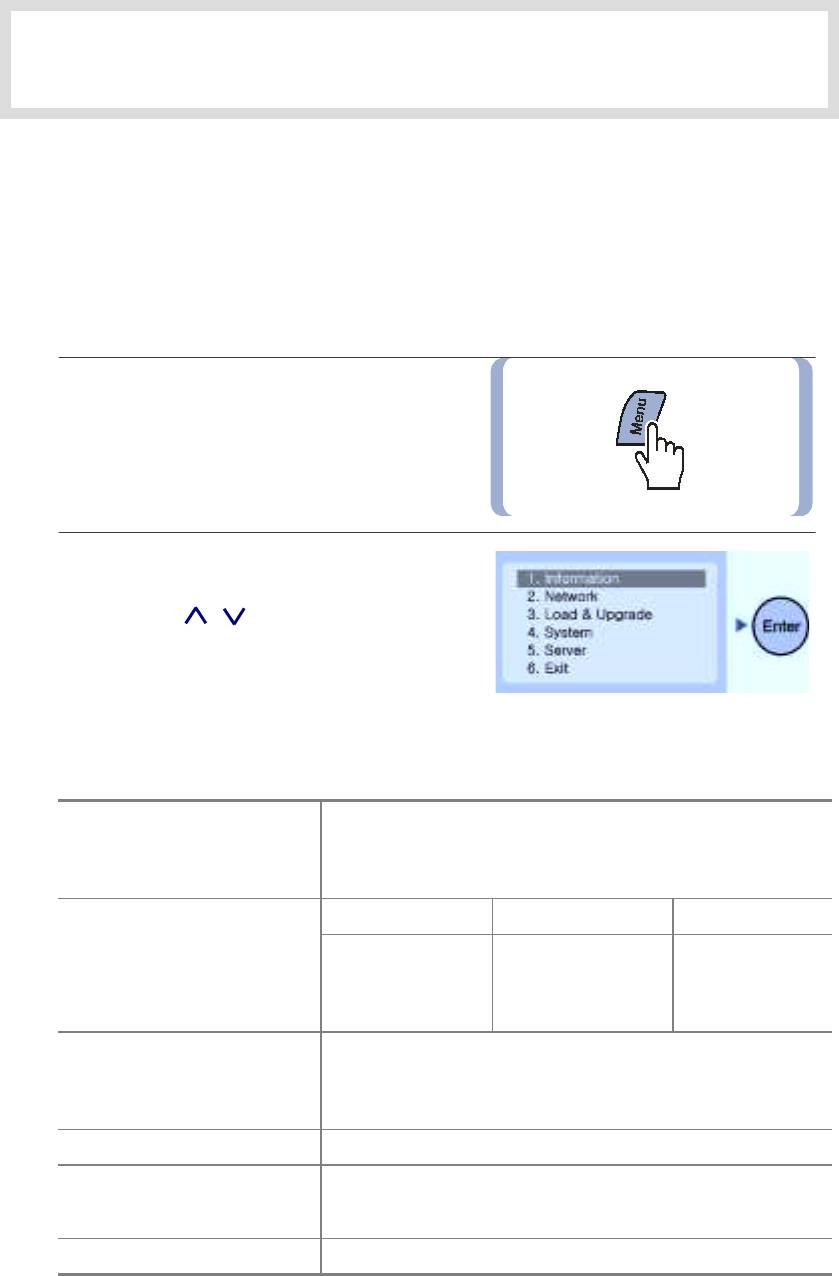
1. Entering the Environment Setup Mode
When the IP phone is first installed or the system settings have changed, you must set the data
network environment settings through the environment setup menu. This menu also allows you to
designate the TFTP server for upgrading the IP phones programs.
1.
Connect the power adaptor while pressing
the
[Menu]
button.
2.
The environment setup menu appears
on the LCD screen.
Press the
[ ]/[ ]
direction button
to move to between the menus, and press
the
[Enter]
button to select.
Setup Menu Structure
Setting items are built in the below structure.
1. Version
2. Network
1. Information
3. Load Option
4. MAC address
Manual IP DHCP PPPoE
1. Mode
1. Mode 1. Mode
2. Network
2. IP
2. ID
3. Netmask
3. Password
4. Gateway
1. Load Option
2. Upgrade Program
3. Load & Upgrade
3. Upgrade Bootrom
4. Format
4. System
1. Password(* Not Used)
1. Server IP
5. Server
2. ID
3. Password
6. Exit
© SAMSUNG Electronics Co., Ltd.
Page 25
GETTING
Page 26
© SAMSUNG Electronics Co., Ltd.
S
TARTED
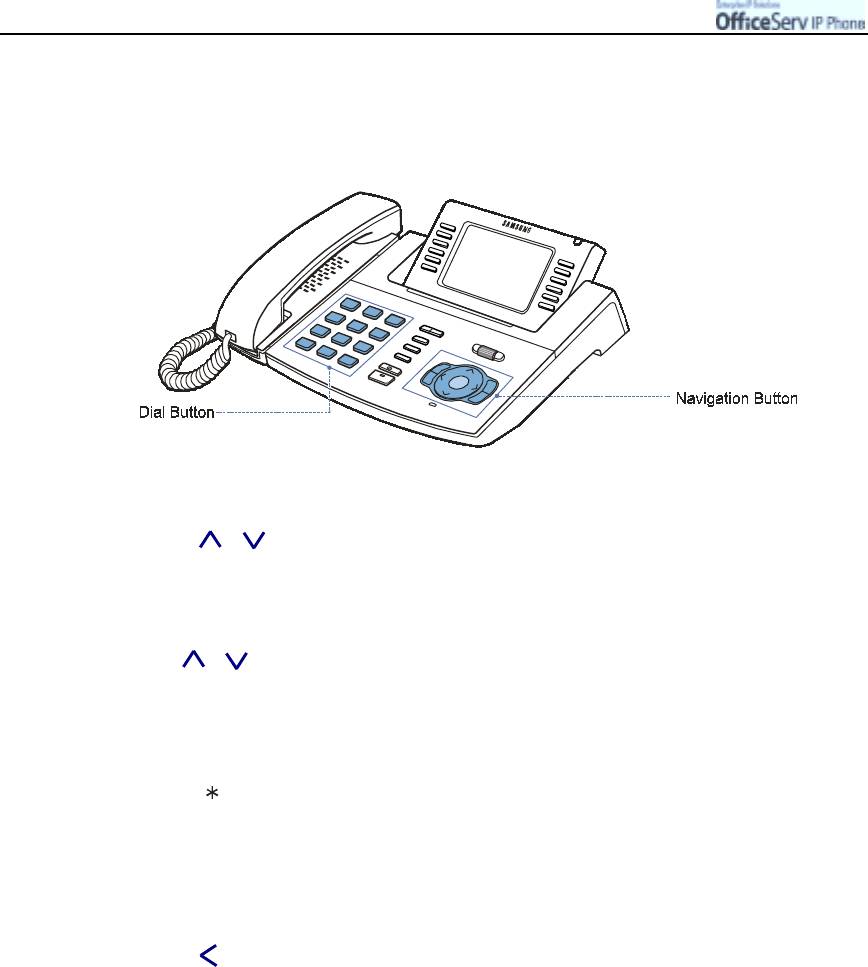
2. Editing
The buttons and functions below are used for selecting a menu from the LCD screen and
entering/cancelling/saving a value.
Moving between Menus
!
Press the [ ]/[ ] direction button to move to a menu and press the [Enter] button, or
press the number of the menu using the dial buttons from [0] to [9].
!
Press the [Menu] button to move to the environment setup main menu.
!
Press the [End] button to move to the previous menu without saving the entry.
!
Use the [ ]/[ ] direction button to move to other menus.
Entering Numbers, Characters, and Period(.)
!
Enter a number or character using the dial buttons [0]~[9].
!
Press the [ ] button to enter a period.
(Refer to the ‘Entering Characters’ section of ‘Things You Should Know’ for procedures on
entering characters.)
Deleting Entries
!
Press the [ ] button or [Cancel] button to erase entries by moving the cursor to the left.
Saving Entries
!
Press the [Enter] button to save the entries.
Cancelling Settings
!
Press the [End] button to move to the previous menu without saving the entry.
GETTING
© SAMSUNG Electronics Co., Ltd. Page 27
S
TARTED
3. Network Settings
You can verify or change the network environment.
1.
Use the [ ]/[ ] button to move to
the [2. Network] menu and press
the [
Enter
] button.
2.
Move to the
[1. Mode]
submenu and
press the
[Enter]
button.
3.
Select
[1. Manual IP] menu
to
directly enter the phone’s IP address.
"
Select [2. DHCP] to let your data network
automatically allocate the IP address.
The IP Address, Subnet Mask,
and Gateway values are automatically
set and are not displayed on the LCD screen.
"
Select [3. PPPoE] to use a broadband network such
as ADSL. In this case, you should enter the
ID and password which was given from
broadband network supplier.
4.
After selecting the required mode a message
confirming the mode is displayed for 2
seconds.
GETTING
Page 28
© SAMSUNG Electronics Co., Ltd.
S
TARTED
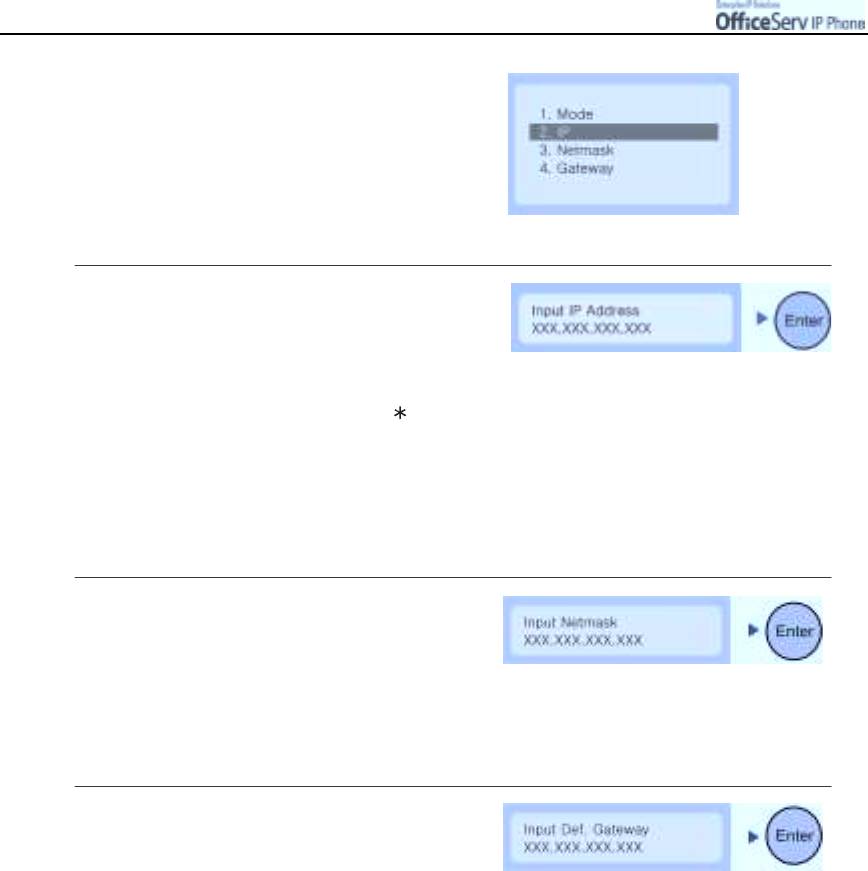
5.
The upper menu is displayed again.
6.
Select
[2. IP]
to display the current
IP address of the IP phone.
No address is displayed if an IP address
is not set.
Use the dial buttons [0]~[9] and [ ] to
enter a new IP address, and press the
[Enter]
button.
"
Be careful not to enter a duplicate
IP address since the data network will not
support duplicated IP addresses.
7.
Select
[3. Netmask]
to display the current
Netmask address of the IP phone.
To change the Netmask address,
enter a new address and press
the
[Enter]
button.
8.
Select
[4. Gateway]
to display the current
Gateway address of the IP phone.
To change the Gateway address,
enter a new address and press
the
[Enter]
button.
GETTING
© SAMSUNG Electronics Co., Ltd. Page 29
S
TARTED
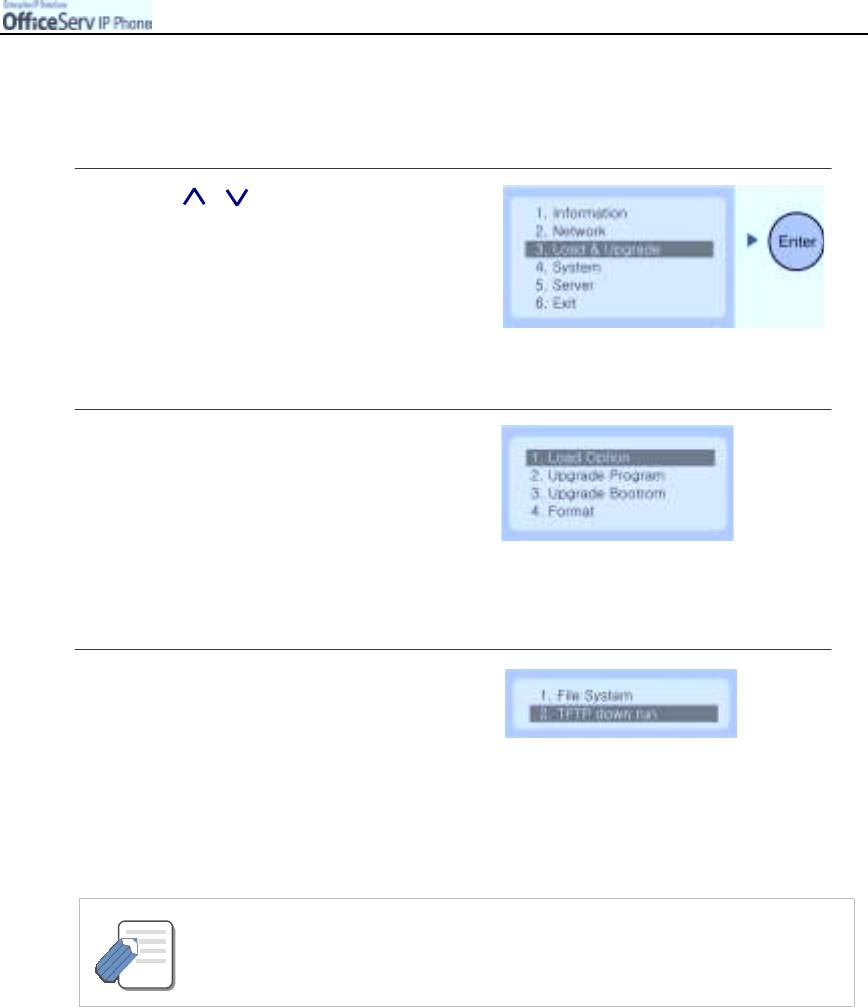
4. Load
&
Upgrade Settings
You can verify or change the upgrade environment of the IP phone.
1.
Use the [ ]/[ ] button to move to
the
[3. Load & Upgrade]
menu
and press
[Enter]
button.
2.
The submenus are displayed.
3.
Select
[1. Load Option]
and designate
the source of program for the IP phone.
"
Select [1. File System] to operate programs
saved in the IP phone flash memory.
"
Select [2. TFTP down run] to download
programs saved in the TFTP server to
the RAM memory of the IP phone.
- When you select [2.TFTP down run], you must consult System Administrator to know
the location of the server.
NOTE
GETTING
Page 30
© SAMSUNG Electronics Co., Ltd.
S
TARTED
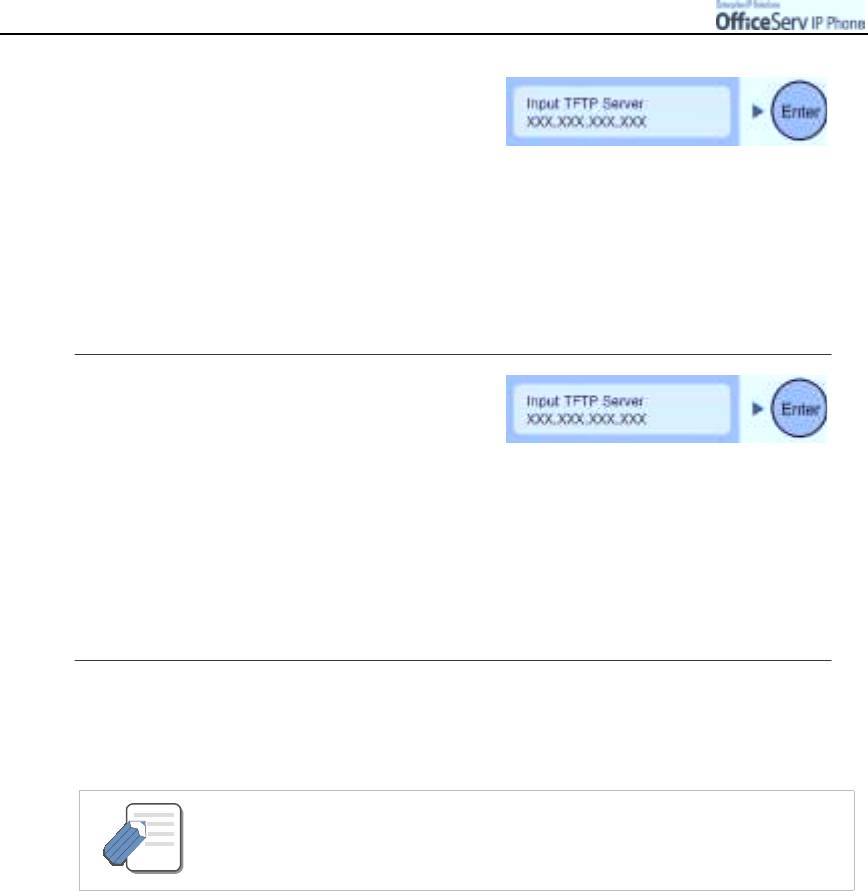
4.
The
[2. Upgrade Program]
menu is
used for upgrading the phone’s program.
Enter the IP address of the TFTP
server from which the program should
be downloaded.
Press the
[Enter]
button to start the program download process.
If the correct TFTP server IP address is programmed
press
[Enter]
to start the download process.
5.
The
[3. Upgrade Bootrom] menu
is
used for upgrading the phone’s Bootrom.
Enter the IP address of the TFTP server
from which the Bootrom program should
be downloaded, and press the
[Enter]
button.
"
The IP phone is rebooted after downloading
the Bootrom program and the Environment
Setup Main Menu appears. At this time, you
don’t need press the [Menu] button.
6.
The
[4. Format]
menu is used to delete previously saved programs.
Check with your System administrator before using this option.
- After formatting the IP phone, download a new program through the [2. Upgrade
Program] menu.
NOTE
GETTING
© SAMSUNG Electronics Co., Ltd. Page 31
S
TARTED
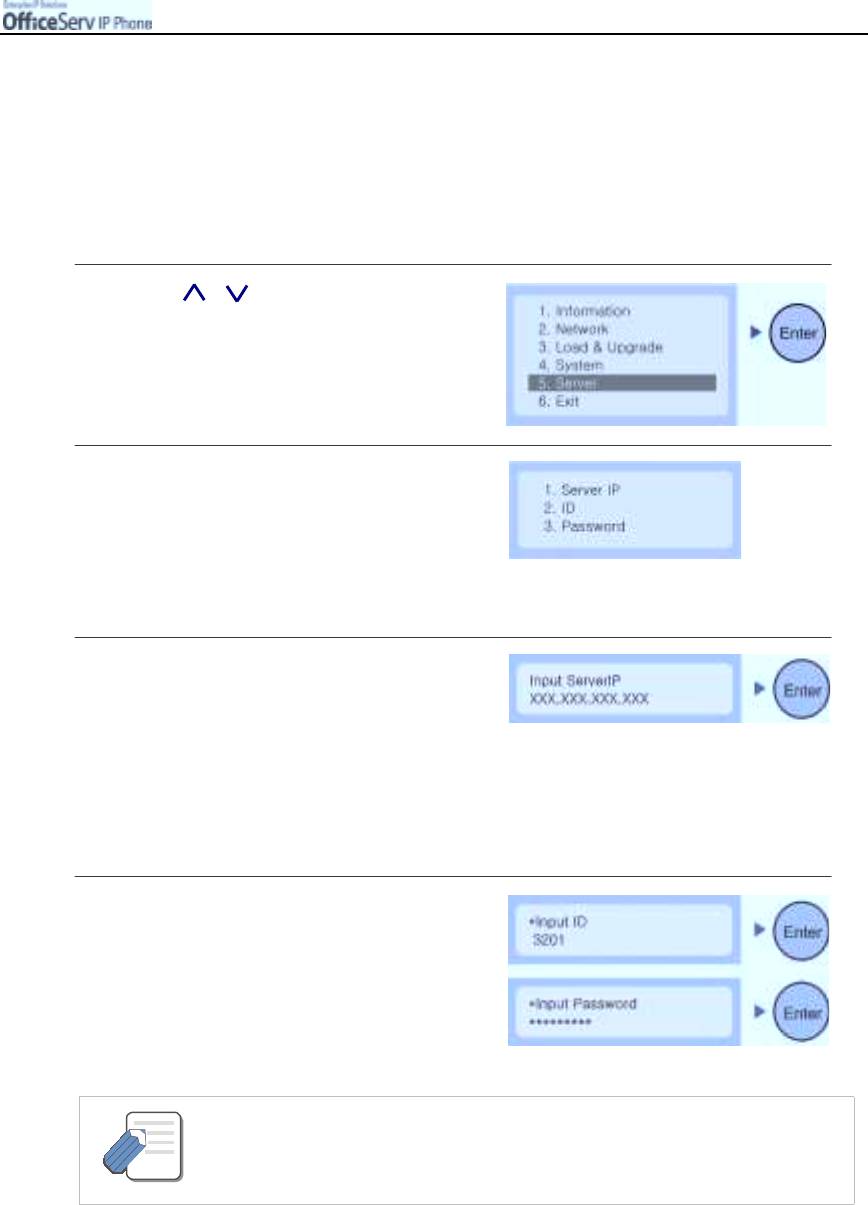
5. Setting System Authentication Information
This function is used to set the IP address of the OfficeServ system connected to the IP phone and
the authentication ID and password of the IP phone. The ID and password of this menu are used
when initially setting the IP phone and are not required while using the functions of the IP phone.
If a function of the IP phone(such as Lock) requests a password, enter the system password set the
Config/Password menu.
1.
Use the [ ]/[ ] button to move to
the
[5. Server]
menu and press
the
[Enter]
button.
2.
The submenus are displayed.
"
If the OfficeServ system is set to request
the ID and password of the IP phone,
[2. I D] and [3. Password] shall be entered.
3.
The
[1. Server IP]
menu is used for
verifying or changing the IP address
of the OfficeServ system. Verify the current
IP address of the OfficeServ system before
making any changes. To change the
IP address, enter a new address and
press the [Enter] button.
4.
[2. ID]
and
[3. Password]
are user
information required for connecting to
the OfficeServ system.
Contact your System Administrator for the
correct ID and password.
- The ID is composed of maximum 16 letters and numbers(Capital and lower case
letters are not distinguished). The password is composed of a maximum 8 numbers.
NOTE
The password is displayed as * when entered.
GETTING
Page 32
© SAMSUNG Electronics Co., Ltd.
S
TARTED
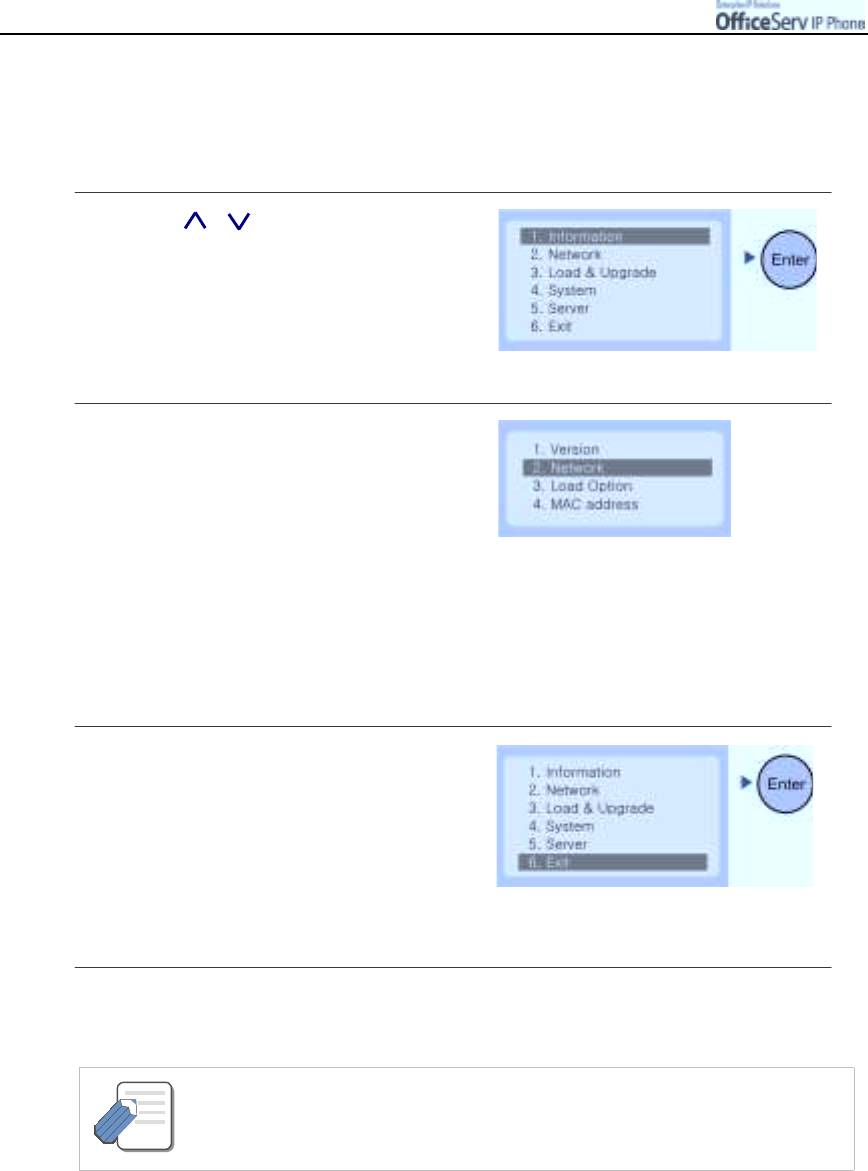
6. Verifying Settings
You can verify the IP phone settings after setup.
Incorrect settings can be adjusted after verification.
1.
Use the [ ]/[ ] button to move to
the
[1. Information]
menu and press
the
[Enter]
button.
2.
The submenus are displayed.
Select each menu and verify the settings.
Check, the
[2. Network]
menu
settings are correct before
using the IP phone.
7. Exiting Setup
This option will exit the environment setup menu and reboot the IP phone.
1.
Return to the main menu of environment
setup and select the
[6. Exit]
menu and
press the
[Enter]
button.
2.
The settings are saved and the IP phone is rebooted.
- You should consult your System Administrator prior to changing any environment
settings of the IP phone.
NOTE


