Samsung AW07A1SE: инструкция
Раздел: Бытовая, кухонная техника, электроника и оборудование
Тип: Кондиционер
Инструкция к Кондиционеру Samsung AW07A1SE
AW07A1SE/AW09A1SE-1 3/12/99 5:27 PM Page 4-1
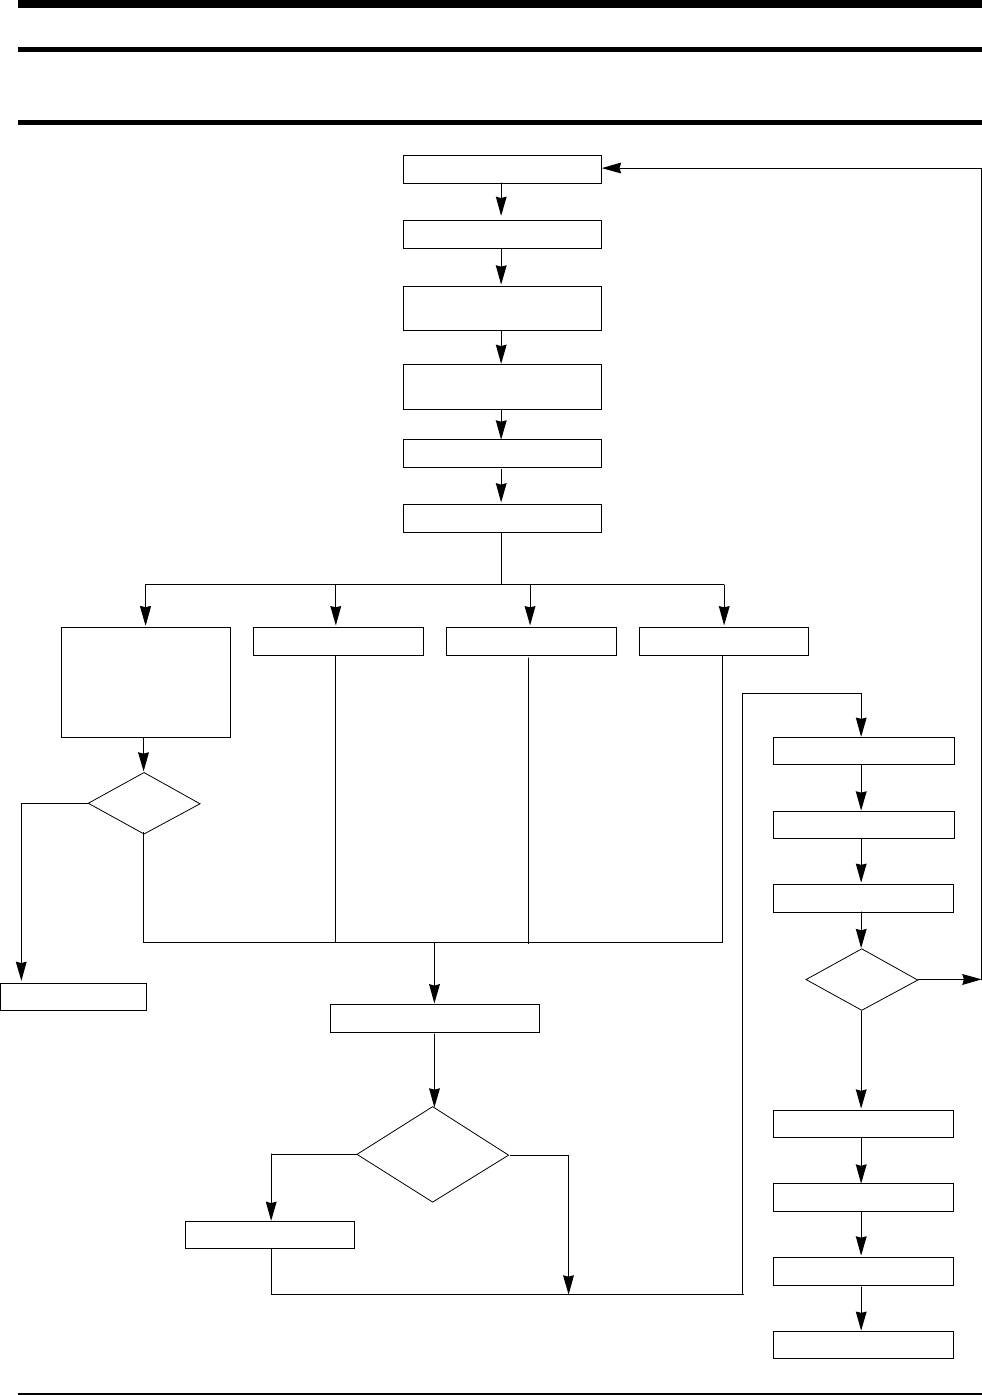
4. Disassembly and Reassembly
4-1. Compressor Replacement Flow Chart
Locate cause of defect
Release refrigerant
Disconnect electrical
wiring from compressor
Cut refrigerant lines
from compressor
Plug disconnected lines
Replace compressor
Inspect electrical
Solder discharge line
Solder suction line Use nitrogen gas
wiring for defects,
and terminals for
correct and secure
connections
Perform soldering function
Problem?
Fill system with nitrogen gas
Y N
Check for leakage
Y
Leakage?
Corrective action
Check refrigerant oil level
N
Release nitrogen gas?
Low oil level?
NY
Evacuate system
Add oil as necessary
Recharge system
Pinch and braze filling tube
Samsung Electronics 4-1
AW07A1SE/AW09A1SE-1 3/12/99 5:27 PM Page 4-2
4-2 Checking the oil
Put approximately 10cc oil into a transparent container and test it.
4-2-1 Oil quality
Oil Condition
Condition of
Remarks
Refrigerant Cycle
Color
Odor
Normal
Straw Yellow
No Odor
Return with the system
Over-heated
Brown Color
-
Change the oil
Motor Damage
Dark Brown
Pungent oil
Change the oil
4-2-2 Changing and adding refrigerant oil
1. Change the compressor - DO NOT recharge the oil as the compressor itself is
already charged.
2. Change the condenser .... add 50cc
3. Change the evaporator .... add 50cc
4. When the refrigerant is replaced .... add 30cc oil.
5. After vacuum is completed, the oil is filled through the high pressure side.
6. In the event of a refrigerant leak, generally it is not necessary to add oil.
(unless the oil has leaked significantly).
4-3 Refrigerant Oil Specifications
Oil ChargeModel Oil specification
AW07A0SE
280cc
AW07A1SE
SONTEX 200LT
AW09A0SE
360cc
AW09A1SE
4-2 Samsung Electronics4-2
AW07A1SE/AW09A1SE-1 3/12/99 5:28 PM Page 4-3
4-3 Disassembly and Reassembly Procedure
Stop operating the air conditioner, and pull out the power cord before repair.
No. Part name Procedures Remarks
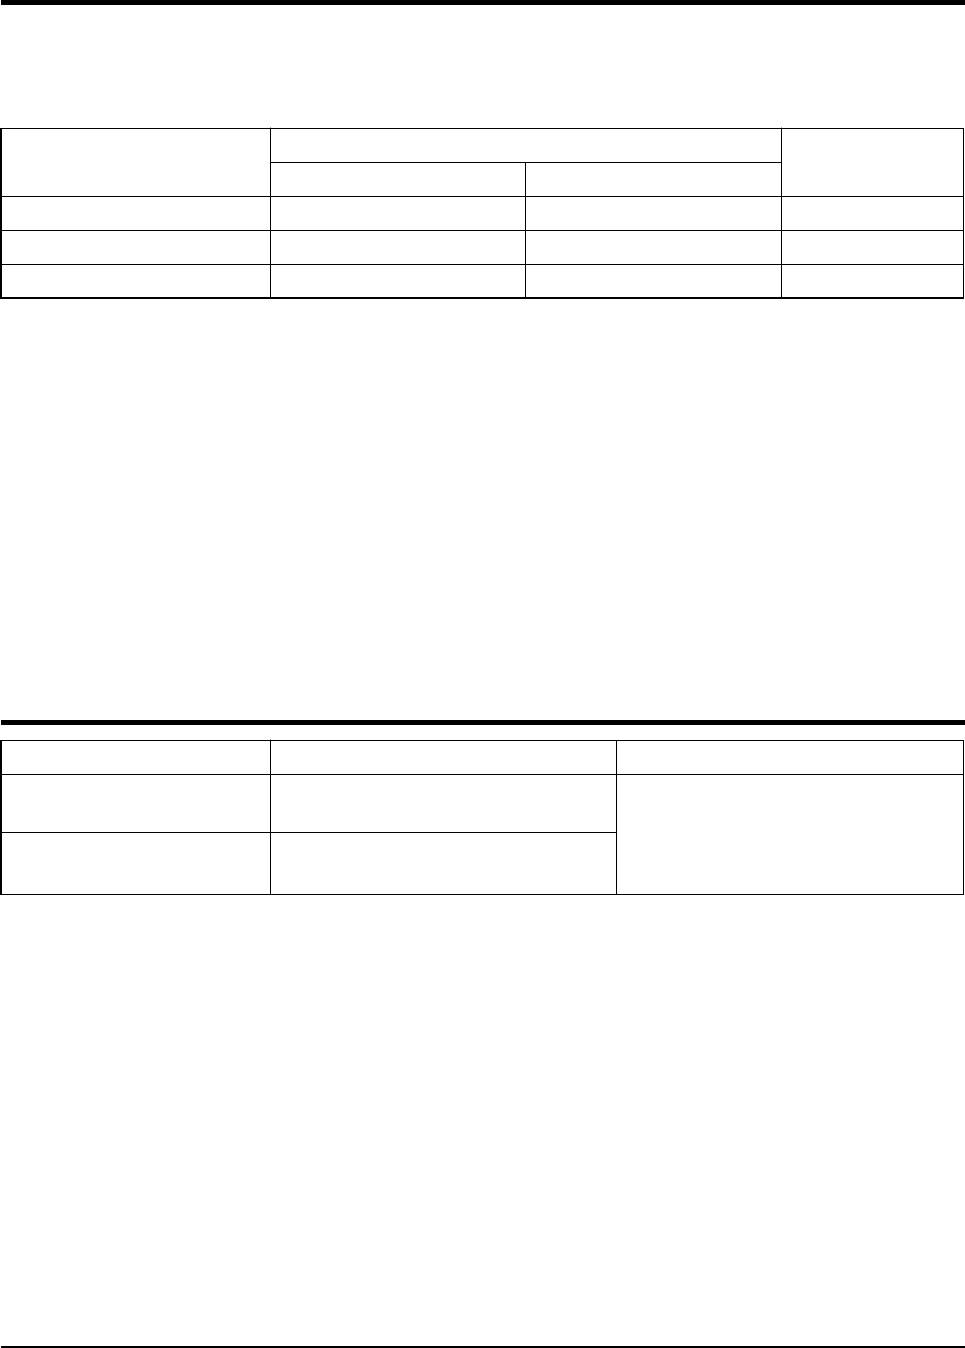
Ass'y Grill
1. Pull the panel front and remove the screw
①
on the grille
2. Push the grille left side and pull up
Ass'y Cabinet
➁
1. Remove the two screws both side cabinet.
2. Pull the front both side, and remove the unit
from the cabinet.
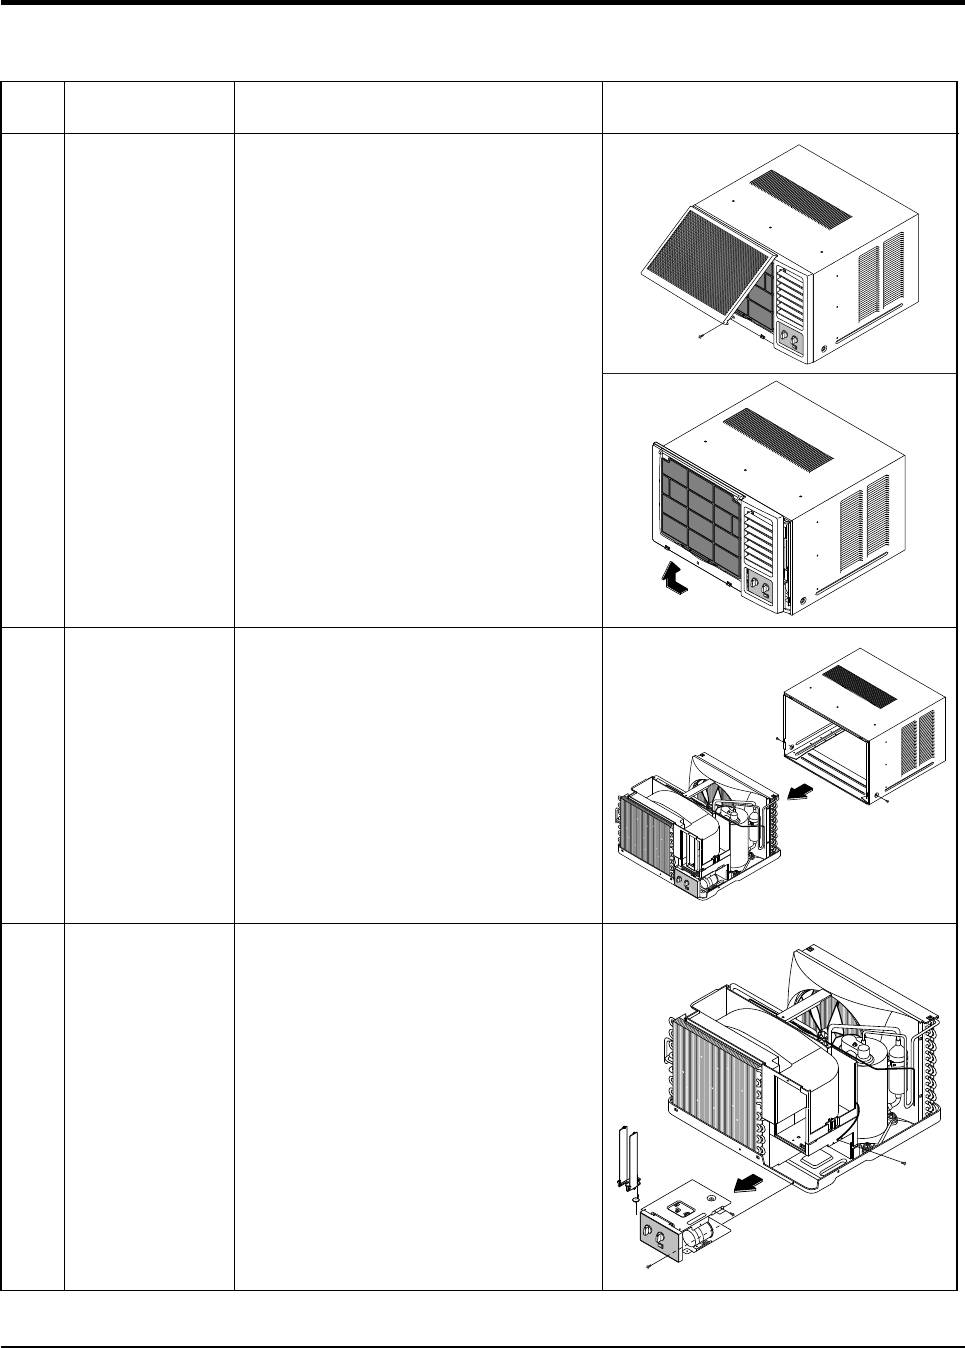
Ass'y Control
1. Remove the blade V and arm blade
➂
2. Remove 2 screws, and earth wire screw.
3. Remove two lead wire assemblies.
4. Take out the control box forward.
Samsung Electronics 4-3

AW07A1SE/AW09A1SE-1 3/12/99 5:28 PM Page 4-4
Disassembly and Reassembly
No. Part name Procedures Remarks
➃
Frame Up
1. Remove 6 screws on the Frame up
and remove the Frame up and the reinf
from case cond.
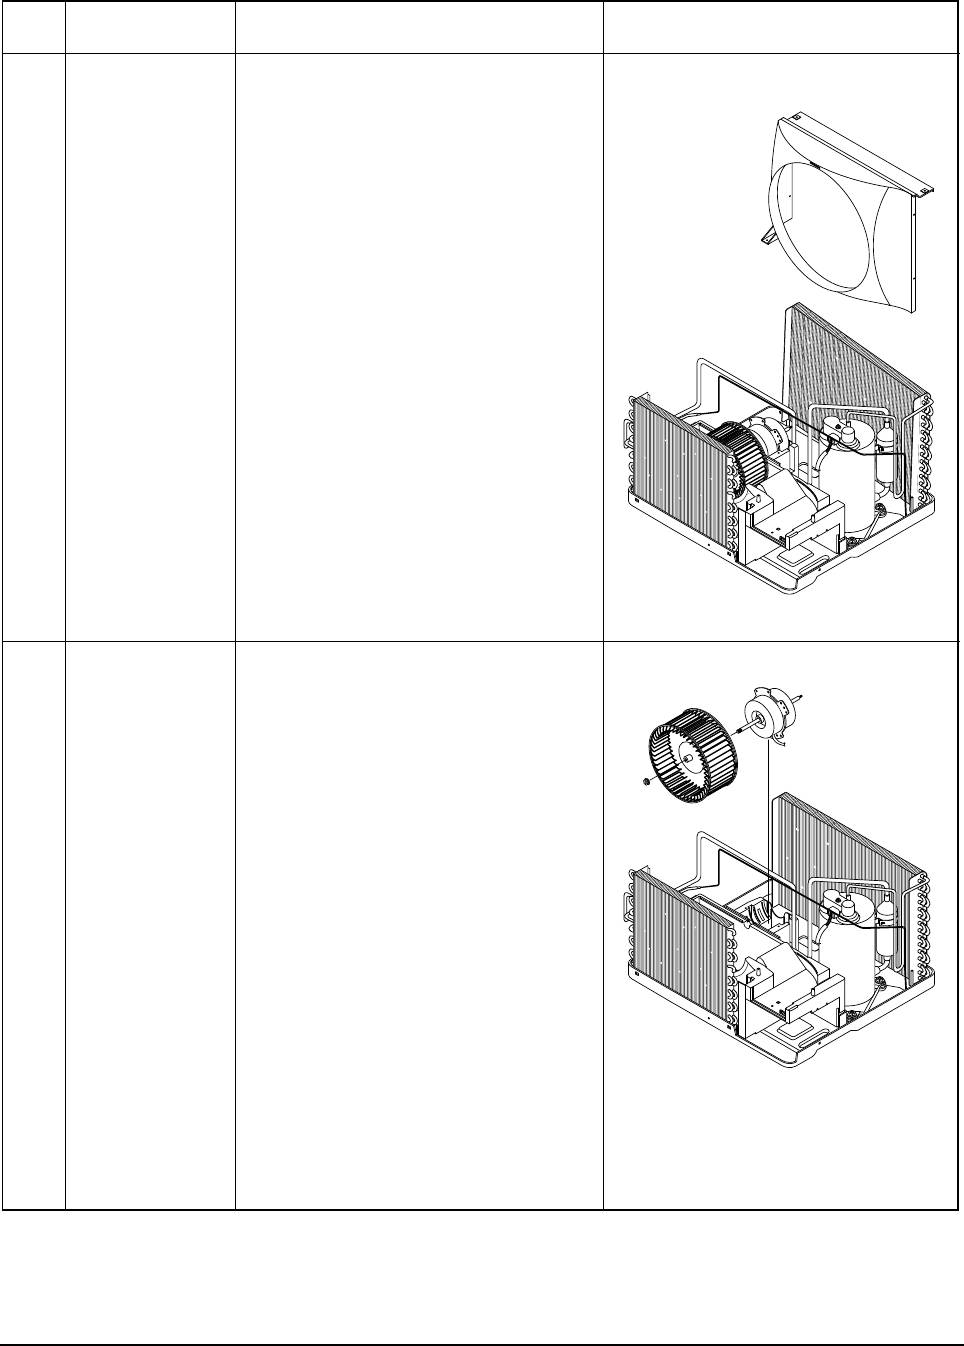
Case Cond &
1. Remove two screws on the bottom side,
➄
Propeller Fan
and 4 screws on the case cond.
2. Pull up the case cond and separate the
cond case from the cond.
3. Remove the nut flange, and remove the
propeller fan
4-4 Samsung Electronics
AW07A1SE/AW09A1SE-1 3/12/99 5:28 PM Page 4-5
Disassembly and Reassembly
No. Part name Procedures Remarks
➅
Cond Casing
1. Remove the cond casing
➆
Blower & Motor
1. Move the motor & blower toward the
evap, and lift up the motor & blower
from the frame low.
Samsung Electronics 4-5

