Samsung LW-46 G15 W: инструкция
Раздел: Бытовая, кухонная техника, электроника и оборудование
Тип: Телевизор
Характеристики, спецификации
Инструкция к Телевизору Samsung LW-46 G15 W

LCD TV
LW46G15W
Owner’s Instructions
Before operating the unit,
please read this manual thoroughly,
and retain it for future reference.
PICTURE IN PICTURE (PIP)
TELETEXT
This dvice is a class B digital apparatus.
BN68-00746A(GAIA2_Euro_ENG) 2004/08/23 03:54 PM Page 1
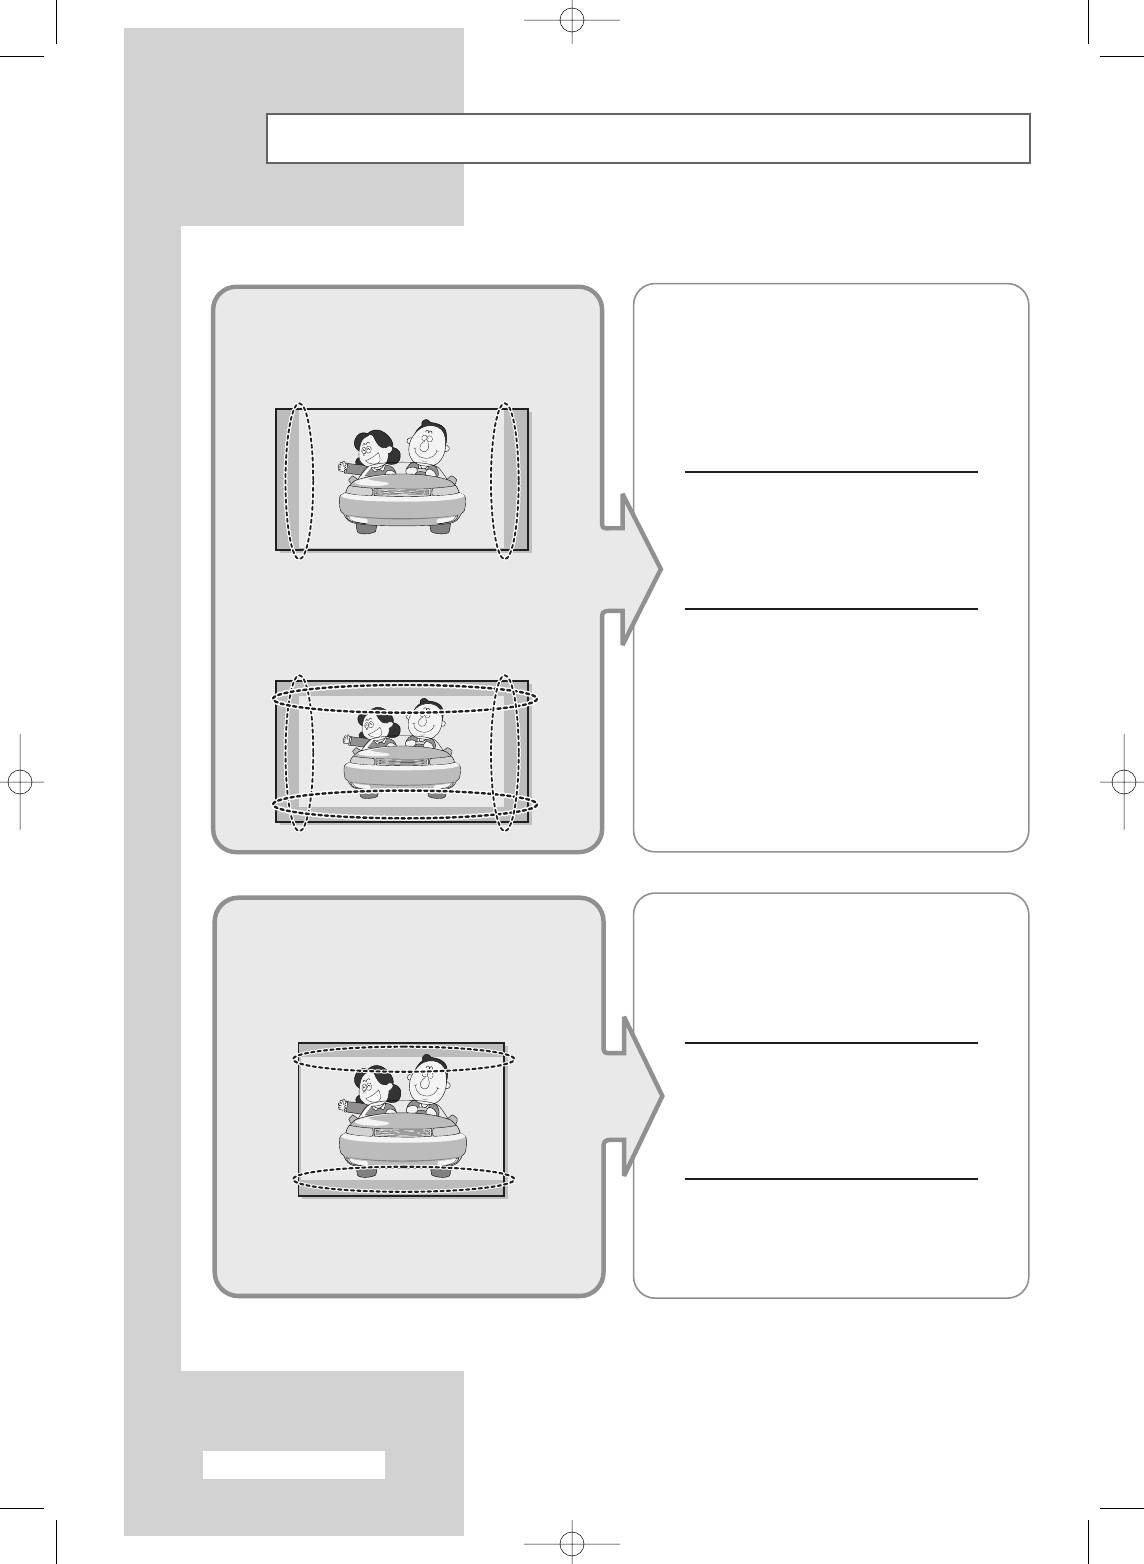
Precautions When Using the Still Image
The still image may cause permanent damage to the TV screen.
• Digital Ready TV: When you select
Although digital broadcasting must be in
the regular screen (4:3) mode to
the wide screen (16:9) HD format,
watch an SD-grade digital
broadcasters sometimes show programs
broadcast (and the set-top box
made originally in the regular screen
output is 480p).
format (4:3) by converting the signals into
digital form, in which case the left and
right side edges of the screen are
cropped.
Note : If the borders at the left, right and
the center of the screen remain
fixed for an extended period of time,
the amounts of light transmission
will also remain varied and as a
• Digital Ready TV: When you select
result the borders may leave traces.
the wide screen (16:9) mode to
watch an SD-grade digital
broadcast (and the set-top box
output is 1080i).
Do not leave the screen in pause mode
for extended periods of time as you may
experience the same problem with
products by other manufacturers.
• Digital Ready TV: When the
When you watch a digital HD-grade
TV receives HD-grade signals
broadcast on a regular (4:3) TV with the
(and the set-top box output is 1080i).
screen size “16:9” or “Panorama” selected,
you will be able to watch the program but
the top and bottom edges of the screen will
be cropped.
Note : If the borders at the top, bottom
and the center of the screen remain
fixed for an extended period of time,
the amounts of light transmission
will also remain varied and as a
result the borders may leave traces.
Do not leave the screen in pause mode
for extended periods of time as you may
experience the same problem with
products by other manufacturers.
English - 2
BN68-00746A(GAIA2_Euro_ENG) 2004/08/23 03:54 PM Page 2
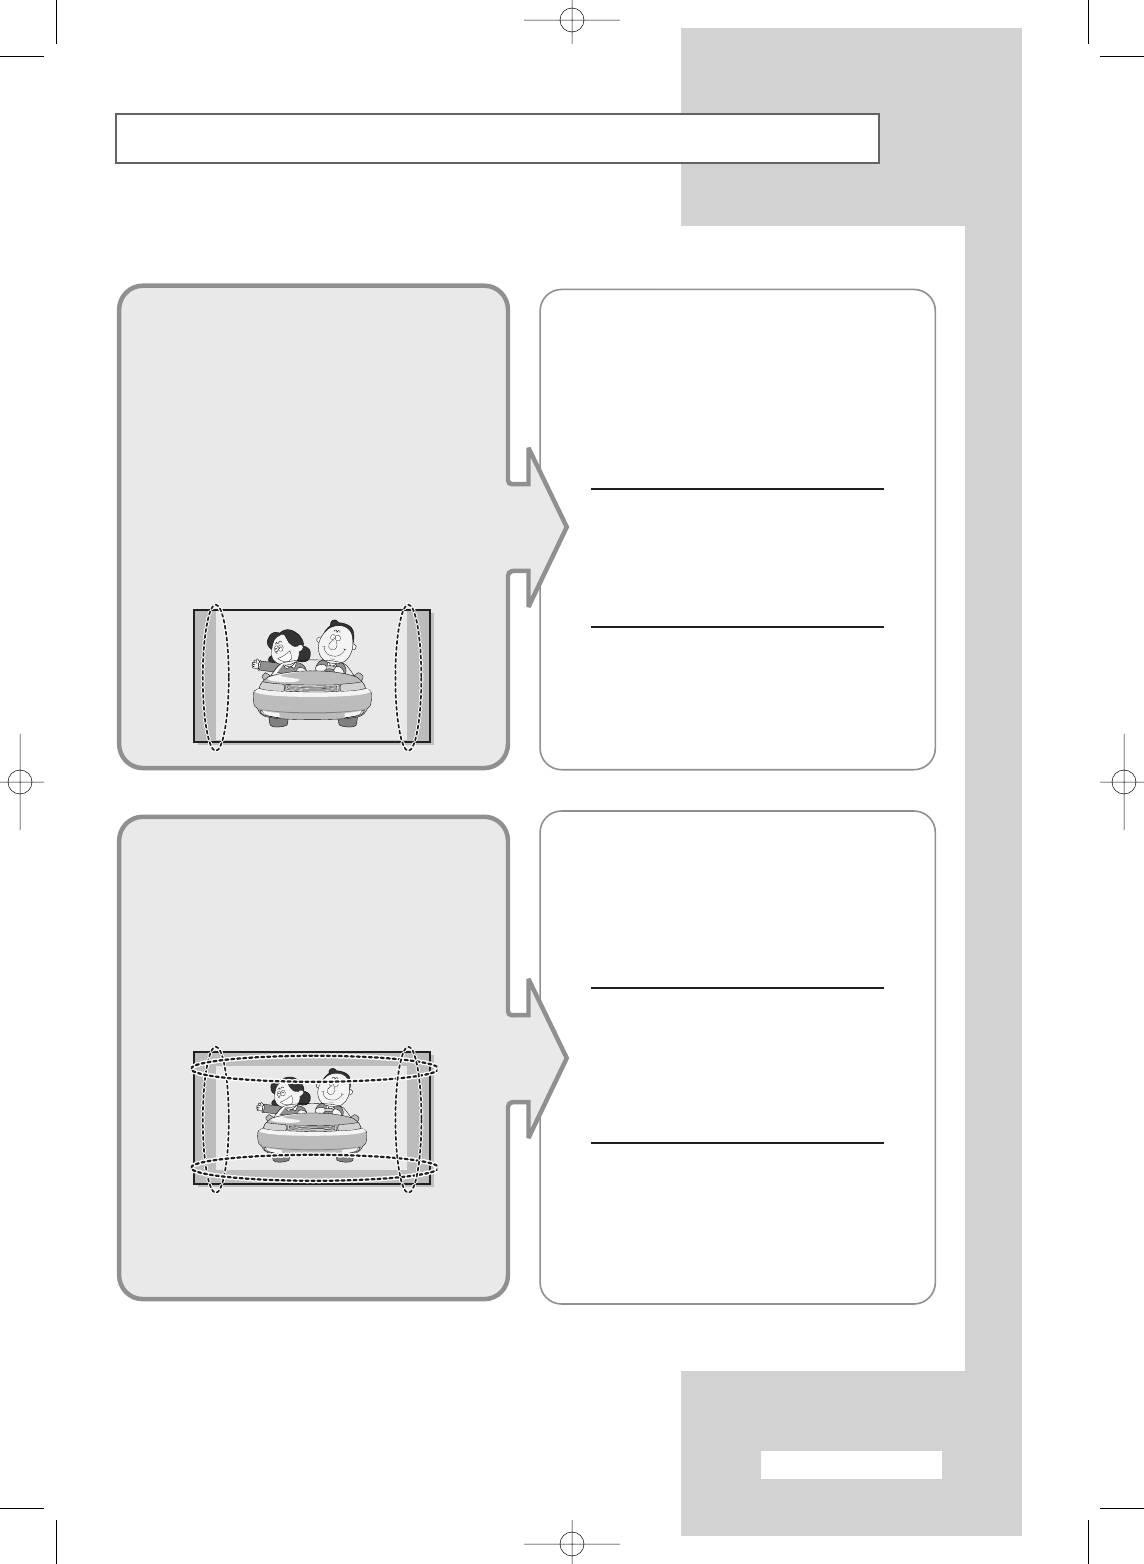
Precautions When Using the Still Image (continued)
• Integrated Digital TV
Although digital broadcasting must be in
(Wide-screen): When the TV
the wide screen (16:9) HD format,
receives SD-grade (regular)
broadcasters sometimes show programs
broadcasting signals (receives
made originally in the regular screen
480p regular signals).
format (4:3) by converting the signals into
digital form, in which case the left and
• Digital Ready TV (wide-screen):
right side edges of the screen are
digital TV: When the TV receives
SD-grade (regular) broadcasting
cropped.
signals (with a set-top box).
Note : If the borders at the left, right and
• When you watch an analogue
the center of the screen remain
(regular) broadcast on a
fixed for an extended period of time,
wide-screen TV (with the 4:3
the amounts of light transmission
screen mode selected).
will also remain varied and as a
result the borders may leave traces.
Do not leave the screen in pause mode
for extended periods of time as you may
experience the same problem with
products by other manufacturers.
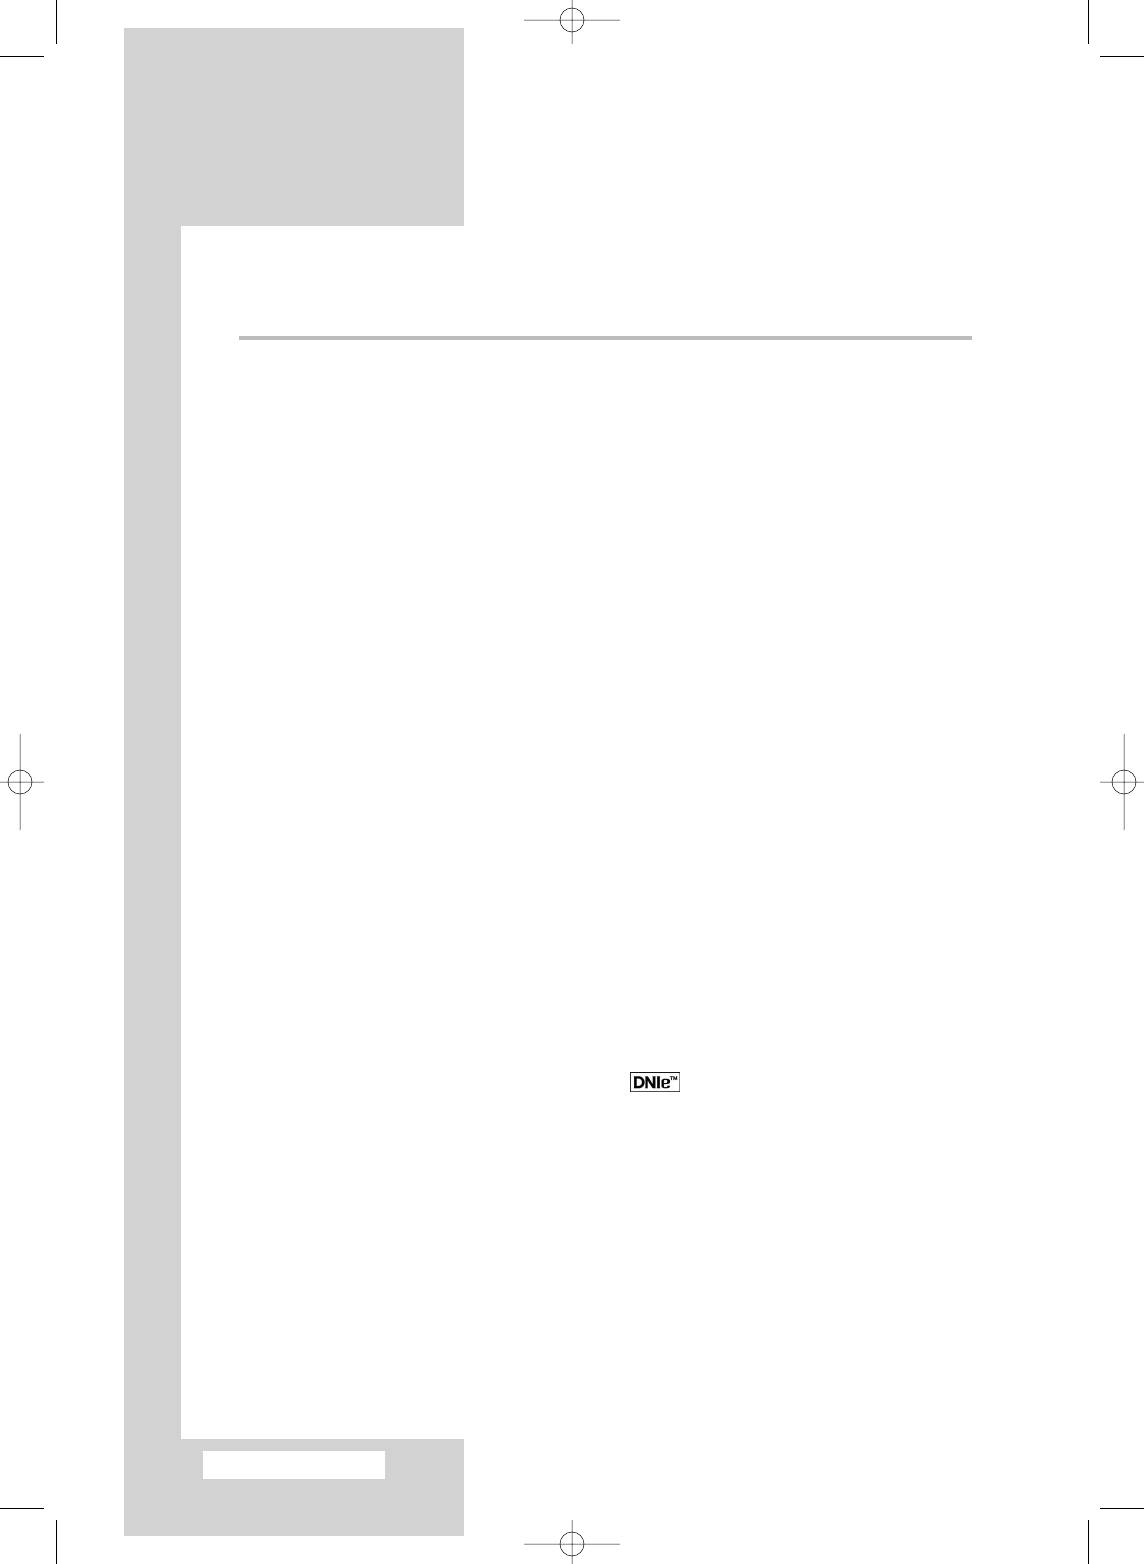
• When you watch a DVD, CD or a video
If you connect a DVD player, computer or
in wide screen (21:9) format on a wide-
a game console to the wide-screen TV
screen (16:9) TV.
and watch a movie or play a game in
regular (4:3) or wide (21:9) screen mode,
• When you connect a computer or a
the left and right side edges, or the top
game console to the TV and select the
and bottom edges of the screen will be
4:3 screen mode.
cropped.
Note : If the borders at the left, right and
the center of the screen remain
fixed for an extended period of time,
the amounts of light transmission
will also remain varied and as a
result the borders may leave
traces.
Do not leave the screen in pause mode
for extended periods of time as you may
experience the same problem with
products by other manufacturers.
English - 3
BN68-00746A(GAIA2_Euro_ENG) 2004/08/23 03:54 PM Page 3
Contents
◆ CONNECTING AND PREPARING YOUR TELEVISION
■ Precautions When Using the Still Image ....................................................... 2
■ Control Panel................................................................................................. 6
■ Connection Panel .......................................................................................... 7
■ Inserting the Batteries into the Remote Control............................................. 8
■ Infrared Remote Control................................................................................ 9
■ Wall Installation Instructions.......................................................................... 10
■ Using the Anti-Theft Lock .............................................................................. 12
■ Connecting to an Aerial or Cable Television Network ................................... 13
■ Connecting a Satellite Receiver or Decoder.................................................. 13
■ Switching Your Television On and Off........................................................... 14
■ Placing Your Television in Standby Mode..................................................... 14
■ Familiarizing Yourself with the Remote Control............................................. 15
■ Plug & Play Feature....................................................................................... 16
■ Choosing Your Language.............................................................................. 17
◆ SETTING THE CHANNELS
■ Storing Channels Automatically..................................................................... 18
■ Sorting the Stored Channels ......................................................................... 19
■ Storing Channels Manually............................................................................ 20
■ Editing the Channels ..................................................................................... 22
■ Assigning Names to Channels ...................................................................... 23
■ Fine Tuning Channel Reception.................................................................... 24
◆ USING YOUR TELEVISION
■ Using the LNA (Low Noise Amplifier) Feature............................................... 25
■ Displaying Information................................................................................... 25
■ Changing the Picture Standard ..................................................................... 26
■ Customizing the Picture Settings................................................................... 27
■ Customizing the Picture Settings (PC or DVI mode) ..................................... 28
TM
■ DNIe
(Digital Natural Image engine) ............................................... 29
■ Viewing Picture In Picture (PIP) .................................................................... 30
■ Setting the My Colour Control Mode (Easy Control) ..................................... 32
■ Setting the My Colour Control Mode (Detail Control) .................................... 33
■ Setting the Dynamic Contrast........................................................................ 34
■ Setting the Brightness Sensor....................................................................... 34
■ Setting the Colour Weakness Enhancement................................................. 35
■ Selecting the Picture Size.............................................................................. 36
■ Setting the Blue Screen Mode....................................................................... 37
■ Freezing the Current Picture ......................................................................... 37
■ Changing the Sound Standard ...................................................................... 38
■ Customizing the Sound Settings ................................................................... 39
■ Adjusting the Volume Automatically .............................................................. 40
■ Setting up SRS TSXT.................................................................................... 41
■ Setting the Sub Woofer Output...................................................................... 42
English - 4
BN68-00746A(GAIA2_Euro_ENG) 2004/08/23 03:54 PM Page 4
Contents (continued)
◆ USING YOUR TELEVISION (continued)
■ Setting up the Melody Sound ........................................................................ 43
■ Selecting the Sound Mode ............................................................................ 44
■ Setting and Displaying the Current Time....................................................... 45
■ Setting the Sleep Timer................................................................................. 46
■ Switching the Television On and Off Automatically....................................... 47
■ Auto Screen Adjustment in PC Mode............................................................ 48
■ Setting the Image Lock in PC Mode.............................................................. 49
■ Setting the Screen Position in PC Mode ....................................................... 50
■ Initializing the Screen Settings in PC Mode................................................... 51
■ Viewing an External Signal Source ............................................................... 52
■ Redirecting an Input to the External Output .................................................. 53
◆ USING THE TELETEXT FEATURE
■ Teletext Feature ............................................................................................ 54
■ Displaying Teletext Information ..................................................................... 55
■ Selecting Display Options.............................................................................. 56
■ Selecting a Teletext Page.............................................................................. 57
◆ ADDITIONAL INFORMATION AND CONNECTIONS
■ Connecting to External Input/Output ............................................................. 58
■ Connecting to the RCA Input......................................................................... 59
■ Connecting to the S-Video Input.................................................................... 59
■ Connecting Headphones............................................................................... 60
■ Connecting to the Digital Audio Input ............................................................ 60
■ Connecting to the HDMI Input ....................................................................... 61
■ Connecting to the Component Input.............................................................. 61
■ Connecting to the Active Sub Woofer Speaker ............................................. 62
■ Connecting to the DVI Input .......................................................................... 63
■ Connecting to the PC(RGB) Input ................................................................. 63
■ Setting up Your PC Software (Windows only)............................................... 64
■ Input Mode (PC/DVI) ..................................................................................... 65
■ Pin Configurations ......................................................................................... 66
◆ RECOMMENDATIONS FOR USE
■ Programming the Remote Control for Other Components ............................ 67
- VCR Remote Control Codes ....................................................................... 68
- Cable box (CATV) Remote Control Codes.................................................. 69
- DVD Remote Control Codes ....................................................................... 69
■ Troubleshooting: Before Contacting Service Personnel................................ 70
■ Technical and Environmental Specifications................................................. 71
Symbols
☛
➢
Press Important Note
English - 5
BN68-00746A(GAIA2_Euro_ENG) 2004/08/23 03:54 PM Page 5

