Samsung LW-46 G15 W: ☛
☛: Samsung LW-46 G15 W
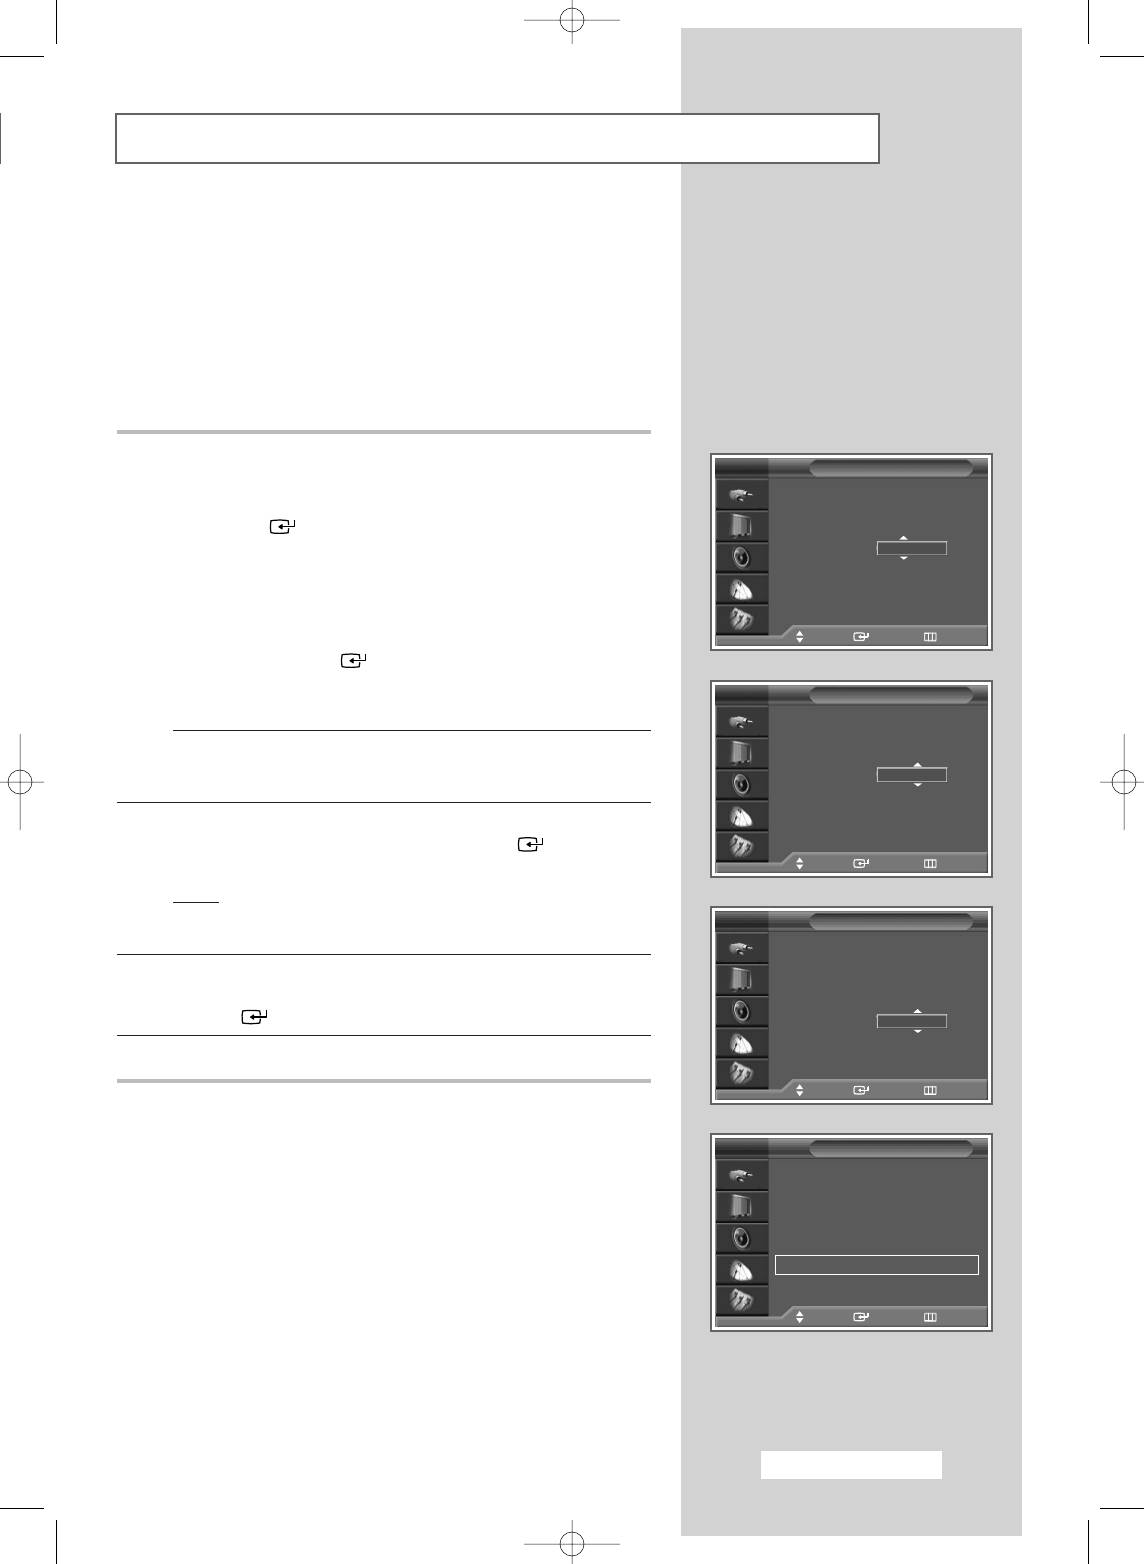
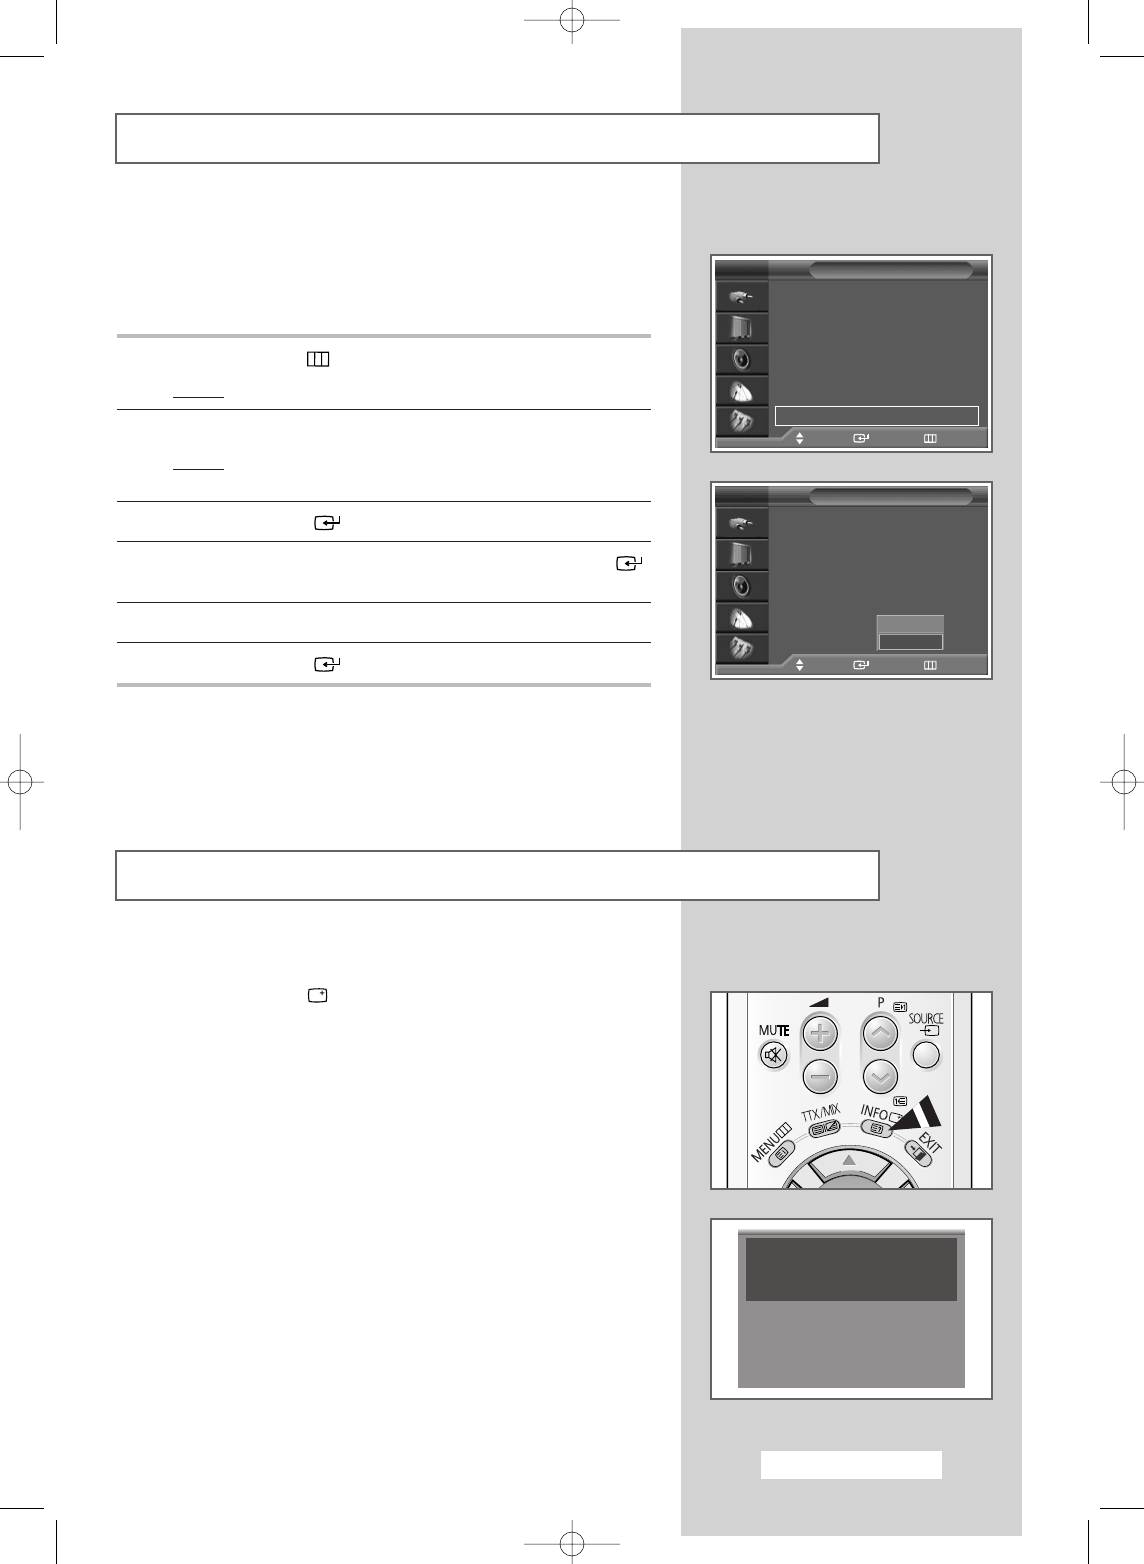
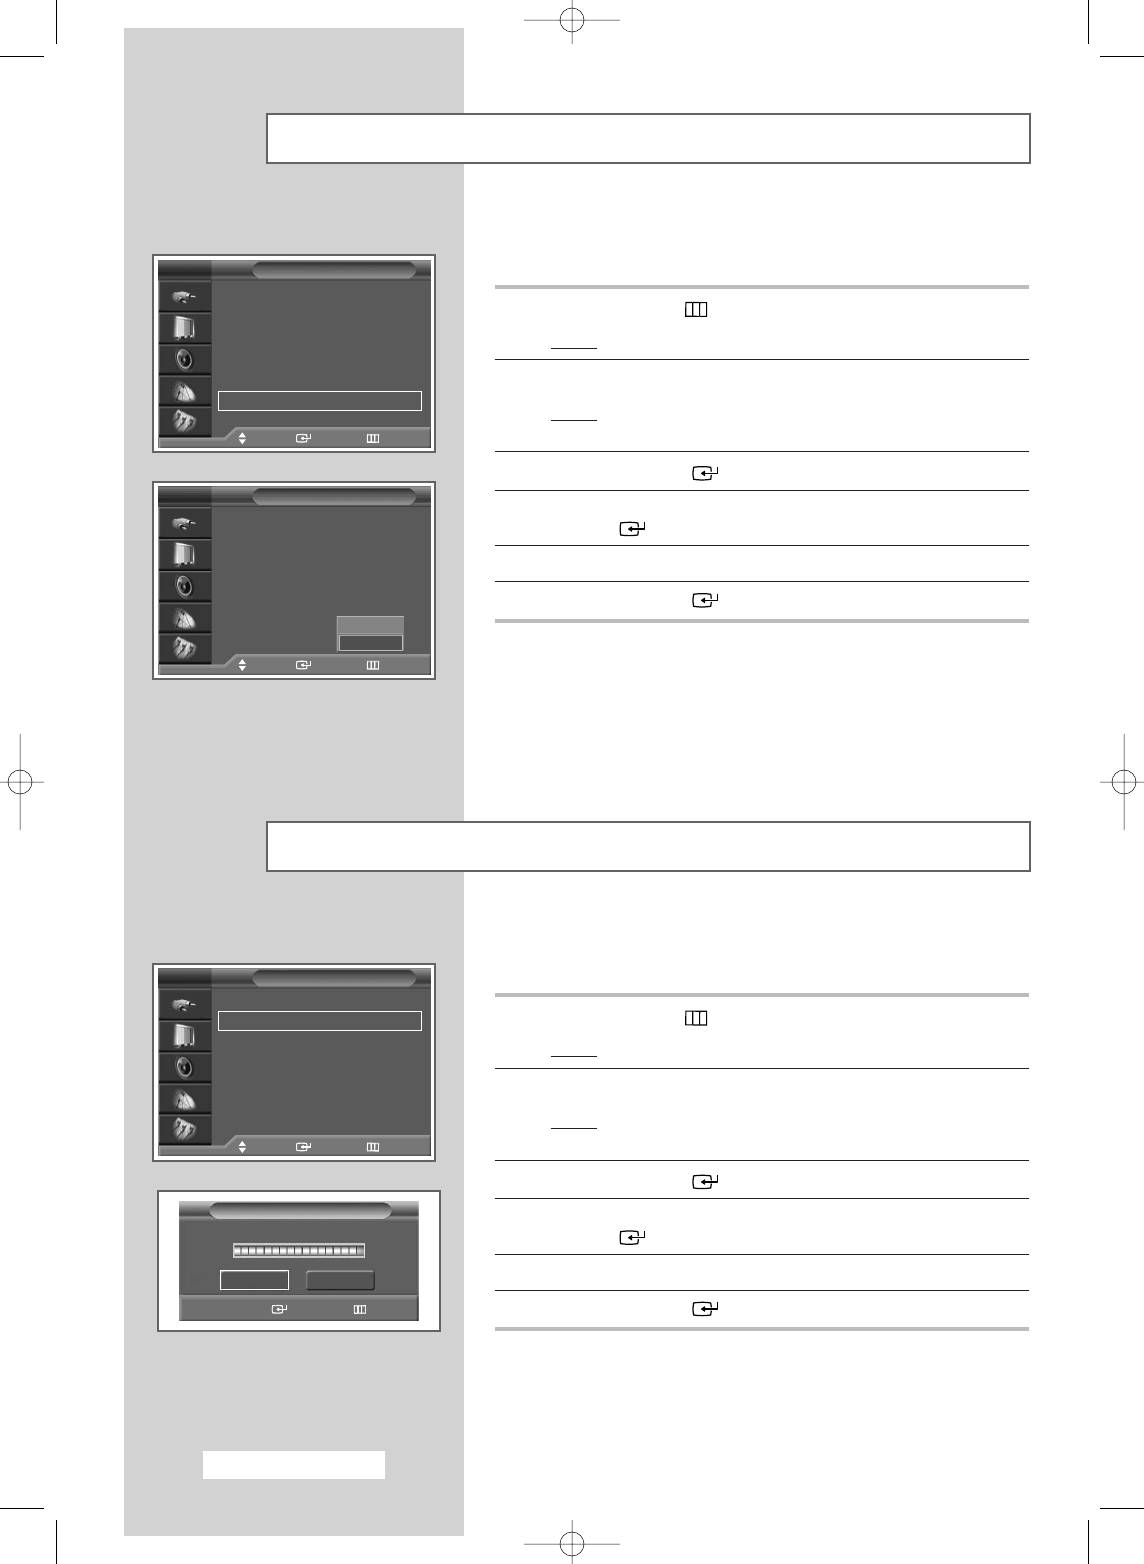
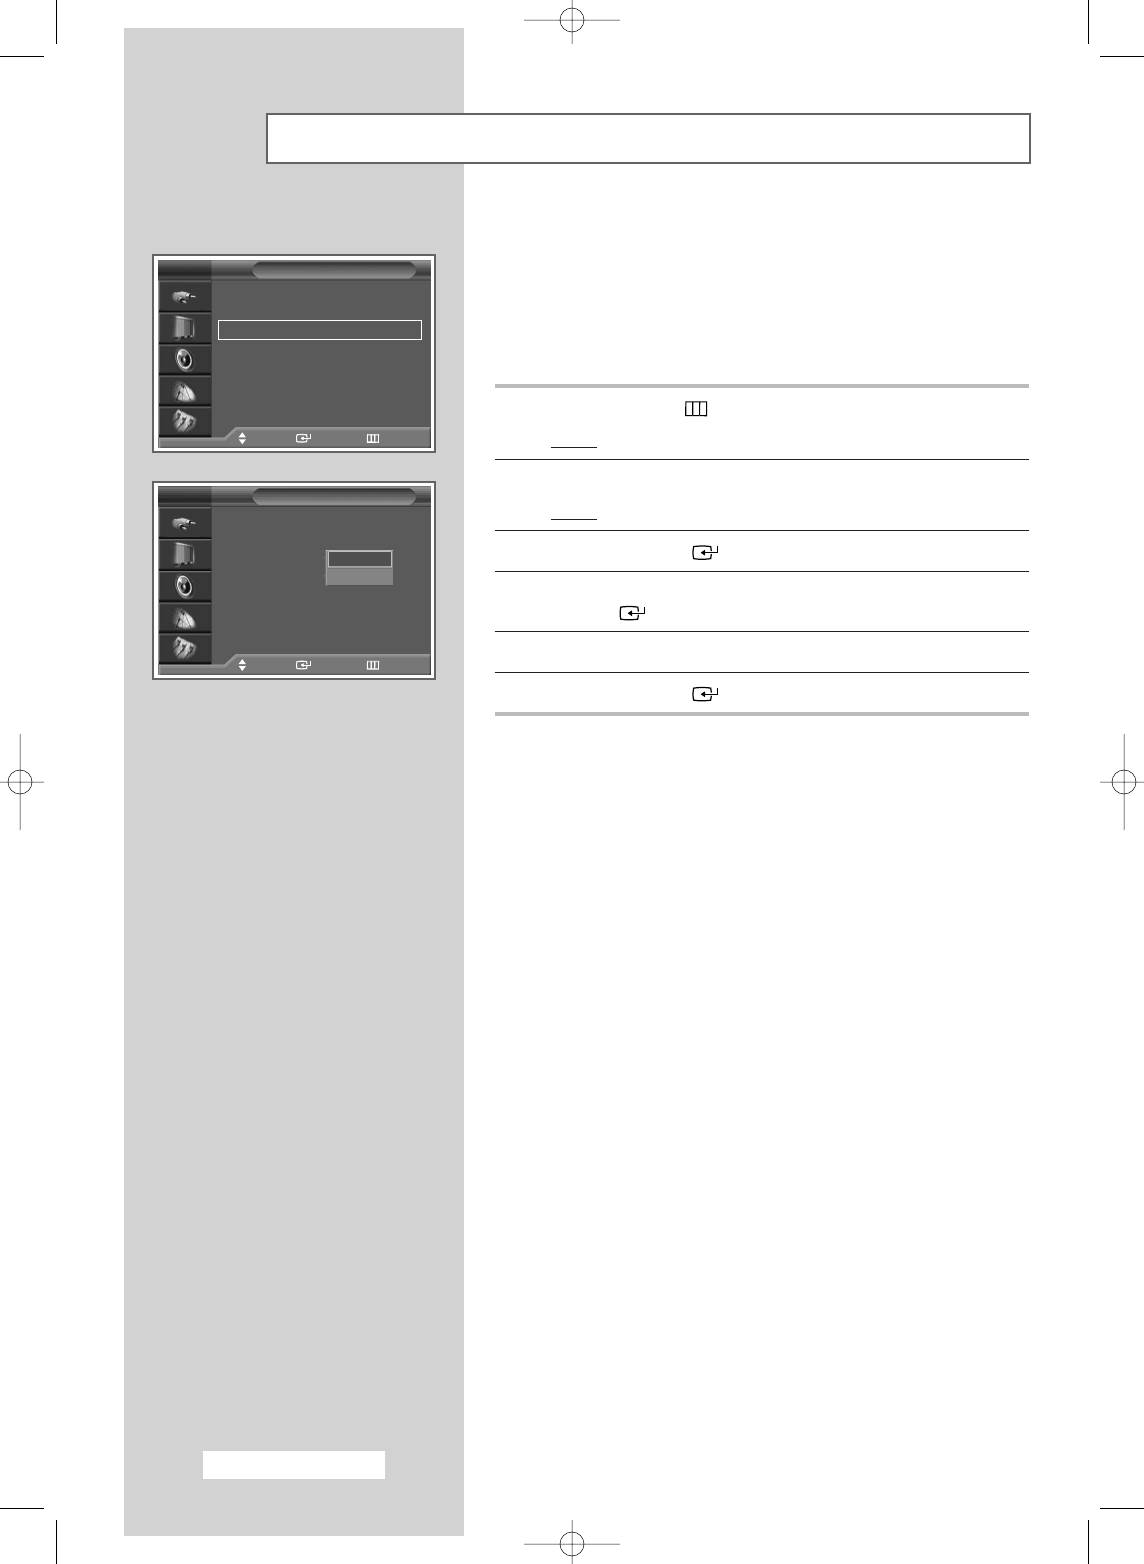
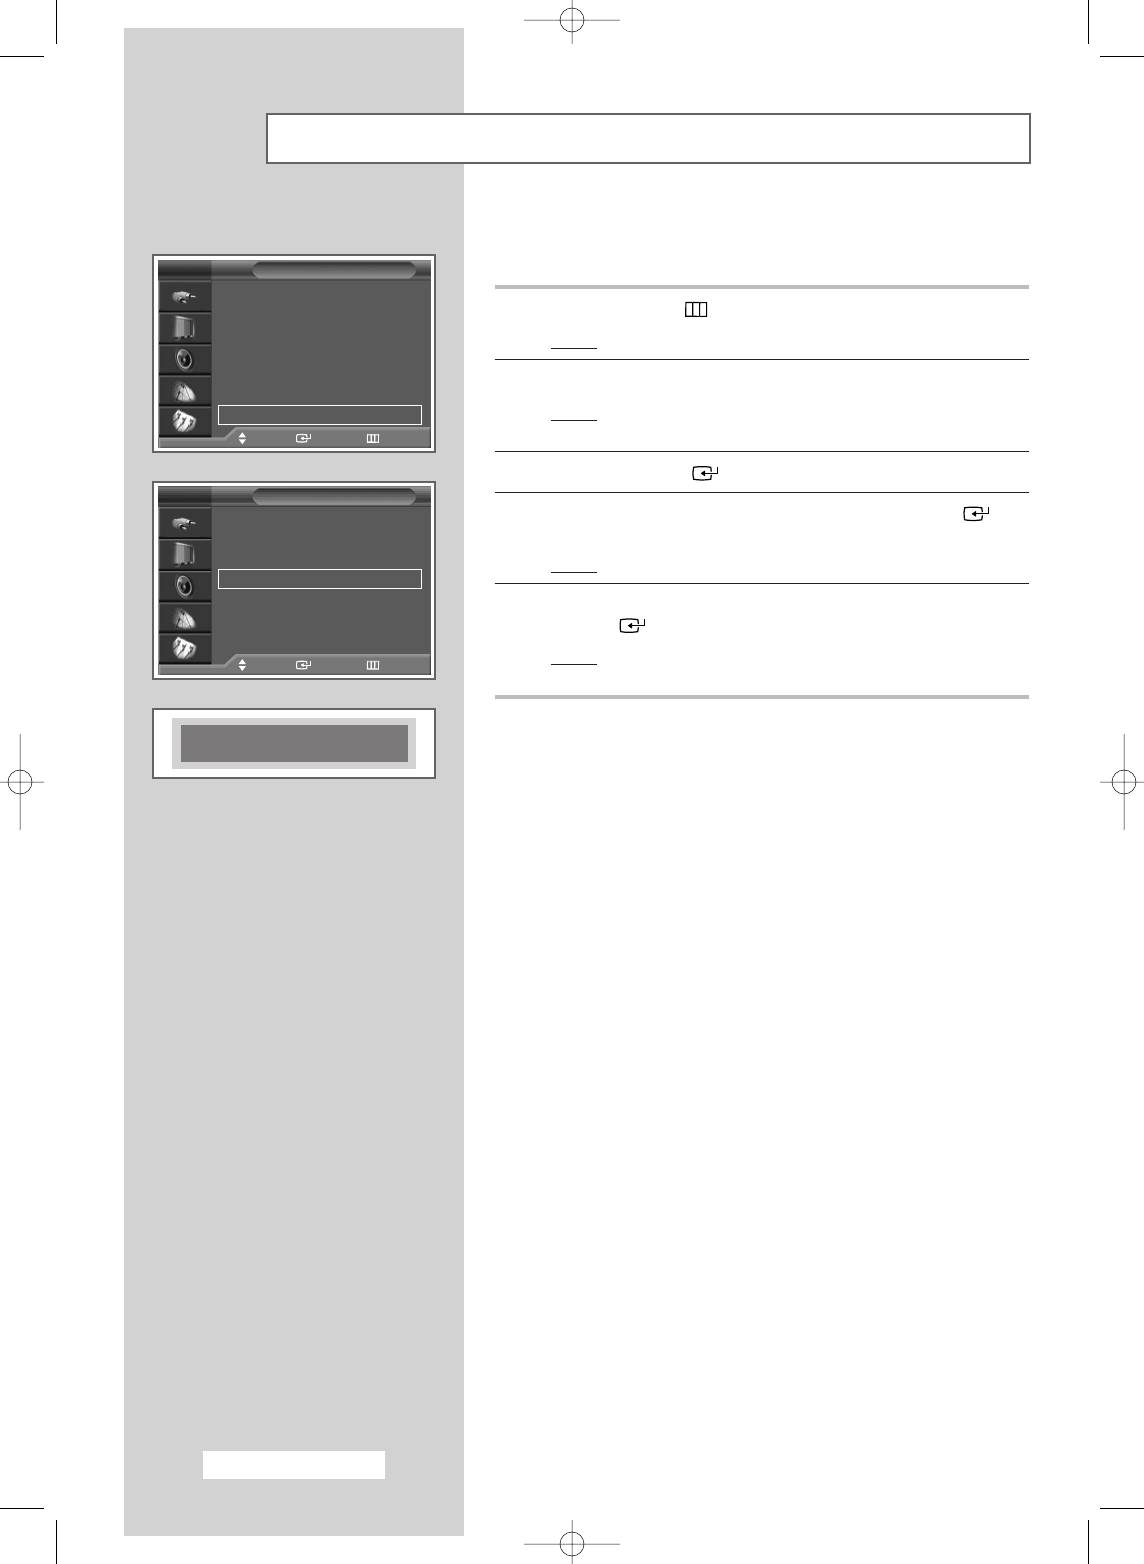
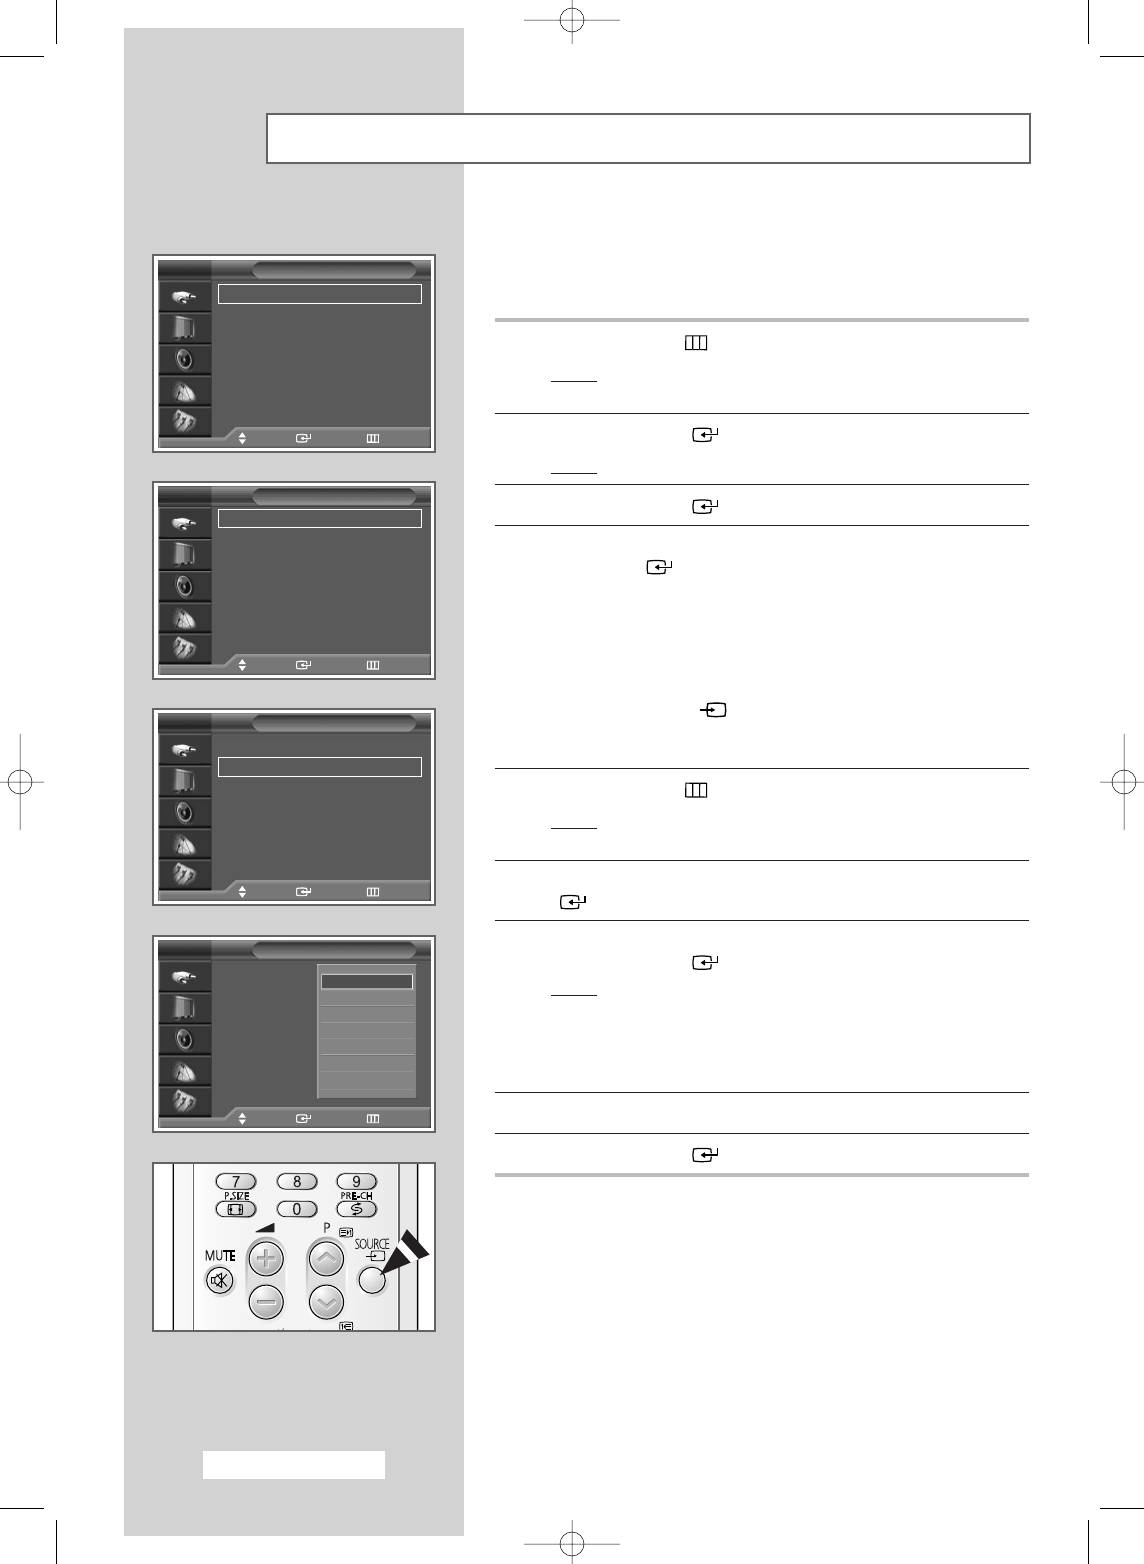
Storing Channels Manually (continued)
12 If you know the number of the channel to be stored, see the
TV
Manual Store
following steps.
Programme : P 1
◆
Press the ▲ or ▼ button to select Channel, then press the
Colour System : AUTO
ENTER () button.
Sound System : B/G
Channel : C
--
C 2
◆
Press the ▲ or ▼ button to select C (Air channel) or S (Cable
Search : 49 MHz
channel).
Store : ?
◆
Press the √ button.
◆
Press the ▲ or ▼ button to select the required number, then
Adjust Enter Return
press the ENTER () button.
➢
You can also set the
channel number
by pressing the
TV
Manual Store
number buttons directly.
Programme : P 1
Colour System : AUTO
Sound System : B/G
➢
If no sound or abnormal sound can be heard, re-select the
Channel : C
--
C 2
sound standard required.
Search : 49 MHz
Store : ?
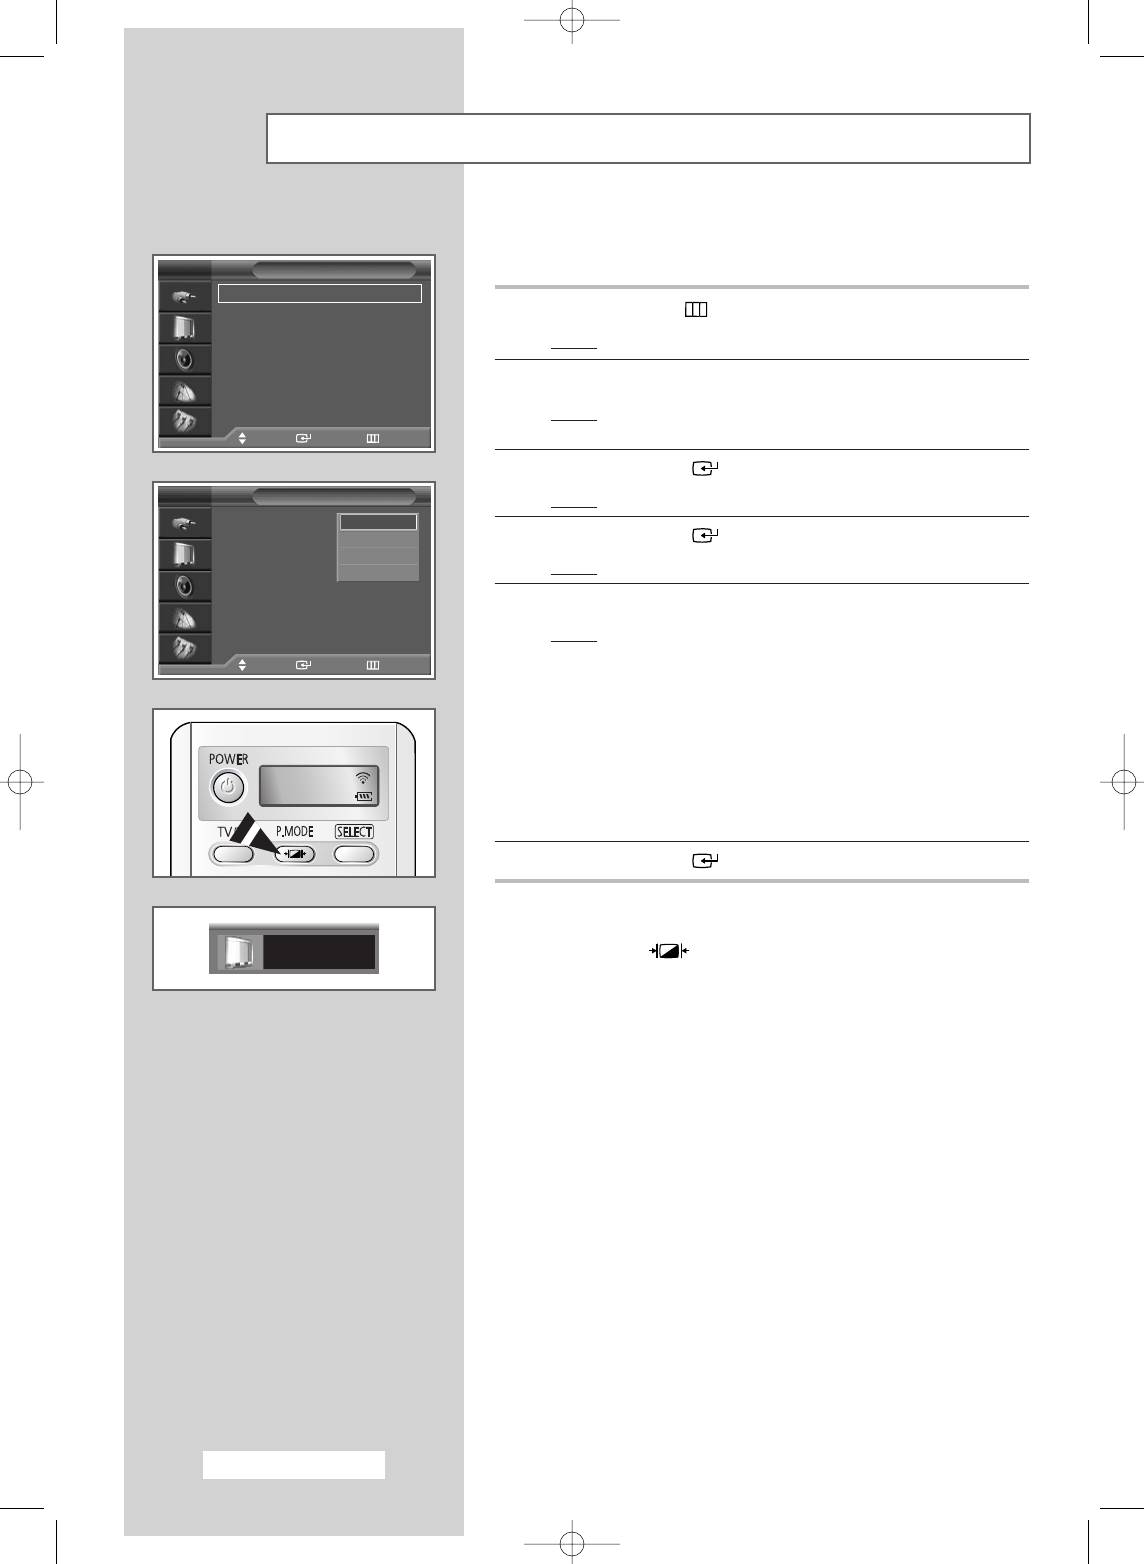
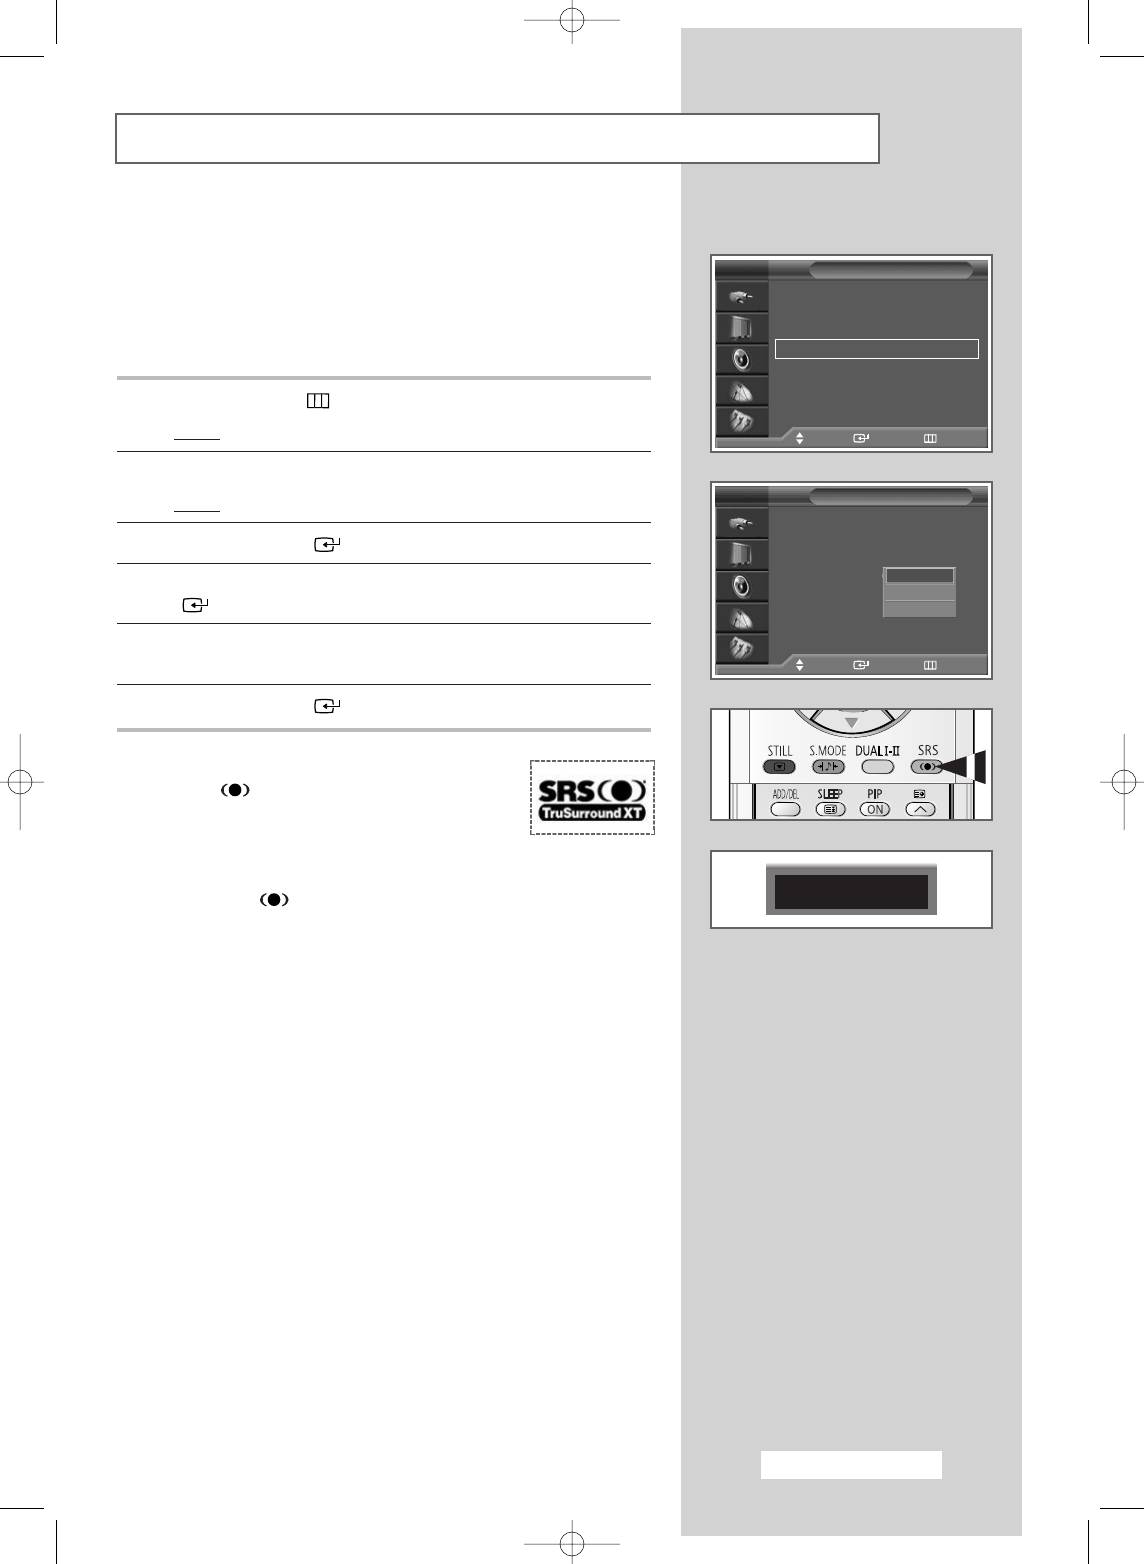
13 If you do not know the channel numbers, select the Search by
pressing the ▲ or ▼ button. Press the ENTER () button.
Press the ▲ or ▼ button to start the search.
Adjust Enter Return
Result
: The tuner scans the frequency range until the first
channel or the channel that you selected is received on
TV
Manual Store
your screen.
Programme : P 1
Colour System : AUTO
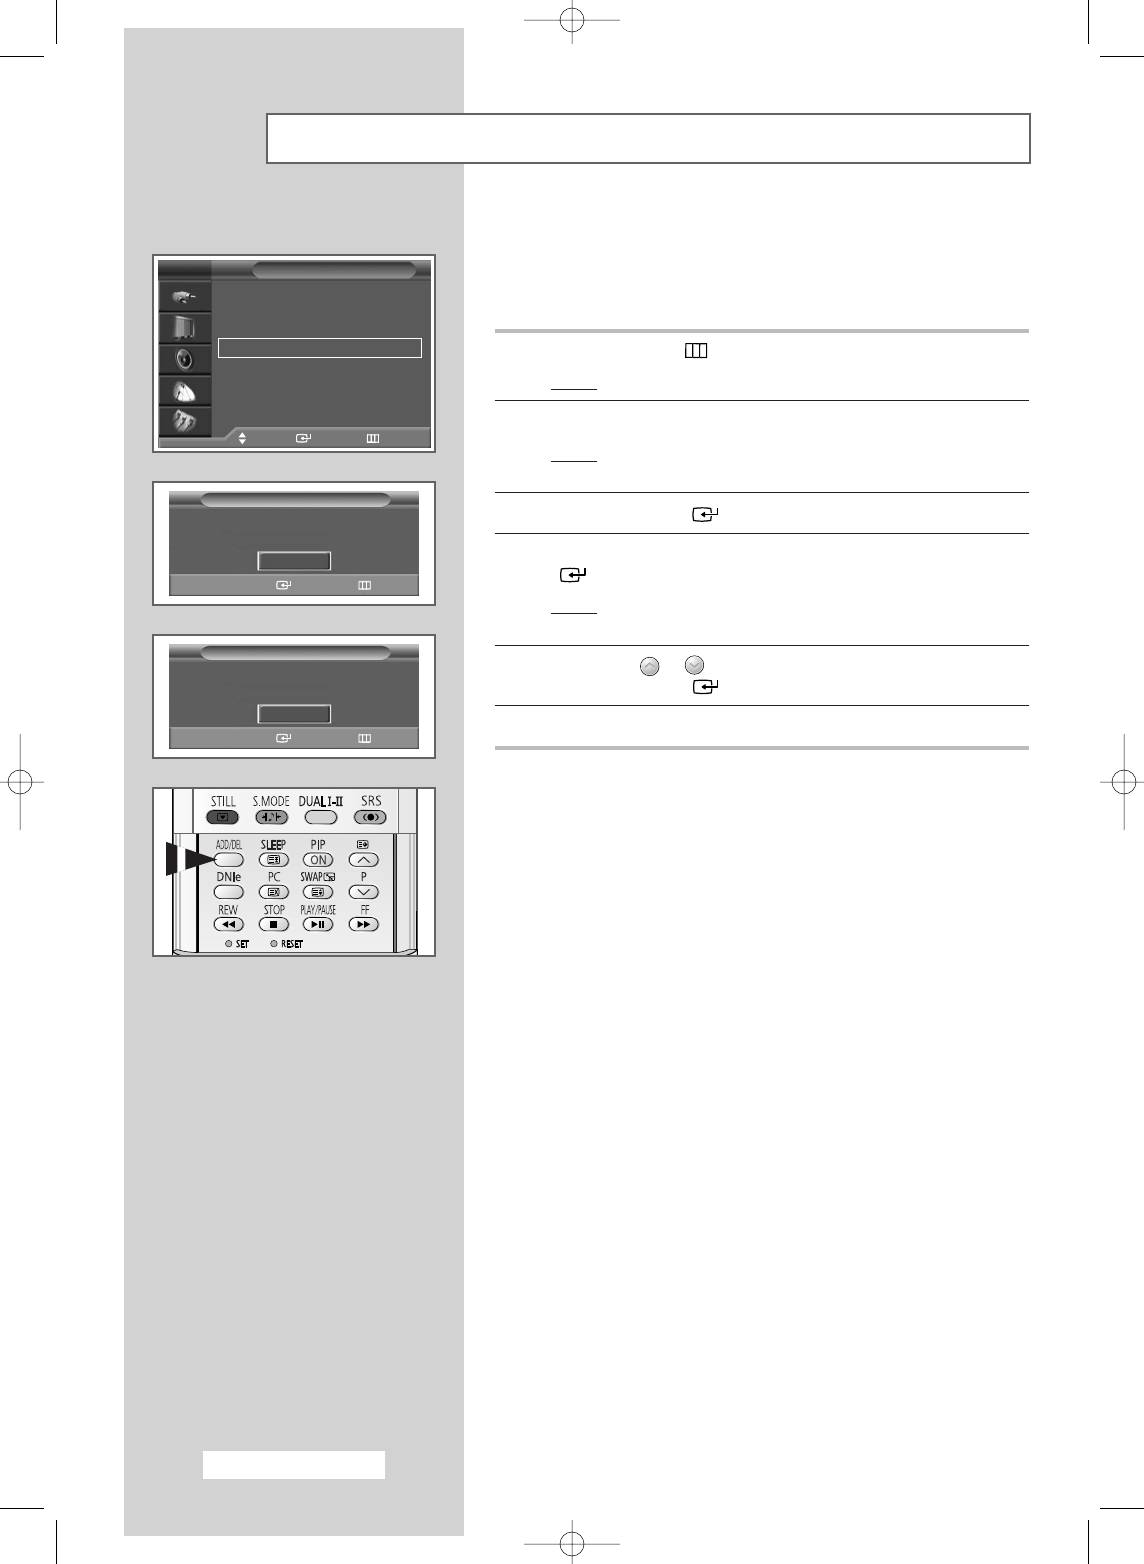
14 To store the channel and associated programme number, select
Sound System : B/G
Store by pressing the ▲ or ▼ button. Set to OK by pressing the
Channel : C 2
ENTER () button.
Search : 76 MHz
49 MHz
Store : ?
15 Repeat Steps 12 to 14 for each channel to be stored.
Adjust Enter Return
☛
Channel mode
TV
Manual Store
◆ P (Programme mode):
When completing tuning, the
Programme : P 1
broadcasting stations in your area have been assigned to
Colour System : AUTO
√
√
Sound System : B/G
√√
position numbers from P00 to max P99. You can select a
Channel : C 2
channel by entering the position number in this mode.
Search : 49 MHz
◆ C (Real channel mode):
You can select a channel by
Store : OK
entering the assigned number for each air broadcasting station
in this mode.
Move Enter Return
◆ S (Cable channel mode):
You can select a channel by
entering the assigned number for each cable channel in this
mode.
English - 21
BN68-00746A(GAIA2_Euro_ENG) 2004/08/23 03:55 PM Page 21
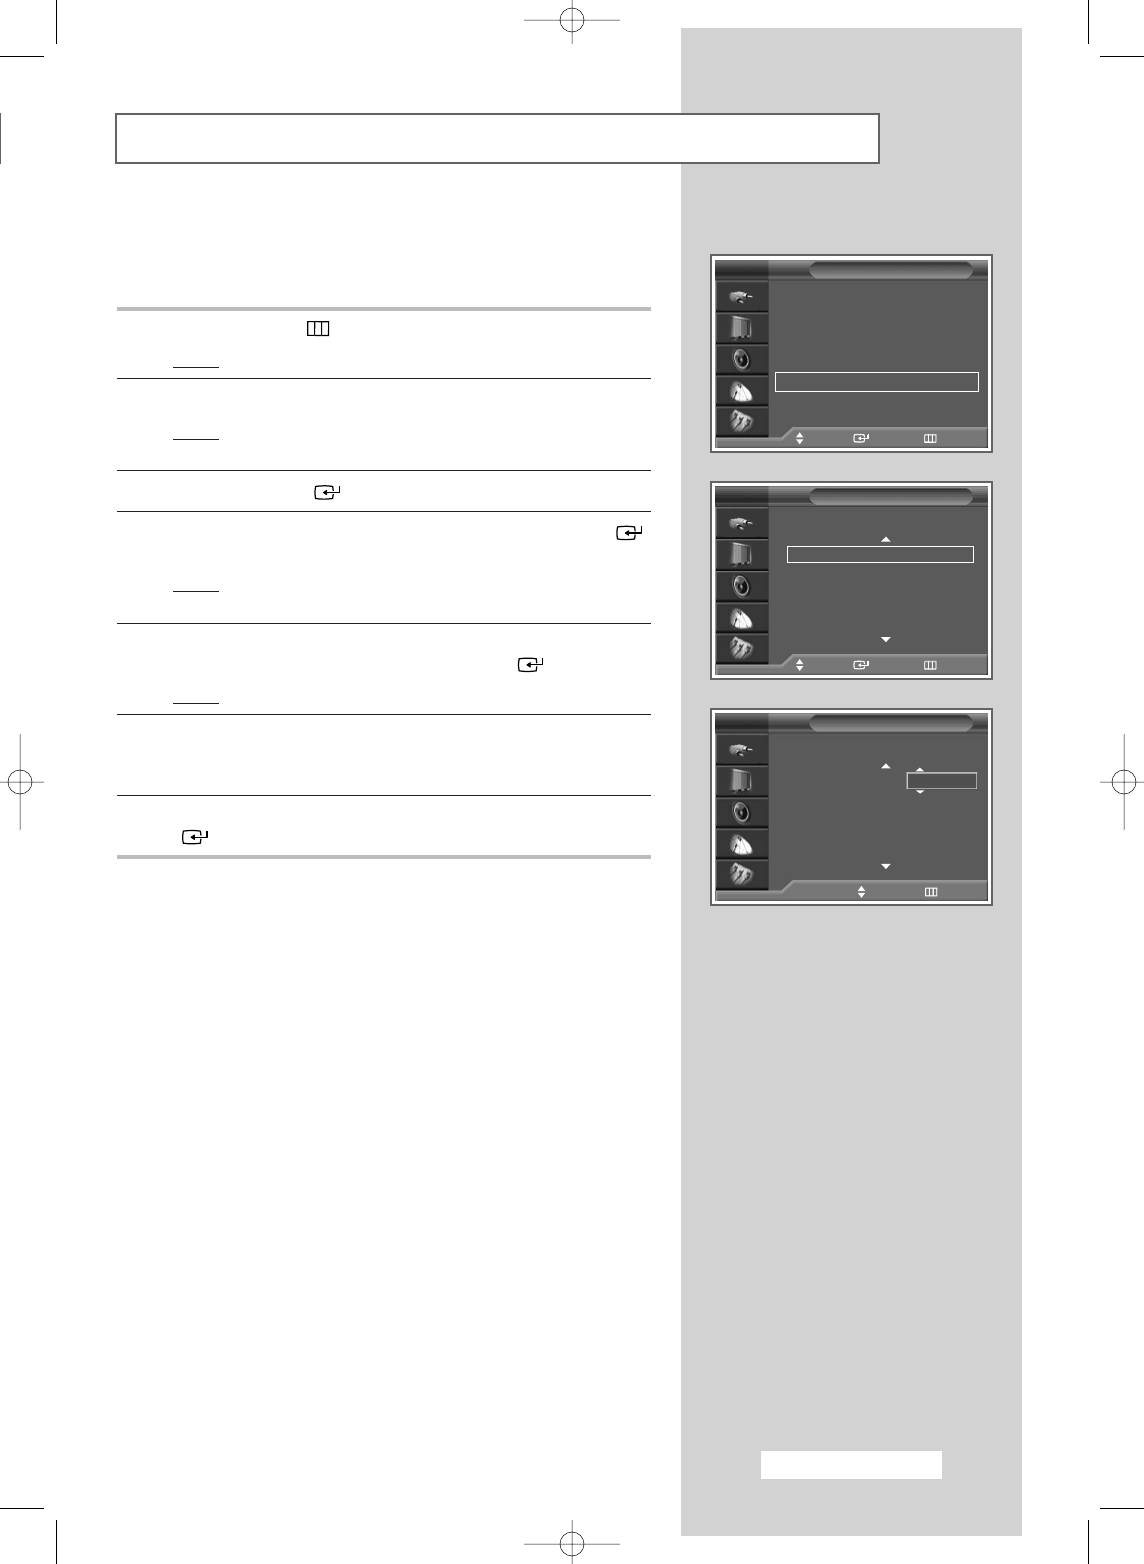
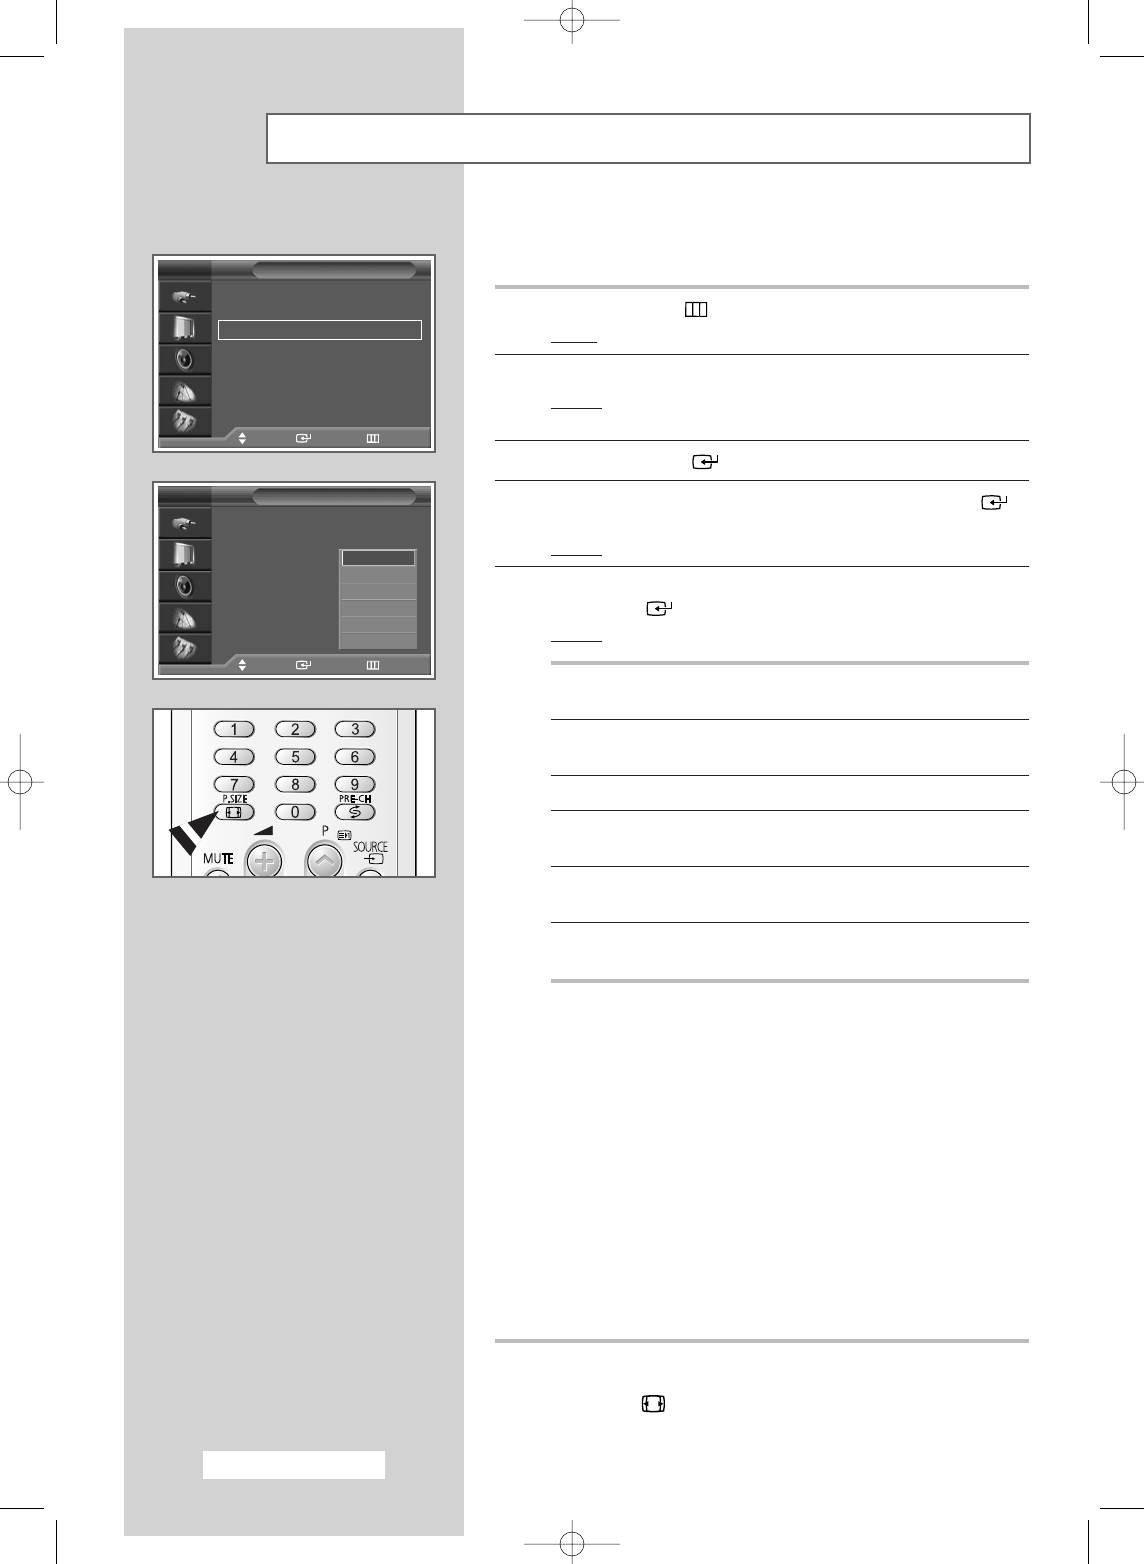
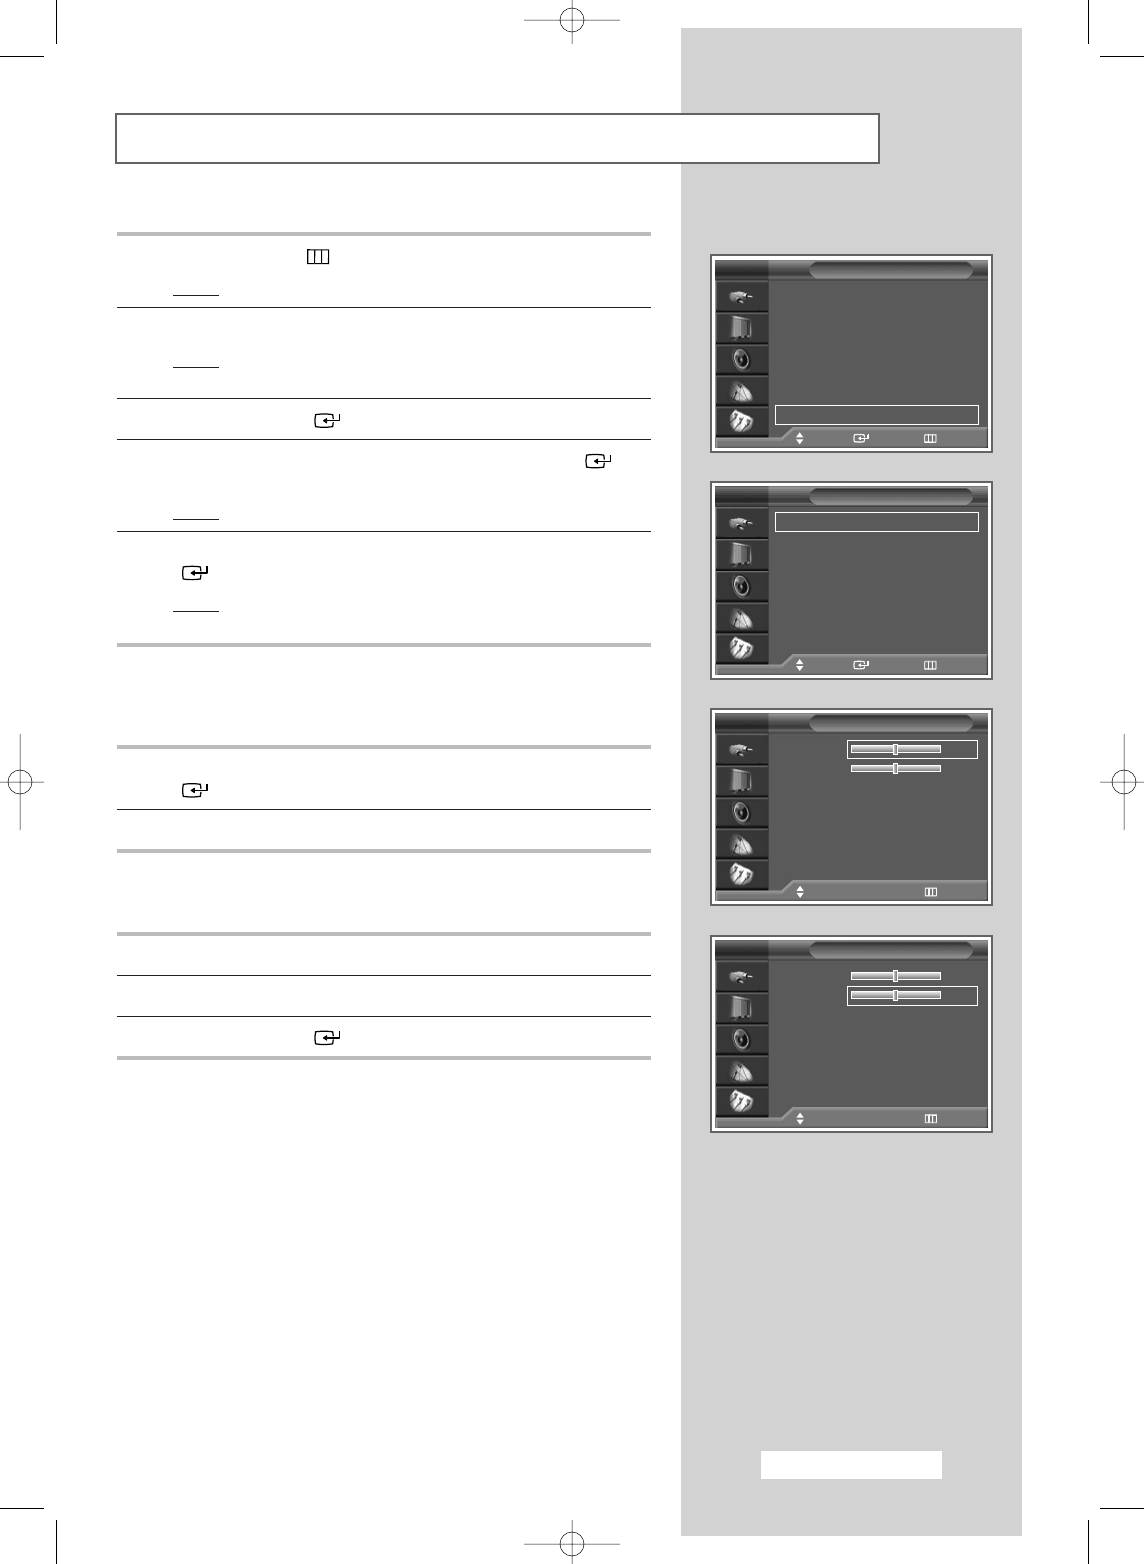
Editing the Channels
You can exclude channels of your choice from the channel scan
operation. When you scan through the stored channels, those that
TV
Channel
you have chosen to skip are not displayed. All channels that you do
Country : Others
√
√
not specifically choose to skip are displayed during scanning.
Auto Store
√√
Manual Store
√√
Add/Delete
√√
1 Press the MENU ()button.
Sort
√√
Name
√√
Result
: The main menu is displayed.
Fine Tune
√√
LNA : On
√√
2 Press the ▲ or ▼ button to select Channel.
Move Enter Return
Result
:
The options available in the
Channel
group are
displayed.
Add/Delete
3 Press the ENTER () button.
P 1 In Memory
Delete
4 Press the ▲ or ▼ button to select Add/Delete. Press the ENTER
< >
() button.
P
Change Enter Return
Result
: The Add/Delete menu is displayed with the current
channel selected.
Add/Delete
5 Press the P or button to delete or add the required channel.
P 1 Not in Memory
Press the ENTER () button.
Add
< >
6 Repeat Step 5 for each channel to be erased or added.
P
Change Enter Return
➢
You can select these options by simply pressing the
ADD/DEL button on the remote control.
English - 22
BN68-00746A(GAIA2_Euro_ENG) 2004/08/23 03:55 PM Page 22
Assigning Names to Channels
Channel names will be assigned automatically when channel
information is broadcast. These names can be changed, allowing
TV
Channel
you to assign new names.
Country : Others
√
√
Auto Store
√√
1 Press the MENU () button.
Manual Store
√√
Add/Delete
√√
Result
: The main menu is displayed.
Sort
√√
Name
√√
2 Press the ▲ or ▼ button to select Channel.
Fine Tune
√√
LNA : On
√√
Result
:
The options available in the
Channel
group are
Move Enter Return
displayed.
3 Press the ENTER () button.
TV
Name
Prog. Ch. Name
4 Press the ▲ or ▼ button to select Name. Press the ENTER ()
button.
1C2
2C4
Result
: The Name menu is displayed with the current channel
3C15
selected.
4S2
5S6
5 If necessary, select the channel to be assigned to a new name by
pressing the ▲ or ▼ button. Press the ENTER () button.
Move Enter Return
Result
: Arrow indications are displayed around the name box.
TV
Name
6 Press the ▲ or ▼ button to select a letter (A~Z), a number (0~9)
Prog. Ch. Name
or a symbol (
-
, space). Move on to the previous or next letter by
pressing the œ or √ button.
1C2
A
2C4
7 When you have finished entering the name, press the ENTER
3C15
4S2
() button to confirm the name.
5S6
œœ √√
Move Adjust Return
English - 23
BN68-00746A(GAIA2_Euro_ENG) 2004/08/23 03:55 PM Page 23
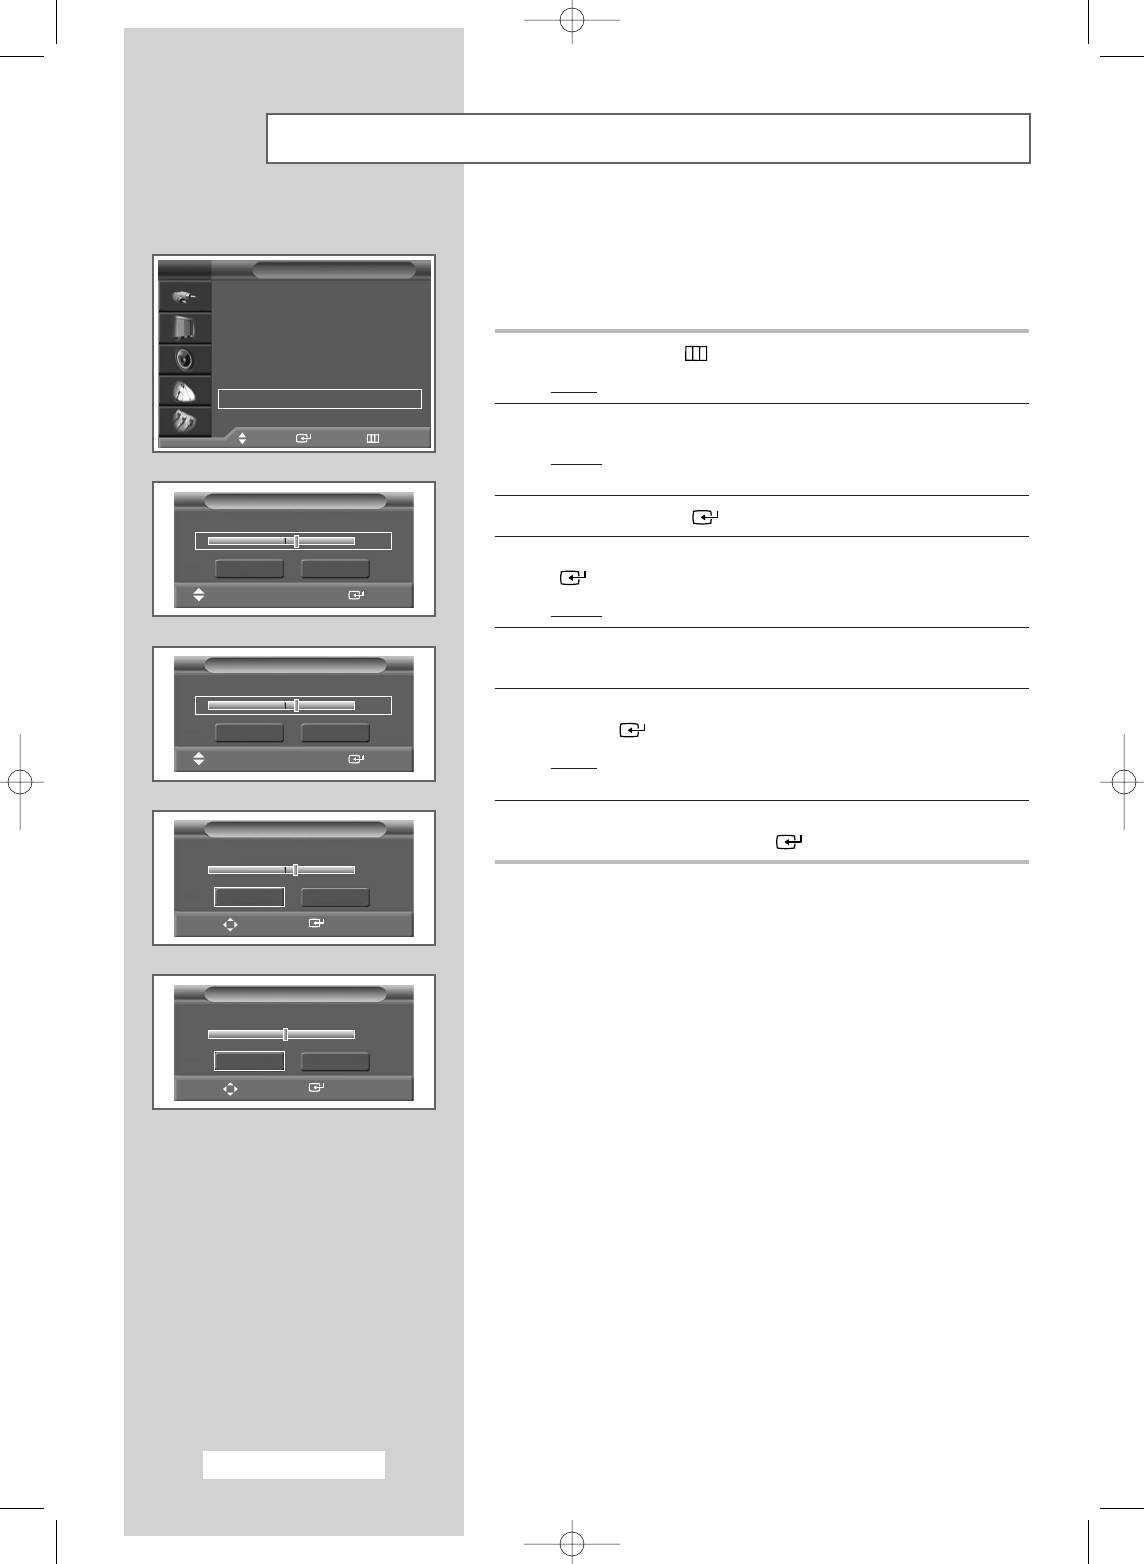
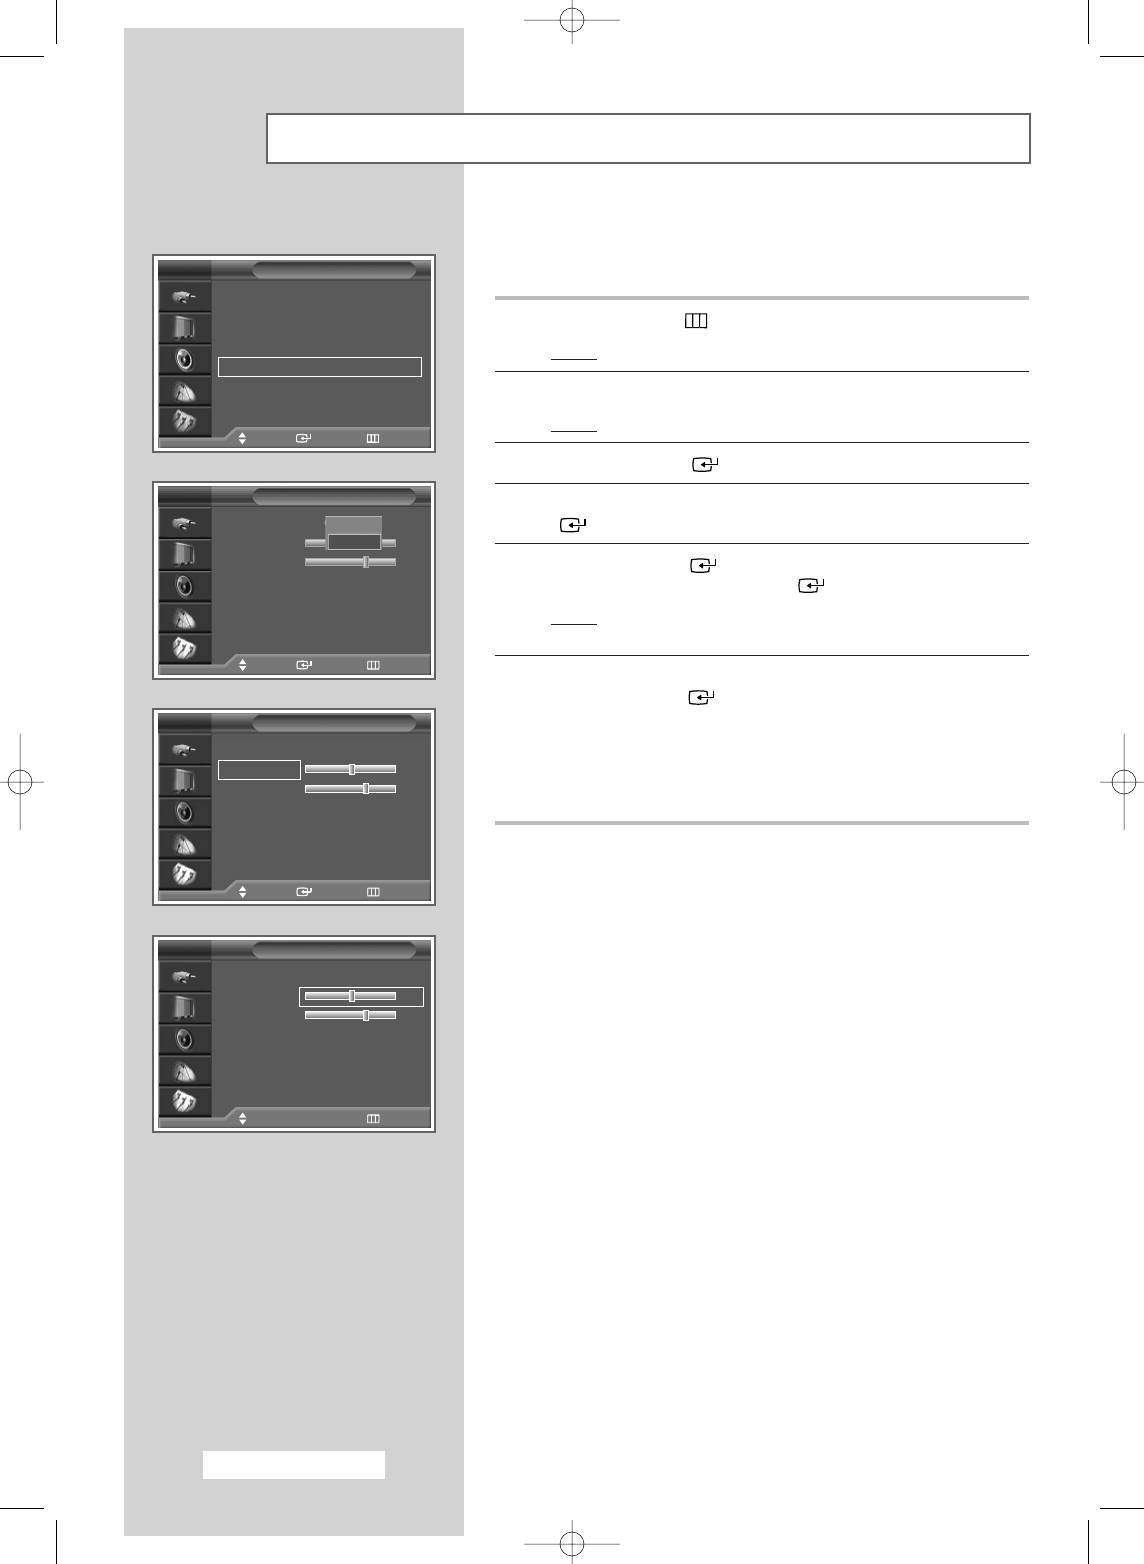
Fine Tuning Channel Reception
If the reception is clear, you do not have to fine tune the channel,
as this is done automatically during the search and store operation.
TV
Channel
If the signal is weak or distorted, you may have to fine tune the
Country : Others
√
√
channel manually.
Auto Store
√√
Manual Store
√√
Add/Delete
√√
1 Press the MENU ()button.
Sort
√√
Name
√√
Result
: The main menu is displayed.
Fine Tune
√√
LNA : On
√√
2 Press the ▲ or ▼ button to select Channel.
Move Enter Return
Result
:
The options available in the
Channel
group are
displayed.
Fine Tune
P 1
3 Press the ENTER () button.
5
4 Press the ▲ or ▼ button to select Fine Tune. Press the ENTER
Reset Return
() button.
Move
œœ √√
Adjust Save
Result
:
The horizontal bar is displayed.
5 To obtain a sharp and clear picture and good sound quality, press
Fine Tune
the œ or √ button until you reach the optimal setting.
P 1
✽
5
6 To store the fine tuning setting in the TV’s memory, press the
Reset
Return
ENTER () button.
Move
œœ √√
Adjust Save
Result
:
The programme number turns red, and the “ ”
✽
symbol is displayed. (P 1 )
✽
7 To reset the fine tuning to 0, select Reset by pressing the ▲ or ▼
Fine Tune
button then press the ENTER () button.
P 1
✽
5
Reset
Return
Move Enter
Fine Tune
P 1
0
Reset Return
Move Enter
English - 24
BN68-00746A(GAIA2_Euro_ENG) 2004/08/23 03:55 PM Page 24
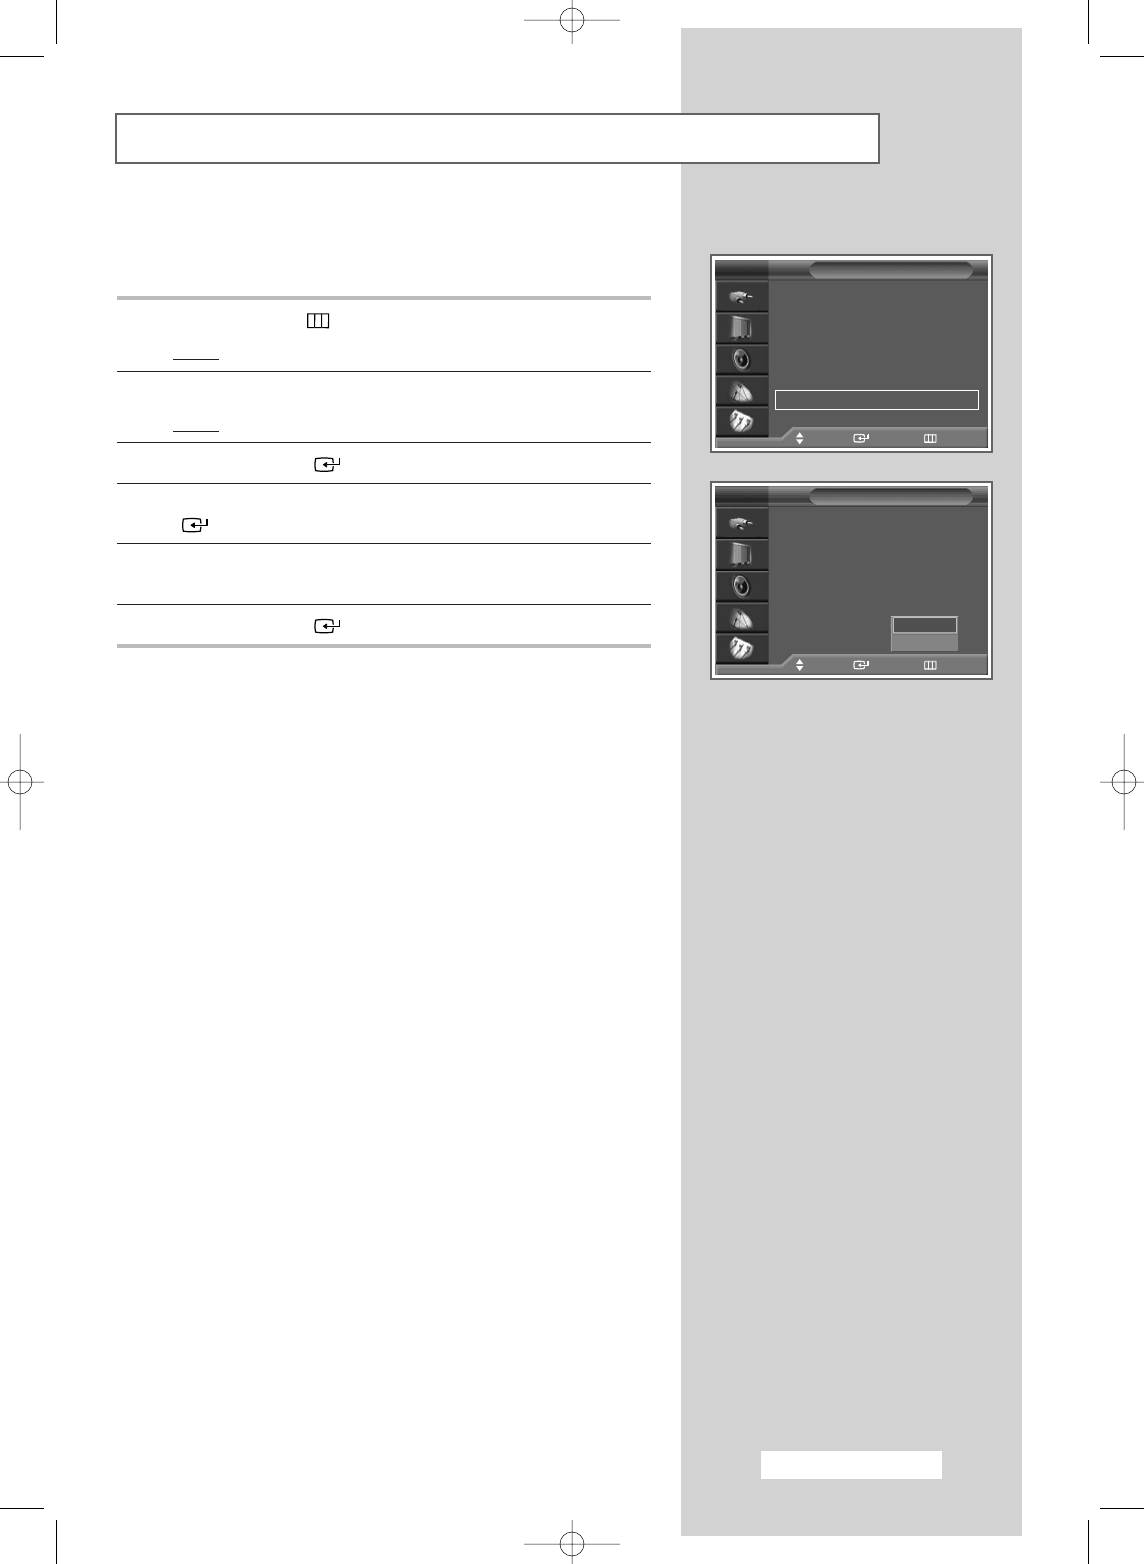
Using the LNA (Low Noise Amplifier) Feature
This feature is very useful in situations where the TV is used in
weak signal areas because it amplifies the TV signal in those area,
TV
Channel
but it does not improve the noise.
Country : Others
√
√
Auto Store
√√
Manual Store
√√
Add/Delete
√√
1 Press the MENU ()button.
Sort
√√
Name
√√
Result
: The main menu is displayed.
Fine Tune
√√
LNA : On
√√
2 Press the ▲ or ▼ button to select Channel.
Move Enter Return
Result
:
The options available in the
Channel
group are
displayed.
TV
Channel
3 Press the ENTER () button.
Country : Others
Auto Store
Manual Store
4 Press the ▲ or ▼ button to select LNA. Press the ENTER ()
Add/Delete
button.
Sort
Name
5 Select Off or On by pressing the ▲ or ▼ button.
Fine Tune
Off
LNA : Off
On
6 Press the ENTER () button to confirm your choice.
Move Enter Return
Displaying Information
You can view the channel information and setting status you select
by pressing the “INFO ( )” button on the remote control.
The displayed information are different depending on the selected
source.
P 1
Mono
Picture : Dynamic
Sound : Custom
12 : 02
English - 25
BN68-00746A(GAIA2_Euro_ENG) 2004/08/23 03:55 PM Page 25
Changing the Picture Standard
You can select the picture mode which best corresponds to your
viewing requirements.
TV
Picture
Mode : Dynamic
√
√
Custom
√√
1 Press the MENU ()button.
Colour Tone : Cool1
√√
DNIe : DNIe On
√√
Result
: The main menu is displayed.
PIP
√√
My Colour Control
√√
2 Press the ▲ or ▼ button to select Picture.
Dynamic Contrast : On
√√
▼ More
Result
:
The options available in the
Picture
group are
Move Enter Return
displayed.
3 Press the ENTER () button.
TV
Picture
Result
: Mode is selected
.
Mode : Dynamic
Dynamic
Custom
Standard
4 Press the ENTER () button again.
Colour Tone : Normal
Movie
DNIe : DNIe On
Custom
Result
:
The available options are listed.
PIP
5 Select the required option by pressing the ▲ or ▼ button.
My Colour Control
Dynamic Contrast : On
Result
: The following modes are available:
▼ More
Move Enter Return
◆ Dynamic : Choose Dynamic to increase the clarity
and sharpness of the picture.
◆ Standard : Choose Standard if viewing in a well-lit
room for optimum sharpness of the
picture.
◆ Movie : Choose Movie when viewing in a dark
room to lessen eye strain.
TV
◆ Custom : Choose Custom to view using your
preferred settings. (see page 27)
6 Press the ENTER () button to confirm your choice.
➢
You can select these options by simply pressing the
Dynamic
P.MODE (: Picture Mode) button on the remote
control.
English - 26
BN68-00746A(GAIA2_Euro_ENG) 2004/08/23 03:55 PM Page 26
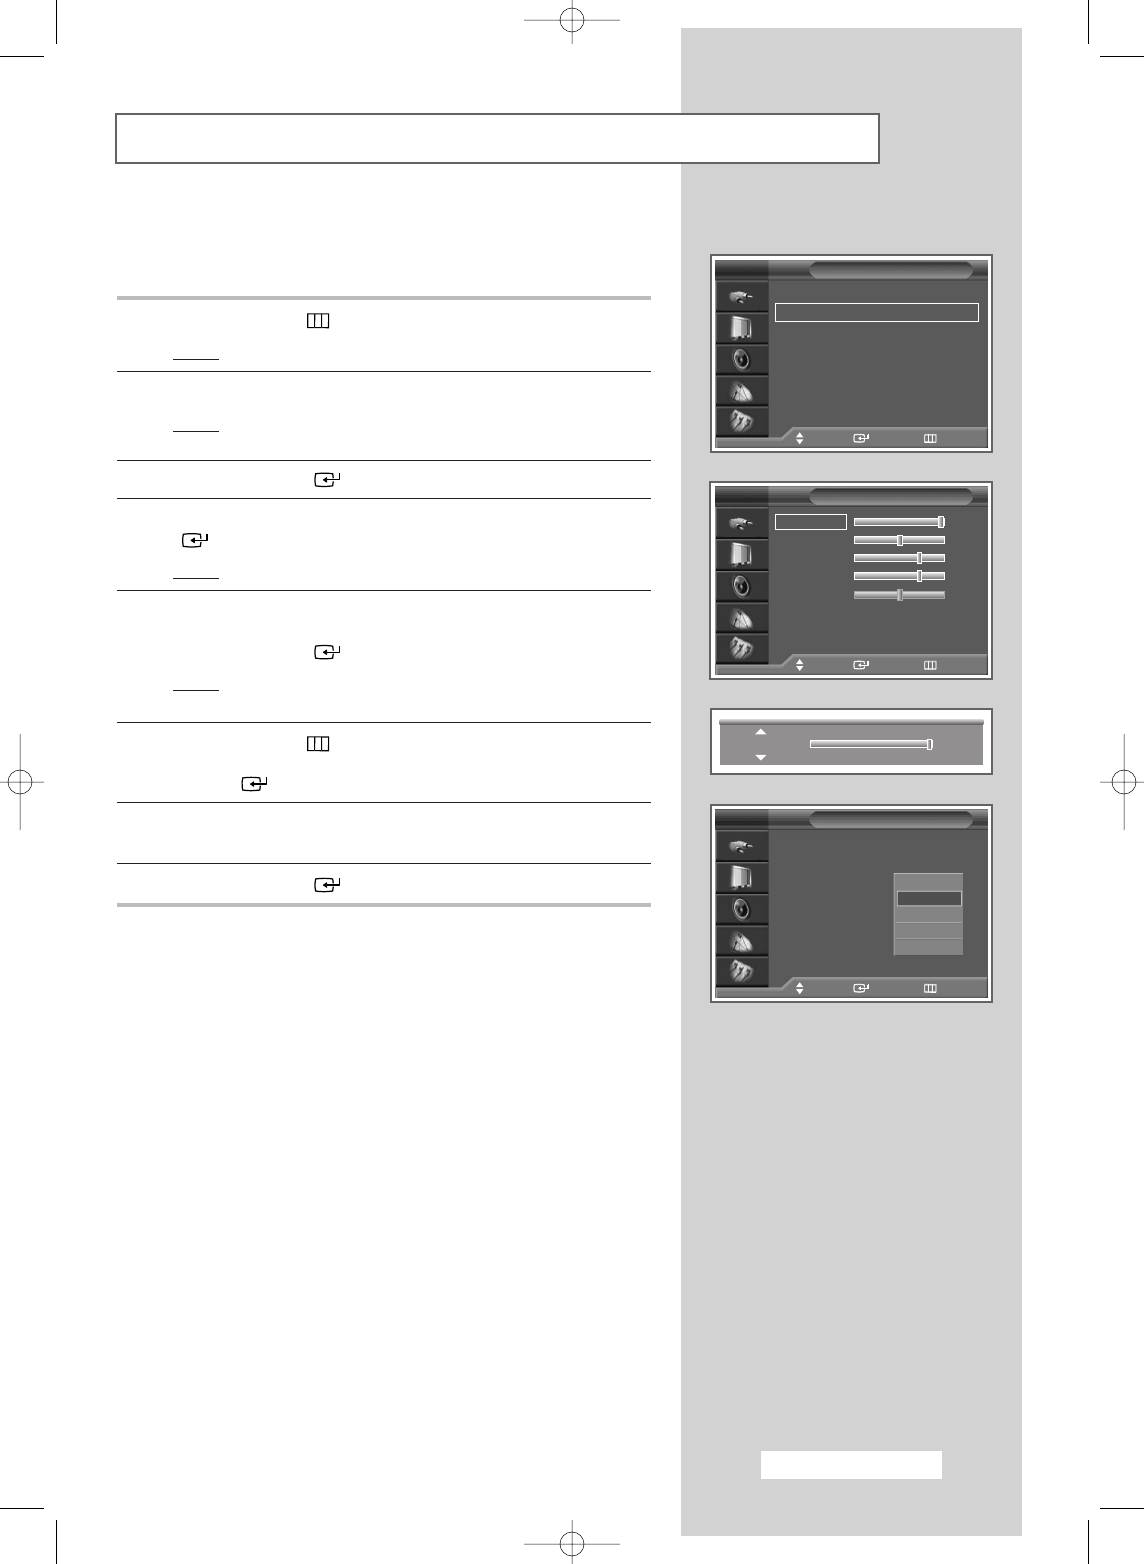
Customizing the Picture Settings
Your television has several settings options that allow you to
control the picture quality.
TV
Picture
Mode : Dynamic
√
√
Custom
√√
1 Press the MENU ()button.
Colour Tone : Cool1
√√
DNIe : DNIe On
√√
Result
: The main menu is displayed.
PIP
√√
My Colour Control
√√
2 Press the ▲ or ▼ button to select Picture.
Dynamic Contrast : On
√√
▼ More
Result
:
The options available in the
Picture
group are
Move Enter Return
displayed.
3 Press the ENTER () button.
TV
Custom
4 Press the ▲ or ▼ button to select Custom. Press the ENTER
Contrast 100
() button.
Brightness 50
Sharpness 75
Result
:
The
Custom
menu is displayed.
Colour 75
Tint G 50 R 50
5 Select the option (Contrast, Brightness, Sharpness, Colour,
or Tint-NTSC only) to be adjusted by pressing the ▲ or ▼ button.
Press the ENTER () button.
Move Enter Return
Result
: The horizontal bar is displayed. Press the œ or √
button until you reach the setting.
6 Press the MENU ()button to return to the Picture menu.
Contrast 100
Press the ▲ or ▼ button to select Colour Tone. Press the
ENTER () button.
TV
Picture
7 Select the required colour tone (Cool2, Cool1, Normal, Warm1, or
Warm2) by pressing the ▲ or ▼ button.
Mode : Dynamic
Custom
Colour Tone : Normal
8 Press the ENTER () button to confirm your choice.
Cool2
DNIe : DNIe On
Cool1
PIP
Normal
My Colour Control
Warm1
Dynamic Contrast : On
Warm2
▼ More
Move Enter Return
English - 27
BN68-00746A(GAIA2_Euro_ENG) 2004/08/23 03:55 PM Page 27
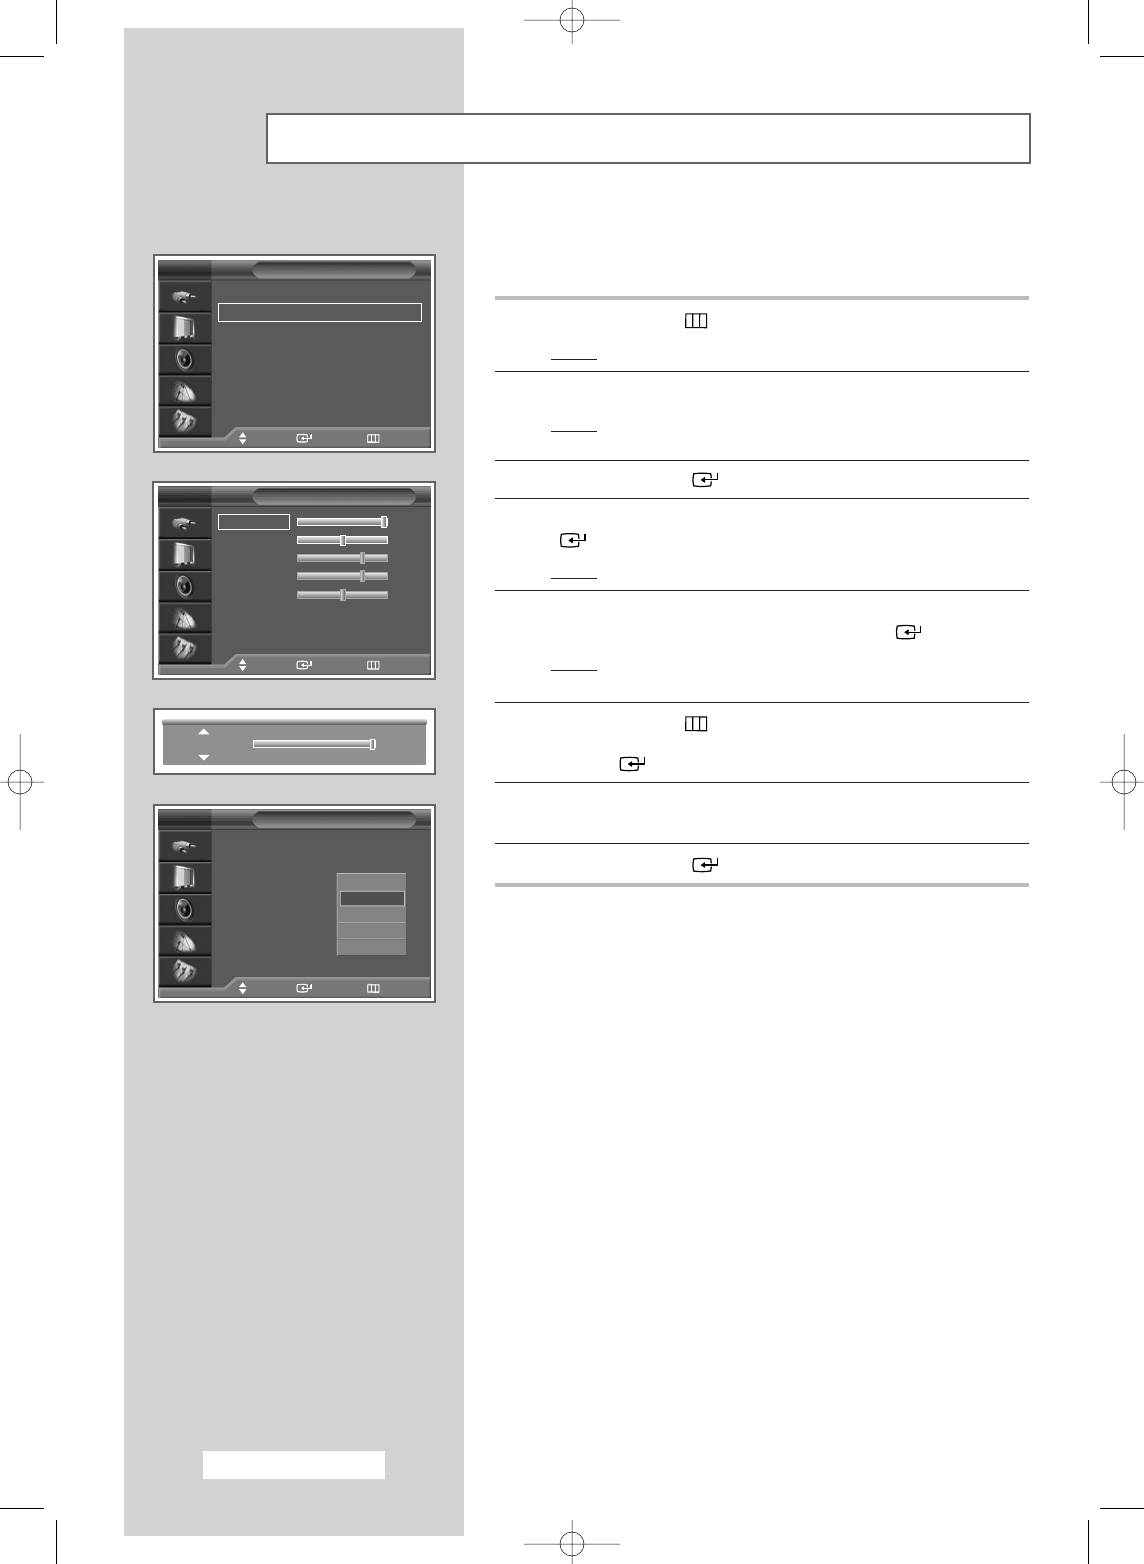
Customizing the Picture Settings (PC or DVI mode)
Your television has several settings options that allow you to
control the picture quality in PC or DVI mode.
TV
Picture
Mode : Dynamic
√
√
Custom
√√
1 Press the MENU ()button.
Colour Tone : Cool1
√√
DNIe : DNIe On
√
√
Result
: The main menu is displayed.
PIP
√
√
My Colour Control
√
√
2 Press the ▲ or ▼ button to select Picture.
Dynamic Contrast : Off
√√
▼ More
Result
:
The options available in the
Picture
group are
Move Enter Return
displayed.
3 Press the ENTER () button.
TV
Custom
Contrast 100
4 Press the ▲ or ▼ button to select Custom. Press the ENTER
Brightness 50
() button.
Sharpness 75
Colour 75
Result
:
The
Custom
menu is displayed.
Tint G 50 R 50
5 Select the option (Contrast or Brightness) to be adjusted by
pressing the ▲ or ▼ button. Press the ENTER () button.
Move Enter Return
Result
: The horizontal bar is displayed. Press the œ or √
button until you reach the setting.
6 Press the MENU ()button to return to the Picture menu.
Contrast 100
Press the ▲ or ▼ button to select Colour Tone. Press the
ENTER () button.
7 Select the required colour tone (Cool2, Cool1, Normal, Warm1, or
TV
Picture
Warm2) by pressing the ▲ or ▼ button.
Mode : Dynamic
Custom
8 Press the ENTER () button to confirm your choice.
Colour Tone : Normal
Cool2
DNIe : DNIe On
Cool1
PIP
Normal
My Colour Control
Warm1
Dynamic Contrast : On
Warm2
▼ More
Move Enter Return
English - 28
BN68-00746A(GAIA2_Euro_ENG) 2004/08/23 03:55 PM Page 28
TM
DNIe
(Digital Natural Image engine)
This feature brings you more detailed images with 3D noise
reduction, detail enrichment, contrast and white enhancement.
TV
Picture
A new image Compensation Algorithm gives brighter, clearer, more
TM
Mode : Dynamic
√
√
detailed images. DNIe
technology will always deliver the best
Custom
√√
quality pictures from any signal.
Colour Tone : Cool1
√√
DNIe : DNIe On
√√
PIP
√√
My Colour Control
√√
1 Press the MENU ()button.
Dynamic Contrast : On
√√
Result
: The main menu is displayed.
▼ More
Move Enter Return
2 Press the ▲ or ▼ button to select Picture.
Result
: The options available in the Picture group are
TV
Picture
displayed.
Mode : Dynamic
Custom
3 Press the ENTER () button.
Colour Tone : Cool1
DNIe : DNIe On
DNIe On
4 Press the ▲ or ▼ button to select DNIe. Press the ENTER ()
PIP
DNIe Off
My Colour Control
DNIe Demo
button.
Dynamic Contrast : On
▼ More
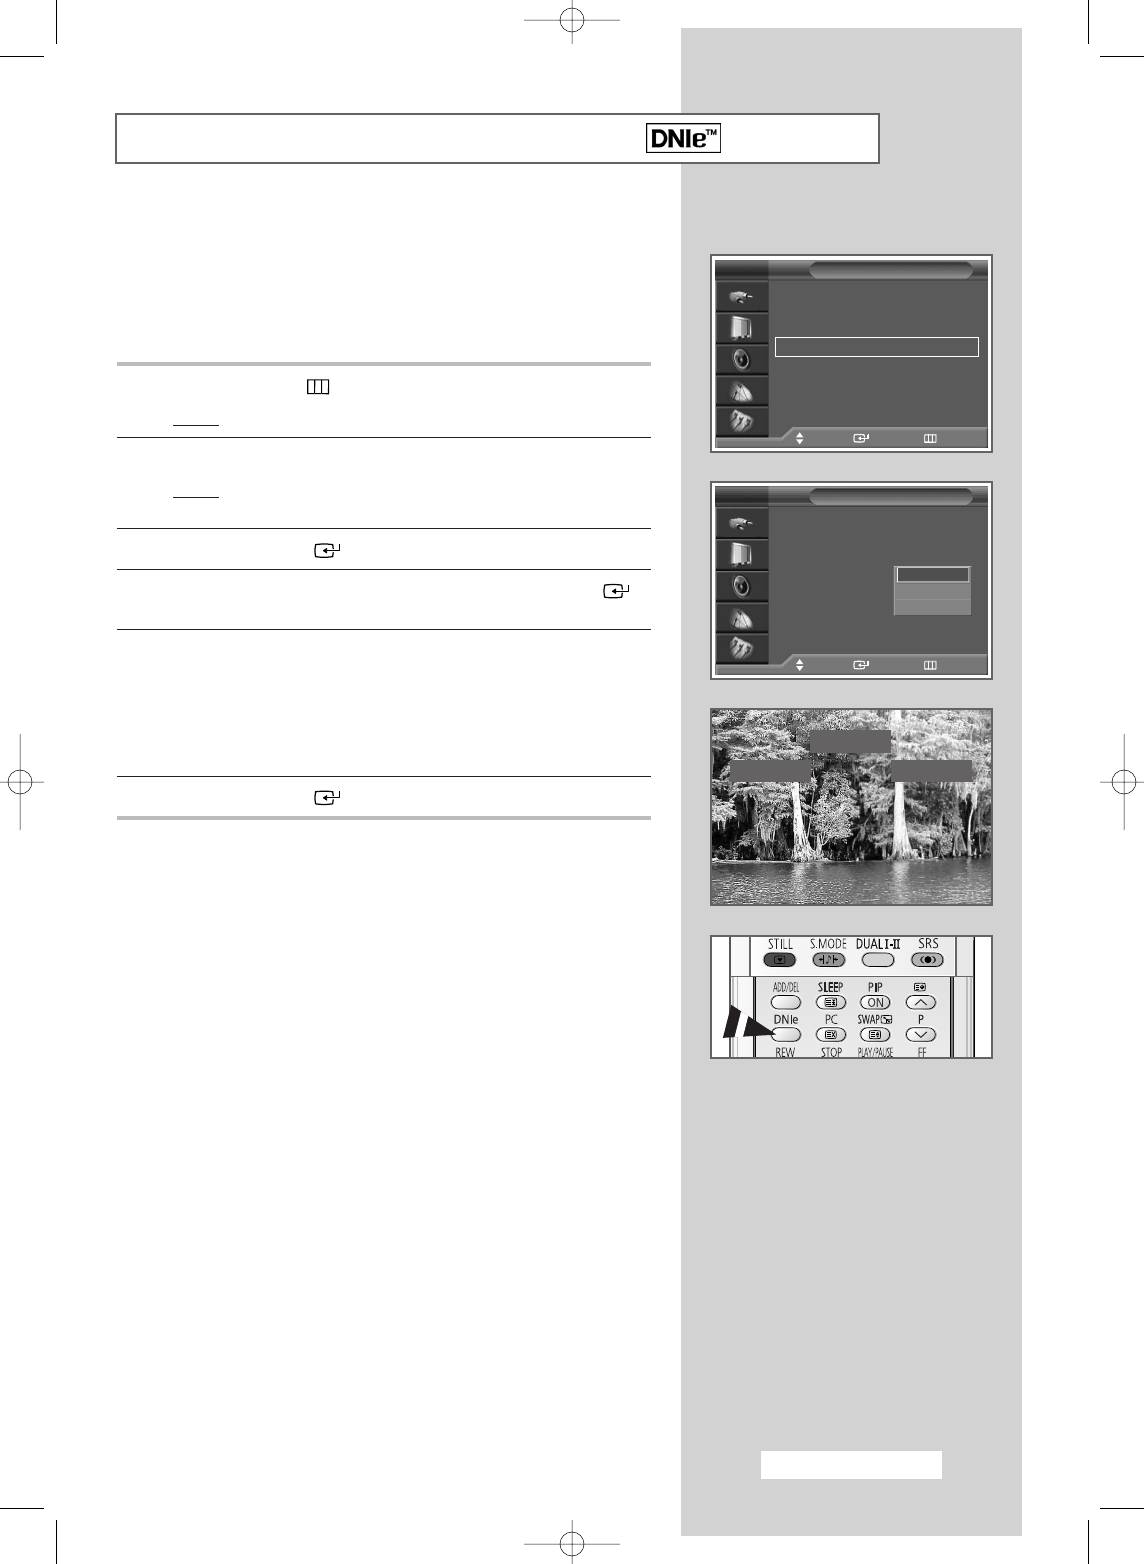
5 Press the ▲ or ▼ button to change the setting.
Move Enter Return
◆ DNIe On : Switches on DNIe mode.
◆ DNIe Off : Switches off DNIe mode.
◆ DNIe Demo : The screen before applying DNIe
appears on the right and the screen
DNIe Demo
after applying DNIe appears on the left.
DNIe On DNIe Off
6 Press the ENTER () button to confirm your choice.
➢
You can select these options simply by pressing the DNIe
button.
English - 29
BN68-00746A(GAIA2_Euro_ENG) 2004/08/23 03:55 PM Page 29
Viewing Picture In Picture (PIP)
You can display a sub picture within the main picture of a TV
programme or external A/V devices. In this way you can watch a TV
TV
Picture
programme or monitor the video input from any connected devices
Mode : Dynamic
√
√
while watching TV or other video input.
Custom
√√
Colour Tone : Cool1
√√
DNIe : DNIe On
√√
PIP
√√
1 Press the MENU ()button.
My Colour Control
√√
Dynamic Contrast : On
√√
Result
: The main menu is displayed.
▼ More
Move Enter Return
2 Press the ▲ or ▼ button to select Picture.
Result
: The options available in the Picture group are
displayed.
TV
PIP
PIP : On
Off
3 Press the ENTER () button.
Source : TV
On
Swap
4 Press the ▲ or ▼ button to select PIP. Press the ENTER ()
Size
:
button.
Position
:
Programme : P 1
Result
: The PIP menu is displayed with the PIP option
selected.
Move Enter Return
5 Press the ENTER () button again. To activate, set PIP to on
by pressing the ▲ or ▼ button. Press the ENTER () button.
TV
PIP
6 Press the ▲ or ▼ button to select Source. Press the ENTER
PIP : On
TV
Ext.1
Source : TV
() button.
Ext.2
Swap
Ext.3
Result
: The available sources are displayed.
Size
:
AV
Position
:
S-Video
TV
-
Ext.1
-
Ext.2
-
Ext.3
-
AV
-
S-Video
-
Component
Programme : P 1
Component
-
HDMI
-
DVI
HDMI
DVI
7 Select the source of the sub picture by pressing the ▲ or ▼
Move Enter Return
button. Press the ENTER () button.
TV
PIP
8 Press the ▲ or ▼ button to select Swap. Press the ENTER ()
button.
PIP : On
√
√
Source : TV
√√
Result
: The main picture and the sub picture are interchanged.
Swap
√√
Size
:
√√
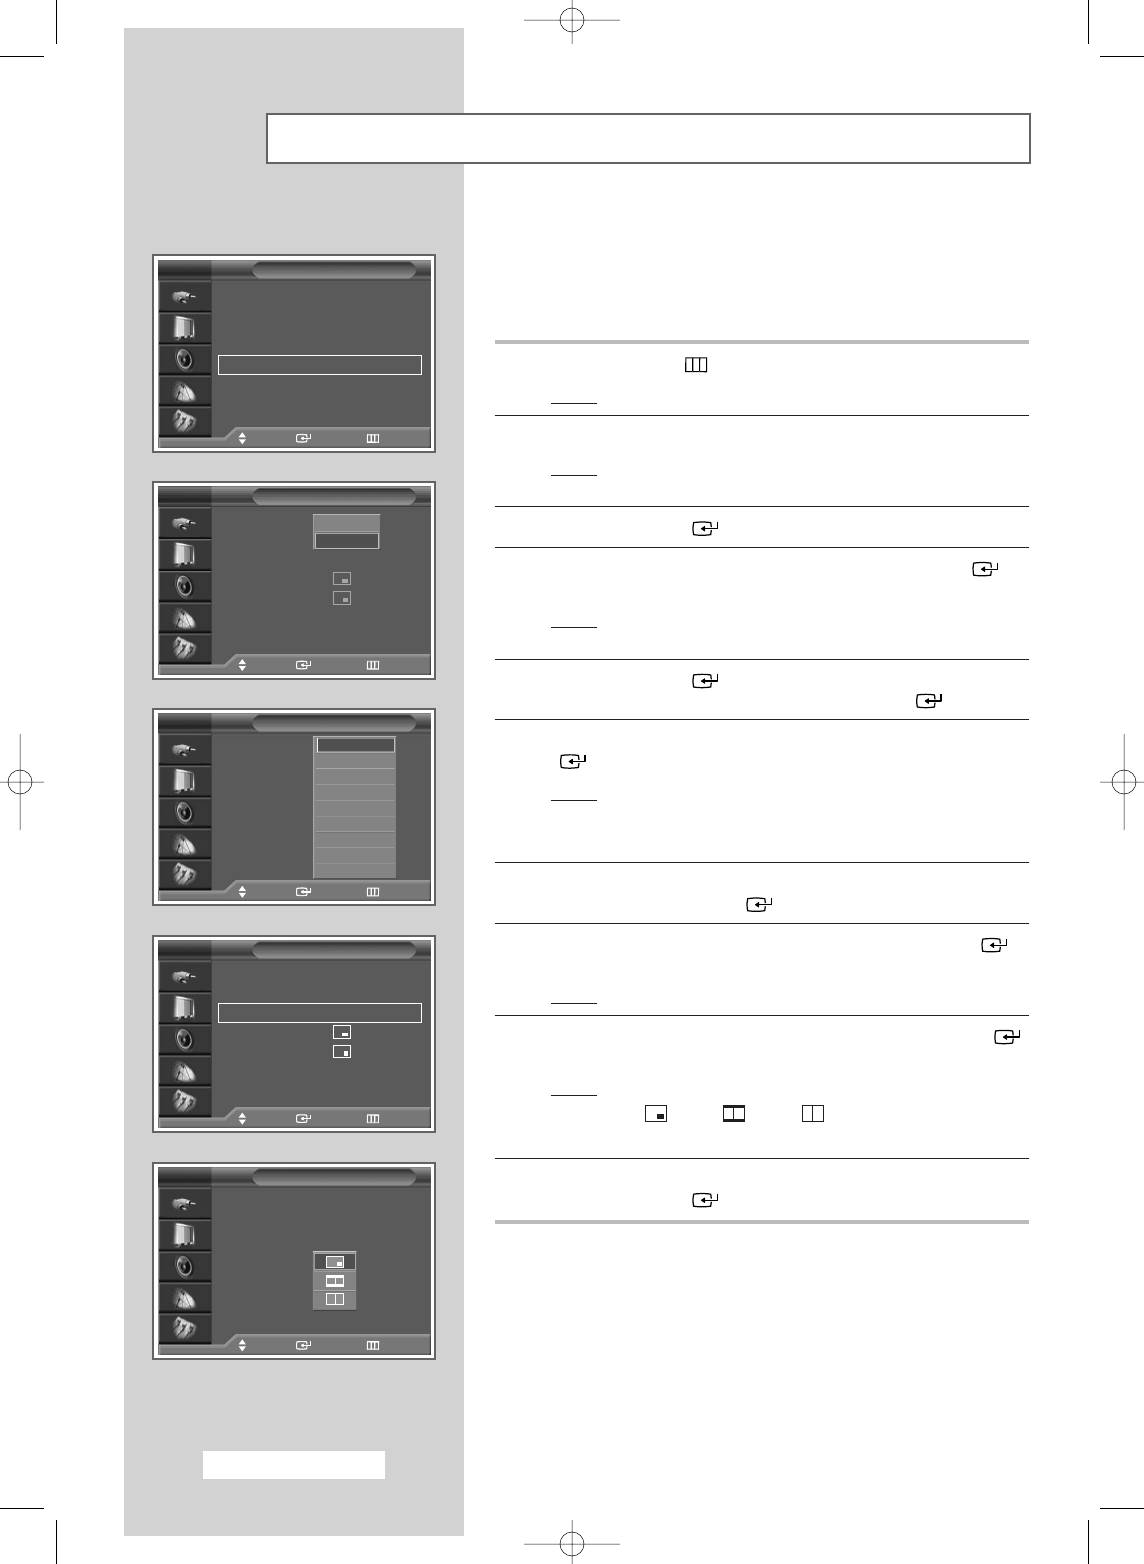
9 Press the ▲ or ▼ button to select Size. Press the ENTER ()
Position
:
√√
button.
Programme : P 1
√√
Result
: The available sizes are displayed.
Move Enter Return
--
(Small) (Double1) (Double2)
TV
PIP
10 Select a size for the sub picture by pressing the ▲ or ▼ button.
PIP : On
Press the ENTER () button.
Source : TV
Swap
Size
:
Position
:
Programme : P 1
Move Enter Return
English - 30
BN68-00746A(GAIA2_Euro_ENG) 2004/08/23 03:55 PM Page 30
Viewing Picture In Picture (PIP) (continued)
TV
PIP
11 Press the ▲ or ▼ button to select Position. Press the ENTER
PIP : On
() button.
Source : TV
Result
: The available positions are displayed.
Swap
Size
:
---
Position
:
➢
The Position menu is available when the Size is small.
Programme : P 1
12 Select a position for the sub picture by pressing the ▲ or ▼
Move Enter Return
button. Press the ENTER () button.
13 Press the ▲ or ▼ button to select Programme. Press the ENTER
TV
PIP
() button. You can select the channel that you want to view
PIP : On
√
√
through the sub picture by pressing the ▲ or ▼ button.
Source : TV
√√
When the Source is set to TV, you can select the channel of
Swap
√√
➢
the sub picture.
Size
:
√√
Position
:
√√
Programme : P 1
√√
14 Press the ENTER () button to confirm your choice.
Move Enter Return
Main
PIP
TV Ext.1 Ext.2 Ext.3 AV
S-Video
Component HDMI
DVI PC
TV
PIP
TV
OOOOOOOOOO
PIP : On
Ext.1 OXOOOOOOOO
Source : TV
Ext.2 OOXOOOOOOO
Swap
Ext.3 OOOXOOOOOO
Size
:
AV OOOOXOOOOO
Position
:
S-Video
OOOOOX OOOO
Programme : P 1
P 1
Component
OOOOOO XOOX
HDMI
OOOOOOOXXO
Move Enter Return
DVI OOOOOOO XXO
PC XXXXXXXXXX
Easy functions of the remote control.
Buttons Feature
PIP ON Used to activate or deactivate the PIP function directly.
SWAP Used to interchange the main picture and the sub picture.
➢
When the main picture is in Video mode and the sub
picture is in TV mode, you might not hear the sound
of the main picture when pressing the SWAP ()
button after changing the sub picture channel. At
this time, reselect the channel of the main picture.
P/ Used to select the channel for the sub picture.
English - 31
BN68-00746A(GAIA2_Euro_ENG) 2004/08/23 03:55 PM Page 31
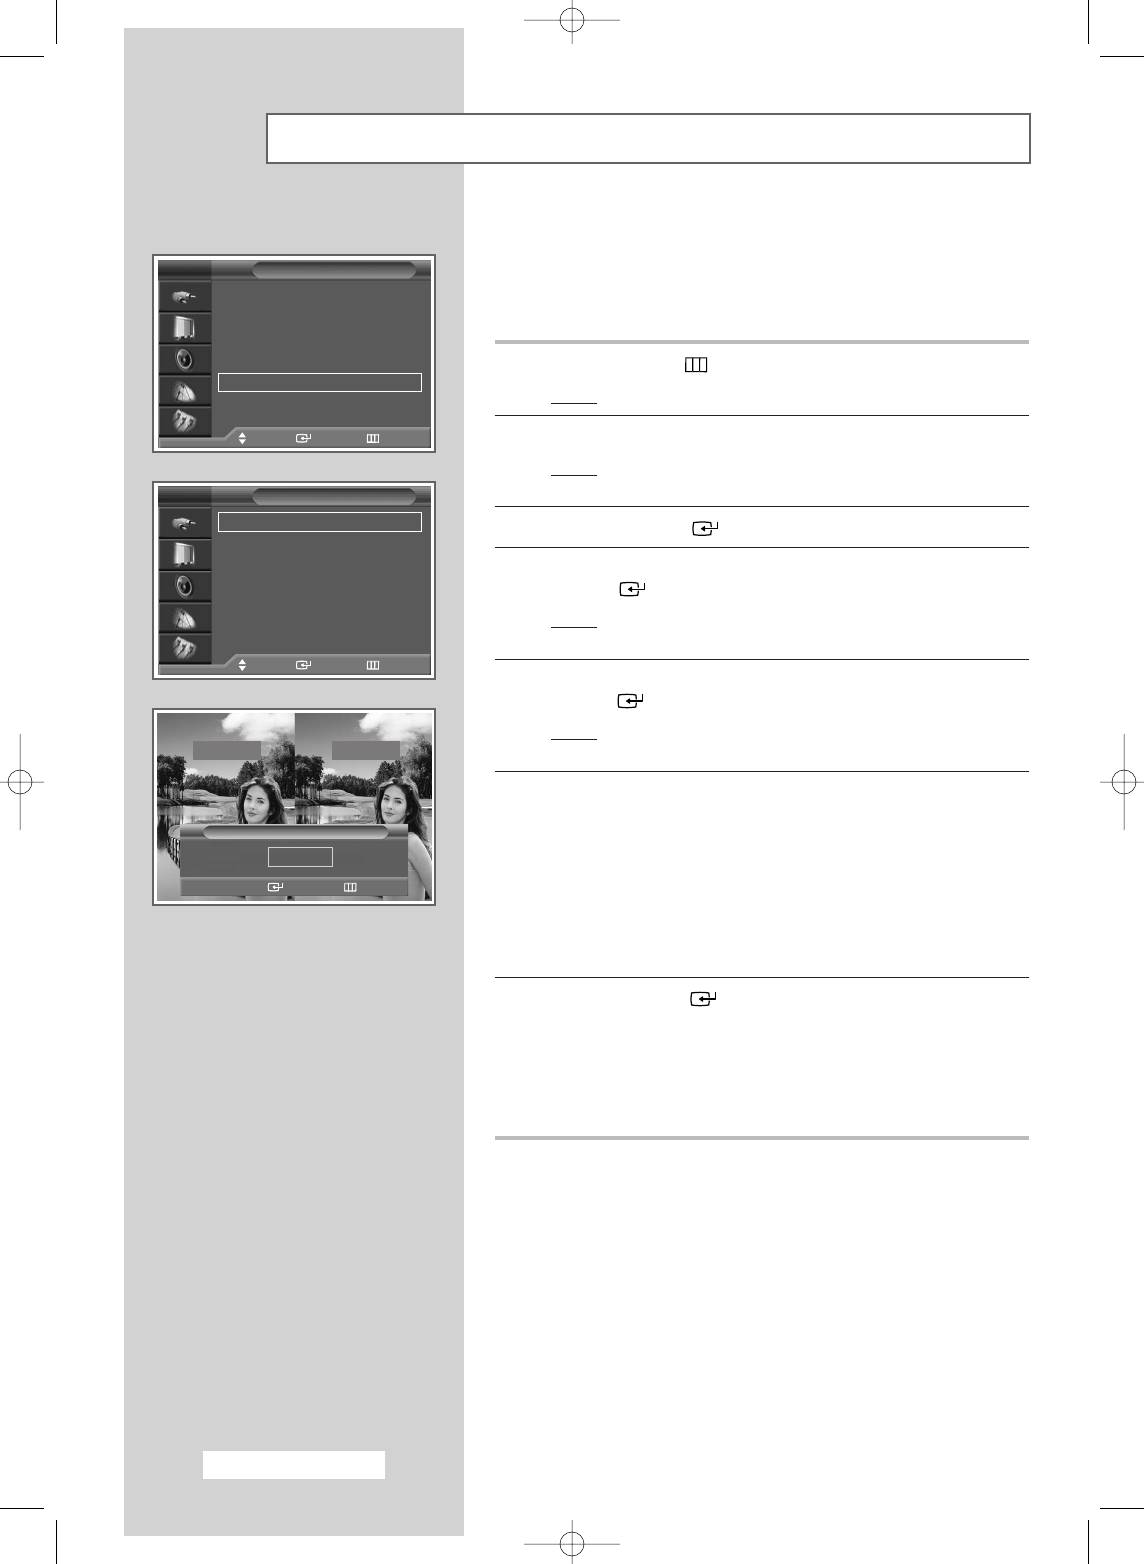
Setting the My Colour Control Mode (Easy Control)
My Colour Control mode allows users to adjust colours according
to their preferences, by adjusting skin, sky ,and grass tones using
TV
Picture
the predefined settings (Blue, Green, Pink, Standard, or Custom)
Mode : Dynamic
√
√
without affecting other colours on the screen.
Custom
√√
Colour Tone : Cool1
√√
DNIe : DNIe On
√√
PIP
√√
1 Press the MENU ()button.
My Colour Control
√√
Dynamic Contrast : On
√√
Result
: The main menu is displayed.
▼ More
Move Enter Return
2 Press the ▲ or ▼ button to select Picture.
Result
: The options available in the Picture group are
displayed.
TV
My Colour Control
Easy Control : Custom
√
√
3 Press the ENTER () button.
Detail Control
√√
4 Press the ▲ or ▼ button to select My Colour Control. Press the
ENTER () button.
Result
: The options available in the My Colour Control
group are displayed.
Move Enter Return
5 Press the ▲ or ▼ button to select Easy Control. Press the
ENTER () button.
Result
: The options available in the Easy Control group are
Original Custom
displayed.
6 Press the œ or √ button to select the mode you want among the
various picture settings. The original picture (before adjustment) is
Easy Control
shown on the left side, while the selected mode is shown on the
œœ
Standard Custom
right side. There are five Easy Colour Control modes:
◆ Blue : Emphasizes clear blues
œœ √√
Move Enter Return
◆ Green : Emphasizes mild greens
◆ Pink : Emphasizes warm skin colours
◆ Standard : Standard picture
◆ Custom : Recalls your personalized settings (see page 33)
7 Press the ENTER () button to confirm your choice.
➢
◆ Images shown above may differ from the actual
adjustment on the screen. These images are presented
for illustrative purposes.
◆ This feature is not available when the input source is in
PC mode, or DNIe is set to Off mode, or PIP is set to On .
English - 32
BN68-00746A(GAIA2_Euro_ENG) 2004/08/23 03:55 PM Page 32

Setting the My Colour Control Mode (Detail Control)
These settings can be adjusted to suit your personal preferences.
TV
Picture
Mode : Dynamic
√
√
1 Press the MENU ()button.
Custom
√√
Result
: The main menu is displayed.
Colour Tone : Cool1
√√
DNIe : DNIe On
√√
PIP
√√
2 Press the ▲ or ▼ button to select Picture.
My Colour Control
√√
Result
: The options available in the Picture group are
Dynamic Contrast : On
√√
▼ More
displayed.
Move Enter Return
3 Press the ENTER () button.
TV
My Colour Control
4 Press the ▲ or ▼ button to select My Colour Control. Press the
ENTER () button.
Easy Control : Custom
√
√
Detail Control
√√
Result
: The options available in the My Colour Control
group are displayed.
5 Press the ▲ or ▼ button to select Detail Control. Press the
ENTER () button.
Result
: The options available in the Detail Control group
Move Enter Return
are displayed.
TV
6 Press the ▲ or ▼ button to select the desired colour, then press
Detail Control
the ENTER () button.
Pink 20
Green 50
7 Press the œ or √ button to adjust the setting.
Blue 50
Reset
➢
Images shown above may differ from the actual adjustment
on the screen. These images are presented for illustrative
purposes.
Move Enter Return
8 To return to the factory defaults, select Reset by pressing the ▲
or ▼ button, then press the ENTER () button.
Result
: The previously adjusted colours will be reset to the
factory defaults.
Original Adjusted
➢
This feature is not available when the input source is in PC
mode, or DNIe is set to Off mode, or PIP is set to On .
Detail Control
Pink 20
Move
œœ √√
Adjust Return
English - 33
BN68-00746A(GAIA2_Euro_ENG) 2004/08/23 03:55 PM Page 33
Setting the Dynamic Contrast
Dynamic Contrast automatically detects the visual signal and
adjusts to create optimum contrast.
TV
Picture
Mode : Dynamic
√
√
Custom
√√
1 Press the MENU ()button.
Colour Tone : Cool1
√√
DNIe : DNIe On
√√
Result
: The main menu is displayed.
PIP
√√
My Colour Control
√√
2 Press the ▲ or ▼ button to select Picture.
Dynamic Contrast : On
√√
▼ More
Result
: The options available in the Picture group are
Move Enter Return
displayed.
3 Press the ENTER () button.
TV
Picture
4 Press the ▲ or ▼ button to select Dynamic Contrast. Press the
Mode : Dynamic
ENTER () button.
Custom
Colour Tone : Cool1
5 Select Off or On by pressing the ▲ or ▼ button.
DNIe : DNIe On
PIP
6 Press the ENTER () button to confirm your choice.
My Colour Control
Dynamic Contrast : On
Off
▼ More
On
Move Enter Return
➢
This feature is not available when the input source is in PC
mode, or
DNIe
is set to
Off
mode, or
PIP
is set to
On
.
Setting the Brightness Sensor
Brightness Sensor adjusts the screen brightness automatically
depending on the surrounding lighting conditions.
TV
Picture
▲ More
Brightness Sensor :Off
√
√
1 Press the MENU ()button.
Size : Auto Wide
√√
Result
: The main menu is displayed.
2 Press the ▲ or ▼ button to select Picture.
Result
: The options available in the Picture group are
Move Enter Return
displayed.
3 Press the ENTER () button.
Brightness Sensor
4 Press the ▲ or ▼ button to select Brightness Sensor. Press the
ENTER () button.
-
+
5 Select Off or On by pressing the œ or √ button.
Off
On
œœ √√
Move Enter Return
6 Press the ENTER () button to confirm your choice.
➢
This feature is not available when the input source is in PC
mode.
English - 34
BN68-00746A(GAIA2_Euro_ENG) 2004/08/23 03:55 PM Page 34

Setting the Colour Weakness Enhancement
This option adjusts the Red, Blue, or Green colour to enhance the
image according to the user’s particular colour weakness.
TV
Setup
Time
√
√
1 Press the MENU ()button.
Plug & Play
√√
Language : English
√√
Result
: The main menu is displayed.
Blue Screen : Off
√√
AV Setup
√√
2 Press the ▲ or ▼ button to select Setup.
Colour Weakness : Off
√√
Melody : On
√√
Result
: The options available in the Setup group are displayed.
PC
√
√
Move Enter Return
3 Press the ENTER () button.
4 Press the ▲ or ▼ button to select Colour Weakness. Press the
TV
Colour Weakness
ENTER () button.
Colour Weakness : Off
Off
5 Press the ENTER () button again. Press the ▲ or ▼ button to
Red 0
On
select On, then press the ENTER () button.
Green 0
Blue 0
Result
: The options available in the Colour Weakness group
are displayed.
6 Press the ▲ or ▼ button to select the colour you wish to enhance,
Move Enter Return
then press the ENTER () button.
7 Press the œ or √ button to adjust to your preference.
TV
Colour Weakness
8 Press the MENU () button to confirm your choice.
Colour Weakness : On
√
√
Red 0
➢
This feature is not available when the input source is in PC
Green 0
mode, or DNIe is set to Off mode.
Blue 0
Move Enter Return
Colour Weakness
Red 0
Move
œœ √√
Adjust Return
English - 35
BN68-00746A(GAIA2_Euro_ENG) 2004/08/23 03:55 PM Page 35
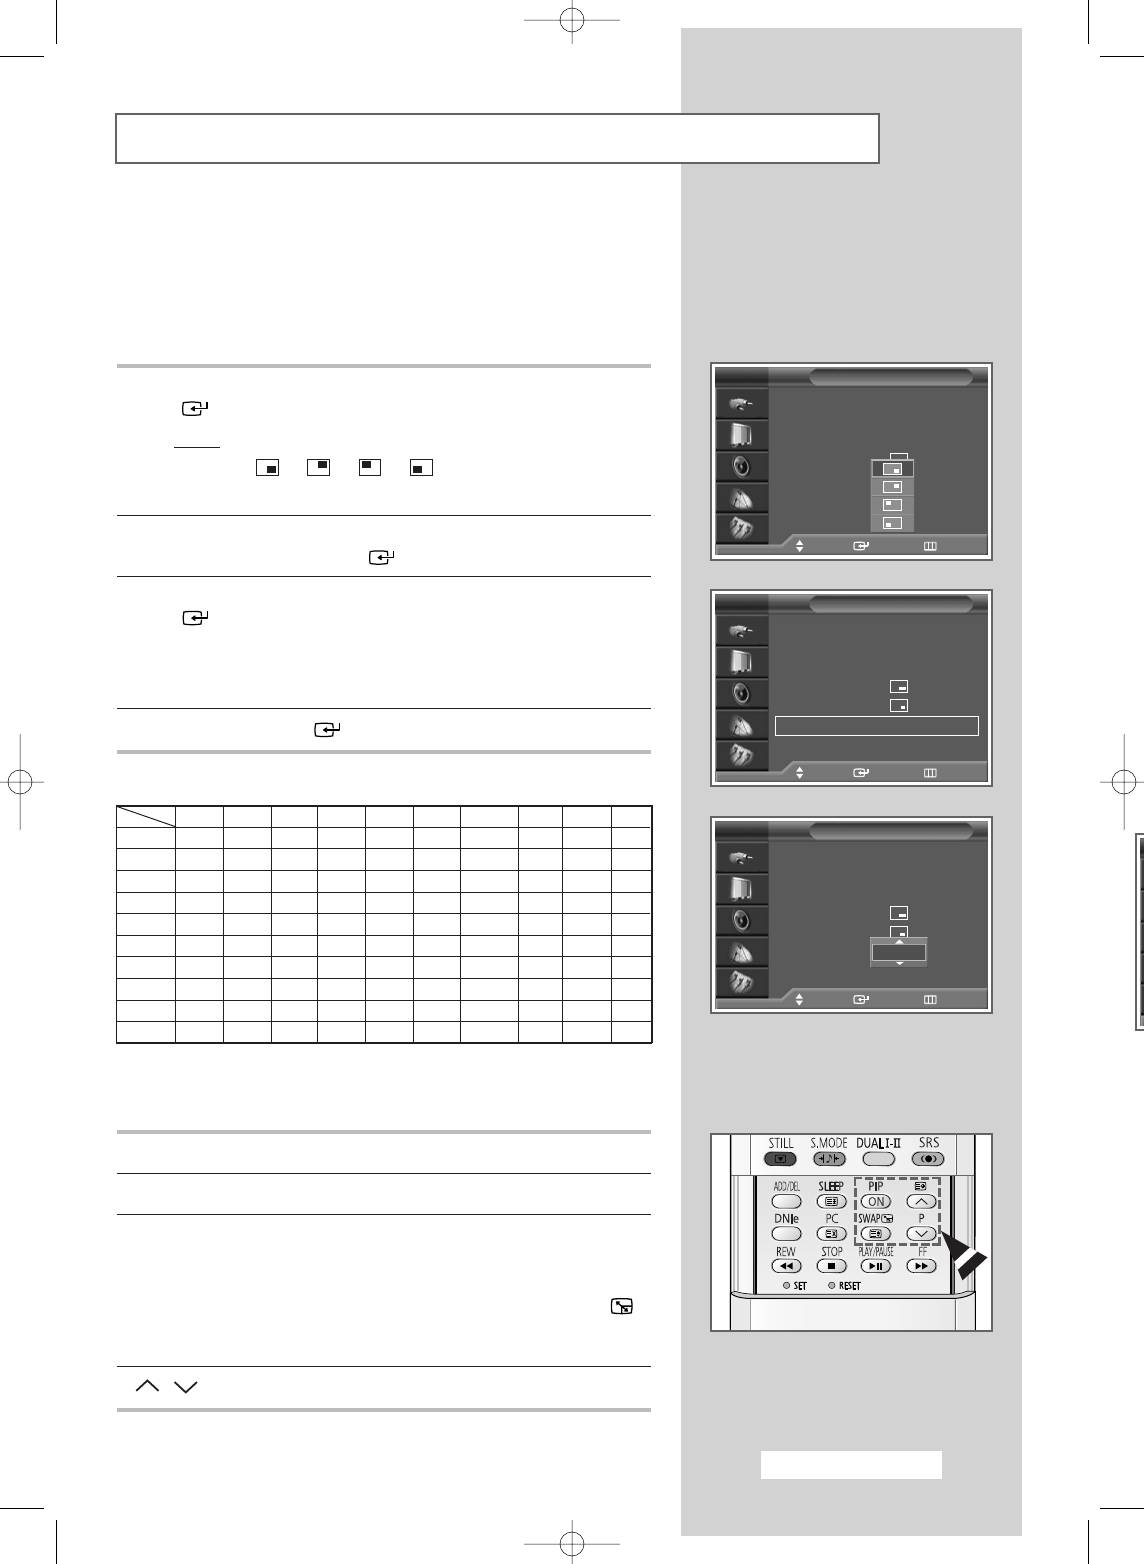
Selecting the Picture Size
You can select the picture size which best corresponds to your
viewing requirements.
TV
Picture
▲ More
Brightness Sensor :Off
√
√
1 Press the MENU ()button.
Size : Auto Wide
√√
Result
: The main menu is displayed.
2 Press the ▲ or ▼ button to select Picture.
Result
:
The options available in the
Picture
group are
displayed.
Move Enter Return
3 Press the ENTER () button.
TV
Picture
4 Press the ▲ or ▼ button to select Size. Press the ENTER ()
▲ More
button.
Brightness Sensor :Off
Result
:
The
Size
menu is displayed.
Size : Auto Wide
Auto Wide
Wide
Panorama
5 Select the required mode by pressing the ▲ or ▼ button. Press
Zoom1
the ENTER () button.
Zoom2
4:3
Result
: The following modes are available:
Move Enter Return
Auto Wide Automatically enlarges the image to fit into 16:9
aspect ratio providing optimal display.
Wide Adjusts the picture to fit into the 16:9 wide aspect
ratio.
Panorama Adjusts a wide picture to appear natural.
Zoom1
Vertically enlarges the picture by approximately
130%.
Zoom2
Vertically enlarges the picture by approximately
150%.
4:3 Adjusts the picture to fit into a 4:3 normal aspect
ratio.
➢
◆ Lifting is available in the Zoom1 or Zoom2 mode by
pressing the ▲ or ▼ button.
◆ Subtitles may be cut-off or hidden below the screen area
in Zoom1 and Zoom2 modes.
◆ Zoom1 and Zoom2 mode is only enabled when the input
s
ource is TV, AV, S-Video
,
or Component.
◆ Panorama, Zoom1, or Zoom2 mode is disabled
in DVI
m
ode.
◆ Only Wide and 4:3 modes are selectable
in PC m
ode.
◆ The screen size can be adjusted in each input mode, and
the PIP is only enabled in Wide mode.
◆ The Panorama mode is disabled in component modes
(480i, 480p, 576i, 576p, 720p, 1080i, 1080p).
➢
You can select these options by simply pressing the
P.SIZE () button on the remote control.
English - 36
BN68-00746A(GAIA2_Euro_ENG) 2004/08/23 03:55 PM Page 36
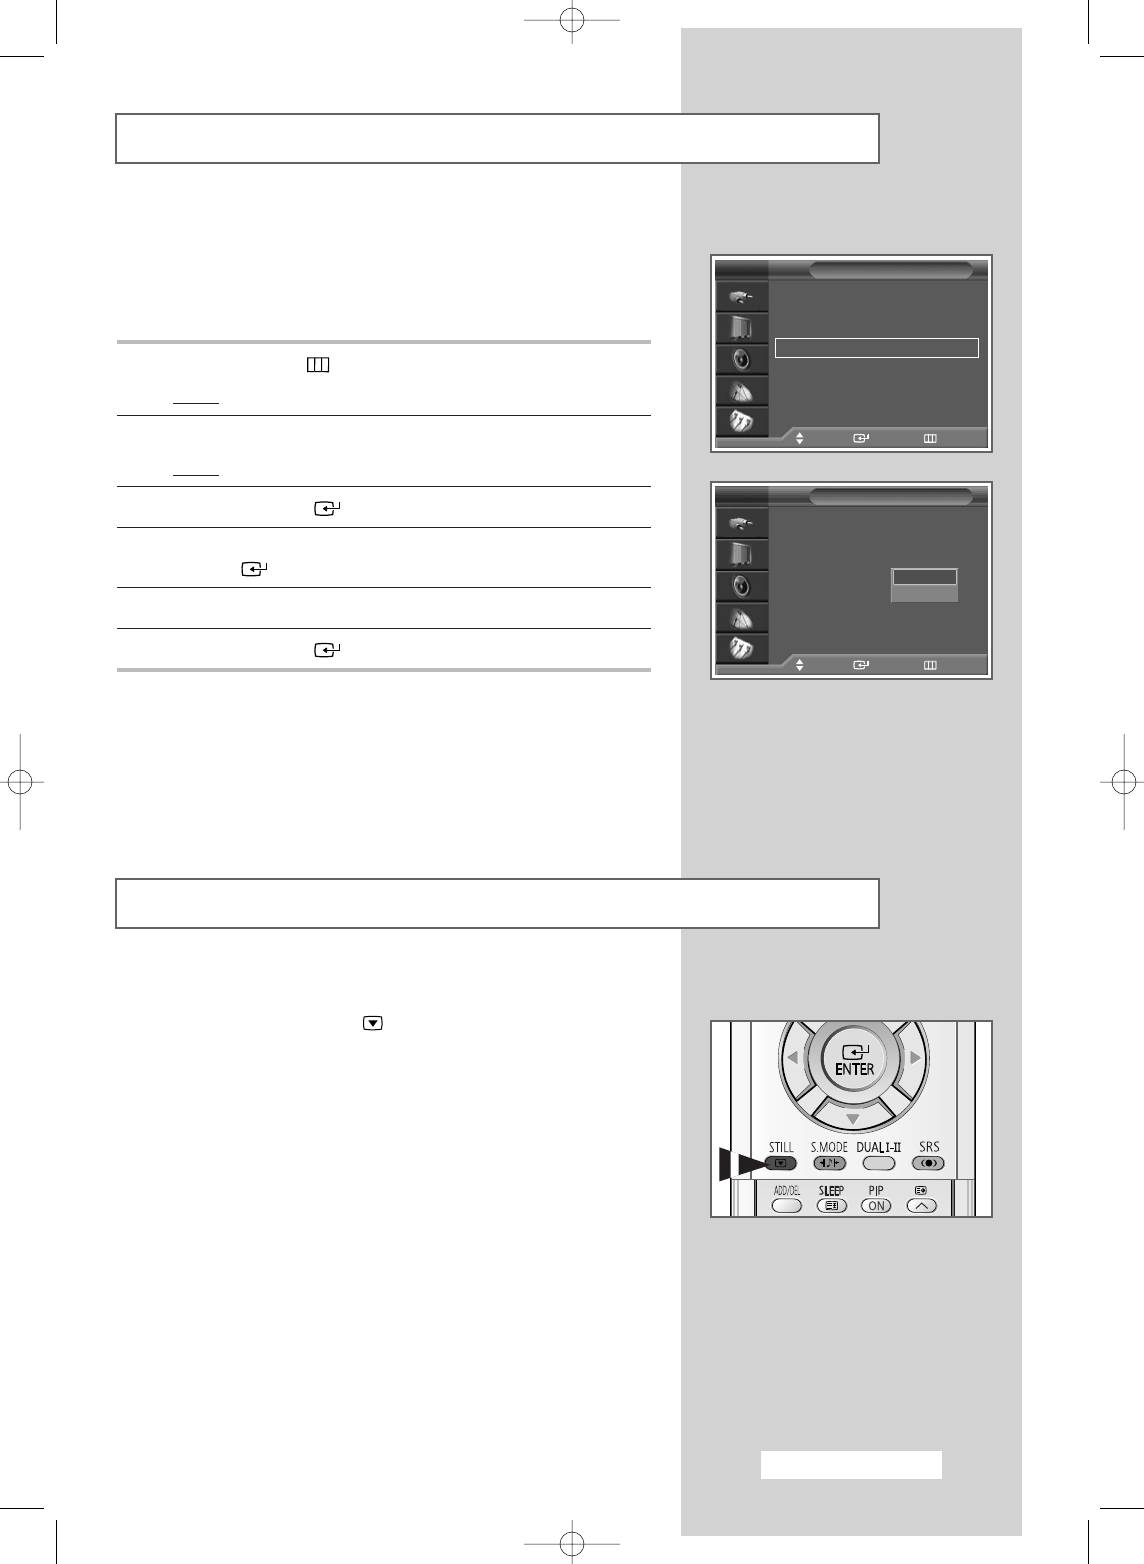
Setting the Blue Screen Mode
If no signal is being received or the signal is very weak, a blue
screen automatically replaces the noisy picture background. If you
TV
Setup
wish to continue viewing the poor picture, you must set the blue
Time
√
√
screen mode to off.
Plug & Play
√√
Language : English
√√
Blue Screen : Off
√√
1 Press the MENU ()button.
AV Setup
√√
Colour Weakness : Off
√√
Result
: The main menu is displayed.
Melody : On
√√
PC
√
√
2 Press the ▲ or ▼ button to select Setup.
Move Enter Return
Result
: The options available in the Setup group are displayed.
TV
Setup
3 Press the ENTER () button.
Time
Plug & Play
4 Press the ▲ or ▼ button to select Blue Screen. Press the
Language : English
ENTER () button.
Blue Screen : Off
Off
AV Setup
On
5 Select Off or On by pressing the ▲ or ▼ button.
Colour Weakness : Off
Melody : On
PC
6 Press the ENTER () button to confirm your choice.
Move Enter Return
Freezing the Current Picture
You can freeze the picture when watching a television programme
simply by pressing the “STILL ( )” button. To return to normal
viewing, press it again.
English - 37
BN68-00746A(GAIA2_Euro_ENG) 2004/08/23 03:55 PM Page 37
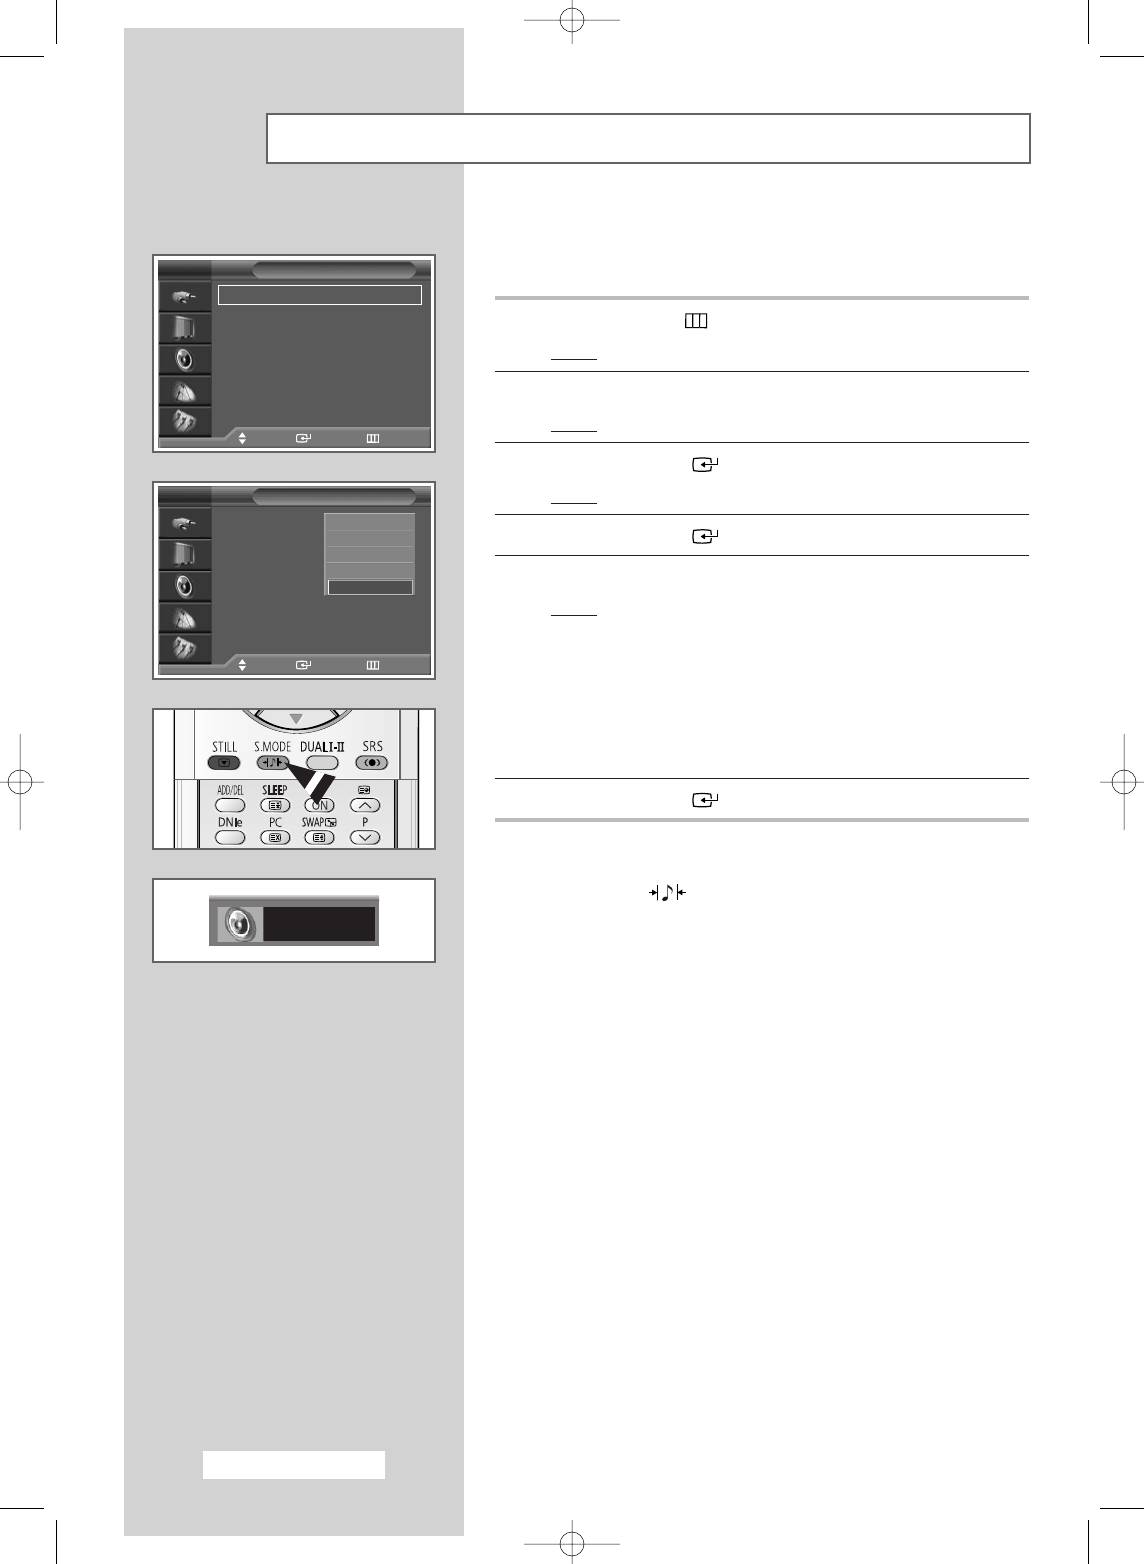
Changing the Sound Standard
You can select the type of special sound effect to be used when
watching a given broadcast.
TV
Sound
Mode : Custom
√
√
Equalizer
√√
1 Press the MENU ()button.
Auto Volume : Off
√√
SRS TSXT : Off
√√
Result
: The main menu is displayed.
Sub Woofer
√√
2 Press the ▲ or ▼ button to select Sound.
Result
:
The options available in the
Sound
group are displayed.
Move Enter Return
3 Press the ENTER () button.
TV
Sound
Result
: Mode is selected
.
Mode : Standard
Standard
Equalizer
Music
4 Press the ENTER () button again.
Auto Volume : Off
Movie
Speech
SRS TSXT : Off
5 Select the required option by pressing the ▲ or ▼ button.
Custom
Sub Woofer
Result
: The following modes are available:
◆ Standard : Standard settings suitable for all
Move Enter Return
programmes
◆ Music : Enhances playback of music
◆ Movie : Emphasizes bass tones
◆ Speech : Emphasizes crisp, clear dialogue
◆ Custom : Recalls your personalized
settings (see page 39)
6 Press the ENTER () button to confirm your choice.
➢
You can select these options by simply pressing the
S.MODE (: Sound Mode) button on the remote
control.
Custom
English - 38
BN68-00746A(GAIA2_Euro_ENG) 2004/08/23 03:55 PM Page 38

Customizing the Sound Settings
Your television has several settings which allow you to control the
sound quality.
TV
Sound
Mode : Custom
√
√
Equalizer
√√
1 Press the MENU ()button.
Auto Volume : Off
√√
Result
: The main menu is displayed.
SRS TSXT : Off
√√
Sub Woofer
√√
2 Press the ▲ or ▼ button to select Sound.
Result
:
The options available in the
Sound
group are displayed.
Move Enter Return
3 Press the ENTER () button.
TV
Equalizer
4 Press the ▲ or ▼ button to select Equalizer. Press the ENTER
() button.
R
Result
: The Equalizer menu is displayed with the current
option.
L
5 Select the option (balance or equalizer) to be adjusted by pressing
100 300 1K 3K 10K
the œ or √ button.
Press the ▲ or ▼ button to reach the required setting.
œœ √√
Move Adjust Return
➢
If you make any changes to the custom settings, the sound
standard is automatically switched to Custom.
English - 39
BN68-00746A(GAIA2_Euro_ENG) 2004/08/23 03:55 PM Page 39
Adjusting the Volume Automatically
Each broadcasting station has its own signal conditions, and so it
is not easy to adjust the volume every time the channel is
TV
Sound
changed. This feature lets you automatically adjust the volume of
Mode : Custom
√
√
the desired channel by lowering the sound output when the
Equalizer
√√
modulation signal is high or by raising the sound output when the
Auto Volume : Off
√√
SRS TSXT : Off
√√
modulation signal is low.
Sub Woofer
√√
1 Press the MENU ()button.
Move Enter Return
Result
: The main menu is displayed.
2 Press the ▲ or ▼ button to select Sound.
TV
Sound
Result
:
The options available in the
Sound
group are displayed.
Mode : Custom
Equalizer
Auto Volume : Off
3 Press the ENTER () button.
Off
SRS TSXT : Off
On
Sub Woofer
4 Press the ▲ or ▼ button to select Auto Volume. Press the
ENTER () button.
5 Select Off or On by pressing the ▲ or ▼ button.
Move Enter Return
6 Press the ENTER () button to confirm your choice.
English - 40
BN68-00746A(GAIA2_Euro_ENG) 2004/08/23 03:55 PM Page 40
Setting up SRS TSXT
TruSurround XT is a patented SRS technology that solves the
problem of playing 5.1 multichannel content over two speakers.
TV
Sound
TruSurround delivers a compelling, virtual surround sound
Mode : Custom
√
√
experience through any two-speaker playback system, including
Equalizer
√√
internal television speakers. It is fully compatible with all
Auto Volume : Off
√√
multichannel formats.
SRS TSXT : Off
√√
Sub Woofer
√√
1 Press the MENU ()button.
Result
: The main menu is displayed.
Move Enter Return
2 Press the ▲ or ▼ button to select Sound.
TV
Sound
Result
:
The options available in the
Sound
group are displayed.
Mode : Custom
Equalizer
3 Press the ENTER () button.
Auto Volume : Off
SRS TSXT : Off
Off
4 Press the ▲ or ▼ button to select SRS TSXT. Press the ENTER
Sub Woofer
3D Mono
() button.
Stereo
5 Select the required option (Off
,
3D Mono, or Stereo) by pressing
the ▲ or ▼ button.
Move Enter Return
6 Press the ENTER () button to confirm your choice.
➢
◆ TruSurround XT, SRS and Symbol
are trademarks of SRS Labs, Inc.
TruSurround XT technology is
incorporated under license from
SRS Labs, Inc.
◆ You can select these options by simply pressing the
SRS TSXT : Off
SRS () button on the remote control.
English - 41
BN68-00746A(GAIA2_Euro_ENG) 2004/08/23 03:55 PM Page 41
Setting the Sub Woofer Output
If your TV is connected to a Sub Woofer, you can select the Sub
Woofer output, volume and cut-off frequencies.
TV
Sound
Mode : Custom
√
√
Equalizer
√√
1 Press the MENU ()button.
Auto Volume : Off
√√
SRS TSXT : Off
√√
Result
: The main menu is displayed.
Sub Woofer
√√
2 Press the ▲ or ▼ button to select Sound.
Result
:
The options available in the
Sound
group are displayed.
Move Enter Return
3 Press the ENTER () button.
TV
Sub Woofer
4 Press the ▲ or ▼ button to select Sub Woofer. Press the ENTER
Sub Woofer : Off
Off
() button
.
Volume 50
On
Cut Off Freq. 150
5 Press the ENTER () button again. Press the ▲ or ▼ button to
select On, then press the ENTER () button.
Result
:
The options available in the Sub Woofer group are
displayed.
Move Enter Return
6 Press the ▲ or ▼ button to select the item you wish to adjust, then
press the ENTER () button. Press the œ or √ button to adjust
TV
Sub Woofer
to your preference.
◆ Volume : Adjusts the volume of the sub woofer.
Sub Woofer : On
√
√
◆ Cut off Freq. : Adjusts the cut off frequency for the
Volume 50
Cut Off Freq. 150
sub woofer for the best bass response in
your room.
Move Enter Return
TV
Sub Woofer
Sub Woofer : On
√
√
Volume 50
Cut Off Freq. 150
Move
œœ √√
Adjust Return
English - 42
BN68-00746A(GAIA2_Euro_ENG) 2004/08/23 03:55 PM Page 42
Setting up the Melody Sound
You can hear clear melody sound when the television is powered
on or off.
TV
Setup
Time
√
√
Plug & Play
√√
1 Press the MENU ()button.
Language : English
√√
Blue Screen : Off
√√
Result
: The main menu is displayed.
AV Setup
√√
Colour Weakness : Off
√√
2 Press the ▲ or ▼ button to select Setup.
Melody : On
√√
PC
√
√
Result
: The options available in the Setup group are displayed.
Move Enter Return
3 Press the ENTER () button.
TV
Setup
4 Press the ▲ or ▼ button to select Melody. Press the ENTER
Time
() button.
Plug & Play
Language : English
5 Select the required option (Off or On) by pressing the ▲ or ▼
Blue Screen : Off
button.
AV Setup
Colour Weakness : Off
6 Press the ENTER () button to confirm your choice.
Melody : On
Off
PC
On
Move Enter Return
English - 43
BN68-00746A(GAIA2_Euro_ENG) 2004/08/23 03:55 PM Page 43
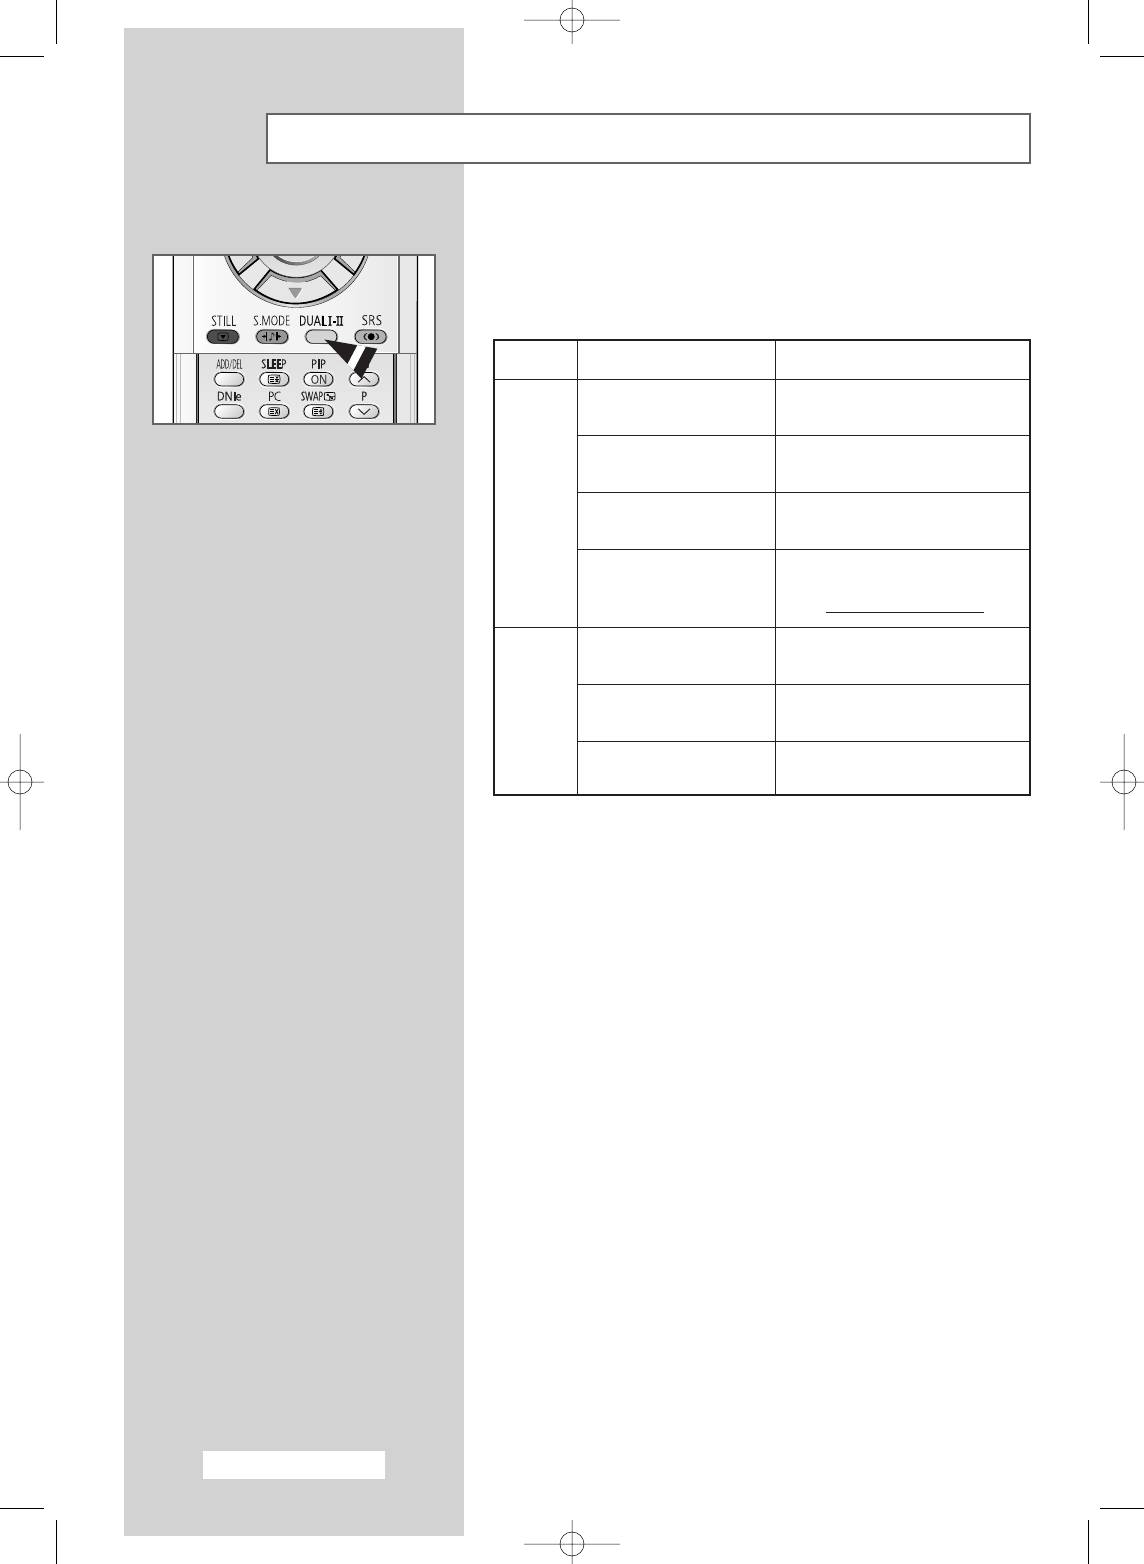
Selecting the Sound Mode
The “DUAL I-II” button displays/controls the processing and output
of the audio signal. When power is switched on, the mode is
automatically preset to either “Dual I ” or “Stereo”, depending on
the current transmission.
Type of broadcast
On-screen indication
Regular broadcast
Mono
(Normal use)
(Standard audio)
Regular +
NICAM ↔ NICAM
NICAM Mono
Mono
NICAM
Stereo
NICAM ↔ Mono
NICAM Stereo
Stereo (Normal)
NICAM → NICAM → Mono
NICAM Dual I/II
Dual I Dual II (Normal)
→
→
Regular broadcast
Mono (Normal use)
(Standard audio)
A2
Bilingual or Dual I/II
Dual I ↔ Dual II
Stereo
Stereo
↔ Mono
Stereo
(Forced mono)
➢
◆ If the receiving conditions deteriorate, listening will be
easier if the mode is set to the Mono.
◆ If the stereo signal is weak and automatic switching
occurs, switch to the Mono.
◆ When receiving mono sound in AV mode, connect to the
“AUDIO-L” input connector on the panel (front or side,
depending on the model). If mono sound only comes out
of the left speaker, press the DUAL I-II button.
English - 44
BN68-00746A(GAIA2_Euro_ENG) 2004/08/23 03:55 PM Page 44
Setting and Displaying the Current Time
You can set the television clock so that the current time is displayed
when pressing the “INFO ( ) ” button. You must also set the time
TV
Setup
if you wish to use the automatic on or off timers.
Time
√
√
Plug & Play
√√
Language : English
√√
➢
When pressing the “”button (On/Off) on the panel of
Blue Screen : Off
√√
the television,
the clock setting will be reset.
AV Setup
√√
Colour Weakness : Off
√√
Melody : On
√√
1 Press the MENU () button.
PC
√
√
Move Enter Return
Result
: The main menu is displayed.
2 Press the ▲ or ▼ button to select Setup.
TV
Time
Result
: The options available in the Setup group are
Clock Set :
--
:
--
√√
displayed.
Sleep Timer : Off
√√
On Timer : Inactivated
√
√
3 Press the ENTER () button.
Off Timer : Inactivated
√√
4 Press the ▲ or ▼ button to select Time. Press the ENTER ()
button.
Move Enter Return
Result
: The options available in the Time group are displayed
with Clock Set is selected.
TV
Clock Set
5 Press the ENTER () button.
6 Press the ➛ or ❿☎ button to move to the Hour or Minute. Set
these by pressing the ▲ or ▼ button.
Hour Minute
00 00
➢
You can also set the Hour and Minute by pressing the
number buttons directly.
œœ √√
Move Adjust Return
English - 45
BN68-00746A(GAIA2_Euro_ENG) 2004/08/23 03:56 PM Page 45
Setting the Sleep Timer
You can select a time period of between 30 and 180 minutes after
which the television automatically switches to Standby mode.
TV
Setup
Time
√
√
Plug & Play
√√
Language : English
√√
1 Press the MENU () button.
Blue Screen : Off
√√
AV Setup
√√
Result
: The main menu is displayed.
Colour Weakness : Off
√√
Melody : On
√√
2 Press the ▲ or ▼ button to select Setup.
PC
√
√
Move Enter Return
Result
: The options available in the Setup group are
displayed.
TV
Time
3 Press the ENTER () button.
Clock Set : 11 : 35
√
√
Sleep Timer : Off
√√
4 Press the ▲ or ▼ button to select Time. Press the ENTER ()
On Timer : Inactivated
√√
button.
Off Timer : Inactivated
√√
Result
: The options available in the Time group are displayed.
5 Press the ▲ or ▼ button to select Sleep Timer. Press the
ENTER () button.
Move Enter Return
6 Select the preset time interval (Off, 30, 60 , 90, 120, 150, or 180)
for staying on by pressing the ▲ or ▼ button.
TV
Time
Clock Set : 11 : 35
7 Press the ENTER () button to confirm your choice.
Sleep Timer : Off
Off
On Timer : Inactivated
30
60
Off Timer : Inactivated
90
➢
◆ You can also set these options simply by pressing the
120
SLEEP () button.
150
180
◆ If the sleep timer is not yet set, Off is displayed.
Move Enter Return
If the sleep timer is already set, the remaining time
before which the television switches to Standby mode
is displayed.
Sleep Timer 30
English - 46
BN68-00746A(GAIA2_Euro_ENG) 2004/08/23 03:56 PM Page 46
Switching the Television On and Off Automatically
You can set the On or Off timers so that the television will:
◆ Switch on automatically and tune to the channel of your
TV
Setup
choice at the time you select
Time
√
√
Plug & Play
√√
◆ Switch off automatically at the time you select
Language : English
√√
Blue Screen : Off
√√
AV Setup
√√
➢
The first step is to set the television’s clock (refer to “Setting
Colour Weakness : Off
√√
and Displaying the Current Time” on page 45).
Melody : On
√√
PC
√
√
Move Enter Return
1 Press the MENU () button.
Result
: The main menu is displayed.
TV
Time
2 Press the ▲ or ▼ button to select Setup.
Clock Set : 11 : 35
√
√
Sleep Timer : 30 min
√√
Result
: The options available in the Setup group are
On Timer : Inactivated
√√
displayed.
Off Timer : Inactivated
√√
3 Press the ENTER () button.
4 Press the ▲ or ▼ button to select Time. Press the ENTER ()
button.
Move Enter Return
Result
: The options available in the Time group are displayed.
TV
On Timer
5 Press the ▲ or ▼ button to select On Timer. Press the ENTER
() button.
Result
: The options available in the On Timer group are
Hour Minute
displayed.
06 30
Prog. Vol. Activation
6 Select the Hour, Minute, Prog. (programme number), or Vol.
P 01 10 Yes
(volume level) by pressing the œ or √ button. Set these by
pressing the ▲ or ▼ button.
œœ √√
Move Adjust Return
7 To activate the On Timer with the settings entered, select
Activation by pressing the œ or √ button, then select Yes by
TV
Time
pressing the ▲ or ▼ button.
Clock Set : 11 : 35
√
√
8 Press the MENU ()button.
Sleep Timer : 30 min
√√
On Timer : 06 : 30
Activated
√√
Result
: The options available in the Time group are displayed
Off Timer : Inactivated
√√
again.
9 Press the ▲ or ▼ button to select Off Timer. Press the ENTER
() button.
Result
: The Off Timer menu is displayed.
Move Enter Return
10 Set the Off Timer in the same way for On Timer setting.
(step 6 ~ 7)
TV
Off Timer
➢
Auto Power Off
Hour Minute Activation
Auto power off will automatically turn the TV off if you do
23 30 Yes
not operate any controls within 3 hours after the TV is turned
on by the timer. This function is available in the timer “On”
mode only and will prevent a leakage accident or
overheating caused by your TV being left on too long.
œœ √√
Move Adjust Return
English - 47
BN68-00746A(GAIA2_Euro_ENG) 2004/08/23 03:56 PM Page 47
Auto Screen Adjustment in PC Mode
➢
Preset to the PC mode by using the PC button.
The frequency and position of the PC screen can be automatically
adjusted.
TV
Setup
Time
√
√
Plug & Play
√
√
1 Press the MENU () button.
Language : English
√
√
Blue Screen : Off
√√
Result
: The main menu is displayed.
AV Setup
√√
Colour Weakness : Off
√
√
2 Press the ▲ or ▼ button to select Setup.
Melody : On
√
√
PC
√√
Result
: The options available in the Setup group are
Move Enter Return
displayed.
3 Press the ENTER () button.
TV
PC
4 Press the ▲ or ▼ button to select PC. Press the ENTER ()
Image Lock
√
√
button.
Position
√√
Image Reset
√√
Result
: The options available in the PC group are displayed.
Auto Adjustment
√√
5 Press the ▲ or ▼ button to select Auto Adjustment. Press the
ENTER () button to reset the image.
1024x768@60Hz
Result
: The message Auto Adjustment in progress.
Move Enter Return
Please wait will be displayed.
Auto Adjustment in progress.
Please Wait
English - 48
BN68-00746A(GAIA2_Euro_ENG) 2004/08/23 03:56 PM Page 48
Setting the Image Lock in PC Mode
➢
Preset to the PC mode by using the PC button.
1 Press the MENU () button.
TV
Setup
Result
: The main menu is displayed.
Time
√
√
Plug & Play
√
√
2 Press the ▲ or ▼ button to select Setup.
Language : English
√
√
Blue Screen : Off
√√
Result
: The options available in the Setup group are
AV Setup
√√
displayed.
Colour Weakness : Off
√
√
Melody : On
√
√
PC
√√
3 Press the ENTER () button.
Move Enter Return
4 Press the ▲ or ▼ button to select PC. Press the ENTER ()
button.
TV
PC
Result
: The options available in the PC group are displayed.
Image Lock
√
√
Position
√√
5 Press the ▲ or ▼ button to select Image Lock. Press the ENTER
Image Reset
√√
() button.
Auto Adjustment
√√
Result
: The options available in the Image Lock group are
displayed.
1024x768@60Hz
Move Enter Return
If vertical patterns appear on the PC screen, adjust the frequency
(Coarse).
TV
Image Lock
Coarse 1344
6 Press the ▲ or ▼ button to select Coarse. Press the ENTER
Fine 128
() button.
7 Press the œ or √ button to adjust the frequency.
Move
œœ √√
Adjust Return
Fine tune the PC screen for improved picture quality.
TV
Image Lock
8 Press the ▲ or ▼ button to select Fine.
Coarse 1344
9 Press the œ or √ button to fine tune the picture.
Fine 128
10 Press the ENTER () button to confirm your choice.
Move
œœ √√
Adjust Return
English - 49
BN68-00746A(GAIA2_Euro_ENG) 2004/08/23 03:56 PM Page 49
Setting the Screen Position in PC Mode
➢
Preset to the PC mode by using the PC button.
Adjust the PC’s screen positioning if it does not fit the TV screen.
TV
Setup
Time
√
√
Plug & Play
√
√
1 Press the MENU () button.
Language : English
√
√
Blue Screen : Off
√√
Result
: The main menu is displayed.
AV Setup
√√
Colour Weakness : Off
√
√
2 Press the ▲ or ▼ button to select Setup.
Melody : On
√
√
PC
√√
Result
: The options available in the Setup group are
Move Enter Return
displayed.
3 Press the ENTER () button.
TV
PC
Image Lock
√
√
4 Press the ▲ or ▼ button to select PC. Press the ENTER ()
Position
√√
button.
Image Reset
√√
Result
: The options available in the PC group are displayed.
Auto Adjustment
√√
5 Press the ▲ or ▼ button to select Position. Press the ENTER
1024x768@60Hz
() button.
Move Enter Return
6 Adjust the position by using the ▲, ▼, œ, or √ button.
7 Press the ENTER () button to confirm your choice.
TV
Position
Move Enter Return
English - 50
BN68-00746A(GAIA2_Euro_ENG) 2004/08/23 03:56 PM Page 50
Initializing the Screen Settings in PC Mode
➢
Preset to the PC mode by using the PC button.
Use this function to return the screen settings to the default values.
TV
Setup
1 Press the MENU () button.
Time
√
√
Plug & Play
√
√
Result
: The main menu is displayed.
Language : English
√
√
Blue Screen : Off
√√
2 Press the ▲ or ▼ button to select Setup.
AV Setup
√√
Colour Weakness : Off
√
√
Result
: The options available in the Setup group are
Melody : On
√
√
displayed.
PC
√√
Move Enter Return
3 Press the ENTER () button.
TV
PC
4 Press the ▲ or ▼ button to select PC. Press the ENTER ()
button.
Image Lock
√
√
Position
√√
Result
: The options available in the PC group are displayed.
Image Reset
√√
Auto Adjustment
√√
5 Press the ▲ or ▼ button to select Image Reset. Press the
ENTER () button to reset the image.
1024x768@60Hz
Result
: The message Image Reset has Completed. will be
displayed.
Move Enter Return
Image Reset has Completed.
English - 51
BN68-00746A(GAIA2_Euro_ENG) 2004/08/23 03:56 PM Page 51
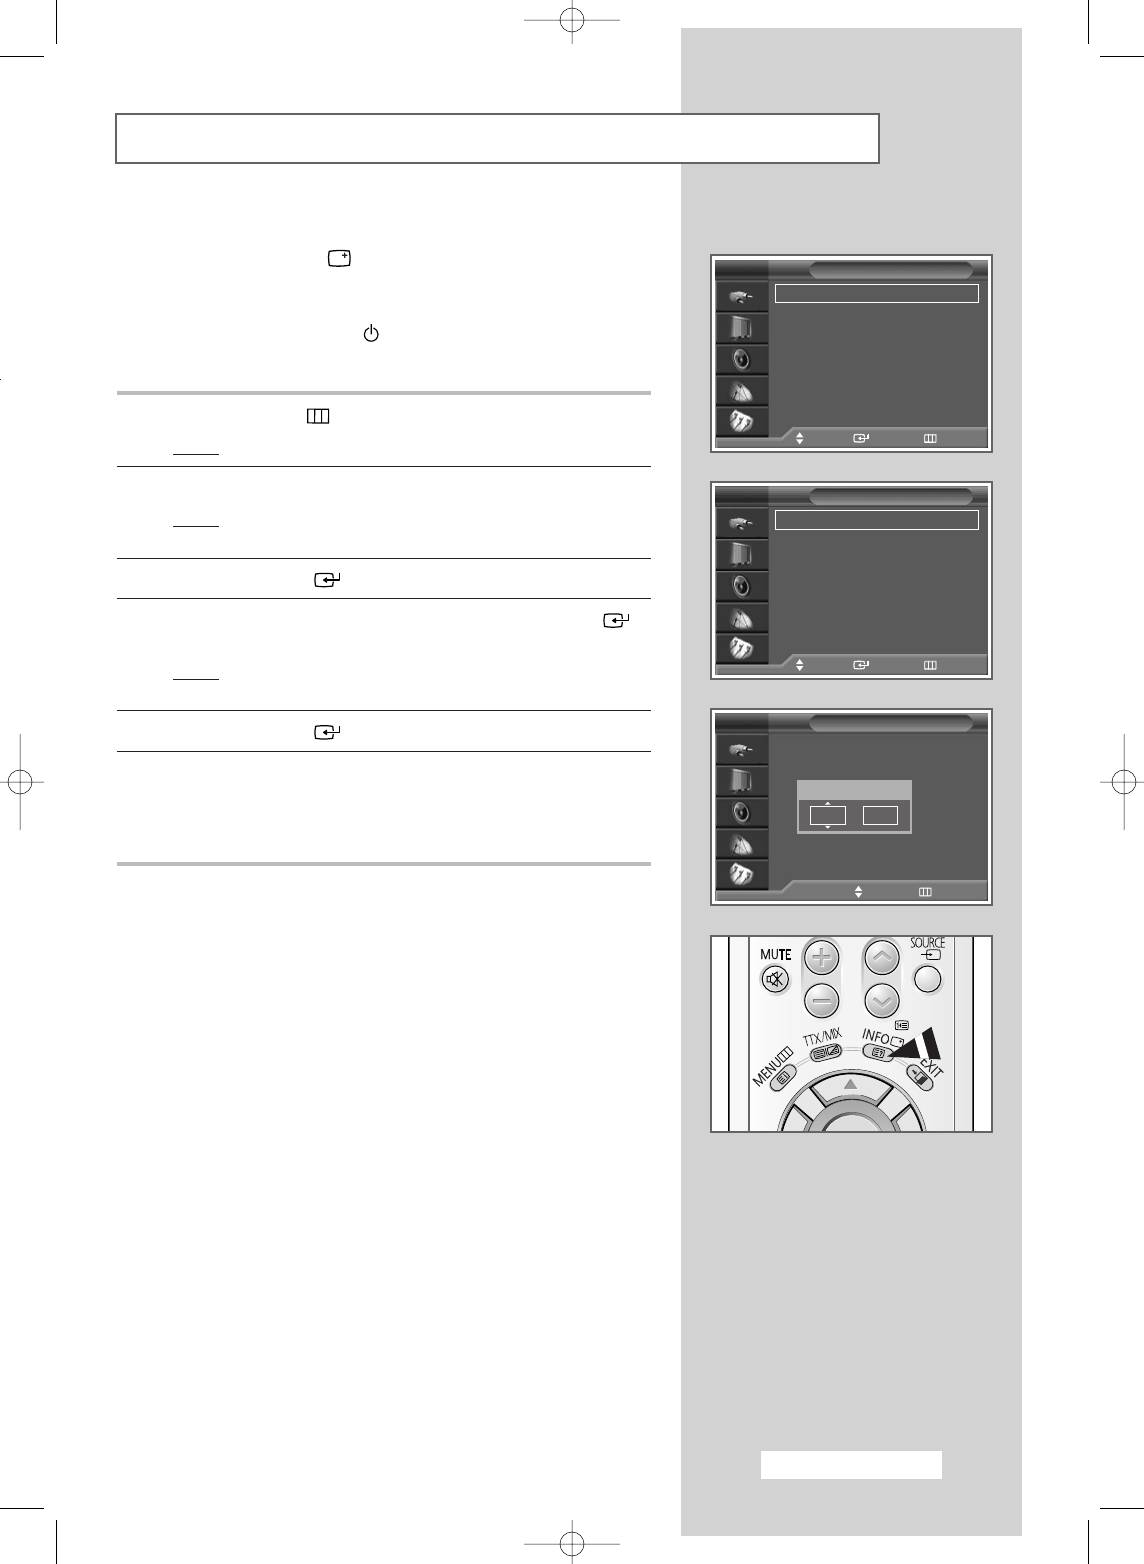
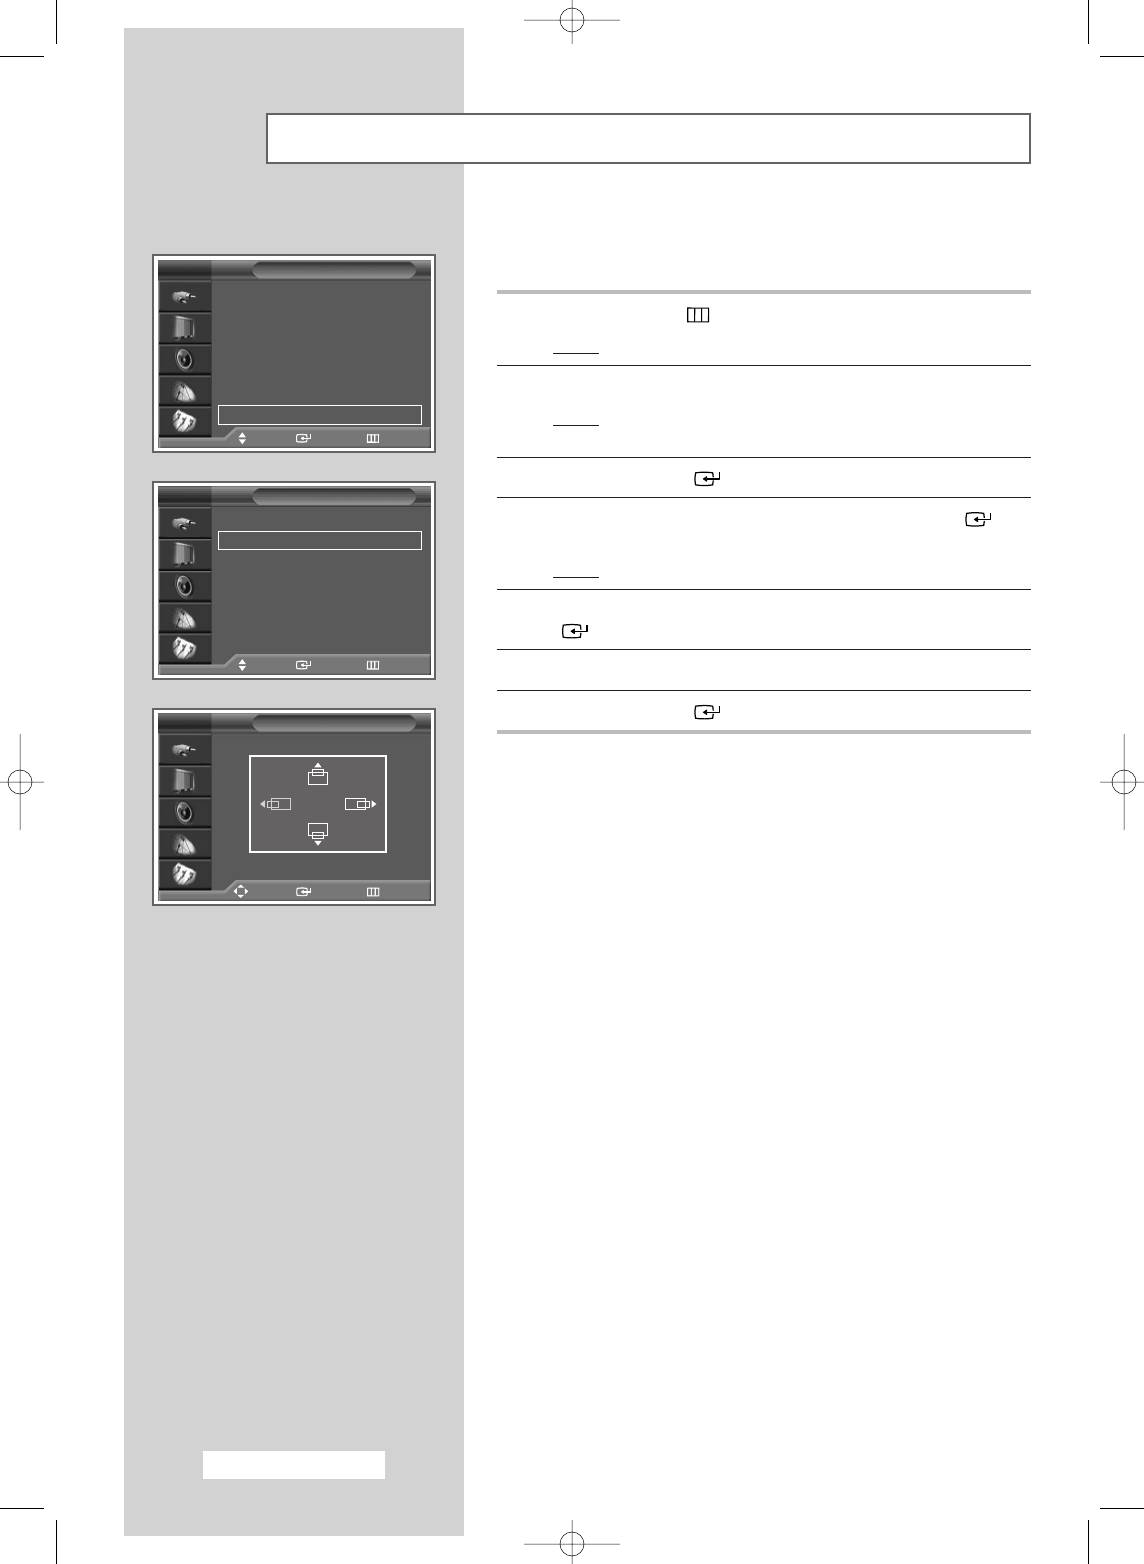
Viewing an External Signal Source
Use the remote control to switch between viewing signals from
connected equipment, such as VCR, DVD, Set-Top Box, and the TV
TV
Input
source (broadcast or cable).
Source List : TV
√
√
Edit Name
√√
1 Press the MENU () button.
Result
: The options available in the Input group are
displayed.
Move Enter Return
2 Press the ENTER () button.
Result
: Source List is selected.
TV
Source List
3 Press the ENTER () button again.
TV
Ext.1 :
----
4 Press the ▲ or ▼ button to select the signal source, then press
Ext.2 :
----
Ext.3 :
----
the ENTER () button.
AV :
----
◆
When you connect a piece of equipment to the TV, you
S-Video :
----
➢
can choose between the following sets of jacks : Ext.1,
Component :
----
▼ More
Ext.2, Ext.3, Component, HDMI, DVI, or PC on the TV’s
rear panel, and AV or S-Video on the TV’s side panel.
Move Enter Return
◆
You can select these options simply by pressing the
SOURCE () button. If you change the external source
TV
Input
while viewing, it might take a short period of time for
Source List : TV
√
√
pictures to be switched.
Edit Name
√√
5 Press the MENU () button.
Result
: The options available in the Input group are
displayed again.
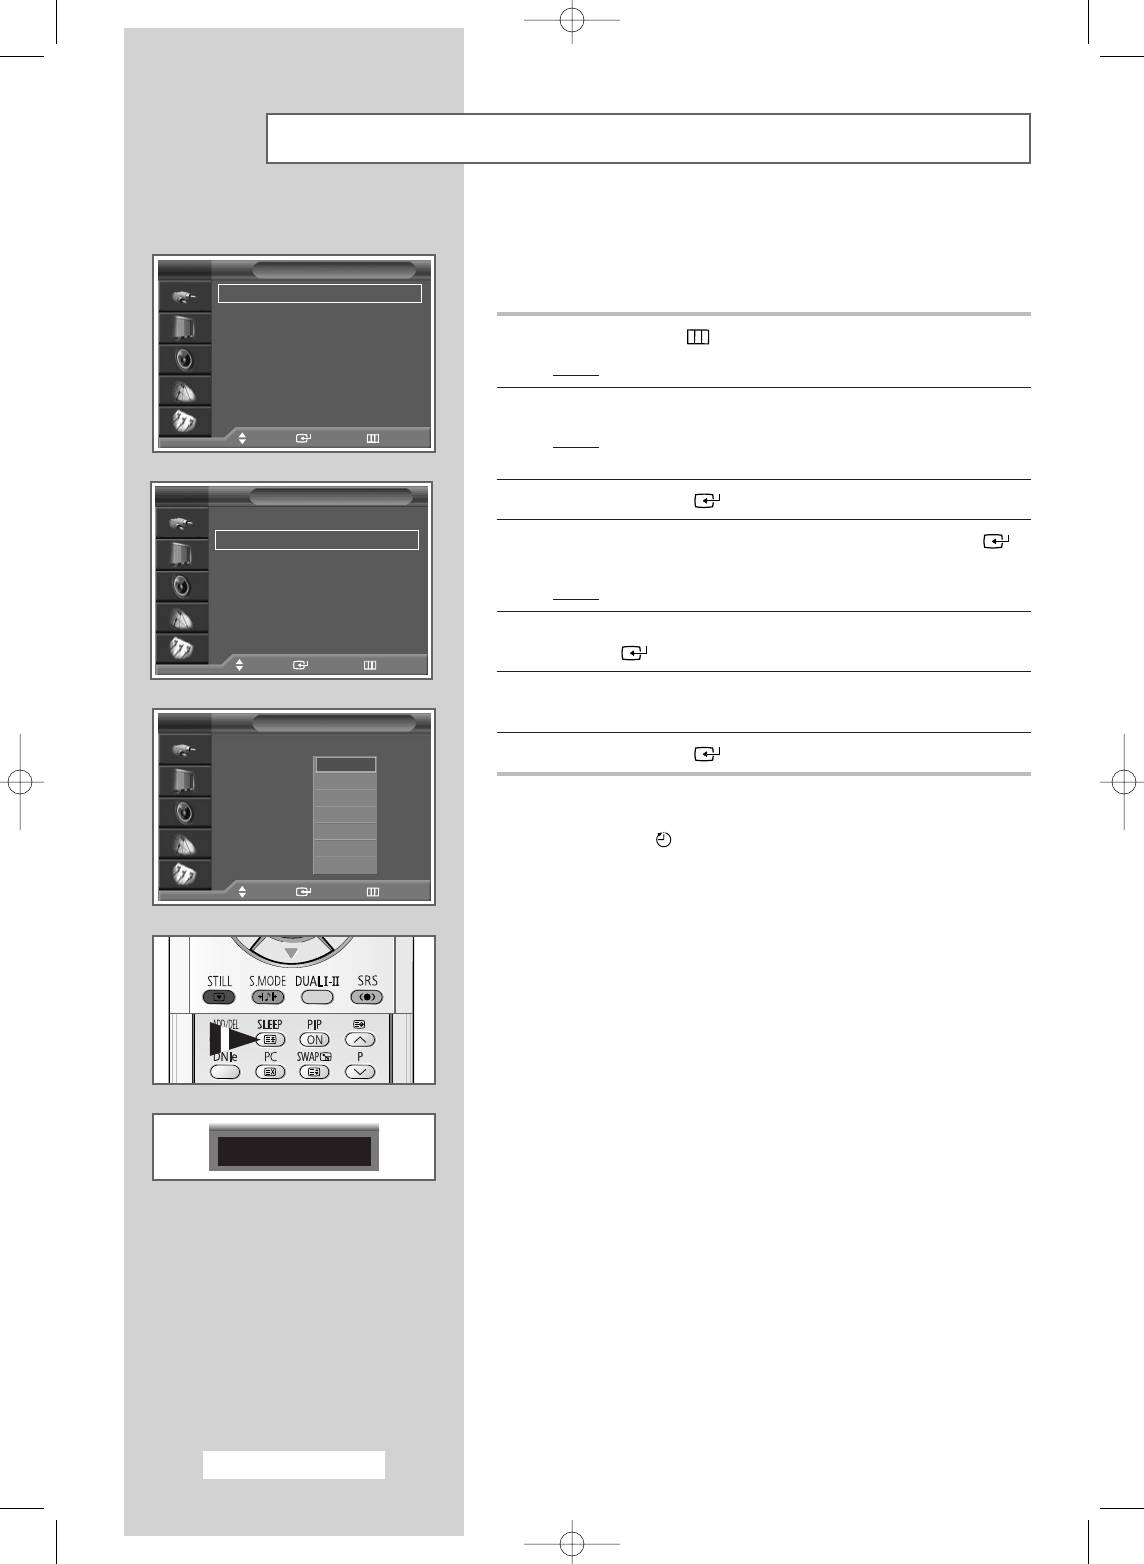
6 Press the ▲ or ▼ button to select Edit Name. Press the ENTER
Move Enter Return
() button.
7 Press the ▲ or ▼ button to select the external source to be edited.
TV
Edit Name
Press the ENTER () button.
Ext.1 :
----
√√√√
----
Ext.2 :
----
√√√√
Result
:
The available device names are listed
.
VCR
Ext.3 :
----
DVD
√√√√
VCR
-
DVD
-
Cable STB
-
HD STB
-
AV :
----
Cable STB
√√√√
Satellite STB
-
AV Receiver
-
DVD Receiver
-
S-Video :
----
HD STB
√√√√
Game
-
Camcorder - DVD Combo - DHR (DVD HDD
Component :
----
Satellite STB
√√√√
Recorder) - PC.
HDMI :
----
AV Receiver
√√√√
†
▼ More
Move Enter Return
8 Select the required device by pressing the ▲ or ▼ button.
9 Press the ENTER () button to confirm your choice.
English - 52
BN68-00746A(GAIA2_Euro_ENG) 2004/08/23 03:56 PM Page 52

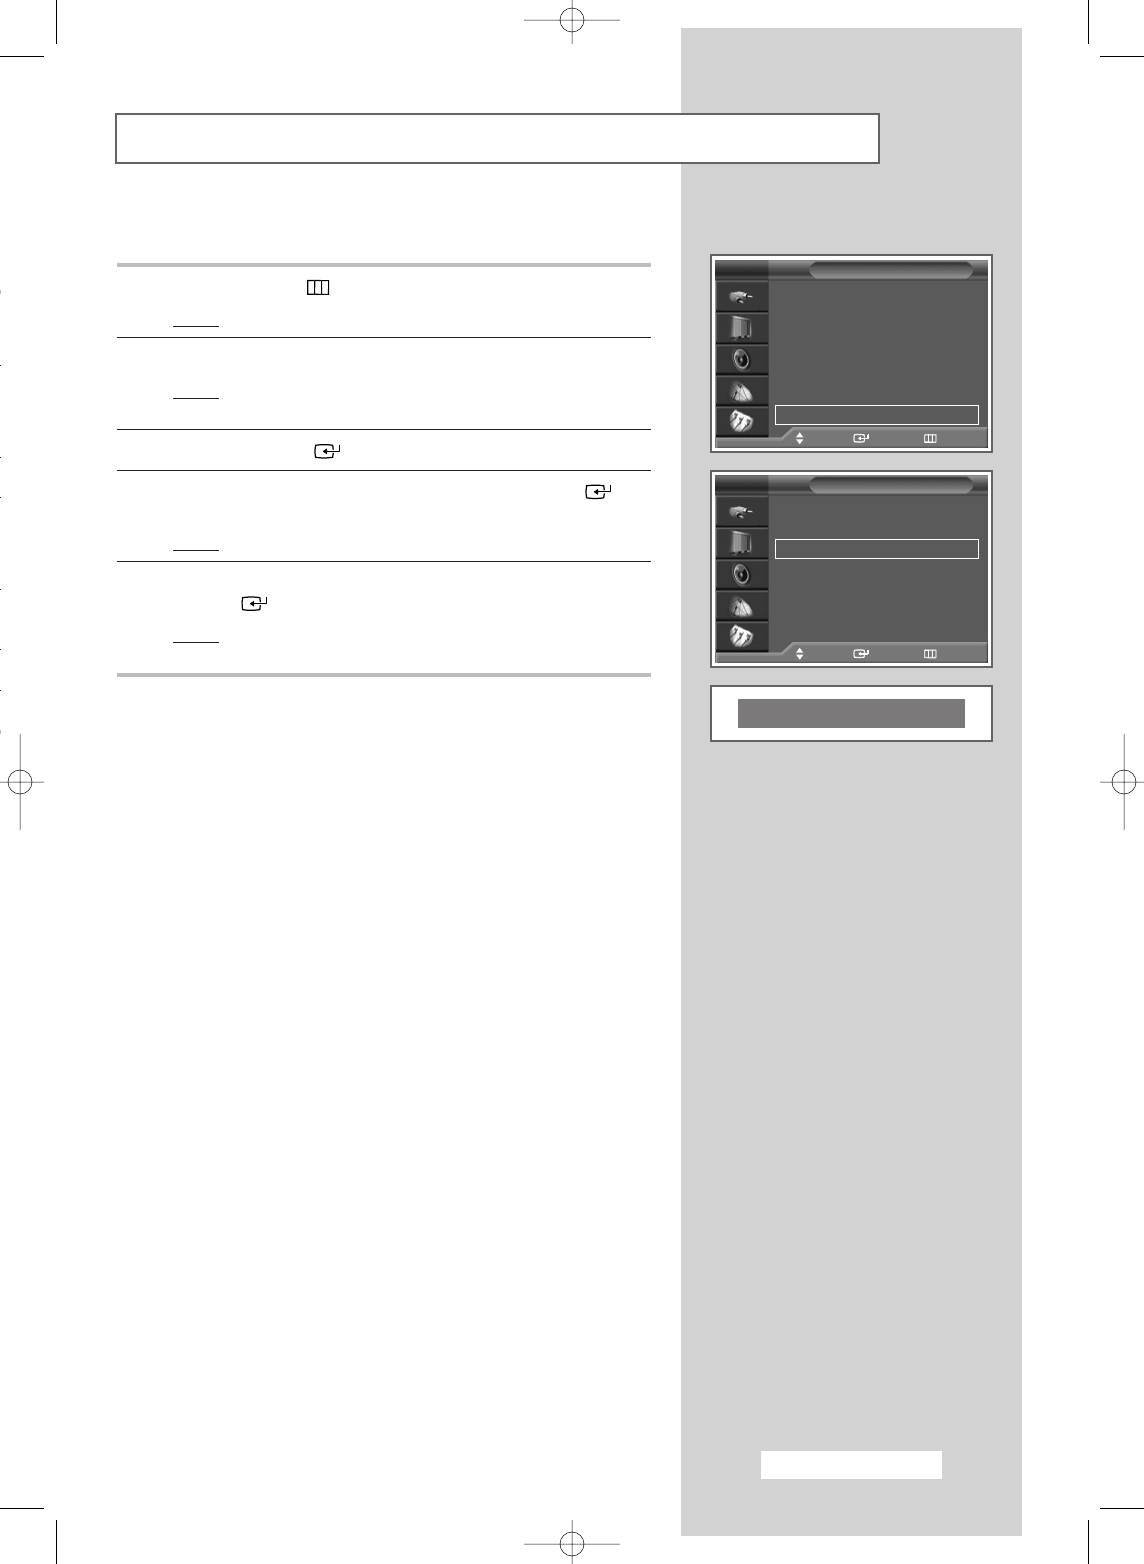
Redirecting an Input to the External Output
Your television enables you to choose which audio/video signals
are output to the external connector.
TV
Setup
Time
√
√
Plug & Play
√√
1 Press the MENU ()button.
Language : English
√√
Blue Screen : Off
√√
Result
: The main menu is displayed.
AV Setup
√√
Colour Weakness : Off
√√
2 Press the ▲ or ▼ button to select Setup.
Melody : On
√√
PC
√
√
Result
: The options available in the Setup group are
Move Enter Return
displayed.
3 Press the ENTER () button.
TV
AV Setup
Ext.1 : TV
√
√
4 Press the ▲ or ▼ button to select AV Setup. Press the ENTER
Ext.2 : TV
√√
() button.
Ext.3 : TV
√
√
Result
: The AV Setup menu is displayed with the Ext.3
selected.
5 Press the ENTER () button. Select the source to be directed to
the output of Ext.3 by pressing the ▲ or ▼ button.
Move Enter Return
➢
Ext.1 : Default (TV)
Ext.2 : Default (TV)
TV
AV Setup
(The default value of the current mode will appear.)
Ext.3 : Variable (TV, Ext.1, Ext.2, Ext.3, AV, or S-Video)
Ext.1 : TV
Ext.2 : TV
6 Press the ENTER () button to confirm your choice.
Ext.3 : TV
TV
Ext.1
Ext.2
Ext.3
AV
S-Video
Move Enter Return
English - 53
BN68-00746A(GAIA2_Euro_ENG) 2004/08/23 03:56 PM Page 53
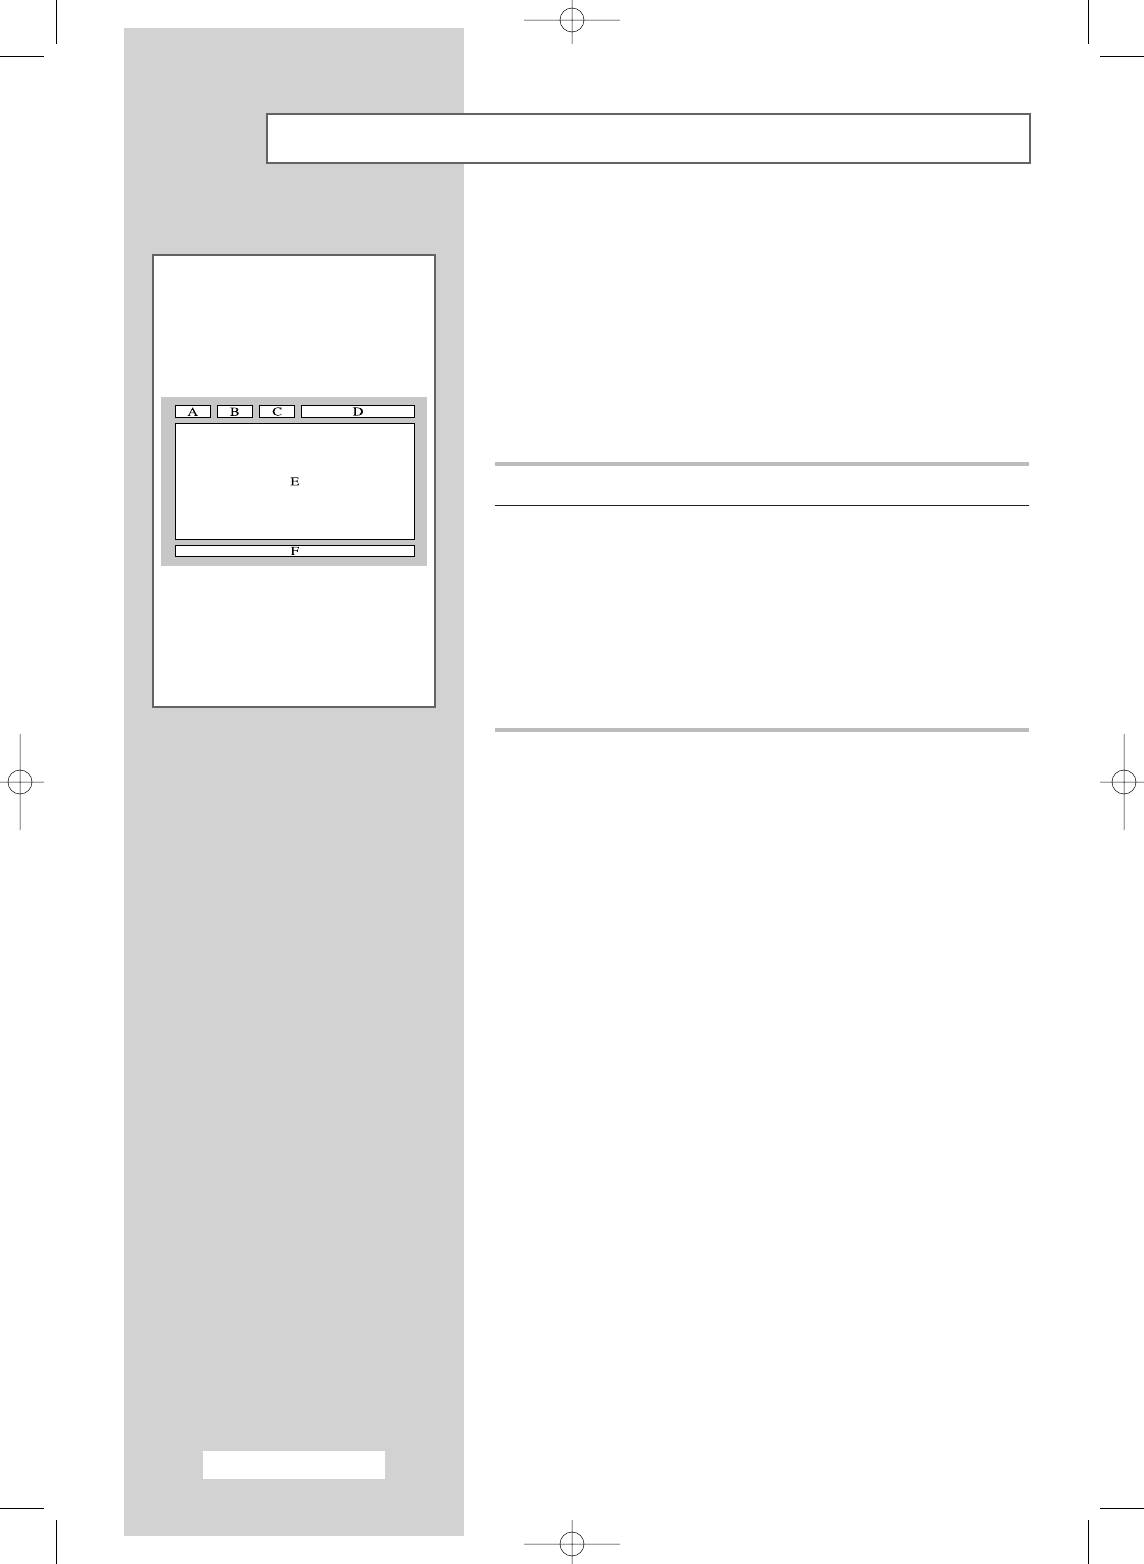
Teletext Feature
Most television channels provide written information services via
teletext. Information provided includes:
◆
Television programme times
◆
News bulletins and weather forecasts
◆
Sports results
◆
Travel information
This information is divided into numbered pages (see diagram).
Part Contents
A Selected page number.
B Broadcasting channel identity.
C Current page number or search indications.
DDate and time.
E Text.
F Status information.
FASTEXT information.
➢
Teletext information is often divided into several pages
displayed in sequence, which can be accessed by:
◆ Entering the page number
◆ Selecting a title in a list
◆ Selecting a coloured heading (FASTEXT system)
English - 54
BN68-00746A(GAIA2_Euro_ENG) 2004/08/23 03:56 PM Page 54

