Samsung LW-46 G15 W: ☛
☛: Samsung LW-46 G15 W

Switching Your Television On and Off
The mains lead is attached to the back of your television.
1 Plug the mains lead into an appropriate socket.
➢
The main voltage is indicated on the back of the television
TV
and the frequency is 50 or 60Hz.
2 Press the “ ” button (On/Off) on the front of the television.
Result
: The Standby indicator on the front of the television
lights up.
3 Press the POWER () button on the remote control to switch the
television on.
Result
: The programme that you were watching last is re-
selected automatically.
➢
◆ If your television isn’t turned on when the POWER ()
button is pressed, press the SELECT button to check if
“TV” mode has been chosen.
◆ If you have not yet stored any channels, no clear picture
appears. Refer to “Storing Channels Automatically” on
page 18 or “Storing Channels Manually” on page 20.
4 To switch your television off, press the “ ” button (On/Off) again.
Placing Your Television in Standby Mode
Your television can be placed in Standby mode, in order to reduce
the power consumption.
Standby mode can be useful when you wish to interrupt
viewing temporarily (during a meal, for example).
TV
1 Press the POWER () button on the remote control.
Result
: The screen is turned off and the Standby indicator on
the front of the television lights up.
2 To switch the television back on, simply press the POWER ()
button again or a number button.
➢
You can also switch the TV back on by pressing the TV (),
P
/
or a number button.
☛
Do not leave your television in Standby mode for long
periods of time (when you are away on holiday, for
example). Turn your television off by pressing the “ ”
button (On/Off) on the front of the television. It is best to
unplug the set from the mains and aerial.
English - 14
BN68-00746A(GAIA2_Euro_ENG) 2004/08/23 03:54 PM Page 14
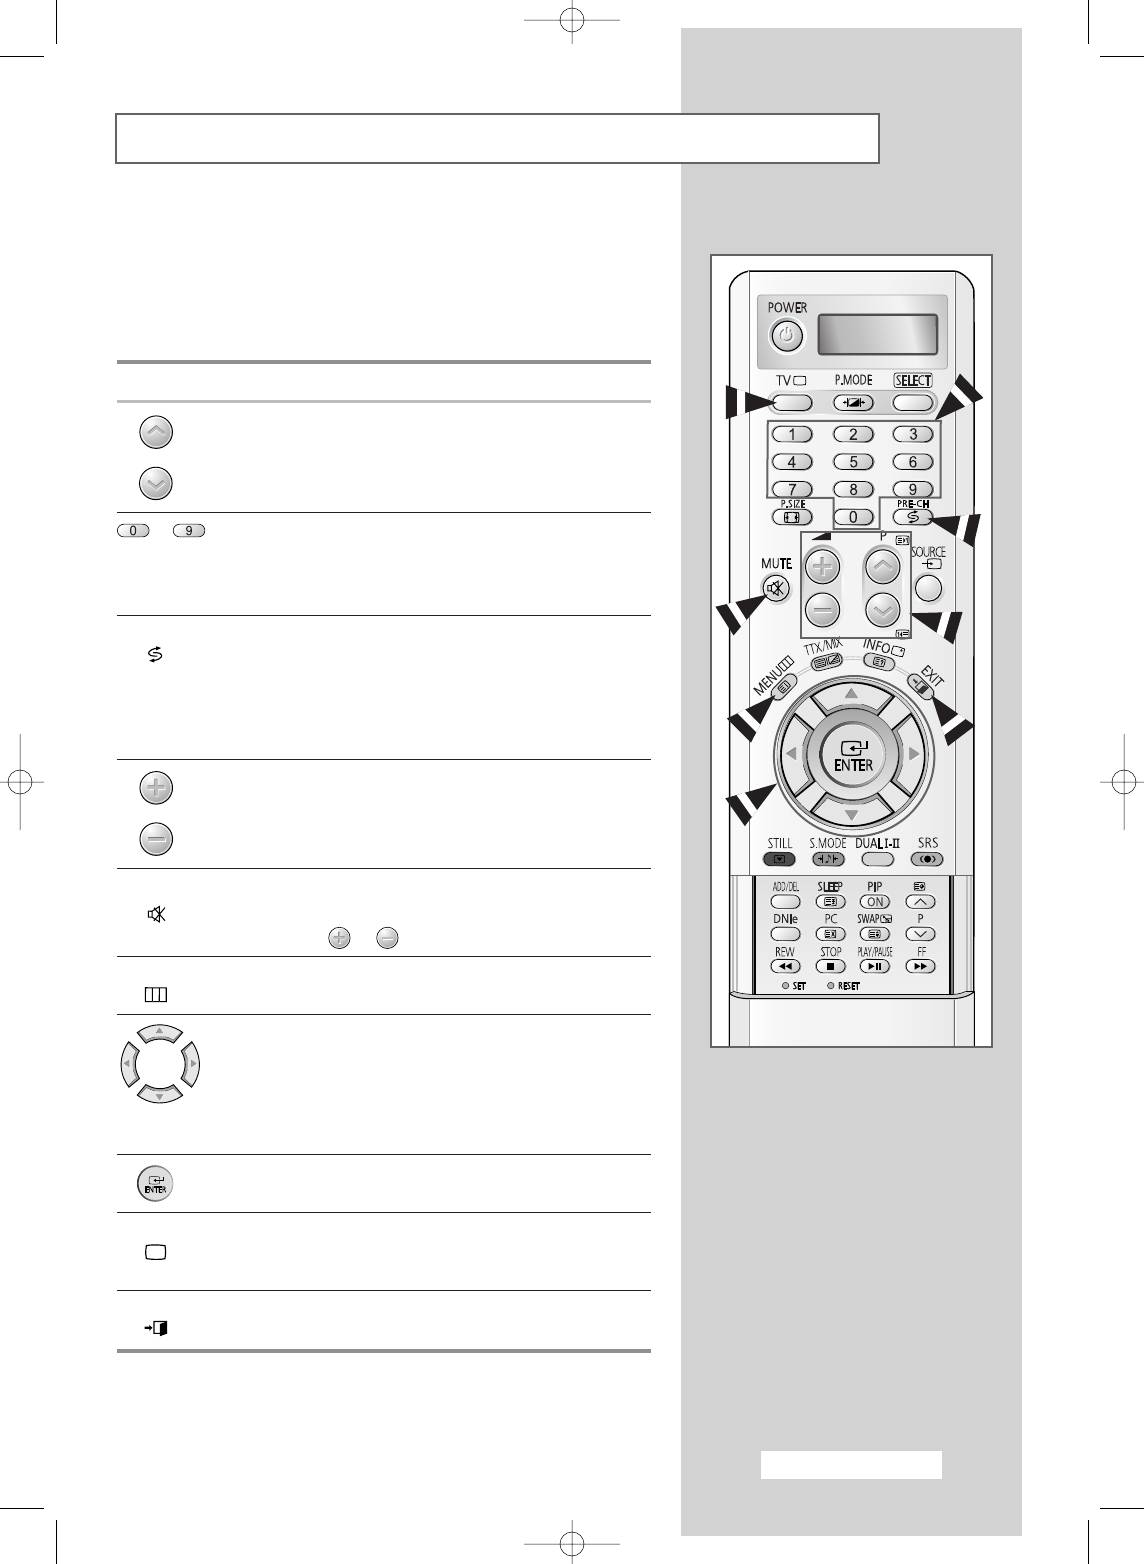
Familiarizing Yourself with the Remote Control
The remote control is used mainly to:
◆ Change channels and adjust the volume
◆ Set up the television using the on-screen menu system
The following table presents the most frequently used buttons and
their functions.
Button Viewing Function Menu Function
Used to display the next
-
stored channel.
Used to display the
-
previous stored channel.
to Used to display the corresponding channels.
➢
For double digit channels, the second digit must be
pushed immediately after the first. Failure to do this will
result in a single digit channel being displayed.
PRE-CH Press the PRE-CH button. The TV will switch to the last
() channel viewed.
To quickly switch between two channels that are far apart,
select the first channel, then use the number buttons to
select the second channel. Then, use the
PRE-CH button to
quickly alternate between them.
Used to increase the
-
volume.
Used to decrease the
-
volume.
MUTE Used to switch the sound off temporarily.
()
➢
To turn the sound back on, press this button again, or
press the or button.
MENU Used to display the Used to return to the previous
() on-screen menu system. menu or normal viewing.
-
Used to:
◆ Display a submenu
containing selections for
the current menu option.
◆ Increase/decrease a
menu option value.
-
Used to confirm your choice.
TV Used to switch the Used to exit from the menu
() television on when it is system and return to normal
in standby mode. viewing directly.
EXIT
-
Used to exit from any
() display.
English - 15
BN68-00746A(GAIA2_Euro_ENG) 2004/08/23 03:54 PM Page 15
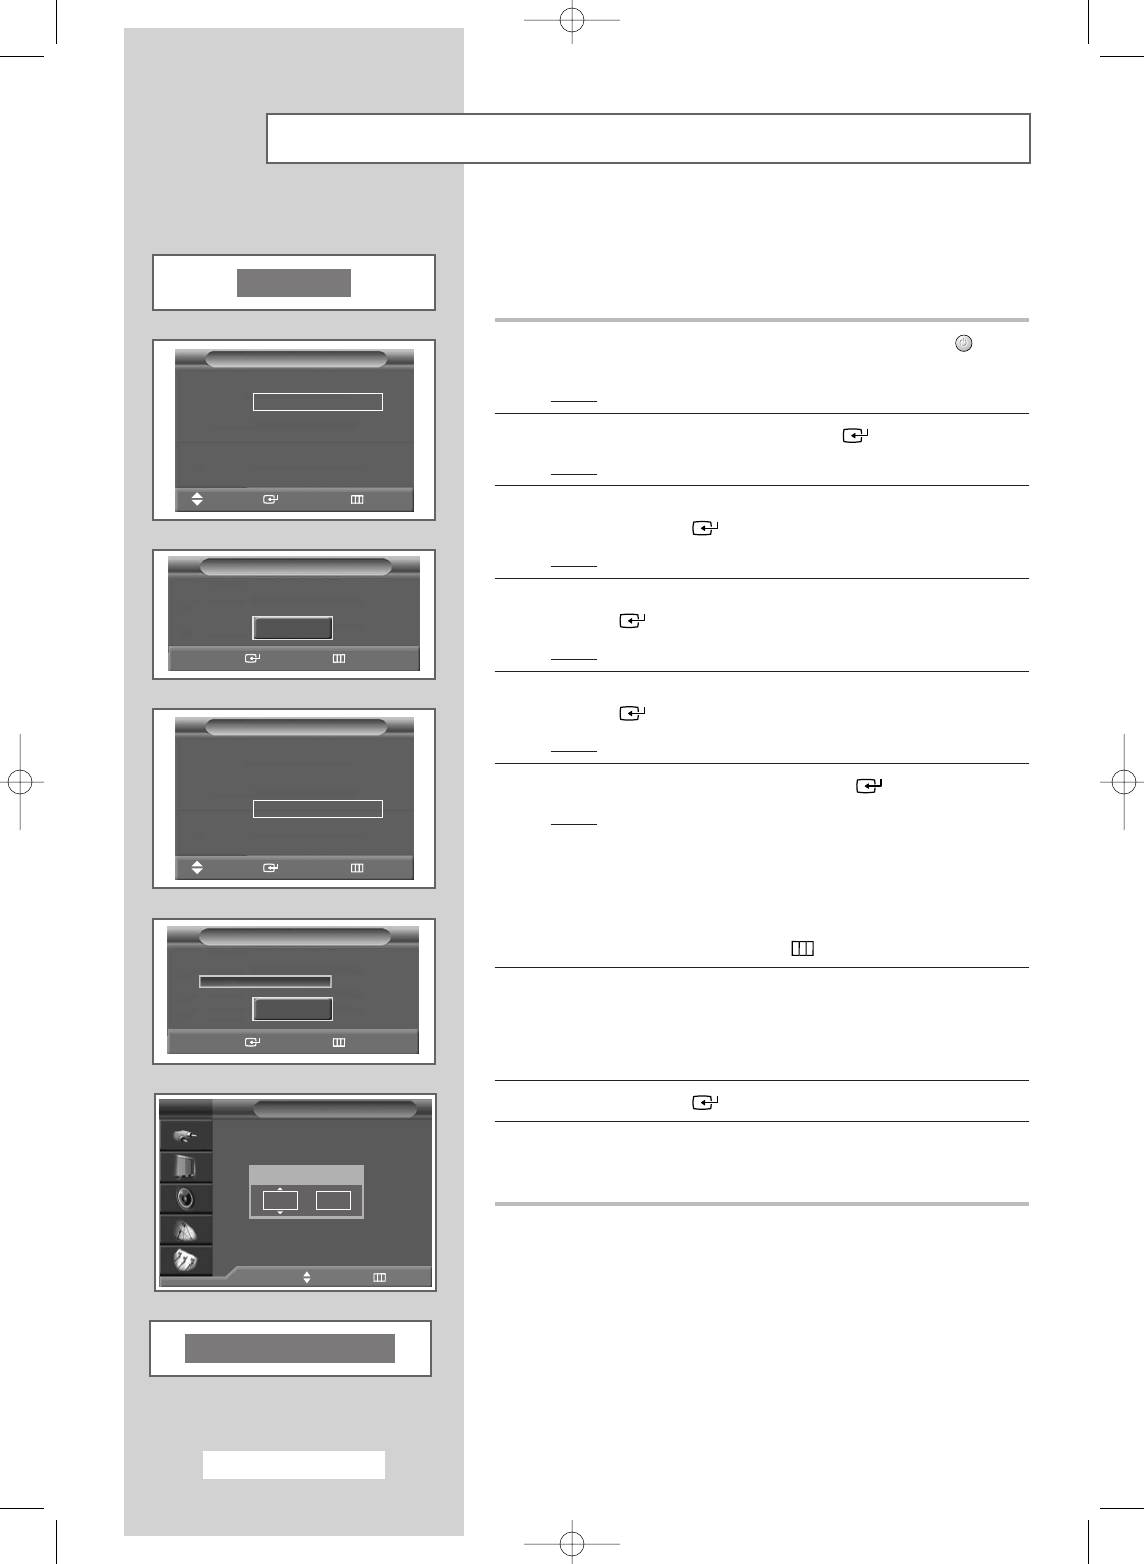
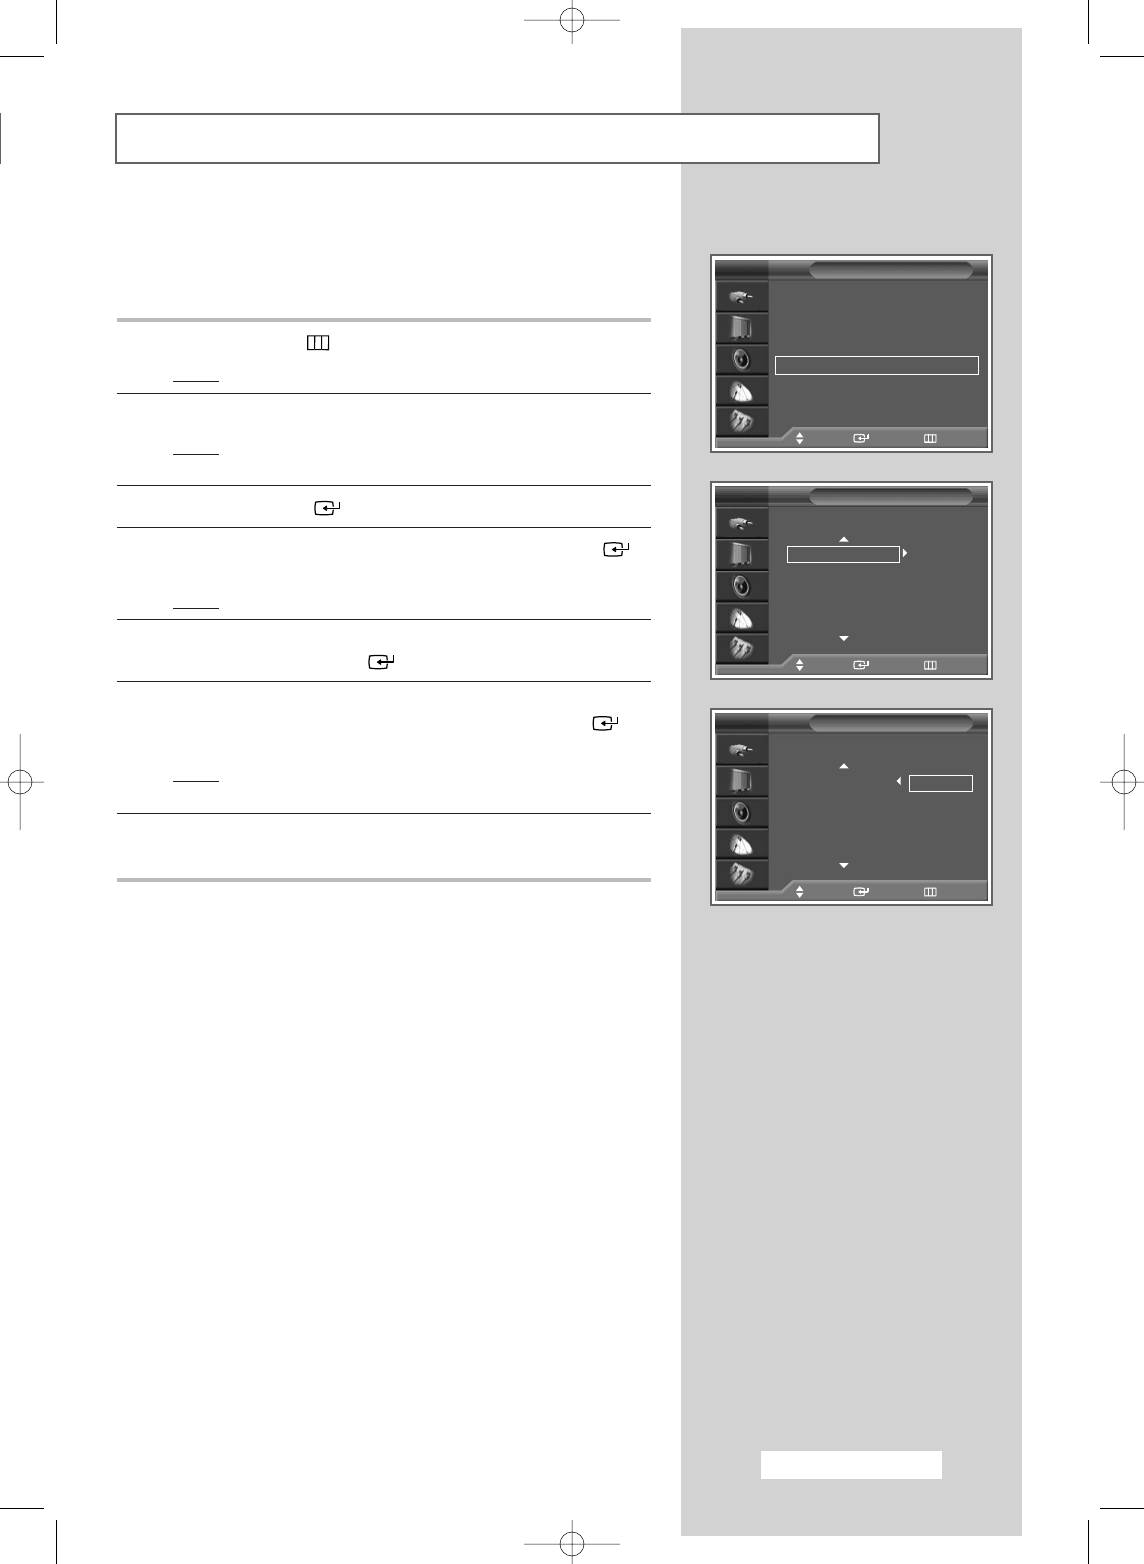
Plug & Play Feature
When the television is initially powered on several basic customer
settings proceed automatically and subsequently. The following
Plug & Play
settings are available.
1 If the television is in Standby mode, press the POWER () button
Plug & Play
on the remote control.
Language
Result
: The message Plug & Play is displayed.
English
Deutsch
Français
2 To start Plug & Play, press the ENTER () button.
Nederlands
Result
: The Language menu is displayed.
††
Move
Enter Skip
3 Select the appropriate language by pressing the ▲ or ▼ button.
Press the ENTER () button to confirm your choice.
Result
: The message Check antenna input. is displayed.
Plug & Play
Check antenna input.
4 Make sure that the antenna is connected to the TV, then press the
ENTER () button.
OK
Result
: The Country menu is displayed.
Enter Skip
5 Select your country by pressing the ▲ or ▼ button. Press the
ENTER () button to confirm your choice.
Plug & Play
Country
▲
Result
: The Auto Store menu is displayed.
United Kingdom
Eastern Europe
6 To start channel store, press the ENTER () button.
Others
Result
: The search will end automatically. Channels are sorted
and stored in the order which reflects their position in
the frequency range (with lowest first and highest last).
Move
Enter Skip
When it has finished, the Clock Set menu is
displayed.
Auto Store
➢
To stop the search before it has finished or return to normal
viewing, press the MENU () button.
P 1 C 2 76MHz
0%
7 Press the œ or √ button to move to the Hour or Minute.
Start
Set these by pressing the ▲ or ▼ button.
Enter Skip
➢
You can also set the Hour and Minute by pressing the
number buttons directly.
TV
Clock Set
8 Press the ENTER () button.
9 When the setting has all finished, the message Enjoy your
viewing is displayed, then the channel which has been stored will
Hour Minute
be activated.
00 00
œœ √√
Move Adjust Skip
Enjoy your viewing
English - 16
BN68-00746A(GAIA2_Euro_ENG) 2004/08/23 03:55 PM Page 16
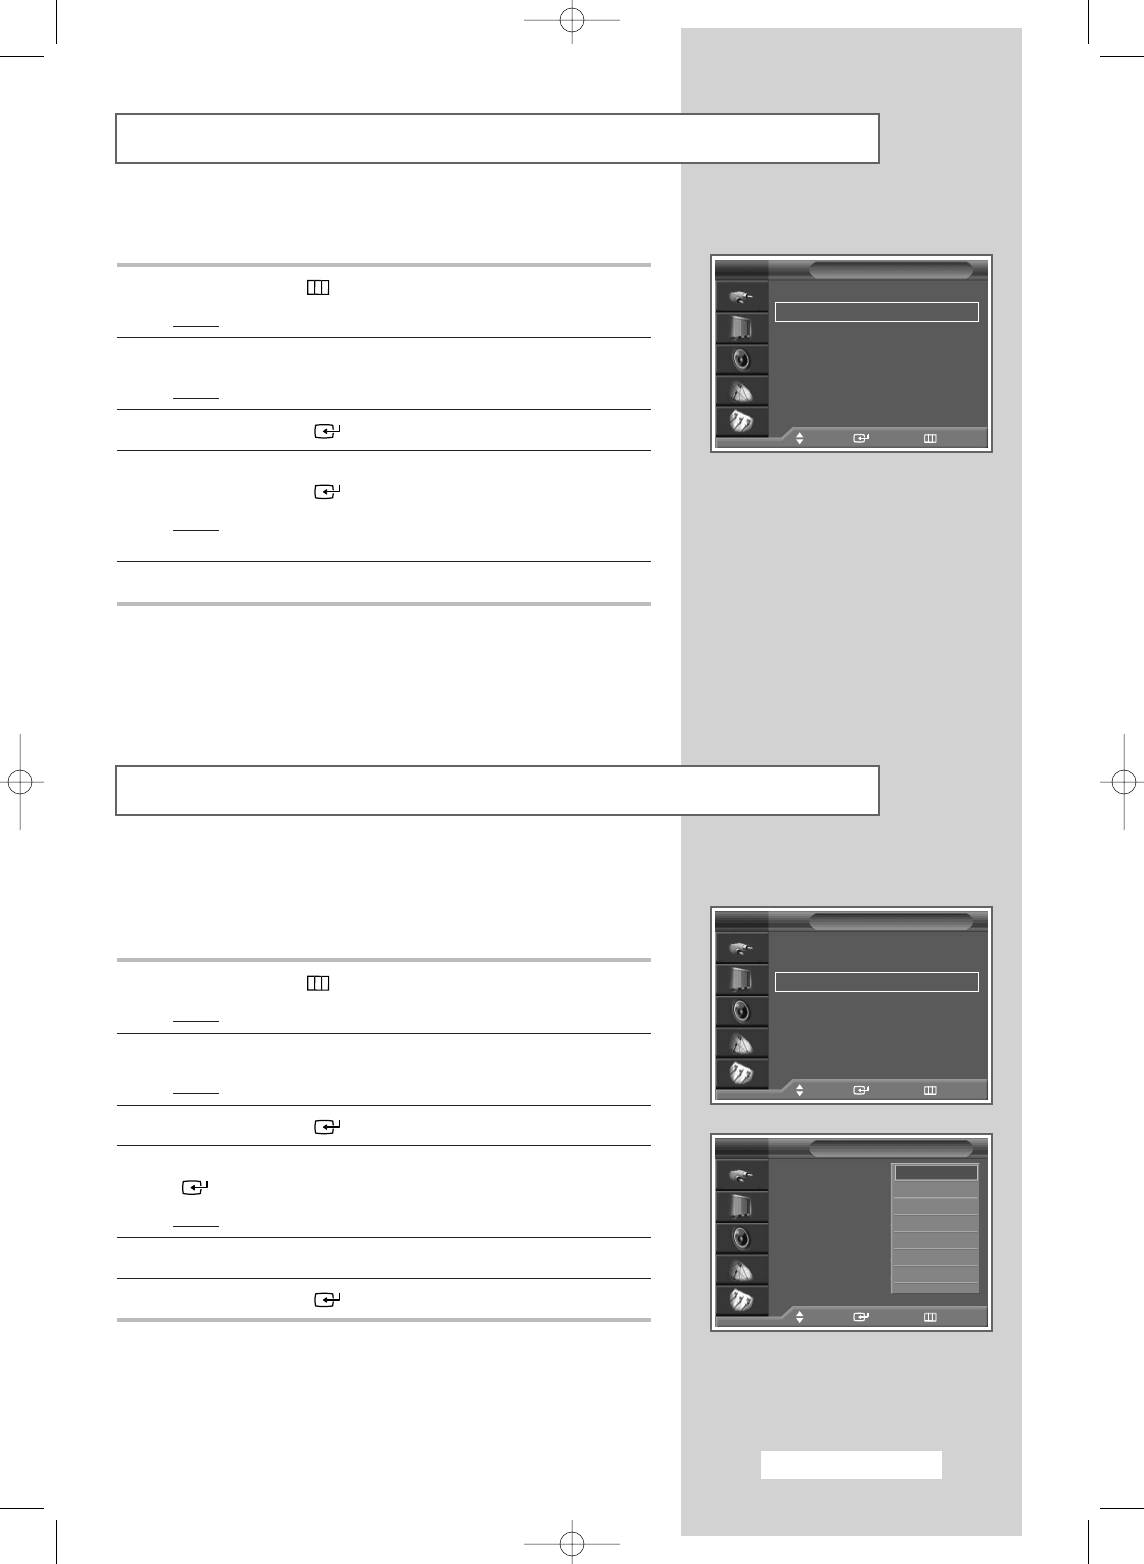
Plug & Play Feature (continued)
If you want to reset this feature...
TV
Setup
1 Press the MENU () button.
Time
√
√
Plug & Play
√√
Result
: The main menu is displayed.
Language : English
√√
Blue Screen : Off
√√
2 Press the ▲ or ▼ button to select Setup.
AV Setup
√√
Colour Weakness : Off
√√
Result
: The options available in the Setup group are displayed.
Melody : On
√√
PC
√
√
3 Press the ENTER () button.
Move Enter Return
4 Press the ▲ or ▼ button to select Plug & Play.
Press the ENTER () button.
Result
: This feature starts with the message Plug & Play
being displayed.
5 For further details on setting up options, refer to the page 16.
Choosing Your Language
When you start using your television for the first time, you must
select the language which will be used for displaying menus and
TV
Setup
indications.
Time
√
√
Plug & Play
√√
1 Press the MENU () button.
Language : English
√√
Blue Screen : Off
√√
Result
: The main menu is displayed.
AV Setup
√√
Colour Weakness : Off
√√
2 Press the ▲ or ▼ button to select Setup.
Melody : On
√√
PC
√
√
Result
: The options available in the Setup group are displayed.
Move Enter Return
3 Press the ENTER () button.
TV
Setup
4 Press the ▲ or ▼ button to select Language. Press the ENTER
Time
English
() button.
Plug & Play
Deutsch
Language : English
Français
Result
: The available languages are listed.
Blue Screen : Off
Nederlands
√
√
AV Setup
√√
Español
5 Select the appropriate language by pressing the ▲ or ▼ button.
Colour Weakness : Of
Italiano
√√
Melody : On
Svenska
†
6 Press the ENTER () button to confirm your choice.
PC
Move Enter Return
English - 17
BN68-00746A(GAIA2_Euro_ENG) 2004/08/23 03:55 PM Page 17
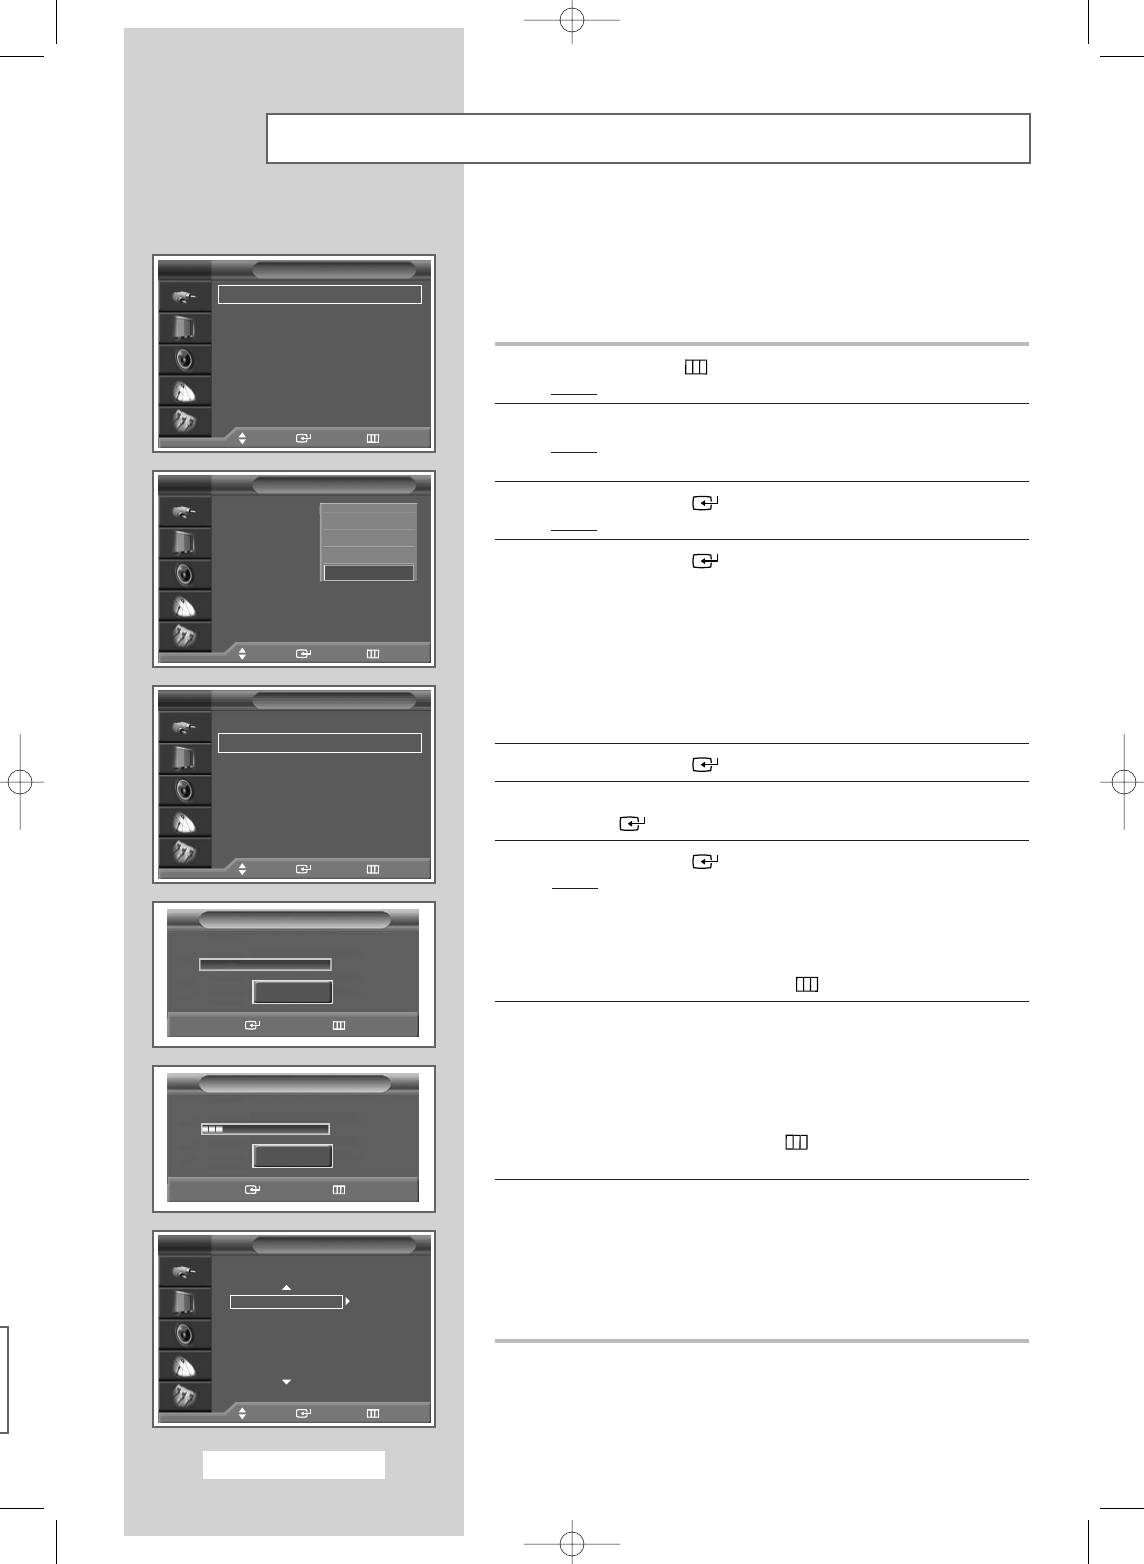
Storing Channels Automatically
You can scan for the frequency ranges available to you, (availability
depends on your country). Automatically allocated programme
TV
Channel
numbers may not correspond to actual or desired programme
Country : Others
√
√
numbers. However you can sort numbers manually and clear any
Auto Store
√√
Manual Store
√√
channels you do not wish to watch.
Add/Delete
√√
Sort
√√
1 Press the MENU ()button.
Name
√√
Result: The main menu is displayed.
Fine Tune
√√
LNA : On
√√
2 Press the ▲ or ▼ button to select Channel.
Move Enter Return
Result: The options available in the Channel group are
displayed.
TV
Channel
3 Press the ENTER () button.
Country : Belgium
▲
Sweden
Auto Store
Result: Country is selected.
United Kingdom
Manual Store
Eastern Europe
Add/Delete
4 Press the ENTER () button again. Select your country by
Others
Sort
pressing the ▲ or ▼ button.
Name
The countries are displayed in the following order:
Fine Tune
Belgium
-
Germany
-
Spain
-
France
-
Italy
-
Netherlands
-
LNA : On
Switzerland
-
Sweden
-
United Kingdom
-
Eastern Europe
-
Move Enter Return
Others.
➢ If you have selected the Others option but do not wish to
TV
Channel
scan the PAL frequency range, store the channels manually
Country : Others
√
√
(see page 20).
Auto Store
√√
Manual Store
√√
5 Press the ENTER () button to confirm your choice.
Add/Delete
√√
Sort
√√
6 Press the ▲ or ▼ button to select Auto Store. Press the
Name
√√
ENTER () button.
Fine Tune
√√
LNA : On
√√
7 Press the ENTER () button to start the search.
Move Enter Return
Result: The search will end automatically. Channels are sorted
and stored in the order which reflects their position in
Auto Store
the frequency range (with lowest first and highest last).
P 1 C 2 49MHz
The programme originally selected is then displayed.
0%
➢
To stop the search before it has finished or return to normal
viewing, press the MENU ()button.
Start
Enter Return
8 When searching and storing are complete, the Sort menu is
displayed.
◆
To sort the stored channels into the desired numerical order,
Auto Store
go to step 5 of the “Sorting the Stored Channels” procedure on
page 19.
P 1 C 2 76MHz
◆
To exit from the channel store function without sorting the
15%
channels, press the MENU () button repeatedly until the
Stop
menus disappear.
Enter Return
9 When the channels have been stored, you can:
◆
Sort them in the order required (see page 19)
TV
Sort
◆
Assign names to the stored channels (see page 23)
◆
Clear a channel (see page 22)
Prog. Ch. Name
◆
Fine-tune channel reception if necessary (see page 24)
1C2
◆
Activate/deactivate the LNA (Low Noise Amplifier) feature
2C4
(see page 25)
3C15
4S2
5S6
Move Enter Return
English - 18
BN68-00746A(GAIA2_Euro_ENG) 2004/08/23 03:55 PM Page 18
Sorting the Stored Channels
This operation allows you to change the programme numbers of
stored channels. This operation may be necessary after using the
TV
Channel
auto store. You can delete those channels you do not want to keep.
Country : Others
√
√
Auto Store
√√
Manual Store
√√
1 Press the MENU ()button.
Add/Delete
√√
Sort
√√
Result
: The main menu is displayed.
Name
√√
Fine Tune
√√
2 Press the ▲ or ▼ button to select Channel.
LNA : On
√√
Move Enter Return
Result
:
The options available in the
Channel
group are
displayed.
TV
Sort
3 Press the ENTER () button.
Prog. Ch. Name
4 Press the ▲ or ▼ button to select Sort. Press the ENTER ()
1C2
button.
2C4
3C15
Result
: The Sort menu is displayed.
4S2
5S6
5 Select the channel that you wish to move by pressing the ▲ or ▼
button. Press the ENTER () button.
Move Enter Return
6 Select the number of the programme to which the channel is to be
moved by pressing the ▲ or ▼ button. Press the ENTER ()
TV
Sort
button.
Prog. Ch. Name
Result
: The channel is moved to its new position and all other
C 2
channels are shifted accordingly.
2C4
3C15
4S2
7 Repeat Steps 5 to 6 until you have moved all the channels to the
5S6
required programme numbers.
Move Enter Return
English - 19
BN68-00746A(GAIA2_Euro_ENG) 2004/08/23 03:55 PM Page 19
Storing Channels Manually
You can store the television channels, including those received via
cable networks.
TV
Channel
Country : Others
√
√
When storing channels manually, you can choose:
Auto Store
√√
Manual Store
√√
◆ Whether or not to store each of the channels found
Add/Delete
√√
Sort
√√
◆ The programme number of each stored channel which
Name
√√
you wish to identify
Fine Tune
√√
LNA : On
√√
Move Enter Return
1 Press the MENU ()button.
Result
: The main menu is displayed.
TV
Manual Store
Programme : P 1
P 1
2 Press the ▲ or ▼ button to select Channel.
Colour System : AUTO
Sound System : B/G
Result
:
The options available in the
Channel
group are
Channel : C 2
displayed.
Search : 49 MHz
Store : ?
3 Press the ENTER () button.
Adjust Enter Return
4 Press the ▲ or ▼ button to select Manual Store. Press the
ENTER () button.
Result
: The options available in the Manual store group are
TV
Manual Store
displayed with the Programme selected.
Programme : P 1
Colour System : AUTO
AUTO
5 Press the ENTER () button again.
Sound System : B/G
PAL
Channel : C
--
SECAM
Search : 76 MHz
NTSC4.43
6 To assign a programme number to a channel, find the correct
Store : ?
number by pressing the ▲ or ▼ button, then press the ENTER
() button.
Move Enter Return
7 If necessary, select the broadcasting standard required. Press the
▲ or ▼ button to select Colour System , then press the ENTER
() button. The colour standards are displayed in the following
TV
Manual Store
order.
Programme : P 1
AUTO
-
PAL
-
SECAM
-
NTSC4.43
Colour System : AUTO
Sound System : B/G
B/G
Channel : C
D/K
--
8 Select the desired colour system by pressing the ▲ or ▼ button.
Search : 76 MHz
I
Press the ENTER () button to confirm your choice.
Store : ?
L
9 Press the ▲ or ▼ button to select Sound System, then press the
Move Enter Return
ENTER () button. The sound standards are displayed in the
following order.
B/G
-
D/K
-
I
-
L
10 Select the desired sound system by pressing the ▲ or ▼ button.
11 Press the ENTER () button to confirm your choice.
English - 20
BN68-00746A(GAIA2_Euro_ENG) 2004/08/23 03:55 PM Page 20

