Samsung ITP5012L: APPLICATION MENUS
APPLICATION MENUS: Samsung ITP5012L
APPLICATION MENUS
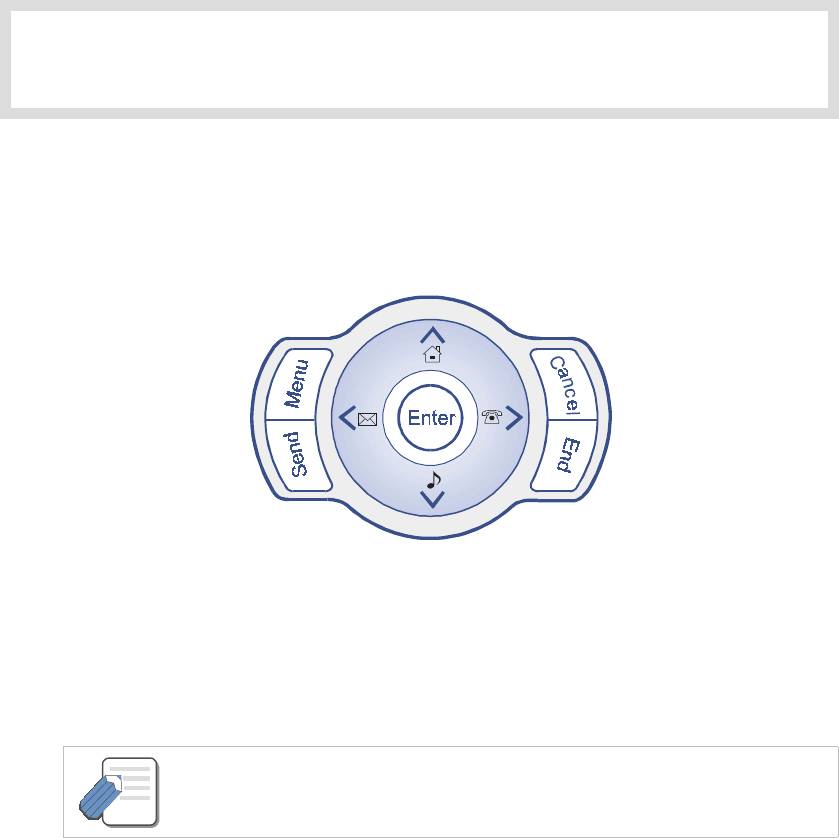
1. Navigation Buttons
Navigation buttons are provided for your convenience.
Menu Button
!
When the [Menu] button is pressed in the standby mode, the phones application menus
are displayed as icons.
- If the [End] button or [Speaker] button is pressed in the application menus, the phone
automatically exits the menus.
NOTE
Send Button
!
The phone is set to ‘Enbloc’ dialling mode as default. So, when you enter phone
numbers, they can be reviewed before dialling. Press the [Send] button to dial the number.
!
Answers incoming calls.
!
Dials the most recently called number when pressed and held. If the [Send] button is
pressed briefly in the standby mode, your recent calls are listed on the screen.
© SAMSUNG Electronics Co., Ltd. Page 99
APPLICATION MENUS
Enter Button
!
The Enter button is used in the menu mode to select or save the corresponding item.
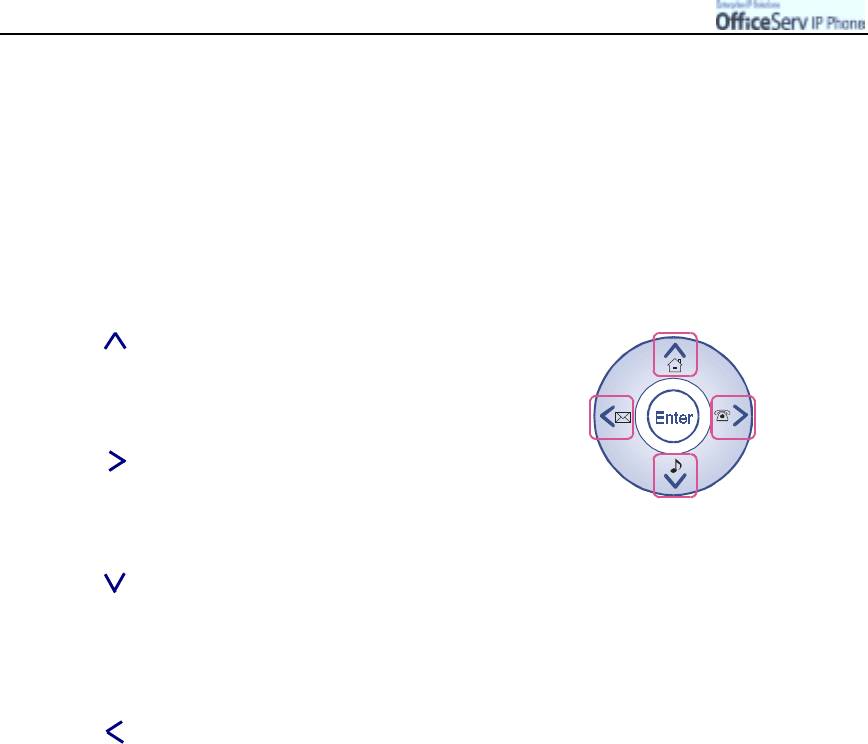
Direction button
The Direction button is used to move between items or to edit the content.
¨ç
1
11
1
[ ] button is used
- To move the cursor upward.
- To select the main menu.
¨ê
¨è
22
2
2
[ ] button is used
- To select the Phonebook menu.
¨é
- To move the cursor to the right.
3
33
3
[ ] button is used
- To select the Ring Type/Volume menu.
- To move the cursor downward.
- When moving to the lower menu item of the current menu.
4
44
4
[ ] button is used
- To select the Text Message menu.
- To move the cursor to the left.
Cancel Button
!
Moves to the previous page of a menu.
!
Deletes the entered letter or number.
End Button
!
Disconnects the current call.
!
Exits from the current mode to the idle screen.
Page 100
© SAMSUNG Electronics Co., Ltd.
APPLICATION MENUS
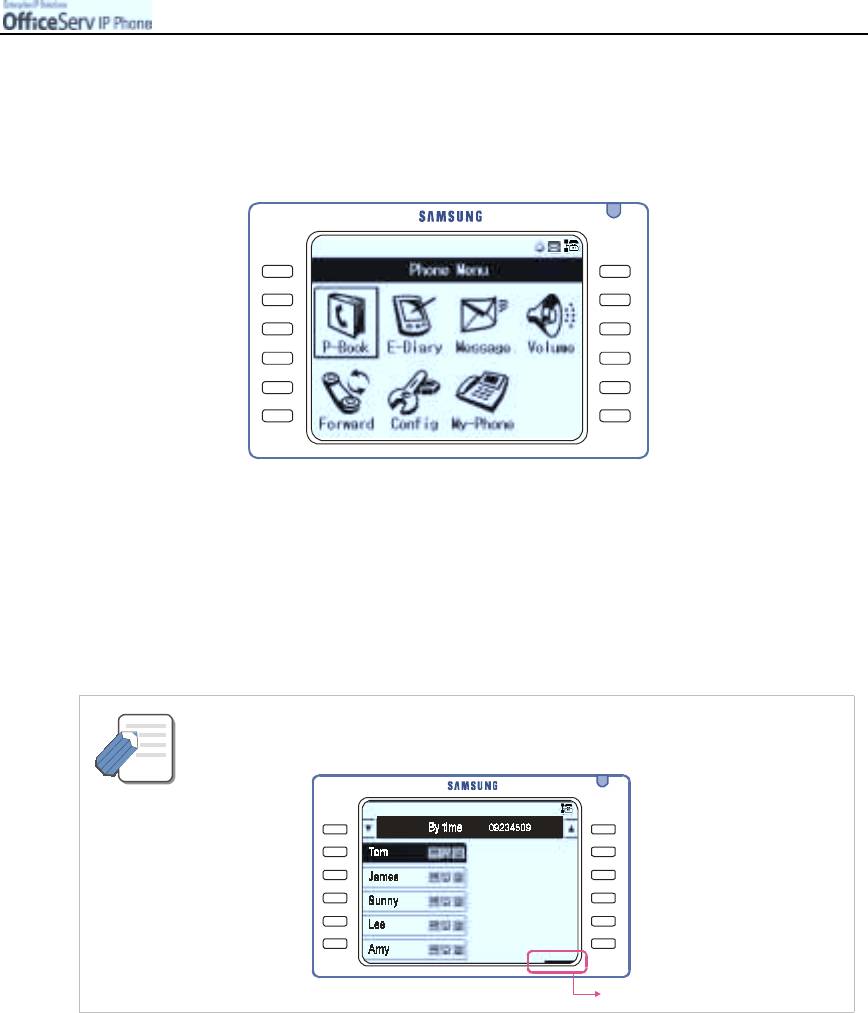
2. Entering Application Menus
When the IP phone is in the standby mode, press the [Menu] button. The main application menu
will appear on the LCD screen.
Selecting Application Menus
!
Use the direction button to move to the desired application. Then, press the [Enter] button.
!
Dial the corresponding to the number of the required menu item.
(P-Book[1], E-Diary[2], Message[3], Volume[4], Forward[5], Config[6], My-Phone[7])
!
Press the [End] button to exit the application menus.
- If there is a black mark at the bottom right of the LCD panel, you can press the [Menu]
button for other functions.
NOTE
[Menu] button
© SAMSUNG Electronics Co., Ltd.
Page 101
APPLICATION MENUS
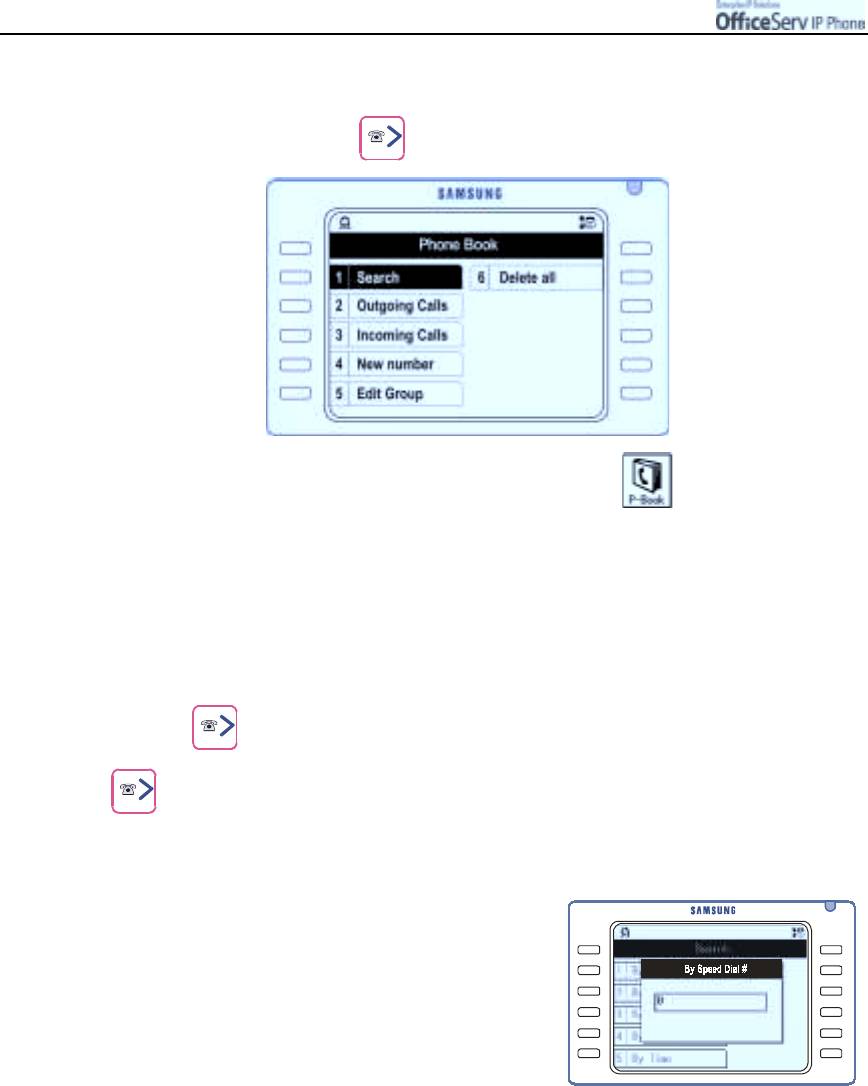
3. Phone Book
Press the Right direction button to enter the Phone Book menu OR
Press the [Menu] button and use the direction button to select Then,
press the [Enter] button.
Search By Speed Dial Number Location
This function allows you to search any telephone number based on the speed
dial number locations registered in the IP phone.
1.
Press the
button and use the direction buttons to select
"
"
""
[1. Search]
""
"
"
[1. By Speed Dial No].
Then, press the
[Enter]
button.
2.
When the speed dial number entry screen appears,
enter the speed dial number location and press
the
[Enter]
button.
#
Phone Book is not related with the OfficeServ system
personal speed dial numbers.
#
A speed dial number location is allocated
automatically you enter and save a new
speed dial number. The location number is shown
in the small box next to the telephone number entered
and can be edited as required.
Page 102
© SAMSUNG Electronics Co., Ltd.
APPLICATION MENUS
3.
The telephone number corresponding to the entered speed dial location is displayed.
#
If you press the [Enter] button without entering the speed dial number location, a list of all
speed dial names programmed will be displayed.
4.
Press the
[Send]
button to dial the selected telephone number.
#
Press the [Menu] button to change or disable the speed dial number. When the popup menu
appears, select the desired menu to Edit/ Delete/ New Entry the number.
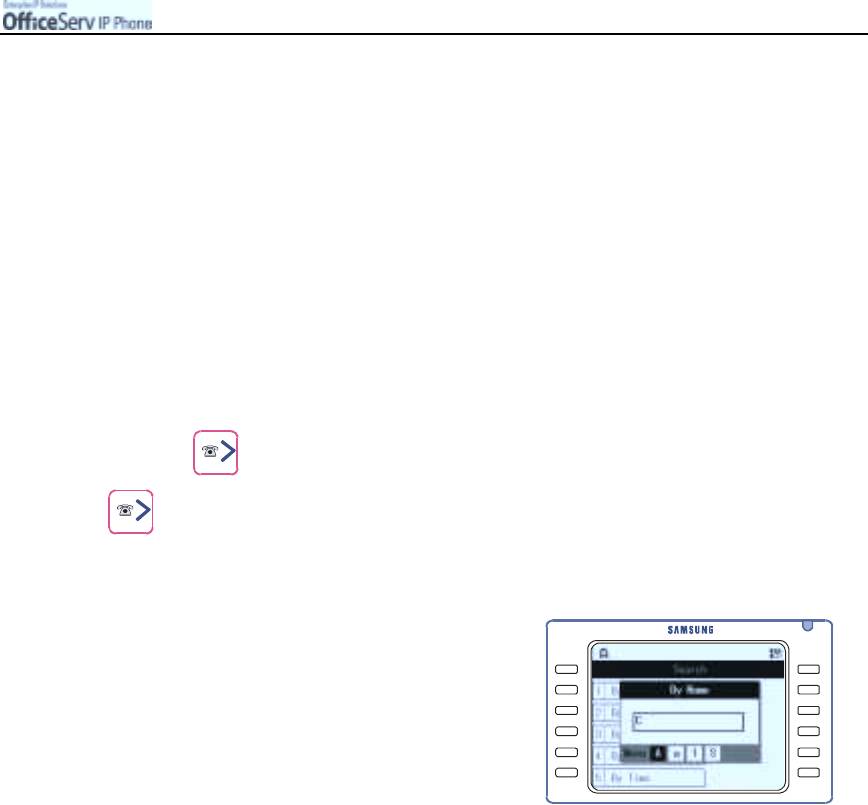
Search a Telephone Number By Name
This function allows you to search any telephone number based on the name registered to the
telephone number in the IP phone.
1.
Press the
button and use the direction button to select
"
""
"
[1. Search]
"
""
"
[2. By name].
Then, press the
[Enter]
button.
2.
A screen that prompts you to enter a name
appears. Enter the name or part of a name
to search and press the
[Enter]
button.
#
Please refer to the ‘Entering Characters’ section
of ‘Things You Should Know’ in this guide
for entering characters.
3.
The speed dial name(s) matching the entry will be displayed from the [Phone Book].
If the
[Enter]
button is pressed without entering any name, all speed dial names will be
displayed.
4.
Press the
[Enter]
button on the selected name to see the saved details(telephone
numbers, email address or notes) of the selected name.
#
Press the [Menu] button to change or the details registered for the speed dial name. When the popup
menu appears, select the desired menu to Edit/ Delete the details registered or to make a New Entry.
5.
Move to the desired telephone number and press the
[Send]
button to dial the number.
© SAMSUNG Electronics Co., Ltd.
Page 103

APPLICATION MENUS
Search By Telephone Number
You can search based on the telephone number or part of a telephone number registered in the
IP phone.
1.
Press the
button and use the direction button to select
""
"
"
[1. Search]
"
""
"
[3. By phone number].
Then, press the
[Enter]
button.
2.
The screen that prompts you to enter
a telephone number appears,
enter the telephone number to search
and press the
[Enter]
button.
3.
The speed dial name(s) related to entered telephone number is displayed.
#
If you press the [Enter] button without entering the phone number, a list of all the
telephone numbers will be displayed. Even if the part of the telephone number is entered,
a list of any telephone number that includes the entered part will be displayed.
- Entering *123* : Searches all numbers including 123.
- Entering 123* : Searches all numbers that start with 123.
- Entering *123 : Searches all numbers that end with 123.
4.
Move to the telephone number to call and press the
[Send]
button.
#
Press the [Menu] button to change or the details registered for the speed dial name.
When the popup menu appears, select the desired menu to Edit/ Delete/ the details
registered or to make a New Entry.
Page 104
© SAMSUNG Electronics Co., Ltd.
APPLICATION MENUS
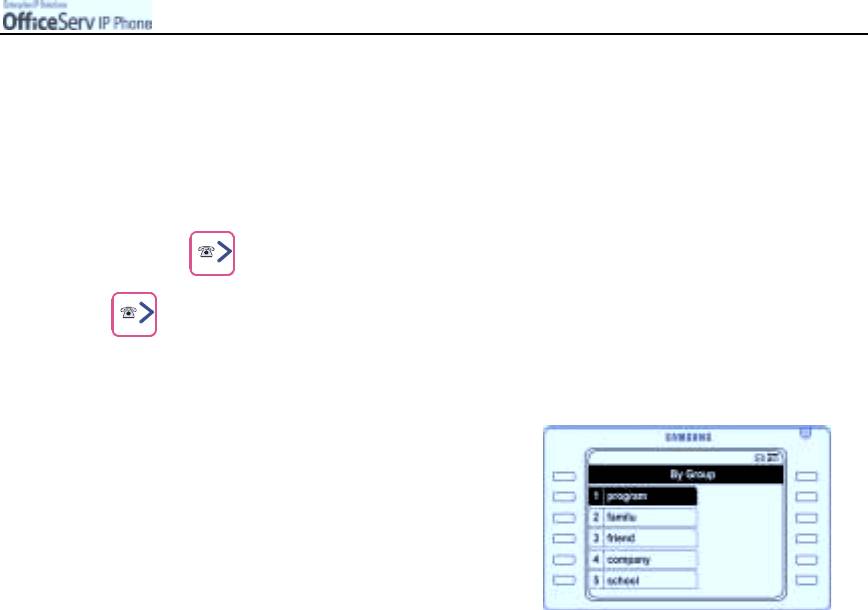
Search a Telephone Number By Group
You can search for telephone numbers by groups registered in the IP phone. This will only work if
you have allocated speed dial names and numbers to specific groups.
Refer to Registering New Numbers and Editing Groups later in this section.
1.
Press the
button and use the direction button to select
"
""
"
[1. Search]
""
"
"
[4. By group].
Then, press the
[Enter]
button.
2.
Move to the desired group from the list of
registered groups and press the
[Enter]
button.
3.
Select the required speed dial name and press
[Enter]
button
.
#
Press the [Menu] button to change or the details registered for the speed dial name. When the
popup menu appears, select the desired menu to Edit/ Delete the details registered or to
make a New Entry.
4.
Select one of the phone numbers(mobile phone, home, work, or other) programmed
and press the
[Send]
button.
© SAMSUNG Electronics Co., Ltd.
Page 105
APPLICATION MENUS
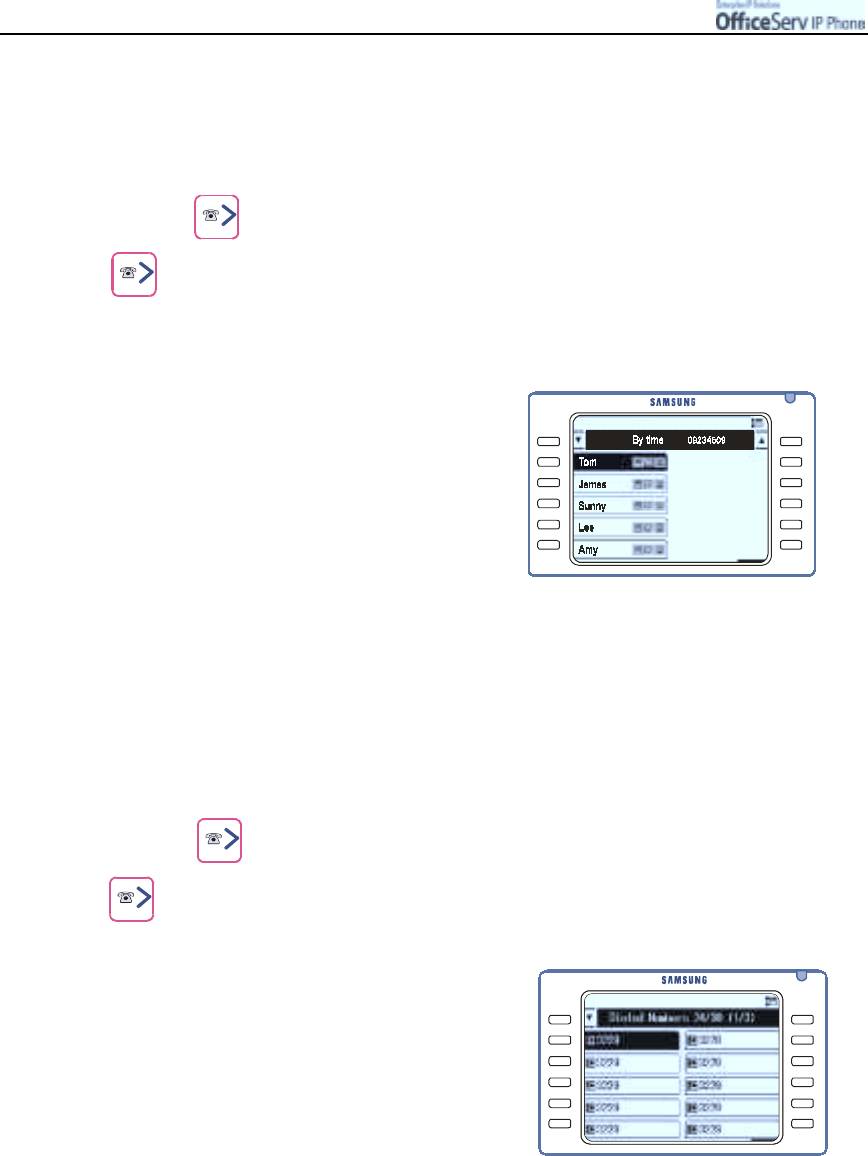
Search a Telephone Number By Time
You can search for any telephone number based on the time the telephone number was registered in
the phone. Speed dial names will be displayed commencing with the latest entry.
1.
Press the
button and use the direction button to select
"
""
"
[1. Search]
"
""
"
[5. By time].
Then, press the
[Enter]
button.
2.
The list of all the registered names is
displayed, move to required name and press
the
[Enter]
button.
#
Press the [Menu] button to change or delete
the selected number. When the popup menu
appears, select the desired menu to
Edit/ Delete the detail registered or make
a New Entry.
3.
Move to the required telephone number to call and press the
[Send]
button.
Recent Caller Numbers
The last 30 called numbers will be saved. You can review to details and redial any one of these
called numbers.
1.
Press the button and use the direction button to select
""
"
"
[2. Dialed Nos].
Then, press the
[Enter]
button.
2.
Move to the desired telephone number
and press the
[Enter]
button to review details
of the previous call.
3.
Press the
[Send]
button to dial the selected telephone number.
#
Press the [Menu] button to save or delete the selected number. When the popup menu appears,
select the desired menu to save/delete the number or delete all outgoing calls.
Page 106
© SAMSUNG Electronics Co., Ltd.
APPLICATION MENUS
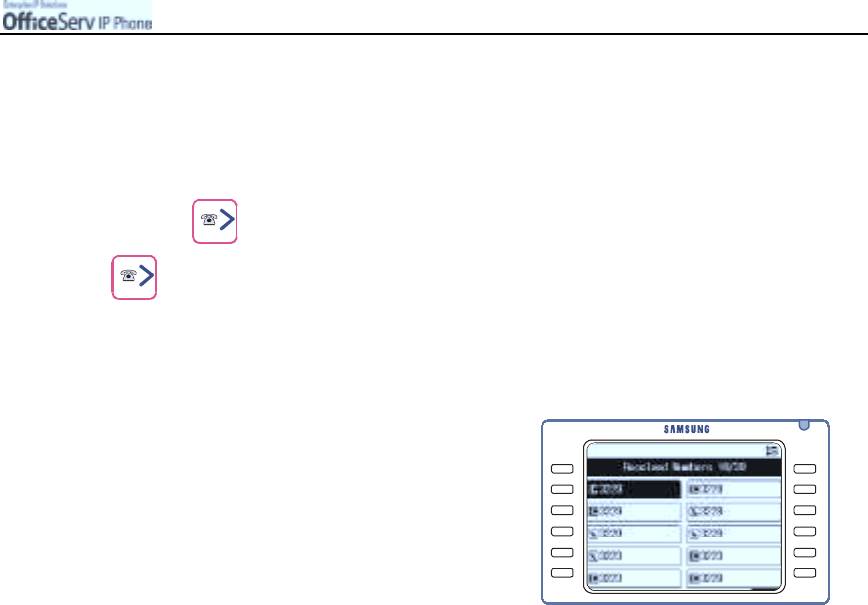
Recent Called Numbers
The call details and Calling line ID, if available, of up to the last 30 incoming calls will be saved in
the incoming call log. You can review the details and dial the Caller ID.
1.
Press the
button and use the direction button to select
"
""
"
[3. Received Nos].
Then, press the
[Enter]
button.
2.
Move to the desired telephone number
and press the
[Enter]
button to review details
about the call.
3.
Press the
[Send]
button to dial the selected telephone number.
#
Press the [Menu] button to save or delete the selected number. When the popup menu appears,
select the desired menu to save/delete the number or delete all incoming calls.
© SAMSUNG Electronics Co., Ltd.
Page 107
APPLICATION MENUS
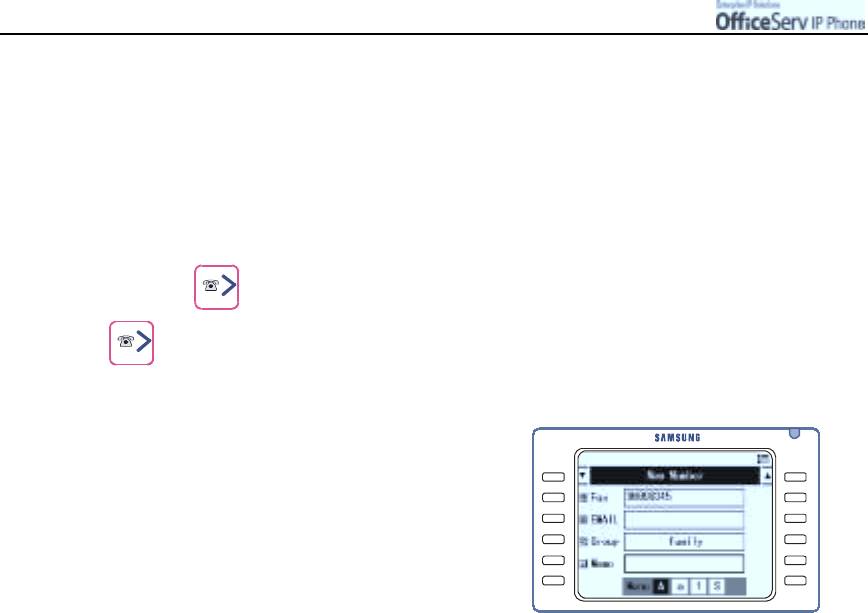
Telephone Number Registration
You can save 1000 speed dial names and 2,400 telephone numbers. Each Speed dial name can
have the following information registered : 5 telephone numbers(home, mobile phone,
work/school, Etc, and facsimile), e-mail, group, and memo. Each speed dial number can also be
allocated a speed dial number location.
1.
Press the
button and use the direction button to select
"
"
""
[4. New number].
Then, press the
[Enter]
button.
2.
Use the direction button to move to each item.
Then, enter user information.
#
Please refer to the ‘Entering Characters’ section
of ‘Things You Should Know’ part in this guide
for entering characters.
3.
Press the
[Enter]
button, the ‘Saved.’ message will appear and the
information is saved.
Page 108
© SAMSUNG Electronics Co., Ltd.
APPLICATION MENUS
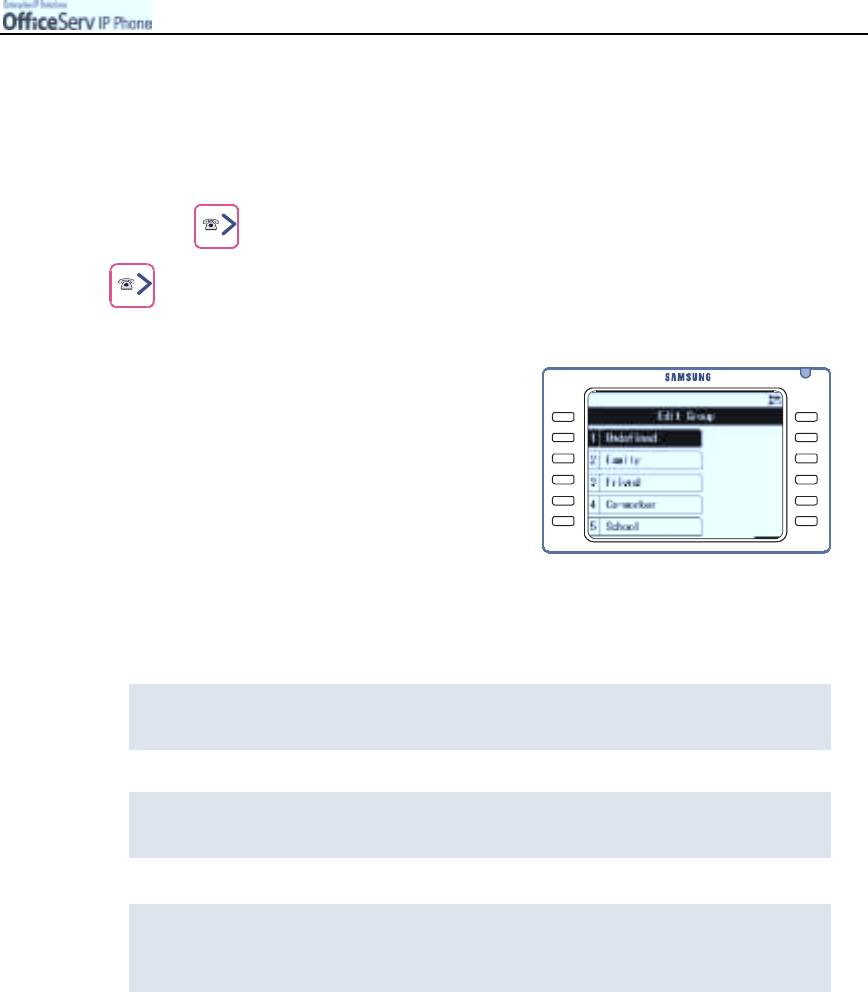
Editing Groups
This function allows you to establish groups to which speed dial names can be included. This
allows you to search for speed dial numbers by personalized groupings.
1.
Press the
button and use the direction button to select
"
""
"
[5. Edit Group].
Then, press the
[Enter]
button.
2.
The list of registered groups appears.
3.
Press the
[Menu]
button to Add/Edit/Delete the group.
(Group 1(Null) provides the option to ‘Add’ only.)
#
To add a group:
Press the [Menu] button and select the [Add] menu. Enter the group name to register
and press the [Enter] button.
#
To Edit a group name:
Select the group to Edit and press the [Menu] button. Then, select the [Edit] menu.
Enter the group name and press the [Enter] button.
#
To delete a group:
Select the group to delete from the list and press the [Menu] button.
Then, select the [delete] menu. If the ‘Do you want to delete?’ message appears,
select [Yes] and press the [Enter] button.
© SAMSUNG Electronics Co., Ltd.
Page 109

APPLICATION MENUS
Deleting All Telephone Numbers
This function allows you to delete all saved telephone numbers and associated names.
1.
Press the
button and use the direction button to select
"
""
"
[6. Delete All].
Then, press the
[Enter]
button.
2.
If the password entry screen appears,
enter the password set in the IP phone.
#
If the password is not changed, the initial value
of password is 1234. If you do not remember
your password, please contact your System
Administrator.
3.
If the ‘Are you sure you want to permanently delete your data?’ message appears,
select
[Yes]
and press the
[Enter]
button.
Then, all the telephone numbers saved in the phone book will be deleted.
#
The recent caller/called numbers are not deleted.
Page 110
© SAMSUNG Electronics Co., Ltd.
APPLICATION MENUS
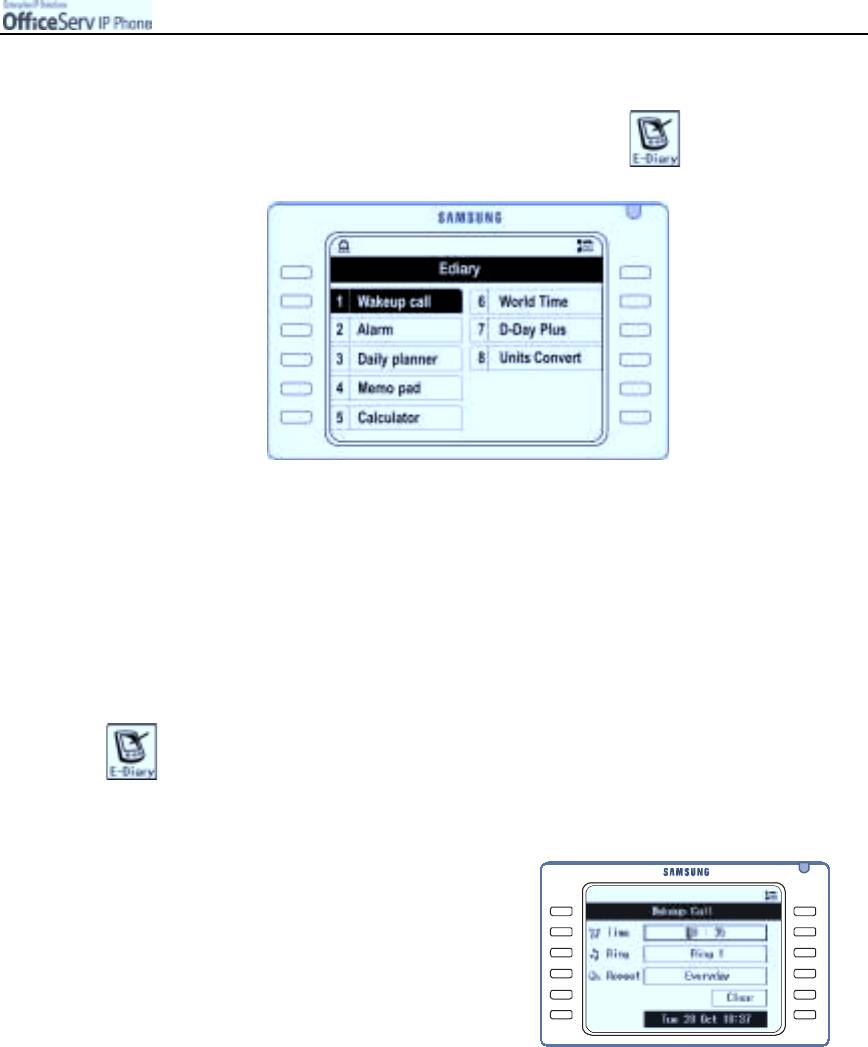
4. E-Diary
Press the [Menu] button and use the direction buttons to select
Then, press the [Enter] button.
Move to the desired menu and press the
[Enter]
button.
Wakeup Call
Allows you to set an alarm to ring for 1 minute or until answered, at the required time. The frequency options
for a wakeup call are ; everyday, Monday to Friday or Monday to Saturday.
1.
Press the
[Menu]
button and use the direction button to select
!
!!
!
[1. Wakeup Call].
Then, press the
[Enter]
button.
2.
Set the Time, Ring type, and frequency.
Select
[Save]
and press the
[Enter]
button.
3.
To clear an existing Wakeup Call. Select
[Save]
and change to
[Clear]
by pressing the
navigation keys(< or >). Then press the
[Enter]
button to clear the setting.
© SAMSUNG Electronics Co., Ltd.
Page 111
APPLICATION MENUS
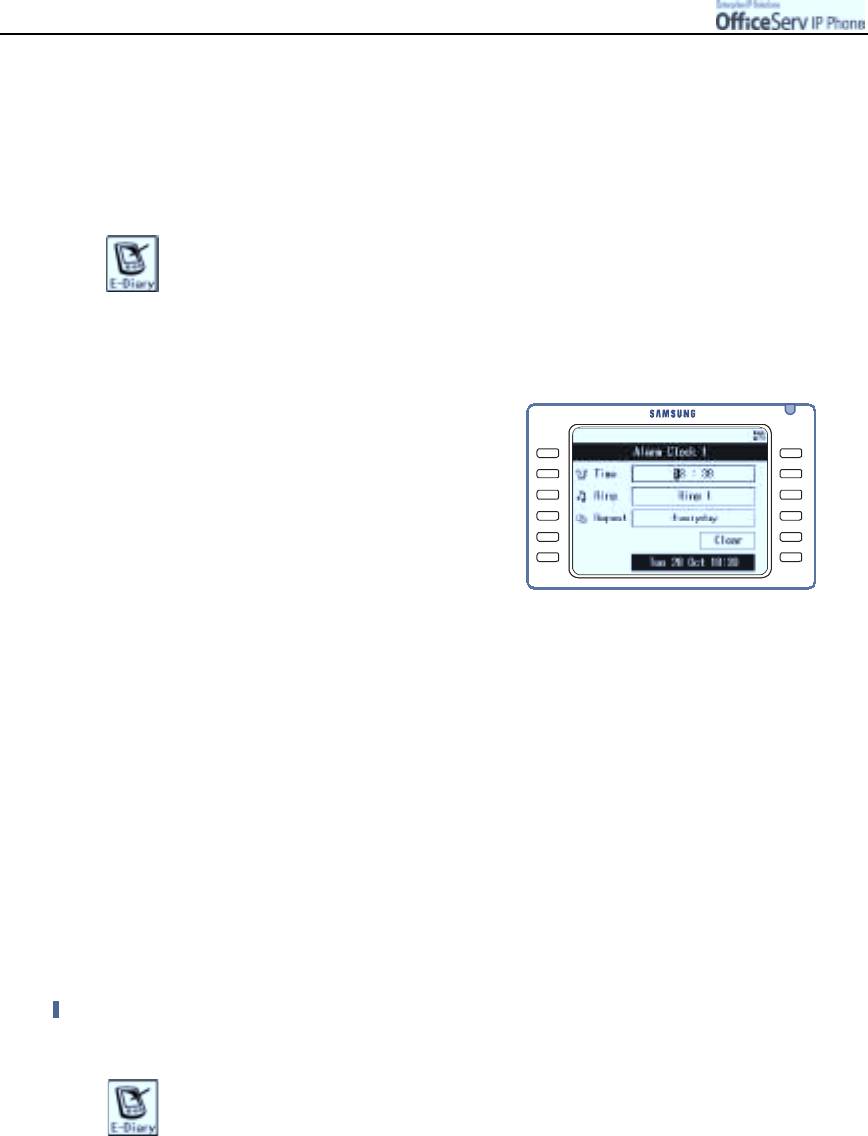
Alarm Clock
This function is similar to the wakeup call function except that the frequency of the alarm is limited to once
only or everyday. Two separate alarm times are available.
1.
Press the
[Menu]
button and use the direction button to select
!
!!
!
[2. Alarm].
Then, press the
[Enter]
button.
2.
Select
[Alarm clock 1]
or
[Alarm clock 2].
3.
Set the Time, Ring, and Frequency of
the selected alarm clock.
You should change the last parameter from
[Clear]
to
[Save]
by pressing navigation
key(< or >). Then press the
[Enter]
button
to save the setting.
"
If you select the [Clear] menu and press
the [Enter] button, then the set alarm will be cleared.
Daily Planner
The Daily Planner allows you to schedule events and have the system notify you when an event is due to
commence. Up to 30 event schedules can be registered.
#
A note of up to 32 characters can be associated with each scheduled event. If the note is more
than 8 characters long, it can be viewed by selecting it, pressing the [Menu] button and then OK.
An available ring tone can be selected.
#
An alarm can be set to ring an hour before, 30 minutes before or on the specified time for the
scheduled event.
Schedule Registration
1.
Press the
[Menu]
button and use the direction button to select
!
!!
!
[3. Daily Planner].
Then, press the
[Enter]
button.
2.
Use the direction button and select the date to be registered. Press the
[Menu]
button
to ‘Add’ a new schedule.
Page 112
© SAMSUNG Electronics Co., Ltd.

APPLICATION MENUS
3.
Use the direction button to program the schedule
items. Set the Date, Time, Message Contents,
Alarm Timer(an hour before the set time,
30 minutes before the set time, or on time)
and Ring type and press the
[Enter]
button.
Adding/Modifying/Deleting the Schedule
1.
Press the
[Menu]
button and use the direction button to select
!
!!
!
[3. Daily Planner].
Then, press the
[Enter]
button.
2.
Use the direction buttons and select the date you require.
Press the
[Enter]
button.
3.
Press the
[Menu]
button to
add/edit/delete/delete all
a schedule.
"
Press [Add] to add a new schedule.
"
Press [Edit] to modify a schedule.
"
Press [Delete] to delete the selected schedule.
Then, the ‘Do you want to delete?’ message will
appear.
Select [Yes], and press the [Enter] button.
"
Press [Delete All] to delete all the schedules.
Then, the ‘Do you want to delete all?’ message will appear. Select [Yes], and press
the [Enter] button.
© SAMSUNG Electronics Co., Ltd.
Page 113
APPLICATION MENUS
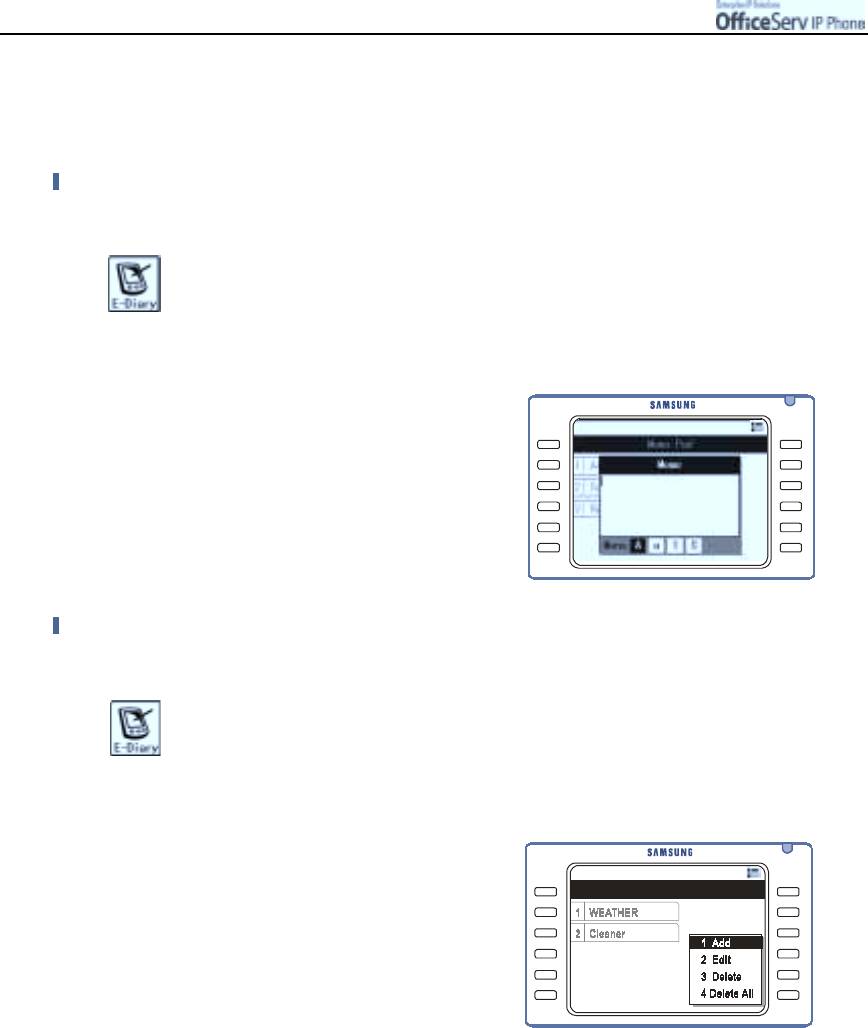
Memo Pad
Allows you to save a simple memo to the IP phone.
Entering a Memo
1.
Press the
[Menu]
button and use the direction button to select
!
!!
!
[4. Memo Pad]
!
!!
!
[1.Add New Memo].
Then, press the
[Enter]
button.
2.
Enter the memo in the Memo screen
and press the
[Enter]
button to save.
"
Please refer to the ‘Entering Characters’ section
of ‘Things You Should Know’ in this guide
for entering characters.
Checking/Modifying/Deleting/Registering Memo
1.
Press the
[Menu]
button and use the direction buttons to select
!
!!
!
[4. Memo Pad]
!!
!
!
[2.Search].
Then, press the
[Enter]
button.
2.
Select the desired memo and press
the
[Menu]
button to add a new memo
or edit/delete existing memos.
"
Press [Add] to add a new memo.
"
Press [Edit] to modify a selected memo.
"
Press [Delete] to delete the selected memo.
"
Press [Delete All] to delete all registered memos.
3.
Press the
[Enter]
button to review details of the selected memo.
Page 114
© SAMSUNG Electronics Co., Ltd.
APPLICATION MENUS
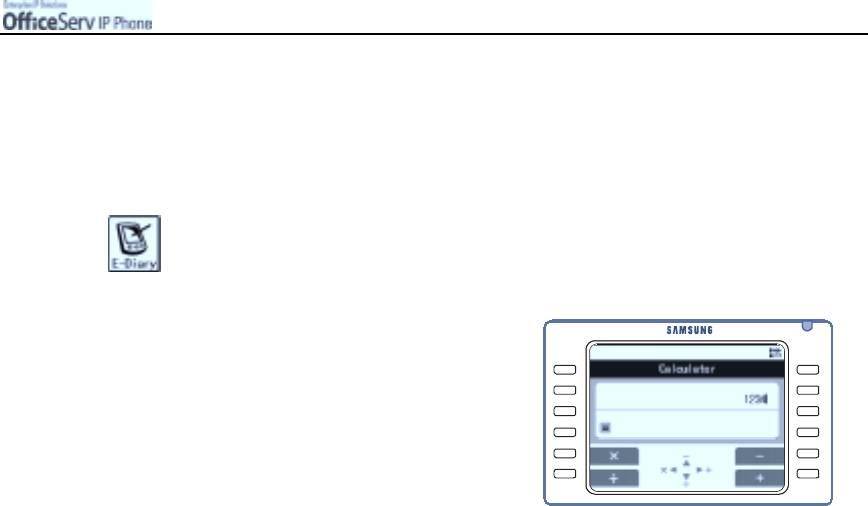
Calculator
A simple calculator is available to add, subtract, multiply, and divide numbers.
1.
Press the
[Menu]
button and use the direction button to select
!
!!
!
[5. Calculator].
Then, press the
[Enter]
button.
2.
Enter the numbers to calculate. Then,
press the direction button to select the required
operation. Enter the next number and press
the
[Enter]
button to check the calculation
results.
"
Press the [#] button to enter negative numbers,
the [*] button to enter decimal points,
and the [Cancel] button to delete incorrectly
entered numbers.
3.
To continue the calculation, select another required operation instead of pressing
the
[Enter]
button at step 2. And enter the number to calculate.
"
Press the [Enter] button to complete the calculation.
4.
Press the
[End]
button to finish calculation.
© SAMSUNG Electronics Co., Ltd.
Page 115
APPLICATION MENUS
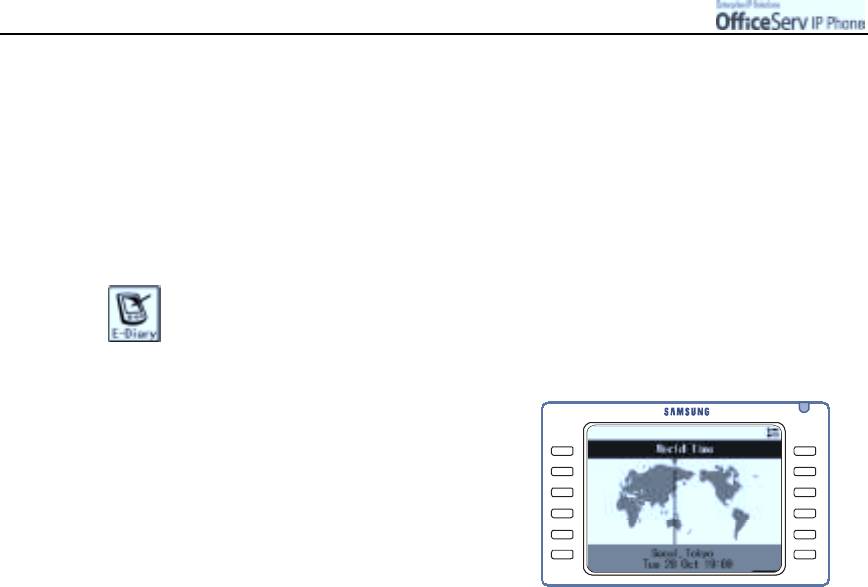
World Time
Allows you to search local time in 39 cities around the world(Guam, New York, Dallas, Tokyo, Denver, Lapas,
London, Rome, Miami, Moscow, Midway, Bangkok, Berlin, Buenos Aires, Beijing, Samoa, San Francisco, Seoul,
Sydney, Chicago, Abu Dhabi, Athens, Alaska, Alma Tai, Oakland, Okhotsk, Wellington, LA, Jakarta, Middle
Atlantic, Tashkent, Phoenix, Karakas, Cape Verde, Paris, Hawaii, Honolulu, Helsinki, and Hong Kong).
1.
Press the
[Menu]
button and use the direction button to select
!
!!
!
[6. World Time].
Then, press the
[Enter]
button.
2.
Use the direction button to select the city where
you want to check local time.
The local time of the time zone and major cities
will be displayed.
Changing the Time Zone
"
You can change the time zone by the following procedure.
"
Press the [Menu] button in the world time.
"
Then pop-up menu will be displayed ‘Do you want to change time zone?’
"
Select [Yes] and press the [Enter] button.
"
Select the time zone(e.g. : Guam, Sydney) and press the [Enter] button.
Page 116
© SAMSUNG Electronics Co., Ltd.
APPLICATION MENUS
D-DAY Plus
D-DAY Plus allows you to enter an important schedule so that you can check the time left until or the time
passed from, the entered date (D-Day). The D-DAY can be entered directly, or can also be entered
automatically by calculating the number of days before/after the entered base date.
Entering a New D-DAY
1.
Press the
[Menu]
button and use the direction button to select
!
!!
!
[7. D-Day Plus]
!
!!
!
[1. D-Day Add].
Then, press the
[Enter]
button.
2.
Select
[1. D-Day Exact Date]
and set each
option to enter a D-Day directly. Then,
press the
[Enter]
button
.
"
Select [2. D-Day Base/Off] and set
the base date, number of days,
and before/after D-Day menus to calculate
and enter a D-Day.
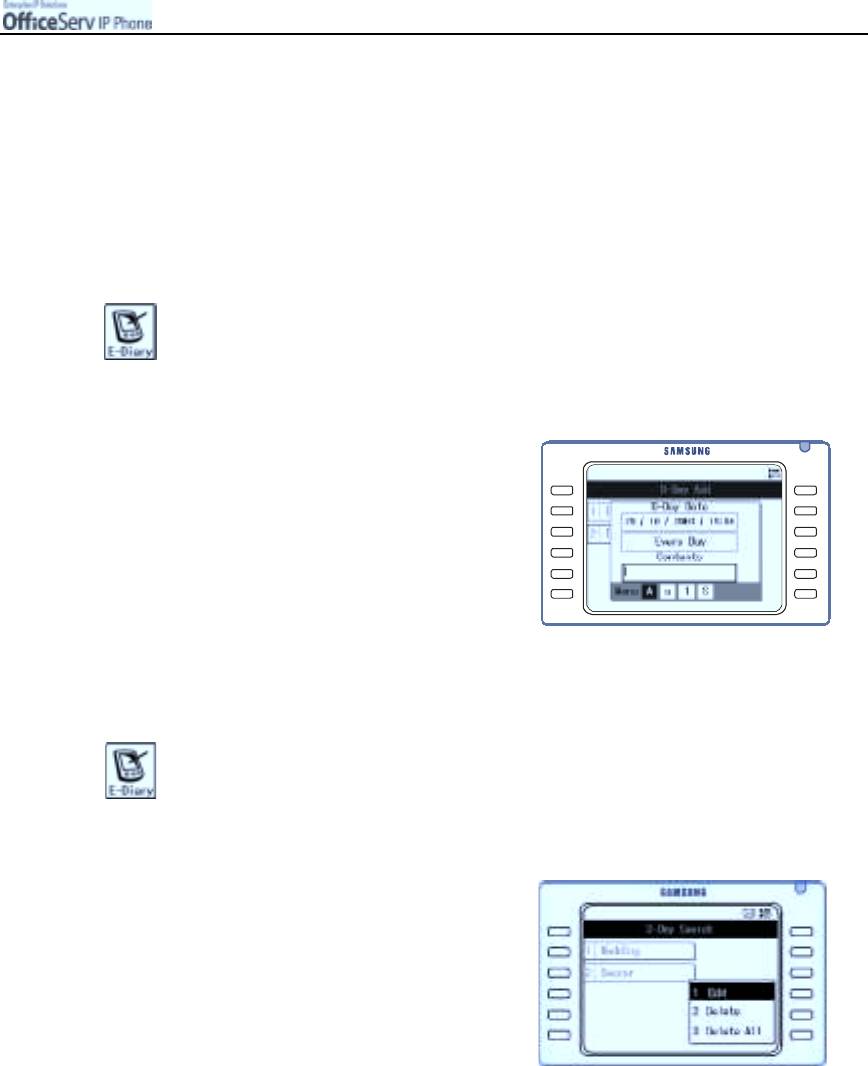
Searching a List of D-Days
1.
Press the
[Menu]
button and use the direction button to select
!
!!
!
[7. D-Day Plus]
!
!!
!
[2. D-Day Search].
Then, press the
[Enter]
button.
2.
When the list of the registered D-Day’s appears,
press the direction button to select
the desired D-Day to review.
"
Press the [Enter] button to
check the details of a D-Day.
3.
Press the
[Menu]
button to edit or delete the selected D-Day or
delete all the D-Day settings.
© SAMSUNG Electronics Co., Ltd.
Page 117
APPLICATION MENUS
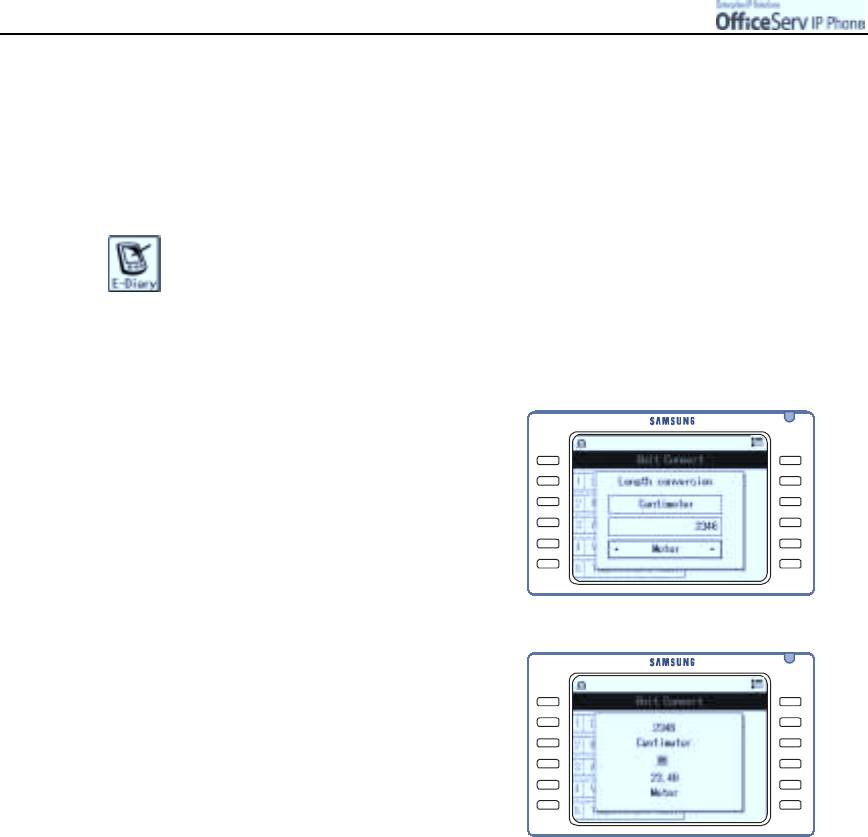
Unit Conversion
This feature provides a simply conversion program for commonly used units of measurement for temperature,
length, weight, volume, and area.
1.
Press the
[Menu]
button and use the direction button to select
!
!!
!
[8. Units Convert].
Then, press the
[Enter]
button.
2.
Use the direction button to select the desired unit. Then, press the
[Enter]
button.
3.
Specify the value of each item(base unit,
number to convert, and conversion unit)
and press the
[Enter]
button
.
4.
The converted value will be displayed.
Page 118
© SAMSUNG Electronics Co., Ltd.
APPLICATION MENUS
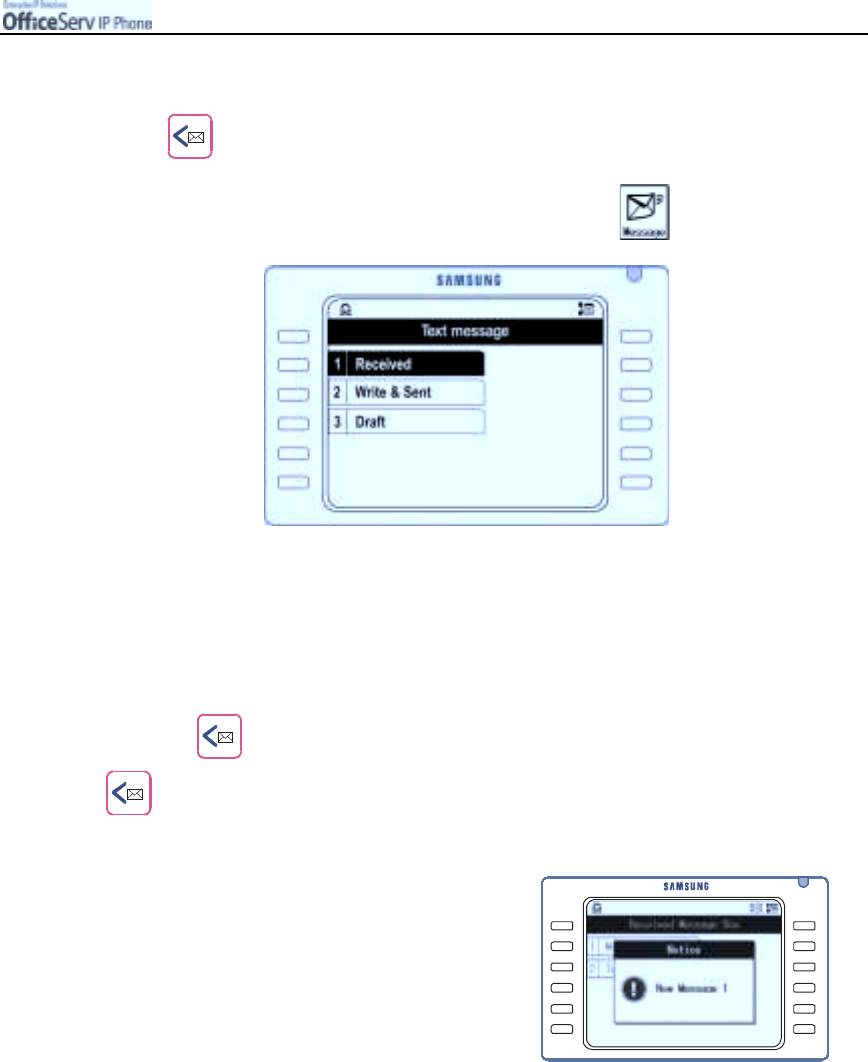
5. Message
Press the direction button to enter the Text Message menu OR
Press the [Menu] button and use the direction button to select
Then, press the [Enter] button.
Move to the desired menu and press the
[Enter]
button.
Received Messages
Allows you to check text messages or set the status of message reception.
1.
Press the button and use the direction button to select
!
!!
!
[1. Received].
Then, press the
[Enter]
button.
2.
When a new message is received, the screen
that shows the number of messages
will appear.
© SAMSUNG Electronics Co., Ltd.
Page 119
APPLICATION MENUS
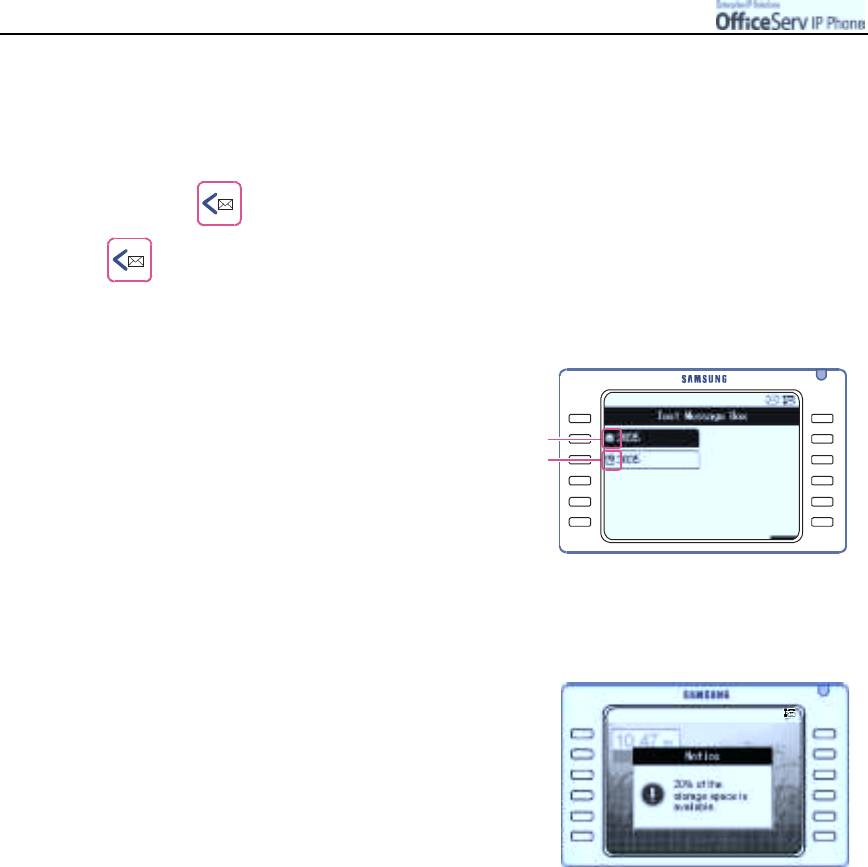
Message Charge
Allows you to review received text messages and to setup how you wish to be notified on the arrival of a new
text message.
1.
Press the
button and use the direction button to select
!
!!
!
[1. Received]
!
!!
!
[1. Msg. Charge].
Then, press the
[Enter]
button.
2.
Select a message from a list of messages
and press the
[Enter]
button to see
Unchecked Message
the message content.
Checked Message
"
If the message is long, press
the direction button and display
the rest of the message.
3.
Press the
[Menu]
button at the Text Message box screen to reply/resending/delete the
selected message or delete all messages.
"
When free space of the draft memory is 20%
of the total space, the screen on the right appears.
Delete the unused messages from the draft
to increase the space.
Page 120
© SAMSUNG Electronics Co., Ltd.
APPLICATION MENUS
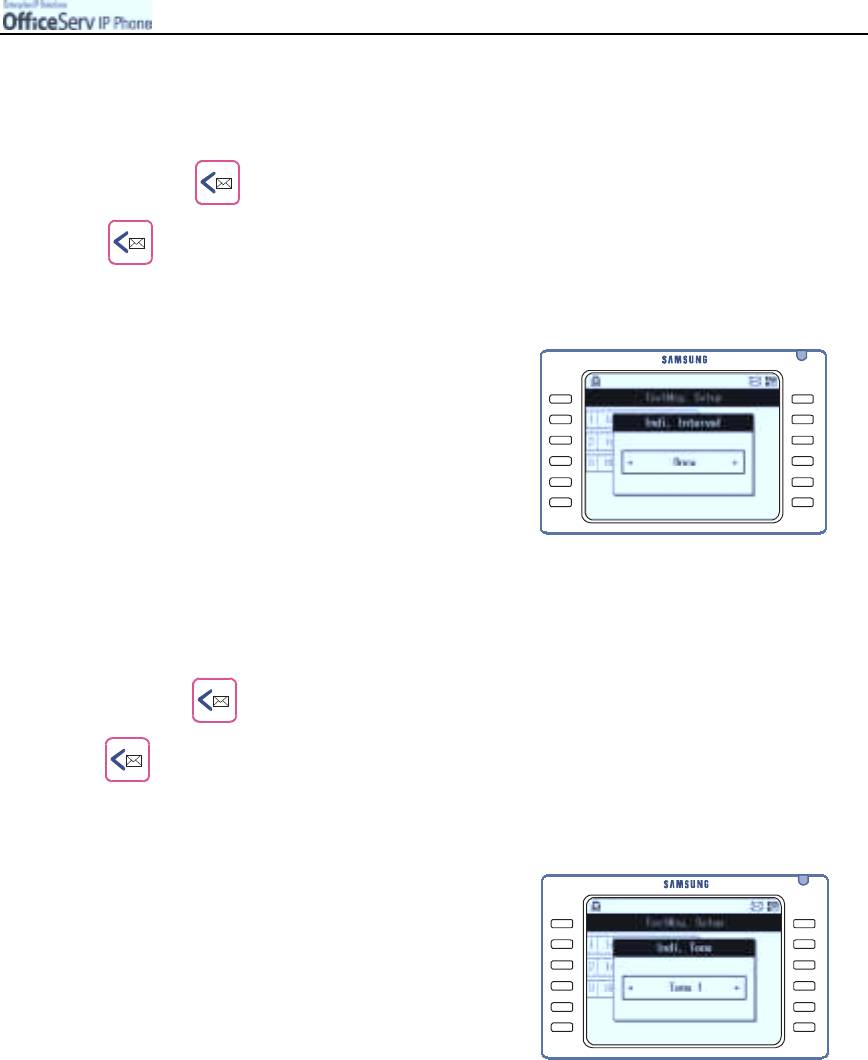
Setting Message Arrival Notice Interval
You can set how your phone will notify you of a new text message
.
1.
Press the button and use the direction button to select
!
!!
!
[1. Received]
!
!!
!
[2. TextMsg.Setup]
!!
!
!
[1. Indi. Interval].
Then, press the
[Enter]
button.
2.
Select the interval for notifying you of
a new message arrival and press
the
[Enter]
button.
"
Once : Alarm rings once when a message arrives.
"
Every 2 Minutes : Alarm rings every 2 minutes
until the message is checked.
"
No Tone : Alarm does not ring when
a message arrives.
Setting a Message Arrival Alarm
Allows you to set an alarm tone for notifying you of a message arrival.
1.
Press the
button and use the direction buttons to select
!
!!
!
[1. Received]
!!
!
!
[2. TextMsg.Setup]
!
!!
!
[2. Indi. Tone].
Then, press the
[Enter]
button.
2.
Select an alarm tone and press
the
[Enter]
button.
"
Alarm tones 1/2/3/4/5 : The specified alarm
rings according to the interval setting.
© SAMSUNG Electronics Co., Ltd.
Page 121
APPLICATION MENUS
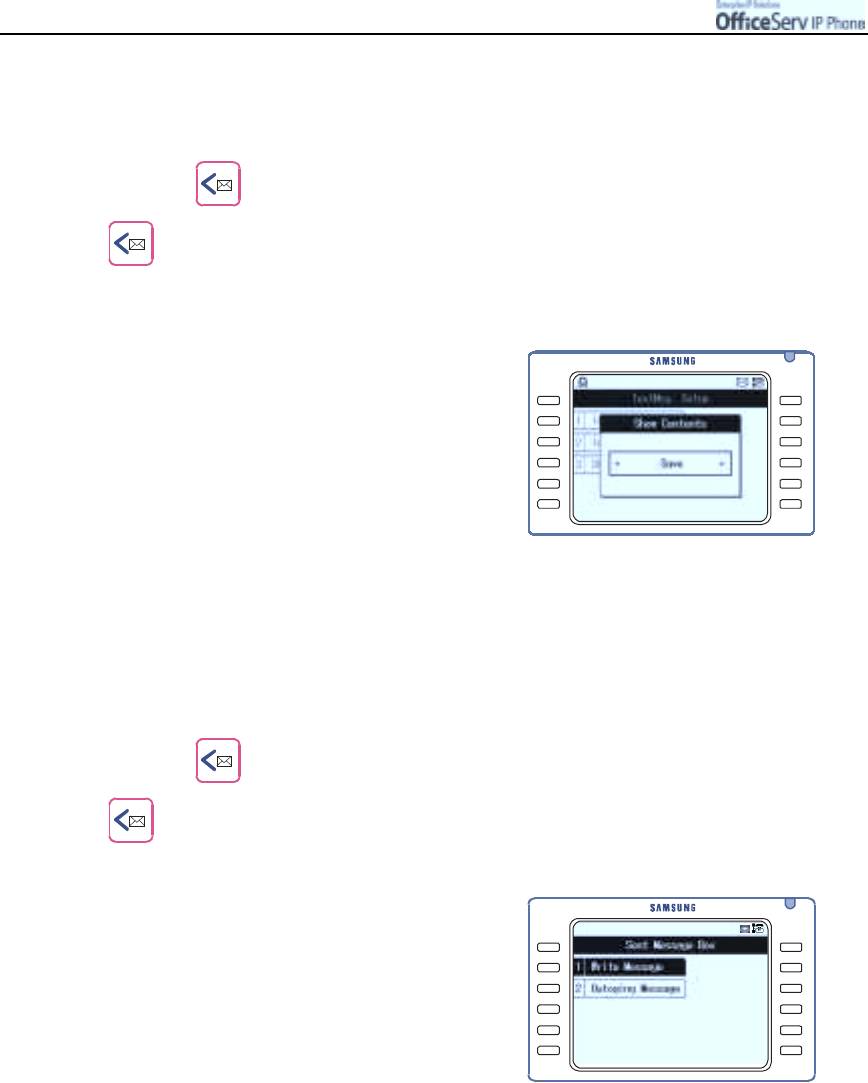
Setting/Clearing Message Display
Allows you to select whether to display the contents of the message when the message arrives.
1.
Press the
button and use the direction buttons to select
!
!!
!
[1. Received]
!!
!
!
[2. TextMsg.Setup]
!
!!
!
[3. Show Contents].
Then, press the
[Enter]
button.
2.
Select whether to display the contents of
the message when the message arrives
and press the
[Enter]
button.
"
Select [Save] to display the popup screen with
the contents of the new message.
"
Select [Clear] to display the popup screen
without displaying the contents of
the new message.
Sent Messages
Allows you to write a new message to be sent. In addition, messages saved in the Sent message box can be
resent through the Sent message function.
1.
Press the
button and use the direction buttons to select
!
!!
!
[2. Write & Sent].
Then, press the
[Enter]
button.
2.
Move from the Sent Message box to
the desired menu and press the
[Enter]
button.
Page 122
© SAMSUNG Electronics Co., Ltd.
APPLICATION MENUS
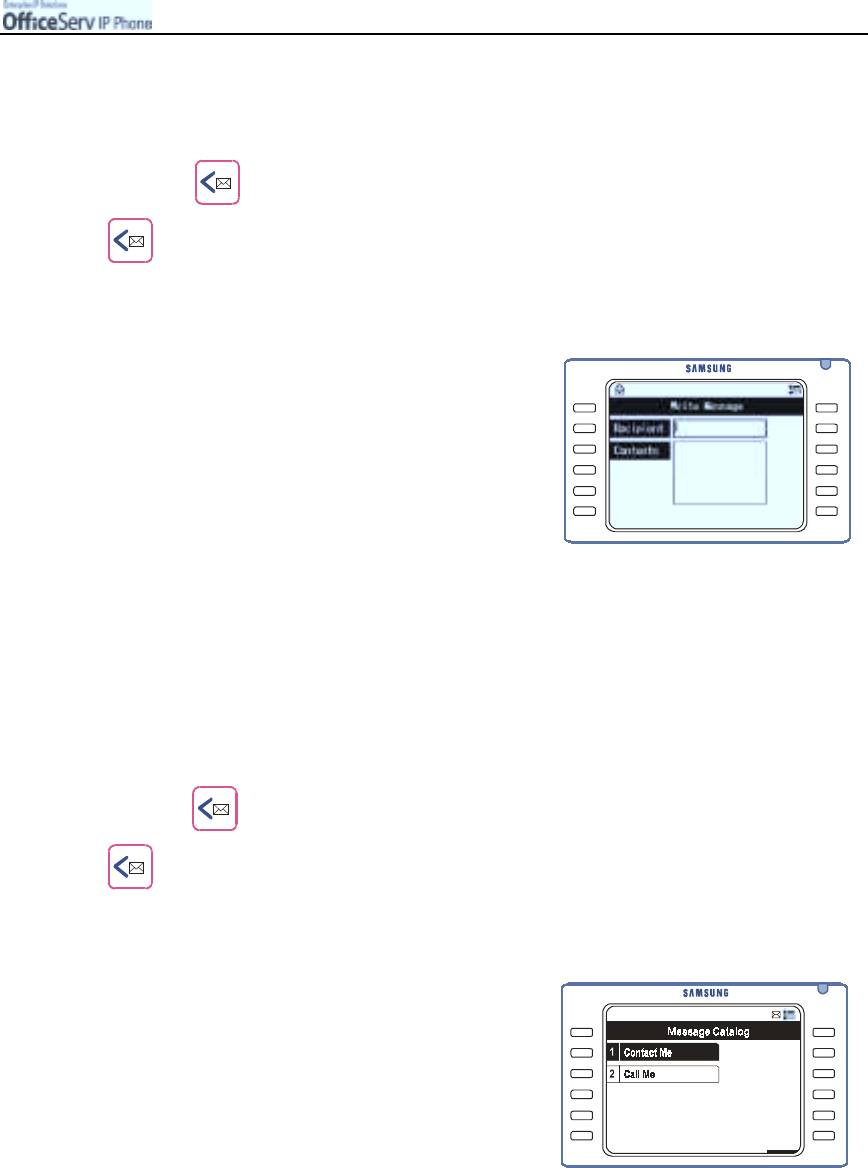
Writing a Message
You can write and send a text message.
1.
Press the button and use the direction buttons to select
!
!!
!
[2. Write & Sent]
!
!!
!
[1. Write Message]
!
!!
!
[1. Write New Message].
Then, press the
[Enter]
button.
2.
Enter the phone number to receive
the message as well as the message.
Press the
[Enter]
button, to send the message.
"
Please refer to the ‘Entering Characters’ section
of ‘Things You Should Know’ in this guide
for entering characters.
"
If the sending succeeds, the screen prompting you
to save the message in the sent message box will
be displayed. Select [Yes] and press the [Enter] button to save the message.
"
If the sending fails, the screen prompting you to save the message in the reserved
message box will be displayed. Select [Yes] and press the [Enter] button to save the message.
Retrieving and Sending a Message
Allows you to retrieve the messages saved in the Text message box and send
them as they are or after modification.
1.
Press the
button and use the direction buttons to select
!!
!
!
[2. Write & Sent]
!
!!
!
[1. Write Message]
!
!!
!
[2. Invoke Message].
Then, press the
[Enter]
button.
2.
Use the direction button to move to the message
to be retrieved and press the
[Menu]
button.
You can add a new sentence
or Edit/Send/Delete the selected message or
Delete All existing messages.
© SAMSUNG Electronics Co., Ltd.
Page 123
APPLICATION MENUS
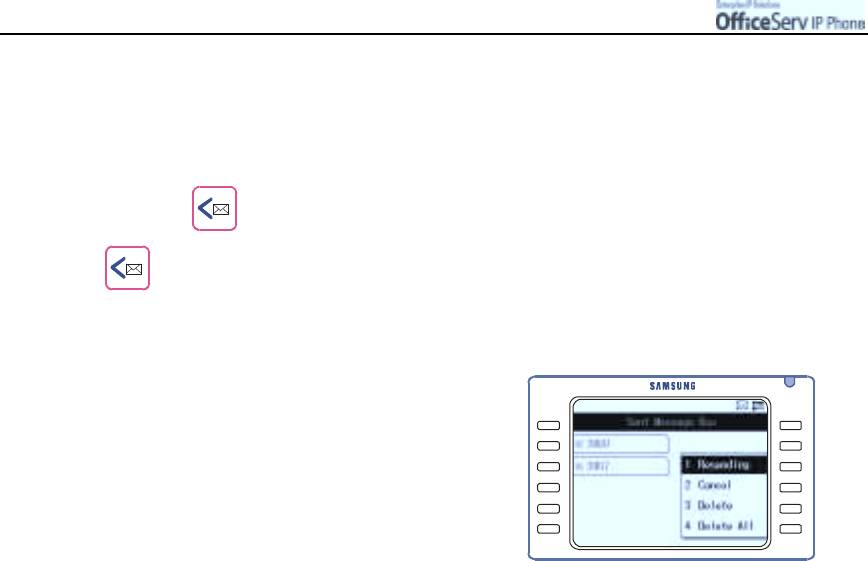
Managing the Sent Message Box
Allows you to check/delete/resend the sent or reserved messages saved in the Sent Message box.
"
Messages cannot be modified.
1.
Press the
button and use the direction buttons to select
!
!!
!
[2. Write & Sent]
!
!
!!
[2. Outgoing Message].
Then, press the
[Enter]
button.
2.
Select the sent message required
and press the
[Menu]
button.
The selected message can be resent to
another person or deleted.
Select the [Delete All] menu to delete all
the messages from the Sent Message box.
"
To review a sent message, select the message from
the Sent Message List screen and press the [Enter] button.
"
To cancel the sent message regardless of being read.
Then the cancelled message is deleted from the receiver’s message box.
Page 124
© SAMSUNG Electronics Co., Ltd.
APPLICATION MENUS
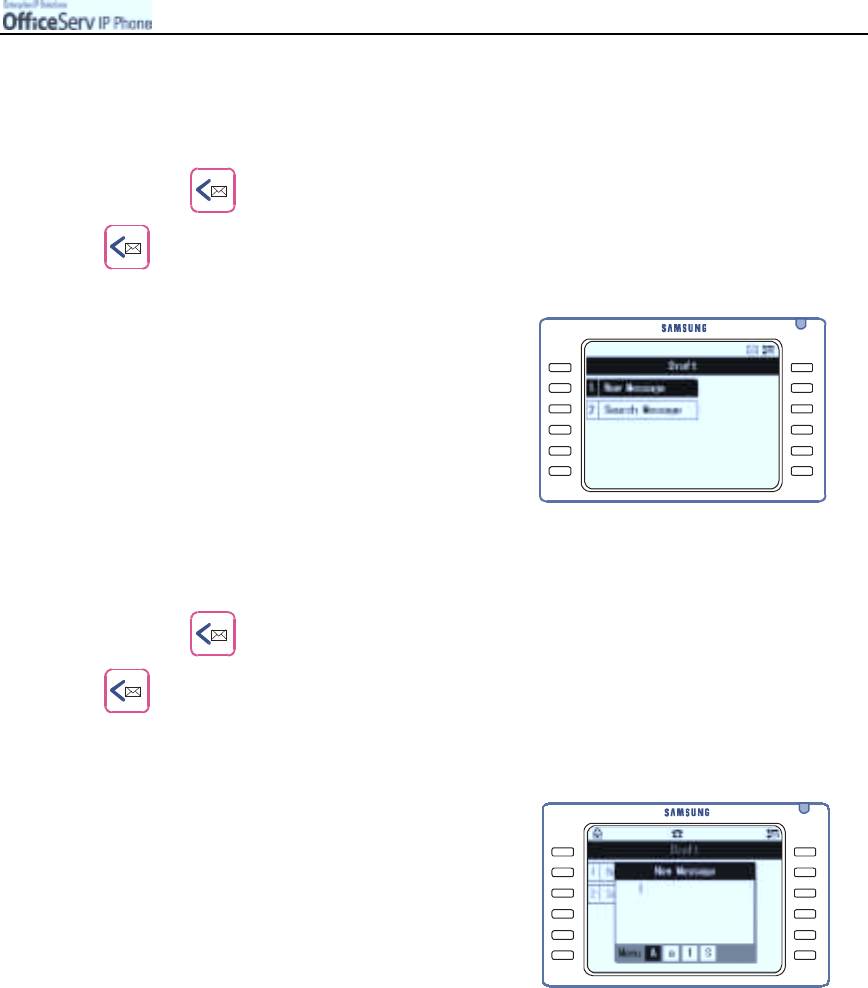
Draft
Allows you to retrieve and conveniently use messages saved as a Draft.
1.
Press the
button and use the direction buttons to select
!!
!
!
[3. Draft].
Then, press the
[Enter]
button.
2.
Move from the Draft screen to the desired menu.
Then, press the
[Enter]
button.
New Draft Message Registration
Allows you to write and register a new draft message for later use.
1.
Press the button and use the direction buttons to select
!
!!
!
[3. Draft]
!
!!
!
[1. New Message].
Then, press the
[Enter]
button.
2.
Enter a new message and press
the
[Enter]
button.
"
Please refer to the ‘Entering Characters’ section
of ‘Things You Should Know’ in this guide
for entering characters.
© SAMSUNG Electronics Co., Ltd.
Page 125
APPLICATION MENUS
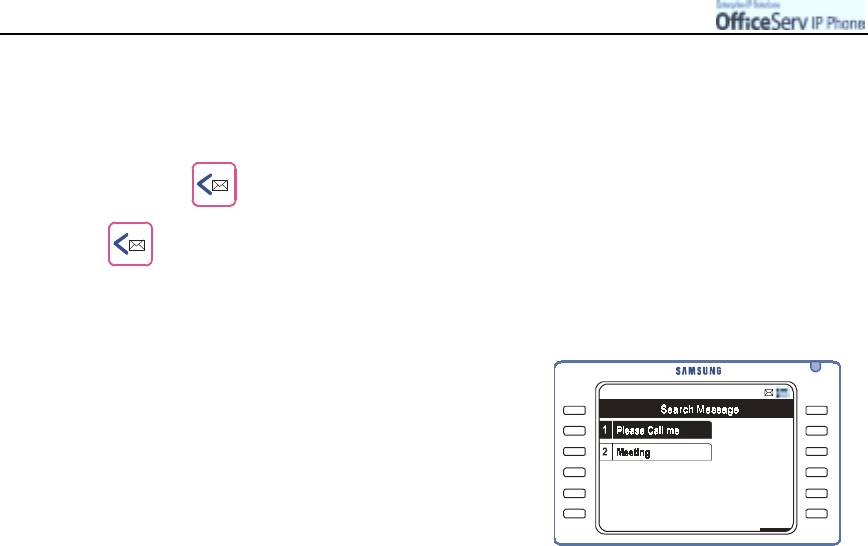
Searching Messages
Allows you to search your saved draft messages.
1.
Press the
button and use the direction buttons to select
!
!!
!
[3. Draft]
!!
!
!
[2. Search Message].
Then, press the
[Enter]
button.
2.
Use the direction button to move to the message
to be retrieved and press the
[Menu]
button.
Then, you can send/modify/delete/delete
all the draft messages or add a new message.
"
To check a message, select the message from
the Message Catalog List screen and press
the [Enter] button.
Page 126
© SAMSUNG Electronics Co., Ltd.
APPLICATION MENUS
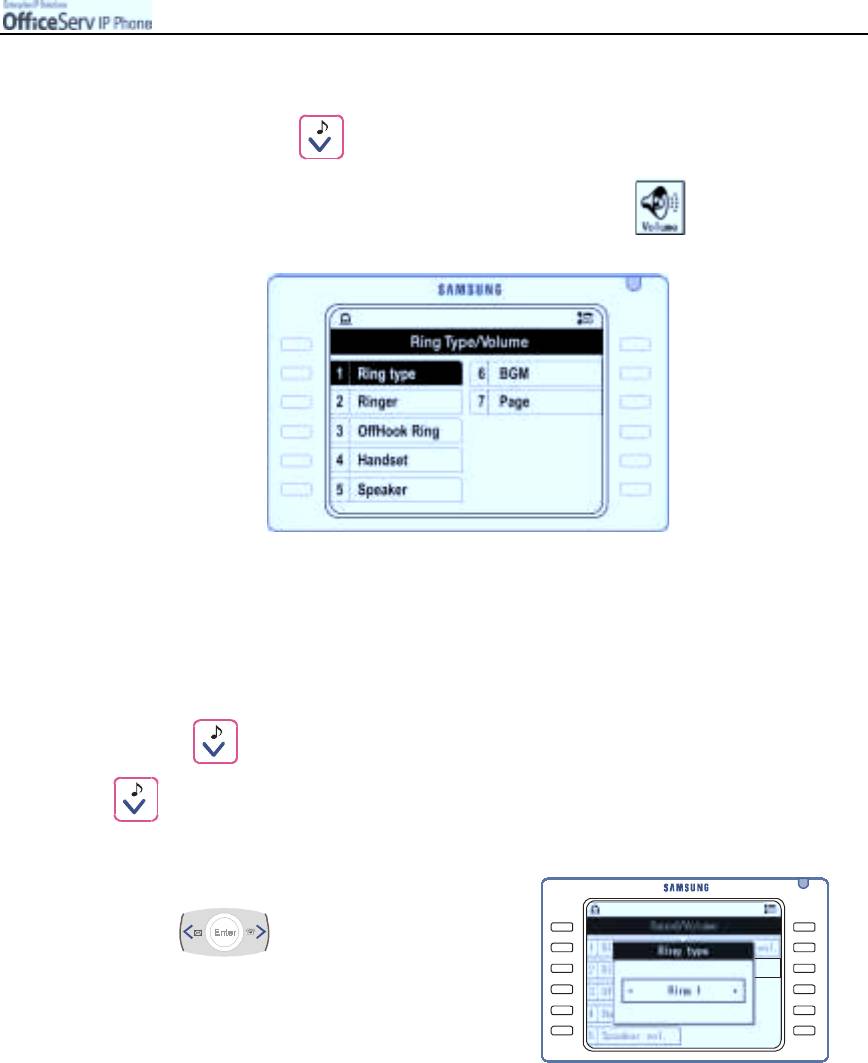
6. Volume Adjustment
Press the down direction button to enter the Ring type/Volume menu OR
Press the [Menu] button and use the direction buttons to select
Then, press the [Enter] button.
Move to the desired menu and press the
[Enter]
button.
Selecting a Ring Type
Allows you to select a ring type for incoming calls.
1.
Press the
button and use the direction button to select
!
!!
!
[1. Ring type].
Then, press the
[Enter]
button.
2.
There are 8 ring types.
Use the direction button to select
the desired ring type.
Then, press the
[Enter]
button.
© SAMSUNG Electronics Co., Ltd.
Page 127
APPLICATION MENUS
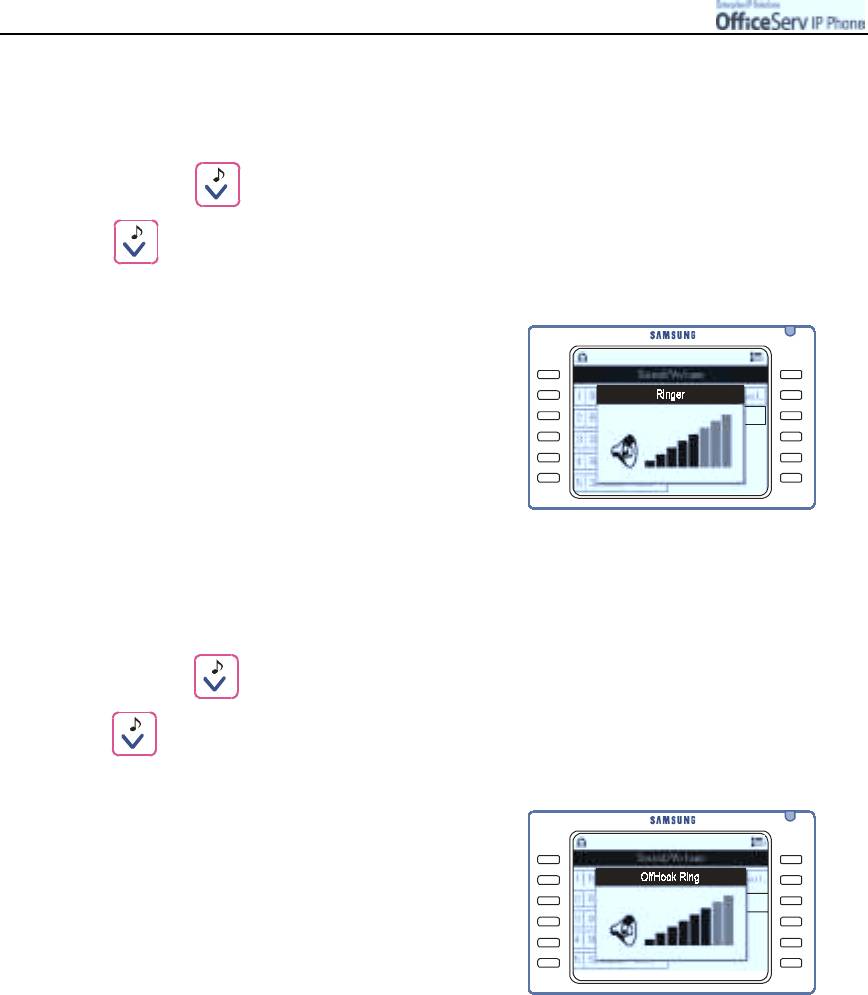
Ringer Volume
Allows you to set the volume of the ringer.
1.
Press the
button and use the direction button to select
!
!!
!
[2. Ringer].
Then, press the
[Enter]
button.
2.
There are 8 volume levels.
Press the
[▼Volume▲]
button to set
the volume.
Off-hook Volume
Allows you to set the volume of the Off-hook ring that that indicates a waiting call.
1.
Press the
button and use the direction buttons to select
!
!!
!
[3. OffHook Ring].
Then, press the
[Enter]
button.
2.
There are 8 volume levels.
Press the
[▼Volume▲]
button to set
the volume.
Page 128
© SAMSUNG Electronics Co., Ltd.
APPLICATION MENUS
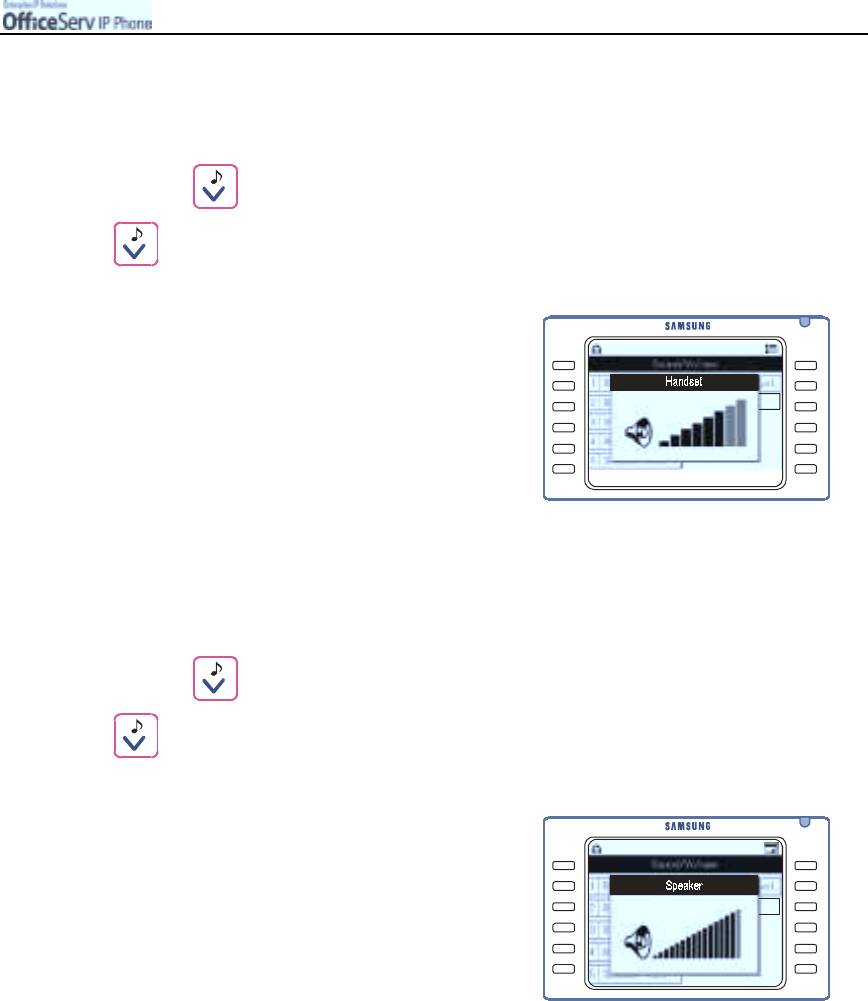
Handset Volume
Allows you to set the volume when speaking through the handset.
1.
Press the
button and use the direction buttons to select
!
!!
!
[4. Handset].
Then, press the
[Enter]
button.
2.
There are 8 volume levels.
Press the
[▼Volume▲]
button to set
the volume.
Speaker Volume
Allows you to set the volume of the speaker when using the phone in speakerphone mode.
1.
Press the
button and use the direction buttons to select
!
!!
!
[5. Speaker].
Then, press the
[Enter]
button.
2.
There are 16 volume levels.
Press the
[▼Volume▲]
button to set
the volume.
© SAMSUNG Electronics Co., Ltd.
Page 129
APPLICATION MENUS
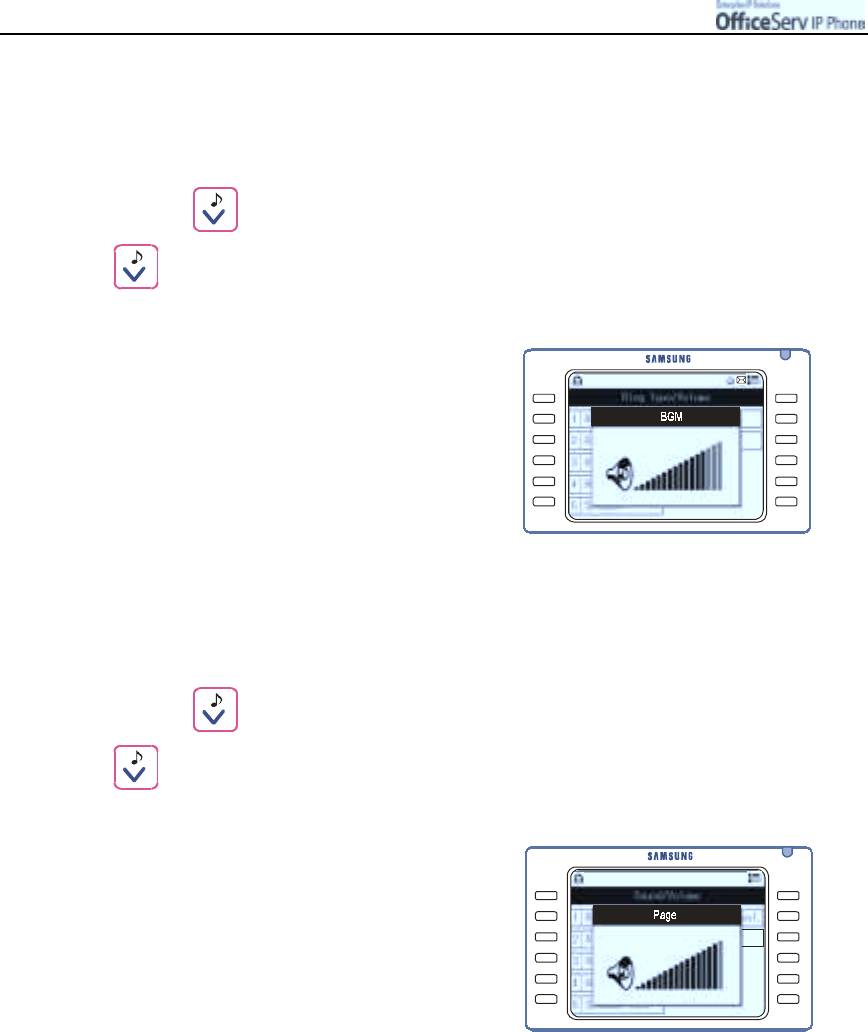
BGM Volume
Allows you to set the Back Ground Music(BGM) volume when the BGM is set on the IP phone.
"
If BGM is not available on your phone refer to your System Administrator.
1.
Press the
button and use the direction buttons to select
!
!!
!
[6. BGM].
Then, press the
[Enter]
button.
2
There are 16 volume levels.
Press the
[▼Volume▲]
button to set
the volume.
Page Volume
Allows you to set the volume for received Page announcements.
1.
Press the
button and use the direction buttons to select
!!
!
!
[7. Page].
Then, press the
[Enter]
button.
2.
There are 16 volume levels.
Press the
[▼Volume▲]
button to set
the volume.
Page 130
© SAMSUNG Electronics Co., Ltd.
APPLICATION MENUS
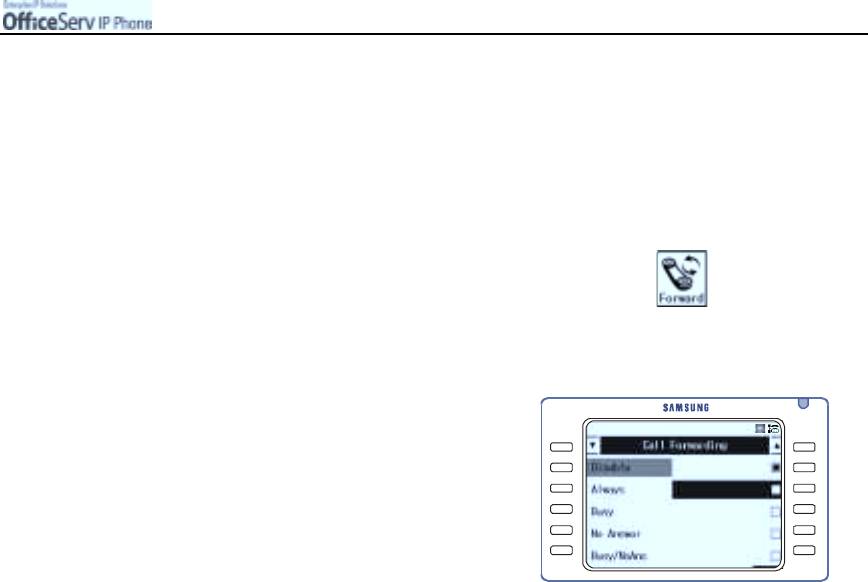
7. Call Forwarding
Allows you to forward your incoming calls to a specific extension, group of extensions or an external
number when you are unable to receive an incoming call.
#
The call forwarding option may not be available to all stations, please consult with your
System Administrator.
1.
Press the
[Menu]
button and use the direction buttons to select
Then, press the
[Enter]
button.
2.
Use the direction button to move to
the desired option, and press the
[Menu]
button to set
[Save]
or
[Edit]
to insert
a new destination.
3.
To set the forward option to an existing phone number, select it and, press the
[Enter]
button.
4.
To enter a new destination or to modify the existing phone number, select
[Edit]
and
press the
[Enter]
button. Enter the new destination number and press
the
[Enter]
button. Press the
[Enter]
button again to set forwarding to the new
destination.
© SAMSUNG Electronics Co., Ltd.
Page 131
APPLICATION MENUS
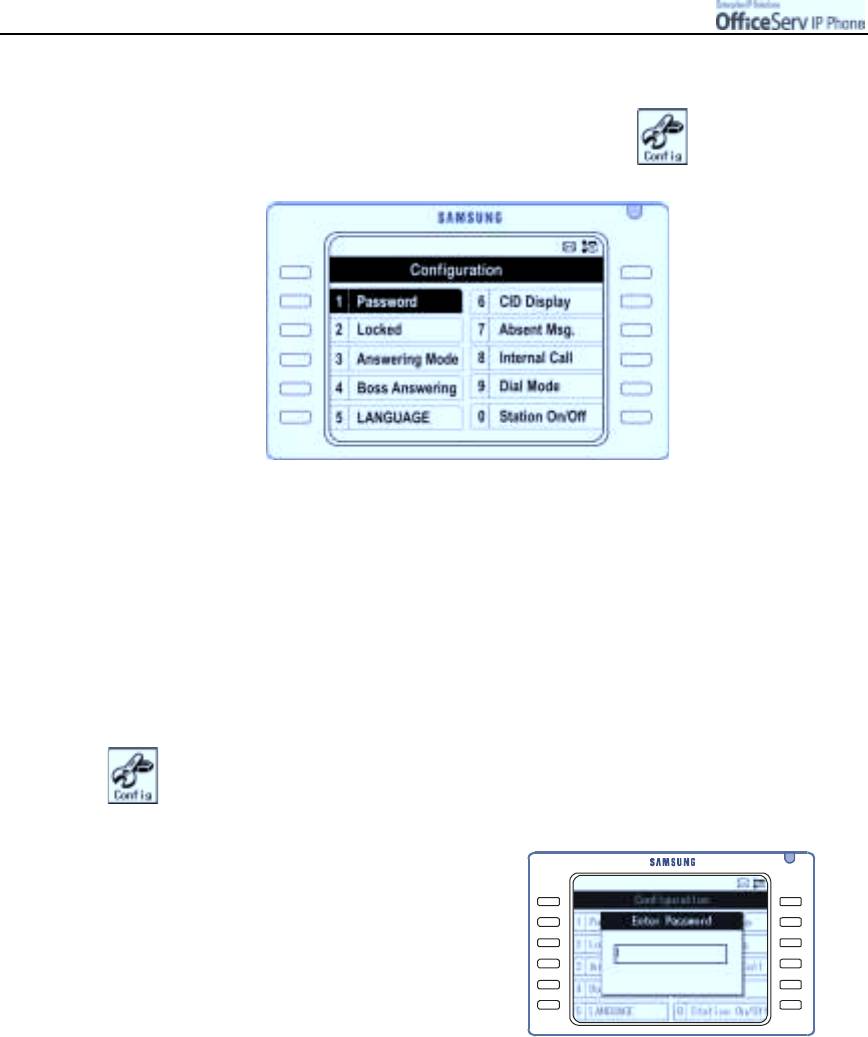
8. Configuration
Press the [Menu] button and use the direction buttons to select
Then, press the [Enter] button.
Move to the desired menu and press the [
Enter
] button.
Changing a Password
Allows you to change your 4-digit password, which is used to protect your IP phone privacy or set a variety of
IP phone features.
"
Initial value of your password is 1234.
1.
Press the
[Menu]
button and use the direction buttons to select
!!
!
!
[1. Password].
Then, press the
[Enter]
button.
2.
Enter the current 4 digit password
and press the
[Enter]
button.
"
The entered digits are displayed as
asterisks ‘*’.
3.
The
[New Password]
screen appears. Enter a new password and press
the
[Enter]
button.
4.
The
[Confirm New Password]
screen appears.
Re-enter the new password entered in Step 3 and press the
[Enter]
button.
Page 132
© SAMSUNG Electronics Co., Ltd.
APPLICATION MENUS
Locking a IP phone
Allows you to lock any outgoing trunk calls or incoming/outgoing calls to prevent others from using your IP
phone without permission.
1.
Press the
[Menu]
button and use the direction buttons to select
!
!!
!
[2. Locked].
Then, press the
[Enter]
button.
2.
Enter the password of the IP phone.
"
Initial value of password is 1234.
"
If you do not remember your password,
contact your System Administrator
3.
Use the direction buttons to select the lock type required. Then,
press the
[Enter]
button.
"
Unlocked : Unlocked.
"
Locked All : Locked from all incoming/outgoing call.
"
Locked Out : Locked from making outgoing calls only.
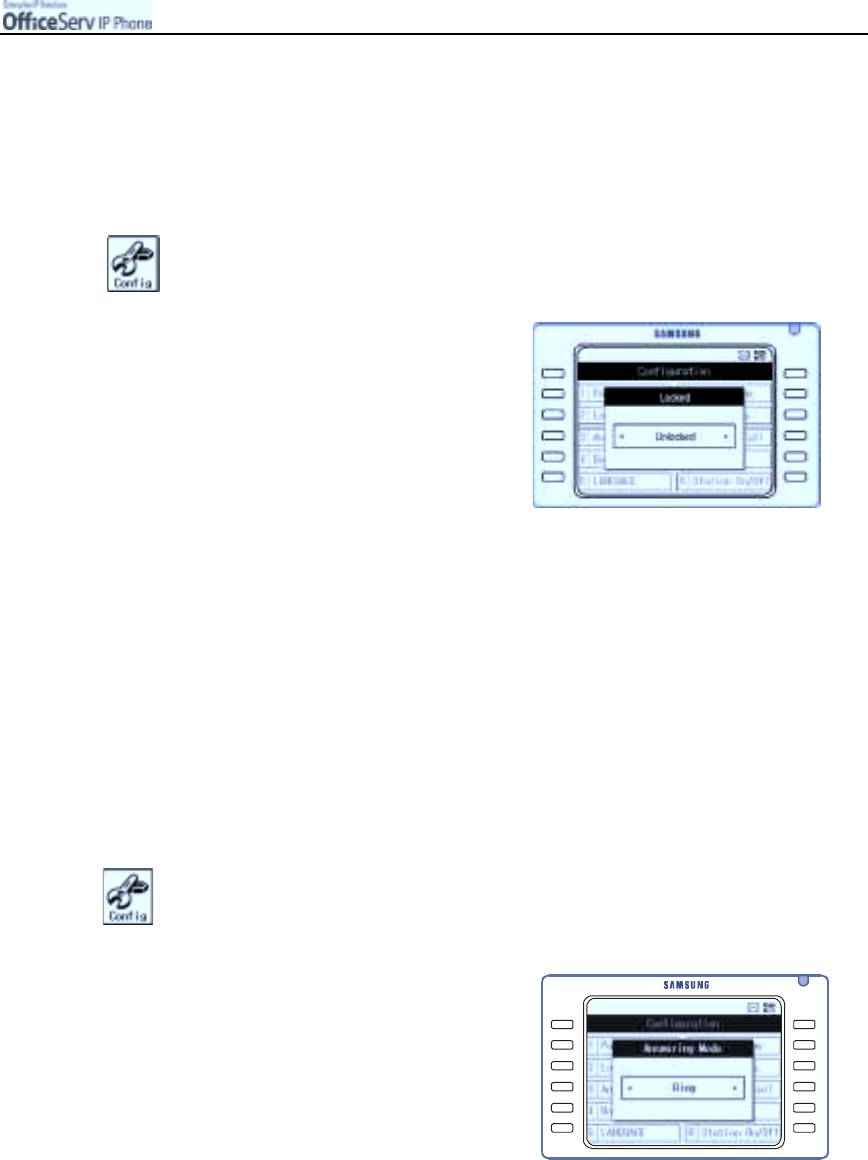
Setting the Answering Mode
Allows you to set the intercom answering mode of your IP phone.
1.
Press the
[Menu]
button and use the direction buttons to select
!
!!
!
[3. Answering Mode].
Then, press the
[Enter]
button.
2.
Use the direction buttons to select
the answering mode. Then, press
the
[Enter]
button.
"
Ring : The IP phone rings when a intercom
call arrives.
"
Auto Answer Mode : The IP phone
automatically answers an incoming intercom call.
"
Voice Announce : You can hear only
the caller’s voice through a speaker.
The caller cannot hear you voice. To answer the call lift the handset or
press the [Send] button and you will be connected to the caller.
© SAMSUNG Electronics Co., Ltd.
Page 133
APPLICATION MENUS
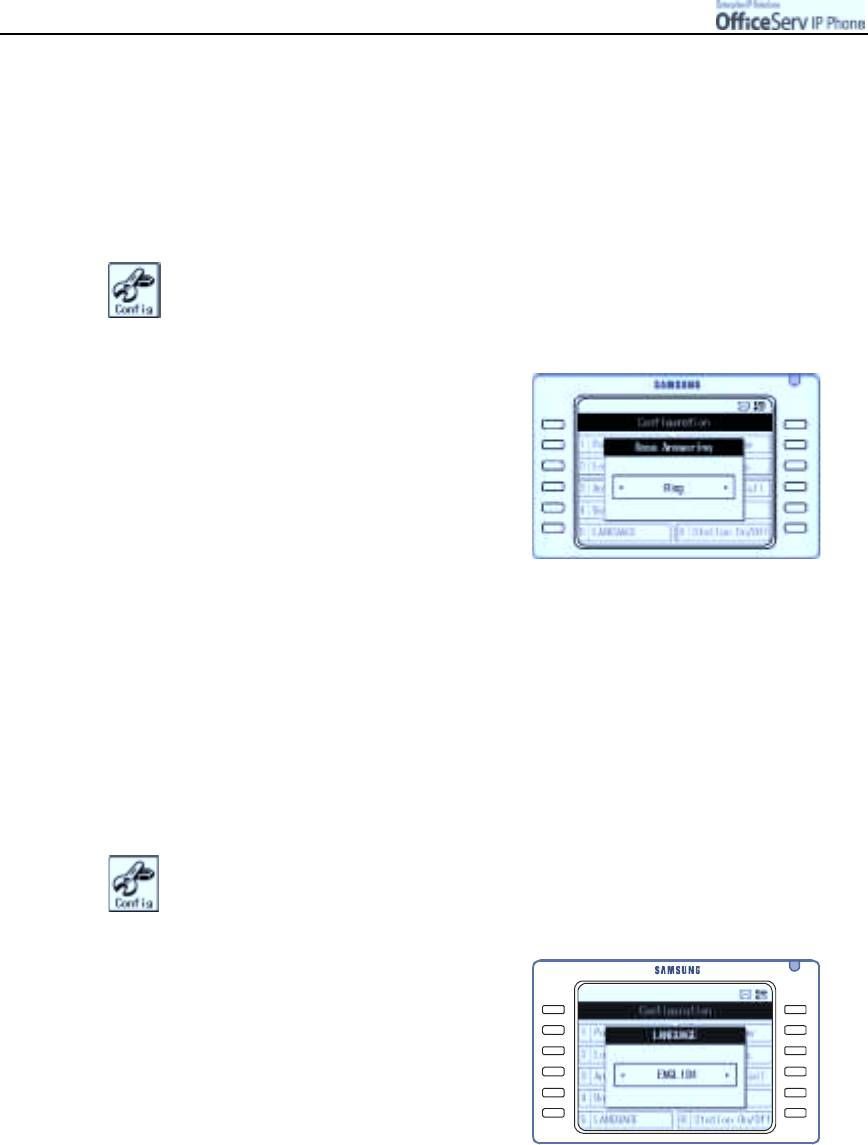
Setting the Boss Answering Mode
Allows you to set the answering mode when you are called by a designated Secretary. Only applies if the IP
phone is assigned with a boss function. If the Automatic mode or the Voice Announce mode is set, the call will
be answered even if you are not present.
1.
Press the
[Menu]
button and use the direction buttons to select
!!
!
!
[4. Boss Answering].
Then, press the
[Enter]
button.
2.
Use the direction button to select the Boss
answering mode.
Then, press the
[Enter]
button.
"
Ring : The IP phone rings when a call arrives.
"
Auto Answer Mode : The IP phone
automatically answers an incoming call.
"
Voice Announce : You can hear only
the caller’s voice through the IP phone speaker.
The caller cannot hear you. To answer the
call lift the handset or press the [Send] button and
you will be connected to the caller.
Language
Allows you to set the language displayed on the LCD screen of the IP phone.
1.
Press the
[Menu]
button and use the direction buttons to select
!
!!
!
[5. LANGUAGE].
Then, press the
[Enter]
button.
2.
Press the direction button to select
the language. Then, press the
[Enter]
button.
"
ENGLI SH : The default language of the IP phone is
set to English.
Page 134
© SAMSUNG Electronics Co., Ltd.
APPLICATION MENUS
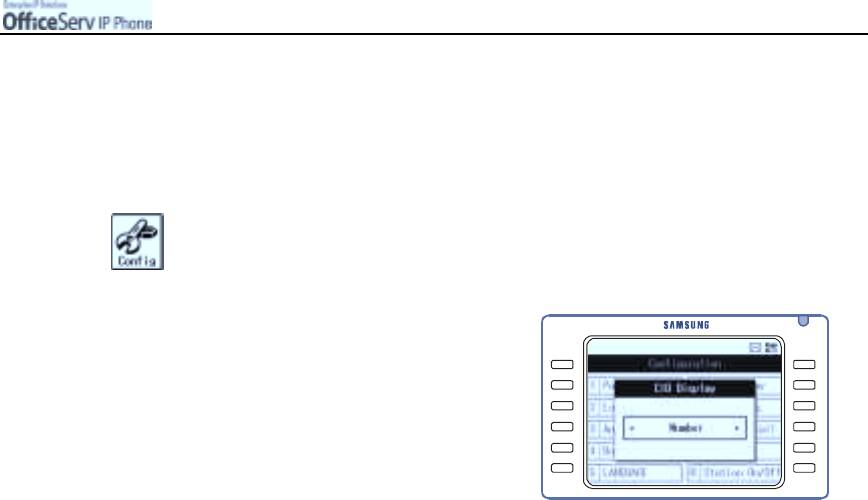
Setting the Method of CID Display
Allows you to set the type of Caller ID(CID) display on the LCD screen of the IP phone.
1.
Press the
[Menu]
button and use the direction buttons to select.
!
!!
!
[6. CID Display].
Then, press the
[Enter]
button.
2.
Use the direction button to select the type of
caller ID display.
Then, press the
[Enter]
button.
"
None : Caller IDs are not displayed.
"
Name : If the name of a caller is registered
in the [Phone Book], the name will be
displayed. If not, the caller’s
telephone number will be displayed.
"
Number : The telephone number of a caller is displayed.
© SAMSUNG Electronics Co., Ltd.
Page 135
APPLICATION MENUS
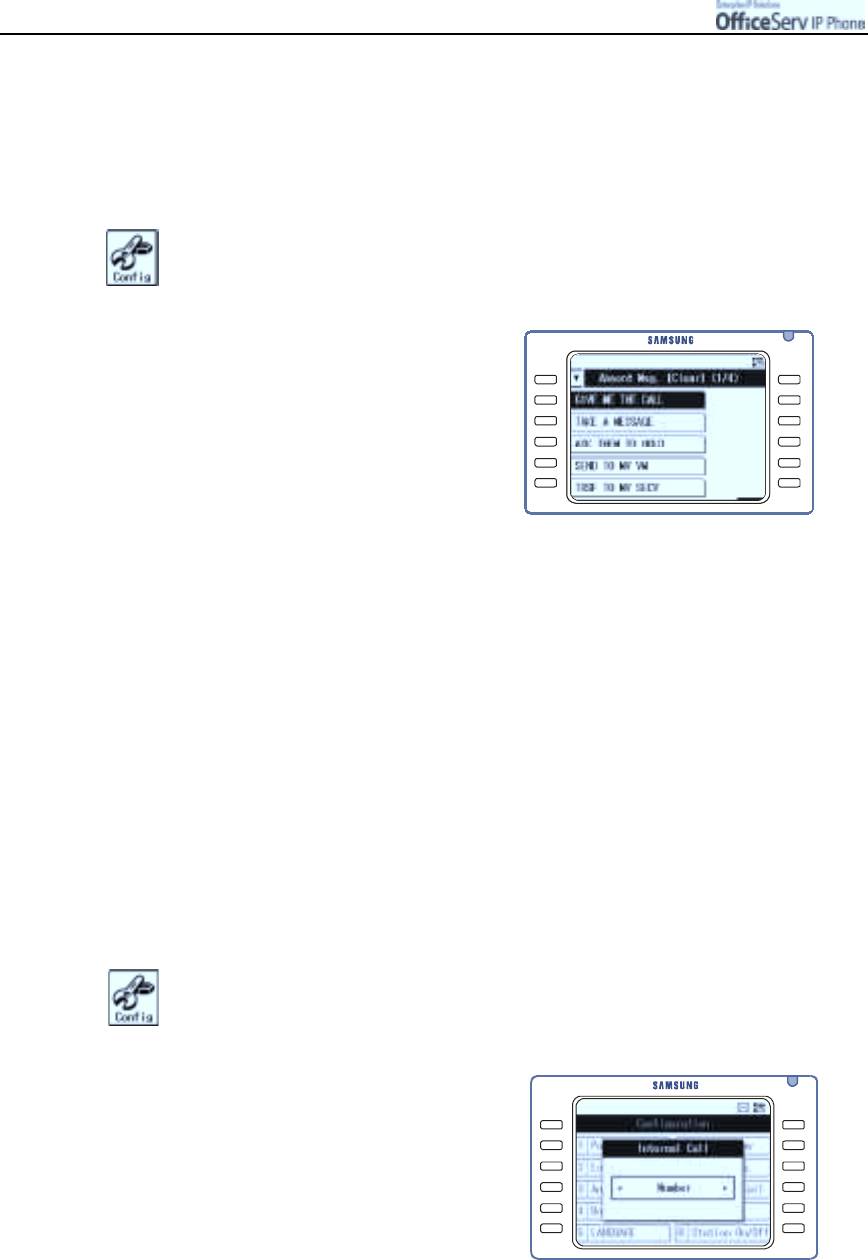
Setting Absent Messages
Allows you to set a message to be displayed to internal callers on their LCD screen if you are absent for a
while.
1.
Press the
[Menu]
button and use the direction buttons to select
!
!!
!
[7. Absent Msg.].
Then, press the
[Enter]
button.
2.
Use the direction buttons to select
the desired absent message and then,
press the
[Enter]
button.
The absent message will be set.
3.
When an internal caller rings you, the
absent message set will be displayed on the LCD panel of the caller’s station.
"
To disable the set absent message, move to the message, press the [Menu] button, and
select the [Clear] menu.
"
Messages 1 to 15 are registered within the OfficeServ system. Messages of 16 to 20 can
be entered by you. Move to messages 16 to 20(the Page 4 screen ), press the [Menu]
button, and select [Edit] to see the message input screen. Enter a message of up to 16
characters. For information about how to enter characters, refer to ‘Entering Characters’
section of ‘Things You Should Know’ in this guide.
Displaying Internal Calls
Allows you to determine whether internal numbers or internal names will be displayed in the Programmable
features screen.
1.
Press the
[Menu]
button and use the direction buttons to select
!
!!
!
[8. Internal call].
Then, press the
[Enter]
button.
2.
Use the Left/Right direction buttons to select
a number or name.
Then, press the
[Enter]
button.
Page 136
© SAMSUNG Electronics Co., Ltd.
APPLICATION MENUS
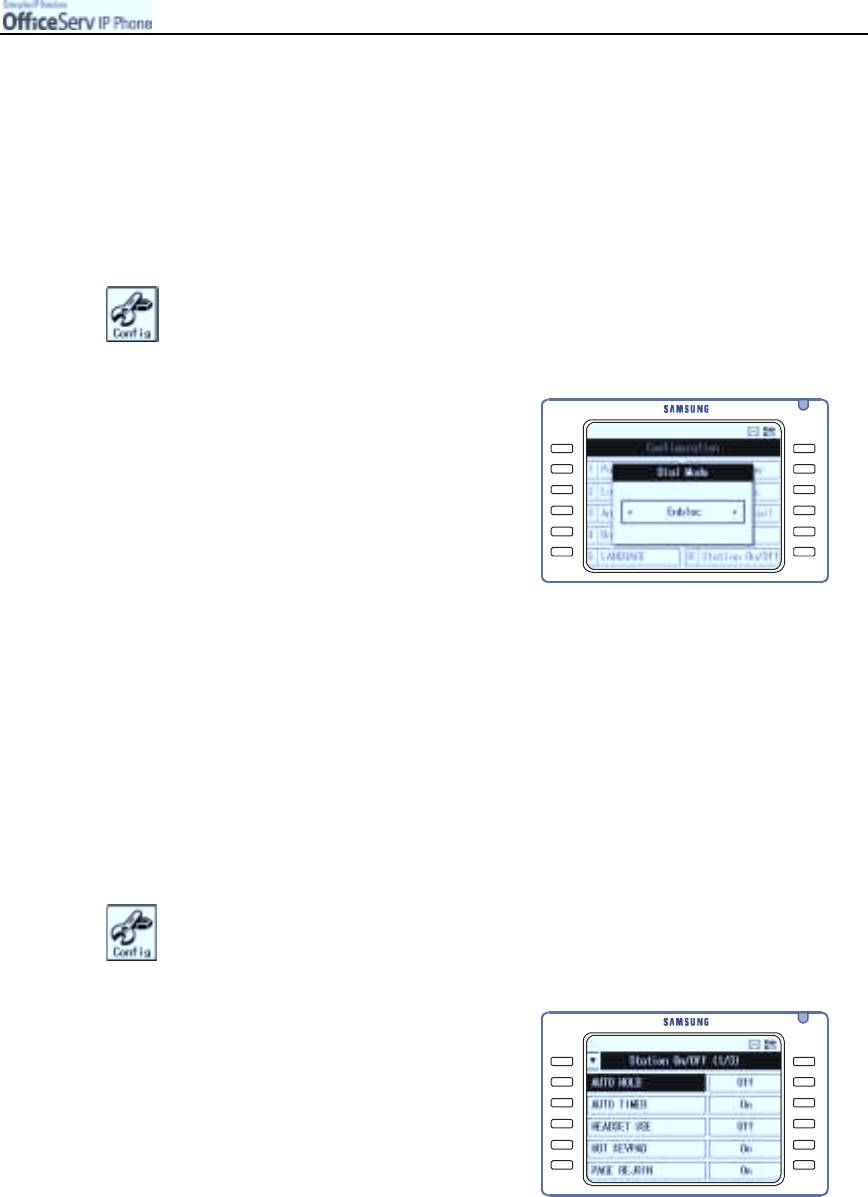
Dial Mode
Allows you to set the dial mode when making a call.
In Enbloc mode which is set by default, you enter the phone number first and press the [Send] button to
connect to the other party. In the Overlap mode, as you enter the phone number, the call connection will be
made immediately.
1.
Press the
[Menu]
button and use the direction buttons to select
!
!!
!
[9. Dial Mode].
Then, press the
[Enter]
button.
2.
Use the Left/Right direction buttons to select
the Dial Mode.
Then, press the
[Enter]
button.
"
Enbloc : This mode is set to the IP phone
by default. Enter the phone number and
press the [Send] button to make a call.
In the Enbloc mode, you can just
delete a wrong phone number and
re-enter the phone number without hanging up
the IP phone and re-pressing the phone number.
"
Overlap : Press the phone number to connect to another party immediately.
If you press a wrong number, hang up the IP phone and re-enter the phone number.
Station ON/OFF
Allows you to set or disable functions of your phone.
1.
Press the
[Menu]
button and use the direction buttons to select
!
!!
!
[0. Station ON/OFF].
Then, press the
[Enter]
button.
2.
Move to the desired menu and
press the
[Enter]
button to toggle the
feature
[On]
and
[Off].
© SAMSUNG Electronics Co., Ltd.
Page 137

APPLICATION MENUS
The functions which can be tailored to your individual requirements in Station ON/Off are:
"
AUTO HOLD : if ON an existing external call is automatically placed on hold if a CALL button, trunk
button or trunk group button is pressed during call. For example to answer a second incoming call.
"
AUTO TI MER : if ON, the stopwatch timer automatically starts during an external call.
"
HEADSET USE : if ON, this feature disables the hook switch allowing you to answer all calls when using
a headset by pressing the [Speaker] or [Send] button, as applicable.
"
HOT KEYPAD : if ON, this feature allows the you to dial numbers, in Overlap dialling mode, without
having to first lift the handset or press the [Speaker] button.
"
KEY TOUCH TONE : if ON, allows the you to hear a tone when pressing buttons on your station.
"
PAGE REJOI N : if ON, allows you to hear the latter part of page announcements when you become
free during a page.
"
RI NGING PREFERENCE : if ON, you can answer a ringing call by pressing the [Send] button, or by
lifting the handset.
"
CALL COST DI SPLAY : if ON, the cost of the call in progress will show in the upper right corner of the
station display instead of duration of the call. May not be available on all systems
"
AUTO CAMPON : if ON, allows you to automatically camp on to busy stations by remaining off hook
without having to press a [CAMP-ON] button.
"
AME BGM : if ON, allows you to hear background music (BGM) instead of your personal mailbox
greeting your caller’s hear when Answer Machine Emulation is activated. Requires the Samsung
Voicemail card and a BGM source programmed for your station.
"
AME PASSWORD : if ON, you must enter your station password to set Answering Machine Emulation
on your station . This feature requires the Samsung Voicemail card to be installed in your OfficeServ
system.
"
DI SPLAY SPEED NAME : if ON, the speed dial name associated with a speed dial number is displayed
on your station’s LCD display when using speed dial. Not available on all systems.
"
CI D REVIEW ALL : if ON, saves information on all calls that ring your station. When OFF, saves
information only on calls that were not answered at the extension or by voice mail. Not available on all
systems.
"
SECURE OHVA : if ON, an OHVA announcement from another station will only be heard when you are
using the handset. When OFF, OHVA announcements will be heard through the phone speaker. Not
available on all systems.
"
STOP CI D DI SPLAY : if ON, the Caller ID will not be displayed after you answer an external call.
"
AUTO ANSWER TRUNK : if ON, your station will automatically answer an incoming external call. Not
available on all systems.
Page 138
© SAMSUNG Electronics Co., Ltd.
APPLICATION MENUS
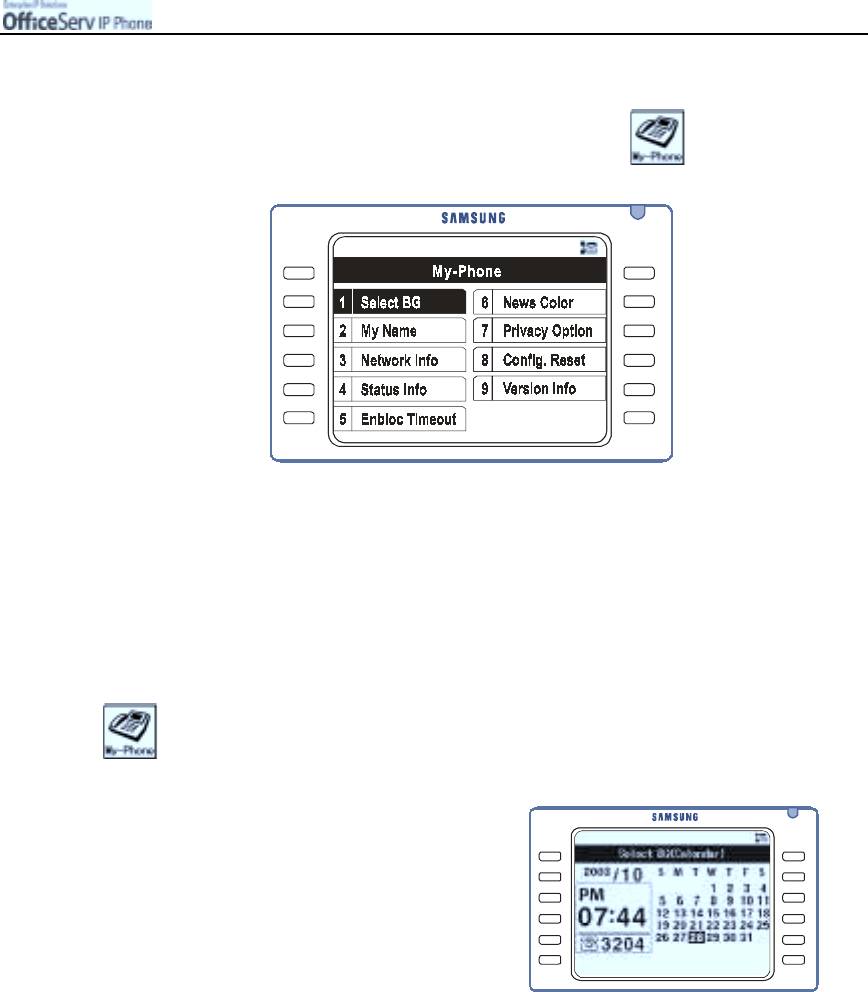
9. My Phone
Press the [Menu] button and use the direction buttons to select
Then, press the [Enter] button.
Move to the desired menu and press the
[Enter]
button.
Select BG
Allows you to set the initial background screen on the LCD of your IP phone.
1.
Press the
[Menu]
button and use the direction buttons to select
!
!!
!
[1. Select BG].
Then, press the
[Enter]
button.
2.
Use the direction buttons
to select the desired screen, and
then press the
[Enter]
button.
© SAMSUNG Electronics Co., Ltd.
Page 139
APPLICATION MENUS
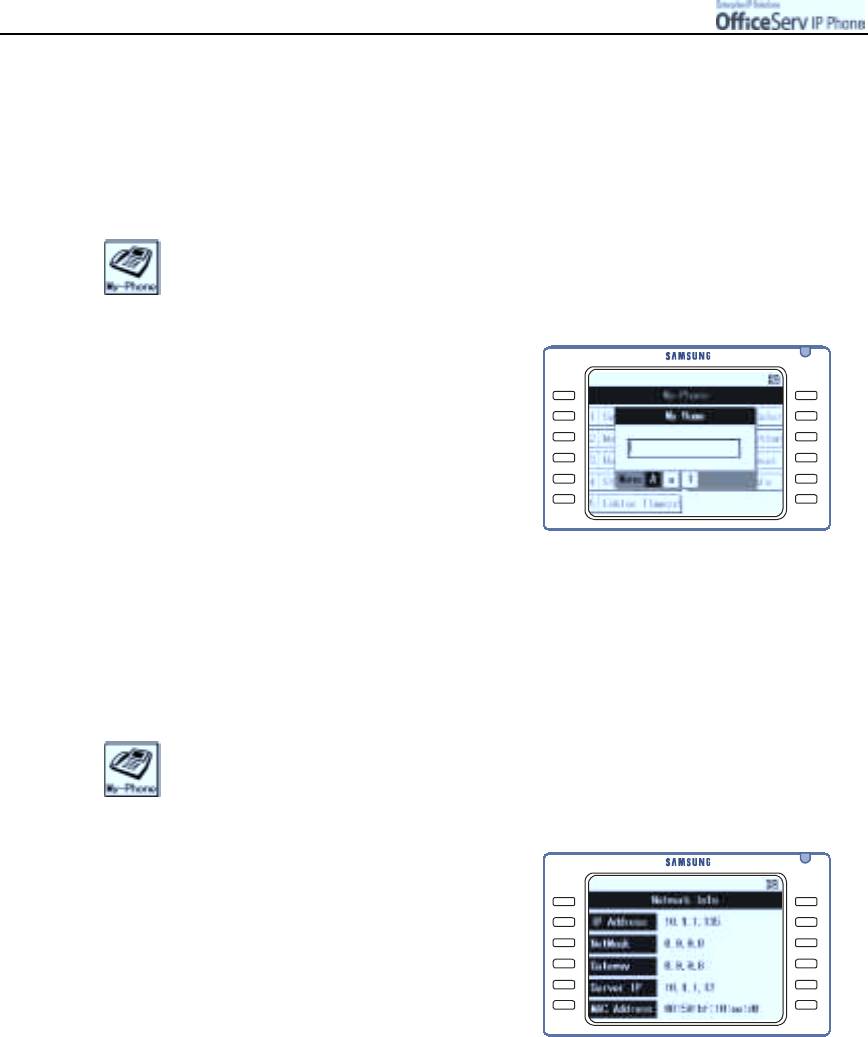
Entering the Name
Allows you to enter your name to identify your IP phone.
The entered name is displayed on the LCD screen of the caller’s phone during an internal phone call.
1.
Press the
[Menu]
button and use the direction buttons to select
!!
!
!
[2. My Name].
Then, press the
[Enter]
button.
2.
When the name input screen appears,
enter a name of up to 11 characters and press
the
[Enter]
button.
"
Please refer to the ‘Entering Characters’
section of ‘Things You Should Know’ in
this guide for entering characters.
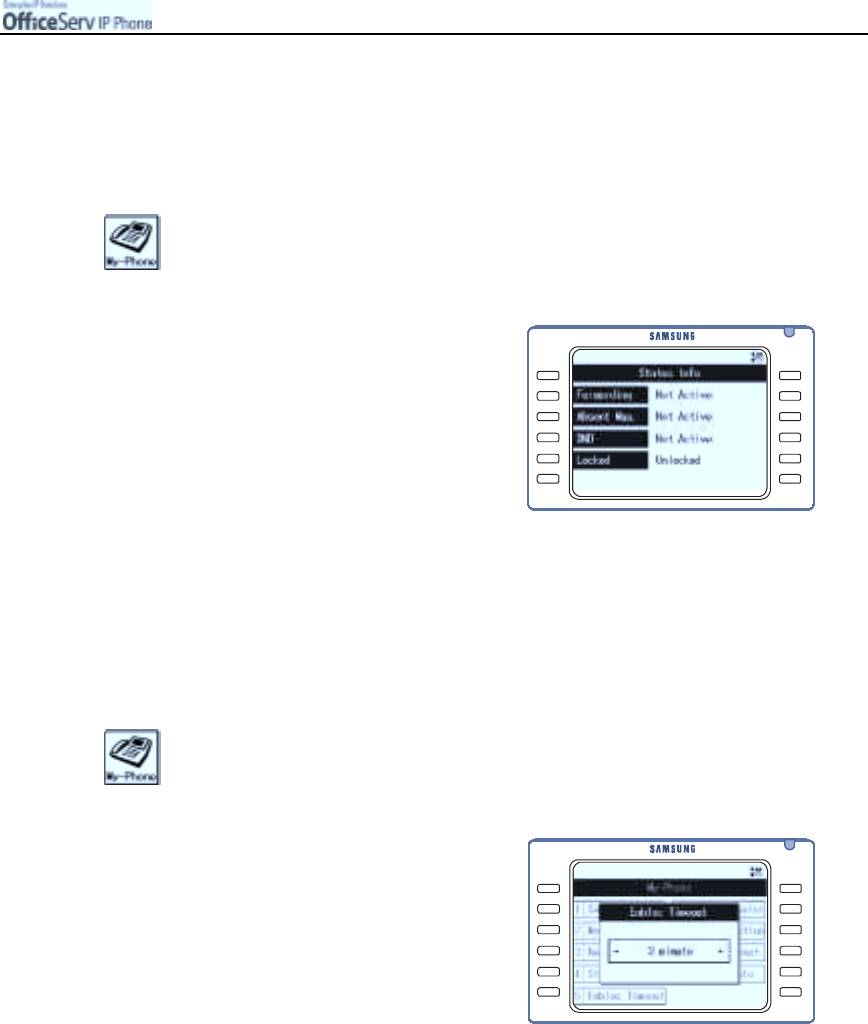
Network Information
Allows you to view the network information registered in your phone.
1.
Press the
[Menu]
button and use the direction button to select
!
!!
!
[3. Network Info].
Then, press the
[Enter]
button.
2.
The network information(IP Address, Sub Net
mask, Gateway, Server IP and MAC Address) is
displayed.
Page 140
© SAMSUNG Electronics Co., Ltd.
APPLICATION MENUS
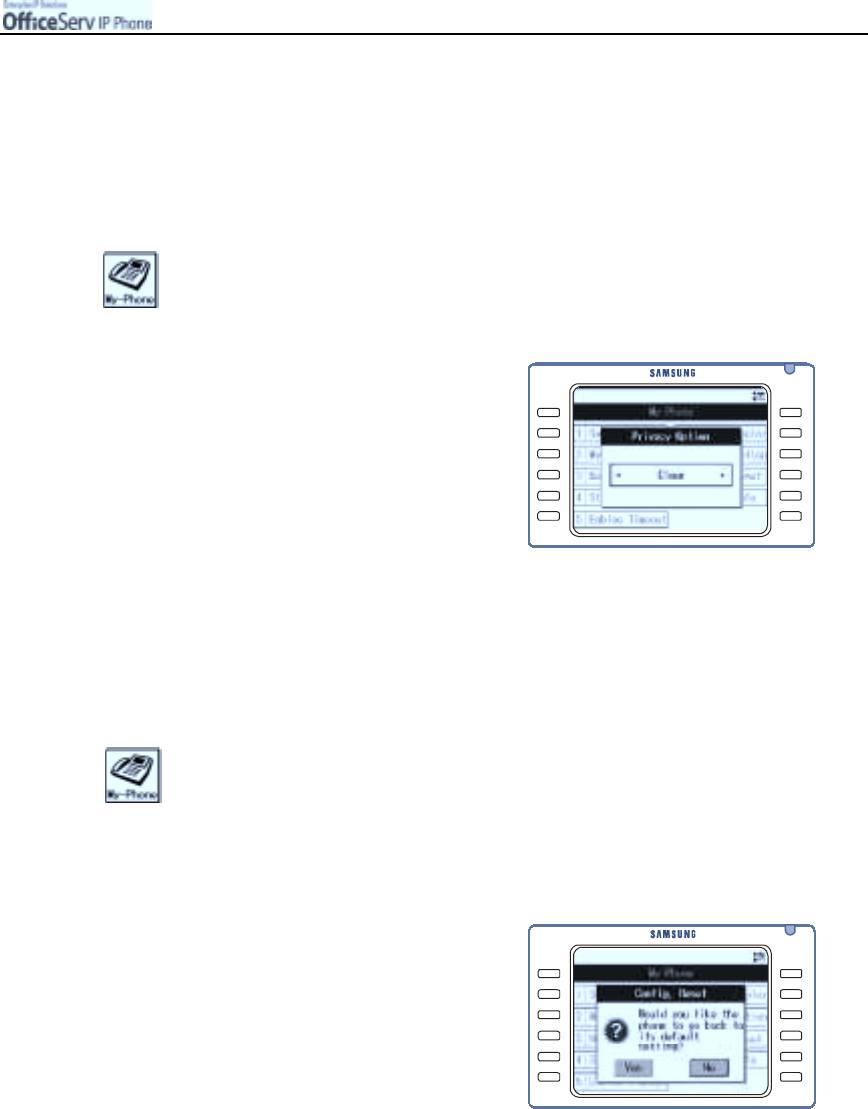
Viewing Status Information
Allows you to check the feature status registered on your phone.
1.
Press the
[Menu]
and use the direction buttons to select
!
!!
!
[4. Status Info].
Then, press the
[Enter]
button.
2.
Displays the Call Forwarding, Absent Message,
DND, and Lock status of your IP phone.
Enbloc Timeout
Allows you to set a valid time from entering a phone number to pressing the [Send] button when
the dial mode of the IP phone is set to Enbloc.
1.
Press the
[Menu]
button and use the direction buttons to select
!
!!
!
[5. Enbloc Timeout].
Then, press the
[Enter]
button.
2.
Use the direction button to select an Enbloc
Timeout time(options are : 30 seconds/a minute/
three minutes).
Then, press the
[Enter]
button.
"
If you do not press the [Send] button before,
the Enbloc timeout the entered phone number
will be cancelled and the number must
be re-entered. This function is applied to the
application menu screen.
"
Enbloc
This is a dial mode set in the IP phone by default. Enter the phone number and press the
[Send] button to make a call. In the Enbloc mode, you can just delete an incorrect number
using the [Cancel] button and re-enter the phone number without hanging up the IP phone and
starting again.
© SAMSUNG Electronics Co., Ltd.
Page 141

APPLICATION MENUS
News Color
Allows you to set the color of characters of OfficeServ News in the calendar screen.
1.
Press the
[Menu]
button and use the direction buttons to select
!
!!
!
[6. News Color].
Then, press the
[Enter]
button.
2.
Select ‘Light’ or ‘Dark’.
"
Light
The black news characters are displayed
on the white background screen.
"
Dark
The white news characters are displayed
on the black background screen.
Page 142
© SAMSUNG Electronics Co., Ltd.
APPLICATION MENUS
Privacy Option
Allows you to restrict unauthorised access to the Application Menus on your phone. To access the Application
Menus you must enter your phone is the privacy option is set.
1.
Press the
[Menu]
button and use the direction buttons to select
!!
!
!
[7. Privacy Option].
Then, press the
[Enter]
button.
2.
Enter your password, and select
[Save]
or
[Clear]
.
Then press the
[Enter]
button to enable.
Config. Reset
Allows you to delete all saved data(Phone Book, Messages etc).
1.
Press the
[Menu]
button and use the direction buttons to select
!!
!
!
[8. Config. Reset].
Then, press the
[Enter]
button.
2.
Enter your password, and select
[Yes]
or
[No].
3.
Press the [Enter] button to save.
© SAMSUNG Electronics Co., Ltd.
Page 143
APPLICATION MENUS
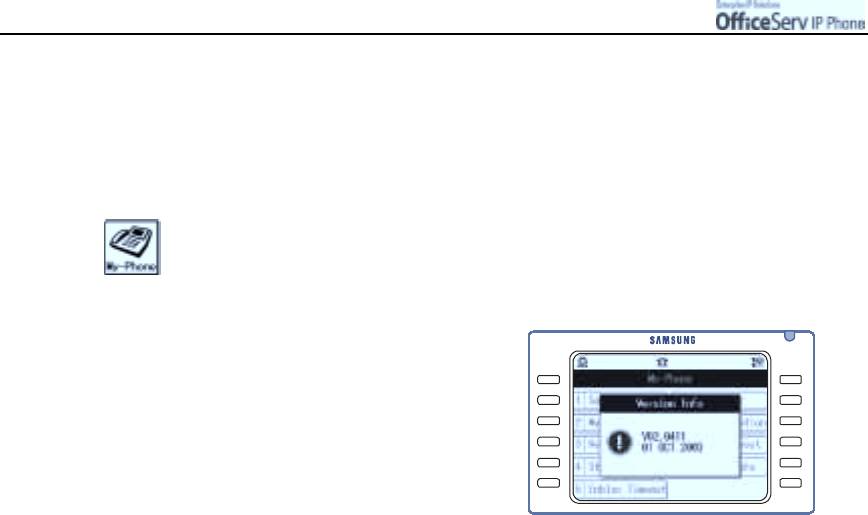
Version Information
Allows you to view the version of your phone.
1.
Press the
[Menu]
button and use the direction buttons to select
!
!!
!
[9. Version Info].
Then, press the
[Enter]
button.
2.
The version of your phone is displayed
on the screen.
Page 144
© SAMSUNG Electronics Co., Ltd.


