Samsung WIP-5000: APPLICATION MENUS
APPLICATION MENUS: Samsung WIP-5000
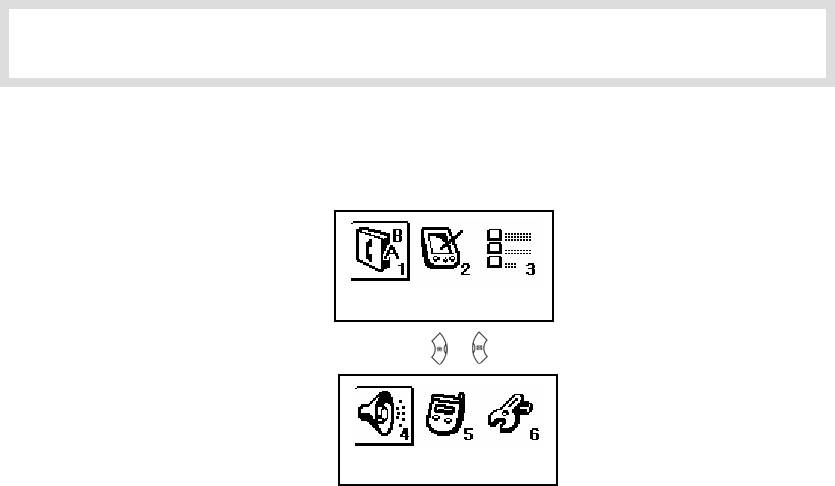
APPLICATION MENUS
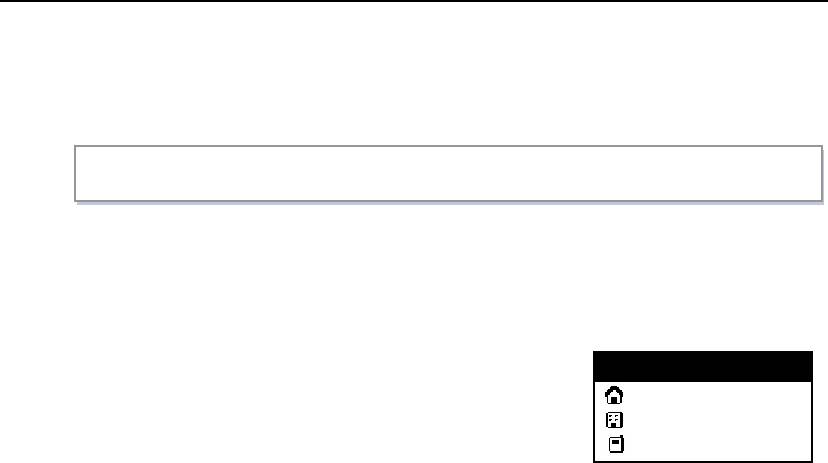
Entering the Application Menus
Press the [Menu] button, then the main application menu will appear on the LCD screen.
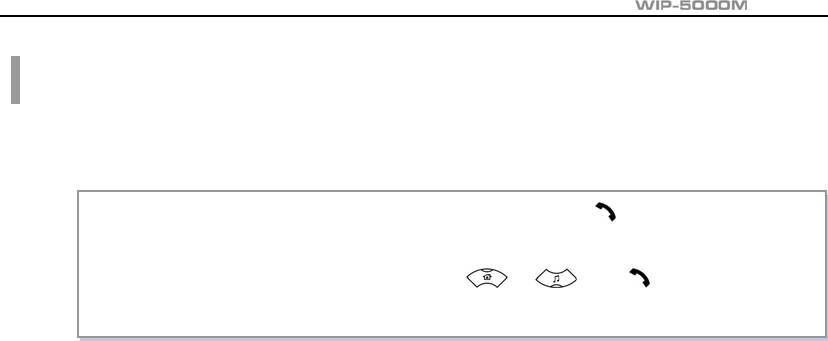
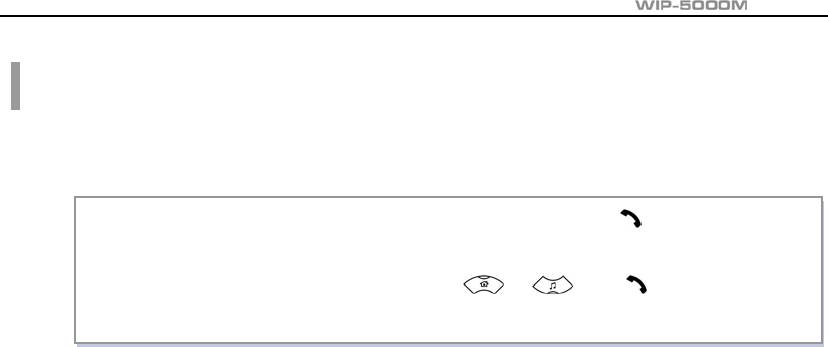
1. Phone book
Press the
[ ]/[ ] buttons
4. Vol/Effect
© SAMSUNG Electronics Co., Ltd.
Page 23

APPLICATION MENUS
Phone book
Press the [MENU] button and the [1. Phone book] icon
to find out various methods to make a call.
1. Phone book
Page 24
© SAMSUNG Electronics Co., Ltd.

User Guide
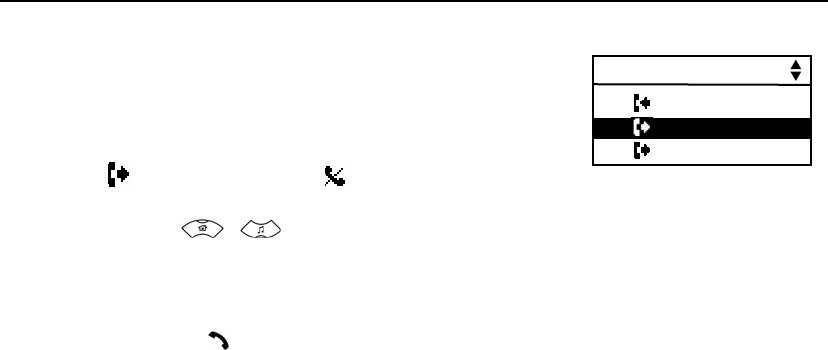
Calling from the Lists of the Latest Calling Number
After querying only the latest called phone numbers, select the desired phone number and make
a call.
z The maximum of up to 32 phone numbers can be saved in the list.
If they are all filled up, the oldest phone number is erased when the newly called phone
number is saved.
z If there are no called numbers saved, the phone screen will not display anything and
returns to the initial screen.
[MENU]
→
[1]
→
[1]
→
[ ]/[ ]
→
[OK] : Query
[MENU]
→
[1]
→
[1]
→
[ ]/[ ]
→
[OK]
→
[ ] : Query and call
[MENU]
→
[1]
→
[1]
→
[ ]/[ ]
→
[ ] : Call
© SAMSUNG Electronics Co., Ltd.
Page 25
APPLICATION MENUS
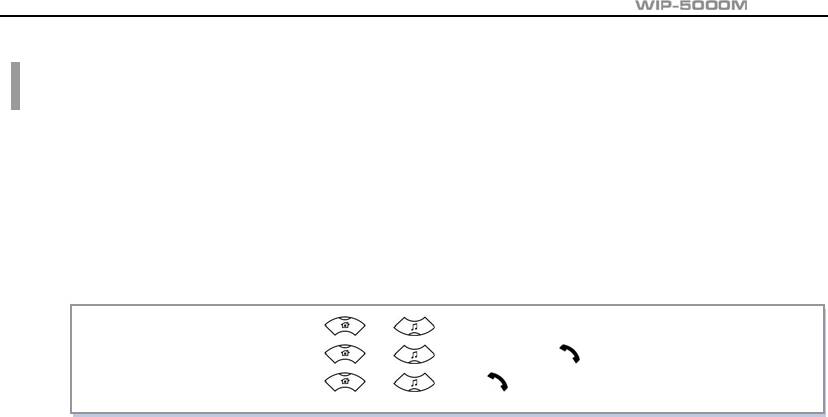
1. Press the [MENU] button, then select the [1. Phonebook]
Dialed Call
icon and press the [OK] button. If the [1. Dialed Call] is
1 : 06-6702-5322
selected, the latest called number list will be
2 : #4321
displayed.
3 : #9876
( : Latest called number, : Failed call)
2. Using the [ ]/[ ] buttons, select the desired phone number.
3. If the [OK] button is pressed, you can check the information on the selected number
(e.g., calling date, time and phone number) and can make a call right away by simply
pressing the [
] button.
Page 26
© SAMSUNG Electronics Co., Ltd.
User Guide
Calling from the Lists of the Latest Called Number
After only querying the latest received phone numbers, select the desired phone number and
make a call.
z The maximum of up to 32 phone numbers can be saved in the list. If they are all
filled up, the oldest phone number is erased when a new received phone number is saved.
z If there is no received phone numbers saved, the phone screen will not display anything
and returns to the initial screen.
[MENU]
→
[1]
→
[2]
→
[ ]/[ ]
→
[OK] : Query
[MENU]
→
[1]
→
[2]
→
[ ]/[ ]
→
[OK]
→
[ ]: Query and call
[MENU]
→
[1]
→
[2]
→
[ ]/[ ]
→
[ ]: Call
© SAMSUNG Electronics Co., Ltd.
Page 27
APPLICATION MENUS
1. Press the [MENU] button, then select the [1. Phonebook]
Recent Call
icon and press the [OK] button. If the [2. Recent Call] is
1 : 06-6702-5322
selected, the latest received phone numbers will be displayed.
2 : 411-1204-5688
( : Latest received number, : Failed call)
3 : #9876
2. Using the [ ]/[ ] buttons, select the desired phone number.
3. If the [OK] button is pressed, you can check the information on the selected phone
number(e.g., calling date, time and phone number) and can make a call right away by
pressing the [
] button.
Page 28
© SAMSUNG Electronics Co., Ltd.
User Guide
Searching/Calling a Phone Number Using Name
You can query the desired phone number from the phone number list saved in the phone using
a name and then make a call.
[MENU]
→
[1]
→
[3]
→
[1]
→
Name Input
→
[OK]
→
[ ]
: Query with names and then call
[MENU]
→
[1]
→
[3]
→
[1]
→
[OK]
→
[ ]/[ ]
→
[ ]
: Select from the phone number list and then call
1. Press the [MENU] button, then select the [1. Phone book] icon and press the [OK] button.
2. Select the [3. Search] and then press the [OK] button.
3. Select the [1. Search Name] and then press the [OK] button.
© SAMSUNG Electronics Co., Ltd.
Page 29

APPLICATION MENUS
4. The name input field will then appear on the screen. Enter the name to be found and
press the [OK] button.
z When entering a name, press the first letter of that name
06-6702-5322
and hit the [OK] button. Then, the numbers of all the
phone numbers starting with that letter will be displayed
Jack
and the related phone number list will show up
James
automatically. (e.g., Enter the name ‘J’ in the input
Jane
field and press the [OK] button. All the names starting
with ‘J’ will be listed.)
z Press the [OK] button without entering a name.
Then, all the numbers in the entire list saved will be displayed.
z If a name is not saved, the screen will show ‘Search Result is Nothing’ message.
z When the related phone number list appears, use the [ ]/[ ] buttons to select
the required phone number and press the [
] button to make a call.
5. When the related phone number appears on the screen, press the [ ] button
to make a call.
Page 30
© SAMSUNG Electronics Co., Ltd.
User Guide
Searching/Calling a Phone Number Using Address
You can query the desired phone number from the phone number list saved in the phone using
an address and then make a call.
[MENU]
→
[1]
→
[3]
→
[2]
→
Address Input
→
[OK]
→
[ ]
: Query with addresses and then call
[MENU]
→
[1]
→
[3]
→
[2]
→
[OK]
→
[ ]/[ ]
→
[ ]
: Select from the phone number list and then call
1. Press the [MENU] button, then select [1. Phone book] icon and press the [OK] button.
2. Select [3. Search] and then press the [OK] button.
3. Select [2. Search Number] and then press the [OK] button.
© SAMSUNG Electronics Co., Ltd.
Page 31

APPLICATION MENUS
4. The address input field will appear on the screen. Enter the address to find and
press the [OK] button.
z If the [OK] button is pressed without entering an address, the entire phone number list
saved in the phone will be displayed.
If an address is not saved, the screen will show the ‘Search Result is Nothing’ message.
5. The phone number list including the related phone
06-6702-5322
number will be displayed in the order of addresses.
Jack
(e.g., When the address ‘2’ is entered, the following phone
James
lists which include number 2 and corresponding phone
Jane
number will be displayed.)
6. Select the number using the [ ]/[ ] buttons and press the [OK] button to make call.
Page 32
© SAMSUNG Electronics Co., Ltd.
User Guide
Searching/Calling a Phone Number Using a Speed Dial Number
This function allows you to make a call to the desired party by simply pressing a speed dial
number for longer than 2 seconds. For example, if the number ‘123456’ is saved to the [1] button,
you can simply press the [1] button until a call is connected to ‘123456’. This function works only
on the initial screen.
1. Press the speed dial number that has the desired phone number for a long time.
z If there is no saved phone number, the ‘Search Result is Nothing’ message appears on
the screen momentarily and then returns to the initial screen.
z If the speed dial number is more than two digits, press the last number of the two digits
for a long time.
2. The phone number saved for that number then appears
on the screen and directly makes a call.
3. Press the [ ] button after a call is finished.
2204
© SAMSUNG Electronics Co., Ltd.
Page 33
APPLICATION MENUS
Registering a Phone Number
Press the [MENU] button of the WIP-5000M phone, then select the [1. Phone book] icon and
register the necessary phone number to be used later.
Entering a phone number directly
Directly enter the phone number on the initial screen and save that number.
Phone number registration(initial screen)
→
[MENU]
→
Name, Speed dial
number Input
→
[OK]
1. On the initial screen, directly enter the phone number
Name
that you want to save and press the [MENU] button.
06-6702-5322
[_ _]
[_ _]
Page 34
© SAMSUNG Electronics Co., Ltd.

User Guide
2. Enter the name that you want to save by using the dial buttons(up to 12 characters can
be used). Refer to the ‘Annex’ for how to enter the characters.
3. Assign the speed dial number for that name and enter it.
4. Press the [OK] button to save the associated phone number.
© SAMSUNG Electronics Co., Ltd.
Page 35
APPLICATION MENUS
Using the menu to save
This function allows you to save the phone number by using the menu function.
[MENU]
→
[1]
→
[4]
→
Name, Phone Number, Speed dial number Input
→
[OK]
1. Press the [MENU] button, then select the [1. Phone book] icon and press the [OK] button.
2. Select [4. New Entry] and press the [OK] button.
3. Enter the name, phone number and its abbreviated
Jack
number by using dial buttons and then press the [OK]
[_ _]
button.
[_ _]
[_ _]
Page 36
© SAMSUNG Electronics Co., Ltd.

User Guide
Modifying the Saved Phone Number
This is the method to modify the saved phone number.
[MENU]
→
[1]
→
[3]
→
[1] or [2]
→
Name/Address Input
→
[OK]
1. Press the [MENU] button, then select the [1. Phone book] icon and [3. Search], and then
press the [OK] button.
2. Select [1. Search Name] or [2. Search Number] and then press the [OK] button.
3. If [1. Search Name] is selected, the name input field appears on the screen and if
[2. Search Number] is selected, the address input field appears on the screen.
© SAMSUNG Electronics Co., Ltd.
Page 37

APPLICATION MENUS
4. Enter the name or address of the phone number to be modified and press the [OK] button.
z If the [OK] button is directly pressed without entering any name/address, then all
the phone numbers saved in the phone will be displayed. Select the phone number that
you want to modify by using the [
]/[ ] buttons and press the [OK] button.
z If any name/address was not entered, the ‘Search Result is Nothing’ message
will appear on the screen.
5. When the information of the phone number that you want to modify appears on the screen,
press the [MENU] button.
Page 38
© SAMSUNG Electronics Co., Ltd.

User Guide
6. The following popup window for modifying and deleting
will appear on the screen. Select the [Modify] button
using the [
]/[ ] buttons and press the [OK]
button.
z To delete the retrieved information, select the
[Delete] button on the popup window and press
the [OK] button.
7. Using the [C/MUTE] button and dial buttons, modify the phone number and press
the [OK] button to save it.
© SAMSUNG Electronics Co., Ltd.
Page 39

APPLICATION MENUS
Utilities
Press the [MENU] button and select the [2. Utilities] icon.
2. Utilities
Page 40
© SAMSUNG Electronics Co., Ltd.

User Guide
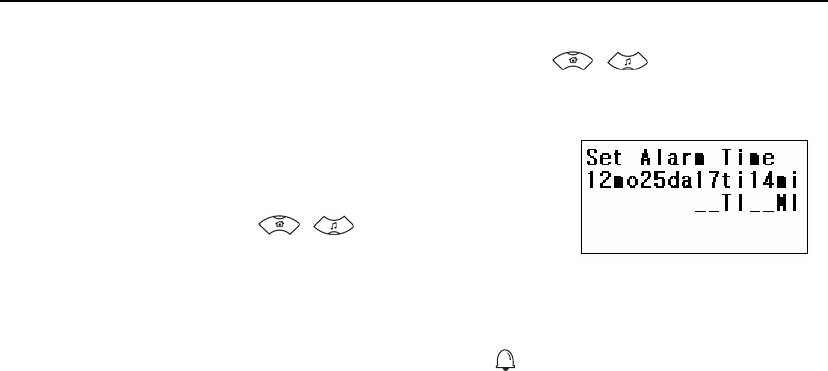
Setting/Disabling the Alarm Time
This function allows you to set and disable the alarm function. You can select a preferred alarm
melody from the following procedure.
[MENU]
→
[2]
→
[1]
→
[1]
→
[1]
→
Enter time
→
[OK]
: Alarm setup /Ring one time
[MENU]
→
[2]
→
[1]
→
[1]
→
[2]
→
Enter time
→
[OK]
: Alarm setup /Ring always
[MENU]
→
[2]
→
[1]
→
[2] : Disable the alarm
[MENU]
→
[2]
→
[1]
→
[3]
→
Select melody
→
[OK]
: Select any alarm melody
© SAMSUNG Electronics Co., Ltd.
Page 41
APPLICATION MENUS
1. Press the [MENU] button and select [2. Utilities], then use [ ]/[ ] buttons to select
[1. Alarm Alert], and press the [OK] button.
2. Select [1. Set Alarm] and press the [OK] button.
3. The alarm interval(ring one time, ring always) appears on
the screen. Use the [
]/[ ] buttons to select the
alarm interval and press the [OK] button. Then, the alarm
setting screen will show up.
4. Enter the alarm time and press the [OK] button to save it.
z As soon as the alarm is set, the alarm set icon( ) will appear on the top of the screen.
This icon will be displayed until the alarm is disabled and shows that an alarm is set up.
5. Select [3. Alarm Melody] to select the alarm melody then, 10 alarm melodies will be displayed.
Page 42
© SAMSUNG Electronics Co., Ltd.
User Guide
Schedule Management
This function allows you to enter important tasks or appointments and then set the phone alarms
on those dates. So, you can easily use this function to manage a personal schedule. If the alarm
is set up as mute, you can directly check what the schedule is on the screen.
[MENU]
→
[2]
→
[2]
→
Select dates
→
[OK]
→
Time/Task Input
→
[OK]
→
Select an alarm
→
[OK]
© SAMSUNG Electronics Co., Ltd.
Page 43

APPLICATION MENUS
1. Press the [MENU] button, then select the [2. Utilities] icon.
Then, use the [
]/[ ] buttons to select [2. Schedule] and press the [OK] button.
2. This will result in the calendar appearing on the screen. You can select any date to
set a schedule and press the [OK] button.
3. When the schedule input field appears you can enter the
time and contents of task. After the [OK] button is pressed,
the schedule alarm appears on the screen. Here, you can
select one alarm with a bell sound, melody selections and
press the [OK] button.
Page 44
© SAMSUNG Electronics Co., Ltd.
User Guide
Using the Electronic Calculator
This function allows you to do four arithmetical operations(e.g., addition, subtraction,
multiplication and division) in a simple way.
z When entering negative numbers, press the [#/ ] button.
z When entering decimal points, press the [*/ ] button.
z When incorrect numbers are entered, press the [C/MUTE] button.
[MENU]
→
[2]
→
[3]
→
Enter Numbers
→
[ ]/[ ]/[ ]/[ ]
→
Enter
Numbers
→
[OK]
1. Press the [MENU] button and select the [2. Utilities], then use the [ ]/[ ] buttons
to select the [3. Calculator], and press the [OK] button.
© SAMSUNG Electronics Co., Ltd.
Page 45

APPLICATION MENUS
2. This will result in the electronic calculator appearing on
the screen.
3. Enter the numbers to be calculated and choose the right arithmetic operation button
on the screen using the [
]/[ ] buttons.
4. Enter any second set of numbers and press the [OK] button. Then, the result will appear
on the screen.
Page 46
© SAMSUNG Electronics Co., Ltd.
User Guide
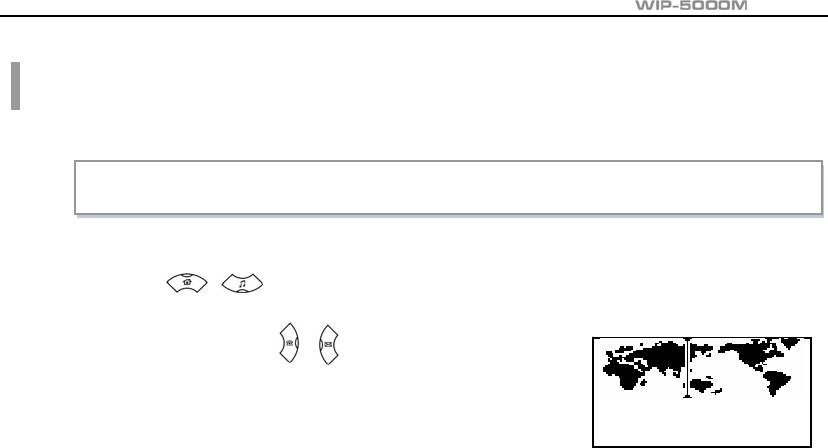
Checking World Time
This function allows you to check current date and time in each region of the world.
[MENU]
→
[2]
→
[4]
1. Press the [MENU] button and select [2. Electronic Diary].
Use the [
]/[ ] buttons to select the [4. World Clock] and press the [OK] button.
2. When pressing either [ ]/[ ] buttons, the meridian line
moves along the countries on the screen. Then, the
corresponding time of each capital name will be shown.
Seoul, Tokyo
07/12[Sa] 4:05 PM
© SAMSUNG Electronics Co., Ltd.
Page 47

APPLICATION MENUS
Soft Menu
Press the [MENU] button and select the [3. Soft Menu] Icon.
Soft Menus are used to set system features. The soft menu
List is decided by system.
You can set the various system menus such as DND(Do
3. Soft Menu
Not Disturb), Conference, Transfer.
Page 48
© SAMSUNG Electronics Co., Ltd.

User Guide
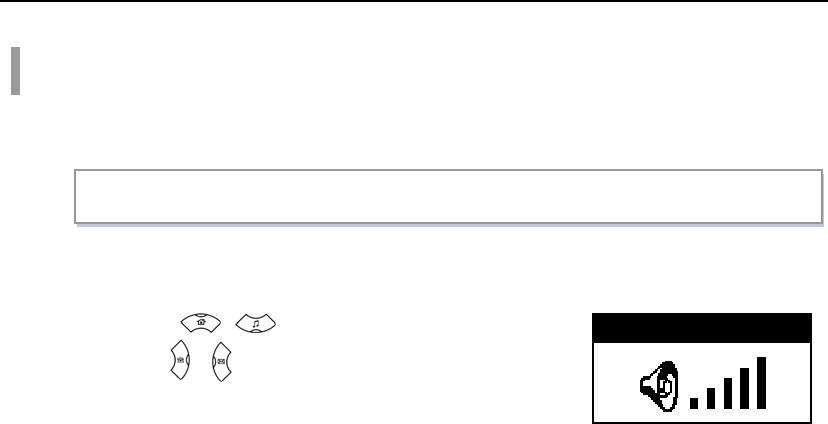
Volume Adjustment
Press the [MENU] button and select the [4. Vol/Effect] icon.
4. Vol/Effect
© SAMSUNG Electronics Co., Ltd.
Page 49

APPLICATION MENUS
Selecting the Bell and Vibration
You can select the modes of call sound such as the bell, vibration, bell after vibrating, or
increasingly higher bell.
[MENU]
→
[4]
→
[1]
→
Select a Mode
→
[OK]
Page 50
© SAMSUNG Electronics Co., Ltd.
User Guide
1. Press the [MENU] button and select [4. Vol/Effect], then press the [OK] button.
2. Select [1. Ring/Vibrate] and press the [OK] button.
3. Press the [ ]/[ ] button and select a desired mode(bell/ vibration/ bell after vibrating/
increasingly higher bell), then press the [OK] button.
Otherwise, press the
[*/ ] button for more than 3 seconds to change from the bell mode to
etiquette mode(Vibrates) automatically.
For information about how to set the etiquette mode, refer to the description of
‘Setting the Etiquette Mode’ section in ‘Basic Features’ of this guide.
NOTE
© SAMSUNG Electronics Co., Ltd.
Page 51
APPLICATION MENUS
Selecting the Bell Sound
This function enables you to select one bell sound out of a selection of 10 sounds.
[MENU]
→
[4]
→
[2]
→
Select a Bell Sound
→
[OK]
1. Press the [MENU] button and select the [4. Vol/Effect], then press the [OK] button.
2. Press the [ ]/[ ] button and select the [2. Ring
Rin
Type], then press the [OK] button. This will result
01 : Melody 1
following screen appearing.
02 : Melody 2
03 : Melody 3
3. Press the [ ]/[ ] button and select a desired bell sound.
Press the [OK] button to save the bell sound.
Page 52
© SAMSUNG Electronics Co., Ltd.
g
T
yp
e
User Guide
Adjusting the Bell Volume
This function enables you to adjust the bell volume.
[MENU]
→
[4]
→
[3]
→
Set Bell Volume
→
[OK]
1. Press the [MENU] button and select [4. Vol/Effect], then press the [OK] button.
2. Press the [ ]/[ ] button and select [3. Ring
Bell Volume
Volume], then press the [OK] button. This will result in the
following screen appearing.
3. Press the [ ]/[ ] button and select the desired bell volume, then press the [OK] button.
© SAMSUNG Electronics Co., Ltd.
Page 53
APPLICATION MENUS
Adjustung the Volume of the Key Buttons
This function enables you to adjust the volume of the key buttons when the key buttons of the
phone are pressed.
[MENU]
→
[4]
→
[4]
→
Set Key Volume
→
[OK]
1. Press the [MENU] button and select [4. Vol/Effect], then press the [OK] button.
2. Press the [ ]/[ ] button and select [4. Key Tone].
Ke
Use the [ ]/[ ] buttons to set the key volume and then
press the [OK] button.
Page 54
© SAMSUNG Electronics Co., Ltd.
y
Tone Volume

User Guide
Setting My Phone
Press the [MENU] button and select [5. Settings] icon
to see a screen which prompts you to enter
a password. The submenus are not displayed until
5. Settings
a password is entered in the [5.Settings] screen.
© SAMSUNG Electronics Co., Ltd.
Page 55

APPLICATION MENUS
Viewing My Extension Number
This feature enables you to view your extension phone number on the LCD screen of the phone.
[MENU]
→
[5]
→
Enter a Password
→
[0]
1. Press the [MENU] button and select [5. Settings], then press the [OK] button.
2. Enter a password on the screen when prompted.
Page 56
© SAMSUNG Electronics Co., Ltd.
User Guide
3. Press the [ ]/[ ] buttons and select [0. Internal
Internal NO.
No], then press the [OK] button.
1234
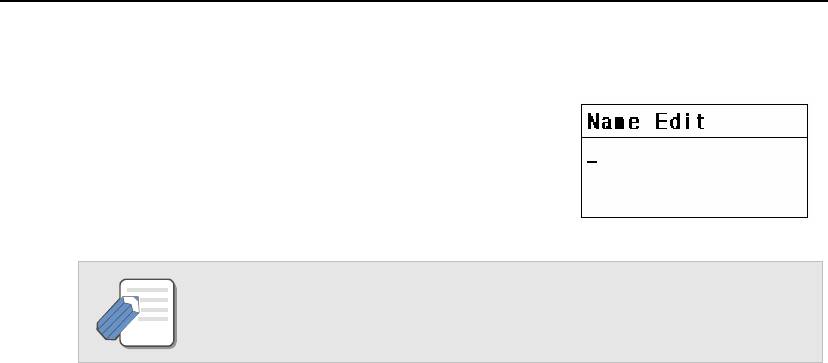
Entering the Users’ Names
This function enables you to enter random characters on the screen displayed on the initial
screen of a handset.
[MENU]
→
[5]
→
Enter a Password
→
[1]
→
Enter a Name
→
[OK]
1. Press the [MENU] button and select [5. Settings], then press the [OK] button.
2. Enter a password on the screen when prompted.
© SAMSUNG Electronics Co., Ltd.
Page 57
APPLICATION MENUS
3. Select [1: Name Edit].
4. A screen prompting you to enter a user’s name then
appears. Enter the desired characters and press the [OK]
button.
For information about how to enter the characters, refer to ‘Annex’ section.
NOTE
Page 58
© SAMSUNG Electronics Co., Ltd.
User Guide
Selecting the Background Screen
This function enables you to select the background of the initial screen that appears
when power on.
[MENU]
→
[5]
→
Enter a Password
→
[2]
→
Select Background Screen
→
[OK]
1. Press the [MENU] button and select [5. Settings], then press the [OK] button.
2. Enter a password on the screen that prompts you to enter a password.
3. Press the [ ]/[ ] buttons and select [2: Display], then press the [OK] button.
© SAMSUNG Electronics Co., Ltd.
Page 59

APPLICATION MENUS
4. The following three screens can be selected and displayed. Select one of them and press
the [OK] button.
12 : 34 am
07/12[Sa] 4:05 PM 07/12[Sa] 4:05 PM
07/12[Sa]
Samsung Logo
Name Display
Time Dis
z The above screens are all initial screens in which the DND and call forwarding are set.
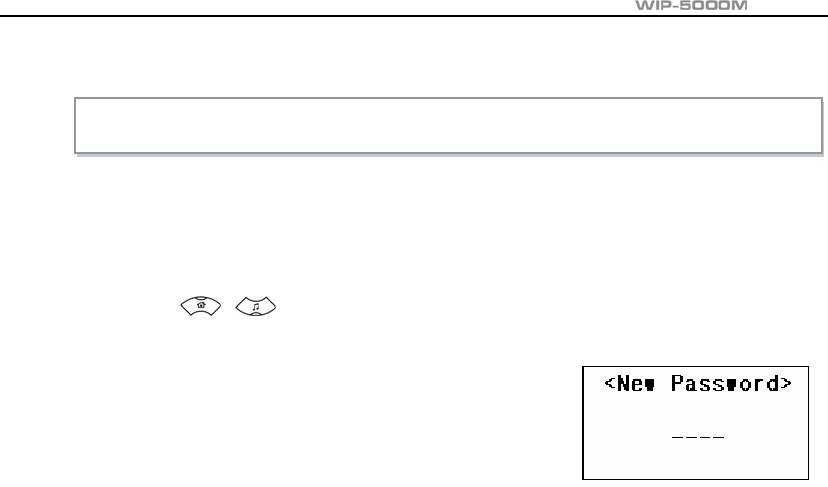
Changing a Password
This function enables you to prevent others from using your phone by changing the initial factory
set password of the phone. The initial password is set to 0000.
Page 60
© SAMSUNG Electronics Co., Ltd.
p
la
y
DND FWD 1234 DND FWD 1234
DND FWD 1234
Jack
User Guide
[MENU]
→
[5]
→
Enter a Password
→
[3]
→
Enter a Password
→
[OK]
1. Press the [MENU] button and select [5. Settings], then press the [OK] button.
2. Enter a password on the screen that prompts you to enter a password.
3. Press the [ ]/[ ] buttons and select the [3: PIN change], then press the [OK] button.
4. If the following screen prompts you to enter a password,
enter a new password and press the [OK] button.
© SAMSUNG Electronics Co., Ltd.
Page 61
APPLICATION MENUS
Setting the Language
This feature enables you to set the language displayed on the LCD screen of the phone.
[MENU]
→
[5]
→
Enter a Password
→
[4]
→
[2]
1. Press the [MENU] button and select [5. Setting], then press the [OK] button.
2. Enter a password on the screen when prompted.
3. Press the [ ]/[ ] buttons and select [4: Language],
Language
then press the [OK] button.
1 : Korean
2 : English
3 : Italian
4. Press the [ ]/[ ] buttons and select [2: English], then press the [OK] button.
Page 62
© SAMSUNG Electronics Co., Ltd.

User Guide
Deleting a Phone Number
This function enables you to clear phone numbers registered within the phone book or calling
numbers and called numbers.
Deleting a saved number
This function enables you to clear all the phone numbers saved within the phone book.
[MENU]
→
[5]
→
Enter a Password
→
[5]
→
[1]
→
Enter a Password
→
Select Yes/No
→
[OK]
1. Press the [MENU] button and select the [5. Settings], then press the [OK] button.
2. Enter a password on the screen that prompts you to enter a password.
3. Press the [ ]/[ ] button and select the [5: Delete Entry], then press the [OK] button.
© SAMSUNG Electronics Co., Ltd.
Page 63
APPLICATION MENUS
4. Press the [ ]/[ ] button and select [1: Del Phone Book], then press the [OK] button.
5. Enter a password on the screen that prompts you to enter
Confirm ?
a password. If a screen prompts you to clear a called
1 : Yes
number, select Yes or No with the [
]/[ ] buttons
2 : No
and press the [OK] button.
Deleting a calling number
This function enables you to clear the list of calling numbers saved within the phone book.
[MENU]
→
[5]
→
Enter a Password
→
[5]
→
[2]
→
Enter a Password
→
Select Yes/No
→
[OK]
Page 64
© SAMSUNG Electronics Co., Ltd.
User Guide
1. Press the [MENU] button and select the [5. Setting], then press the [OK] button.
2. Enter a password on the screen that prompts you to enter a password.
3. Press the [ ]/[ ] button and select the [5: Delete Entry], then press the [OK] button.
4. Press the [ ]/[ ] button and select the [2. Del Dialed call], then press the [OK] button.
5. Enter a password on the screen that prompts you to enter
Confirm ?
a password. Then, a screen appears as shown and
1 : Yes
prompts you to clear a called number. Select Yes or No
2 : No
using the [
]/[ ] buttons and press the [OK]
button.
Deleting a called Number
This function enables you to clear the list of called numbers saved within the phone book.
© SAMSUNG Electronics Co., Ltd.
Page 65
APPLICATION MENUS
[MENU]
→
[5]
→
Enter a Password
→
[5]
→
[3]
→
Enter a Password
→
Select Yes/No
→
[OK]
1. Press the [MENU] button and select the [5. Setting], then press the [OK] button.
2. Enter a password on the screen that prompts you to enter a password.
3. Press the [ ]/[ ] button and select the [5: Delete Entry], then press the [OK] button.
4. Press the [ ]/[ ] button and select the [3: del Recent call], then press the [OK] button.
5. Enter a password on the screen that prompts you to enter
Confirm ?
a password. Then, a screen appears as shown and
1 : Yes
prompts you to clear a called number. Select Yes or No
2 : No
using the [
]/[ ] buttons and press the [OK]
button.
Page 66
© SAMSUNG Electronics Co., Ltd.
User Guide
Selecting the Screen Lighting
This function enables you to set the intensity of the lighting on the phone screen.
Setting lighting time
This function enables you to set the time for background lighting, which lights automatically when
the keys are pressed or a messages appears.
[MENU]
→
[5]
→
Enter a Password
→
[6]
→
[1]
→
Select Lighting Time
→
[OK]
1. Press the [MENU] button and select the [5. Settings], then press the [OK] button.
2. Enter a password on the screen that prompts you to enter a password.
3. Press the [ ]/[ ] button and select [6: Back Light], then press the [OK] button.
© SAMSUNG Electronics Co., Ltd.
Page 67
APPLICATION MENUS
4. Press the [ ]/[ ] button and select the [1: Light Time], then press the [OK] button.
5. Select one of the three options by using the [ ]/[ ]
buttons as shown and press the [OK] button.
1 : 8 sec On
z The lighting of the LCD screen turns off automatically
2 : 20 sec On
unless a button is pressed within 8 seconds. You
3 : Alwa
can also set the lighting duration to 20 seconds or turn
off the lighting altogether.
Setting power saving lighting
You can set the mode of the energy-saving lighting.
Page 68
© SAMSUNG Electronics Co., Ltd.
y
Light Time
s Disable
[MENU]
→
[5]
→
Enter a Password
→
[6]
→
[2]
→
Set/Disable Energy Saving
Lighting
→
[OK]
User Guide
1. Press the [MENU] button and select the [5. Settings], then press the [OK] button.
2. Enter a password on the screen that prompts you to enter a password.
3. Press the [ ]/[ ] button and select the [6: Back Light], then press the [OK] button.
4. Press the [ ]/[ ] button and select [2: Power Saving], and then press the [OK] button.
5. A screen prompt appears and enables you to set or
Power Saving
disable the energy saving lighting. Select Set or Disable
1 : On
using the [
]/[ ] button and press the [OK] button.
2 : Off
© SAMSUNG Electronics Co., Ltd.
Page 69
APPLICATION MENUS
Setting the Forward Type
This feature enables you to forward your incoming calls to a specific extension, group of
extensions or external number when you are unable to receive an incoming call. You may also
set the forwarding type(Forward All, Forward Busy, Forward No Answer or Do Not Disturb).
If this feature is set up, the ‘FWD’ message will be displayed on the initial screen.
[MENU]
→
[5]
→
Enter a Password
→
[7]
→
[2]
→
Dial the number to which
calls should be forwarded
→
[OK]
1. Press the [MENU] button and select [5. Setting], then press the [OK] button.
2. Enter a password on the screen when prompted.
3. Press the [ ]/[ ] buttons and select [7: Forward Type], then press the [OK] button.
Page 70
© SAMSUNG Electronics Co., Ltd.
User Guide
4. Press the [ ]/[ ] buttons and select the forward
type you want, then press the [OK] button.
1 : Off
2 : All
3 : Bus
5. Press the number to which calls should be forwarded, then press the [OK] button.
The forwarding types are as follows.
- Off : You can disable the forward feature.
- All : You can forward all incoming calls to another number.
NOTE
- Busy : You can forward incoming calls to another number when you are using the phone.
- No Answer : Your incoming calls can be forwarded to another number if you cannot answer
the call within the specified time.
- Do Not Disturb : Busy : You can forward incoming calls to another number when the DND
feature is set up.
© SAMSUNG Electronics Co., Ltd.
Page 71
y
Setting
APPLICATION MENUS
Setting the Programmed Message
When you will be away from you desk, you can leave an absence message to advise internal
callers of your status. Internal callers will receive the message on their LCD screen when they
call you.
[MENU]
→
[5]
→
Enter a Password
→
[8]
→
[1]
→
[1]
1. Press the [MENU] button and select [5. Setting], then press the [OK] button.
2. Enter a password on the screen when prompted.
3. Press the [ ]/[ ] buttons and select [8: Program Msg], then press the [OK] button.
4. Press the [ ]/[ ] buttons and select [1: On], then
Program Msg.
press the [OK] button.
1 : On
2 : Off
Page 72
© SAMSUNG Electronics Co., Ltd.
User Guide
5. Press the [ ]/[ ] buttons and select [1. Give Me The Call], then press the [OK] button.
Locking the Phone
When you will be away from you desk, you can lock any outgoing trunk calls or
incoming/outgoing calls to prevent others from using your phone without permission.
[MENU]
→
[5]
→
Enter a Password
→
[9]
→
[1]
1. Press the [MENU] button and select [5. Setting], then press the [OK] button.
2. Enter a password on the screen when prompted.
3. Press the [ ]/[ ] buttons and select [9: Station Lock], then press the [OK] button.
© SAMSUNG Electronics Co., Ltd.
Page 73
APPLICATION MENUS
4. Press the [ ]/[ ] buttons and select [1: On], then
Station Lock
press the [OK] button.
1 : On
2 : Off
Initialization
This function enables you to initialize all the functions and status of a phone.
Initializing all
This function enables you to initialize the status of a phone. All the saved records as well as the
phone options are deleted.
[MENU]
→
[5]
→
Enter a Password
→
[*/ ]
→
[1]
→
Enter a Password
→
Select Yes/No
→
[OK]
Page 74
© SAMSUNG Electronics Co., Ltd.
User Guide
1. Press the [MENU] button and select the [5. Settings], then press the [OK] button.
2. Enter a password on the screen that prompts you to enter a password.
3. Press the [ ]/[ ] button and select the [*, Reset], then press the [OK] button.
4. Press the [ ]/[ ] button and select [1: Reset All], then a screen appears and
prompts you to enter a password.
5. If you enter a password, the following dialog box appears.
Reset All
Select Yes or No using the [
]/[ ] buttons and
1 : Yes
press the [OK] button.
2 : No
Initializing featares only
This function enables you to initialize the options for the phone functions only.
© SAMSUNG Electronics Co., Ltd.
Page 75
APPLICATION MENUS
[MENU]
→
[5]
→
Enter a Password
→
[*/ ]
→
[2]
→
Enter a Password
→
Select Yes/No
→
[OK]
1. Press the [MENU] button and select the [5. Settings], then press the [OK] button.
2. Enter a password on the screen that prompts you to enter a password.
3. Press the [ ]/[ ] button and select the [*.Reset], then press the [OK] button.
4. Press the [ ]/[ ] button and select the [2. Reset Func.] to display the screen that
prompts you to enter a password.
5. If you enter a password, the following dialog box appears.
Reset Func.
Select Yes or No using the [
]/[ ] buttons and
1 : Yes
press the [OK] button.
2 : No
Page 76
© SAMSUNG Electronics Co., Ltd.
User Guide
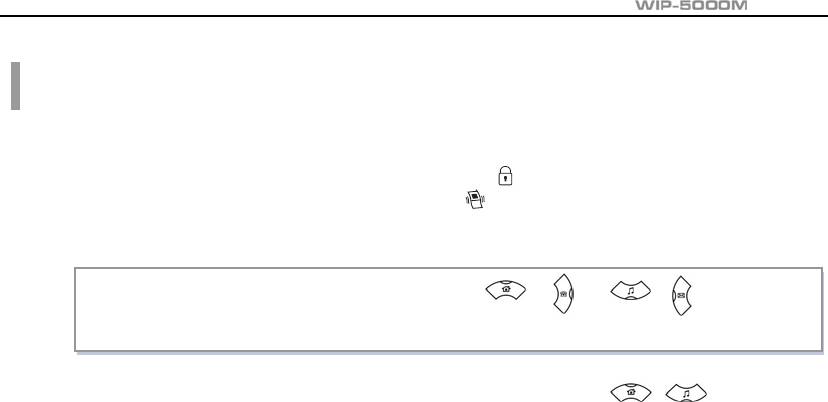
Setting Auto Lock
If you set the auto lock for privacy, to prevent other people from seeing personal information.
Once the auto lock is set, the keys will not operate and functions other than answering a call
cannot be used until a password is entered.
[MENU]
→
[5]
→
Enter a Password
→
[#/ ]
→
Keypad Lock
→
[OK]
1. Press the [#/ ] button so that the auto lock can be set.
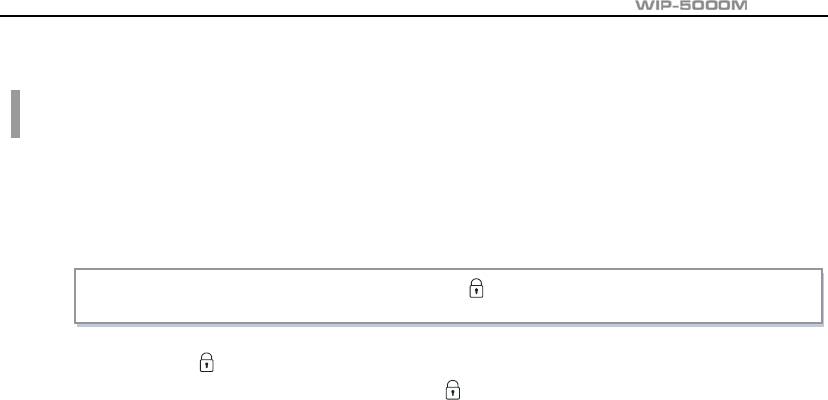
z If this function is set, the auto lock icon( ) appears
on the upper part of the screen.
z If you want to cancel this function, enter a password.
© SAMSUNG Electronics Co., Ltd.
Page 77

APPLICATION MENUS
Setting the System
Press the [MENU] button to see the main menu
on the screen.
Select [6. System] and use the desired functions.
6. System
Page 78
© SAMSUNG Electronics Co., Ltd.
User Guide
Registering a Phone
This function enables you to register a phone via the sytem.
[MENU]
→
[6]
→
[1]
→
Select System
→
[OK]
→
Enter a System ID
→
[OK]
→
Enter a User ID
→
[OK]
→
Enter a Password
→
[OK]
© SAMSUNG Electronics Co., Ltd.
Page 79

APPLICATION MENUS
1. Press the [MENU] button and select [6. System], then press the [OK] button.
2. Press the [ ]/[ ] button and select the [1: Registration], then press the [OK] button.
3. Determine whether the phone will be registered with System 1 or System 2 and
press the [OK] button.
4. If the screen as shown prompts you to enter a system ID,
In
enter the system ID and press the [OK] button.
5. If the screen as shown prompts you to enter a user ID,
enter the user ID and press the [OK] button.
Page 80
© SAMSUNG Electronics Co., Ltd.
p
ut S
y
s. ID
In
p
ut User ID

User Guide
6. If the [Encryption Key] screen prompts, you enter the encryption key 13 digits which was
set up in the system. If the encryption key is not set up in the system, you can press the [OK]
button without entering the encryption key.
7. If the screen as shown prompts you to enter a password
In
and press the [OK] button to start the registration.
© SAMSUNG Electronics Co., Ltd.
Page 81
p
ut Password
APPLICATION MENUS
Selecting a System
This function easily enables you to register the two systems being used.
[MENU]
→
[6]
→
[2]
→
Select a System
→
[OK]
1. Press the [MENU] button and select [6. System], then press the [OK] button.
2. Press the [ ]/[ ] button and select the [2: System Setting], then press the [OK] button.
3. System 1 and System 2 appear and are entered in the [1.
System Setting
Registeration] from the [6.System]. Select one of the two
1 : System1
systems using the [
]/[ ] buttons. Press the [OK]
2 : System2
button to register the selected one.
3 : Encryption Key
4. You can set the encryption key(WEP key) in the system which should be entered when
you register the phone.
Page 82
© SAMSUNG Electronics Co., Ltd.
User Guide
Viewing the IP of a Phone
This function enables you to identify the currently registered IP.
[MENU]
→
[6]
→
[3]
1. Press the [MENU] button and select the [6. System], then press the [OK] button.
2. Press the [ ]/[ ] button and select the [3: IP Address], then press the [OK] button.
3. The current IP address registered with the phone then appears.
© SAMSUNG Electronics Co., Ltd.
Page 83
APPLICATION MENUS
Viewing the MAC Address of the Phone
This function enables you to identify the current MAC address of the phone.
[MENU]
→
[6]
→
[4]
1. Press the [MENU] button and select the [6. System], then press the [OK] button.
2. Press the [ ]/[ ] button and select the [4: MAC Address], then press the [OK] button.
3. The current MAC address registered with the phone then appears.
Page 84
© SAMSUNG Electronics Co., Ltd.
User Guide
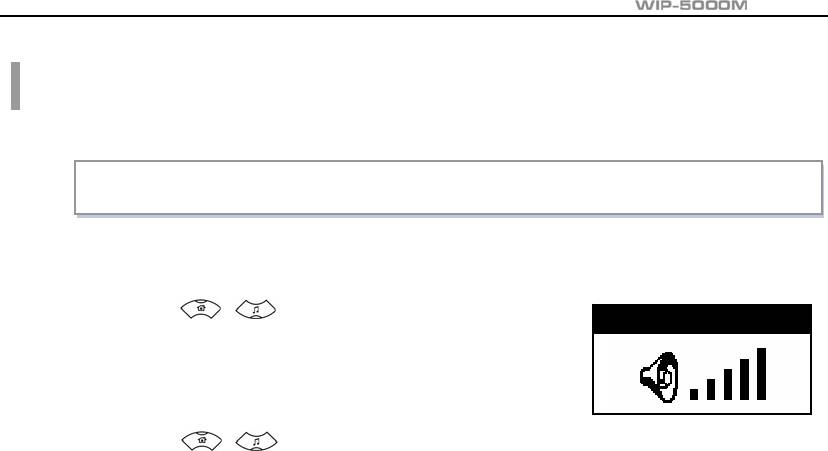
Viewing the Signal Quality of the Phone
This function displays the Wireless Signal Quality of the phone.
[MENU]
→
[6]
→
[5]
1. Press the [MENU] button and select the [6. System], then press the [OK] button.
2. Press the [ ]/[ ] button and select the [5: CommsQuality], then press the [OK] button.
3. Display every one second the current Wireless Signal Quality
Signal Quality o
Values if the phone was registered.
CQ : 92(0 ~ 92)
z CQ: Call Quality, ASL: Signal Strength, ANL: Signal Noise.
ASL: 154(27~154)
ANL: 0(27~154)
© SAMSUNG Electronics Co., Ltd.
Page 85
APPLICATION MENUS
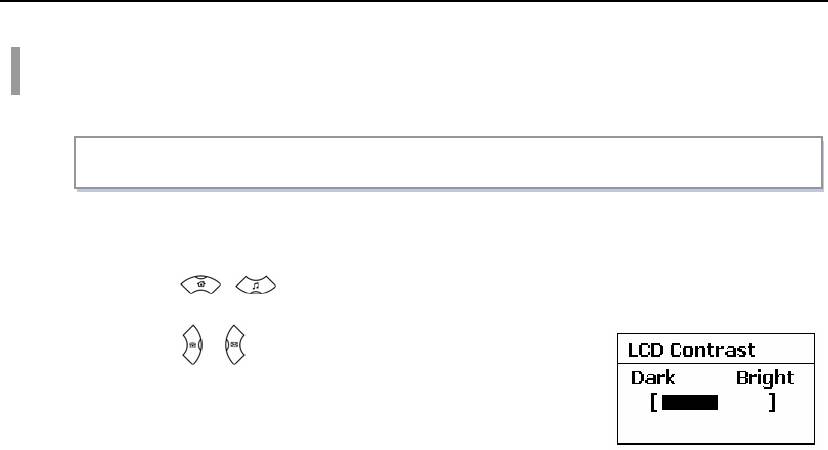
Setting LCD Contrast of the Phone
This feature support to set the LCD contrast if you want to change it.
[MENU]
→
[6]
→
[6]
1. Press the [MENU] button and select the [6. System], then press the [OK] button.
2. Press the [ ]/[ ] button and select the [6. LCD Contrast], then press the [OK] button.
3. Press the [ ]/[ ] button and control ‘Dark’/’Bright’ density,
then press the [OK] button.
Page 86
© SAMSUNG Electronics Co., Ltd.


