Samsung PS-63 A756T1M – страница 2
Инструкция к Телевизору Samsung PS-63 A756T1M
English - 21
Sound Control
Changing the Sound Standard
❑
You can select the type of special sound effect to be used when watching a
Sound
given broadcast.
Mode : Custom
T
Press the TOOLS button to display Tools menu.
Equalizer
SRS TruSurround XT : Off
Mode.
Audio Language : ----
Audio Format : ----
Audio Description
❑
Equalizer
Auto Volume : Off
The sound settings can be adjusted to suit your personal preferences.
Select Speaker : TV Speaker
Mode: You can select a sound mode to suit your personal preferences.
Balance: Controls the balance between the right and left speakers.
100Hz / 300Hz / 1kHz / 3kHz / 10kHz (Bandwidth Adjustment): To adjust the level of different bandwidth frequencies
Reset: Resets the equalizer settings to the default values.
❑
TruSurround XT is a patented SRS technology that solves the problem of playing 5.1 multichannel content over two speakers.
TruSurround delivers a compelling, virtual surround sound experience through any two-speaker playback system, including
internal television speakers. It is fully compatible with all multichannel formats.
T
Press the TOOLS button to display Tools menu.
You can also set the SRS TruSurround XT by selecting .
TruSurround XT, SRS and Symbol are trademarks of SRS Labs, Inc. TruSurround XT
technology is incorporated under license from SRS Labs, Inc.
❑
Audio Language
You can change the default value for audio languages. Displays the language information for the incoming stream.
N
While viewing a digital channel, this function can be selected.
N
You can only select the language among the actual languages being broadcast.
❑
When sound is emitted from both the main speaker and the audio receiver, a sound echo may occur due to the decoding
speed difference between the main speaker and the audio receiver. In this case, use the TV Speaker function.
N
While viewing a digital channel, this function can be selected.
N
You can only select the language among the actual languages being broadcast.
Manufactured under license from Dolby Laboratories. Dolby and the double-D symbol are
trademarks of Dolby Laboratories.
❑
Audio Description
This is an auxiliary audio function that provides an additional audio track for visually challenged persons. This function handles
the Audio Stream for the AD (Audio Description), when it is sent along with the Main audio from the broadcaster. Users can
turn the Audio Description On or Off and control the volume.
: Turn the audio description function on or off.
Volume: You can adjust the audio description volume.
N
Volume is active when Audio Description is set to On.
N
While viewing a Digital channel, this function can be selected.
BN68-01757D-Eng_.indb 21 2008-08-20 오후 7:18:26
❑
Auto Volume
Select Speaker : TV Speaker
Each broadcasting station has its own signal conditions, and so it is not easy
Sound
Sound Select : Main
to adjust the volume every time the channel is changed. This feature lets you
automatically adjust the volume of the desired channel by lowering the sound
output when the modulation signal is high or by raising the sound output when
the modulation signal is low.
❑
If you want to hear the sound through separate speakers, cancel the internal
N
The –
+, MUTE buttons do not operate when the TV Speaker is set to Off.
N
If you select External Speaker in the Select Speaker menu, the sound settings will be limited.
TV's Internal Speakers Audio Out (Optical, L / R Out) to Sound System
TV / Ext. / AV / S-Video / Component / PC / HDMI TV / Ext. / AV / S-Video / Component / PC / HDMI
TV Speaker Speaker Output Sound Output
External Speaker Mute Sound Output
Video No Signal Mute Mute
❑
Sound Select
When the PIP feature is activated, you can listen to the sound of the sub (PIP) picture.
Main: Used to listen to the sound of the main picture.
Sub: Used to listen to the sound of the sub picture.
T
Press the TOOLS button to display Tools menu.
You can also set the sound of the sub picture by selecting .
❑
Sound Reset
Reset All / Reset Sound Mode / Cancel:
You can restore the Sound settings to the factory defaults.
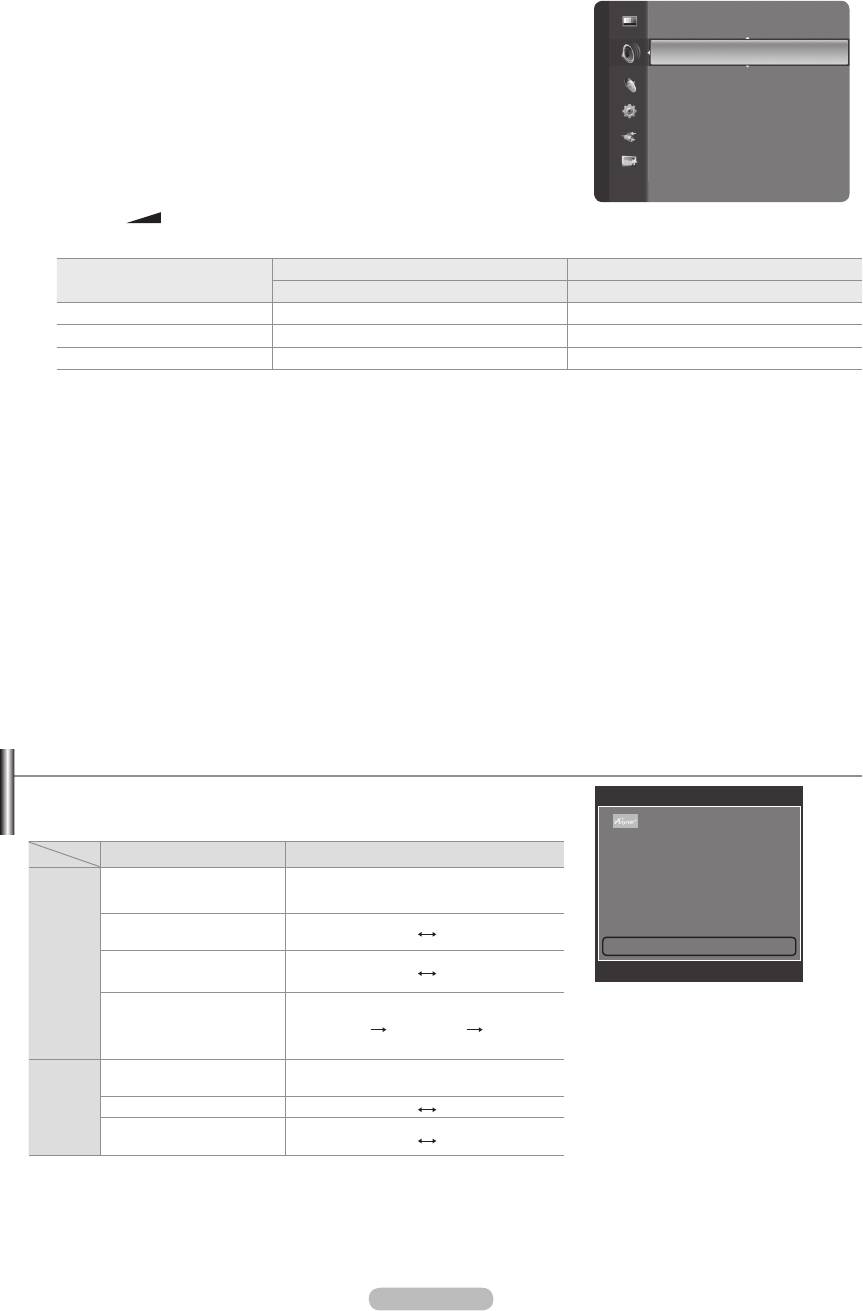
Selecting the Sound Mode
You can set the sound mode in the Tools menu. When you set to Dual l ll, the
Tools
current sound mode is displayed on the screen.
Anynet+ (HDMI-CEC)
Picture Size : Auto Wide
Type of broadcast
On-screen indication
Picture Mode : Standard
Regular broadcast
Sound Mode : Custom
(Standard audio)
Mono (Normal use)
Sleep Timer : Off
SRS TS XT : Off
Regular + NICAM Mono
NICAM
Mono
Energy Saving : Off
(Normal)
NICAM
Stereo
NICAM-Stereo
NICAM
Mono
Stereo
(Normal)
U
Move
L
Adjust
e
Exit
NICAM Dual-I/II
NICAM
NICAM
Mono
Dual-1
Dual-2
(Normal)
Regular broadcast
(Standard audio)
Mono (Normal use)
A2
Stereo
Bilingual or DUAL-I/II
Dual I Dual II
Stereo Stereo
Mono
(Forced mono)
N
If the stereo signal is weak and an automatic switching occurs, then switch to the mono.
N
This function is only activated in stereo sound signal. It is deactivated in mono sound signal.
N
This function is only available in TV mode.
English - 22
BN68-01757D-Eng_.indb 22 2008-08-20 오후 7:18:26
English - 23
Function Description
❑
Language
You can set the menu language.
Setup
Plug & Play
Language : English
❑
Time
This feature allows you to prevent unauthorized users, such as children, from
Network Selection : Cable
watching unsuitable programmes by muting out video and audio.
Wireless Network Setup
N
Before the setup screen appears, the PIN number input screen appears.
Cable Network Setup
Enter your 4 digit PIN number.
Child Lock : On
Change PIN
N
The default PIN number of a new TV set is 0-0-0-0. You can change the
Parental Lock
PIN by selecting Change PIN from the menu.
N
You can lock some channels in Channel List. (refer to page 14)
N
Child Lock is available only in TV mode. .
❑
Change PIN
You can change your personal ID number that is required to set up the TV.
N
Before the setup screen appears, the PIN number input screen appears. Enter your 4 digit PIN number.
N
The default PIN number of a new TV set is 0-0-0-0.
N
If you forget the PIN code, press the remote control buttons in the following sequence, which resets the PIN to 0-0-0-0:
POWER (Off), MUTE, 8, 2, 4, POWER (On).
❑
This feature allows you to prevent unauthorized users, such as children, from watching unsuitable programmes by a 4-digit
-
In the Parental Rating
N
Before the setup screen appears, the PIN number input screen appears. Enter your 4 digit PIN number.
N
The default PIN number of a new TV set is 0-0-0-0. You can change the PIN by selecting Change PIN from the menu.
N
When the parental ratings are set, the
\
symbol is displayed.
N
Allow All: Press to unlock all TV ratings.
Block All: Press to lock all TV ratings.
❑
Subtitle
You can activate and deactivate the subtitles. Use this menu to set the Subtitle Mode. Normal under the menu is the basic
subtitle and Hard of hearing is the subtitle for a hearing-impaired person.
: Switches subtitles off or on.
: Sets the subtitle mode.
Subtitle Language: Set the subtitle language.
N
If the programme you are watching does not support the Hard of hearing function, Normal automatically activates even
though Hard of hearing mode is selected.
N
English is the default in cases where the selected language is unavailable in the broadcast.
N
You can select these options simply by pressing the SUBT. button on the remote control.
❑
Teletext Language
You can set the Teletext language by selecting the language type.
N
English is the default in cases where the selected language is unavailable
in the broadcast.
BN68-01757D-Eng_.indb 23 2008-08-20 오후 7:18:27
❑
Preference
Primary Audio Language / Secondary Audio Language / Primary Subtitle Language / Secondary Subtitle Language /
Primary Teletext Language / Secondary Teletext Language
Using this feature, users can select one of the languages. The language selected here is the default when the user selects a
channel.
If you change the language setting, the Subtitle Language, Audio Language, and the Teletext Language of the Language
menu are automatically changed to the selected language.
The Subtitle Language, Audio Language, and the Teletext Language of the Language menu show a list of languages
supported by the current channel and the selection is highlighted. If you change this language setting, the new selection is
only valid for the current channel. The changed setting does not change the setting of the Primary Subtitle Language, Primary
Audio Language, or the Primary Teletext Language of the Preference menu.
❑
If the programme is broadcast with digital text, this feature is enabled.
Teletext Language : ----
Setup
Preference
N
MHEG (Multimedia and Hypermedia Information Coding Experts
Group)
An International standard for data encoding systems used in multimedia and
Light Effect : Watching TV
hypermedia. This is at a higher level than the MPEG system which includes
Wall-Mount Adjustment
data-linking hypermedia such as still images, character service, animation,
Melody : Off
Entertainment : Off
Energy Saving : Off
(Video-On-Demand), ITV (Interactive TV), EC (Electronic Commerce), tele-
PIP
education, tele-conferencing, digital libraries and network games.
Software Upgrade
❑
You can turn on/off the blue LED on the front of TV according to the situation. Use it for saving power or when the LED dazzles
your eyes.
Off: The blue LED is always off.
In Standby: The blue LED lights while in Standby mode and it turns off when your TV is turned on.
Watching TV: The blue LED lights when watching TV and it turns off when your TV is turned off.
Always: The blue LED always lights.
N
Set the Light Effect to Off to reduce the power consumption.
❑
Melody
Off / Low / Medium / High
The TV power on / off melody sound can be adjusted.
N
The Melody does not play
-
When no sound is output from the TV because the MUTE button has been pressed.
-
When no sound is output from the TV because the –
(Volume) button has been pressed.
-
When the TV is turned off by Sleep Timer function.
❑
Entertainment
The Entertainment mode enables you to select the optimal display and sound for sports, cinema and games.
Off: Switches the Entertainment function off.
Sports: Provides the optimal picture and sound quality for sports.
Cinema: Provides the optimal picture and sound quality for movie watching. You can experience a richer picture and
enhanced sound.
Game: Provides the optimal picture and sound quality for games. This mode accelerates the playing speed when
using an external game console connected to the TV.
N
If you set any of the three Entertainment modes to On, the settings will be locked and can not be adjusted. In addition,
Picture and Sound mode settings are not allowed. If you want to make Picture and Sound mode adjustments, the
Entertainment mode must be turned off.
N
The Entertainment settings are saved for each input source.
N
Entertainment mode is not activated in PC mode.
O
You can press the E.MODE button on the remote control repeatedly to change
the Entertainment setting.
English - 24
BN68-01757D-Eng_.indb 24 2008-08-20 오후 7:18:27
English - 25
❑
Energy Saving
This feature adjusts the brightness of the TV in order to reduce power consumption. When watching TV at night, set the
Energy Saving mode option to High to reduce eye fatigue as well as power consumption.
Off: Turns off the energy saving function.
Low: Sets the TV to low energy saving mode.
Medium: Sets the TV to medium energy saving mode.
High: Sets the TV to high energy saving mode.
T
Press the TOOLS button to display Tools menu.
You can also set the Energy Saving option by selecting .
❑
Software Upgrade
To keep your product up-to-date with new Digital Television features then
software upgrades are periodically broadcast as part of the normal Television
signal. It will automatically detect these signals and display the software
upgrade banner. You are given the option to install the upgrade.
BY USB
to not disconnect the power or remove the USB drive while upgrades are being
applied. The TV will turn off and turn on automatically after completing the
audio settings you have made will return to their default (factory) settings. We recommend you write down your settings so that
you can easily reset them after the upgrade.
BY Channel
Upgrades the software using the broadcasting signal.
Standby Mode Upgrade
standby mode, a manual upgrade is automatically conducted. Since the power of the unit is turned on internally, the screen
may be on slightly for the product. This phenomenon may continue for more than 1 hour until the software upgrade is
completed.
Alternative Software
To display the software version information.
❑
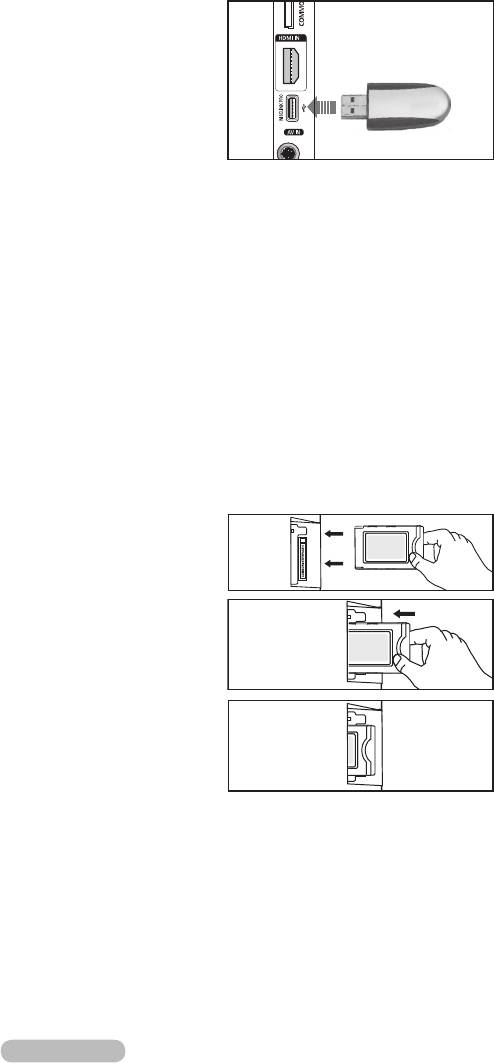
Common Interface
Installing the CI Card
a. Purchase the CI CAM module by visiting your nearest dealer or by phone.
c. Insert the CAM with the CI CARD installed into the common interface slot.
N
Insert the CAM in the direction of the arrow, right up to the end so that it is
parallel with the slot.
d. Check if you can see a picture on a scrambled signal channel.
CI Menu
This enables the user to select from the CAM-provided menu.
Select the CI Menu based on the menu PC Card.
Application Info.
This contains information on CAM inserted in the CI slot and displays it.
The Application Info inserting is about the CI CARD. You can install the CAM
anytime whether the TV is ON or OFF.
1. Purchase the CI CAM module by visiting your nearest dealer or by phone.
2.
3. Insert the CAM with the CI CARD installed into the common interface slot. (Insert the CAM in the direction of the arrow, right
up to the end so that it is parallel with the slot.)
4. Check if you can see a picture on a scrambled signal channel.
4
TV Side Panel
USB Drive
BN68-01757D-Eng_.indb 25 2008-08-20 오후 7:18:28

Setting the Time
❑
Clock
Plug & Play
Setting the clock is necessary in order to use the various timer features of the
Setup
Language : English
TV.
N
The current time will appear every time you press the INFO button.
Network Selection : Cable
N
If you disconnect the power cord, you have to set the clock again.
Wireless Network Setup
Cable Network Setup
Clock Mode
Child Lock : On
You can set up the current time manually or automatically.
Change PIN
•
Auto: Set the current time automatically using the time from the digital
Parental Lock
broadcast.
Subtitle
•
Manual
Time
Clock Set
Clock : -- : --
You can set the current time manually.
Sleep Timer : Off
N
Set up this item when you have set Clock Mode to Manual.
Timer 1 : Inactivated
N
You can set the day, month, year, hour, minute directly by pressing the
Timer 2 : Inactivated
number buttons on the remote control.
Timer 3 : Inactivated
❑
/ 180 min
U
Move
E
Enter
R
Return
The sleep timer automatically shuts off the TV after a preset time (30, 60, 90,
120, 150 and 180 minutes).
N
The TV automatically switches to standby mode when the timer reaches 0.
N
To cancel the Sleep Timer function, select Off.
T
Press the TOOLS button to display Tools menu.
You can also set the sleep timer by selecting .
❑
Timer 1 / Timer 2 / Timer 3
Three different on / off timer settings can be made.
On Time:
Set the hour, minute, and Activate / Inactivate.
(To activate timer with the setting you’ve chosen, set to Activate.)
Off Time:
Set the hour, minute, and Activate / Inactivate.
(To activate timer with the setting you’ve chosen, set to Activate.)
Volume:
Set the required volume level.
Contents:
When the On Timer
•
TV / USB: Select TV or USB. (Make sure that an USB device is connected to your TV.)
•
Antenna: Select ATV or DTV.
•
Channel: Select the desired channel.
•
Music
•
Photo
Repeat:
Select Once, Everyday, Mon~Fri, Mon~Sat, Sat~Sun, or Manual.
N
When ManualENTER
E
button over the
desired day and the c mark will appear.
N
N
You can set the hour, minute and channel by pressing the number buttons on the remote control.
N
Auto Power Off
When you set the timer On, the television will eventually turn off, if no controls are operated for 3 hours after the TV was
turned on by the timer. This function is only available in timer On mode and prevents overheating, which may occur if a TV is
on for too long time.
English - 26
BN68-01757D-Eng_.indb 26 2008-08-20 오후 7:18:28
English - 27
Network Connection
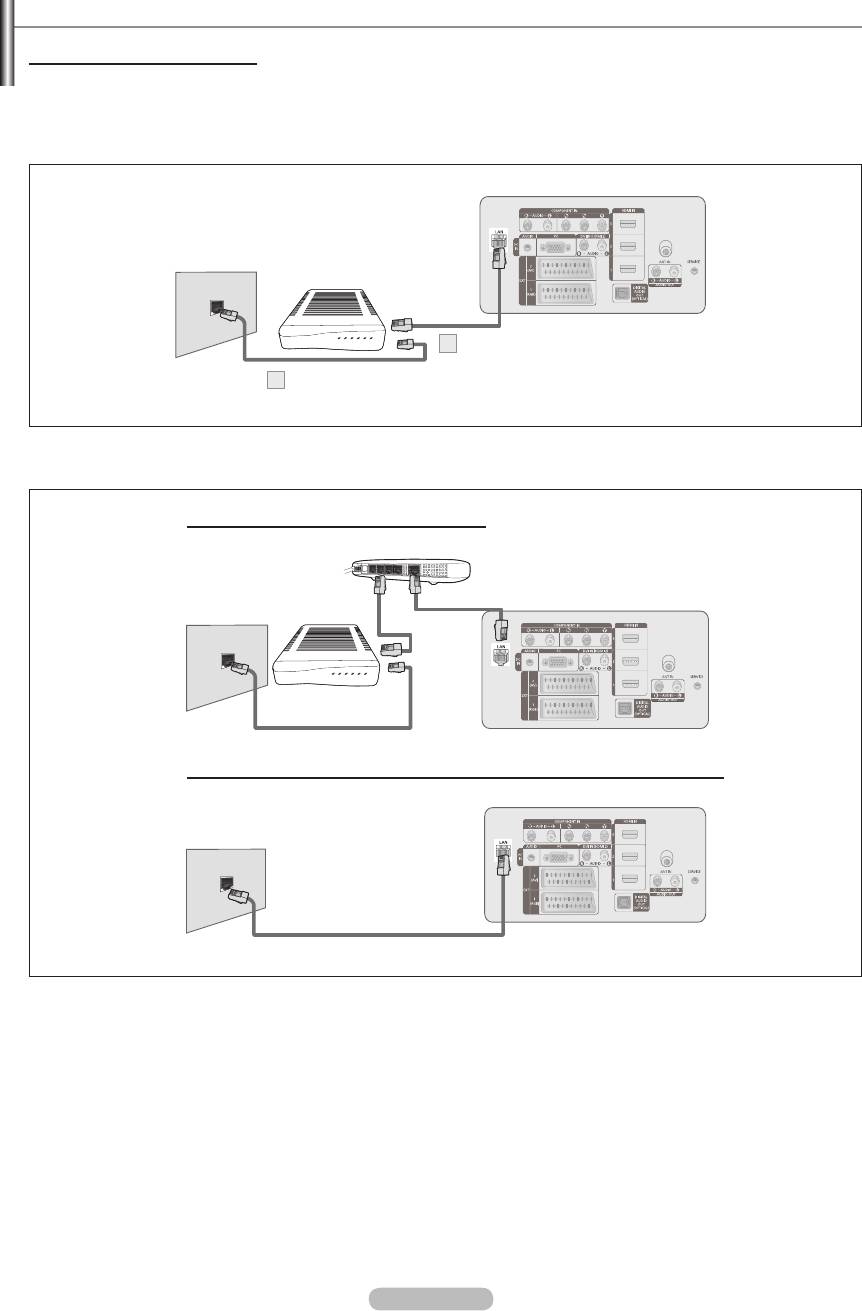
Network Connection - Cable
Cable Connection for a DHCP Environment
address, subnet mask, gateway, and DNS are automatically allocated when DHCP is selected, you do not have to enter them
manually.
TV Rear Panel
The Modem Port
on the Wall
External Modem
(ADSL/VDSL/Cable TV)
1
LAN Cable
2
Modem Cable
1. Connect the [LAN] port on the rear panel of the TV and the external modem with a LAN Cable.
2.
Connect the LAN port on the wall and the external modem with a Modem Cable.
You can connect the LAN via a Sharer (Router).
IP Sharer
External Modem
The Modem Port
(ADSL/VDSL/
LAN Cable
TV Rear Panel
on the Wall
Cable TV)
LAN Cable
Modem Cable
You can connect the LAN port and the TV directly depending on your network status.
TV Rear Panel
The LAN Port
on the Wall
LAN Cable
N
The terminals (the position of the port and the type) of the external device may differ depending on the manufacturer.
N
If the IP address allocation by the DHCP server has failed, turn the external modem off, turn it on again after at least 10
seconds and then try again.
N
For the connections between the external modem and the Sharer (Router), refer to the owner’s manual of the corresponding
product.
N
You can connect the TV to the LAN directly without connecting it through a Sharer (Router).
N
You cannot use a manual-connection-type ADSL modem becaus;e it does not support DHCP. You have to use an automatic-
connection-type ADSL modem.
BN68-01757D-Eng_.indb 27 2008-08-20 오후 7:18:32
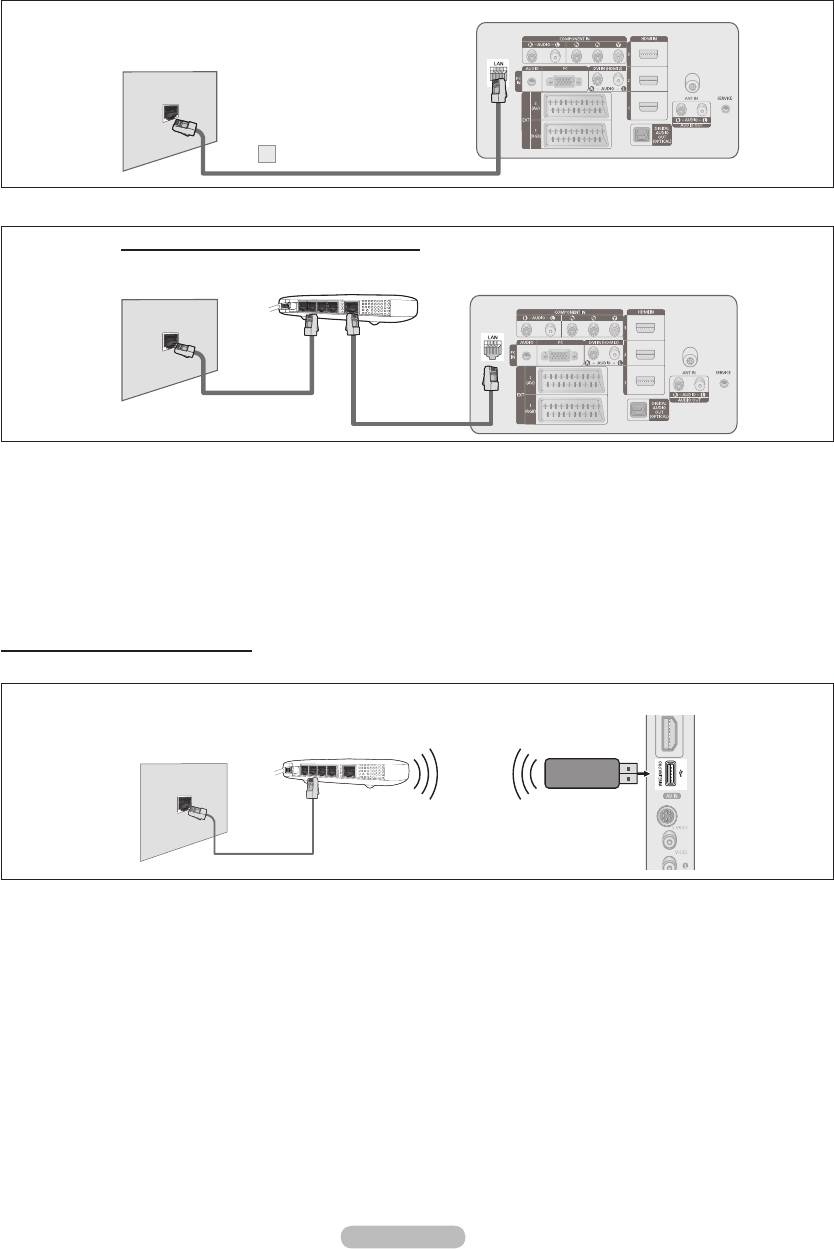
LAN Connection for Static IP Environment
The procedures to set up the network using a static IP address are described below. You have to manually enter the IP
address, subnet mask, gateway, and DNS that are provided by your Internet Service Provider (ISP).
TV Rear Panel
The LAN Port
on the Wall
1
LAN Cable
1. Connect the [LAN] port on the rear panel of the TV and the LAN port on the wall using the LAN cable.
You can connect the LAN via a Sharer (Router).
The LAN Port
on the Wall
IP Sharer
TV Rear Panel
LAN Cable
LAN Cable
N
The terminals (the position of the port and the type) of the external device may differ depending on the manufacturer.
N
If you are using a static IP address, your ISP will inform you of the IP address, subnet mask, gateway, and DNS. You must
enter these values to complete the network settings. If you do not know the values, ask your network administrator.
N
product.
N
You can connect the TV to the LAN directly without connecting it through a Sharer (Router).
N
If you use an IP Sharer (IP Router) that supports DHCP, you can set up the device as either DHCP or static IP.
N
For the procedures to use a static IP address, ask your Internet Service Provider.
Network Connection - Wireless
You can connect to the network wirelessly through a wireless IP sharer.
TV Side Panel
Samsung Wireless LAN
The LAN Port
Wireless IP sharer
Adapter for InfoLive
on the Wall
LAN Cable
1. Connect the ‘Samsung Wireless LAN Adapter for InfoLive’ into the Wiselink terminal of the TV.
N
You must use the ‘Samsung Wireless LAN Adapter for InfoLive’(WIS-08BG) to use a wireless network.
N
The ‘Samsung Wireless LAN Adapter for InfoLive’ is sold separately. Contact a Samsung Electronics agent or service center
for purchasing.
N
To use a wireless network, your TV must be connected to a wireless IP sharer.
N
If the wireless IP sharer supports DHCP, you TV can use a DHCP or static IP address to connect to the wireless network.
N
You must use a wireless IP sharer that supports IEEE 802.11 B or IEEE 802.11G.
N
If the wireless IP sharer allows you to turn on / off the Ping connection function, turn it on.
N
Set the wireless IP sharer to Infrastructure mode. Ad-hoc mode is not supported.
N
Select a channel for the wireless IP sharer that is not currently being used. If the channel set for the wireless IP sharer is
currently being used by another device nearby, this will result in interference and communications may fail.
N
When applying the security key for the AP (wireless IP sharer), only the following is supported.
1) Authentication Mode : WEP, WPAPSK, WPA2PSK
2) Encryption Type : WEP, TKIP, AES
If you apply a security system other than the systems listed above, it will not work with the TV.
English - 28
BN68-01757D-Eng_.indb 28 2008-08-20 오후 7:18:35
English - 29
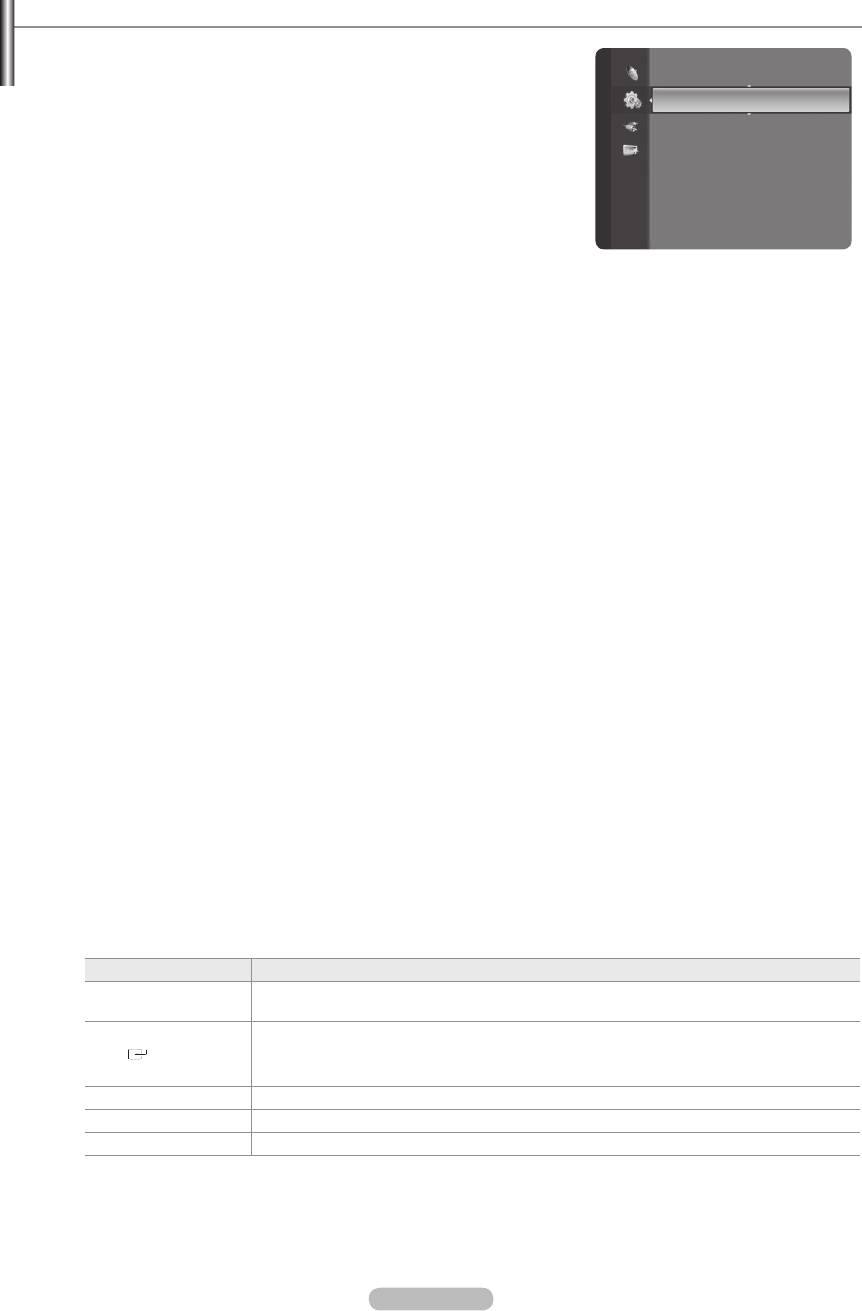
Network Setup
❑
Network Selection
Language : English
Select Cable or Wireless as the method to connect to the network.
Setup
Time
N
The menu is activated only if the ‘Samsung Wireless LAN Adapter for
InfoLive’ is connected.
Wireless Network Setup
Cable:
Connect to network using a cable.
Cable Network Setup
Wireless:
Connect to network wirelessly.
Child Lock : On
Change PIN
Parental Lock
❑
Cable Network Setup
Subtitle
Teletext Language : - - - -
Network Test:
N
When unable to connect to a wired network
time and authenticates the MAC address each time you connect to the Internet, your TV may not be able to connect to
case, ask your Internet service provider about the procedures to connect devices other than your PC (such as your TV) to
the Internet. If your Internet service provider requires an ID or password to connect to the Internet (network), your TV may
not be able to connect to the Internet. In this case, you have to enter your ID or password when connecting to the Internet
using an Internet Sharer (Router).
cannot connect to the Internet even if you have followed the procedures of your Internet service provider, please contact a
Samsung Electronics Service Center.
❑
Wireless Network Setup
Network Test: You can test or confirm the network connection status after setting up the network.
N
When unable to connect to a wireless network
try again. If your Internet service provider has registered the MAC address of the device used to connect to the Internet
time. In this case, ask your Internet service provider about the procedures to connect devices other than your PC (such
as your TV) to the Internet. If you cannot connect to the Internet even if you have followed the procedures of your Internet
service provider, please contact a Samsung Electronics Service Center.
Select Access Point:
You can select the IP sharer to use when using a wireless network.
N
If a wireless Access Point is not in the Access Point list, press the Red button.
N
When the connection is made, you will be returned to the screen automatically.
N
If you selected an Access Point that requires security authentication, enter the security key.
N
If you have selected an Access Point with a security authentication:
-
The Security Key input screen appears.
-
Enter the security key and press the ENTERE button.
-
Using the Remote Control Buttons on the Security Key Input Screen.
N
Setup Screen can be different depending on the security types.
Button Operations
(Wheel)
Moves the selection up/down/left/right.
(ENTER)
Enters (Inputs) the selected character.
Red button
Switch between Upper- and Lower-Case Letters
Green button
You can delete an already entered character.
Blue button
BN68-01757D-Eng_.indb 29 2008-08-20 오후 7:18:37

Cable Network Setup-Auto Setup
if the LAN cable is connected. (See page 27)
1.
Set Network Selection to Cable.
2.
Select Cable Network Setup.
3.
Set Internet Protocol Setup to Auto Setup.
4.
Select Network Test to check the network connectivity.
Cable Network Setup-Manual Setup
To connect the TV to the LAN using a static IP address, you must set up the Internet Protocol (IP). Please check if the LAN cable is
connected. (See page 27)
1.
Set Network Selection to Cable.
2.
Select Cable Network Setup.
3.
Set Internet Protocol Setup to Manual Setup.
4.
Set up IP Address, Subnet Mask, Gateway and DNS Server.
N
Press the number buttons on the remote control when you set the Network manually.
5. Select Network Test to check the network connectivity.
Wireless Network Setup-Auto Setup
The menu is activated only if the ‘Samsung Wireless LAN Adapter for InfoLive’ is connected. (See page 28)
IP sharer to be connected to this product must support DHCP.
1.
Set Network Selection to Wireless.
2.
Select Wireless Network Setup.
3.
Set Internet Protocol Setup to Auto Setup.
4.
Select an AP through Select Access Point.
5.
Select Network Test to check the network connectivity.
Wireless Network Setup-Manual Setup
The menu is activated only if the ‘Samsung Wireless LAN Adapter for InfoLive’ is connected. (See page 28)
1.
Set Network Selection to Wireless.
2.
Select Wireless Network Setup.
3.
Set Internet Protocol Setup to Manual Setup.
4.
Select an AP through Select Access Point.
5.
Select Network Test to check the network connectivity.
English - 30
BN68-01757D-Eng_.indb 30 2008-08-20 오후 7:18:37
Source List / Edit Name
❑
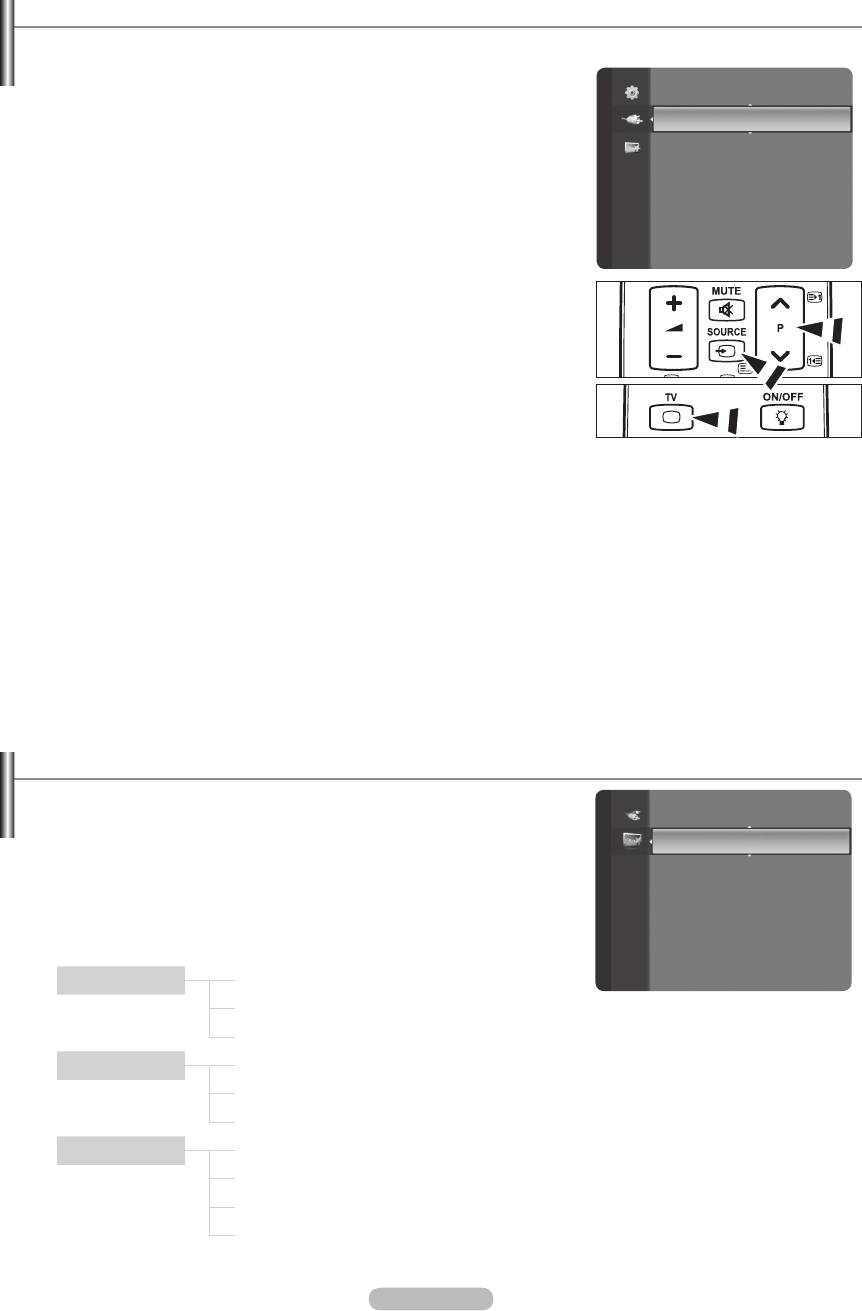
Source List
Use to select TV or other external input sources such as DVD players or Cable
Box / Satellite receivers (Set-Top Box) connected to the TV. Use to select the
Input
input source of your choice.
Source List
TV, Ext.1, Ext.2, AV, S-Video, Component, PC, HDMI1, HDMI2 / DVI,
Edit Name
HDMI3, HDMI4, USB, DLNA.
N
You can choose only those external devices that are connected to the TV.
In the Source List, connected inputs will be highlighted and sorted to the
top. Inputs that are not connected will be sorted to the bottom.
N
Using the Colour buttons on the remote with the Source list
-
Red (Refresh): Refreshes the connecting external devices.
-
TOOLS (Option): Displays the Edit Name and Information menus.
O
Press the SOURCE button on the remote control to view an external signal
source. TV mode can be selected by pressing the TV button, number
buttons (0~9), and the P < / > button on the remote control.
❑
Edit Name
VCR / DVD / Cable STB / Satellite STB / PVR STB / AV Receiver / Game / Camcorder / PC / TV / IPTV / Blu-Ray / HD
DVD / DMA
Name the device connected to the input jacks to make your input source selection easier.
N
When a PC with a resolution of 1920 x 1080@60Hz is connected to the HDMI IN 2 port, you should set the HDMI2 / DVI
mode to PC in the Edit Name of the Input mode.
Product Guide
The Product Guide gives you information on the most important features of this TV.
Content Library
Application
1.
Press the MENU
InfoLive
Application, then press the ENTER
E
button.
2.
Product Guide, then press the ENTER
E
button.
3.
Picture Quality, Entertainment or
Connectivity) and press the ENTER
E
button.
4.
Picture Quality Full HD 1080p
Ultra FilterBright
Real 100Hz(50") / 100Hz Dual Scan(63")
Entertainment InfoLive
Content Library
Entertainment Mode
Connectivity WISELINK Pro
DLNA
4HDMI
Anynet+
5.
Press the EXIT button to exit.
English - 31
BN68-01757D-Eng_.indb 31 2008-08-20 오후 7:18:38
Using the Remote Control Button in Product Guide Menu
Button Operations
Yellow button Shows the contents of the Product Guide sequentially. (AutoPlay)
(Wheel)
Move the cursor and select an item.
ENTER
E
Select the currently selected item.
RETURN Return to the previous menu.
EXIT Stop the current function and return to the Product Guide main menu.
P
,
PRE-CH
Stop Product Guide mode and Returns to TV mode
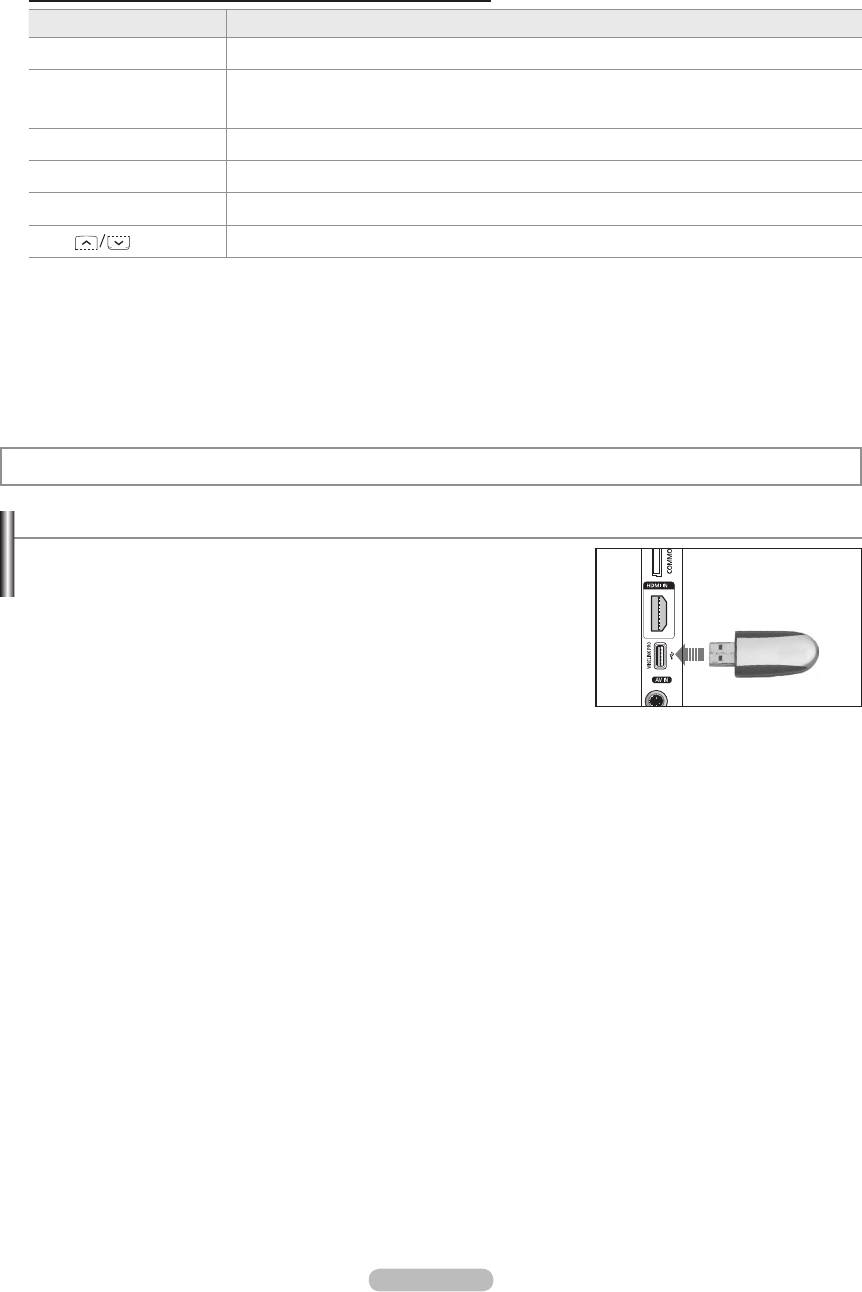
WISELINK Pro
Connecting a USB Device
1. Press the POWER button to turn the TV on.
2.
WISELINK jack (USB jack) on the side of the TV.
N
If you enter the WISELINK Pro mode with no USB device connected the
message ‘No external storage device found. Check the connection status.’
will appear. In this case, insert the USB device, exit the screen by pressing
the W.LINK button on the remote control and enter the WISELINK Pro screen
again.
N
MTP (Media Transfer Protocol) is not supported.
N
N
Certain types of USB Digital camera and audio devices may not be compatible with this TV.
N
WISELINK Pro only supports USB Mass Storage Class devices (MSC). MSC is a Mass Storage Class Bulk-Only Transport
device. Examples of MSC are Thumb drives and Flash Card Readers (Both USB HDD and HUB are not supported.)
N
Please connect directly to the USB port of your TV. If you are using a separate cable connection, there may be a USB
compatibility problem.
N
N
Do not disconnect the USB device while it is loading.
N
N
The sequential JPEG format is supported.
N
The higher the resolution of the image, the longer it takes to display on the screen.
N
The maximum supported JPEG resolution is 15360X8640 pixels.
N
Not Supported File Format message is displayed.
N
not be displayed in the Photo List (or Music List).
N
is a technology that supports the creation of content, the distribution and management of the content in an integrated and
comprehensive way, including the protection of the rights and interests of the content providers, the prevention of the illegal
copying of contents, as well as managing billings and settlements.
N
When moving to a photo, loading may take a few seconds. At this point, the loading icon will appear at the screen.
English - 32
4
TV Side Panel
USB Drive
BN68-01757D-Eng_.indb 32 2008-08-20 오후 7:18:39
English - 33
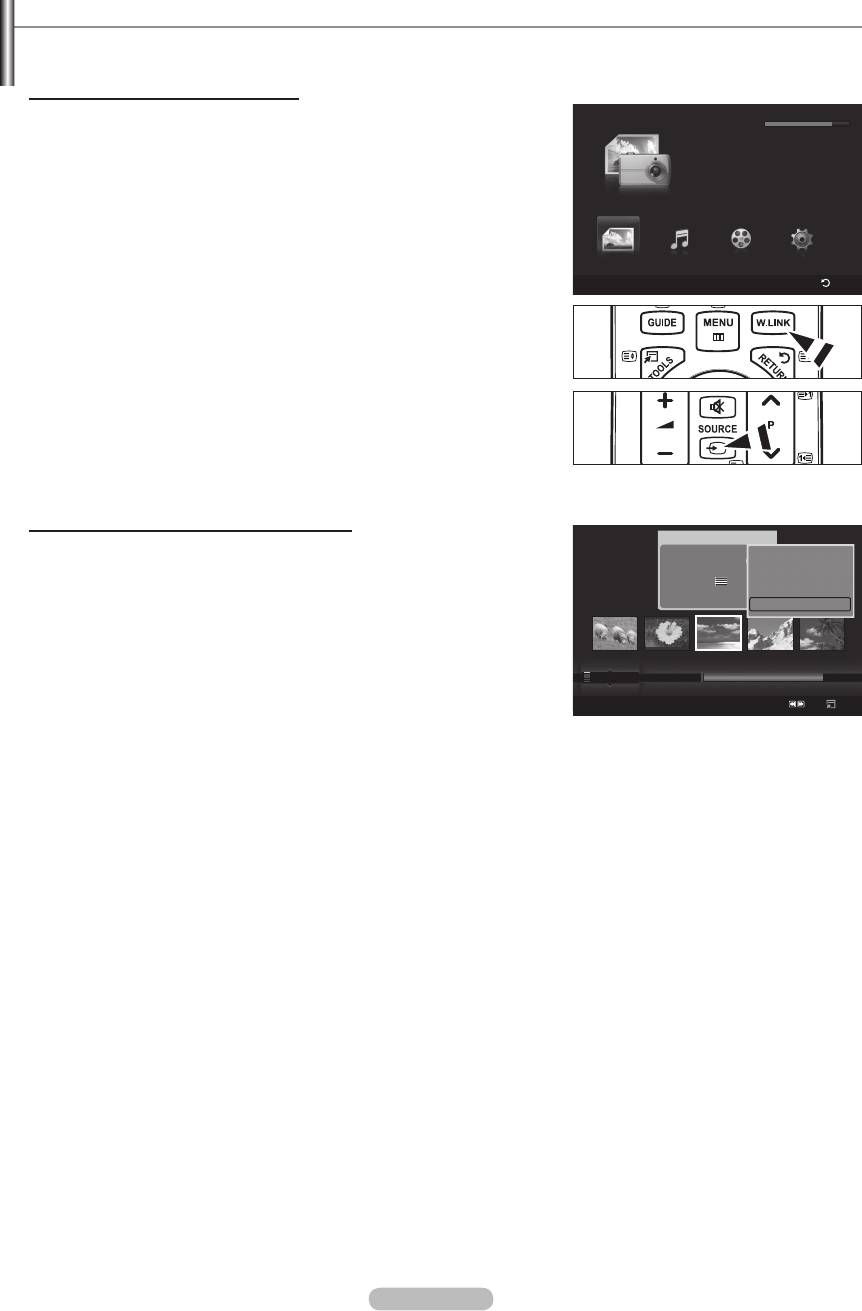
Using the WISELINK Pro Function
Entering the WISELINK Pro Menu
1. Press the MENUApplication, then
WISELINK Pro
SUM
851.98MB/995.00MB Free
press the ENTER
E
button.
2.
WISELINK Pro, then press the ENTER
E
PHOTO
button.
N
The WISELINK Pro menu is displayed.
O
Press the W.LINK button on the remote control to display the WISELINK
Pro menu.
O
Press the SOURCE button on the remote control repeatedly to select USB
Photo
Music Setup
Movie
or DLNA, then press the ENTER
E
button.
SUM
Device
Return
3.
corresponding USB Memory Device (i.e. if connected through a hub). Press the
ENTER
E
button.
N
This function differs depending on the USB Memory Device/ DLNA device
connected to TV.
N
The selected USB device name appears at the bottom left of the screen.
4.
press the ENTER
E
button. To exit WISELINK Pro mode, press the W.LINK
button on the remote control.
N
You can enjoy game movies. (Not support game program)
Removing a USB Memory Device Safely
You can remove the device safely from the TV.
Photo
image_1.jpg
Month : Jan
Date : Jan.01.2008
Play Current Group
1.
Press the TOOLS
Color : Gray
Composition :
Delete
Folder : P-other
Information
Favourites :
★ ★ ★
Remove Safely
2.
Remove Safely, then press the ENTER
E
button.
3.
Remove the USB device from the TV.
Preference
Monthly
Jan Nov
Timeline
SUM
Device
Favourites Settings
Select
Jump
Option
BN68-01757D-Eng_.indb 33 2008-08-20 오후 7:18:41
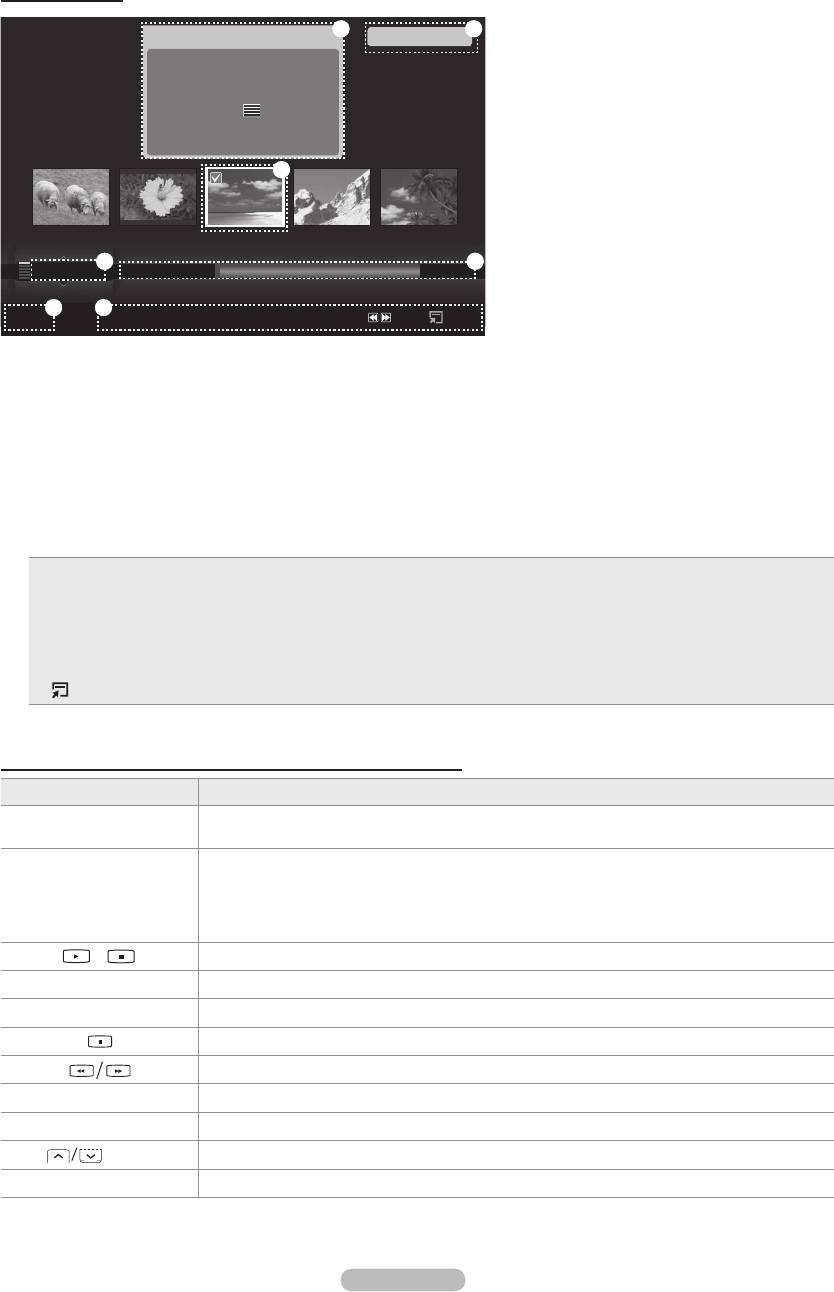
Screen Display
Photo
image_1.jpg
2 6
1File(s) Selected
Month : Jan
Date : Jan.01.2008
Color : Gray
Composition :
Folder : P-other
Favourites :
★ ★ ★
1
Preference
Monthly
3 4
Jan Nov
Timeline
5 7
SUM
Device
Favourites Settings
Select
Jump
Option
1.
2.
3.
4.
View Groups: Shows the sorting groups. The sorting group including the currently selected photo is highlighted.
5.
Current Device: Shows the currently selected device name. Press the Red button to select a device.
6.
Item Selection Information: Shows the number of photos that are selected by pressing the Yellow button.
7.
Help Items
•
Red (Device) button: Selects a connected device.
•
Green
until the desired value appears.
•
Yellow c. Press the yellow button
•
πµ (Jump) button: Jumps to the previous sorting group/Jumps to the next sorting group.
•
TOOLS
(Option) button: Displays the option menus. (The option menu changes according to the current status.)
Using the Remote Control Button in WISELINK Pro Menu
Button Operations
(Wheel)
Move the cursor and select an item.
Select the currently selected item.
ENTER
E
- Pressing the ENTER
E
button during play pauses the play.
- Pressing the ENTER
E
button during pause resumes the play.
RETURN Return to the previous menu.
TOOLS Run various functions from the Photo, Music and Movie menus.
Jump to previous group/Jump to next group.
INFO
W.LINK Exit WISELINK Pro mode.
P
,
PRE-CH
Stop WISELINK Pro mode and Returns to TV mode.
EXIT Stop the current function and return to the WISELINK Pro main menu.
English - 34
BN68-01757D-Eng_.indb 34 2008-08-20 오후 7:18:43
English - 35
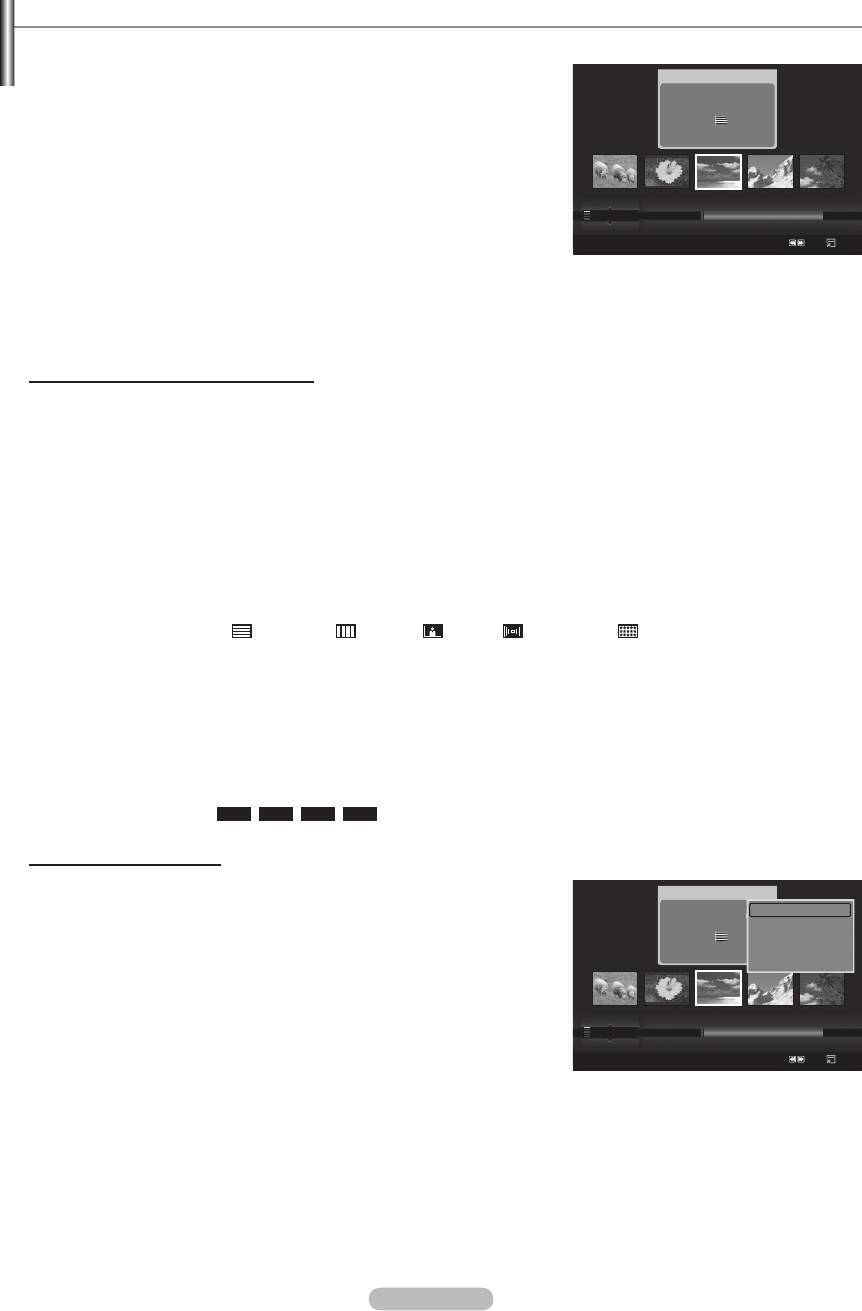
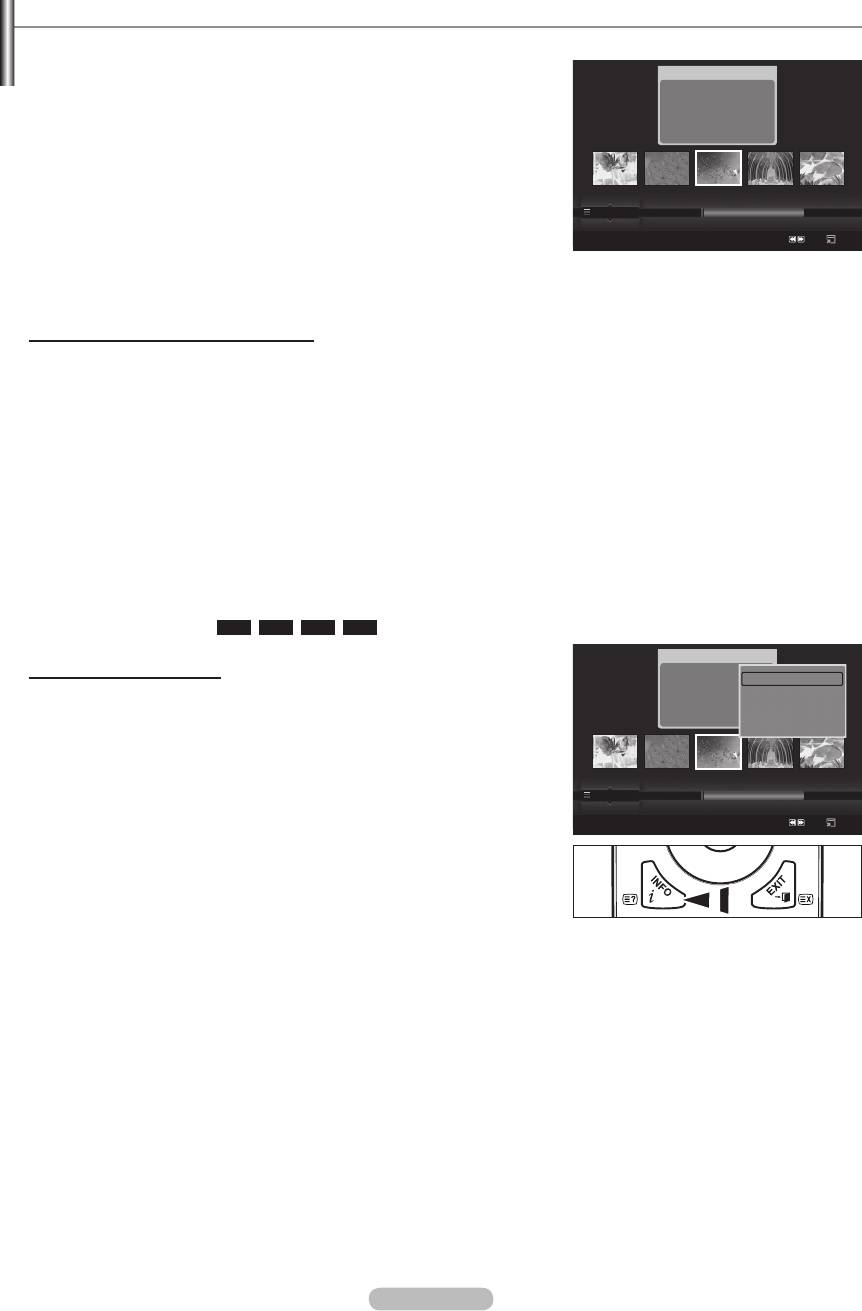
Using and Sorting Photo List
You can sort photos in the Photo List by a particular standard.
1.
Photo
image_1.jpg
N
The photos are sorted according to the newly selected sorting standard.
Month : Jan
Date : Jan.01.2008
N
To move to the previous/next group, press the
π
(REW) or
µ
(FF)
Color : Gray
Composition :
button.
Folder : P-other
Favourites :
★ ★ ★
2.
Press the
∂
(Play)/ENTER
E
button to start the Slide Show in the order
selected by the user.
N
Preference
N
The Color and Composition
Monthly
Jan Nov
may be different from the user’s expectations.
Timeline
SUM
Device
Favourites Settings
Select
Jump
Option
N
Photo information is automatically set. You can change the Color,
Composition, and Favourites.
N
Photos for which information cannot be displayed are set as
.
N
PTP does not support folder sort mode.
Sorting Standard for the Photo List
Monthly
Timeline
It sorts and shows photos by date. It sorts by year and month from the earliest photo.
Color
It sorts photos by color. You can change the photo color information.
N
Color
Composition
It sorts photos by composition. You can change the compositional information of photos.
N
Composition options:
(horizontal), (vertical), (object), (perspective),
Folder
Preference
It Sorts photos by preference (Favourites). You can change the photo preferences.
N
Changing the Favourites Settings.
Select the desired photo in the Photo list, then press the Green button repeatedly until the desired setting appears.
N
Favourites options:
★ ★ ★
,
★ ★ ★
,
★ ★ ★
,
★ ★ ★
Photo List Option Menu
Slide Show
Photo
image_1.jpg
Month : Jan
Date : Jan.01.2008
Slide Show
memory device.
Color : Gray
Play Current Group
Composition :
Folder : P-other
Delete
Play Current Group
Favourites :
★ ★ ★
Information
currently selected sorting group.
Preference
Delete
Monthly
Jan Nov
Timeline
SUM
Device
Favourites Settings
Select
Jump
Option
Change Group
You can change the Color and Composition
N
N
BN68-01757D-Eng_.indb 35 2008-08-20 오후 7:18:45
Information
N
O
Alternatively, select a photo from the photo list and press the INFO button
to view the information.
Remove Safely
You can remove the device safely from the TV.
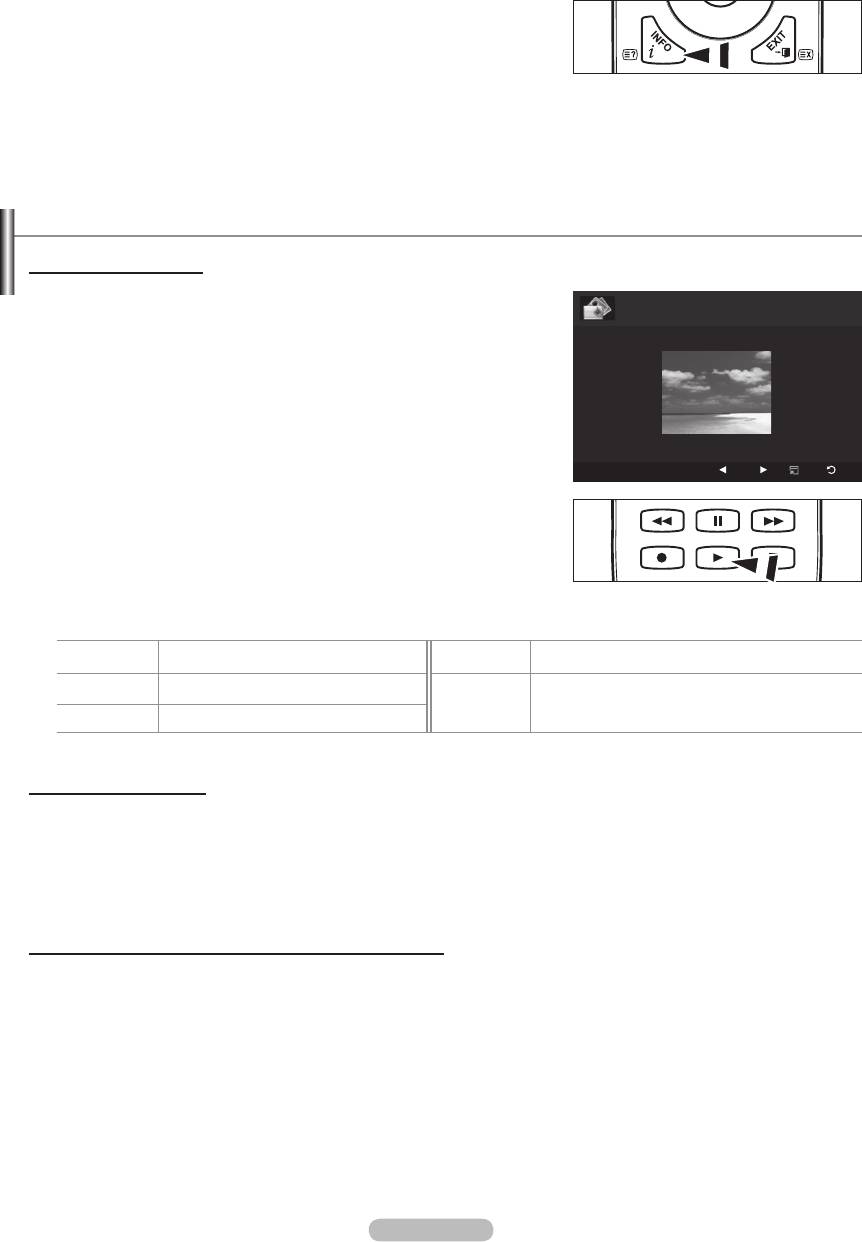
Viewing a Photo or Slide Show
Viewing a Slide Show
1.
Normal
20/22 image_1.jpg 440x440 2.0KB 2008/1/1
2.
Press the TOOLS button.
3.
Slide Show, then press the ENTER
E
button.
N
N
N
The Slide Show progresses in the order sorted in the Photo list.
SUM
E
Pause
Previous
Next
Option
Return
N
Background Music is set to On. (Refer to page 37).
O
While a photo list is displayed, press the
∂
(Play)/ENTER
E
button
on the remote control to start slide show.
N
SlideShow Control Buttons
ENTER
E
Play/Pauses the Slide Show.
∫
Exit Slide Show and return to the photo list.
∂
Play the Slide Show. TOOLS Run various functions from the Photo menus.
∑
Pause the Slide Show.
π
/
µ
Change the SlideShow playing speed.
Playing current group
1. Monthly, Timeline, Color, Composition, Folder, Preference)
2.
Press the
π
(REW) or
µ
(FF) button to select the desired group.
3.
Press the TOOLS button.
4.
Play Current Group, then press the ENTER
E
button.
N
1.
2 .
Press the yellow button. Repeat the above operation to select multiple photos.
N
The
c
mark appears to the left of the selected photo.
N
N
TOOLS button and select Deselect All.
3.
Press the
∂
(Play)/ENTER
E
button.
O
English - 36
BN68-01757D-Eng_.indb 36 2008-08-20 오후 7:18:46

English - 37
Slide Show Option Menu
Stop Slide Show / Start Slide Show
Tools
You can start or stop a SlideShow.
Stop Slide Show
Rotate
Rotate
Zoom
You can rotate photos saved on a USB memory device.
Slide Show Speed : Normal
Background Music : Off
N
Background Music Setting
N
Picture Setting
Sound Setting
Information
Zoom
U
Move
E
Enter
e
Exit
N
To move the enlarged photo image, press the ENTER
E
button, then
is smaller than the original screen size, the location change function
doesn’t work.
N
N
If you have select Rotate, the Zoom deactivated.
Slide Show Speed
You can select the slide show speed.
N
You can select the Slide Show speed only during a slide show.
N
You can also change the speed of the Slide Show by pressing the
π
(REW) or
µ
(FF) button during the Slide Show.
If you set Background Music to On, the background music will be played when viewing photos one by one or in a Slide
Show.
If you set Background Music to On, a screen appears immediately where you can set the Background Music.
Background Music Setting
You can select background music when watching a SlideShow.
N
If you turn off the Background Music, even if the Background Music Settings have been set up, the background music
will not be played.
N
•
•
N
If you set BGM Mode to Mood, you can select a mood.
N
•
Select Music File
N
If you set BGM Mode to Selected File
Picture Setting / Sound Setting
Refer to page 43.
Information
Remove Safely
You can remove the device safely from the TV.
BN68-01757D-Eng_.indb 37 2008-08-20 오후 7:18:46
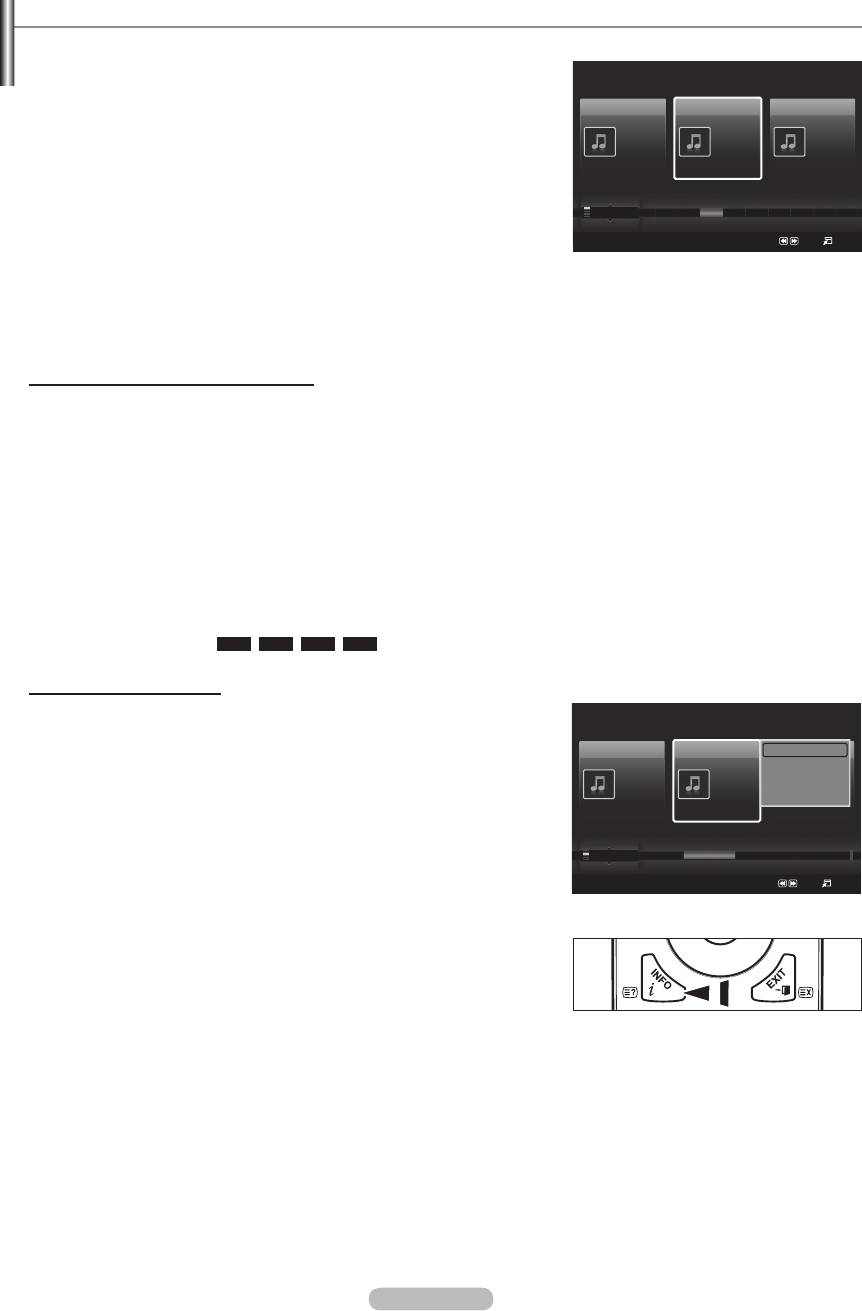
Using and Sorting the Music List
1.
Music
N
Thanks
I Love You
Better than yesterday
N
To move to the previous/next group, press the
π
(REW) or
µ
(FF)
button.
Jee
Darby
Catherine
2005
Album 1
Album 2
Album 3
2.
Press the ENTER
E
button to start playing music in the order selected by
Pop
Pop
2005
2005
Pop
the user.
Energetic ★ ★ ★
Sad ★ ★ ★
Calm ★ ★ ★
N
Preference
Artist
F G H I J L P S T V
N
The Mood
Title
expectations of the user.
SUM
Device
Favourites Settings
Select
Jump
Option
N
Music information is automatically set. You can change the Mood and
Favourites.
N
.
N
N
If no information is available for the Genre, Artist, Album, or Year, the corresponding item is displayed as blank.
Sorting Standard for the Music List
Title: It sorts the Music titles in alphabetical order, and shows the music file.
Artist: It sorts the music file by artist in alphabetical order.
Mood: It sorts music files by the mood. You can change the music mood information.
N
Mood
Genre: It sorts music files by the genre.
Folder: It sorts music files by the folder. If there are many folders in USB, the files are shown in order in each folder.
The music file in the Root folder is shown first and the others are shown in alphabetical order by name.
Preference: It sorts music files by preference (Favourites). You can change the music files preferences.
N
Changing the Favourites Settings
N
N
Favourites options:
★ ★ ★
,
★ ★ ★
,
★ ★ ★
,
★ ★ ★
Music List Option Menu
Play Current Group: Using this menu, you can only play music files in
Music
the currently selected sorting group.
Delete: Using this menu, you can delete the selected music files.
Thanks
I Love You
Play Current Group
Better than yesterday
Darby
Delete
Change Group: You can change the mood information of music files.
Jee
Catherine
Album 1
Change Group
The group information of the current file is updated and the file is
Pop
2005
Album 2
Pop
2005
Information
Pop
2005
Album 3
moved to the new group.
Sad ★ ★ ★
Sad ★ ★ ★
Exciting ★ ★ ★
N
Artist
yellow button.
Mood
Rhythmical Sad Exciting Calm ...
Genre
Information: The music file information including the name, the size,
SUM
Device
Favourites Settings
Select
Jump
Option
the date modified and the path is displayed.
N
the same procedures.
O
INFO
button to view the information.
Remove Safely: You can remove the device safely from the TV.
English - 38
BN68-01757D-Eng_.indb 38 2008-08-20 오후 7:18:47
English - 39
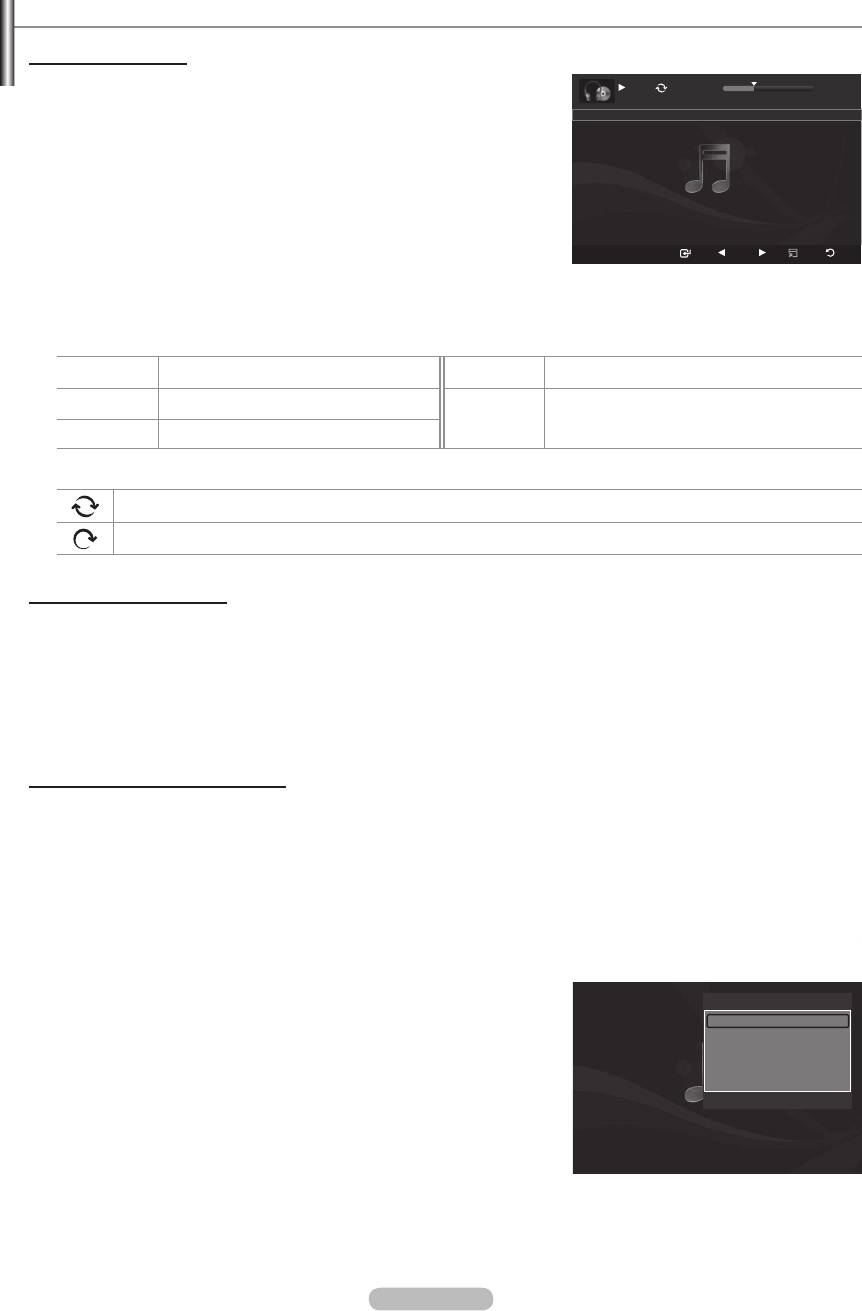
Playing a Music
1.
7/14 00:01:15 00:05:41
2.
Press the
∂
(Play)/ENTER
E
button.
I Love You
N
USB device.
N
π
(REW) or
µ
(FF) buttons do not function during play.
N
N
To adjust the music volume, press the volume button on the remote
control. To mute the sound, press the MUTE button on the remote
SUM
Pause
Previous
Next
Option
Return
control.
N
N
Music Play Control Buttons
ENTER
E
∫
Exit play mode and return to the music list.
∂
TOOLS Run various functions from the Music menus.
∑
N
Music function information icon
Repeat Mode is On.
Repeat Mode is Off.
Playing the music group
1.
(
Title, Artist, Mood, Genre, Folder, Preference)
2.
Press the
π
(REW) or
µ
(FF) button to select the desired group.
3.
Press the TOOLS button.
4.
Play Current Group, then press the ENTER
E
button.
N
1.
2.
N
The
c
3.
Tools
Repeat Mode
Picture Setting
Sound Setting
Information
Remove Safely
U
Move
L
Adjust
e
Exit
BN68-01757D-Eng_.indb 39 2008-08-20 오후 7:18:48
Using and Sorting the Movie List
You can sort movies in the Movie List by a particular standard.
1.
Movie
movie_1.jpg
N
Date : Jan.01.2008
Folder : movie-folder
standard.
Favourites :
★ ★ ★
N
To move to the previous/next group, press the
π
(REW) or
µ
(FF)
button.
N
Movie doesn't support subtitles.
Preference
SYMBOL
ENG
Title
A M
2.
Press the
∂
(Play)/ENTER
E
button to play the movie in the order
Timeline
SUM
Device
Favourites Settings
Select
Jump
Option
selected by the user.
N
The movies are sorted according to the newly selected sorting standard.
N
Movie information is automatically set. You can change the Favorites.
Sorting Standard for the Movie List
Title
It sorts and displays the Movie titles in symbol/Number/alphabet/special order.
Timeline
It sorts and shows movies by date. It sorts by year and month from the earliest movie.
Folder
Preference
It sorts movies by preference. (favourites) You can change the movie preferences.
N
Changing the Favourites Settings
N
Favourites options:
★ ★ ★
,
★ ★ ★
,
★ ★ ★
,
★ ★ ★
Movie
movie_1.jpg
Movie List Option Menu
Date : Jan.01.2008
Folder : movie-folder
Play Current Group
Favourites :
★ ★ ★
Delete
Play Current Group
Information
Remove Safely
sorting group.
Delete
Preference
SYMBOL
ENG
Title
A M
Timeline
Information
SUM
Device
Favourites Settings
Select
Jump
Option
O
INFO
button to view the information.
Remove Safely
You can remove the device safely from the TV.
English - 40
BN68-01757D-Eng_.indb 40 2008-08-20 오후 7:18:50


