Samsung LE-32 N71 B – страница 2
Инструкция к Телевизору Samsung LE-32 N71 B
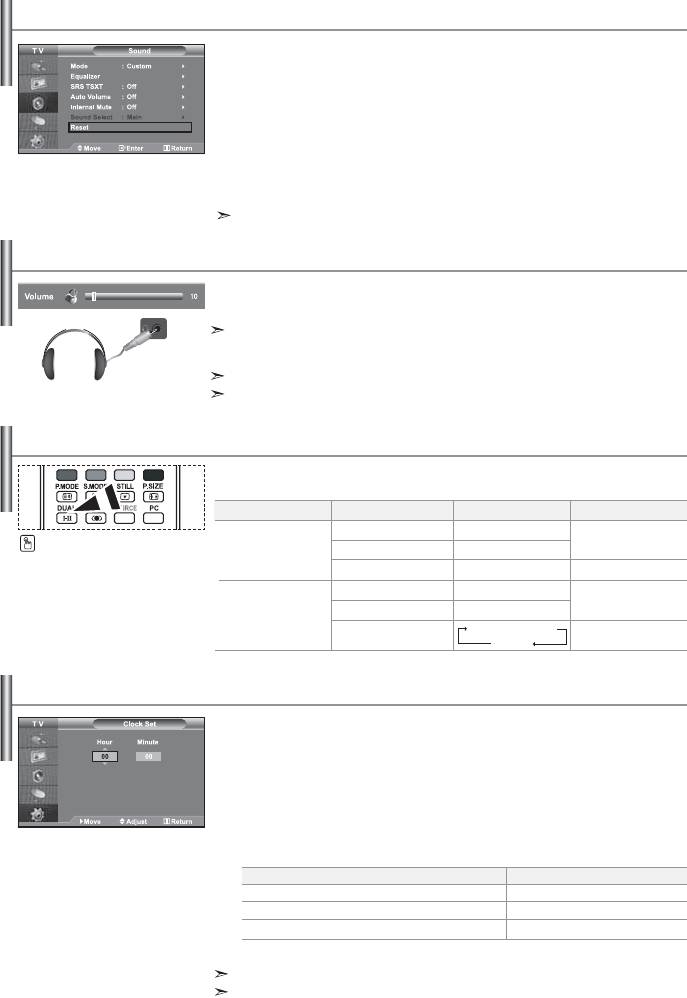
Resetting the Sound Settings to the Factory Defaults
If Game Mode is On, the Reset Sound function is activated. Selecting the Reset
function after setting the equalizer resets the equalizer setting to the factory
defaults.
1. Press the MENU button to display the menu. Press the or button to
select “Sound”, then press the ENTER button.
2. Press the or button to select “Reset”, then press the ENTER button.
3. Press the EXIT button to exit.
You can select this option when the “Game Mode” is set to “On”.
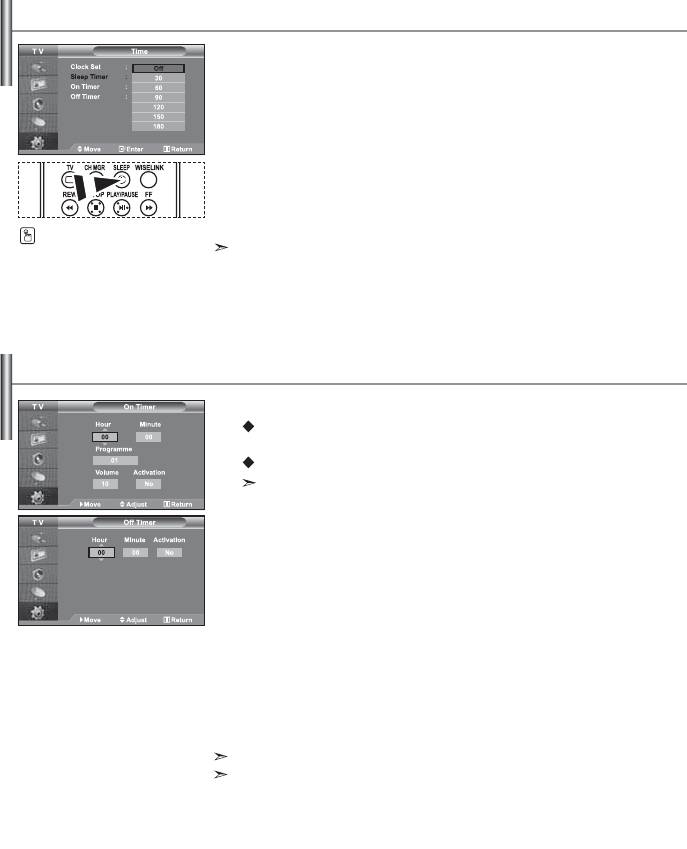
Connecting Headphones
You can connect a set of headphones to your set if you wish to watch a
TV programme without disturbing the other people in the room.
When you insert the head set jack into the corresponding port,
you can operate only "Internal Mute" and "Sound Select" (in PIP mode) in Sound menu.
(Refer to “Selecting the Internal Mute” on page 18)
Prolonged use of headphones at a high volume may damage your hearing.
You will not receive sound from the speakers when you connect headphones to the system.
Selecting the Sound Mode
You can set the sound mode by pressing the “DUAL” button.
When you press it, the current sound mode is displayed on the screen.
Audio Type
DUAL 1/2
Default
Mono
MONO
Automatic
You can also set these options
FM
Stereo
Stereo
STEREO ↔ MONO
change
simply by pressing the DUAL
button on remote control.
Dual
DUAL 1 ↔ DUAL 2
DUAL 1
Mono
MONO
Automatic
NICAM
Stereo
MONO ↔ STEREO
change
Stereo
Dual
MONO ↔ DUAL 1
DUAL 1
DUAL 2
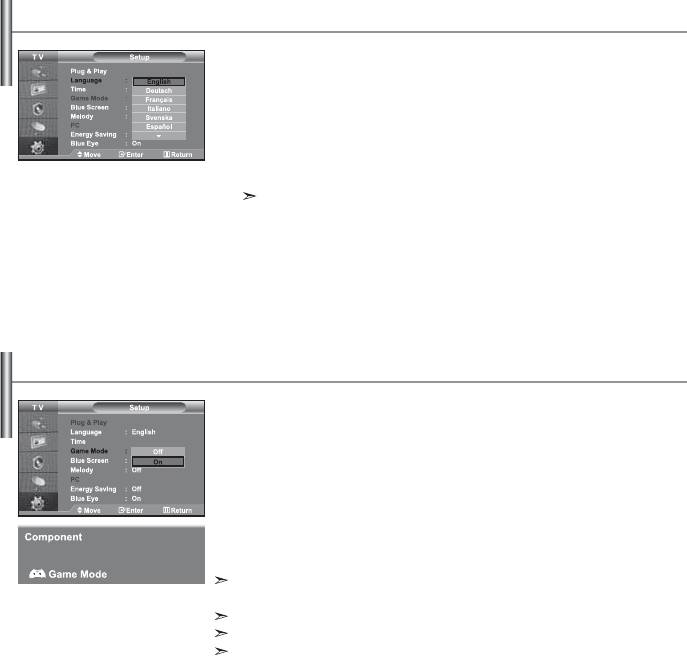
Setting and Displaying the Current Time
You can set the TV’s clock so that the current time is displayed when you press
the INFO button. You must also set the time if you wish to use the automatic
On/Off timers.
1. Press the MENU button to display the menu. Press the or button to
select “Setup”, then press the ENTER button.
2.
Press the or button to select “Time”, then press the
ENTER
button.
3. Press the ENTER button to select “Clock Set”.
4.
To.. .
Press the...
Move to “Hour” or “Minute”
or button.
Set the “Hour” or “Minute”
or button.
Press the ENTER button.
5. Press the EXIT button to exit.
If you disconnect the power cord, you have to set the clock again.
You can also set hour and minute by pressing the number buttons on the remote control.
English-19
Setting the Sleep Timer
You can select a time period of between 30 and 180 minutes after which the televi-
sion automatically switches to standby mode.
1. Press the MENU button to display the menu. Press the or button to
select “Setup”, then press the ENTER button.
2.
Press the or button to select “Time”, then press the
ENTER
button.
3. Press the or button to select “Sleep Timer”, then press the ENTER button.
4. Press the or button repeatedly until the desired time appears
(Off, 30, 60, 90, 120, 150, 180). Press the ENTER button.
5. Press the EXIT button to exit.
Press the SLEEP button on the
remote control repeatedly until
The TV automatically switches to standby mode when the timer reaches 0.
the appropriate time interval
appears.
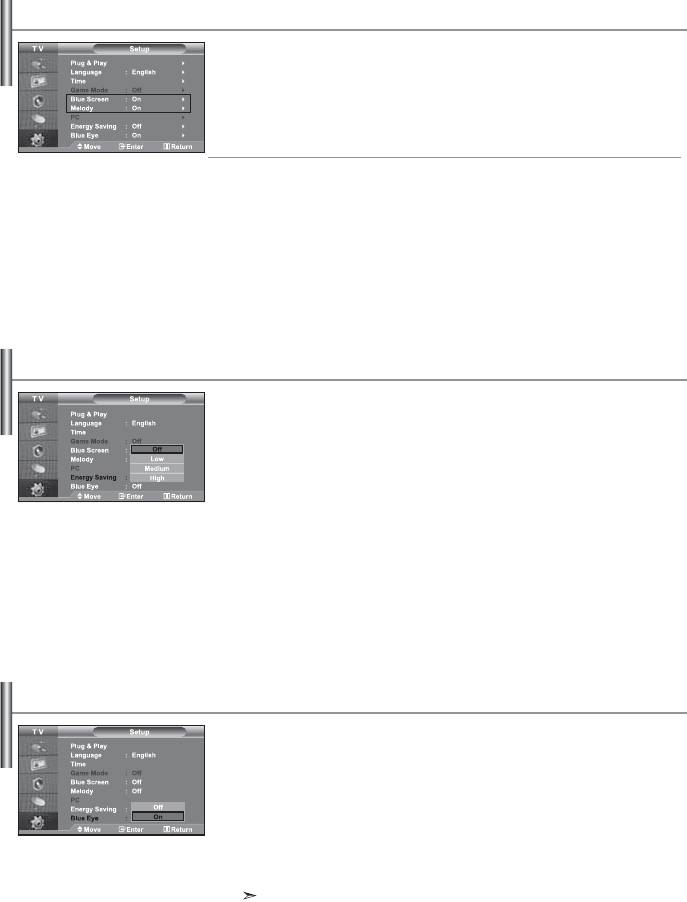
Switching the Television On and Off Automatically
You can set the On/Off timers so that the set will:
Switch on automatically and tune to the channel of your choice at
the time you select.
Switch off automatically at the time you select.
The first step is to set the television’s clock.
1. Press the MENU button to display the menu. Press the or button to
select “Setup”, then press the ENTER button.
2. Press the or button to select “Time”, then press the ENTER button.
3. Press the or button to select “On Timer”, then press the ENTER button.
4. Press the or button to adjust “Hour”, then press the button to
move to the next step. Set other items using the same method as above.
When finished, press the ENTER button to return.
5. Press the or button to select “Off Timer”, then press the ENTER button.
6. Press the or button to adjust “Hour”, then press the button to
move to the next step. Set other items using the same method as above.
When finished, press the ENTER button to return.
7. Press the EXIT button to exit.
You can also set hour and minute by pressing the number buttons on the remote control.
The "Activation" setting must be set to "Yes" in order for the timers to work.
English-20
Choosing Your Language
When you start using your set for the first time, you must select the
language which will be used for displaying menus and indications.
1. Press the MENU button to display the on-screen menu.
Press the or button to select “Setup”, then press the ENTER button.
2. Press the or button to select “Language”, then press the ENTER button.
3. Select a particular language by pressing the or button repeatedly.
Press the
ENTER button.
You can choose one of 21 languages.
4. Press the EXIT button to exit.
Using Game Mode
When connecting to a game console such as PlayStation
TM
or Xbox
TM
,
you can enjoy a more realistic gaming experience by selecting game menu.
1. Press the MENU button to display the menu. Press the or button to
select “Setup”, then press the ENTER button.
2. Press the or button to select “Game Mode”, then press the
ENTER button.
3.
Press the or button to select “On” or “Off”. Press the
ENTER
button.
4. Press the EXIT button to exit.
To disconnect the game console and connect another external device, set Game to Off in the
setup menu.
If you display the TV menu in Game mode, the screen shakes slightly.
Game Mode is not available in TV mode.
If Game Mode is On:
• Picture Mode and Sound Mode are automatically changed to Custom and users can
not change the mode.
• Adjust the sound using the equalizer.
• The Reset Sound function is activated. Selecting the Reset function after setting the
equalizer resets the equalizer setting to the factory defaults.
English-21
Setting the Blue Screen Mode / Selecting the Melody
Blue Screen:
If no signal is being received or the signal is very weak, a blue screen automatically
replaces the noisy picture background. If you wish to continue viewing the poor pic-
ture, you must set the "Blue Screen" mode to "Off".
Melody:
You can hear melody sound when the television is powered on or off.
1. Press the MENU button to display the menu. Press the or button to
select “Setup”, then press the ENTER button.
2. Press the or button to select “Blue Screen” or “Melody”.
Press the ENTER button.
3.
Press the or button to select “On” or “Off”.
Press the
ENTER
button.
4. Press the EXIT button to exit.
Using the Energy Saving Feature
This function adjusts the brightness of the TV so as to reduce power consumption.
When you watching TV at night, set the "Energy Saving " mode option to "High" so
as to reduce the dazzling of your eyes as well as the power consumption.
1. Press the MENU button to display the on-screen menu.
Press the or button to select “Setup”, then press the ENTER button.
2. Press the or button to select “Energy Saving”,
then press the ENTER button.
3. Select the required option (Off, Low, Medium, High) by pressing
the or button. Press the ENTER button.
4. Press the EXIT button to exit.
Setting the Blue Eye
You can set the power of Blue LED to be on. If the power is off when
Blue Eye TV is off, the Blue LED goes off. This will save power and reduce eye
fatigue.
1. Press the MENU button to display the on-screen menu.
Press the or button to select “Setup”, then press the ENTER button.
2. Press the or button to select “Blue Eye”,
then press the ENTER button.
3.
Press the or button to select “On” or “Off”. Press the
ENTER
button.
Off: LED(Blue) will not come on.
On: LED(Blue) will come on after you turn the TV off.
4. Press the EXIT button to exit.
English-22
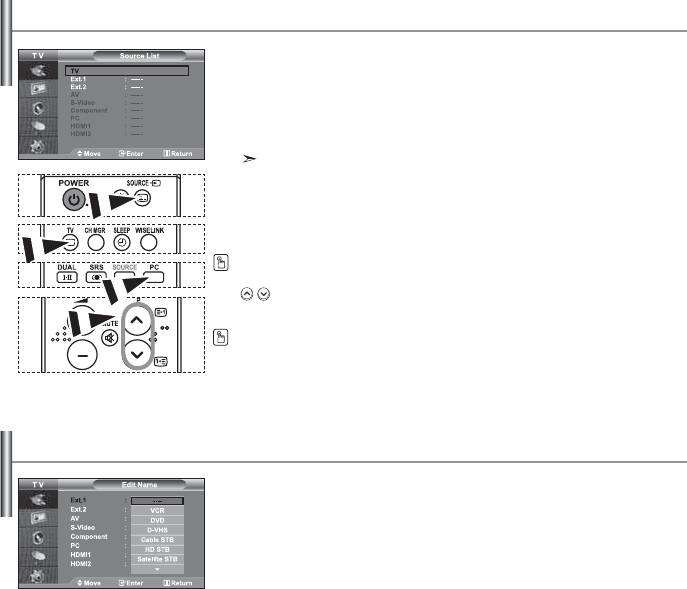
Selecting the Source
You can select among external sources connected to
your TV’s input jacks.
1. Press the MENU button to display the menu.
Press the ENTER button, to select “Input”.
2. Press the ENTER button again, to select “Source List”.
When no external device is connected to your set, only “TV”, “Ext.1”, “Ext.2” are
activated in the “Source List”. “AV”, “S-Video”, “Component”, “PC”,
“HDMI1” , “HDMI2” are activated only when they are connected to your set.
3. Select the required device by pressing the or button.
Press the ENTER button.
Press the SOURCE button on the remote control to toggel between all the available source.
TV mode can be selected by pressing the
TV
button, number buttons(0~9), and the
P
/
button on the remote control. But it cannot be selected using the SOURCE button.
You can select PC mode by simply pressing the PC button on the remote control.
Editing the Input Source Names
Name the device connected to the input jacks to make your input source selec-
tion easier.
1. Press the MENU button to display the menu.
Press the ENTER button, to select “Input”.
2. Press the or button to select “Edit Name”, then press the ENTER button.
3. Press the or button to select the device that you wish to edit.
Press the ENTER button.
4. Press the or button to select the required device.
Press the ENTER button.
5. Press the EXIT button to exit.
English-23
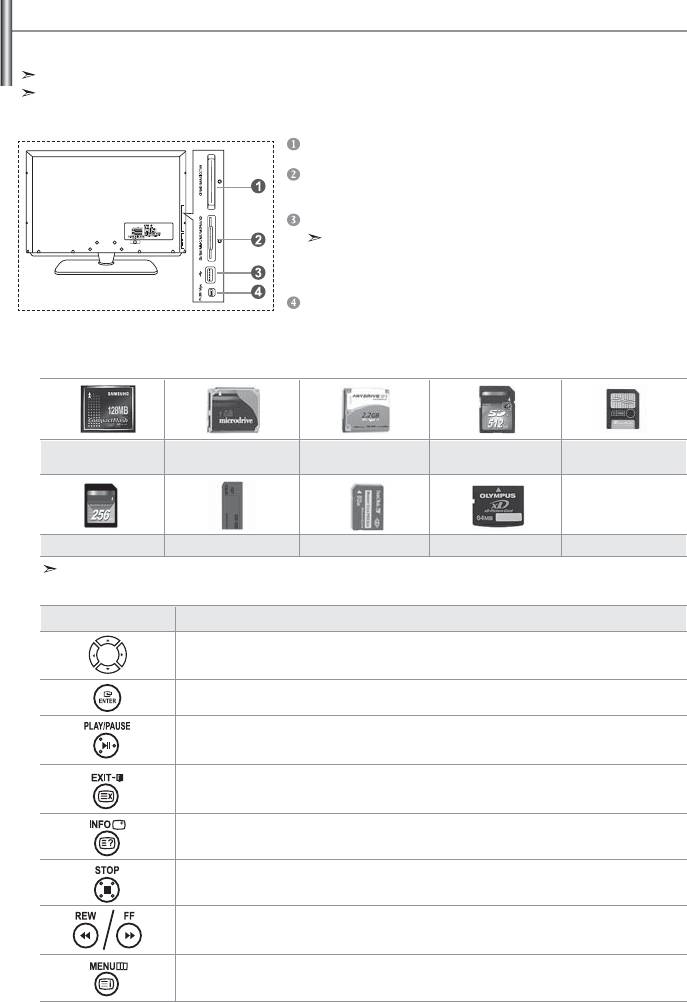
Using the WISELINK Function
You can view stored photos (JPEG files) or play music files (MP3) using a memory card or USB storage media.
The "Photo" menu supports image files in the JPEG format only.
The "Music" menu supports sound files in the MP3 format only.
Compact Flash (CF) / Micro Driver (MD) / MAGICSTOR
Secure Digital Card (SD Card) / Smart Media Card (SM) /
Multimedia Card (MMC) / Memory Stick / MSPRO / XD
USB Mass Storage Class
The USB hub type is not available becuase using the
Half-Speed USB can cause the hardware limitation.
(Only the Full-Speed USB is available.)
Photo Printer
1. First, connect the memory card or USB storage media containing your files to the WISELINK terminal
on the side of the TV.
Supported Memory Cards
Compact Flash (CF) Micro Driver (MD) MAGICSTOR Secure Digital Card
Smart Media Card
(SD Card)
Multimedia Card (MMC) Memory Stick MSPRO XD
Some types of Memory Cards or USB hosts, depending on the manufacturer, may not be supported.
2. Using the Remote Control Button in WISELINK Menu
Button Operations
Move the cursor and select an item.
Select the currently selected item.
Play or pause the Slide Show or MP3 file.
Stop the current function and return to the previous high-level menu.
Run various functions from the Photo and Music menus.
Stop the current slide show or MP3 file.
Page Up or Down (file list item)
Return to the previous menu
English-24
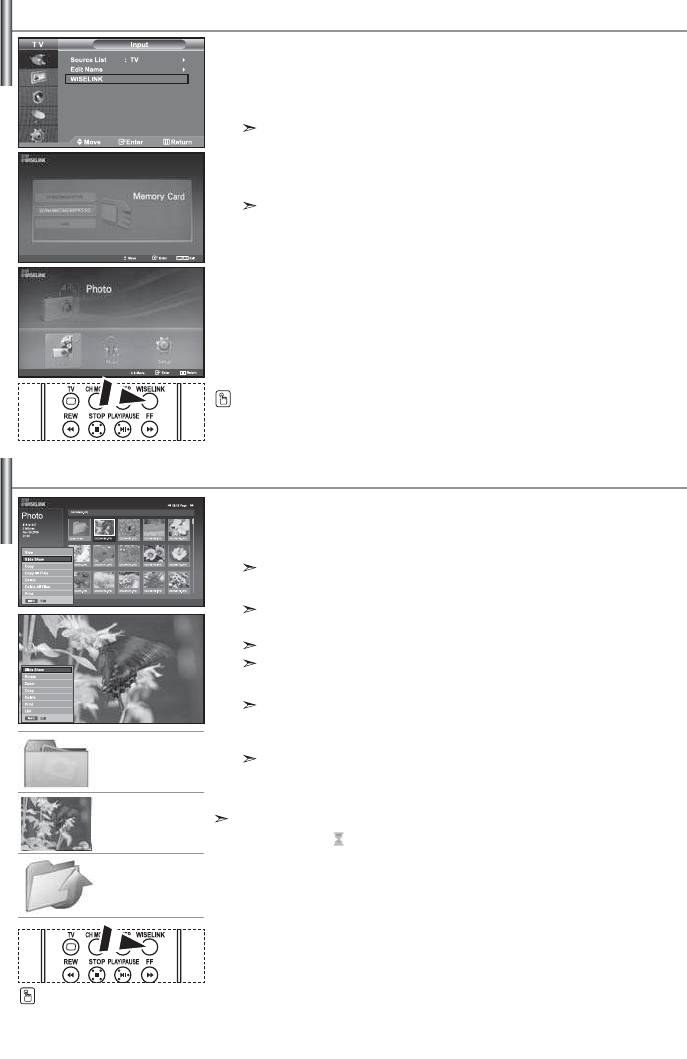
Using the WISELINK Menu
This menu shows JPEG and MP3 files and folders saved on a memory card.
1. Press the MENU button to display the menu.
Press the ENTER button, to select “Input”.
2. Press the or button to select “WISELINK”, then press the ENTER button.
If the "Insert memory cards." message is displayed, check whether the memory card
is correctly inserted into the WISELINK terminal on the side of the TV.
3. Press the or button to select the corresponding Memory Card,
then press the ENTER button.
A menu for selecting the format of the files saved on the selected
Memory Card will be displayed.
4. Press the or button to move to an item,
then press the ENTER button.
5. To exit WISELINK, press the WISELINK button on the remote control.
You can select these options by simply pressing the WISELINK button on the
remote control.
Using the PHOTO (JPEG) List
This menu shows JPEG files and folders saved on a memory card.
1. Complete Steps 1 to 4 of "Using the WISELINK Menu".
2. Press the or button to select “Photo”, then press the ENTER button.
The saved file information is displayed as a folder or file.
3. Press the ,, and buttons to select a file, then press the ENTER button.
Pressing the button over a photo icon shows the currently selected
photo in full screen.
Pressing the button over a folder icon shows the JPEG files included in the folder.
The Menu is displayed. Select the View option to display a photo in the aspect ratio.
4. Press the INFO button to configure the options.
When the Photo List screen is displayed:
"View", "Slide Show", "Copy", "Copy All files",
"Delete", "Delete All Files", "Print"
folder icon
When a full screen is displayed:
"Slide Show", "Rotate", "Zoom", "Copy", "Delete", "Print", "List"
5. To exit WISELINK, press the WISELINK button on the remote control.
photo icon
• Moving to another photo may take a few seconds to load the file.
At this point, the
icon will appear at the top left of the screen.
• This menu only shows files whose file extension is JPEG.
Move to the previous
Files of other formats such as bmp or tiff will not be displayed.
folder stage icon
• The files are displayed on a page. 15 thumbnail photos are displayed per page.
•
The thumbnails are numbered from left to right and from top to bottom, from 1 to 15.
• Folders are displayed first and they are followed by all JPEG files in the current folder.
The folders and JPEG files are sorted in alphabetical order.
You can select these options
by simply pressing the WISELINK
English-25
button on the remote control.
Using the Options Menu
"Slide Show":
Starts a slide show.
(Refer to “Selecting a Photo and Slide Show” on page 27)
"Rotate":
You can rotate images in full screen mode.
Images are rotated in the order of 90°, 180°, 270° and 0° (original state).
(Refer to “Rotating” on page 28)
You cannot save a rotated image.
"Zoom":
You can zoom into images in full screen mode.
Images are zoomed in on in the order of X2, X3, X4 and X1 (original size).
(Refer to “Zooming-in” on page 29)
You cannot save a zoomed-in on image.
"Copy", "Copy All files":
You can copy image files to a different memory card.
(Refer to “Copying Image Files” on page 30)
"Delete", " Delete All Files":
You can delete selected image files.
(Refer to “Deleting Image Files” on page 30)
"Print":
You can print image files directly with your printer.
(Refer to “Printing a Photo” on page 31)
"List":
Displays the stored files and folders and file info.
The “File Error” message appears on the screen in the following situations:
•
When the file actually has an error
•
If the target memory cannot be writtien to when copying files
•
If the target memory has not enough space when copying files
English-26
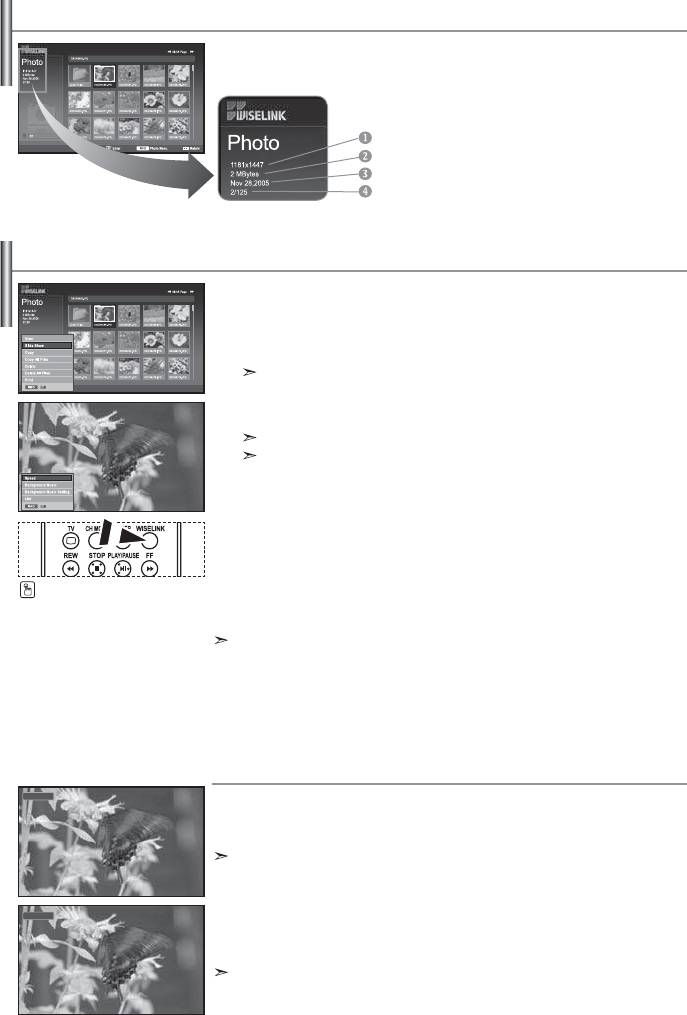
Viewing Photo File Information
When selecting a photo file, the photo file information is displayed on the left
in the TV screen, such as the resolution, the date modified and the order of the
file in the current directory.
Such as the resolution
File size
Date modified
Order of the file in the current directory
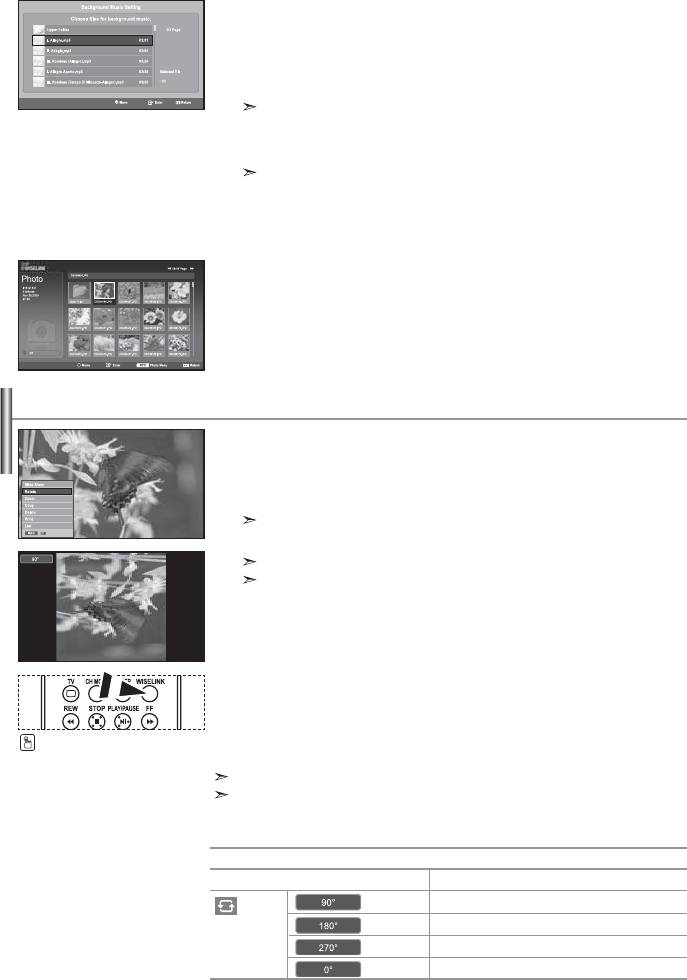
Selecting a Photo and Slide Show
This menu shows JPEG files and folders saved on a memory card.
1. Complete Steps 1 to 4 of "Using the WISELINK Menu".
(Refer to page 25)
2. Press the or button to select “Photo”, then press the ENTER button.
The saved file information is displayed as a folder or file.
3. Press the INFO button.
4. Press the or
button to select “Slide Show”, then press the ENTER button.
The Menu is displayed. Select the View option to display a photo in the aspect ratio.
• Slide Show all files in the selected folder at a predetermined interval.
• During the Slide Show, files are displayed in order from the currently shown file.
5. Press the INFO button during “Slide Show” to set the option
("Speed", "Background Music, "Background Music Setting", "List").
Press the
or
button to select the option, then press the
ENTER
button.
6. To change the sub option, press the INFO button again to open the options
window and select option you want to change, then press the ENTER
You can select these options
button. Whenever you do this, the sub option on the screen is changed.
by simply pressing the WISELINK
button on the remote control.
7. To exit WISELINK, press the WISELINK button on the remote control.
If the Slide Show feature is selected when a photo is displayed in full screen,
other photos are also in the full screen size during the Slide Show.
Using the Menu during a Slide Show
Normal
"Speed":
Select to control the slide show speed.
Press the ENTER button to select the option "Normal", "Slow", or "Fast".
When the Speed feature is set to the Fast option, usually it takes about 7 seconds to slide to
the next photo. The loading time may be longer depends on the size of the file.
On
"Background Music":
Select to determine whether to play an MP3 file during a slide show.
Press the ENTER button to select the option "On" or "Off".
Set the Background Music Seetings first to use the “On” or “Off” function in this menu.
English-27
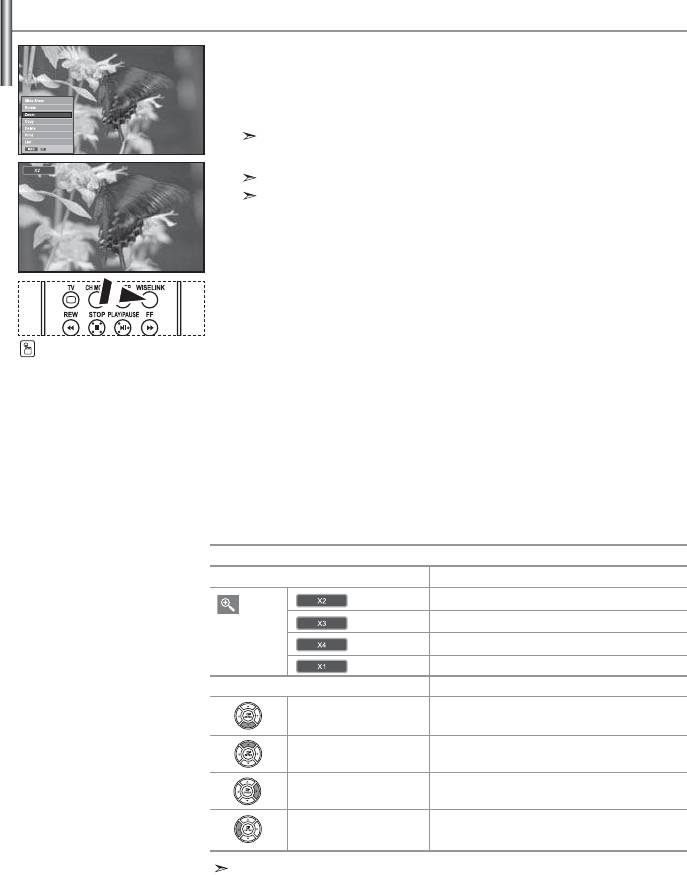
"Background Music Setting":
The saved file information is displayed as folder or MP3 file.
1. Select the "Background Music Settings" and press the ENTER button.
Navigate to the folder that contains the MP3 files to use as the
background music. Select an MP3 file and press ENTER button.
The selected file is displayed in yellow.
2. MENU button again to return to the Slide Show screen.
The selected background music is played.
• If you turn Off the Background Music, even if the Background Music Settings
have been set up, the background music will not be played.
• MP3 files can be automatically played during the Slide Show if the Default
Background Music is set to On. To enable this function, MP3 files and
other photo files must be located in the same folder.
"List":
Displays the stored files and folders and file info.
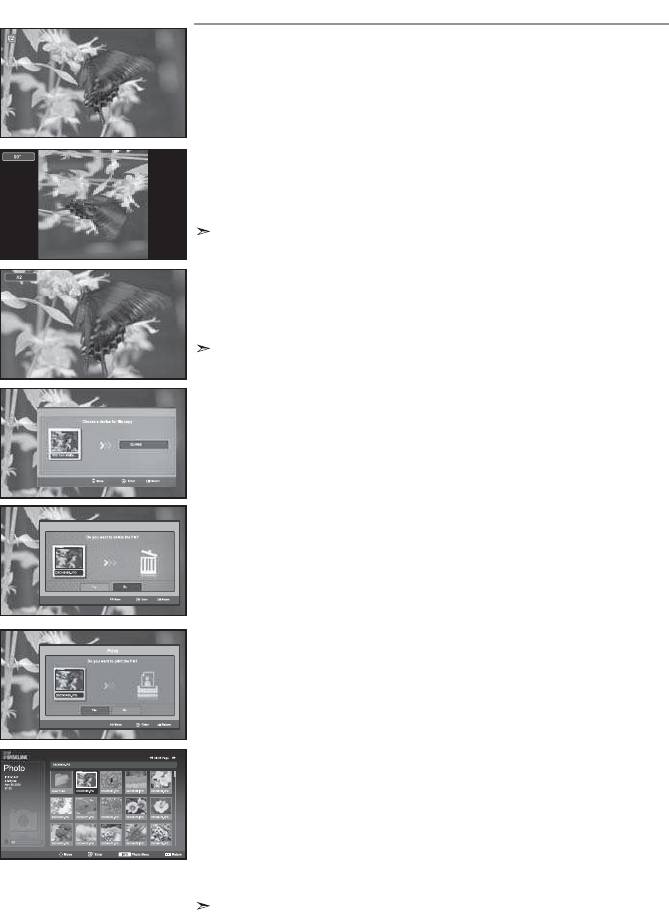
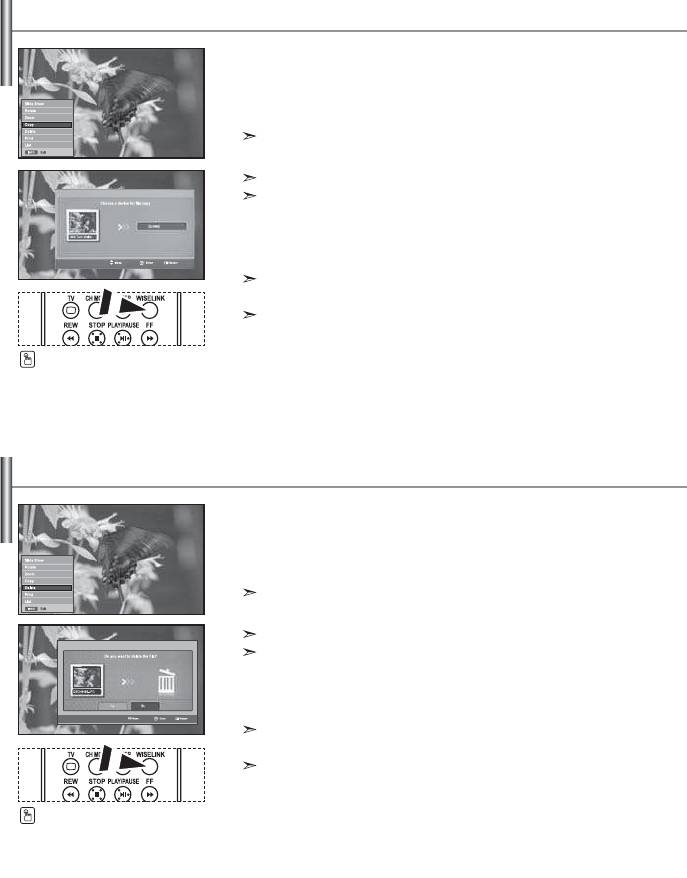
Rotating
Displays a 90°, 180°, or 270° rotated image in full screen mode.
1. Complete Steps 1 to 4 of "Using the WISELINK Menu".
(Refer to page 25)
2. Press the or button to select “Photo”, then press the ENTER button.
The saved file information is displayed as a folder or file.
3. Press the ,, and buttons to select a file, then press the ENTER button.
Pressing the button over a photo thumbnail displays the photo in full screen.
The Menu is displayed. Select the View option to display a photo in the aspect ratio.
4. Press the INFO button to display the option
("Slide Show", "Rotate", "Zoom", "Copy", "Delete", "Print", "List").
Press the or button to select “Rotate”, then press the
ENTER button. Press the ENTER button to select the option
(90°, 180°, 270°, 0°(Original))
To rotate a photo, press the INFO button to open the options window,
select the “Rotate” option and press the ENTER button.
Whenever you do this, the photo on the screen is gradually rotated.
You can select these options
by simply pressing the WISELINK
5. To exit WISELINK, press the WISELINK button on the remote control.
button on the remote control.
The rotated file is not saved.
This feature is also available for the photo in the aspect ratio.
The Rotating function information
Current OSD
Function
To rotate a photo by 90 degrees
To rotate a photo by 180 degrees
To rotate a photo by 270 degrees
To rotate a photo by original
English-28
Zooming-in
Displays a 2x, 3x or 4x zoomed-in image in full screen mode.
1. Complete Steps 1 to 4 of "Using the WISELINK Menu".
(Refer to page 25)
2. Press the or button to select “Photo”, then press the ENTER button.
The saved file information is displayed as a folder or file.
3. Press the ,, and buttons to select a file, then press the ENTER button.
Pressing the button over a photo thumbnail displays the photo in full screen.
The Menu is displayed. Select the View option to display a photo in the aspect ratio.
4. Press the INFO button to display the option
("Slide Show", "Rotate", "Zoom", "Copy", "Delete", "Print", "List").
Press the or button to select “Zoom”, then press the
ENTER button. Press the ENTER button to select the option
("X2", "X3", "X4", "X1").
To zoom into a photo, press the INFO button to open the Options window,
select the “Zoom” option and press the ENTER button.
You can select these options
Whenever you do this, the following zoom options are applied in
by simply pressing the WISELINK
sequence.
button on the remote control.
• X2: Zoom-in to the photo X2.
• X3: Zoom-in to the photo X3.
• X4: Zoom-in to the photo X4.
• X1: Restore the photo to its original size.
To move to pan up/down/left/right, press the ,, and buttons.
5. To exit WISELINK, press the WISELINK button on the remote control.
Zoom function information
Current OSD
Function
Zoom-in to a photo X2.
Zoom-in to a photo X3.
Zoom-in to a photo X4.
Restore a photo to its original size.
Button
Function
Pan Down
Pan down to view the lower
part of a zoomed-in photo.
Pan Up
Pan up to view the upper part
of a zoomed-in photo.
Pan Right
Pan right to view the right side
of a zoomed-in photo.
Pan Left
Pan left to view the left side of a
zoomed-in photo.
This feature is also available for the photo in the aspect ratio.
English-29
Copying Image Files
You can copy image files to a different memory card.
1. Complete Steps 1 to 4 of "Using the WISELINK Menu".
(Refer to page 25)
2. Press the or button to select “Photo”, then press the ENTER button.
The saved file information is displayed as a folder or file.
3. Press the ,, and buttons to select a file, then press the ENTER button.
Pressing the button over a photo thumbnail displays the photo in full screen.
The Menu is displayed. Select the View option to display a photo in the aspect ratio.
4. Press the INFO button to display the option
("Slide Show", "Rotate", "Zoom", "Copy", "Delete", "Print", "List").
Press the or button to select “Copy”, then press the ENTER button.
To copy all photos, select the INFO button in the Photo List screen and
then select the "Copy All Files" menu.
If there is no target memory card inserted, the “There is no device connected.”
message is displayed and no operation follows.
You can select these options
5. To exit WISELINK, press the WISELINK button on the remote control.
by simply pressing the WISELINK
button on the remote control.
Deleting Image Files
You can delete selected image files.
1. Complete Steps 1 to 4 of "Using the WISELINK Menu".
(Refer to page 25)
2. Press the or button to select “Photo”, then press the ENTER button.
The saved file information is displayed as a folder or file.
3. Press the ,, and buttons to select a file, then press the ENTER button.
Pressing the button over a photo thumbnail displays the photo in full screen.
The Menu is displayed. Select the View option to display a photo in the aspect ratio.
4. Press the INFO button to display the option
("Slide Show", "Rotate", "Zoom", "Copy", "Delete", "Print", "List").
Press the or button to select “Delete”, then press the ENTER button.
To delete all photos, select the INFO button in the Photo List screen and
then select the "Delete All Files" menu.
When selecting the “Delete” or “Delete All Files” menu, an OSD screen
is displayed to confirm the deletion. To cancel the deletion, select “No.”
You can select these options
5. To exit WISELINK, press the WISELINK button on the remote control.
by simply pressing the WISELINK
button on the remote control.
English-30
Printing a Photo
You can print image files directly with your printer.
1. Complete Steps 1 to 4 of "Using the WISELINK Menu".
(Refer to page 25)
2. Press the or button to select “Photo”, then press the ENTER button.
The saved file information is displayed as a folder or file.
3. Press the ,, and buttons to select a file, then press the ENTER button.
Pressing the button over a photo thumbnail displays the photo in full screen.
The Menu is displayed. Select the View option to display a photo in the aspect ratio.
4. Press the INFO button to display the option
You can select these options
("Slide Show", "Rotate", "Zoom", "Copy", "Delete", "Print", "List").
by simply pressing the WISELINK
Press the or button to select “Print”, then press the ENTER button.
button on the remote control.
If no printer is connected, the "Check the printer" message is displayed
and no operation follows.
5. To exit WISELINK, press the WISELINK button on the remote control.
Connect to the photo printer with the PictBridge feature to print pictures.
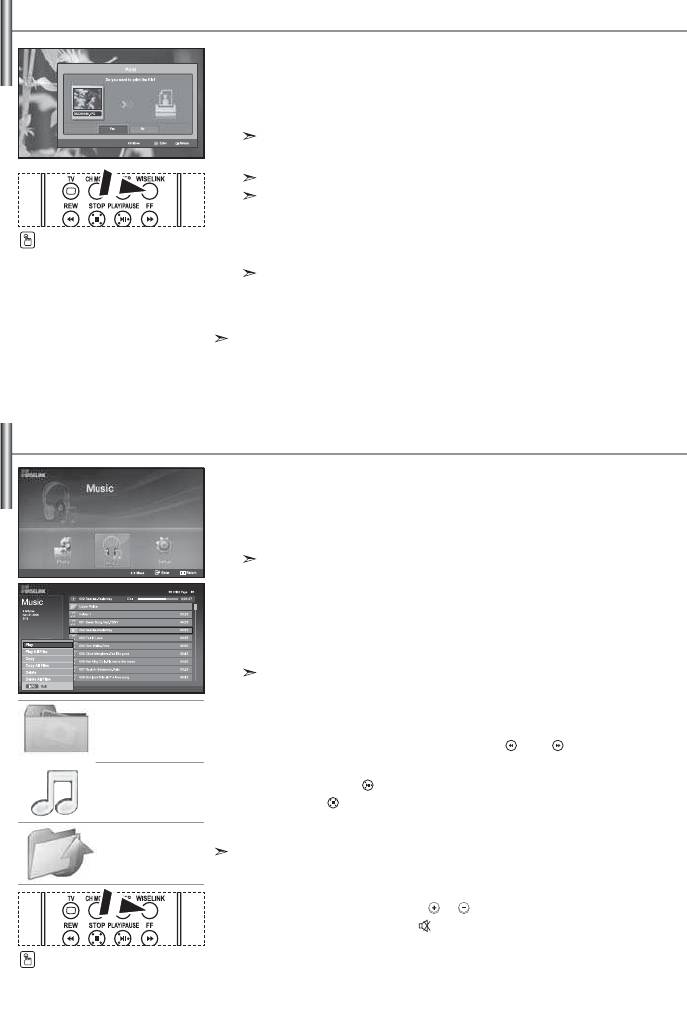
Using the MP3 List
This menu shows MP3 files from among the files saved on the memory card.
1. Complete Steps 1 to 4 of "Using the WISELINK Menu".
(Refer to page 25)
2. Press the or button to select “Music”, then press the ENTER button.
The saved file information is displayed as a folder or file.
3. Press the or button to select a file, then press the ENTER button.
To select all files or a file, press the INFO button to display
the Music menus. ("Play", "Play All Files", "Copy", "Copy All Files",
"Delete", "Delete All Files")
Press the ENTER button to select “Play All Files” or “Play”.
• Pressing the ENTER button over a musical note icon immediately plays the music
file.
• Pressing the ENTER button over a folder icon shows the music files included
folder icon
in the folder
.
To select a file on the next page, press the REW or FF button
to move to the next page.
musical note icon
4.
Press the PLAY/PAUSE button while playing an MP3 file to pause the file.
Press the STOP button to exit Play mode.
5. To exit WISELINK, press the WISELINK button on the remote control.
Move to the previous
• This menu only shows files with the MP3 file extension. Files with other file
folder stage icon
extensions are not displayed, even if they are saved on the same memory card.
• The selected file is displayed on the top with its playing time.
• To adjust the music volume, press the
or
button on the remote control.
To mute the sound, press the MUTE
button on the remote control.
You can select these options
by simply pressing the WISELINK
button on the remote control.
English-31
Music function information
Current OSD
Function
(Music) Play/Pause
When pressing the PLAY/PAUSE
button on the
remote control while music is playing.
(Music) Stop
When pressing the STOP
button on the remote
control when music is stopped.
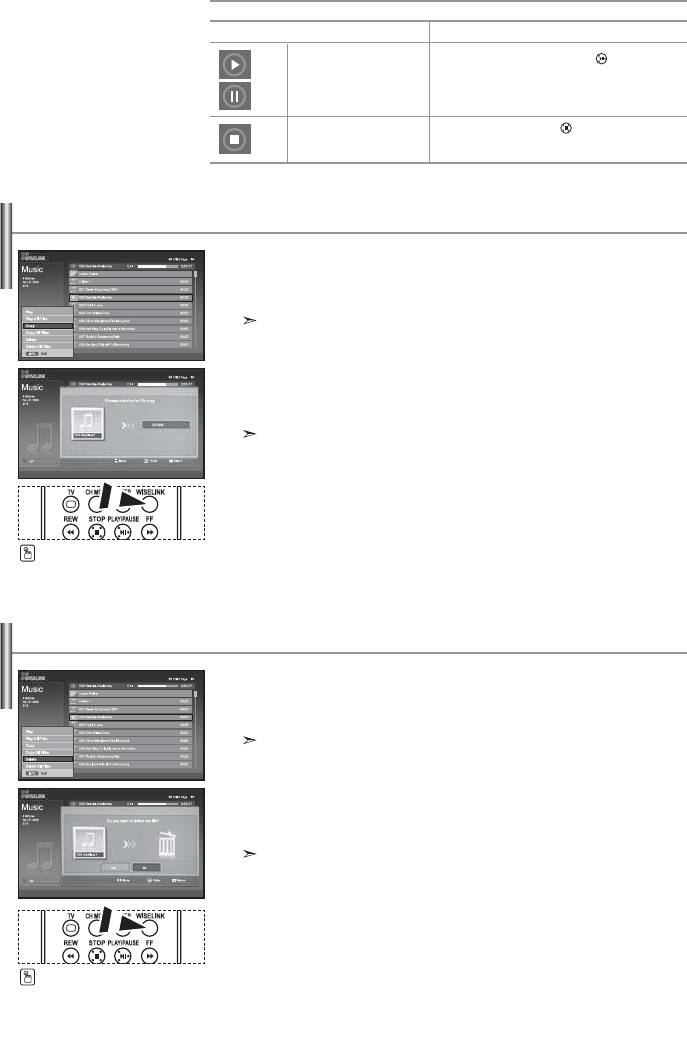
Copying Music Files
You can copy music files to a different memory card.
1. Complete Steps 1 to 4 of "Using the WISELINK Menu". (Refer to page 25)
2. Press the or button to select “Music”, then press the ENTER button.
The saved file information is displayed as a folder or file.
3. Press the or button to select a file, then press the ENTER button.
To select all files or a file, press the INFO button to display
the Music menus. ("Play", "Play All Files", "Copy", "Copy All Files",
"Delete", "Delete All Files")
Press the ENTER button to select “Copy” or “Copy All Files”.
If no target memory card is inserted, the “There is no device connected.”
message is displayed and no operation follows.
4. To exit WISELINK, press the WISELINK button on the remote control.
You can select these options
by simply pressing the WISELINK
button on the remote control.
Deleting Music Files
You can delete selected music files.
1. Complete Steps 1 to 4 of "Using the WISELINK Menu". (Refer to page 25)
2. Press the or button to select “Music”, then press the ENTER button.
The saved file information is displayed as a folder or file.
3. Press the or button to select a file, then press the ENTER button.
To select all files or a file, press the INFO button to display
the Music menus. ("Play", "Play All Files", "Copy", "Copy All Files",
"Delete", "Delete All Files")
Press the ENTER button to select “Delete” or “Delete All Files”.
When selecting the “Delete” or “Delete All Files” menu, an OSD screen is
displayed to confirm the deletion. To cancel the deletion, select “No.”
4. To exit WISELINK, press the WISELINK button on the remote control.
You can select these options
by simply pressing the WISELINK
button on the remote control.
English-32
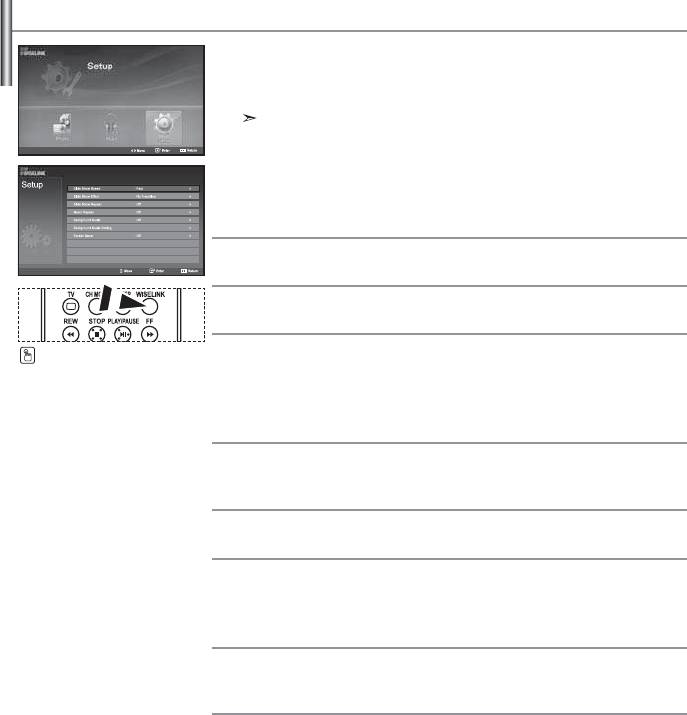
Using the Setup Menu
Setup displays the user settings of the WISELINK menu.
1. Complete Steps 1 to 4 of "Using the WISELINK Menu". (Refer to page 25)
2. Press the or button to select “Setup”, then press the ENTER button.
The saved file information is displayed as a folder or file.
3. Press the or button to select an item you want,
then press the ENTER button.
4. Press the or button to select the option, then press the ENTER button.
5. To exit WISELINK, press the WISELINK button on the remote control.
"Slide Show Speed":
Select to control the slide show speed.
"Slide Show Effect":
You can select effects to use with the slide show.
You can select these options
"Slide Show Repeat":
by simply pressing the WISELINK
• On: Repeats the slide show from the beginning when all the files in the
button on the remote control.
folder have been displayed.
• Off: Exit a slide show.
To return to the Photo menu when all the files in the folder have been displayed.
"Music Repeat":
Select to determine whether to repeat playing the music when all MP3 files in the
current folder have been played.
"Background Music":
Select to determine whether to play an MP3 file during a slide show.
"Background Music Setting":
You can select the background music to play during a slide show.
You can also select the background music while a slide show is in process by press-
ing the INFO button and selecting the “Background Music Setting” menu.
"Screen Saver":
Select to set the waiting time before the screen saver is run
when no button is pressed.
English-33
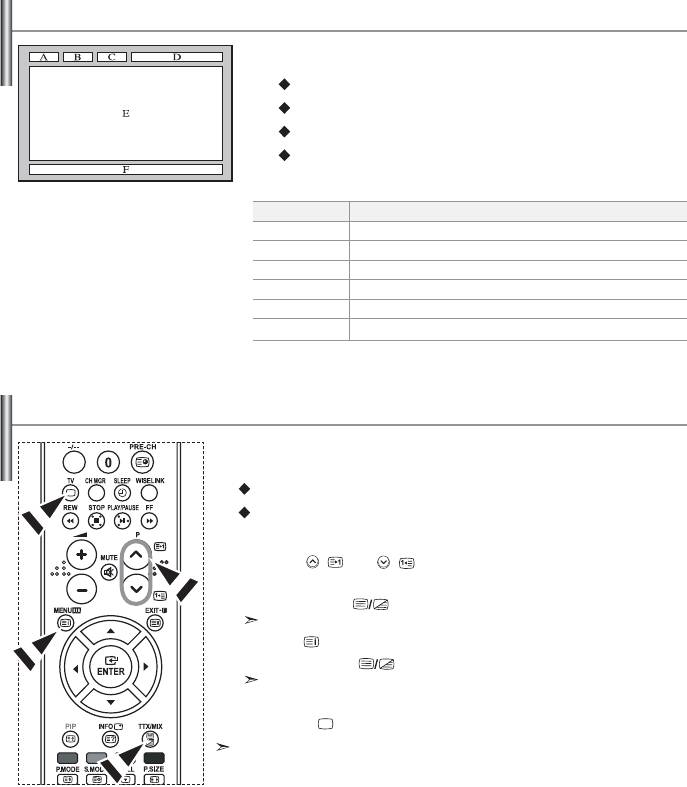
Teletext Decoder
Most set channels carry “ Teletext ”, pages of written
information that provide information such as:
Television programme times.
News bulletins and Weather forecasts.
Sports results.
Subtitles for the hard of hearing.
The Teletext pages are organized according to six categories:
Part
Contents
A
Selected page number.
B
Broadcasting station identity.
C
Current page number or search status.
D
Date and time.
E
Text.
F
Status information.
Displaying the Teletext Information
You can display Teletext information at any time, but signal reception must be
good. Otherwise:
Information may be missing.
Some pages may not be displayed.
To activate the Teletext mode and display the contents page:
1.
Using the P ( ) or P ( ) button, select the channel providing the
Teletext service.
2.
Press the TTX/MIX ( ) button to activate the Teletext mode.
The contents page is displayed. It can be redisplayed at any time by pressing the
MENU ( ) button.
3. Press the TTX/MIX ( ) button again.
The actual broadcast will be displayed with “Teletext”, “Double”, and “Mix” in order
on the screen.
4. Press the TV(
) button to exit from the Text display.
If any broken character appears while Text is being viewed, make sure that the
Text language is identical with the language in the “Setup” menu mode. If both languages are
different, select the same language with the Text language on the “Setup” menu.
English-34
Selecting a Specific Teletext Page
Press the number buttons on the remote control to enter the page number
directly:
1.
Enter the three-digit page number listed in the contents by pressing the
corresponding numeric buttons.
2.
If the selected page is linked with several secondary pages, the secondary
pages are displayed in sequence. To freeze the display on a given page, press
the
PIP
( ) button. Press the
PIP
( ) button again to resume.
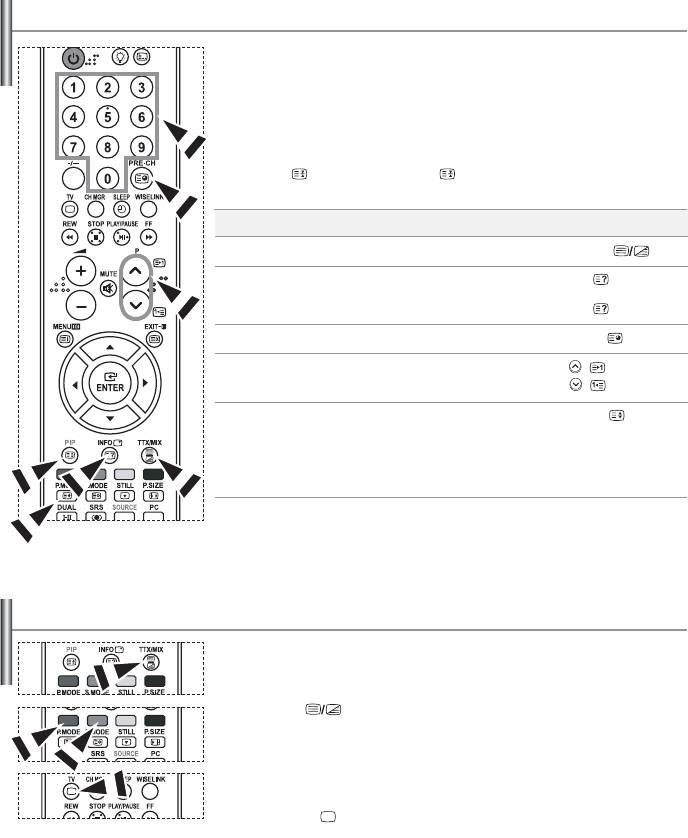
3. Using the various display options:
To display...
Press the...
Both Teletext information and the normal broadcast
TTX/MIX (
)
Hidden text (answers to quiz games, for example)
INFO (
)
The normal screen
INFO (
)
A secondary page, by entering its 4-digit number
PRE-CH (
)
The next page
P
( )
The previous page
P
( )
Double-size letters in the:
P.MODE
( )
Upper half of the screen
Once
Lower half of the screen
Twice
Normal screen
Three times
Using Fastext to Select a Teletext Page
The various topics included in the Teletext pages are colour-coded, and can be selected
by pressing the coloured buttons on the remote control.
1.
Display the Teletext contents page by pressing the
TTX/MIX ( )
button.
2. Press the coloured button corresponding to the topic that you wish to
select (The available topics are listed on the status information line).
3. Press the Red button to display the previous page.
Press the Green button to display the next page.
4. Press the TV(
) button to exit from the Text display.
English-35
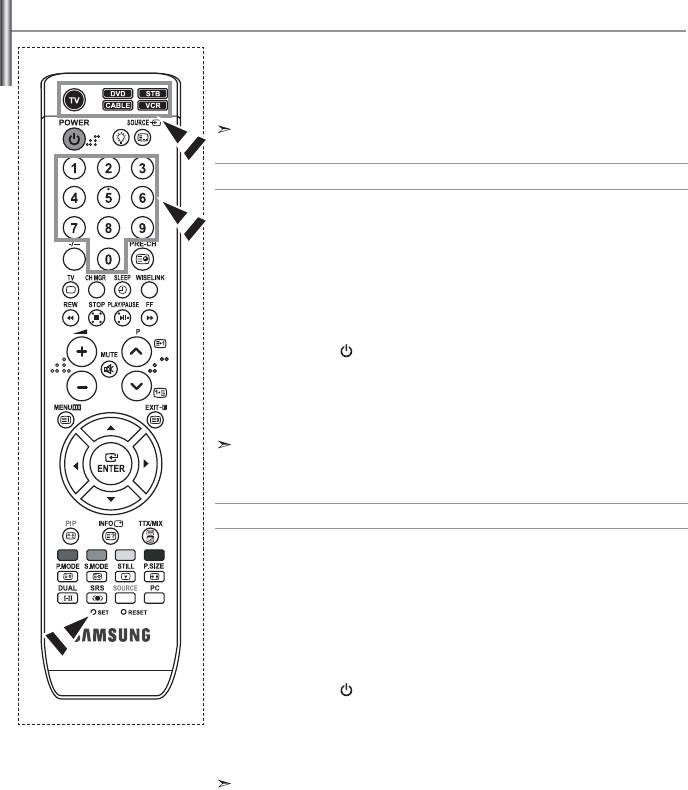
Setting Up Your Remote Control
After it has been set up properly, your remote control can operate in five different
modes: TV, DVD, Cable, Set-Top Box, VCR. Pressing the corresponding button on the
remote control allows you to switch between these modes, and control whichever piece
of equipment you choose.
The remote control might not be compatible with all DVD Players, VCRs, Cable boxes, and Set-
Top Boxes.
Setting Up the Remote to Operate Your VCR
1.
Turn off your VCR.
2. Press the VCR button on your TV’s remote control.
3. Press the SET button on your TV’s remote control.
4.
Using the number buttons on your remote control, enter three digits of the VCR
code listed on page 38 of this manual for your brand of VCR. Make sure you
enter three digits of the code, even if the first digit is a “0”.
(If more than one code is listed, try the first one.)
5.
Press the POWER button on the remote control.
Your VCR should turn on if your remote is set up correctly.
If your VCR does not turn on after set up, repeat steps 2, 3, and 4, but try one of
the other codes listed for your brand of VCR.
If no other codes are listed, try each VCR code, 000 through 080.
Note on Using Remote Control Modes: VCR
When your remote control is in “VCR” mode, the volume buttons still control your TV’s volume.
Setting Up the Remote to Operate Your Cable Box
1.
Turn off your cable box.
2. Press the
CABLE
button on your TV’s remote control.
3. Press the SET button on your TV’s remote control.
4.
Using the number buttons on your remote control, enter three digits of the
cable box code listed on page 39 of this manual for your brand of cable box.
Make sure you enter three digits of the code, even if the first digit is a “0”. (If
there is more than one code listed, try the first one.)
5.
Press the POWER button on the remote control.
Your cable box should turn on if your remote is set up correctly.
If your cable box does not turn on after set up, repeat steps 2, 3, and 4, but try
one of the other codes listed for your brand of cable box. If no other codes are
listed, try each code, 000 through 046.
Note on Using Remote Control Modes: Cable Box
When your remote control is in “CABLE” mode, the volume buttons still control your TV’s volume.
English-36
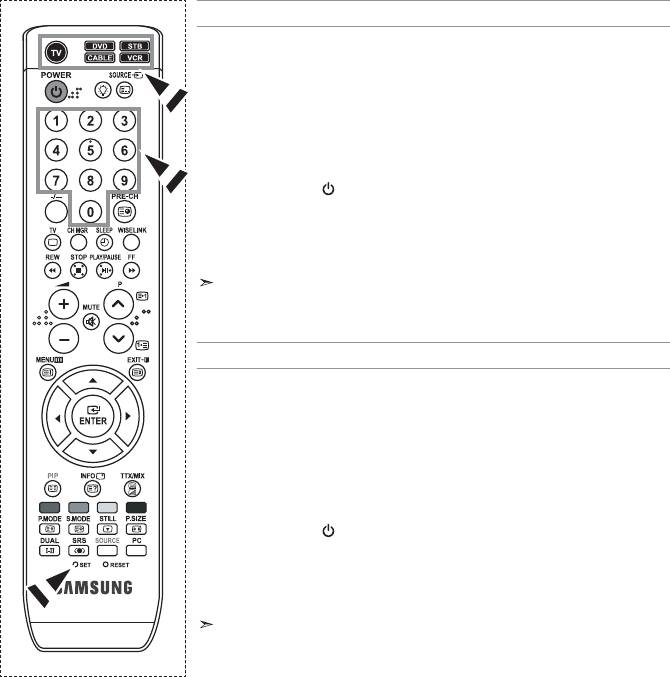
Setting Up the Remote to Operate Your DVD
1.
Turn off your DVD.
2. Press the
DVD
button on your TV’s remote control.
3. Press the SET button on your TV’s remote control.
4.
Using the number buttons on your remote control, enter three digits of the
DVD code listed on page 39~40 of this manual for your brand of DVD.
Make sure you enter three digits of the code, even if the first digit is a “0”.
(If there is more than one code listed, try the first one.)
5.
Press the POWER button on the remote control.
Your DVD should turn on if your remote is set up correctly.
If your DVD does not turn on after set up, repeat steps 2, 3, and 4, but try one of
the other codes listed for your brand of DVD.
If no other codes are list-ed, try each code, 000 through 141.
Note on Using Remote Control Modes: DVD
When your remote control is in “DVD” mode, the volume buttons still control your TV’s volume.
Setting Up the Remote to Operate Your STB
1.
Turn off your STB.
2. Press the
STB
button on your TV’s remote control.
3. Press the SET button on your TV’s remote control.
4.
Using the number buttons on your remote control, enter three digits of the STB
code listed on page 40 of this manual for your brand of STB.
Make sure you enter three digits of the code, even if the first digit is a “0”.
(If there is more than one code listed, try the first one.)
5.
Press the POWER
button on the remote control.
Your STB should turn on if your remote is set up correctly.
If your STB does not turn on after set-up, repeat steps 2, 3 and 4, but try one of
the other codes listed for your brand of STB.
(If no other codes are listed, try each code, 000 through 074.)
Note on Using Remote Control Modes: STB
When your remote control is in “STB” mode, the volume buttons still control your TV’s volume.
English-37

Remote Control Codes
VCR
Brand Code
Brand Code
SAMSUNG 000 001 002 003 004 005 077 078 079
MONTGOMERY WARD
020
ADMIRAL 020
MTC 002 025
AIWA 025
MULTITECH 002 005 025 038
AKAI 004 027 032
NEC 007 008 018 026 037 062 064
AUDIO DYNAMICS 007 026
OPTIMUS 020
BELL&HOWELL 018
ORION 073 074 075 076
BROKSONIC 022
PANASONIC 021 056 071 072
CANDLE 002 003 006 008 015 055
PENTAX 019 041 075
CANON 021 056
PENTEX RESEARCH+
008
CITIZEN 002 003 006 008 015 055
PHILCO 021 056 059
COLORTYME 007
PHILIPS 021 080
CRAIG 002 024
PIONEER 019 026 039 053
CURTIS MATHES 002 007 008 017 021 025 056 064 066
PORTLAND 015 049 055
DAEWOO 003 010 011 012 013 014 015 016
PROSCAN 017
DB 007 026
QUARTZ 018
DIMENSIA 017
QUASAR 021 056
DYNATECH 025
RADIO SHACK/
006 018 020 021 024 025 029 034 048 056
ELECTROHOME 034
REALISTIC
EMERSON
001 003 006 021 022 025 030 032 034 040 047
RCA
002 017 019 021 035 041 043 057 068 076
050 052 060 063 065 066 067 069 073
SANSUI 026
FISHER 018 024 028 029 048 051 061
SANYO 018 024
FUNAI 025
SCOTT 003 047 052 067
GENERAL ELECTRIC
002 005 017 021 056
SEARS 006 018 019 024 028 029 041 048 051
GO VIDEO 002
SHARP 020 034 045 015
HARMAN KARDON 007
SHIMTOM 027 033 038 058
HITACHI 019 025 041 042 074
SIGNATURE 025
INSTANT REPLAY 021
SONY 027 033 044
JC PENNEY
002 007 018 019 021 026 037 041 054 056
SYLVANIA 021 025 056 059
JCL
007 008 018 021 026 037
SYMPHONIC 025
JVC
081 082 083
TANDY 018 025
KENWOOD
007 008 018 021 026 037
TASHIKA 006
KLH
070
TATUNG 037
KONIA
036
TEAC 025 037 068
LG(Goldstar)
006 007 008 009 010
TECHNICS 021
LIOYD
025
TEKNIKA 006 021 025 031
LOGIK
038
TMK 066
LXI
025
TOSHIBA 003 019 029 051 052
MAGNAVOX
021 056 059
TOTEVISION 002 006
MARANTZ
007 008 018 021 026 037 062
UNITECH 002
MARTA
006
VECTOR RESEARCH
007 026
MEI
021
VICTOR 026
MEMOREX
006 021 024 025
VIDEO CONCEPTS 007 026
MGA
034
VIDEOSONIC 002
MIDLAND
005
WARDS
002 003 006 019 020 021 024 025 034 038 041
MINOLTA
019 041 075
YAMAHA 007 008 018 026 037
MITSUBISHI
019 034 041 046
ZENITH 023 027 033
English-38
