Siemens TE809201RW: инструкция
Раздел: Кухонная техника
Тип:
Инструкция к Siemens TE809201RW
Оглавление
siemens-home.com/welcome
Register
your
product
online
TE 809..
en Instruction manual
fr Mode d’emploi
nl Gebruiksaanwijzing
pl Instrukcjaobsługi
cs Návodkpoužití
ru Инструкцияпоэксплуатации
en
...................................................................................................................................2
fr
.................................................................................................................................29
nl
.................................................................................................................................56
pl
.................................................................................................................................83
cs
............................................................................................................................... 111
ru
...............................................................................................................................138
A
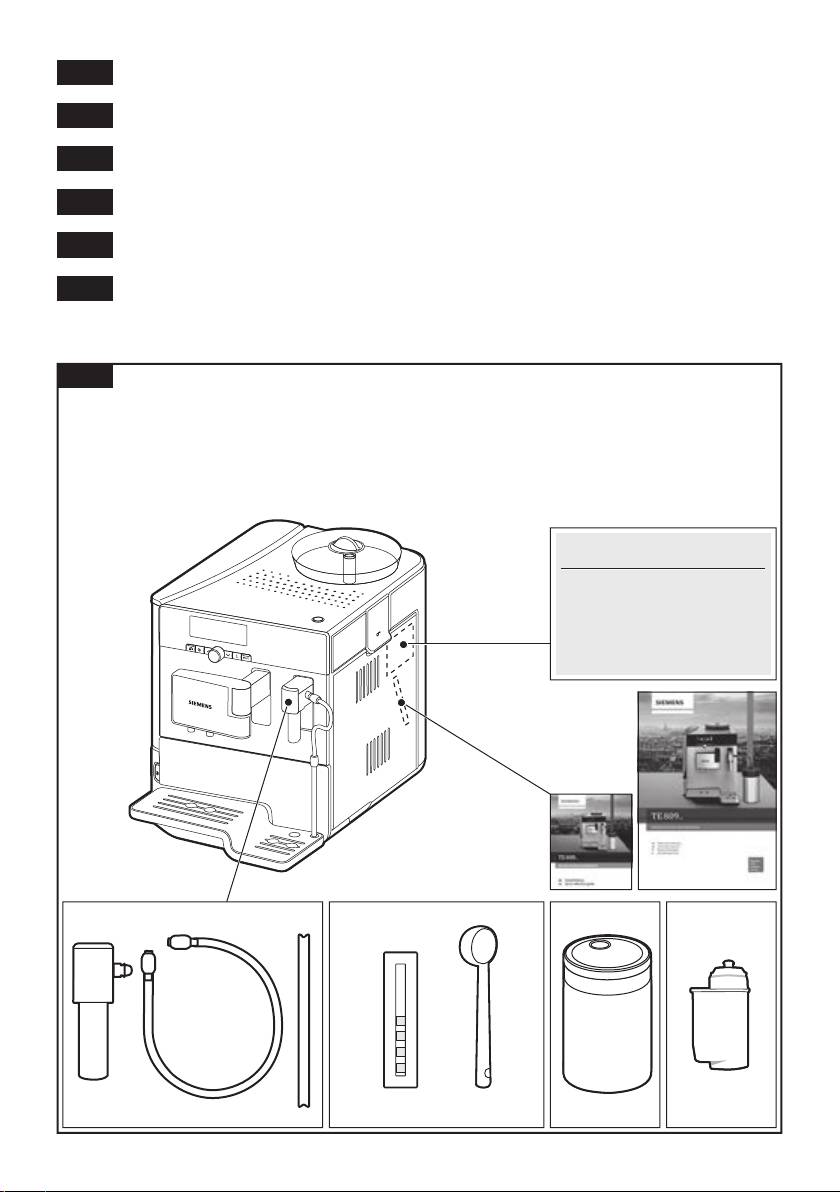
Included in delivery (see page 5)
Contenu de l’emballage (voir page 32)
De verpakking bevat (zie pagina 59)
Zakres dostawy (patrz strona 86)
Rozsah dodávky (na straně 114)
Объем поставки (см. стр. 141)
E-Nr. ……… FD… …
1
2
3
4
5 6
7
8
B
5a
5
5b
5c
29
2
3 4 6 4 7 8
2827
16
17
15
12
18
5
11
25
10
19
9
1
23
26
C
14
13
24
D E
23c23a
10a
10c
10b
23b
10d
F
20b
22 19
2.
20
21
1.
20a
1.
2.

en
Dear Coffee Connoisseur,
Contents
Congratulations on purchasing this fully
Safety instructions ......................................3
automatic espresso machine from Siemens.
Included in delivery .....................................5
At a glance..................................................5
Before using for the rst time......................6
These operating instructions describe vari-
Controls ......................................................7
ous appliance designs, which differ in detail.
Displays ......................................................9
Display settings ........................................10
Please also refer to the quick reference
Customising .............................................. 11
guide. This can be kept in a special storage
Child-proof lock.........................................12
compartment 22 until the appliance is used
Menu settings ...........................................13
again.
Preparation using coffee beans ................15
Preparation using ground coffee ..............16
Preparing milk froth and warm milk ..........17
Dispensing hot water ................................18
Maintenance and daily cleaning ...............18
Service Programmes ................................21
Tips on energy saving ..............................25
Frost protection.........................................25
Storing accessories ..................................25
Accessories ..............................................25
Disposal ....................................................26
Guarantee.................................................26
Technical specications ............................26
Simple troubleshooting .............................27
2

en
Safety instructions
Please read and follow the operating instructions carefully and
keep them for later reference. Enclose these instructions when
you give this appliance to someone else. This appliance is
designed for the preparation of normal household quantities in
the home, or in household-like, non-commercial environments.
Household-like environments include staff kitchens in shops,
of ces, agricultural and other small businesses or for use by
guests at bed-and-breakfast establishments, small hotels and
similar residential facilities.
¡ Danger of electric shock!
Connect and operate the appliance only according to the type plate
speci cations. To avoid potential hazards, repairs such as replacing
a damaged cable must only be carried out by our customer service
personnel.
This appliance may be used by children aged 8 years and older and
by persons with reduced physical, sensory or mental capabilities
or who lack experience and/or knowledge if they are supervised or
have been given instruction in the safe use of the appliance and
have understood the dangers involved. Keep children under 8 years
of age away from the appliance and connecting cable and do not
allow them to use the appliance. Children shall not play with the
appliance. Cleaning and user maintenance shall not be made by
children unless they are older than 8 years and supervised.
Never immerse the appliance or mains cable in water. Use only if
power cord and appliance show no signs of damage. Should a fault
occur, pull the plug or disconnect from the mains immediately.
3

en
¡ Risk of suffocation!
Do not allow children to play with packaging material.
¡ Risk of scalding!
The milk frother 10 for milk / hot water
gets very hot. After use, allow to
cool down rst before touching.
¡ Risk of injury!
Do not reach into the grinding unit.
¡ Warning!
The cup warmer 27 gets very hot!
4

en
Included in delivery
(Figure A on the fold-out pages)
1 Fully automatic espresso machine
5 Water hardness testing strip
2 Instruction manual
6 Measuring spoon
3 Quick reference guide
7 Milk container, insulated
4 Milk frother
8 Water lter
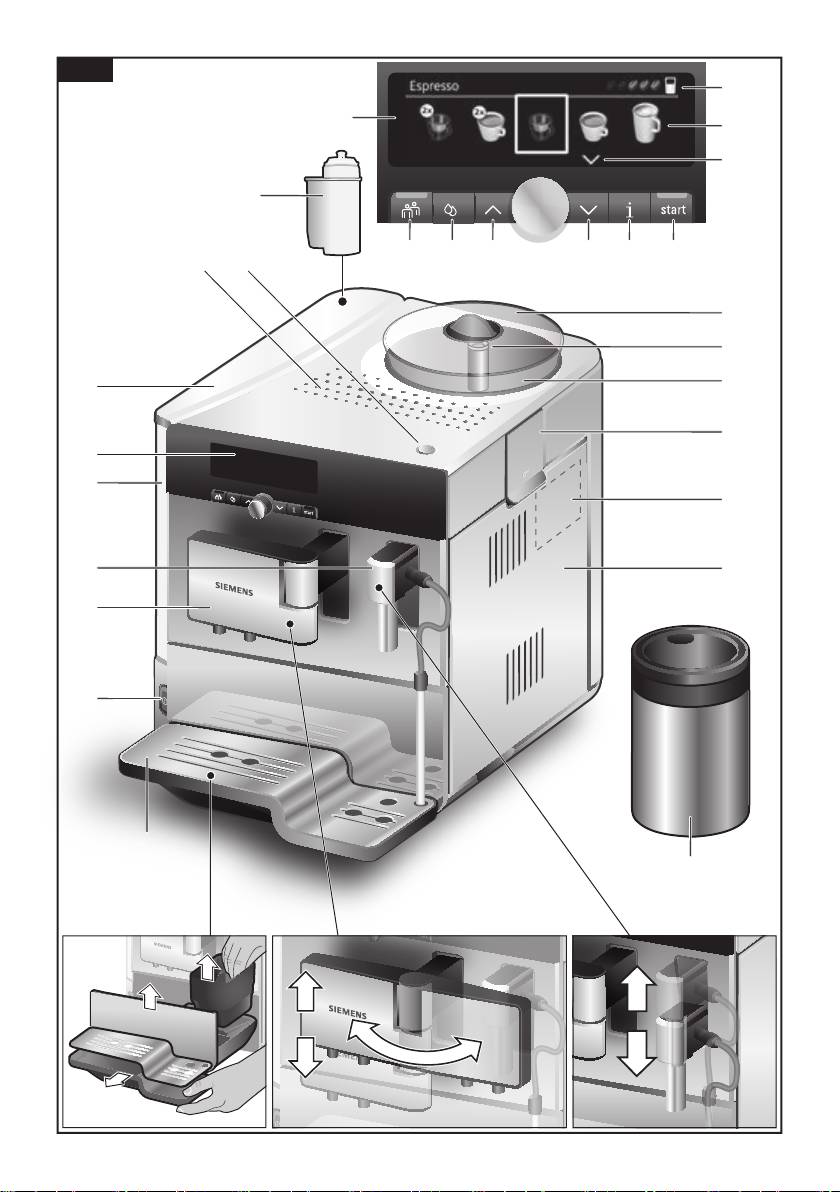
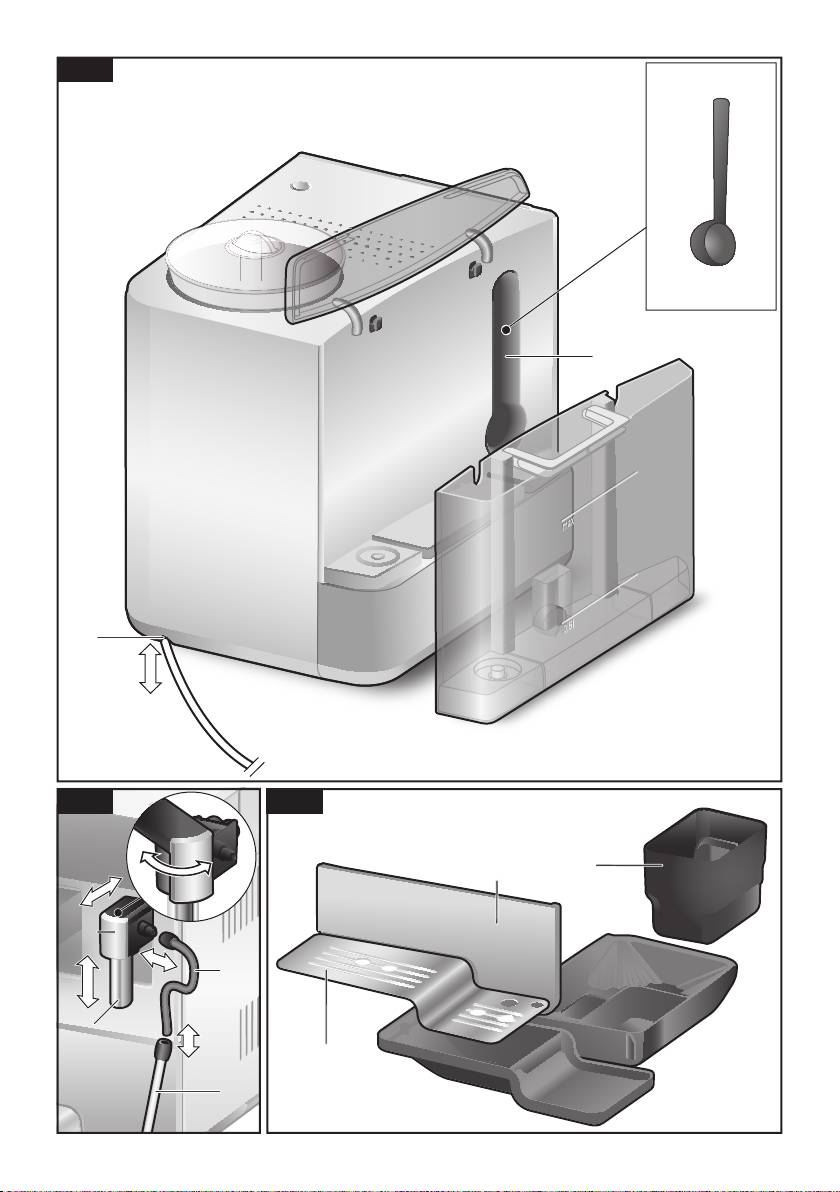
At a glance
(Figures B, C, D, E and F on the fold-out pages)
1 Power on/off switch O / I
15 Bean container
2 Customising button á
16 Aroma cover
3 Service programmes button à
17 Selector for grind setting
4 Selection buttons < >
18 Powder compartment
5 Display
(ground coffee / cleaning tablet)
a) Status line
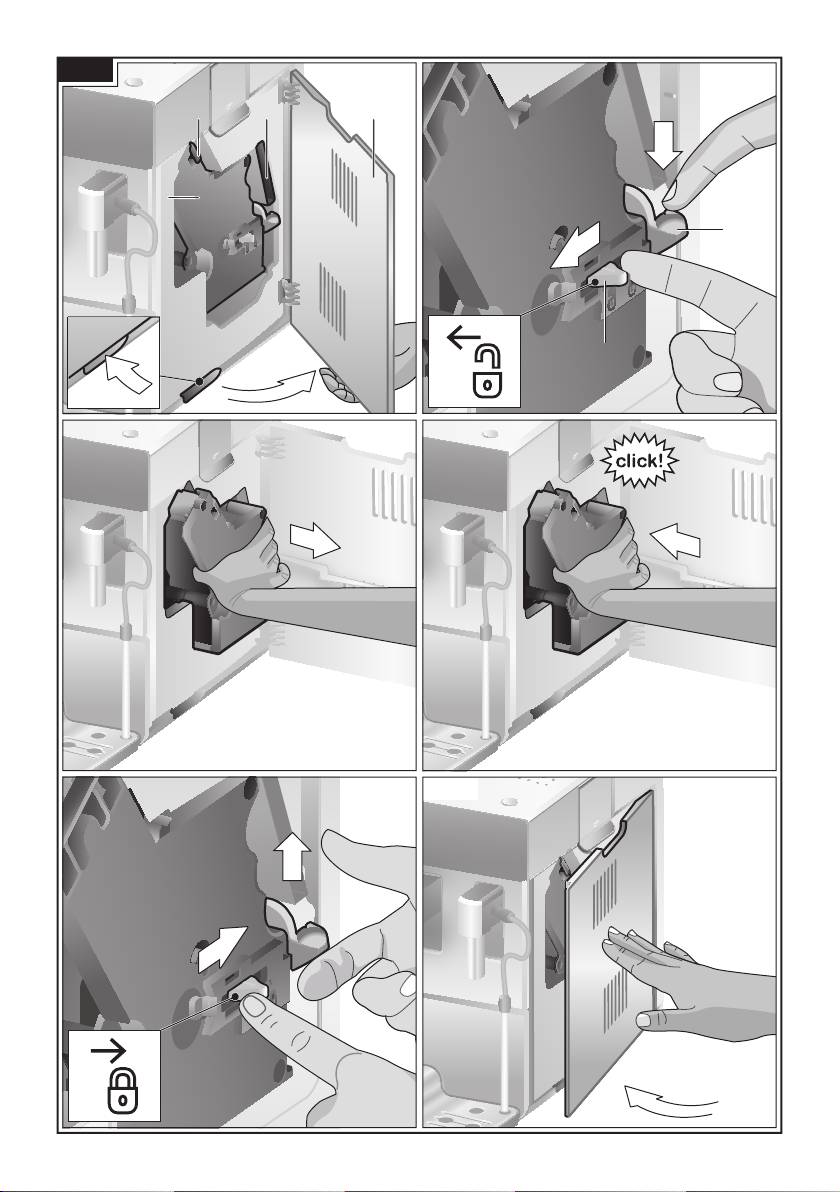
19 Door to brewing unit
b) Selection line
20 Brewing unit
c) Navigation line
a) Lock
6 Rotary knob for display settings
b) Cover
7 Info menu button j
21 Eject lever for brewing unit
8 start button (drinks / programmes)
22 Storage compartment for
9 Coffee outlet,
quick reference guide
height-adjustable and swivelling
23 Drip tray
10 Milk system,
a) Panel
height-adjustable and removable
b) Grate
(milk / hot water)
c) Coffee grounds container
a) Upper part
24 Cable storage compartment
b) Lower part
25 Rating label (E-No.; FD)
c) Suction hose
26 Milk container, insulated
d) Suction pipe
27 Cup warming function
11 Removable water tank
28 Button for cup warming function,
12 Lid for water tank
illuminated
13 Storage compartment for
29 Water lter
measuring spoon
14 Measuring spoon
(insertion aid for water lter)
5
en
● Press the power switch 1 O / I . The
Before using for the
start button 8 lights up and the different
rst time
languages appear in the display 5.
The following languages can be selected:
General
Fill the appropriate container using only
TE809 DE
pure, cold, uncarbonated water and only
Deutsch English
roasted beans (preferably espresso or cof-
Français Italiano
fee bean blends for fully automatic coffee
machines). Do not use coffee beans that
TE809 RW
have been glazed, caramelised or treated
English Русский
with other additives containing sugar, since
Nederlands Français
they will block the brewing unit.
Italiano Svenska
The water hardness setting can be adjusted
Español Polski
on this appliance. The factory setting for the
Українська Magyar
water hardness is 4. Check the hardness
Türkçe Dansk
of the water you use with the enclosed test
Norsk Suomi
strip. If a value other than water hardness
Português Čeština
4 is displayed, change the setting on the
Ελληνικa
appliance accordingly after switching on
(see “Menu settings – Water hardness”).
● Use the buttons < and > 4 to select the
language in which you want the display
Setting up the appliance
texts to appear.
● Place the fully automatic espresso
Sprache
machine on a at, water-resistant surface
Deutsch ▶ start
that can take its weight.
English
Français
Important: Only use the appliance in
frost-free rooms. If the appliance has been
transported or stored at temperatures below
0 °C, wait at least 3 hours before operation.
● Pull out the mains plug from the cable
compartment 24 and plug it in. Adjust the
The selected language is highlighted.
length of the cable by pushing it back in
● Press the start button 8. The language
and pulling it out. To do this, place the
you selected is saved.
appliance with its back ush with the edge
● The brand logo lights up in the display 5.
of the work surface and either pull the
The appliance now heats up and rinses.
cable downwards or push it upwards.
Some water will run out of the coffee
● Lift the lid of the water tank 12.
outlet 9.
● Remove and rinse the water tank 11 and
ll it with fresh, cold water. Do not ll
above the “max” mark.
● Replace the water tank 11 and push it
rmly downwards into place.
● Close the water tank lid 12 again.
● Fill the bean container 15 with coffee
beans.
6

en
● The appliance is ready for use when the
Controls
symbols for the drink selection and the
start button 8 light up in the display 5.
Power on/off switch O / I
The power on/off switch 1 O / I is used
Espresso
to switch the appliance on or off. The
appliance rinses automatically when it is
switched on and off.
The appliance will not rinse if:
● it is still warm when switched on.
Info: The factory settings of the fully auto-
● there was no coffee drawn before
matic espresso machine are programmed
switching off.
for optimal performance. The appliance
switches off automatically after a specic
The appliance is ready for use when the
time (see “Menu settings – Auto off after”).
symbols for the drink selection and the start
button 8 light up in the display 5.
Note: If the appliance is being used for the
rst time, the service programme has been
Customising button á
run, or the appliance has not been oper-
The appliance provides the option of saving
ated for a long period, the rst beverage will
and calling up customised settings for
not have the full aroma and should not be
coffee drinks. Please refer to the section
consumed.
“Customising” for information on how to
save and call up these settings.
When the fully automatic espresso machine
is rst used, you will achieve a suitably thick
Service programmes button
à
and stable “crema” only after the rst few
Press the à button 3 briey to call up the
cups have been dispensed.
selection of service programmes. Please
run the programme as described in “Service
Programmes”.
Press and hold to activate or deactivate the
child-proof lock, see “Child-proof lock”.
Rotary knob
Turn the rotary knob 6 to the left or right to
navigate through the display 5, or to adjust
parameters in the menu.
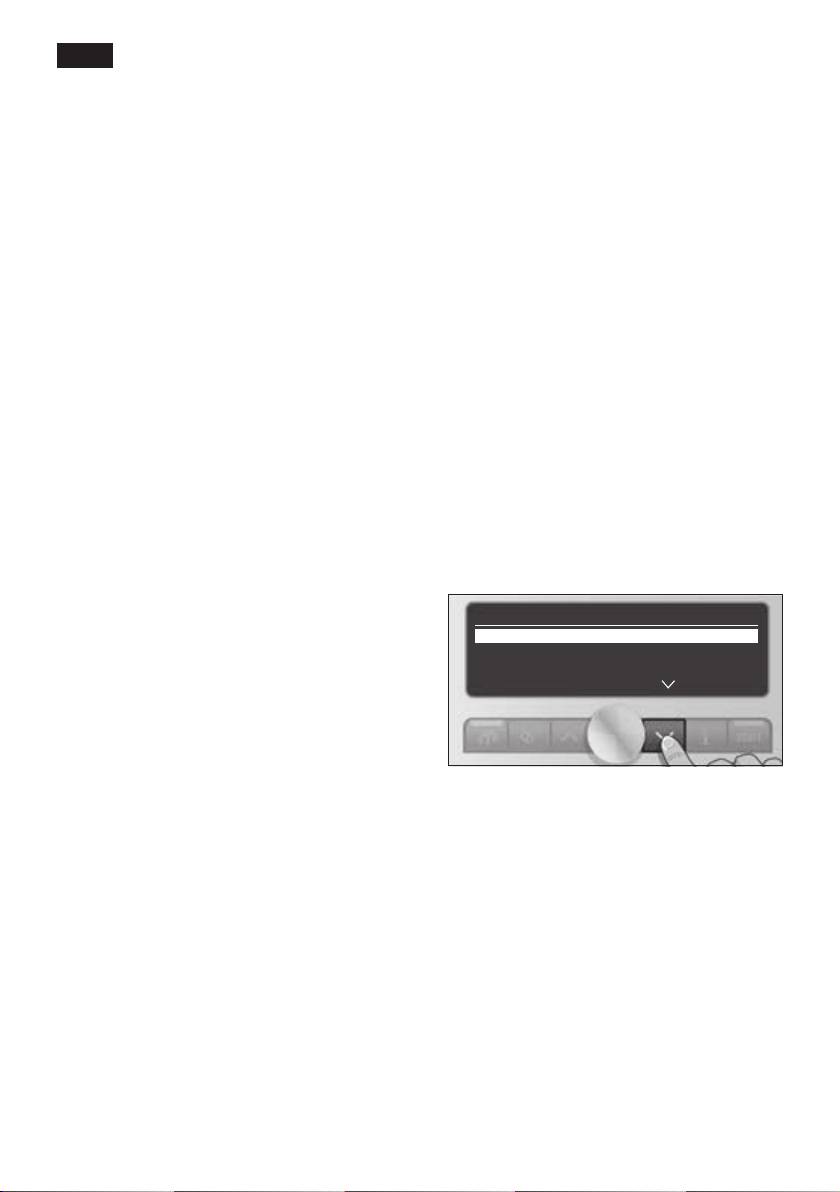
Selection buttons < and >
Press the selection buttons 4 < and > to
navigate up and down through the menu
levels (navigation line 5c).
7
en
Display
j button and settings
The display 5 uses symbols to indicate
Use the j button 7 to display information
the selection options, coffee strength and
(press briey) and adjust settings (hold
per-cup quantity, and uses text to indicate
down for at least 3 seconds).
settings, ongoing processes and messages.
The rotary knob 6 and selection buttons
Displaying information
4 can be used to change settings. The
The following information can be displayed
selected setting is highlighted by a frame.
in the Info menu:
● when should the next service be
Espre sso
5a
completed.
● how many drinks have been dispensed
5b
since the espresso machine was
switched on.
5c
Example:
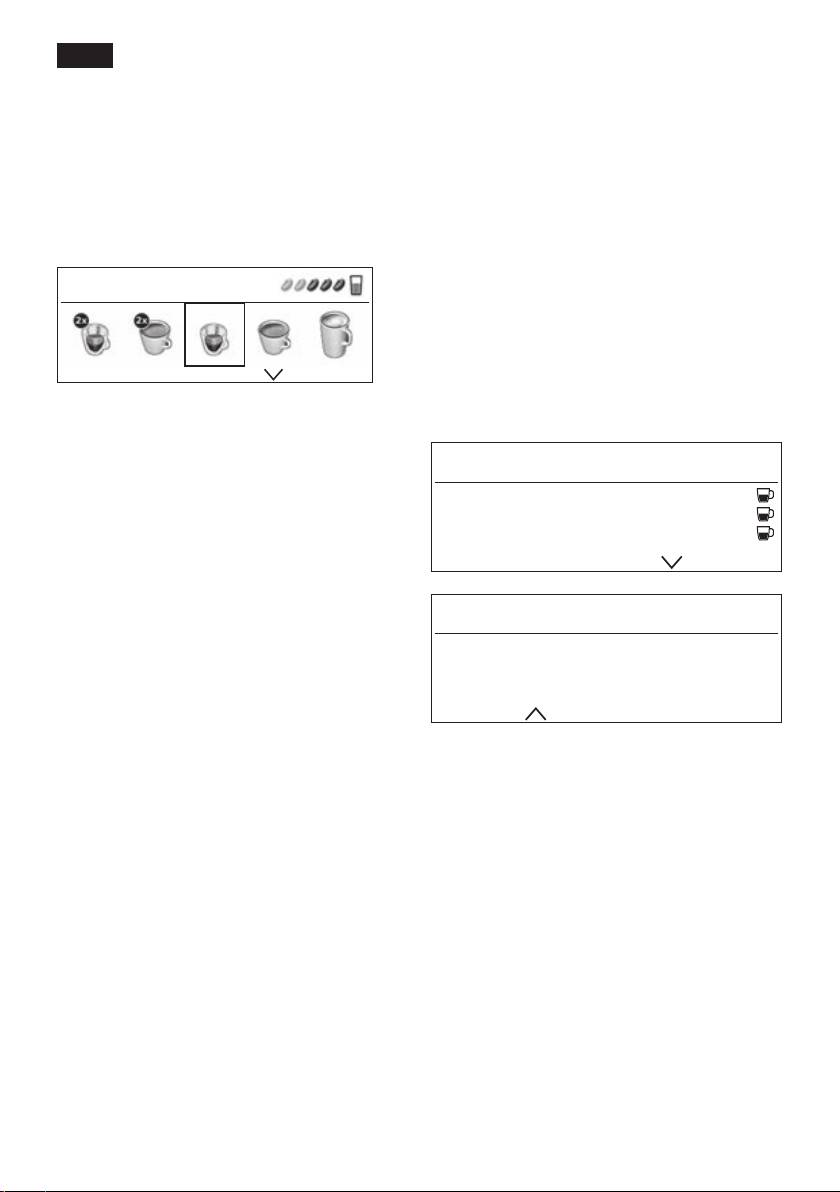
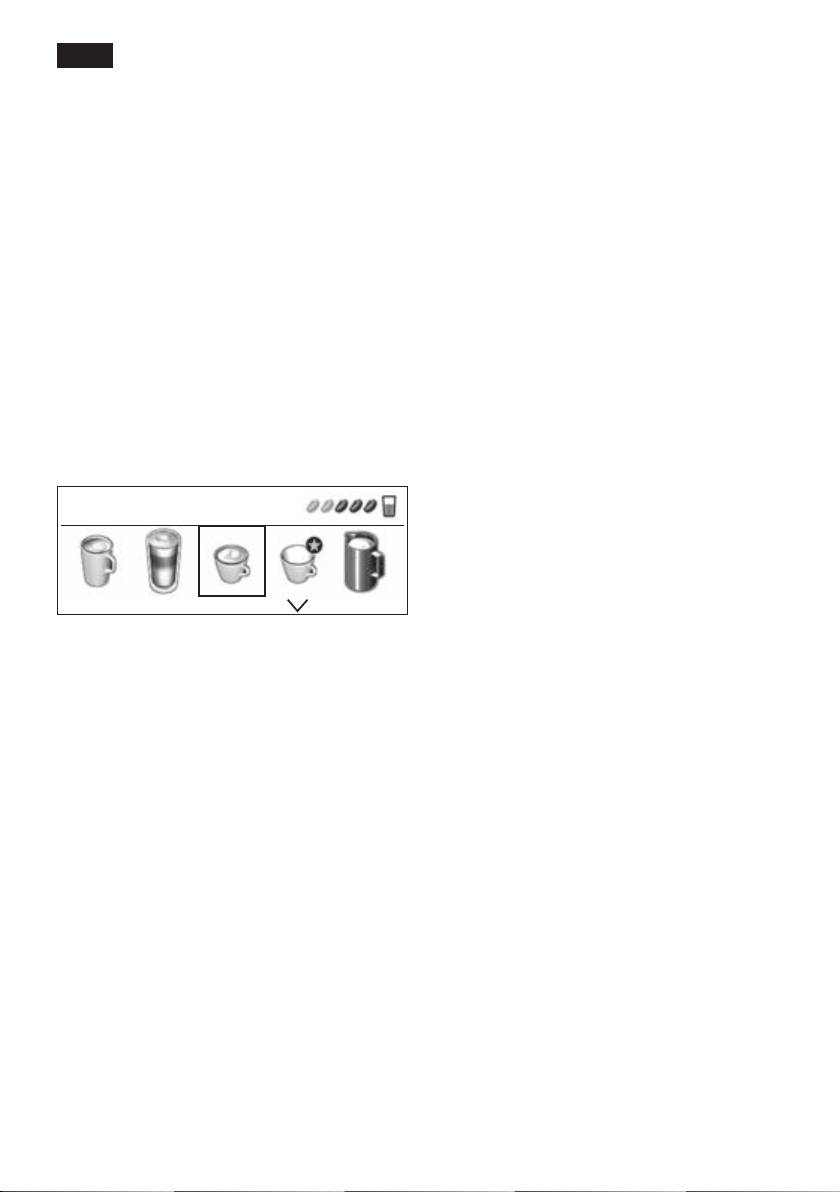
● Press the j button 7 briey and navigate
The status line 5a shows the name of the
with the < and > buttons 4.
type of drink, along with the strength setting
Info
55 and per-cup quantity
.
Î
The selection line 5b shows symbols for
Descale after 150
drink selection.
Clean after 200
The arrows in the navigation line 5c indicate
Change filter in 200
*
the direction in which more menu levels can
be found.
Info
Please refer to “Displays” for more detailed
information.
No. of coffees 11
No. of milk mixes 15
Start button
Amount hot water 2 l
Press the start button 8 to begin drink
preparation or to start a service programme.
Press the start button 8 again during drink
* appears only if the lter is activated.
preparation to stop the dispensing process
prematurely.
Press the j button 7 briey to return to the
drink selection. If no button is pressed for
about 10 seconds, the appliance automati-
cally switches back to drink selection mode.
Adjusting settings
See “Menu settings”.
8
en
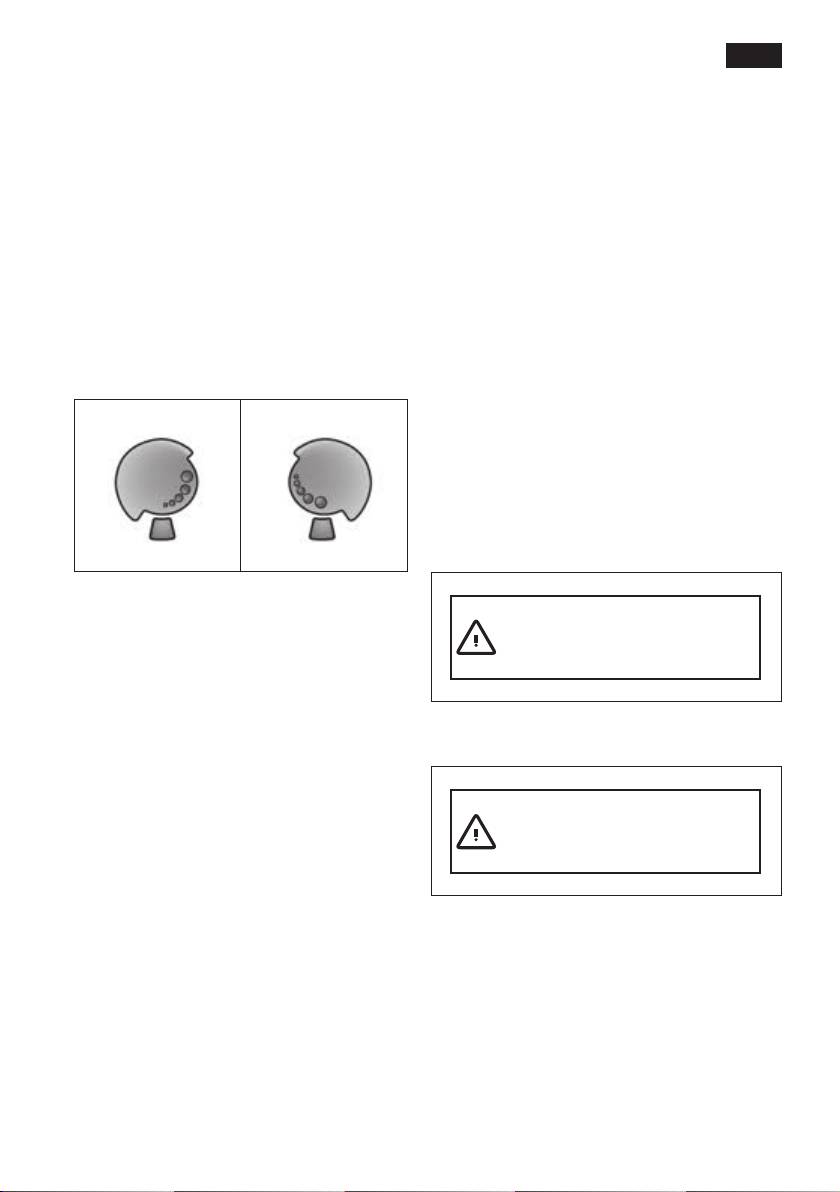
Adjusting the grinding unit
Cup warming function
The rotary selector 17 adjusts the grind
settings from coarse to ne.
¡ Warning!
The cup warmer 27 gets very hot.
¡ Warning!
Adjust the grinding unit only while it is
The fully automatic espresso machine has
running! Otherwise the appliance may be
a cup warmer 27 that can be switched on or
damaged. Do not reach into the grinding
off manually with button 28. When the cup
unit.
warmer 27 is on, button 28 lights up.
● While the grinding unit is running,
Tip: For optimal cup warming, place the
adjust the rotary selector 17 from
base of the cups on the cup warmer 27.
ne (a: Turn anticlockwise) to
coarse (b: Turn clockwise).
Displays
a b
Display messages
Various messages are shown in the
display 5.
Information
For example:
Info: The new setting will not become
apparent until after the second cup of
coffee.
Water tank almost empty
Note: If the message Adjust the grinding
unit to a coarser setting appears in the dis-
play, the grind setting for the coffee beans is
Prompts
too ne. Adjust the grinding unit to a coarser
For example:
setting.
Tip: For dark roast coffee beans, choose a
ner grind; for lighter beans a coarser grind.
Refill water tank
9
en
Turn the rotary knob 6 to adjust the
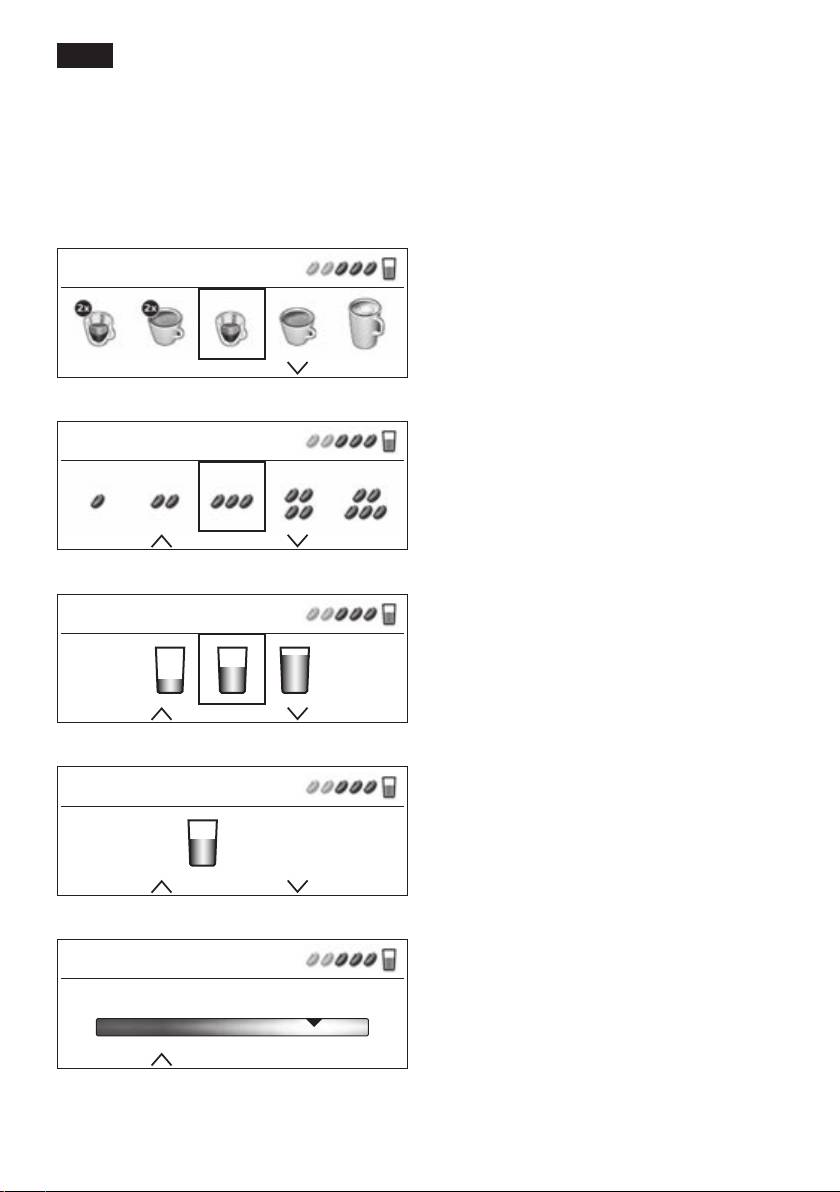
Display settings
following parameters within the menus:
Press the selection buttons < and > 4 to
select the following selection menus in the
Settings – Drink selection:
menu levels:
2 x Espresso
2 x Coffee
Drink selection
Espresso
Coffee
Espresso
Caffe Latte
Macchiato
Cappuccino
Mycoffee
Milk froth
Warm milk
Hot water
Coffee strength (only for coffee drinks)
Espresso
Settings – Coffee strength:
å
Very mild
åå
Mild
ååå
Normal
ä
Strong
Per-cup quantity
ã
Very strong
2x
å
aromaDouble Shot strong
Espresso
2x
ååå
aromaDouble Shot strong +
2x
ã
aromaDouble Shot strong ++
aromaDouble Shot:
The longer the coffee is brewed, the
Select your personal per-cup quantity
more bitter substances and undesired
aromas are released. This has a nega-
Espresso
tive effect on the taste and makes the
coffee less easily digestible. So for extra
strong coffee, the TE809 has a special
+ 0 ml
aromaDouble Shot function. When half
the quantity has been prepared, coffee is
ground and brewed again so that only the
My coffee
pleasant, aromatic scents are released. The
aromaDouble Shot function can be selected
My coffee
for all coffee drinks except for Espresso with
a small per-cup quantity, 2 x Espresso and
80% Espresso 20% Milk
2 x Coffee.
10
en
Settings – Per-cup quantity
Customising
small
Î
You can store up to 6 user proles in the
medium
Ð
User settings menu. The required coffee and
large
Ò
hot water temperatures are saved in the
user proles.
Settings – Personal per-cup quantity
The preset per-cup quantity can be individu-
Important: The “Customising” settings
ally adjusted to the size of the cup in use
(á button 2) are not identical to those
by turning the rotary knob 6. The per-cup
under “Menu settings” (
j button 7) and vice
quantity can be adjusted according to the
versa.
drink selected. An arrow in the
symbol
Ò
in the top right-hand corner of the display
Storing or changing the user
indicates whether the per-cup quantity
● Hold down the
á button 2 for at least
was increased or decreased. If you set for
3 seconds.
example Coffee, the adjustment of the per-
The menu appears:
cup quantity in ml, and in the case of a milk-
User settings
based coffee drink, for example Cappuccino,
the adjustment of the per-cup quantity
User 1 ▶ start
including the volume of milk (froth) in ml, is
User 2
indicated.
User 3
Important: The selected amount in ml
is an approximate value and can vary
● Select the required user using the selec-
signicantly as a result of crema forming,
tion button and press the start button 8.
the grind setting or the type of milk used,
The following selection appears in the
etc.
display:
User settings: User 1
Settings – My coffee
In addition to selecting coffee strength and
Edit name ▶ start
per-cup quantity, you can choose the exact
Delete name
mix of espresso and milk for your own
aromaIntense Espresso
coffee setting Mycoffee:
● The setting can be dened in 20 % steps
by turning the rotary knob 6.
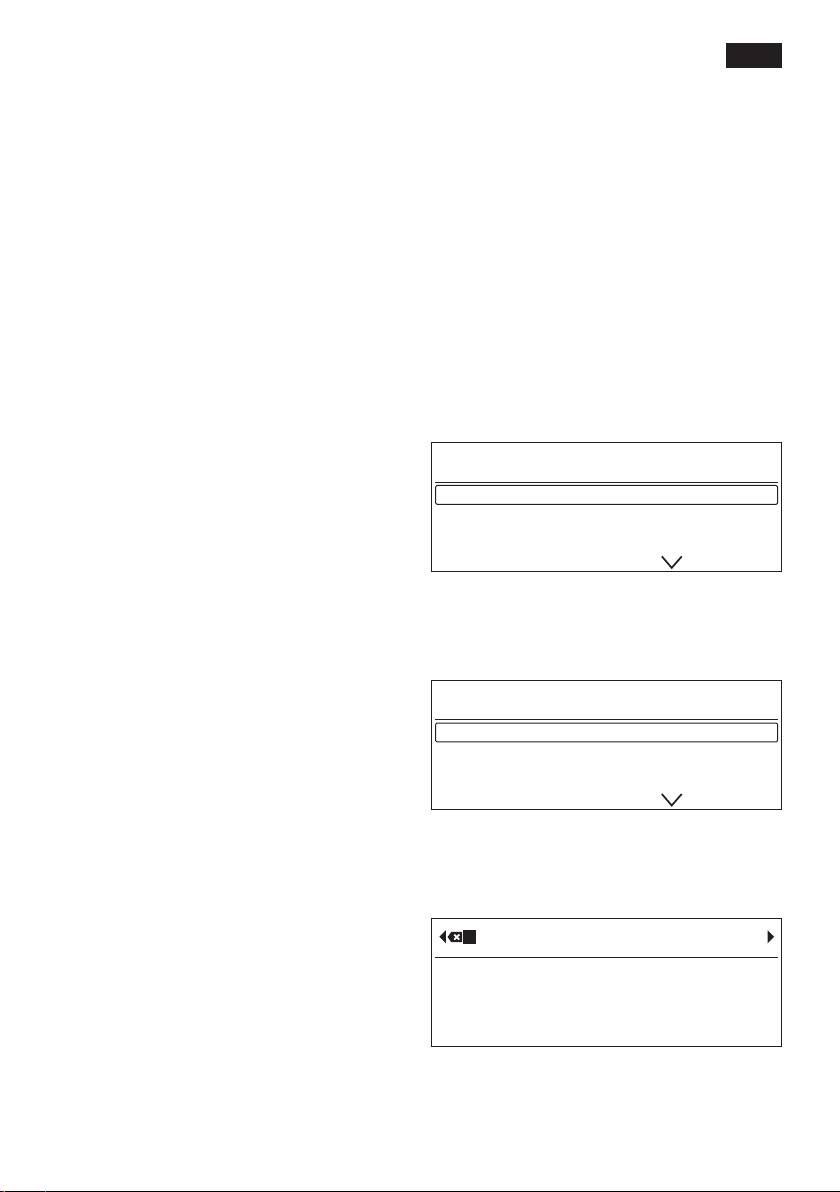
● To change the user name, use the selec-
tion button to go to Editname▶start and
press the start button 8.
The input eld appears in the display:
ABCDEFGHIJKLMNOPQRSTUVWXYZÄÅ
A
Abort Store
● Turn the rotary knob 6 to select a letter or
number.
● Conrm by pressing the start button 8.
en
There are 6 characters available for the
● Turn the rotary knob 6 to select a user
user name.
prole and press the start button 8.
To delete entries made, select the symbol
The drink selection menu appears:
â and press the start button 8.
ROBERT Macchiato
Note:
Press the selection button
> to save your
entry. Press the selection button < to cut
the process short.
Info: The entry can be overwritten at any
● Set the drink, coffee strength, etc. (see
time.
“Display settings”).
To delete the user, use the selection button
● Dispense a drink (see “Preparation using
Deletename▶start and press the start
coffee beans”).
button 8.
● The selected settings are saved.
● Press the á button 2 to exit the
Saving temperatures
customised menu.
● Use the selection button to select Coffee
temperature or Hot water temperature.
Info: If you wish the appliance to exit the
● Turn the rotary knob 6 to select the
menu automatically, you can set this as
required setting.
described under “Menu settings –
● Press the á button 2.
Exit profile”.
The settings are saved.
aromaIntense
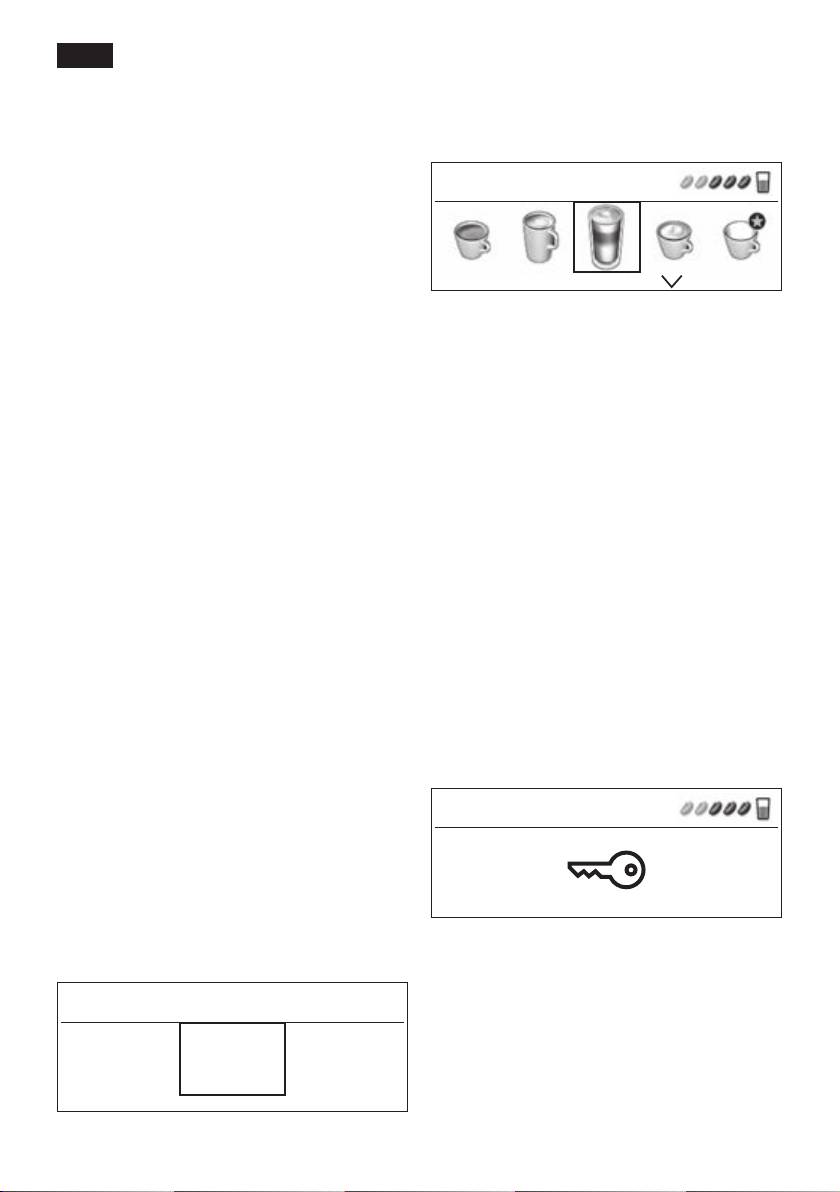
Child-proof lock
The intense avour of the espresso or
coffee may be adapted to individual require-
The appliance can be locked to protect
ments by setting the brewing speed.
children from scalding and burning.
● Simply press the selection but-
● Hold down the à button 3 for at least
ton aromaIntense Espresso or
3 seconds.
aromaIntense Coffee.
The display 5 shows a key; the child-proof
● Finally, use the rotary knob 6 to select
lock is activated.
either normal brewing speed, e. g.
Espresso standard or slow brewing speed
Espresso
e. g. Espresso intensive.
● Press the á button 2.
The settings are saved.
Calling up a user prole
● Press the á button 2 briey.
It is no longer possible to operate the
The user prole menu appears:
appliance.
The cup warmer 27 is switched off.
Select a profile ▶ start
● To deactivate the child-proof lock,
hold down the à button 3 for at least
Robert User 2
3 seconds. The key disappears from the
display 5.
12

en
aromaIntense Coffee
Menu settings
The intense avour of the coffee may be
● Hold down the j button 7 for at least
adapted to individual requirements by
3 seconds.
setting the brewing speed.
The different setting options are now
● Use the rotary knob 6 to select either
displayed.
normal brewing speed Coffee standard or
slow brewing speed Coffee intensive.
Settings
Info: The brewing setting can also be
Language English
aromaIntense Espresso
selected for Caffe Latte and MyCoffee.
aromaIntense Coffee
It makes no change to the warm milk.
Coffee temperature
The different setting options can be selected
● Turn the rotary knob 6 to set the coffee
with the selection buttons < and > 4.
temperature. The setting applies to all
types of preparation, except the custom-
Note: The changes you have made are
ised settings under “Customising”.
saved automatically. It is not necessary
to conrm them additionally. If no entry is
Hot water temperature
made after approx. 2 minutes, the menu will
● Turn the rotary knob 6 to set the tem-
close automatically.
perature. The setting applies to all types
of preparation except the customised
The following settings can be selected:
settings under “Customising”.
Language
Exit profile
● Turn the rotary knob 6 to select the
● Here you can set whether the appliance
required language.
should exit the customising function auto-
matically automatic or manually manually.
aromaIntense Espresso
The intense avour of the espresso may be
Auto off after
adapted to individual requirements by set-
● Turn the rotary knob 6 to enter the time
ting the brewing speed.
span after which the appliance should
● Use the rotary knob 6 to select either
automatically switch off following the last
normal brewing speed Espresso standard
drink preparation.
or slow brewing speed Espresso intensive.
A time between 5 minutes and 8 hours can
be set.
Info: The brewing setting can also be
selected for Cappuccino and Macchiato. It
Cup warmer off in
makes no change to the milk froth.
Here you can set the time span after which
the cup warmer 27 switches off again
automatically.
● Set the required time by turning the rotary
knob 6.
13
en
Brightness
The appliance is ready for use again.
The display 5 brightness can be set from
1 to 10.
● Turn the rotary knob 6 to select the
required setting.
Water hardness
● Turn the rotary knob 6 to select the
required water hardness 1, 2, 3 or 4.
Info: It is important to set the water
hardness correctly, so that the appliance
indicates accurately when the descaling
programme should be run. The factory
Info: Rinsing the lter 29 simultaneously
setting for the water hardness is 4.
activates the setting for the “change lter”
display.
You can check the water hardness using
the enclosed test strip or by asking your
You can nd detailed information about the
local water supplier.
water lter in the enclosed lter instructions.
● Dip the test strip briey in water and
check the result after one minute.
The lter 29 is no longer effective when the
Service - change filter display appears, or at
Level Water hardness
the latest after two months. It needs to be
German (°dH) French (°fH)
replaced for reasons of hygiene and so that
1
1-7
1-13
there is no build-up of limescale (this could
2
8-14
14-25
damage the appliance).
3
15-21
26-38
4
22-30
39-54
Water lters are available from retail outlets
or from customer services (see the section
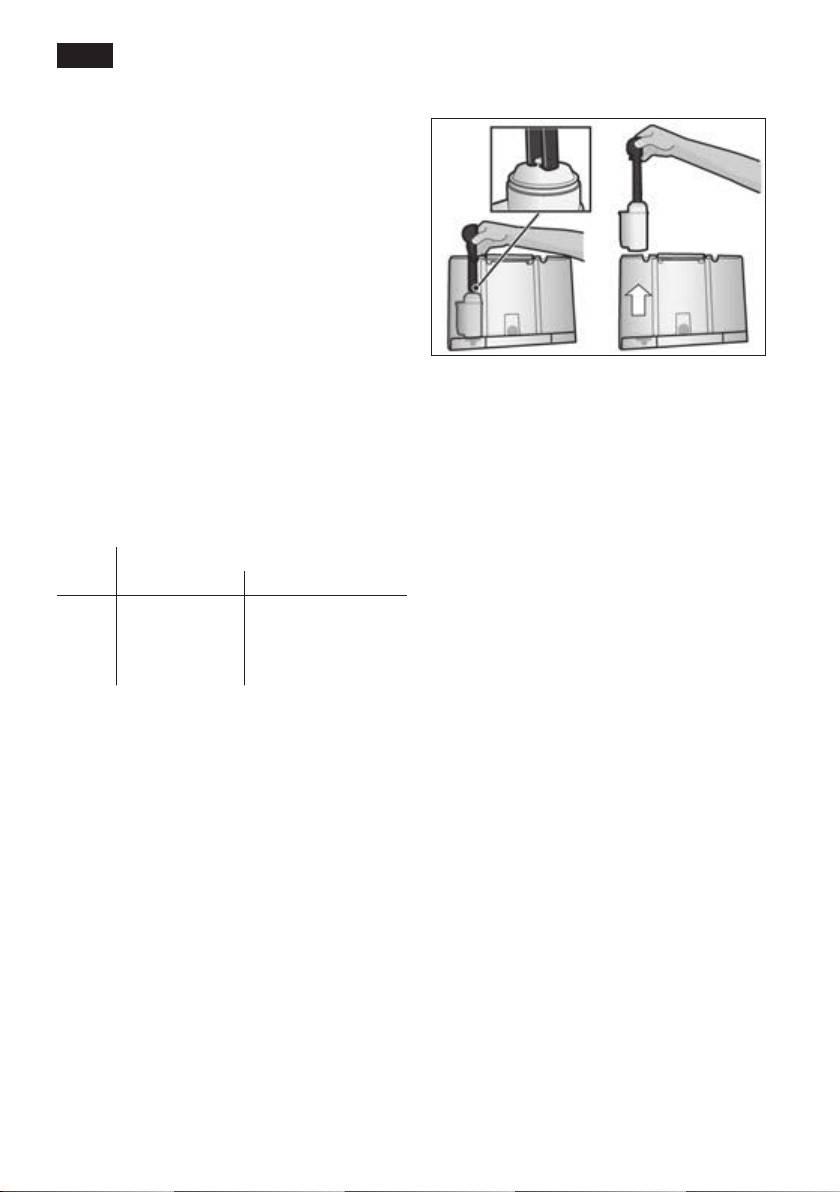
Water filter
“Accessories”).
A new water lter 29 must be rinsed before
it can be used.
If no new lter 29 is used, turn the Water
● To do this, press the water lter 29 rmly
filter setting to no.
into the water tank 11 with the aid of the
measuring spoon 14. Fill the water tank
Info: If the appliance has not been used
with water up to the “max” mark.
for a prolonged period (for example, when
● Turn the rotary knob 6 to select start and
you are on vacation), the existing lter 29
press the start button 8.
should be rinsed before the appliance is
Place 1 l container under milk frother
used again. To do this, simply dispense a
Placesuctionpipeincontainer▶start
cup of hot water.
● Place a container with a capacity of 1 litre
under the milk frother 10.
● Place the end of the suction pipe 10d in
the container.
● Press the start button 8. Water will now
ow through the lter 29 to rinse it.
● Next, empty the container.
14

en
Transportation lock
Preparation using
● To avoid damage caused by frost during
coffee beans
transport and storage, the appliance must
be completely emptied rst.
This fully automatic espresso machine
Info: The appliance must be ready for use
grinds beans freshly for each brew. If pos-
and the water tank 11 lled.
sible, use only beans for fully automatic
coffee and espresso machines. For optimal
● Press the start button 8. The appliance
quality, deep-freeze the beans or store in
automatically empties the pipe system
a cool place in sealed containers. Coffee
and switches off.
beans can be ground while frozen.
● Empty the water tank 11 and the drip
tray 23.
Important: Fill the water tank 11 with cold,
fresh water every day. The water tank 11
Factoryreset
should always contain sufcient water for
You can cancel your own settings and reset
operating the appliance.
the factory settings.
● To activate the factory settings, press the
Tip: Pre-warm cups, especially small, thick
start button 8.
espresso cups, on the cup warmer 27.
Info: The appliance can also be reset to
Different coffee drinks can be prepared
the factory settings using a combination of
quite simply at the press of a button.
buttons. The appliance must be switched
off fully.
Note: With some settings, the coffee is
prepared in two stages (see
● Hold down the selection buttons < and
“ aromaDouble Shot”). Wait until the
> 4 and the on/off switch 1 O / I at the
procedure is fully completed.
same time for at least 5 seconds. Press
the start button 8. The factory settings
Drink preparation without milk
are now reactivated.
The appliance must be ready for use.
● Place the pre-warmed cup(s) under the
coffee outlet 9.
● Select the required 2 x Espresso,
2 x Coffee, Espresso or Coffee by turning
the rotary knob 6.
The display 5 shows the selected drink
along with the setting for coffee strength
and per-cup quantity for this drink.
Espresso
You can change the settings (see “Display
settings”) or call up and customise settings
(see “Customising”).
15
en
● Press the start button 8.
Preparation using
The coffee is brewed and then dispensed
ground coffee
into the cup(s).
Drink preparation with milk
This fully automatic espresso machine can
The appliance must be ready for use.
also be operated using ground coffee (not
● Place the suction pipe 10d of the milk
instant coffee powder).
frother 10 deep in the milk container 26.
● Swivel the coffee outlet 9 to the right until
Note: The aromaDouble Shot function
it clicks into place.
cannot be used when coffee is prepared
● Place the pre-warmed cup or glass under
using ground coffee.
the coffee outlet 9 and milk frother 10.
● Select the required Caffe Latte,
Drink preparation without milk
Macchiato, Cappuccino or Mycoffee by
The appliance must be ready for use.
turning the rotary knob 6.
● Place the pre-warmed cup(s) under the
The display 5 shows the selected drink
coffee outlet 9.
along with the setting for coffee strength
● Select the required Espresso or Coffee by
and per-cup quantity for this drink.
turning the rotary knob 6.
● Open the powder compartment 18.
Cappuccino
● Pour in no more than 2 level measuring
spoons 14 of ground coffee.
¡ Warning!
Do not use whole beans or instant coffee.
You can change the settings (see “Display
● Close the powder compartment 18.
settings”) or call up and customise settings
● Press the start button 8.
(see “Customising”).
The coffee is brewed and then dispensed
into the cup(s).
● Press the start button 8.
First milk is delivered into the cup or glass.
Note: Repeat the procedure for another cup
Then the coffee is brewed and dispensed
of coffee. If coffee is not dispensed within
into the cup or glass.
90 seconds, the brewing chamber empties
automatically to avoid an overow. The
Important: Dried milk residue is difcult
appliance rinses.
to remove, so the milk frother 10 must be
cleaned with lukewarm water immediately
after use (see “Cleaning the milk system”).
16
