Phottix Atlas II: инструкция
Раздел: Аксессуары для фото- и видеотехники
Тип:
Инструкция к Phottix Atlas II
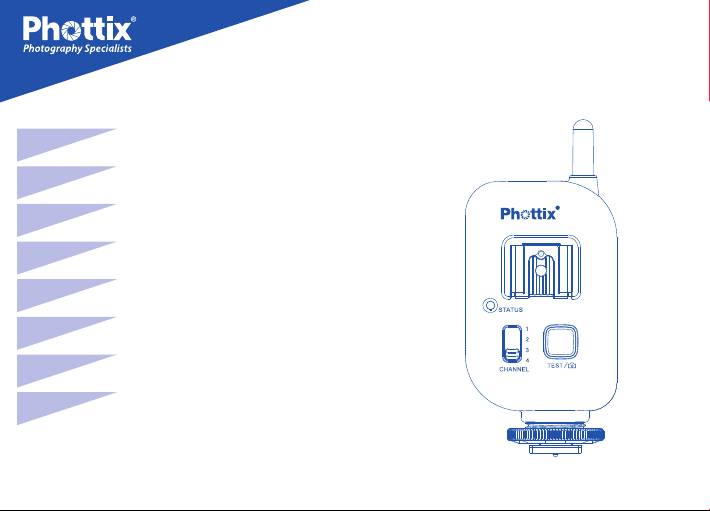
Phottix Atlas II - 2.4 GHz
Flash Trigger Instructions
En
INSTRUCTION MANUAL 2
De
BENUTZERHANDBUCH
14
Fr
MANUEL D’UTILISATION
26
Es
MANUAL DE INSTRUCCIONES
38
Pl
50INSTRUKCJA OBSŁUGI
Ru
РУКОВОДСТВО ПОЛЬЗОВАТЕЛЯ 61
Simp
Cn
说明书
75
Trad
Cn
說明書
85
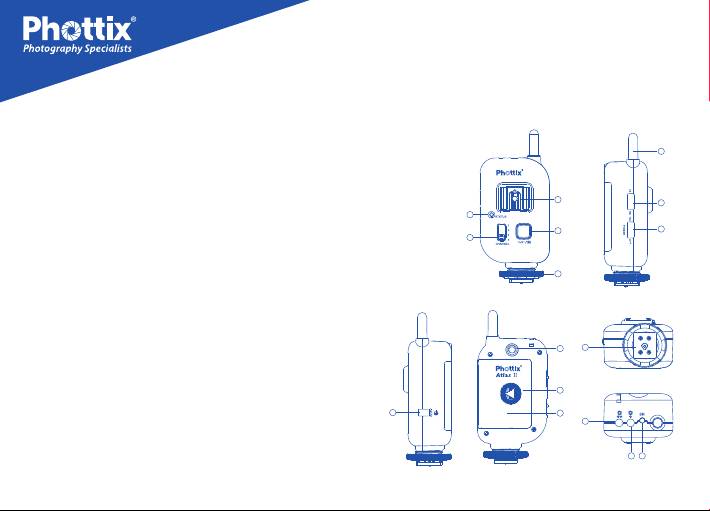
Parts
12
1. Power Switch
2. Transmit / Receive Mode Switch
3. DC Power Port
6
2
4. Channel Selector Switch
16
5. Test / Shutter Button
5
1
4
6. Flash Hot Shoe Connection
7. Camera Hot Shoe Connection
8
8. Locking Ring
9. Flash in/out Port
10. Flash out Port
11. Shutter Release Port
13
7
12. Antennae
13. Tripod Lug
14
14. Battery Cover
3
15
9
15. Battery Compartment
16. Status LED
10 11
2

En
INSTRUCTION MANUAL
Please Note
Tip:Turn o all devices – ashes/strobes,
1. The Phottix Atlas II hot shoe connection is
cameras, and Phottix Atlas II transceivers -
designed to re speedlight-type ashes that
when connecting and disconnecting devices.
are triggered by the center contact. Some
ashes (by Nissin, Sigma, and other manufac-
Compatibility
turers) may not be triggered by the center hot
The Phottix Atlas II has limited compatibility
shoe contact but by specic secondary
with Phottix Odin, Strato II Multi 5-in-1 and
contacts. Please check your ash manual for
Phottix Strato 4-in-1 Wireless Trigger Systems.
specics. These ashes can be red by PC Sync
1. Phottix Odin TCUs set on Channel 1, 2, 3 or 4
cable if available.
and in any group will trigger the Phottix Atlas II
2. The Atlas II is designed to work in Manual
set on Channel 1, 2, 3 or 4. Other Odin TCU
Exposure mode and has no TTL functions.
functions will not work with the Atlas II. Using
Odin TCUs in HSS mode may cause issues with
3. Transmit or receive mode must be set on the
ash sync when using the Atlas II.
transceivers, the Atlas II will not do both at the
same time.
2. Phottix Strato II Transmitter set on Channel
1, 2, 3 or 4 and in any group will trigger the
4. The Phottix Atlas II is not compatible with
Phottix Atlas II set on Channel 1, 2, 3 or 4.
previous Phottix Atlas series ash triggers.
3

3. Phottix Strato transmitters will trigger the
ashes/strobes or take a photo as a wireless
Atlas II on Channels 1 to 4.
remote when the Phottix Atlas II is set in Tx
(transmit mode).
4. The Atlas II will not trigger Strato II Multi or
Odin receivers.
2. The Test / Shutter Button takes a photo when
used as a wired remote and connected to a
5. The Atlas II will trigger Strato receivers.
camera with a Phottix Accessory Cable.
Inserting Batteries
3. To Test: Press the Test / Shutter Button –
1. Press the battery cover in while pushing it
remote ashes connected to Phottix Atlas II
away from the Atlas II. The battery cover will
transceivers set in Rx (receive mode) and on the
snap open.
same channel, will re.
2. Lift the battery cover.
For Remote Use See:
Using the Atlas II as a
3. Insert AA batteries as shown.
wireless remote
and Using the Atlas II
as a wired remote
below.
4. Close the battery cover and push the cover
back into the locked position.
Status LED
1. The Status LED on the front of the Phottix
Test / Shutter Button
Atlas II will ash green when it is ready to
1. The Test / Shutter Button will test re remote
4

En
INSTRUCTION MANUAL
transmit or receive signals. The LED will turn
less remote shutter release.
solid red when a signal is sent or received.
2. Set the Transmit / Receive Mode Switch to
2. When the battery power is very low, the
Rx for receive mode. This can be used to
Status LED will ash green light every 0.5
trigger remote ashes or cameras when using
seconds. Please change the batteries (see
the Atlas II as a wireless remote shutter release.
above).
Setting Channels
Turning units on/o
1. The Phottix Atlas II has four channel settings.
1. To turn on the Phottix Atlas II – move the
2. Move the Channel Selector Switch to 1, 2, 3,
power switch to the “ON” position.
or 4 to select a channel.
2. To turn o the Phottix Atlas II – move the
3. Make sure all Phottix Atlas II transceivers,
power switch to the “OFF” position.
both on the camera and attached to
ashes/strobes, are on the same channel.
Setting Transmit or Receive Mode
1. Set the Transmit / Receive Mode Switch to Tx
4. Atlas II transceivers in Rx (receive) mode set
for transmit mode. This can be used on a
to channels dierent from the channel set on
camera hot shoe to trigger remote ashes or to
the Atlas II set to Tx (transmit) mode will not
take photos when using the Atlas II as a wire-
re.
5

Connecting to the camera hot shoe
2. Slide the ash into the transceiver’ s hot shoe
1. Turn o the camera and Phottix Atlas II
mount.
transceiver.
3. Lock the ash with the ash’ s locking
2. Slide the Atlas II transceiver into the
mechanism.
camera’s hot shoe mount.
4. Set the Transmit / Receive Mode Switch on
3. Turn the Atlas II locking ring until tight.
the Atlas II to Rx (receive mode).
4. Set the Transmit / Receive Mode Switch on
5. Turn on the Phottix Atlas II and ash.
the Atlas II to Tx (transmit mode).
6. Set the ash to Manual mode.
5. Turn on the Phottix Atlas II and the camera.
* It is not unusual for the ash to discharge
6. Set the camera and ash to Manual mode.
once after turning on the Phottix Atlas II.
Connecting a ash
Connecting a ash
or studio light by cable
to the Atlas II hot shoe
1. Turn o the ash/strobe and the Phottix
1. Turn o the ash and the Phottix Atlas II
Atlas II transceiver.
transceiver.
6

En
INSTRUCTION MANUAL
2. Connect a compatible cable to the Phottix
Connecting a local ash on a
Atlas II Flash in/out port or Flash out port.
bracket
3. Connect the opposite end of the cable to the
(The Atlas II will trigger a local ash on
ash or studio strobe (A 6.3 mm adaptor is
a bracket and a remote manual
included for studio strobes with larger ports).
ash/strobe equipped with a Phottix
Atlas II)
4. Set the Transmit / Receive Mode Switch on
1. Turn o the camera, ash/strobe and the
the Atlas II to Rx (receive mode).
Phottix Atlas II transceiver.
5. Turn on the ash/strobe, Phottix Atlas II and
2. Mount a Phottix Atlas II in the camera’ s hot
camera.
shoe port.
6. Set the ash/strobe to Manual mode.
3. Connect a compatible cable to the Phottix
* It is not unusual for the ash to discharge
Atlas II Flash in/out port or Flash out port.
once after turning on the Phottix Atlas II.
4. Connect the opposite end of the cable to the
ash’s PC Sync port.
5. Set the Transmit / Receive Mode Switch on
the Atlas II to Tx (transmit mode).
7

6. Turn on the camera, Phottix Atlas II and
Phottix Atlas II transceiver.
ash.
2. Connect compatible cables to the Atlas II
7. Set the camera and ash to Manual mode.
Flash in/out port and Flash out port.
* It is not unusual for the ash to discharge
3. Connect the cables to two ashes or strobes.
once after turning on the Phottix Atlas II.
4. Set the Transmit / Receive Mode Switch on
the Atlas II to Rx (receive mode).
Connecting two ashes /
5. Turn on the ash/strobe, Phottix Atlas II and
studio lights
camera.
One Phottix Atlas II can be used to trigger two
studio strobes or two ashes. Both ashes or
6. Set the ash to Manual mode.
studio strobes must be of the same brand,
* It is not unusual for the ash to discharge
model, and voltage. DO NOT USE DIFFERENT
once after turning on the Phottix Atlas II.
FLASHES! Flashes have dierent trigger volt-
ages – use the same make and model. Phottix
is not responsible for damage resulting from
improper use.
1. Turn o the camera, ash/strobe, and the
8

En
INSTRUCTION MANUAL
shoe mounted ash, simultaneously
Connecting to the camera PC Sync
transmitting a signal from the camera to the
Port*
PC Sync attached Phottix Atlas II. The Atlas II
(A ash on the camera hot shoe, the
will trigger any remote ashes or strobes
Atlas II connected to the camera PC
connected to Phottix Atlas II transceivers on
Sync port)
the same channel set in Rx (receive) mode.
1. Turn o the camera, ash, and the Phottix
*On compatible cameras
Atlas II transceiver.
2. Connect a compatible cable to the Phottix
Using the Atlas II as a wireless
Atlas II Flash in/out port.
remote*
3. Connect the opposite end of the cable to the
1. Turn o the camera and the Phottix Atlas II
camera’s PC Sync port.
transceiver.
4. Set the Transmit / Receive Mode Switch on
2. Attach the correct Phottix Accessory Cable
the Atlas II to Tx (transmit mode).
for your camera make and model to the
Shutter Release Port on the Atlas II.
5. Turn on the camera and Phottix Atlas II. Set
the camera to Manual mode.
3. Attach the other end of the cable to the
camera’ s remote port.
6. Releasing the camera shutter will re the hot
9

4. Set the Transmit / Receive Mode Switch on
2. Attach the correct Phottix Accessory Cable
the Atlas II to Rx (receive mode).
for your camera make and model to the
Shutter Release Port on the transceiver.
5. Turn on the camera and Phottix Atlas II
transceiver.
3. Attach the other end of the cable to the
camera’s remote port.
6. Consult your camera manual for specic
settings for remote use.
4. Turn on the camera and Phottix Atlas II
7. Using a second Phottix Atlas II transceiver
transceiver.
set in Tx (transmit mode) will allow for remote
5. Consult your camera manual for specic
wireless shutter release functions. The Atlas II
settings for remote use.
test button will work as shutter button – a
6. The attached Phottix Atlas II transceiver will
half-press will autofocus, a full press will take a
allow for wired shutter release functions. The
photo.
Atlas II test button will work as shutter button
*On compatible cameras
– a half-press will autofocus, a full press will
take a photo.
Using the Atlas II as a wired remote*
7. The Atlas II will function as a wired remote
1. Turn o the camera and the Phottix Atlas II
when used with or without batteries and the
transceiver.
power switch set to on or o.
10

En
INSTRUCTION MANUAL
*On compatible cameras your ash will not trigger: 1) reposition the
remote ash or strobe; 2) change the channel
Warnings
on the Atlas II transceivers.
- This product is a precise electronic instru-
ment. Do not expose to damp environments or
dust.
- Do not drop or crush.
- Do not use harsh chemical(s) or solvents to
clean the Atlas II. Use a soft cloth or lens paper.
- Interference: The Phottix Atlas II transmits
and receives radio signals at 2.4 GHz. Its perfor-
mance can be aected by electrical current,
magnetic elds, and radio signals. Environ-
mental objects, such as large buildings or
walls, trees, fences, or cars can also aect
performance. For best results position the
Atlas II so the antenna is vertical. If you nd
11

Technical Specications
Frequency: 2.4 GHz.
Top ports: 3.5mm, 2.5mm
Distance: 350m +
C/F port voltage handling: 300V
Channel: 4 channels
Flash port voltage handling: 300V
Batteries: 2 x AA batteries
Body dimensions: 3.6x5.3x10.2cm
Max sync speed: 1/250 sec*
Antenna: 6.0x0.7cm
Output: Hot shoe, 3.5mm ports, 2.5mm shutter
Weight: 140g
release port
Attachment: 1/4 tripod lug
Operating temperature: -15—65 ℃
Input voltage: 2.2-3.2V (DC input voltage 5V )
Storage temperature: -30—85 ℃
Minimum response time: 650 us
12

En
INSTRUCTION MANUAL
FCC
This device complies with part 15 of the FCC Rules. Operation is subject to the following two
conditions: (1) This device may not cause harmful interference, and (2) this device must accept
any interference received, including interference that may cause undesired operation.
13
