Phottix Ares: инструкция
Раздел: Аксессуары для фото- и видеотехники
Тип:
Инструкция к Phottix Ares
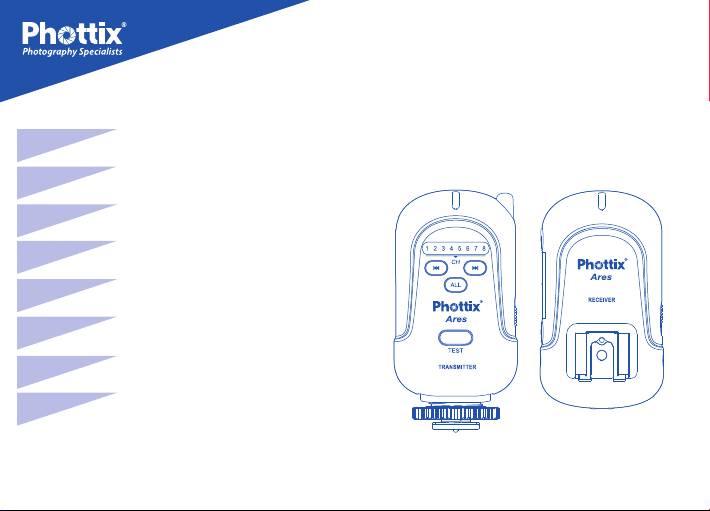
Phottix Ares Flash Trigger
Instructions
En
INSTRUCTION MANUAL
2
De
BENUTZERHANDBUCH
11
Fr
MANUEL D’UTILISATION
20
Es
MANUAL DE INSTRUCCIONES
29
Pl
INSTRUKCJA OBSŁUGI
38
Ru
РУКОВОДСТВО ПОЛЬЗОВАТЕЛЯ
47
Simp
Cn
说明书
57
Trad
Cn
說明書
66
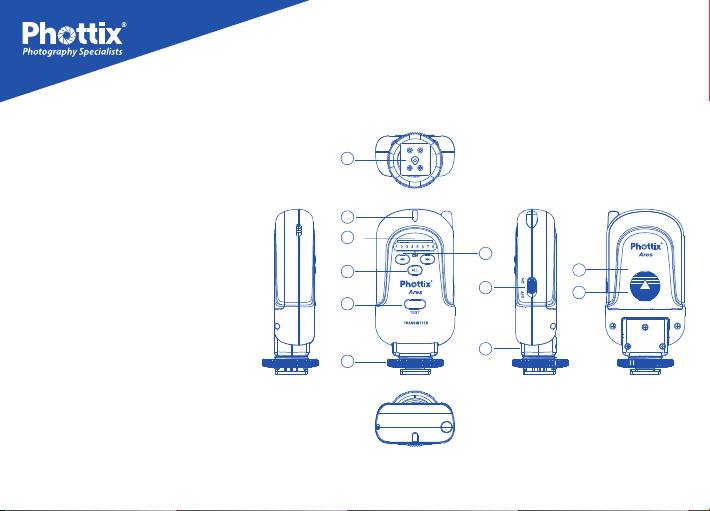
Parts
Transmitter
8
1. Status LED
2. Channel Numbers
3. Channel Adjustment Buttons
1
4. Fire All Button
2
5. Test Button
3
6. Swivel Rotator
4
11
7. Locking Ring
9
10
5
8. Camera Hot Shoe Connection
9. Power Switch
10. Battery Cover
6
7
11. Battery Compartment
2
En
INSTRUCTION MANUAL
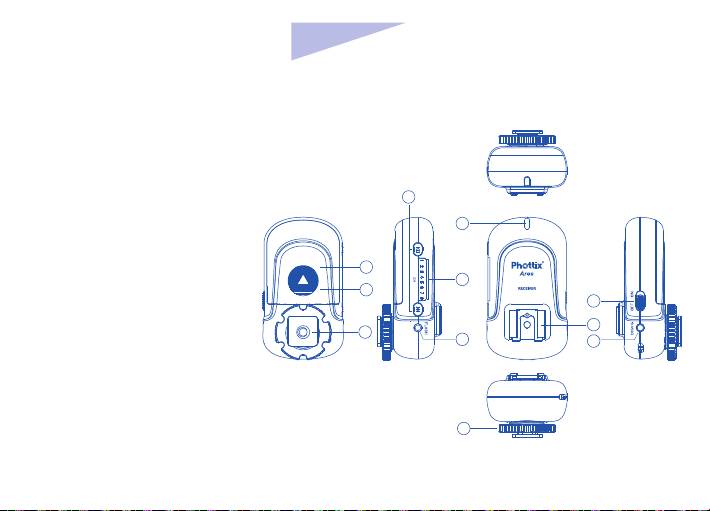
Receiver
1. Status LED
2. Hot Shoe Connection
3. Power Switch
6
4. DC Power Port
5. Channel Numbers
1
6. Channel Adjustment Buttons
7. 3.5mm Output Port
9
5
8. Battery Cover
8
9. Battery Compartment
3
10. Locking Ring
2
11
11. Cold Shot / Tripod Lug
7
4
10
3

Please Note
Inserting Batteries
1. Phottix Ares receivers are designed to work in
1. Press the battery cover in while pushing it
camera and ash manual mode and have no
away from the Ares transmitter or receiver. The
TTL functions.
battery cover will snap open.
2. Remove the battery cover from the Ares.
2. Phottix Ares receivers will re hot shoe ashes
that are triggered from the center contact pin.
3. Insert AA batteries as shown inside the
Some third party ashes that trigger from
battery compartment.
auxiliary hot shoe pins will not trigger when
4. Replace the battery cover and push back into
used on the Ares receiver hot shoe. Flashes will
the locked position.
trigger via sync cable if the ash has a sync port.
Test Button
Tip: Turn o all devices – ashes/strobes,
1. The Transmitter Test Button will test re
cameras, and Phottix Ares transmitters and
remote ashes/strobes.
receivers - when connecting and disconnecting
devices.
2. To Test: Press the Transmitter Test Button –
ashes/strobes connected to Phottix Ares
receivers on the same channel will re.
4

En
INSTRUCTION MANUAL
Status LED
receiver - move the power switch to the “ON”
1. The Status LED on the front of the Phottix
position.
Ares transmitter will ash green approximately
2. To turn o the Phottix Ares transmitter or
every one second when in standby mode. It will
receiver - move the power switch to the “OFF”
turn red when a signal is being transmitted.
position.
2. The Status LED on the Phottix Ares receiver
will ash green approximately every one
Setting Channels
second while in standby mode. The LED will
1. The Phottix Ares has eight channel settings.
turn red when a signal is received from the
2. Press the Channel Adjustment Buttons (left
transmitter.
or right) on the transmitter or receiver to set
3. When battery power is low the Status LED on
the channel.
the transmitter or receiver will quickly ash red
3. Channel Numbers 1 to 8 will illuminate on
indicating low power and the need to change
the transmitter or receiver to indicate which
batteries.
channel the device is set to.
4. Phottix Ares transmitters will only trigger
Turning Transmitter and Receiver
receivers set to the same channel.
On/O
1. To turn on the Phottix Ares transmitter or
5

Fire All Channels Switch
hot shoe mount.
1. To re all ashes or strobes on receivers set to
3. Turn the Ares locking ring until tight.
dierent channels press the Fire All Button on
4. Turn on the camera, Ares transmitter and set
the transmitter.
the shooting mode to Manual.
2. The Channel Numbers 1 to 8 will illuminate.
3. All nearby Ares receivers set to any channel in
Raising and Lowering the
standby mode will re connected ashes/
Transmitter
strobes.
The Phottix Ares transmitter can be used in an
4. To turn o Fire All mode press the Fire All
up or down position.
Button. The channel selection will revert to its
1. To lower the transmitter: After mounting,
previous setting.
gently push the Ares transmitter forward to use
in the down position. The transmitter will lock
Connecting the transmitter to the
in place in the down position.
camera hot shoe
2. To raise the transmitter: gently pull the Ares
1. Turn o the camera and Phottix Ares transmit-
transmitter up. The transmitter will lock in
ter.
place in the up position.
2. Slide the Ares transmitter into the camera’s
6

En
INSTRUCTION MANUAL
Connecting a ash to the Ares
Connecting a ash/strobe to the
Receiver hot shoe
Ares receiver by sync cable
1. Turn o the ash and the Phottix Ares
1. Turn o the ash/strobe and the Phottix Ares
receiver.
receiver.
2. Slide the ash into the receiver’s hot shoe
2. Connect a cable to the receiver’s 3.5 mm Sync
mount.
Port.
3. Lock the ash with the ash’s locking mecha-
3. Connect the opposite end of the cable to a
nism.
ash or studio strobe (A 6.3 mm adapter is
included for studio strobes with larger ports).
4. Turn on the ash and the Phottix Ares
receiver.
4. Turn on the ash/strobe and the Phottix Ares
receiver. Set the ash/strobe to Manual mode.
5. Set the ash to Manual mode.
* It is not unusual for the ash to discharge once
* It is not unusual for the ash to discharge once
after turning on the Phottix Ares.
after turning on the Phottix Ares.
7

Technical Specs
Frequency: 2.4 GHz
Range: 200m +
Channel: 8 channels and Fire All Function
Power: 2 x AA batteries (Transmitter and Receiver), 5V DC (Receiver)
Max sync speed: 1/250 sec*
Antenna: internal antenna
Working Temperature: 0℃~+40℃
Working Humidity: 35﹪~95﹪RH
* On compatible cameras/ashes
Transmitter
Input Voltage: 2.2-3.2V
Current: Maximum Working Current ≤45mA, Standby Current: 7mA (single channel), 27mA (all channels),
O Current Info: 0mA
Dimensions: 104mmx50mmx35mm
Weight: With batteries: 108g, Without batteries: 61g
Receiver
Input Voltage: 2.2-3.2V (DC Input Voltage :5V)
8

En
INSTRUCTION MANUAL
Current: Maximum Working Current ≤26mA, Standby Current≤15mA, O Current Info: 0mA
Ports: 3.5mm sync port, hot shoe output
Dimensions: 88mmx50mmx40mm
Weight: With batteries: 108g, Without batteries: 61g
9

Warnings
- This product is a precise electronic instrument.
Do not expose to damp environments or dust.
- Do not drop or crush.
- Do not disassemble.
- Do not use harsh chemical(s) or solvents to
clean the body. Use a soft cloth or lens paper.
- Interference: The Phottix Ares transmits and
receives radio signals at 2.4 GHz. Its
performance can be aected by electrical
current, magnetic elds, radio signals, wireless
routers, cellular phones, and other electronic
devices. Environmental objects, such as large
buildings or walls, trees, fences, or cars can also
aect performance. If your Ares receiver will not
trigger move its location slightly.
10
