Siemens TK76001 – страница 2
Инструкция к Кофе-Машину Siemens TK76001
Оглавление
de
Pulverschublade 21 einfüllen!
0,5 L behäLter unter
Zum Entkalken und Reinigen ausschließlich
M
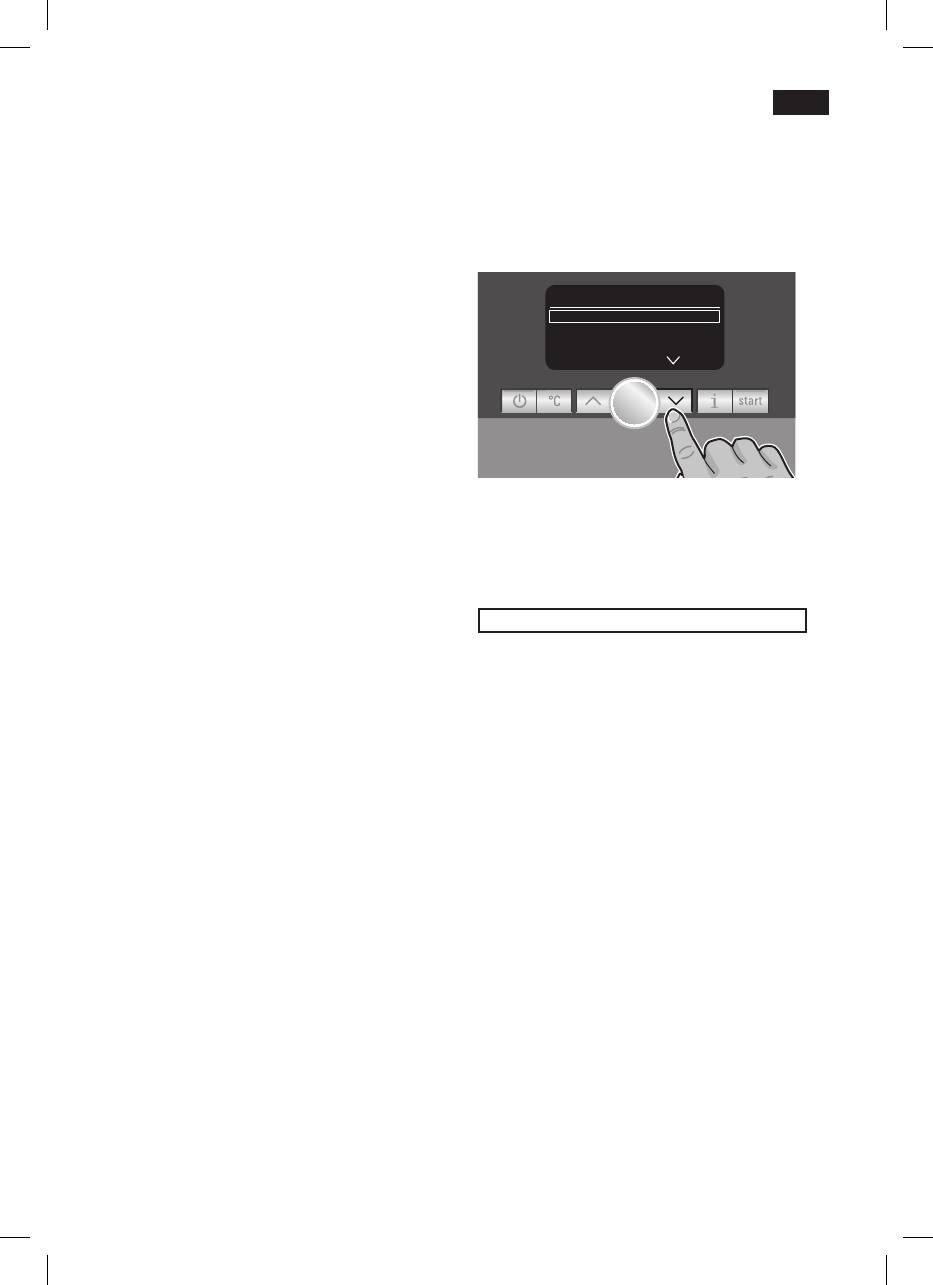
iLchschäuMer steLLen
start
die beiliegenden Tabletten verwenden. Sie
●
Einen Behälter mit 0,5l Fassungsvermö-
wurden speziell für diesen Espressovoll-
gen unter den Milchschäumer 10 stellen.
automaten entwickelt.
●
Taste 8
start
drücken.
Info: IstderWasserlter34 aktiviert,
Speziell entwickelte und geeignete
erscheint die entsprechende Aufforderung,
Entkalkungs- und Reinigungstabletten
den Filter 34 zu entfernen und erneut die
sind über den Handel, sowie den
Taste 8
start
zu drücken.
Kundendienst erhältlich.
WasserFiLter entFernen
start
0,5 L Wasser + entkaLker einFüLLen
Bestellnummer Handel Kundendienst
start
Reinigungs-
TZ60001 310575
●
Lauwarmes Wasser in den leeren
tabletten
Wassertank 11 bis zur Markierung „0,5l“
einfüllen und 2 Siemens
Entkalkungs-
TZ60002 310967
Entkalkungstablettendarinauösen.
tabletten
●
Taste 8
start
drücken, das
Wichtig:IsteinWasserlter34 in den
Entkalkungsprogramm läuft jetzt ca. 20
Wassertank 11 eingesetzt, diesen
Minuten.
unbedingt vor dem Start des Service-
entkaLkunksPrograMM LäuFt
Programms entfernen.
zu Wenig entkaLker
e
ntkaLker nachFüLLen
Entkalken
Info: Ist zu wenig Entkalkunglösung im
Wassertank 11, erscheint die
entsprechende Aufforderung.
esPresso Ë Í
Entkalkungslösung nachfüllen und erneut
Taste 8
start
drücken.
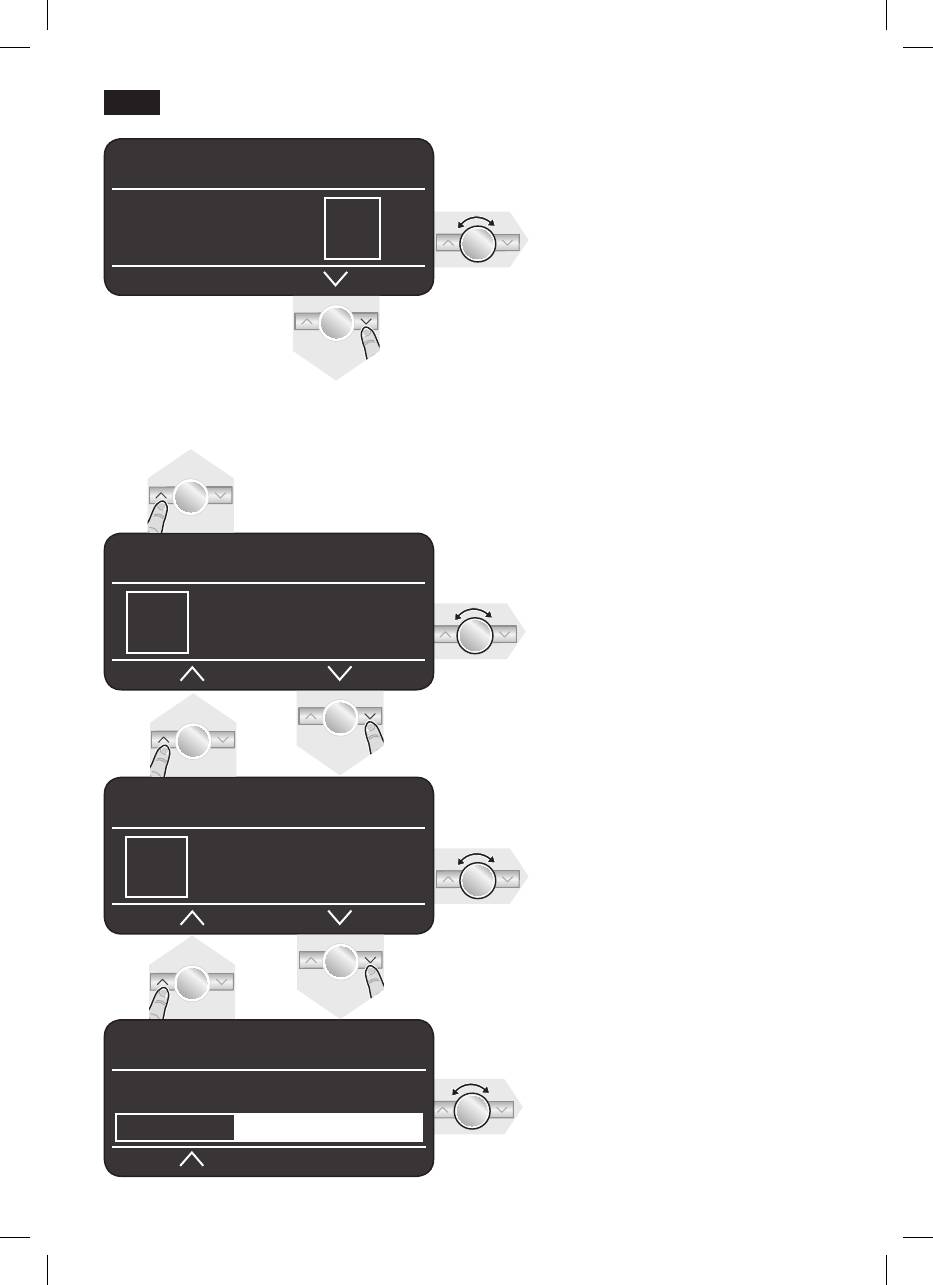
service - entkaLken
i - taste 3 sek.
Wassertank sPüLen unD FüLLen
start
●
Den Wassertank 11 spülen und frisches
Während der einzelnen Entkalkungsschritte
Wasser bis zur Markierung „max“
blinkt die Taste 8
start
.
einfüllen.
Die Zahlen rechts oben zeigen an, wie weit
●
Die Taste 8
start
drücken, das
der Ablauf fortgeschritten ist.
Entkalkungsprogramm läuft jetzt ca. 1
Minute und spült das Gerät.
●
Taste 7 j mindestens 3 Sekunden
gedrückt halten.
entkaLkunksPrograMM LäuFt
entkaLken
start
t
roPFschaLe Leeren
●
Taste 8
start
drücken, das Display 5 führt
troPFschaLe einsetzen
durch das Programm.
●
Die Tropfschalen 28 leeren und wieder
einsetzen.
troPFschaLe Leeren
Das Gerät ist fertig entkalkt und wieder
t
roPFschaLe einsetzen
betriebsbereit.
●
Tropfschale 28 leeren und wieder
einsetzen.
17

de
●
Die Tropfschale 28 leeren und wieder
Reinigen
einsetzen.
Das Gerät ist fertig gereinigt und wieder
betriebsbereit.
esPresso Ë Í
service - reinigen
Calc‘n‘Clean
i - taste 3 sek.
Calc‘n‘Clean kombiniert die Einzel-
funktionen Entkalken und Reinigen.
Während der einzelnen Reinigungsschritte
Liegt die Fälligkeit der beiden Programme
blinkt die Taste 8
start
. Die Zahlen rechts
nah beieinander, schlägt der Espresso-
oben zeigen an, wie weit der Ablauf
vollautomat automatisch dieses
fortgeschritten ist.
Serviceprogramm vor.
●
Wassertank 11 bis „max“ füllen.
●
Taste 7 j mindestens 3 Sekunden
esPresso Ë Í
gedrückt halten.
reinigen
start
service - caLc‘n‘cLean
●
Taste 8
start
drücken, das Display 5 führt
i - taste 3 sek.
durch das Programm.
troPFschaLe Leeren
Während der einzelnen Calc‘n‘Clean
t
roPFschaLe einsetzen
Schritte blinkt die Taste 8
start
. Die Zahlen
●
Tropfschale 28 leeren und wieder
rechts oben zeigen an, wie weit der Ablauf
einsetzen, das Gerät spült zweimal.
fortgeschritten ist.
●
Taste 7 j mindestens 3 Sekunden
kaFFeeausLauF schWenken
gedrückt halten.
●
Den Kaffeeauslauf 9 nach links
schwenken bis er hörbar einrastet.
caLc‘n‘cLean
start
reinigungsPrograMM LäuFt
●
Taste 8
start
drücken, das Display 5 führt
durch das Programm.
PuLverschubLaDe öFFnen
●
Die Pulverschublade 21 durch drücken
troPFschaLe Leeren
öffnen.
t
roPFschaLe einsetzen
●
Tropfschale 28 leeren und wieder
sieMens reinigungstabLette
einsetzen.
einWerFen unD schubLaDe schLiessen
●
Den Kaffeeauslauf 9 nach rechts
●
Eine Siemens Reinigungstablette ein-
schwenken bis er hörbar einrastet.
werfen und die Schublade 21 schließen.
●
Einen Behälter mit mind. 1 l Fassungsver-
mögen unter den Milchschäumer 10 stellen.
start Drücken
●
Taste 8
start
drücken, das Gerät spült
●
Taste 8
start
drücken, das Reinigungs-
zweimal.
programm läuft jetzt ca. 7 Minuten.
reinigungsPrograMM LäuFt
reinigungsPrograMM LäuFt
P
uLverschubLaDe öFFnen
t
roPFschaLe Leeren
●
Die Pulverschublade 21 durch drücken
t
roPFschaLe einsetzen
öffnen.
18

de
sieMens reinigungstabLette
Wichtig: Wurde eines der Service-
einWerFen unD schubLaDe schLiessen
Programme z.B. durch Stromausfall
●
Eine Siemens Reinigungstablette in die
unterbrochen, wie folgt vorgehen:
Schublade 21 einwerfen und schließen.
●
Den Wassertank 11 spülen und frisches
Wasser bis zur Markierung „max“
Info: IstderWasserlter34 aktiviert,
einfüllen.
erscheint die entsprechende Aufforderung,
●
Die Taste 8
start
drücken, das Reinigungs-
den Filter 34 zu entfernen und erneut die
programm läuft jetzt ca. 3 Minuten und
Taste 8
start
zu drücken.
spült das Gerät.
WasserFiLter entFernen
start
reinigungsPrograMM LäuFt
0,5 L Wasser + entkaLker einFüLLen
troPFschaLe Leeren
start
t
roPFschaLe einsetzen
●
Lauwarmes Wasser in den leeren
●
Die Tropfschale 28 leeren und wieder
Wassertank 11 bis zur Markierung „0,5l“
einsetzen.
einfüllen und 2 Siemens
Das Gerät ist wieder betriebsbereit.
Entkalkungstablettendarinauösen.
●
Taste 8
start
drücken, das Entkalkungs-
programm läuft jetzt ca. 20 Minuten.
Frostschutz
entkaLkunksPrograMM LäuFt
! Um Schäden durch Frosteinwirkung
zu Wenig entkaLker
bei Transport und Lagerung zu
e
ntkaLker nachFüLLen
vermeiden, muss das Gerät vorher
Info: Ist zu wenig Entkalkungslösung im
vollständig entleert werden.
Wassertank 11, erscheint die entsprechen-
de Aufforderung. Entkalkungslösung nach-
Info: Das Gerät muss betriebsbereit und
füllen und erneut Taste 8
start
drücken.
der Wassertank 11 gefüllt sein.
●
Ein großes, schmales Gefäß unter den
Wassertank sPüLen unD FüLLen
Milchschäumer 10 stellen.
start
●
Die Einstellung „Milchschaum“
È
●
Den Wassertank 11 spülen und frisches
auswählen, starten und ca. 15 Sekunden
Wasser bis zur Markierung „max“
dampfen lassen.
einfüllen.
●
Mit dem Netzschalter 1 O / I das Gerät
●
Die Taste 8
start
drücken, das Entkal-
ausschalten.
kungsprogramm läuft jetzt noch ca. 1
●
Den Wassertank 11 und die Tropfschale
Minute und anschließend das Reinigungs-
28 entleeren.
programm ca. 7 Minuten und spült das
Gerät.
entkaLkunksPrograMM LäuFt
reinigungsPrograMM LäuFt
troPFschaLe Leeren
t
roPFschaLe einsetzen
●
Die Tropfschale 28 leeren und wieder
einsetzen.
Das Gerät ist fertig gereinigt sowie entkalkt
wieder betriebsbereit.
19

de
Zubehör
Garantiebedingungen
Folgendes Zubehör ist über den Handel
Für dieses Gerät gelten die von unserer
und Kundendienst erhältlich.
jeweils zuständigen Landesvertretung
herausgegebenen Garantiebedingungen, in
Bestellnummer Handel Kundendienst
dem das Gerät gekauft wurde. Sie können
Reinigungs-
TZ60001 310575
die Garantiebedingungen jederzeit über
tabletten
Ihren Fachhändler, bei dem Sie das Gerät
gekauft haben oder direkt bei unserer
Entkalkungs-
TZ60002 310967
Landesvertretung anfordern. Die Garantie-
tabletten
bedingungen für Deutschland und die
Wasserfilter TZ70003 467873
AdressenndenSieaufdenletztenvier
Seiten dieses Heftes.
Darüber hinaus sind die Garantiebe-
dingungen auch im Internet unter der
Entsorgung A
benannten Webadresse hinterlegt. Für die
Dieses Gerät ist entsprechend der
Inanspruchnahme von Garantieleistungen
europäischen Richtlinie 2002/96/EG über
ist in jedem Fall die Vorlage des Kauf-
Elektro- und Elektronik-Altgeräte (waste
beleges erforderlich.
electrical and electronic equipment –
WEEE) gekennzeichnet. Die Richtlinie gibt
Änderungen vorbehalten.
den Rahmen für eine EU-weit gültige
Rücknahme und Verwertung der Altgeräte
vor.
Über aktuelle Entsorgungswege bitte beim
Fachhändler informieren.
20

de
Einfache Probleme selbst beheben
Problem Ursache Abhilfe
Displayanzeige
Bohnen fallen nicht ins Mahl-
Leicht an den Bohnen-
bohnenbehäLter FüLLen
werk (zu ölige Bohnen).
behälter 15 klopfen.
trotz gefülltem Bohnbehälter
Eventuell Kaffeesorte wech-
15 oder
seln.
Mahlwerk mahlt keine
Bei geleertem Bohnenbehäl-
Kaffeebohnen.
ter 15 diesen mit einem
trocken Tuch auswischen.
Kein Heißwasserbezug
Der Milchschäumer 10 oder
Den Milchschäumer 10 oder
möglich.
die Aufnahme des Milch-
die Aufnahme des
schäumers 10 ist
Milchschäumers 10
verschmutzt.
reinigen.
Zu wenig oder kein
Der Milchschäumer 10 oder
Den Milchschäumer 10
Milchschaum
die Aufnahme des Milch-
oder Aufnahme des Milch-
oder
schäumers 10 ist
schäumers 10 reinigen.
der Milchschäumer 10 saugt
verschmutzt.
keine Milch an.
Ungeeignete Milch. Milch mit 1,5 % Fettgehalt
verwenden.
Der Milchschäumer 10 ist
Milchschäumer 10 richtig
nicht richtig zusammen-
zusammenbauen.
gesetzt.
Kaffee läuft nur tropfen-
Der Mahlgrad ist zu fein.
Den Mahlgrad gröber
weiseoderesießtkein
Der Pulverkaffee ist zu fein.
stellen. Gröberes
Kaffee mehr.
Kaffeepulver verwenden.
Das Gerät ist stark verkalkt. Das Gerät entkalken.
Kaffee hat keine „Crema“. Ungeeignete Kaffeesorte. Kaffeesorte wechseln.
Die Bohnen sind nicht mehr
Frische Bohnen verwenden.
röstfrisch.
Der Mahlgrad ist nicht auf
Mahlgrad auf fein einstellen.
die Kaffeebohnen
abgestimmt.
Der Kaffee ist zu „sauer“. Der Mahlgrad ist zu grob
Mahlgrad feiner stellen oder
eingestellt oder das
feineres Kaffeepulver
Kaffeepulver ist zu grob.
verwenden.
Ungeeignete
Kaffeesorte. Dunklere Röstung
verwenden.
Können Probleme nicht behoben werden, unbedingt die Hotline anrufen!
Telefon Nr. 018 05 54 74 36
21

de
Einfache Probleme selbst beheben
Problem Ursache Abhilfe
Der Kaffee ist zu „bitter“. Der Mahlgrad ist zu fein
Mahlgrad gröber stellen
eingestellt oder das
oder gröberes Kaffeepulver
Kaffeepulver ist zu fein.
verwenden.
Ungeeignete Kaffeesorte. Kaffeesorte wechseln.
Displayanzeige
störung
Im Gerät ist ein Fehler. Bitte die Hotline anrufen.
b
itte hotLine anruFen.
DerWasserlter34 hält
Der Wasserfilter 34 ist nicht
Wasserfilter 34 fest in den
nicht im Wassertank 11.
eingerastet.
Tankanschluss drücken, bis
er fühlbar einrastet.
Der Kaffeesatz ist nicht
Der Mahlgrad ist zu fein
Mahlgrad gröber oder feiner
kompakt und zu naß.
oder zu grob eingestellt
stellen oder 2 gestrichene
oder das Kaffeepulver zu
Messlöffel Kaffeepulver
wenig.
verwenden.
Displayanzeige
Verschmutzte Brüheinheit. Brüheinheit reinigen.
bitte brüheinheit
Zuviel Pulverkaffee in der
Brüheinheit reinigen.
überPrüFen
Brüheinheit.
(Maximal 2 gestrichene
Pulverlöffel mit Kaffeepulver
einfüllen).
Stark schwankende Kaffee-
Das Gerät ist verkalkt. Das Gerät nach Anleitung
bzw. Milchschaumqualität.
mit zwei Entkalkungs-
tabletten entkalken.
Tropfwasser auf innerem
Tropfschale zu früh
Tropfschale erst einige
Geräteboden bei
entnommen.
Sekunden nach dem letzten
entnommener Tropfschale.
Getränkebezug entnehmen.
Können Probleme nicht behoben werden, unbedingt die Hotline anrufen!
Telefon Nr. 018 05 54 74 36
22

deen
Table of Contents
Safety instructions
Overview...................................................24
Please read the operating instructions
Beforeusingforthersttime....................25
carefully and keep them for future
Controls ....................................................26
reference.
− Power on/off switch O / I .......................26
This automatic espresso machine is
− a button ................................................26
designed for domestic use and not
− Rotary knob ...........................................26
commercial use.
− Selection buttons < and > ..................26
− Display ..................................................27
! Risk of electric shock
−
start
button ............................................ 29
Connect and operate the appliance only in
−
°C
button ...............................................29
accordancewiththespecicationsonthe
− j button and settings .............................30
rating label.
− Adjusting the grinding unit .....................30
Do not use if either the power cord or the
− Cup warming ......................................... 30
appliance is damaged.
Menu settings ...........................................31
Use indoors at room temperature only.
−Language ..............................................31
This appliance is not intended for use by
−Waterhardness .....................................31
persons (including children) with reduced
− Descale .................................................31
physical, sensory or mental capabilities, or
− Clean .....................................................31
lack of experience and knowledge, unless
− Calc‘n‘Clean .......................................... 31
they have been given supervision or
− Show clock ............................................ 32
instruction concerning use of the appliance
− Time mode ............................................32
by a person responsible for their safety.
− Set clock................................................32
Keep children away from the appliance.
− Cup warmer on (TK76F09 only) ............32
Children should be supervised to ensure
− Cup warmer off in .................................. 32
that they do not play with the appliance.
−Auto off after ..........................................32
In the event of malfunction, unplug the
−Waterlter .............................................32
appliance immediately.
− Contrast.................................................33
To avoid potential hazards, repairs such as
− Factory settings .....................................33
replacing a damaged cord should only be
Preparation using coffee beans ................ 33
performed by our service personnel.
Preparation using ground coffee .............34
Never immerse the appliance or power cord
Preparing milk froth and warm milk ..........35
in water.
Dispensing hot water ................................35
Do not reach into the grinding unit.
Maintenance and daily cleaning ...............35
− Cleaning the milk system ......................36
! Risk of scalding
− Cleaning the brewing unit .....................36
The milk frother for milk and hot water gets
Storing accessories ..................................37
veryhot.Afteruse,allowtocooldownrst
Tips on energy saving ..............................37
before touching.
Service Programmes ...............................37
− Descaling ..............................................38
− Cleaning ................................................ 38
− Calc‘n‘Clean .......................................... 39
Frost protection.........................................40
Disposal .................................................... 40
Accessories ..............................................40
Guarantee.................................................40
Simple troubleshooting .............................41
23

deen
Dear Coffee Connoisseur,
These instructions describe various models
with different features.
Congratulations on purchasing this fully
Please also note the enclosed quick
automatic espresso machine from Siemens.
reference guide. It can be kept in the
special storage compartment 25 until it is
needed.
Overview
Figures A, B, C, D and E
1 Power on/off switch O / I
20 Button for cup warming function,
2 a button
illuminated
3
°C
button (temperature / child-proof lock)
21 Drawer
4 Selection buttons < >
(ground coffee / cleaning tablet)
5 Display
22 Door to brewing unit
a) Status line
23 Door opener
b) Selection line
24 Brewing unit
c) Navigation line
a) Sliding button
6 Rotary knob for display settings
b) Lock
7 Info menu button j
25 Storage compartment for quick
8
start
button (drinks / programmes)
reference guide
9 Coffee outlet, height-adjustable and
26 Cover of storage compartment
swivelling
27 Drip tray panel
10 Milk frother, height-adjustable
28 Drip tray for coffee outlet
(milk / hot water)
29 Grate for coffee outlet
a) Upper part
30 Grate for milk frother
b) Lower part
31 Coffee grounds container
c) Tube
32 Cable storage compartment
d) Milk pipe
33 Milk container (insulated)
11 Removable water tank
34 Waterlter
12 Lid for water tank
13 Storage compartments
(measuring spoon and milk frother
accessories)
14 Measuring spoon
(insertionaidforwaterlter)
15 Bean container
16 Aroma cover
17 Selector for grind setting
18 Illuminated ring
19 Cup warming
24
deen
●
Press the power switch 1 O / I. The
start
Before using
button 8 lights up and the different
for the rst time
languages appear in the display 5.
General
●
Use the buttons < and > 4 to select the
Fill the water tank with fresh, uncarbonated
language in which you want the display
water only, and preferably use only beans
texts to appear.
for fully automatic coffee and espresso
machines. Do not use coffee beans that
Language
Deutsch
start
have been glazed, caramelised or treated
engLish
with other additives containing sugar, since
Pycckий
they will block the brewing unit.
The water hardness setting can be adjusted
on this appliance. The factory default setting
for the water hardness is 4. Check the
water hardness with the enclosed test strip.
If a value other than water hardness 4 is
displayed, change the setting on the
The selected language is highlighted by a
appliance accordingly after switching on
frame. The following languages can be
(see “Menu settings WATER HARDNESS”).
selected:
Switching on the appliance
Deutsch
●
Place the fully automatic espresso
machineonaatsurfacethatcantakeits
e
ngLish
weight.
P
ycckий
Note: The appliance has four runners under
its base and can be moved sideways in an
n
eDerLanDs
arc to make operation and positioning
easier.
F
rançais
●
Pull the power cord out of the storage
compartment 32 and plug in. Adjust the
i
taLiano
length of the cable by pushing it back in
or pulling it out. The easiest way to do
s
venska
this is to place the appliance so that its
backisushwiththeedgeofthecounter
e
sPañoL
and either pull the cable downward or
push it upward.
P
oLski
●
Lift the lid of the water tank 12.
●
Remove and rinse the water tank 11 and
●Pressthe
start
button 8. The language
llitwithfreshcoldwater.
you selected is saved and the a button 2
Donotllabovethe“max” mark.
lights up.
●
Replace the water tank 11 and push it
rmlydownwardintoplace.
●
Close the lid of the water tank 12 again.
●
Fill the bean container 15 with coffee
beans.
25
deen
●Pressthe
a button 2. The brand logo
Controls
lights up in the display 5. The appliance
now heats up and rinses. Some water will
Power on/off switch O / I
run out of the coffee outlet 9. The
The power switch 1 O / I is used to switch
appliance is ready for use when the
the appliance to “energy saving mode” or to
symbols for selecting the type of coffee
switch it off completely. In “energy saving
preparation appear in the display 5.
mode” only the a button 2 lights up.
Important: Do not switch the appliance off
at the power on/off switch 1 until it is in
energy saving mode, so that the automatic
esPresso Ë Í
rinse process can take place.
a button
 à À Á Ä Å
The appliance is switched on (ready for
use) or put into “energy saving mode” with
the a button 2.
The a button 2asheswhiletheappliance
Note: The factory settings of the fully
is rinsing.
automatic espresso machine are
programmed for optimal performance. The
The appliance does not rinse if:
appliance switches to “energy saving mode”
●
it is still warm when switched on
automatically after 1 hour (see “Menu
●
no coffee was dispensed before it was
settings AUTO OFF AFTER”).
switched to “energy saving mode”.
Tip: If the appliance is being used for the
The appliance is ready for use when the
rsttimeorhasnotbeenoperatedfora
symbols for drink selection and the
start
longperiod,therstcupofcoffeewillnot
button 8 light up on the display 5.
have the full aroma.
Rotary knob
When using the espresso machine for the
Turn the knob 6 to the left or right to
first time, you will achieve a suitably thick
navigate through the display 5, or to adjust
and stable “crema” only after the first few
parameters in the menu.
cups have been dispensed.
Selection buttons < and >
Press the selection buttons < and > 4 to
navigate up and down through the menu
levels (navigation line 5c).
26
deen
Display
Display messages
The display 5 uses symbols to indicate the
Various messages are shown on the
selection options, coffee strength and per-
display 5.
cup quantity, and uses texts to indicate
settings, ongoing processes and messages.
Information:
The rotary knob 6 and selection buttons 4
Water tank aLMost eMPty
can be used to change settings. The
bean container aLMost eMPty
selected setting is highlighted by a frame.
PLease Wait
Prompts:
reFiLL Water tank
5a
esPresso Ë Í
rePLace Water tank
check Water tank
b
 à À Á Ä Å
rePLace DriP tray
eMPty DriP tray
c
reFiLL bean container
The status line 5a in the display shows the
Position sWiveL arM
name of the type of drink, along with the
set uP MiLk Frother
strength setting, e.g. 55 and per-cup
rePLace breWing unit
quantity, e.g.
�
. The selection line 5b
c
Lose Door
shows symbols for drink selection.
PLease check breWing unit
The arrows in the navigation line 5c indicate
FiLL DraWer With PoWDer
the direction in which more menu levels can
cLose DraWer
be found.
service - change FiLter
service - DescaLe
service - cLean
service - caLc‘n‘cLean
insuFFicient teMPerature
PLease Wait
high or LoW voLtage
27
deen
Selection options
My coFFee Ë Í
2 x esPresso
2 x coFFee
Â
Ã
Á Ä Å Æ Ç È
À
esPresso Á coFFee
Ä White coFFee
Macchiato
Å
Æ
caPPuccino
Ç
My coFFee
È
MiLk Froth
É
WarM MiLk
s
hort rinse For
hot Water
MiLk systeM
Ê
Ì
My coFFee Ë Í
Coffee strength
(only for coffee drinks)
5 5 5 5 5 5
5 55 555
mild regular strong
Per-cup quantity
My coFFee Ë Í
(only for coffee drinks)
� Ð Ò
� Ð Ò
small medium large
In addition to selecting the coffee
My coFFee Ë Í
strength and per-cup quantity you
can choose the exact mix of
esPresso MiLk
espresso and milk for your own
coffee setting My coFFee Ç. The
40%
settingcanbedenedin20%steps
by turning the rotary knob 6.
28
deen
Start button
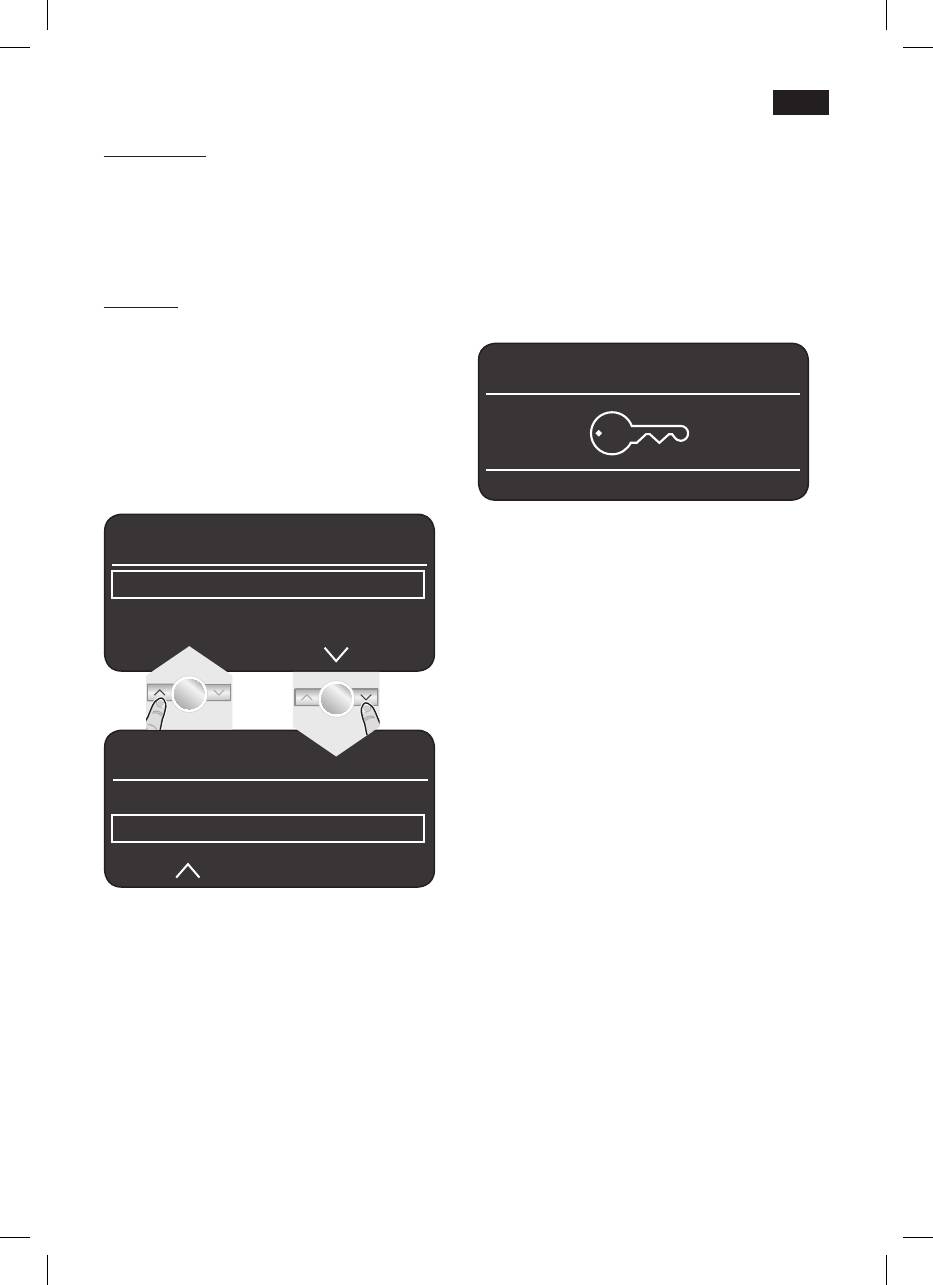
Child-proof lock
Press the
start
button 8 to begin drink
The appliance can be locked to protect
preparation or to start a service programme.
children from scalding and burning.
Press the
start
button 8 again during drink
●Holddownthe
°C
button 3 for at least 3
preparation to cut the dispensing process
seconds. The display 5 shows a key: the
short.
child-proof lock is activated.
It is no longer possible to operate the
°C button
appliance and the cup warmer 19 is
Use the °
C
button 3 to set the temperature
switched off.
forcoffeeandteawater(pressbriey)and
to switch the child-proof lock on or off
esPresso Ë Í
(hold down for at least 3 seconds).
Setting the temperature:
Press the
°C
button 3brieyandenterthe
settings with the < and > buttons 4 and
the rotary knob 6.
● Todeactivatethechild-prooflock,hold
teMPerature
down the
°C
button 3 for at least 5
seconds. The key disappears from the
coFFee
norMaL
display 5.
hot Water
teMPerature
coFFee
hot Water
<90°c
Press the
C°
button 3 again to save the
settings and return to drink selection.
These settings are automatically effective
for all types of coffee preparation.
29

deen
j button and settings
Adjusting the grinding unit
Use the j button 7 to display information
The rotary selector 17 adjusts the grind
(pressbriey)andadjust settings (hold
settingsfromcoarsetone.
down for at least 3 seconds).
Warning
Displaying information
Adjust the grinding unit only while it is
The following information can be displayed
running! Otherwise the appliance may be
in the Info menu:
damaged.
–
how many drinks have been dispensed
●Whilethegrindingunitisrunning,adjust
since the espresso machine was switched
the rotary selector 17fromne•••to
on
coarse●●●asrequired.
–
when should the next service be
completed.
●Pressthej button 7brieyandnavigate
with the < and > buttons 4.
inFo
Note: The new setting will not become
apparent until after the second cup of
DescaLe aFter xxx cuPs
coffee.
cLean aFter xxx cuPs
no FiLter
Tip: For dark roast coffee beans, choose a
change FiLter in xxx cuPs *
nergrind,forlighterbeansacoarsergrind.
Cup warming
! Warning: The cup warmer 19
becomes very hot.
The fully automatic espresso machine has a
inFo
cup warmer 19 that can be switched on or
off manually with button 20. When the cup
no. oF coFFees xx
warmer 19 is on, button 20 lights up.
no. oF MiLk Mixes xx
aMount hot Water xL
Tip: For optimal cup warming, place the
base of the cups on the cup warmer 19.
*appearsonlyifthelterisactivated.
TK76F09 only
The cup warming function can also be pre-
Press the j button 7againbrieytoreturn
programmed (see “Menu settings CUP
to drink selection. If no button is pressed for
WARMER ON”).
about 10 seconds the appliance
automatically switches back to drink
selection mode.
Adjusting settings
(see “Menu settings”).
30
deen
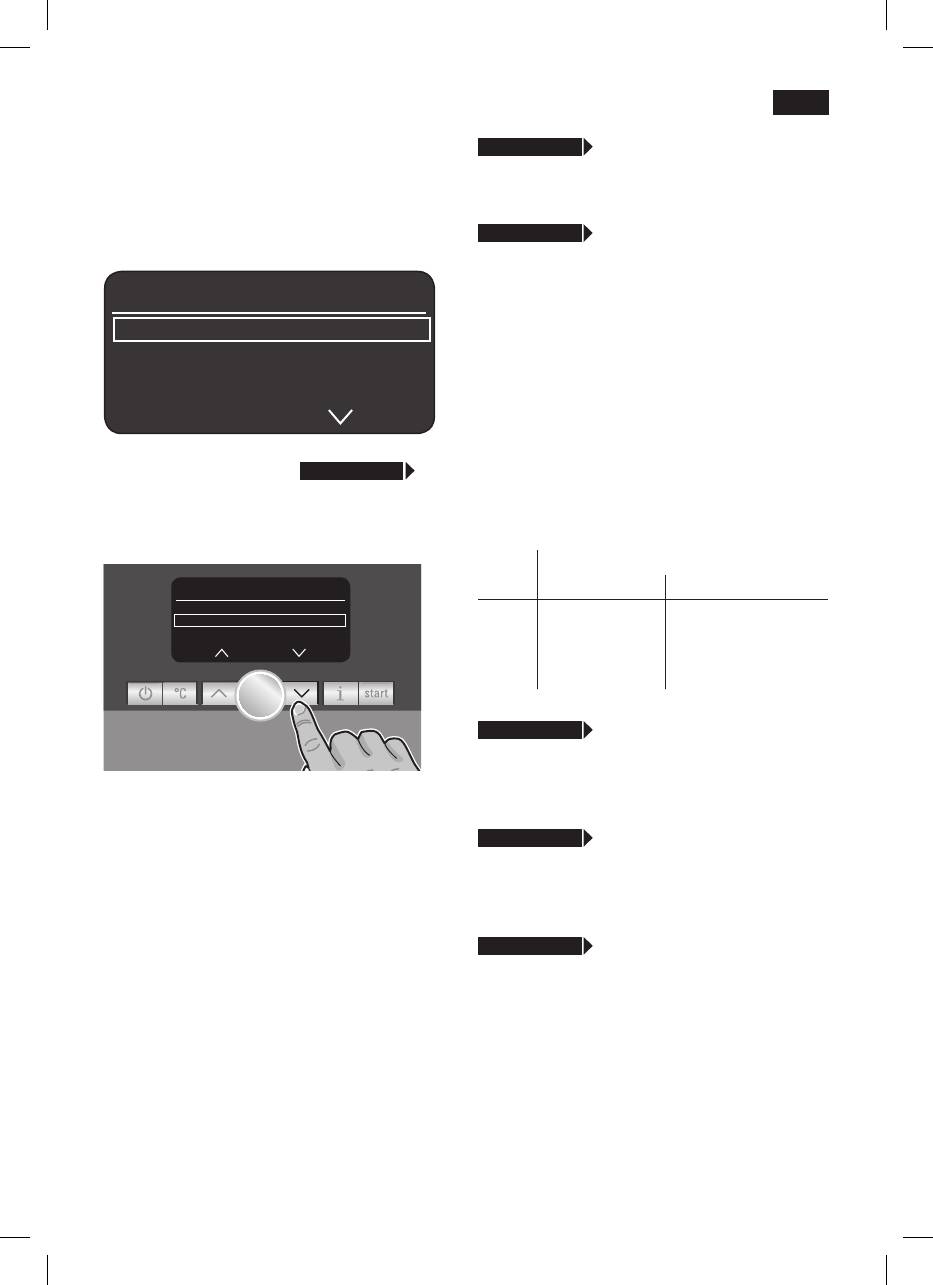
j 3 sec. + >
Language
Menu settings
●Turntheknob6 to select the required
●Holdthej button down for at least 3
language
seconds.
The different setting options are now
j 3 sec. + >
Water harDness
displayed
●Turntheknob6 to select the required
water hardness
1,2,3 or 4.
settings
Note: It is important to set the water
Language engLish
hardness correctly, so that the appliance
Water harDness
indicates accurately when the descaling
DescaLe
programme should be run. The factory
setting for the water hardness is 4.
You can check the water hardness using
In the following operating instructions, each
the enclosed test strip or by asking your
new setting begins with
j 3 sec. + >
local water supplier.
followed by an exact description.
●Diptheteststripinthewaterbrieyand
The different setting options can be
check the result after 1 minute.
selected with the
< and > buttons 4.
Level Water hardness
settings
German (°dH) French (°fH)
Water harDness
1
1-7
1-13
DescaLe
start
cLean
2
8-14
14-25
3
15-21
26-38
4
22-30
39-54
j 3 sec. + >
DescaLe
●Ifyouwanttodescaletheappliance,
press the
start
button 8 and run the
N.B.: The changes you have made are
descaling programme (see “Descaling”).
saved automatically.
Itisnotnecessarytoconrmthem
j 3 sec. + >
cLean
additionally.
●Ifyouwanttocleantheappliance,press
the
start
button 8 and run the cleaning
programme (see “Cleaning”).
j 3 sec. + >
caLc‘n‘cLean
●Ifyouwanttodescaleandcleanthe
appliance, press the
start
button 8 and
run the Calc‘n‘Clean programme (see
“Calc‘n‘Clean”).
31
deen
j 3 sec. + >
shoW cLock
j 3 sec. + >
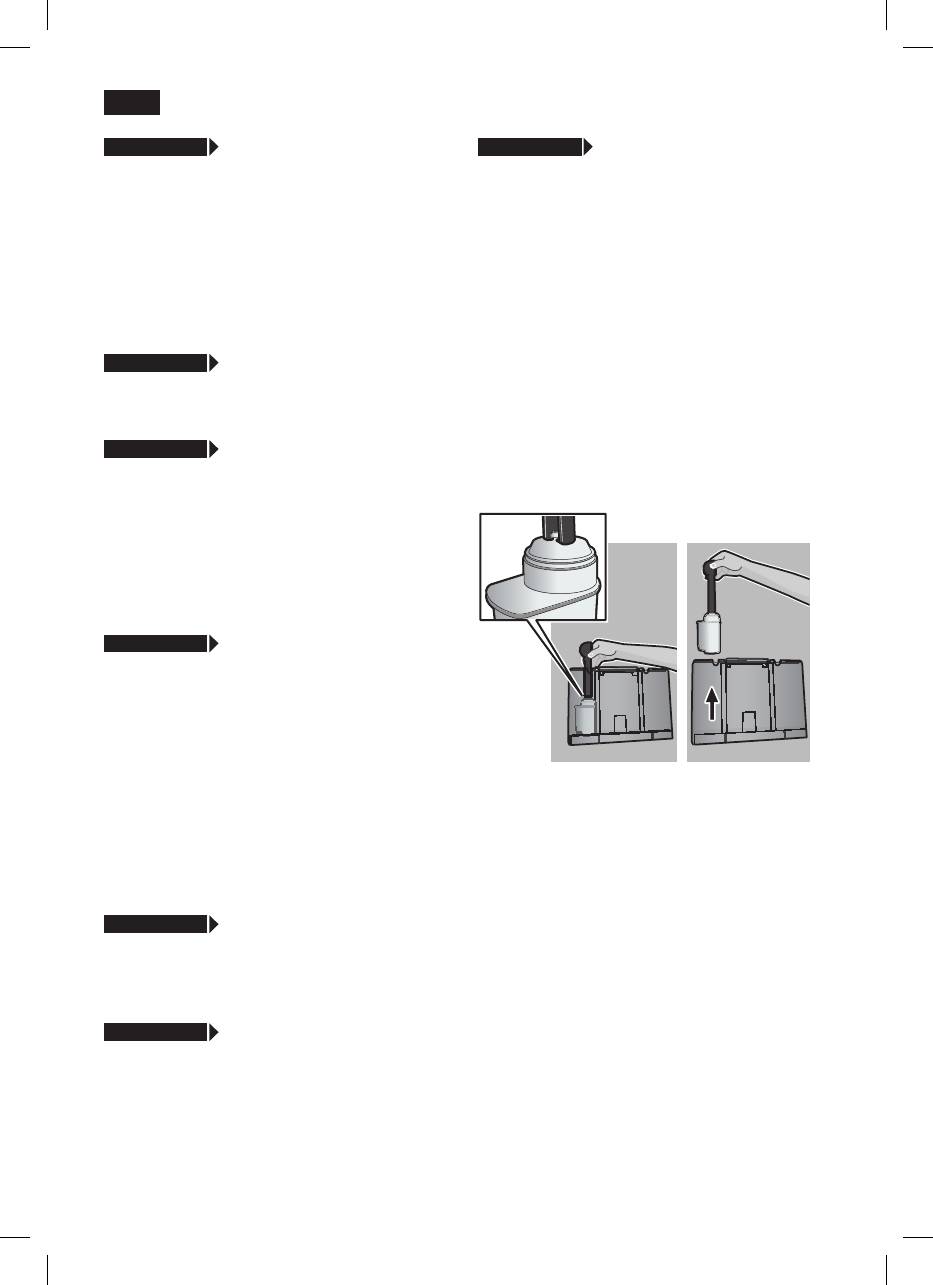
Water FiLter
With this function you can set the clock to
Beforeanewwaterlter34 is used, it must
show the time in the display 5 during energy
be rinsed.
saving mode.
●
Todothis,pressthewaterlter34rmly
●Turntheknob6 to switch the clock
into the water tank 11 with the aid of the
display on = yes or off = no.
measuring spoon 14. Fill the water tank
with water up to the “max” mark.
Note: You must already have set the time
●
Turn the knob 6 to select start and
as shown in set cLock.
press the
start
button 8.
●PLace 0.5 L container unDer MiLk
j 3 sec. + >
tiMe MoDe
Frother
start
●
In time mode you can turn the knob 6 to
●
Place a container with a capacity of 0.5
set the time format to 12h or 24h.
litres under the milk frother 10.
●
Press the
start
button 8. Water will now
j 3 sec. + >
set cLock
owthroughthelter34 to rinse it.
●Turntheknob6 to set the current time,
●
Next, empty the container. The appliance
e.g. 08:25.Thegurethatcanbesetis
is ready to use once more.
always backlit; the backlighting switches
automatically between the hours and
minutes.
TK76F09 only
(programmable cup warmer)
j 3 sec. + >
cuP WarMer on
With this additional function the cup warmer
19 switches on automatically at a
programmable time, irrespective of whether
the appliance is in “energy saving mode” or
is ready for use.
Note: Rinsingthelter34 simultaneously
Note: You must already have set the time
activatesthesettingforthe“changelter”
under set cLock
display.
●
Set the required time by turning the knob
6. If oFF is selected, the function is
Youcannddetailedinformationaboutthe
deactivated.
waterlterintheenclosedlterinstructions.
j 3 sec. + >
cuP WarMer oFF in
Thelter34 is no longer effective when the
Here you can set the time span after which
change FiLter display appears, or at the
the cup warmer 19 switches off again
latest after 2 months. It needs to be
automatically.
replaced for reasons of hygiene and so that
there is no build-up of limescale (this could
j 3 sec. + >
auto oFF aFter
damage the appliance).
●
Turn the knob 6 to enter the time span
after which the appliance should
Replacementlterscanbeobtainedfrom
automatically switch to “energy saving
retailers (TZ70003) or from customer
mode” following drink preparation.
service(467873).Ifnonewlter34 is used,
A time between 5 minutes and 8 hours can
turn the Water FiLter setting to no.
be set.
32

deen
Note: If the appliance has not been used
Different coffee drinks can be prepared
for a prolonged period (e.g. vacation) the
quite simply at the press of a button.
lter34 should be rinsed before the
appliance is used again. To do this, simply
Drink preparation without milk
dispense a cup of hot water.
The appliance must be ready for use.
●
Place the pre-warmed cup(s) under the
j 3 sec. + >
contrast
coffee outlet 9.
The display contrast can be set from –20
●
Select the required espresso or coffee by
to +20. The factory setting is +0.
turning the knob 6. The display 5 shows
●
Enter the required setting with the knob 6.
the selected drink along with the setting
for coffee strength and the per-cup
j 3 sec. + >
Factory settings
quantity for this drink.
You can cancel your own settings and
reactivate the factory settings.
esPresso Ë Í
●
To activate the factory settings, press the
start
button 8.
Note: The appliance can also be reset to
 à À Á Ä Å
the factory settings using a combination of
buttons. The appliance must be switched off
fully.
●
Hold down the < and > buttons 4 and
The settings can be altered (see “Controls”).
the on/off switch 1 O / I at the same time
●
Press the
start
button 8.
for at least 5 seconds. Press the
start
The coffee is brewed and then dispensed
button 8. The factory settings are now
into the cup(s).
reactivated.
Drink preparation with milk
The appliance must be ready for use.
●Placethepipe10d of the milk frother 10
Preparation
deep in the milk container 33.
●
Swivel the coffee outlet 9 to the right until
using coffee beans
it clicks into place.
This fully automatic espresso machine
●
Place the pre-warmed cup or glass under
grinds beans freshly for each brew. If
the coffee outlet 9 and milk frother 10.
possible, use only beans for fully automatic
●
Select the required Macchiato
Å
,
coffee and espresso machines. For optimal
Cappuccino
Æ
, White coffee Ä or My
quality, deep-freeze the beans or store in a
coffee Ç by turning the knob 6. The
cool place in sealed containers. Coffee
display 5 shows the selected drink along
beans can be ground while frozen.
with the setting for coffee strength and
the per-cup quantity for this drink.
Important: Fill the water tank 11 with fresh
water every day. The tank should always
containsufcientwaterforoperatingthe
caPPuccino Ë Í
appliance.
Tip: Pre-warm cups, especially small, thick
À Á Ä Å Æ Ç
espresso cups, on the cup warmer 19.
33

deen
The settings can be altered (see “Controls”).
Drink preparation with milk
●
Press the
start
button 8. First milk is
●
Turn the knob 6 to select White coffee Ä,
delivered into the cup or glass. Then the
Macchiato
Å
, Cappuccino
Æ
or
coffee is brewed and dispensed into the
My coffee Ç.
cup or glass.
●
Place the pipe 10d of the milk frother 10
in the milk container 33.
Important:Driedmilkresidueisdifcultto
●
Swivel the coffee outlet 9 to the right until
remove, so clean the milk frother 10 with
it clicks into place.
lukewarm water immediately after use
●
Place the pre-warmed cup or glass under
(see “Cleaning the milk system”).
the coffee outlet 9 and milk frother 10.
●
Open the drawer 21 by pressing.
●
Pour in no more than 2 level measuring
spoons 14 of ground coffee.
Preparation using
Warning: Do not use whole beans or
ground coffee
instant coffee.
This fully automatic espresso machine can
●
Close the drawer 21.
also be operated with ground coffee (not
●
Press the
start
button 8. First milk is
instant coffee powder).
delivered into the cup or glass. After that
the ground coffee is brewed and
Drink preparation without milk
dispensed into the cup or glass.
●
Select À or Á by turning the knob 6.
●
Place the pre-warmed cup(s) under the
Important:Driedmilkresidueisdifcultto
coffee outlet 9.
remove, so clean the milk frother 10 with
●
Open the drawer 21 by pressing.
lukewarm water immediately after use (see
●
Pour in no more than 2 level measuring
“Cleaning the milk system”).
spoons 14 of ground coffee.
N.B.: Repeat the procedure for another
Warning: Do not use whole beans or
coffee / milk drink. If no coffee is taken
instant coffee.
within 90 seconds, the brewing chamber
●
Close the drawer 21.
emptiesautomaticallytoavoidoverlling.
●
Press the
start
button 8.
The appliance rinses.
The coffee is brewed and then dispensed
into the cup(s).
N.B.: Repeat the procedure for another cup
of coffee. If no coffee is taken within 90
seconds, the brewing chamber empties
automaticallytoavoidoverlling.Theappli-
ance rinses.
34

deen
Preparing milk froth
Dispensing hot water
and warm milk
! Risk of burns
! Risk of burns
The milk frother 10 gets very hot. After use,
The milk frother 10 gets very hot. After use,
allowtocooldownrstbeforetouching.
allowtocooldownrstbeforetouching.
The appliance must be ready for use.
The appliance must be ready for use.
●
Place the pre-warmed cup or glass under
●
Place the pipe 10d of the milk frother 10
the outlet of the milk frother 10.
in the milk container 33.
●
Select the required setting for hot water
●
Place the pre-warmed cup or glass under
Ê
by turning the knob 6.
the outlet of the milk frother 10.
●
Press the
start
button 8. Hot water runs
●
Select the required setting
out of the milk frother outlet 10 for about
“Milk froth”
È
or “Warm milk”
É
by
40 seconds.
turning the knob 6.
●
Press the
start
button 8 again to cut the
●
Press the
start
button 8. Milk froth or
process short.
warmmilkowsfromtheoutletofthemilk
frother 10 for about 40 or 60 seconds
N.B.: It is possible to set the temperature of
respectively.
the hot water (see “Controls, °
C
button”).
●
Press the
start
button 8 again to cut the
process short.
Maintenance and daily
Note: When preparing warm milk you may
cleaning
hear a whistling sound. This is caused by
the milk frother 10 for technical reasons.
! Risk of electric shock
Unplug the appliance before cleaning it.
Tip: For optimal milk froth quality, use cold
Never immerse the appliance in water.
low-fat milk (1.5% fat) if possible.
Do not use a steam cleaner.
Important:Driedmilkresidueisdifcultto
●
Wipe the outside of the appliance with a
remove, so clean the milk frother 10 with
soft, damp cloth. Do not use abrasive
lukewarm water immediately after use (see
cloths or cleaning agents.
“Cleaning the milk system”).
●
Rinse the water tank 11 and the brewing
unit 24 with water only.
●
The cover of the storage compartment
26, the drip tray panel 27 and the
insulating cover of the milk container 33
should only be wiped gently with a damp
cloth. Do not put them in the
dishwasher.
●
Remove the grate for the coffee outlet 29,
and the grate for the milk frother 30. Take
out the drip tray for coffee outlet 28 with
the coffee grounds container 31 by pulling
them out forward, empty and clean. All
these parts can also be cleaned in the
dish washer.
35

deen
●
Clean the measuring spoon 14, aroma
●
Rinse all parts with clear water and dry
cover 16 and the inside of the milk
them.
container 33 by hand or in the dish
●
Reassemble all the parts and replace fully
washer.
in the appliance.
●
Wipe out the inside of the appliance (tray
holders).
Note: All the parts of the milk frother 10 can
also be put in the dishwasher.
Important: Drip tray 28 should be emptied
and cleaned daily to prevent mould from
Cleaning the brewing unit
developing.
(refer also to the quick reference guide)
In addition to the automatic cleaning pro-
N.B.: If the appliance is cold when switched
gramme, the brewing unit 24 should be
on with the
a button 2, or if it is set to a
removed regularly for cleaning.
mode after brewing coffee, it rinses
●
Switch to the “energy saving mode” with
automatically, in other words the system
the a button 2.
cleans itself.
●
Switch the appliance off completely at the
power on/off switch 1 O / I; no buttons
Cleaning the milk system
are lit.
Clean the milk system 10 immediately after
●
Slide the door opener 23 to the right and
use!
open the door 22 to the brewing unit 24.
The milk system 10 can be pre-cleaned
●
Slide the red lock 24b on the brewing unit
automatically.
24 completely to the left.
●
Select the
symbol in the display 5 and
●
Press the red button 24a, grasp the
Ì
press the
start
button 8.
brewing unit 24 by the recessed grips
PLace eMPty gLass unDer Frother,
(Fig. E) and remove carefully.
P
Lace suction PiPe in gLass
start
●
Rinse the brewing unit 24 under running
●
Place an empty glass under the milk
water.
system 10 and put the end of the pipe
10d in the glass.
Important: Clean without detergent and do
●
Press the
start
button 8. The appliance
not place in the dishwasher.
nowllstheglassautomaticallywith
●
Wipe out the inside of the appliance with
water and draws it in again through the
a damp cloth.
pipe 10d for cleaning. The rinse
●
Allow the brewing unit 24 and the inside
procedure stops automatically after about
of the appliance to dry.
1 minute.
●
Reinsert the brewing unit 24 fully into the
●
Now empty the glass and clean the pipe
appliance.
10d.
●
Slide the red lock 24b fully to the right
and close the door 22.
In addition to this, clean the milk system
thoroughly at regular intervals (by hand or
in the dishwasher).
Dismantling the milk system 10 for
cleaning:
●
Pull the milk system 10 forward out of the
appliance.
●
Clean the individual parts (Fig. C) with a
detergent solution and a soft brush.
36


