Pioneer KEH-P7910R: Audio Adjustment
Audio Adjustment: Pioneer KEH-P7910R
Audio Adjustment
3. Boost or attenuate the selected
band with the 5/∞ buttons.
The display shows “+6” – “–6”.
“ ”
Note:
• If you make adjustments when a curve other than “CUSTOM” is selected, the newly adjusted curve
will replace the previous adjusted curve. Then a new curve with “CUSTOM” appears on the display
while selecting the equalizer curve. (Refer to page 37.)
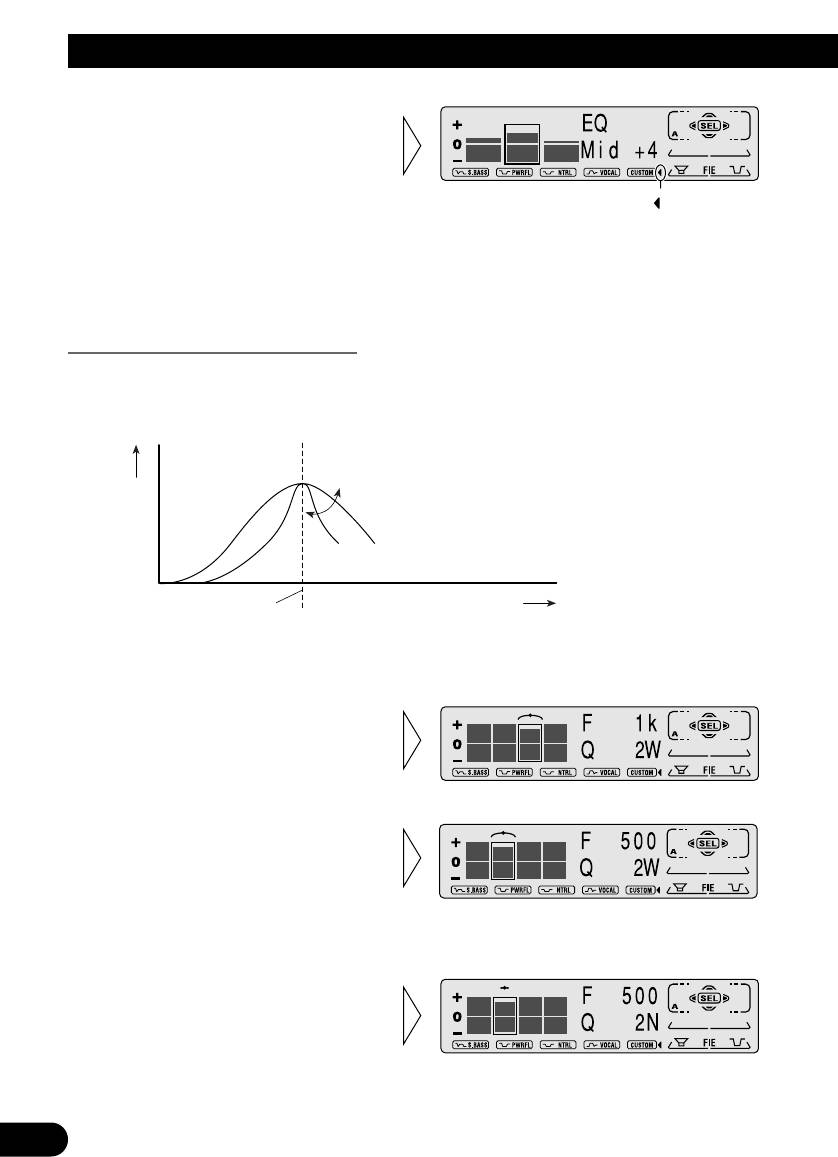
Equalizer Curve Fine Adjustment
You can adjust the center frequency and the Q factor (curve characteristics) of each cur-
rently selected curve band (EQ-Low/Mid/High). Adjusted equalizer curve settings are
memorized in “CUSTOM”.
Level (dB)
Q=2N Q=2W
Center frequency
Frequency (Hz)
1. Press the AUDIO button for 2 seconds to select Equalizer Curve Fine
Adjustment.
2. Press the AUDIO button to
select the desired band for
adjustment.
3. Select the desired frequency
with the 2/3 buttons.
Low: 40
+=
80
+=
100
+=
160 (Hz)
Mid: 200
+=
500
+=
1k
+=
2k (Hz)
High:3.15k
+=
8k
+=
10k
+=
12.5k (Hz)
4. Select the desired Q factor
with the 5/∞ buttons.
2N += 1N += 1W += 2W
Note:
• If you make adjustments when a curve other than “CUSTOM” is selected, the newly adjusted curve
will replace the previous adjusted curve. Then a new curve with “CUSTOM” appears on the display
39
while selecting the equalizer curve. (Refer to page 37.)
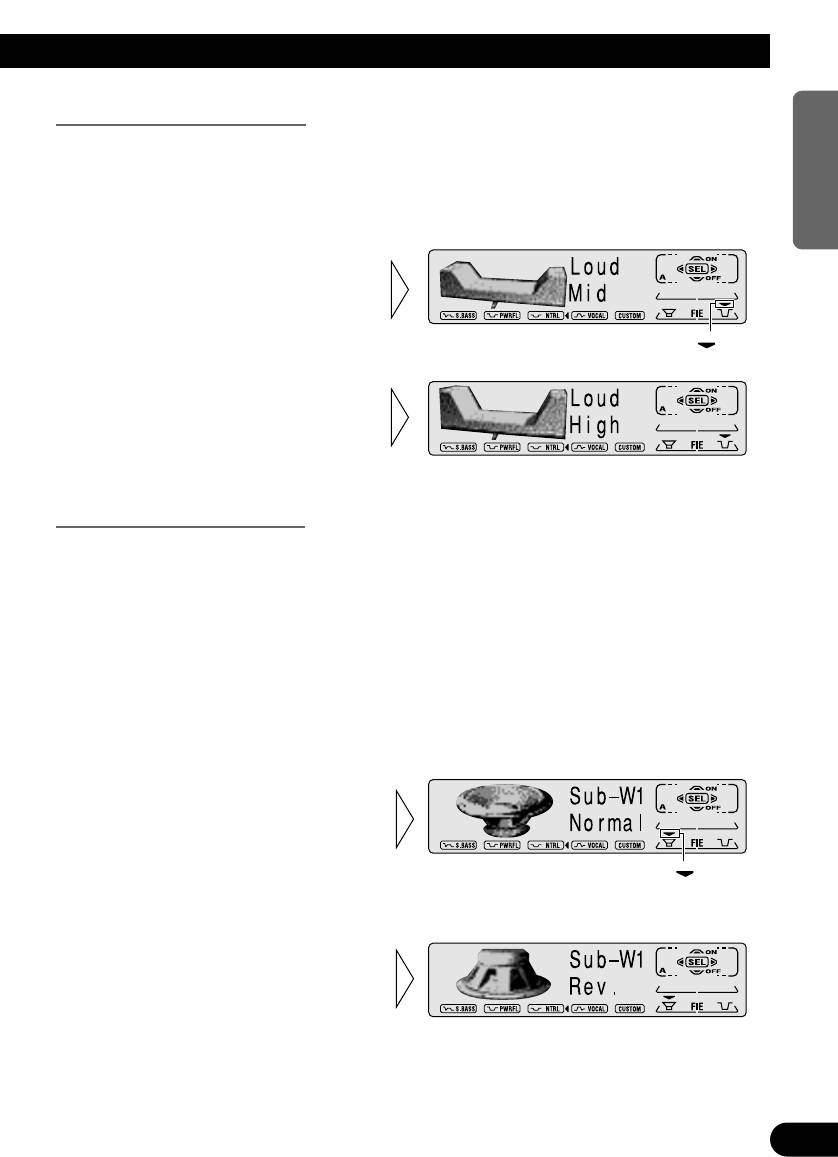
Loudness Adjustment (Loud)
ENGLISH ESPAÑOL DEUTSCH FRANÇAIS ITALIANO NEDERLANDS
The Loudness function compensates for deficiencies in the low and high sound ranges at
low volume. You can select a desired Loudness level.
1. Press the AUDIO button and select the Loudness mode (Loud) in the Audio
Menu.
2. Switch the Loudness function
ON/OFF with the 5/∞ but-
tons.
”“
3. Select the desired level with
the 2/3 buttons.
Low += Mid += High
Subwoofer Output (Sub-W1)
When a Subwoofer is connected, switch Subwoofer output ON.
Initially, Subwoofer output is OFF.
The Subwoofer output phase can be switched between normal, or 0˚ (“Normal”), and
reverse, or 180˚(“Rev.”). 0˚ is the default phase.
Note:
• When the Subwoofer Controller setting is “S.W Control:EXT”, you cannot switch the Subwoofer
ON/OFF mode. In this case, this setting is not necessary. (Refer to page 49.)
• Select the OFF setting when you do not want the Subwoofer to operate.
1. Press the AUDIO button and select the Subwoofer ON/OFF mode
(Sub-W1) in the Audio Menu.
2. Switch the Subwoofer output
ON/OFF with the 5/∞
buttons.
”“
Note:
• When the Subwoofer output is OFF, you cannot change the phase of Subwoofer output.
3. Change the phase of
Subwoofer output with the
2/3 buttons.
40
Audio Adjustment
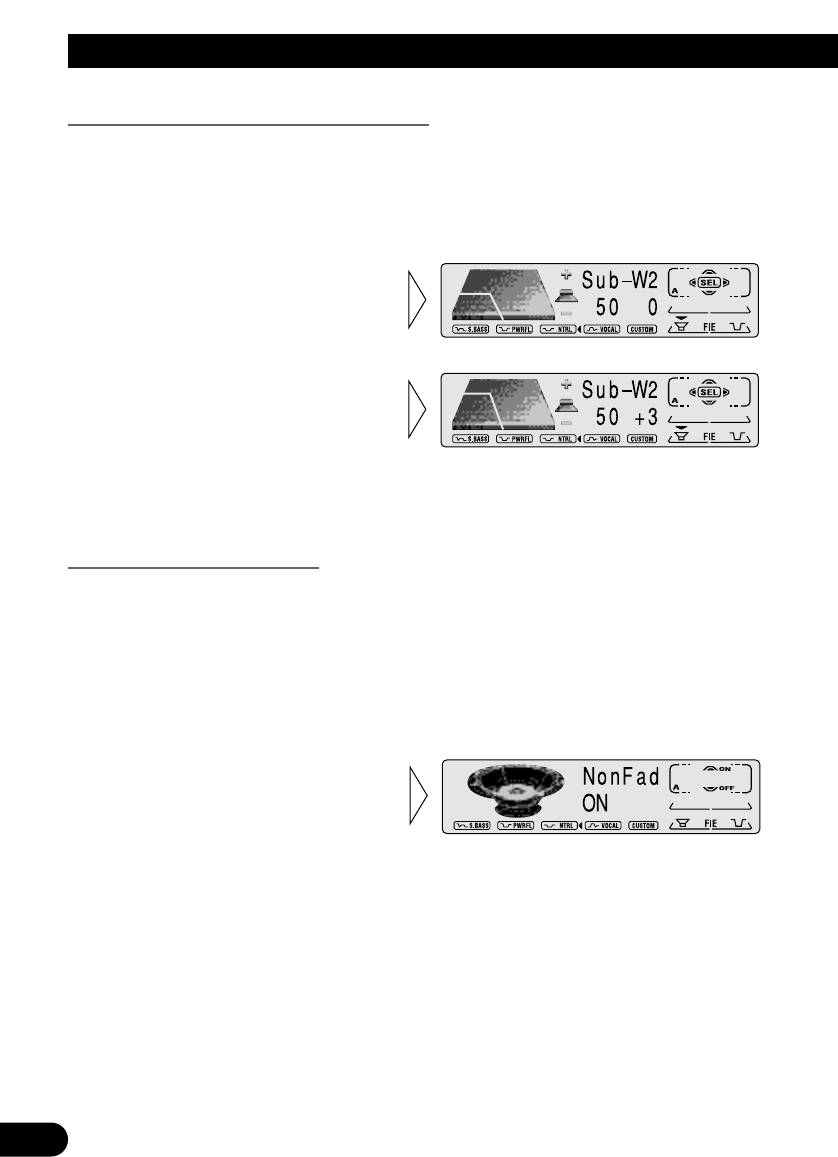
Subwoofer Setting Adjustment (Sub-W2)
When the Subwoofer output is ON, you can adjust the cut-off frequency and the output
level of Subwoofer.
1. Press the AUDIO button and select the Subwoofer setting mode
(Sub-W2) in the Audio Menu.
2. Select the frequency to 50 Hz,
80 Hz or 125 Hz with the 2/3
buttons.
3. Increase or decrease the output
level with the 5/∞ buttons.
The display shows “+ 6” – “– 6”.
Note:
• You can select the Subwoofer setting mode only when Subwoofer output is switched ON in the
Subwoofer ON/OFF mode.
Non Fading Output (NonFad)
When the Non Fading Output setting is ON, the audio signal does not pass through this
unit’s low pass filter (for the Subwoofer), but is output through the RCA output.
Note:
• When the Subwoofer Controller setting is only “S.W Control:EXT”, you can switch the Non
Fading Output ON/OFF mode. (Refer to page 49.)
1. Press the AUDIO button and select the Non Fading Output ON/OFF
mode (NonFad) in the Audio Menu.
2. Switch the Non Fading output
ON/OFF with the 5/∞ buttons.
41
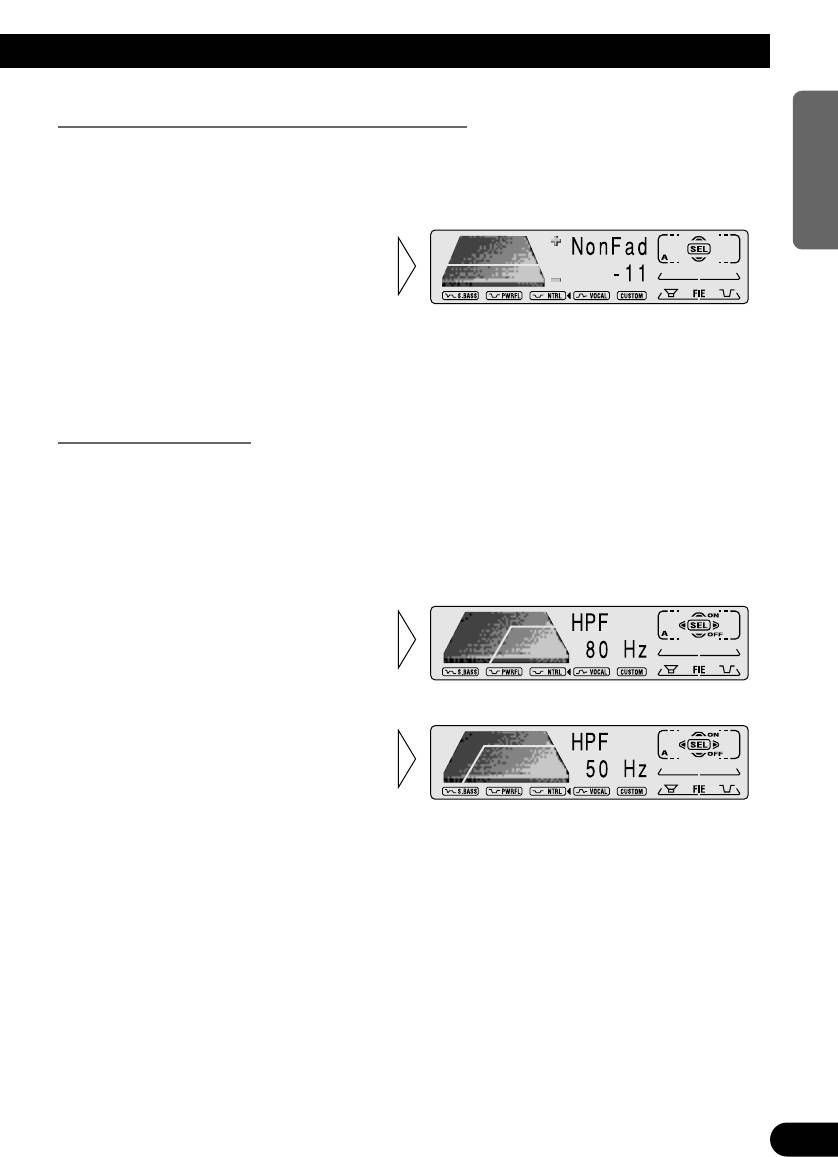
Non Fading Output Level Adjustment (NonFad)
ENGLISH ESPAÑOL DEUTSCH FRANÇAIS ITALIANO NEDERLANDS
When the Non Fading output is ON, you can adjust the level of Non Fading output.
1. Press the AUDIO button and select the Non Fading Output setting mode
(NonFad) in the Audio Menu.
2. Increase or decrease the output
level with the 5/∞ buttons.
The display shows “0” – “–15”.
Note:
• You can select the Non Fading Output setting mode only when Non Fading output is switched ON
in the Non Fading Output ON/OFF mode.
High Pass Filter (HPF)
When you do not want sound in the Subwoofer output frequency range output from the
front or rear speakers, switch the High Pass Filter ON. Only higher frequencies than those
in the selected range are output from the front and rear speakers.
1. Press the AUDIO button and select the H.P.F. mode (HPF) in the Audio
Menu.
2. Switch the H.P.F. function
ON/OFF with the 5/∞ buttons.
3. Select the desired frequency
with the 2/3 buttons.
50 += 80 += 125 (Hz)
Note:
• When the F.I.E. function is ON, you cannot switch to the H.P.F. mode.
42
Audio Adjustment
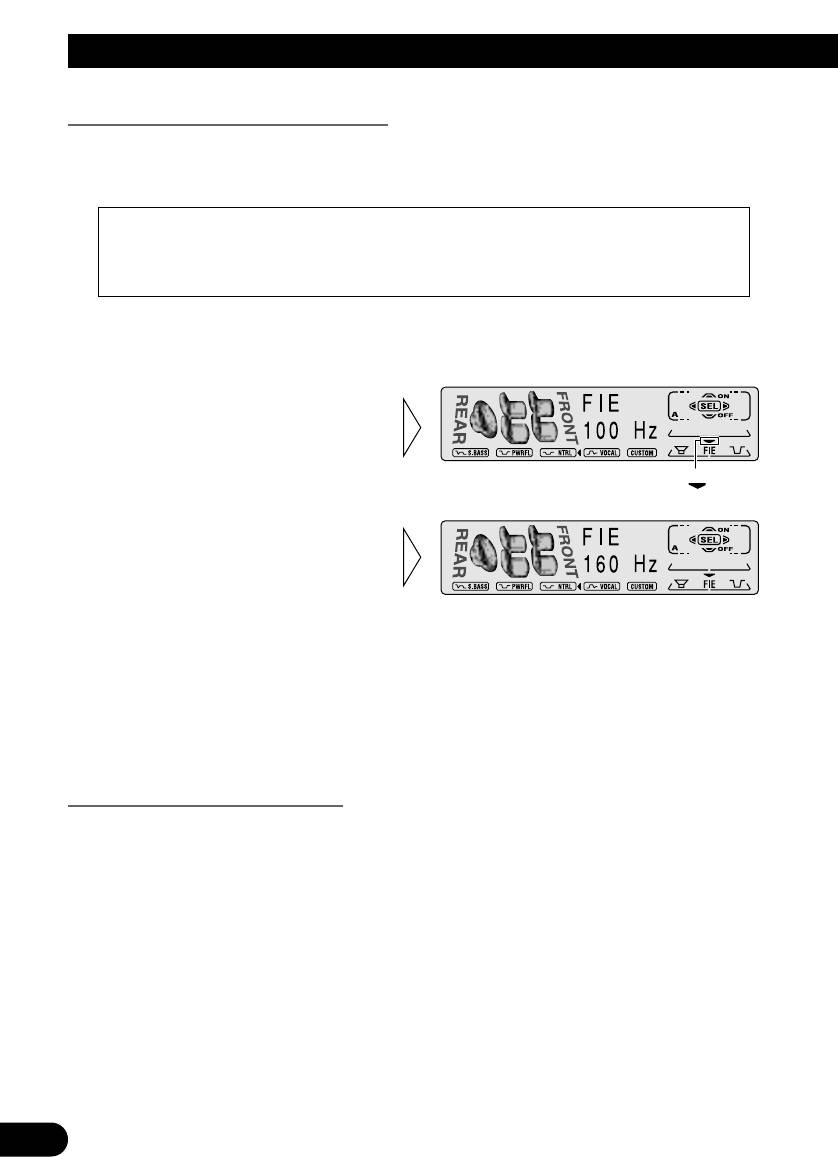
Front Image Enhancer Function (FIE)
The F.I.E. (Front Image Enhancer) function is a simple method of enhancing front imaging
by cutting mid- and high-range frequency output from the rear speakers, limiting their out-
put to low-range frequencies. You can select the frequency you want to cut.
Precaution:
• When the F.I.E. function is deactivated, the rear speakers output sound of all frequencies, not
just bass sounds. Reduce the volume before disengaging F.I.E. to prevent a sudden increase in
volume.
1. Press the AUDIO button and select the F.I.E. mode (FIE) in the Audio
Menu.
2. Switch the F.I.E. function
ON/OFF with the 5/∞ but-
tons.
”“
3. Select the desired frequency
with the 2/3 buttons.
100 += 160 += 250 (Hz)
Note:
• When the H.P.F. function is ON, you cannot switch to the F.I.E. mode.
• After switching the F.I.E. function ON, select the Fader/Balance mode in the Audio Menu, and
adjust front and rear speaker volume levels until they are balanced.
• When the Rear Speaker Lead setting is “Rear SP:S.W”, you cannot switch the F.I.E. mode. (Refer
to page 49.)
• Switch the F.I.E. function OFF when using a 2-speaker system.
Source Level Adjustment (SLA)
The SLA (Source Level Adjustment) function prevents radical leaps in volume level when
switching between sources. Settings are based on the FM volume level, which remains
unchanged.
1. Compare the FM volume with the volume of the other source.
(e.g. Cassette player.)
2. Press the AUDIO button and select the SLA mode (SLA) in the Audio Menu.
43
3. Increase or decrease the level
ENGLISH ESPAÑOL DEUTSCH FRANÇAIS ITALIANO NEDERLANDS
with the 5/∞ buttons.
The display shows “+4” – “–4”.
Note:
• Since the FM volume is the control, SLA is not possible in the FM modes.
• The MW/LW volume level, which is different from the FM base setting volume level, can also be
adjusted similar to sources other than tuner.
• The CD player (one disc only) and Multi-CD player are set to the same volume adjustment setting
automatically.
• External Unit 1 and External Unit 2 are set to the same volume adjustment setting automatically.
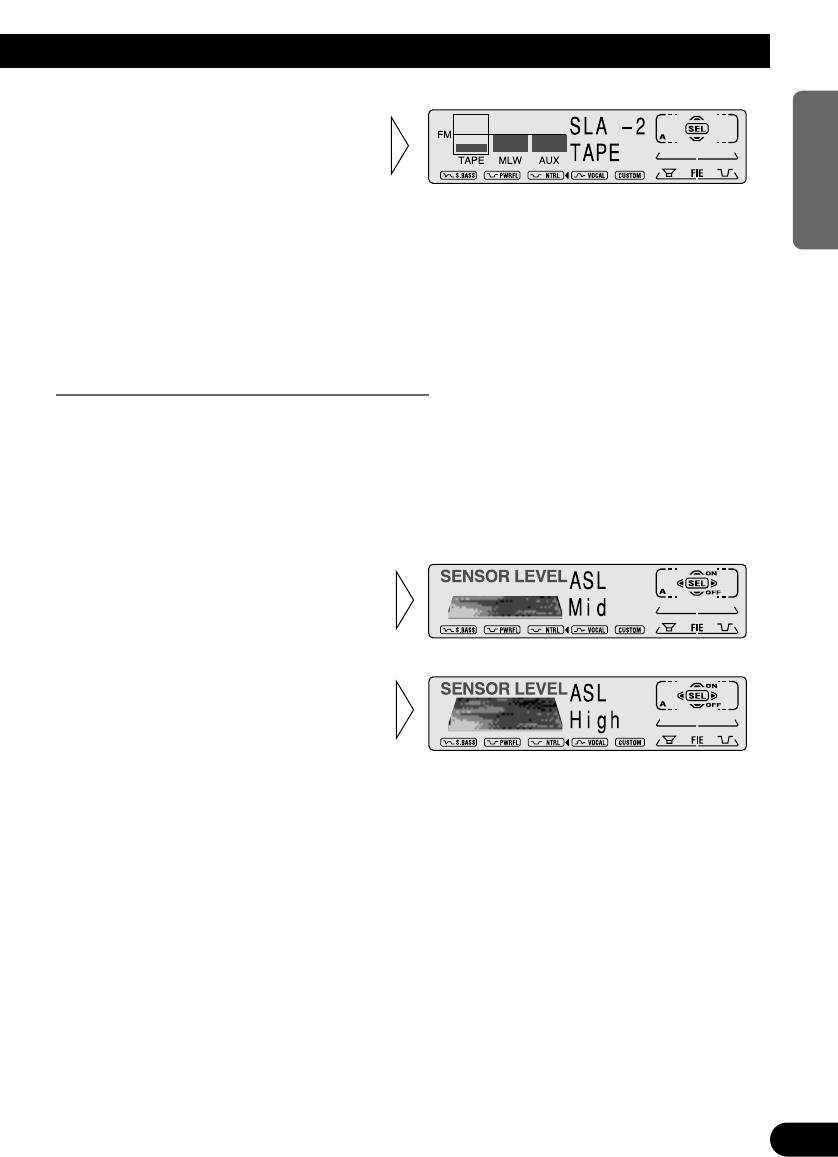
Automatic Sound Levelizer (ASL) Function
During driving, noise in the car changes according to the driving speed and road condi-
tions. The automatic sound levelizer (ASL) monitors such varying noise and automatically
increases the volume level, if this noise becomes greater. The sensitivity (variation of vol-
ume level to noise level) of ASL can be set to one of five levels.
1. Press the AUDIO button and select the Auto Sound Levelizer mode (ASL) in
the Audio Menu.
2. Switch the Auto Sound
Levelizer ON/OFF with the
5/∞ buttons.
3. Select the desired level in the
following order with the 2/3
buttons:
Low Ô Lo-Mid Ô Mid Ô
Mid-Hi Ô High
44
Оглавление
- Contents
- Key Finder
- Before Using This Product
- Before Using This Product
- Basic Operation
- Basic Operation
- Basic Operation
- Basic Operation
- Basic Operation
- Basic Operation
- Tuner Operation
- Using RDS Functions
- Using RDS Functions
- Using RDS Functions
- Using RDS Functions
- Using the Cassette Player
- Using Multi-CD Players
- Using Multi-CD Players
- Using Multi-CD Players
- Audio Adjustment
- Audio Adjustment
- Detaching and Replacing the Front Panel
- Initial Setting
- Initial Setting
- Initial Setting
- Other Functions
- Cassette Player and Care
- Specifications
- СодÕàÖÐÝØÕ
- УкÐ×ÐâÕлì кÝоßок
- ¿ÕàÕд Øсßолì×оÒÐÝØÕÜ дÐÝÝого Ø×дÕлØï
- ¿ÕàÕд Øсßолì×оÒÐÝØÕÜ дÐÝÝого Ø×дÕлØï
- ОсÝоÒÝëÕ ßàØñÜë àÐбоâë
- ОсÝоÒÝëÕ ßàØñÜë àÐбоâë
- ОсÝоÒÝëÕ ßàØñÜë àÐбоâë
- ОсÝоÒÝëÕ ßàØñÜë àÐбоâë
- ОсÝоÒÝëÕ ßàØñÜë àÐбоâë
- ОсÝоÒÝëÕ ßàØñÜë àÐбоâë
- ОсÝоÒÝëÕ àÕÖØÜë àÐбоâë ßàØñÜÝØкÐ
- ¸сßолì×оÒÐÝØÕ фуÝкæØÙ RDS
- ¸сßолì×оÒÐÝØÕ фуÝкæØÙ RDS
- ¸сßолì×оÒÐÝØÕ фуÝкæØÙ RDS
- ¸сßолì×оÒÐÝØÕ фуÝкæØÙ RDS
- ¿олì×оÒÐÝØÕ кÐссÕâÝëÜ ßàоØгàëÒÐâÕлÕÜ
- ¿олì×оÒÐÝØÕ ÜÝогодØскоÒëÜØ КД-ßàоØгàëÒÐâÕлïÜØ
- ¿олì×оÒÐÝØÕ ÜÝогодØскоÒëÜØ КД-ßàоØгàëÒÐâÕлïÜØ
- ¿олì×оÒÐÝØÕ ÜÝогодØскоÒëÜØ КД-ßàоØгàëÒÐâÕлïÜØ
- ½ÐсâàоÙкÐ ×ÒуçÐÝØï
- ½ÐсâàоÙкÐ ×ÒуçÐÝØï
- ½ÐсâàоÙкÐ ×ÒуçÐÝØï
- СÝïâØÕ Ø усâÐÝоÒкÐ ßÕàÕдÝÕÙ ßÐÝÕлØ
- ½ÐçÐлìÝëÕ усâÐÝоÒØ
- ½ÐçÐлìÝëÕ усâÐÝоÒØ
- ½ÐçÐлìÝëÕ усâÐÝоÒØ
- ¿àоçØÕ фуÝкæØØ
- КÐссÕâÝëÙ ßàоØгàëÒÐâÕлì Ø уåод ×Ð ÝØÜ
- СßÕæØфØкÐæØØ


