LG KG225: Camera
Camera: LG KG225
Camera
Your multimedia phone comes with an easy-to-use
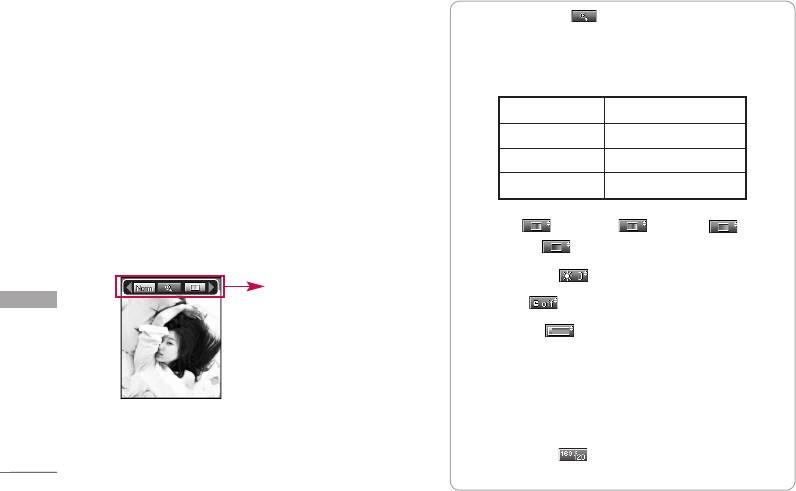
Before shooting, you can set the following options.
built-in camera, which allows you to instantly take,
1. Digital zoom ( ): x1, x2, x3, x4, x5
view and share pictures with your friends and family.
Note
Note
]
The maximum zoom scale depends on the resolution as
]
If the battery is too low, you may not be able to use the
follows.
Camera feature.
48 x 48 1x, 2x, 3x, 4x, 5x
Take a picture Menu 6.1
160 x 120
1x, 2x, 3x, 4x, 5x
320 x 240
1x, 2x, 3x, 4x
Press the Menu key and select Camera > Ta k e a
picture using the navigation keys. Or you can directly
640 x 480
unavailable
open the camera module by a press of the Camera
key in standby mode. The camera module opens and
2. Tone ( ):
Colour( )/ Sepia( )/ Black
you’ll see the view to be captured.
and white( )
3. Brightness ( ):
-2, -1, 0, +1, +2
preview option
menu bar
4. Timer ( ):
Off (kein timer), 3 sec, 5 sec
Camera
5. Memory ( ):
Shows the current memory
status.
Note
AAllbbuumm BBaacckk
]
If the memory is full, “Memory full” message is displayed
and you cannot save a photo. Create space by deleting
old photos.
6. Resolution ( ):
48x48 (for phonebook),
160x120, 320x240, 640x480
52
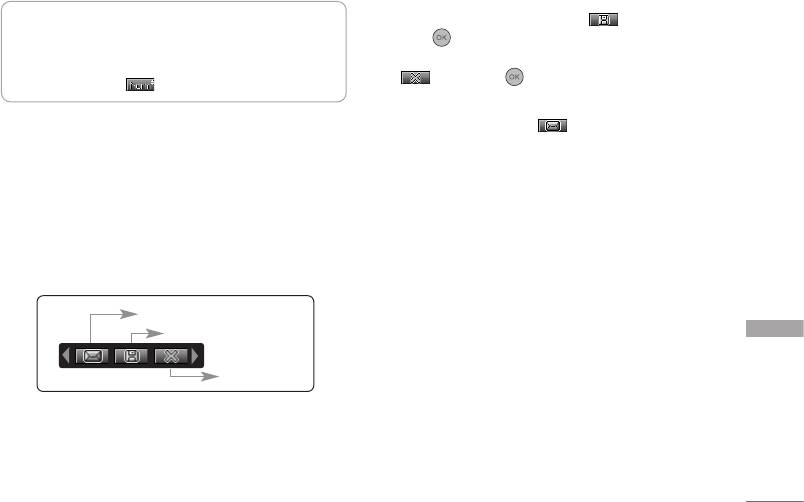
4. To save the image, centre the ( ) and
Note
]
For the picture to be used in the phonebook, select
press .
48x48 (for phonebook).
If you don’t want to save the image, center the
7. Image quality ( ):
Fine/ Normal/ Basic.
( ) and press .
You can also send the image via multimedia
1. Centre the desired option menu using the
message by selecting ( ). For further
left/right navigation keys.
information regarding multimedia message writing,
2. Select the desired value with the up/down
refer to page 44. Sending of pictures via MMS
navigation keys.
leads to cost, for details please contact your
network operator / service provider.
3. After setting all the values, focus on the subject to
capture and press the Camera key or OK key. With
a click, the image is captured and the following
menu bar appears.
MMS message
Save
Camera
Delete
Note
]
If Auto save (Menu 6.3.1) is set to Yes, the captured
image is automatically saved without displaying this
menu bar. (Refer to page 53.)
53
Camera
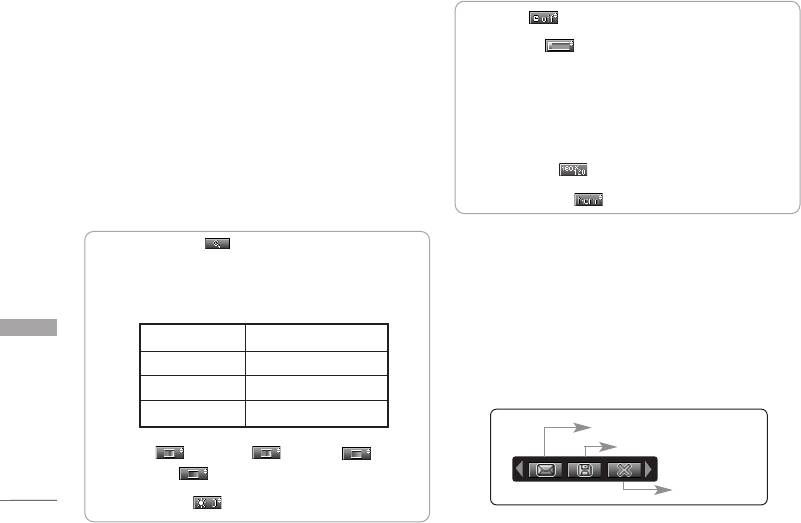
Take continuously Menu 6.2
4. Timer ( ):
Off (kein timer), 3 sec, 5 sec
You can take the maximum of 9 pictures
5. Memory ( ):
Shows the current memory
subsequently at the same time. After taking a picture,
status.
you can view it using the up/down navigation keys.
Note
You can also save them by pressing the OK key.
]
If the memory is full, “Memory full” message is displayed
and you cannot save a photo. Create space by deleting
Note
old photos.
]
If you set 320x240 in resolution, you can take only 6
pictures. In case of 160x120, it is available to 9
6. Resolution ( ):
160x120, 320x240
pictures.
7. Image quality ( ):
Fine/ Normal/ Basic.
Before shooting, you can set the following options.
1. Centre the desired option menu using the
1. Digital zoom ( ): x1, x2, x3, x4, x5
left/right navigation keys.
Note
2. Select the desired value with the up/down
]
The maximum zoom scale depends on the resolution as
navigation keys.
follows.
3. After setting all the values, focus on the subject to
Camera
48 x 48 unavailable
capture and press the Camera key or OK key.
160 x 120
1x, 2x, 3x, 4x, 5x
Once the images have been captured the following
320 x 240
1x, 2x, 3x, 4x
menu bar appears.
640 x 480
unavailable
MMS message
2. Tone ( ):
Colour( )/ Sepia( )/ Black
Save
and white( )
Delete
3. Brightness ( ):
-2, -1, 0, +1, +2
54

Note
]
If Auto save (Menu 6.3.1) is set to Yes, the captured
image is automatically saved without displaying this
menu bar. (Refer to page 53.)
4. To save the image, centre the ( ) and
press .
If you don’t want to save the image, centre the
( ) and press .
You can also send the image via multimedia
message by selecting ( ).
Settings Menu 6.3
Press the Menu key and select
Camera > Settings
using the navigation keys.
]
Auto save:
If you set this to
Yes
, the captured
Camera
images are automatically saved without displaying
the Save menu bar.
]
Clear album:
Use this menu to delete all the
photos. You are asked to confirm this action.
55
Оглавление
- KG225 ИНСТРУКЦИЯ ПОЛЬЗОВАТЕЛЯ KG225 ИНСТРУКЦИЯ ПОЛЬЗОВАТЕЛЯ
- Table of Contents
- Introduction
- Guidelines for safe and efficient use
- KG225 Features
- Getting started
- General functions
- Selecting functions and options
- Menu tree
- Profiles
- Call register
- Fun & Tools
- Organiser
- Messages
- Camera
- Downloads
- Internet
- Settings
- On browsing menu
- Accessories
- Technical data


