Karcher Autolaveuse BR 55-40 RS Bp Pack: Operation
Operation: Karcher Autolaveuse BR 55-40 RS Bp Pack
-
4
Remove the power plug from the charg-
er and hook the holder into the appli-
ance (model Bp Pack only).
Open the lock.
Swivel the top of the appliance forward.
Tilt the wastewater tank backwards.
Clamp off the minus pole of the battery.
Clamp off the remaining cables from the
battery.
Remove the batteries.
Dispose of the used batteries according
to the local provisions.
While standing, the device is protected
against rolling off with the help of an electri-
cal immobilising brake. To push the de-
vice, you need to first unlock the
immobilising brake.
Press the unlocking lever down to un-
lock the parking brake.
Danger
Risk of accident if the device rolls off. Apply
the immobilising brake again immediately
after finishing pushing the machine by
pushing the unlocking lever down.
Caution
Risk of damage. Never move the appliance
faster than 7 km/h.
Note
Take the foot off the aceelerator pedal,
press the emergency-stop button to imme-
diately deactivate all functions and turn the
key switch to the "0" position.
Unscrew the wooden board from the
top side of the packaging (will be need-
ed as a ramp later).
Loosen the screws and remove the
wooden cage.
Cut plastic packing belt and remove foil.
Loosen the fixing at the wheels.
Place the wooden board at the back of
the appliance on the pallet as a ramp
and attach with screws.
Remove both blocks from behind the
rear wheels.
Remove the block underneath the suc-
tion bar.
Remove the cable ties from the suction
bar.
Loosen the flexible steering shaft from
the pallet.
Swivel the top part of the appliance for-
ward and remove the steering wheel
from the wastewater reservoir.
Remove the key from the steering
wheel.
Remove the nut and the sleeve from the
upper end of the steering shaft.
Slide the top of the steering shaft
through the bore in the control panel
from the inside out.
Install the nut and the sleeve onto the
upper end of the steering shaft.
Slide the lower end of the steering shaft
onto the end of the rotary shaft on the
bottom of the appliance.
Remove the nut from the upper end of
the steering shaft.
Insert the steering wheel and straight-
align the front wheel.
Pull out the steering wheel, align and in-
sert back.
Fasten the steering wheel using en-
closed nut.
Insert the cover in the steering wheel.
Press the unlocking lever down to un-
lock the parking brake.
Slide the appliance backwards to re-
move it from the pallet.
Press the unlocking lever upward to un-
lock the parking brake.
Danger
Long hours of using the appliance can
cause circulation problems in the hands on
account of vibrations.
It is not possible to specify a generally valid
operation time, since this depends on sev-
eral factors:
–
Proneness to blood circulation deficien-
cies (cold, numb fingers).
–
Low ambient temperature. Wear warm
gloves to protect hands.
–
A firm grip impedes blood circulation.
–
Continuous operation is worse than an
operation interrupted by pauses.
In case of regular, long-term operation of
the device and in case of repeated occur-
rence of the symptoms (e.g. cold, numb fin-
gers) please consult a physician.
Note
Take the foot off the aceelerator pedal,
press the emergency-stop button to imme-
diately deactivate all functions and turn the
key switch to the "0" position.
Carry out maintenance jobs "Prior to
operation" (see section "Maintenance
and Care").
Danger
Danger of accident. The immobilizing brake
must always be checked first on an even
surface before starting the machine.
Set main switch to “0”.
Press emergency-stop button.
If the appliance can be moved by hand, the
parking brake is not engaged.
Pull up the reset lever of the parking
break.
If the appliance can still be moved by hand,
the parking break is defective. Shut down
the appliance and call Customer Service.
Danger
Danger of accident. If the appliance cannot
brake adequately while going downhill,
press the emergency stop button.
Close the lid of the fresh water tank.
Connect the hose to the automatic fill-
ing system and open the water supply
(max. 60 °C, max. 5 bars).
Monitor the appliance - the automatic
filling system will interrupt the water
supply when the tank is full.
Shut off the water supply and discon-
nect the hose from the appliance.
or
Open the cover of the fresh water reser-
voir.
Fill in fresh water (maximum 60 °C).
Leave sufficient space for the deter-
gent.
Close the cover of the fresh water res-
ervoir.
Note
Fill up the fresh water tank completely be-
fore starting up the machine to ventilate the
water supply system.
If the pipe system is empty, it can take
about 2 minutes till the detergent solution
comes out of the cleaning head.
몇
Warning
Risk of damage. Only use the recommend-
ed detergents. With respect to different de-
tergents the operator bears the increased
risk regarding the operational safety and
danger of accident.
Only use detergents that are free from sol-
vents, hydrochloric acid and hydrofluoric
acid.
Follow the safety instructions for using de-
tergents.
Note
Do not use highly foaming detergents.
Recommended detergents:
After charging
Removing the batteries
Pushing the device
Unloading
Operation
Check immobilizing brake
Brakes
Filling in detergents
Fresh water
Detergent
Application
Detergent
Routine cleaning of all wa-
ter resistant floors
RM 780
RM 746
Routine cleaning of glossy
surfaces (e.g. granite)
RM 755 es
Routine cleaning and ba-
sic cleaning of industrial
floors
RM 69 ASF
Routine cleaning and ba-
sic cleaning of fine stone-
ware tiles
RM 753
Routine cleaning of tiles in
sanitary areas
RM 751
18 EN
-
5
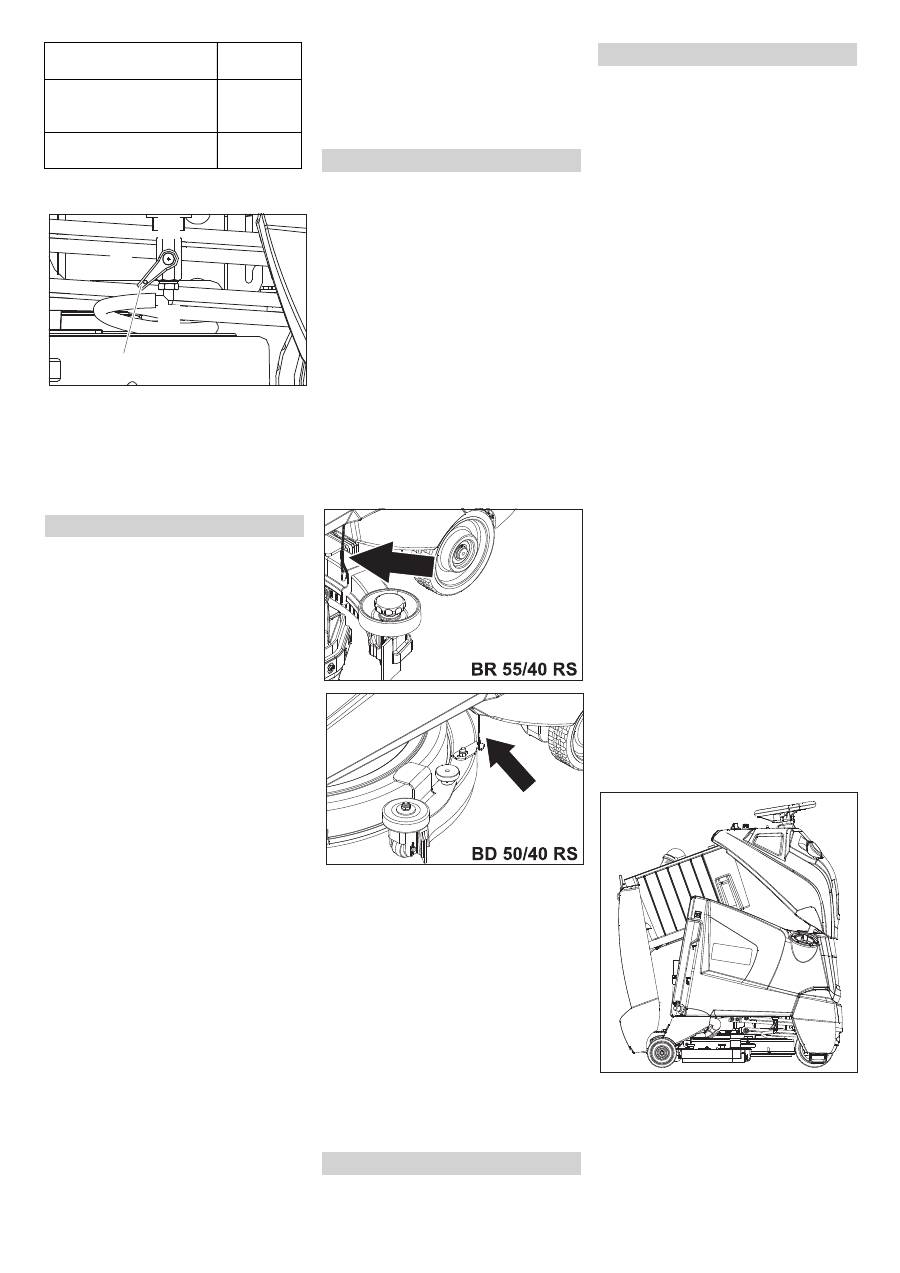
Add the detergent to the fresh water
reservoir.
1 Fresh water valve
A Maximum fresh water volume
B Half of the fresh water volume
C Valve for fresh water closed
Turn the valve of the fresh water into
the desired position.
Carry out the initial trials in an open surface
so that you familiarise yourself with the ap-
pliance.
Danger
Danger of tipping if gradient is too high.
The gradient in the direction of travel
should not exceed 10%.
Danger of tipping when driving round
bends at high speed.
Danger of slipping on wet floors.
Drive slowly when cornering.
Danger of tipping on unstable ground.
Only use the machine on sound surfac-
es.
Danger of tipping with excessive sideways
tilt.
The gradient perpendicular to the direc-
tion of travel should not exceed 10%.
Step on the standing platform.
Do not press the accelerator pedal.
Release emergency-stop button by
turning.
Set main switch to “1”.
Set the speed range on the programme
selection switch.
Set the drive direction using the drive
direction button at the operator console.
Note
The driving direction switch is also used as
a safety switch. Therefore, this switch must
be pressed even if the desired driving di-
rection has already been set.
Press the accelerator carefully to drive.
Note
The drive direction can also be changed
during the drive. You can thus clean very
dirty surfaces by driving back and forth a
couple of times.
In case of overloading, the drive motor au-
tomatically switches off after a certain peri-
od.
Allow the appliance to cool down at
least for 5 minutes.
Note
The detergent supply and brush drive are
interrupted till further movement if the de-
vice stands at one place for more than 2
seconds.
Step on the standing platform.
Do not press the accelerator pedal.
Release emergency-stop button by
turning.
Set main switch to “1”.
Turn the program selection switch to
the desired cleaning program.
Set the forward drive direction using the
drive direction button at the operator
console.
Press accelerator pedal and drive to the
surface to be cleaned.
Hook in both ropes on the suction bar
so that the suction bar is not lowered.
Set programme selection switch to "Ap-
ply detergent".
Apply detergent solution to the severe-
lyk contaminated surface and let it soak
in.
Unhook both ropes from the suction
bar.
Perform the second cleaning run with
light or high cleaning intensity.
Set the program selection switch to suc-
tion or vacuuming.
Push the appliance a little further to
vacuum up the remaining water.
Park the machine on an even surface.
Turn key to "0" and remove it.
Note
Overflow dirt water tank. The suction flow is
interrupted by the swimmer when the dirt
water tank is full. Empty the dirt water res-
ervoir.
몇
Warning
Please observe the local provisions regard-
ing the wastewater treatment.
Take the wastewater discharge hose
from the support and open the lid of the
drain hose.
Press the hose end together and lower
it over the disposal unit.
Regulate the force of the dirt waster
stream by pressing the hose end to-
gether.
Swivel the top of the appliance forward.
Clean the swimmer and check the
movement of the swimmer ball.
Rinse the dirty water tank with clear wa-
ter.
Clean the interior of the top of the appli-
ance.
Press the wastewater hose into the
holder on the appliance.
Take the fresh water discharge hose
from the support and lower above a
suitable collection device.
Drain off the detergent liquid.
Remove the lid from the fresh water
reservoir.
Rinse the fresh water reservoir with
clear water (max. 60°C).
Caution
Risk of damage for fresh water container,
valves and seals. Never leave the cleaning
solution in the fresh water reservoir after
operation.
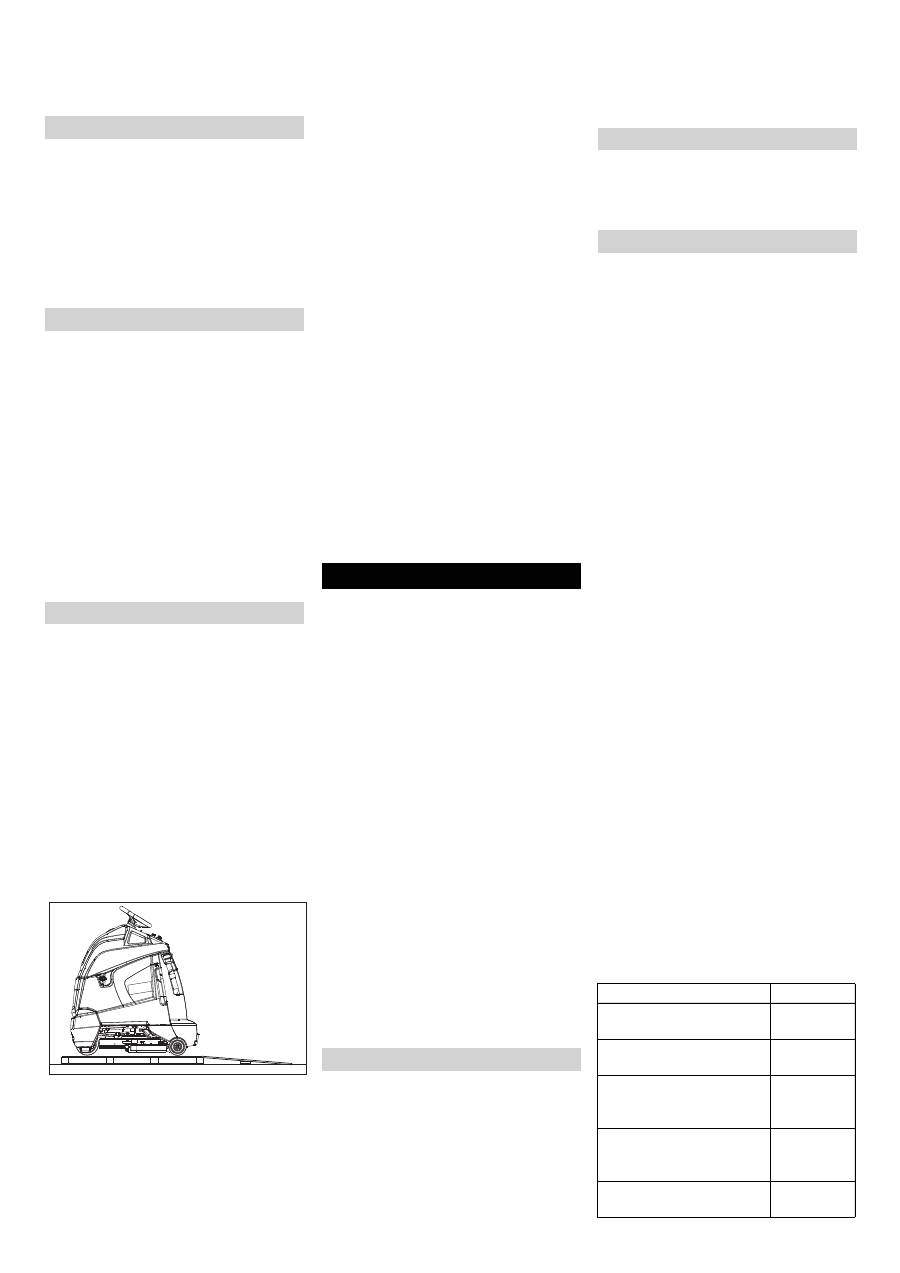
Store the appliance as shown above to
dry off the tanks.
Cleaning and disinfection
in sanitary areas
RM 732
Removal of coating from
all alkali-resistant floors
(e.g. PVC)
RM 752
Removal of coating from li-
noleum floors
RM 754
Driving
B
C
1
A
Overload
Cleaning
Severe soiling (two-step method)
Complete cleaning
Shutting down
Empty tanks.
Drain off dirt water
Drain off clean water
19 EN
Оглавление
- Inhaltsverzeichnis
- Bedien- und Funktionselemente
- Vor Inbetriebnahme
- Betrieb
- TransportLagerung Pflege und Wartung
- Störungen
- Zubehör
- Technische Daten
- Ersatzteile Garantie EG-Konformitätserklärung
- Contents
- Operating and Functional Elements
- Before Commissioning
- Operation
- Transport Storage Maintenance and care
- Faults
- Accessories
- Specifications
- Spare parts Warranty EC Declaration of Conformity
- Table des matières
- Eléments de commande
- Avant la mise en service
- Fonctionnement
- Transport Entreposage Entretien et maintenance
- Pannes
- Accessoires
- Données techniques
- Pièces de rechange Garantie Déclaration de conformité CE
- Indice
- Elementi di comando e di funzione
- Prima della messa in funzione
- Funzionamento
- Trasporto Supporto Cura e manutenzione
- Guasti
- Accessori
- Dati tecnici
- Ricambi Garanzia Dichiarazione di conformità CE
- Inhoud
- Bediening- en werkingsonderdelen
- Voor ingebruikneming
- Gebruik
- Vervoer Opslag Verzorging en onderhoud
- Storingen
- Accessoires
- Technische gegevens
- Reserveonderdelen Garantie EG-conformiteitsverklaring
- Índice de contenidos
- Elementos de operación y funcionamiento
- Antes de la puesta en marcha
- Funcionamiento
- Transporte Almacenamiento Cuidados y mantenimiento
- Averías
- Accesorios
- Datos técnicos
- Piezas de repuesto Garantía Declaración de conformidad CE
- Índice
- Elementos de comando e de funcionamento
- Antes de colocar em funcionamento
- Funcionamento
- Transporte Armazenamento Conservação e manutenção
- Avarias
- Acessórios
- Dados técnicos
- Peças sobressalentes Garantia Declaração de conformidade CE
- Indholdsfortegnelse
- Betjenings- og funktionselementer
- Inden idrifttagning
- Drift
- Transport Opbevaring Pleje og vedligeholdelse
- Fejl
- Tilbehør
- Tekniske data
- Reservedele Garanti EU-overensstemmelseser- klæring
- Innholdsfortegnelse
- Betjenings- og funksjonsorganer
- Før igangsetting
- Drift
- Transport Lagring Pleie og vedlikehold
- Funksjonsfeil
- Tilbehør
- Tekniske data
- Reservedeler Garanti EU-samsvarserklæring
- Innehållsförteckning
- Manövrerings- och funktionselement
- Före idrifttagandet
- Drift
- TransportFörvaring Skötsel och underhåll
- Störningar
- Tillbehör
- Tekniska data
- Reservdelar Garanti Försäkran om EU-överensstämmelse
- Sisällysluettelo
- Ohjaus- ja toimintaelementit
- Ennen käyttöönottoa
- Käyttö
- KuljetusSäilytys Hoito ja huolto
- Häiriöt
- Varusteet
- Tekniset tiedot
- Varaosat Takuu EU-standardinmukaisuusto- distus
- Πίνακας περιεχομένων
- Στοιχεία χειρισμού και λειτουργίας
- Πριν την ενεργοποίηση
- Λειτουργία
- Μεταφορά Αποθήκευση Φροντίδα και συντήρηση
- Βλάβες
- Εξαρτήματα
- Τεχνικά χαρακτηριστικά
- Ανταλλακτικά Εγγύηση Δήλωση Συμμόρφωσης των Ε . Κ .
- İ çindekiler
- Kullan ı m ve çal ı ş ma elemanlar ı
- Cihaz ı çal ı ş t ı rmaya ba ş lamadan önce
- Çal ı ş t ı rma
- Ta ş ı ma Depolama Koruma ve Bak ı m
- Ar ı zalar
- Aksesuar
- Teknik bilgiler
- Yedek parçalar Garanti AB uygunluk bildirisi
- Оглавление
- Описание элементов управления и рабочих узлов
- Перед началом работы
- Эксплуатация прибора
- Транспортировка Хранение Уход и техническое обслу - живание
- Неполадки
- Принадлежности
- Технические данные
- Запасные части Гарантия Заявление о соответствии ЕС
- Tartalomjegyzék
- Kezelési- és funkciós elemek
- Üzembevétel el ő tt
- Üzem
- Szállítás Tárolás Ápolás és karbantartás
- Üzemzavarok
- Tartozékok
- M ű szaki adatok
- Alkatrészek Garancia EK konformitási nyiltakozat
- Obsah
- Ovládací a funk č ní prvky
- Pokyny p ř ed uvedením p ř ístroje do provozu
- Provoz
- P ř eprava Ukládání Pé č e a údržba
- Poruchy
- P ř íslušenství
- Technické údaje
- Náhradní díly Záruka Prohlášení o shod ě pro ES
- Vsebinsko kazalo
- Upravljalni in funkcijski elementi
- Pred zagonom
- Obratovanje
- Transport Skladiš č enje Nega in vzdrževanje
- Motnje
- Pribor
- Tehni č ni podatki
- Nadomestni deli Garancija ES-izjava o skladnosti
- Spis tre ś ci
- Elementy obs ł ugi urz ą dzenia
- Przed uruchomieniem
- Dzia ł anie
- Transport Przechowywanie Czyszczenie i konserwacja
- Zak ł ócenia
- Akcesoria
- Dane techniczne
- Cz ęś ci zamienne Gwarancja Deklaracja zgodno ś ci UE
- Cuprins
- Elemente de utilizare ş i func ţ ionale
- Înainte de punerea în func ţ iune
- Func ţ ionarea
- Transport Depozitarea Îngrijirea ş i între ţ inerea
- Defec ţ iuni
- Accesorii
- Date tehnice
- Piese de schimb Garan ţ ie Declara ţ ie de conformitate CE
- Obsah
- Ovládacie a funk č né prvky
- Pred uvedením do prevádzky
- Prevádzka
- Transport Uskladnenie Ošetrovanie a údržba
- Poruchy
- Príslušenstvo
- Technické údaje
- Náhradné diely Záruka Vyhlásenie o zhode s normami EÚ
- Pregled sadržaja
- Komandni i funkcijski elementi
- Prije prve uporabe
- U radu
- Transport Skladištenje Njega i održavanje
- Smetnje
- Pribor
- Tehni č ki podaci
- Pri č uvni dijelovi Jamstvo EZ izjava o uskla đ enosti
- Pregled sadržaja
- Komandni i funkcioni elementi
- Pre upotrebe
- Rad
- Transport Skladištenje Nega i održavanje
- Smetnje
- Pribor
- Tehni č ki podaci
- Rezervni delovi Garancija Izjava o uskla đ enosti sa propisima EZ
- Съдържание
- Обслужващи и функционални елементи
- Преди пускане в експлоатация
- Експлоатация
- T рансп o рт Съхранение Грижи и поддръжка
- Повреди
- Принадлежности
- Технически данни
- Резервни части Гаранция Декларация за съответствие на ЕО
- Sisukord
- Teenindus- ja funktsioonielemendid
- Enne seadme kasutuselevõttu
- Käitamine
- Transport Hoiulepanek Korrashoid ja tehnohooldus
- Rikked
- Tarvikud
- Tehnilised andmed
- Varuosad Garantii EÜ vastavusdeklaratsioon
- Satura r ā d ī t ā js
- Vad ī bas sist ē mas un funkciju elementi
- Pirms ekspluat ā cijas s ā kuma
- Ekspluat ā cija
- Transport ē šana Glab ā šana Kop ana un tehnisk ā apkope
- Trauc ē jumi
- Piederumi
- Tehniskie parametri
- Rezerves da ļ as Garantijas nosac ī jumi EK Atbilst ī bas deklar ā cija
- Turinys
- Aptarnavimo ir funkciniai elementai
- Prieš pradedant naudoti
- Naudojimas
- Transportavimas Laikymas Į prastin ė ir technin ė s prieži ū ra
- Gedimai
- Priedai
- Techniniai duomenys
- Atsargin ė s dalys Garantija EB atitikties deklaracija
- Зміст
- Елементи управління і функціональні вузли
- Перед введенням в експлуатацію
- Експлуатація
- Транспортування Зберігання Догляд та технічне обслуговування
- Неполадки
- Аксесуари
- Технічні дані
- Запасні частини Гарантія Заява при відповідність Європейського співтовариства
