LG X Power 2 M320 16Gb Gold: Custom-designed Features
Custom-designed Features: LG X Power 2 M320 16Gb Gold

01
Custom-designed
Features
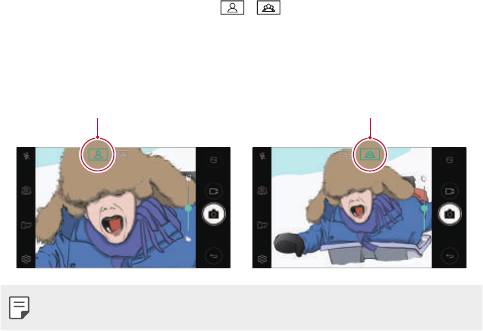
Wide-angle camera
You can take photos or record videos with a wider range than your actual
field of vision by using the wide-angle on the front camera.
Launch the Camera app, then tap
/ to switch between the
standard and wide-angle.
Front camera
Standard angle icon Wide-angle icon
• See
Starting the camera
for details.
Custom-designed Features 14
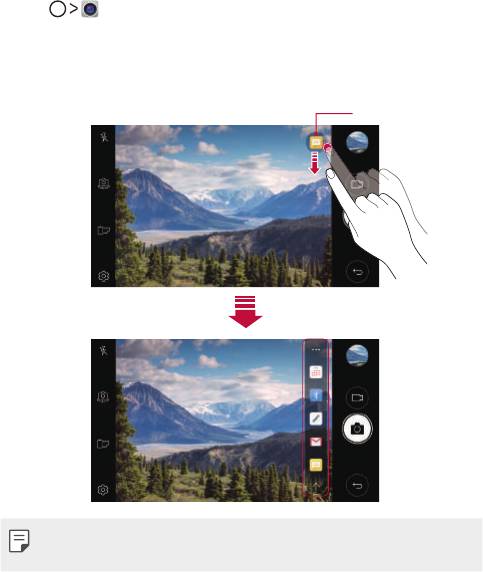
quick share
You can share a photo or video to the app you want immediately after
taking it.
1
Tap , then take a photo or record a video.
2
Tap the app icon that appears on the screen to share it using that app.
You can also swipe the icon towards the opposite direction to see
what other apps you can use to share your photos and videos.
quick share icon
• The app displayed by the quick share icon may vary, depending on the
type and frequency of access to the apps installed on the device.
Custom-designed Features 15

QuickMemo+
QuickMemo+ overview
You can make creative memos by using a variety of options on this
advanced QuickMemo+ feature, such as image management and
screenshots, which are not supported by the conventional QuickMemo+.
Creating a memo
1
Tap QuickMemo+.
2
Tap to create a memo.
•
: Save a memo.
•
: Undo the last action.
•
: Redo the last action you undid.
•
: Enter a memo by using the keypad.
•
: Write memos by hand.
•
: Erase handwritten memos.
•
: Zoom in or out, rotate or erase the parts of a handwritten
memo.
•
: Access additional options.
3
Tap to save the memo.
Writing memos on a photo
1
Tap QuickMemo+.
2
Tap to take a photo, then tap OK.
• The photo is automatically attached into the QuickMemo+.
3
Tap or to write memos on the photo.
• Write memos by hand on the photo.
• Enter text below the photo.
4
Tap to save the memo.
Custom-designed Features 16
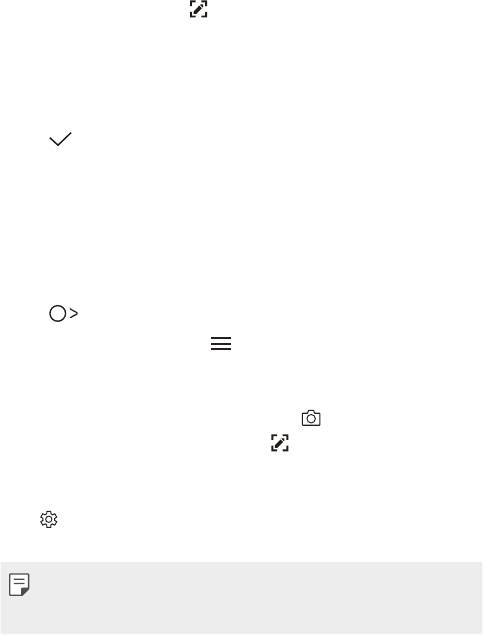
Writing memos on a screenshot
1
While viewing the screen you want to capture, drag the status bar
downwards and then tap
.
• The screenshot appears as the QuickMemo+ background theme.
Memo tools appear at the top of the scr
een.
2
Take memos as desired.
• Write memos by hand on the photo.
3
Tap and save the memos to the location you want.
• Saved memos can be viewed in either QuickMemo+ or Galler
y.
• To save memos in the same location all the time, select the Use as
default app checkbo
x and select an app.
Managing folders
You can view memos grouped by the type of the memos.
1
Tap QuickMemo+.
2
At the top of the screen, tap and select a menu item:
• All memos: View all memos sav
ed in QuickMemo+.
• My memos: View memos cr
eated by QuickMemo+.
• Photo memos: View memos cr
eated by .
• Capture+: View memos cr
eated by .
• Trash: View deleted memos.
• New category: Add c
ategories.
•
: Rearrange, add or delete categories. To change the name of a
category, tap the category.
• Some folders do not appear when launching QuickMemo+ for the first
time. Disabled folders are enabled and appear when they contain at
least one related memo.
Custom-designed Features 17
Multi-tasking feature
Multi window
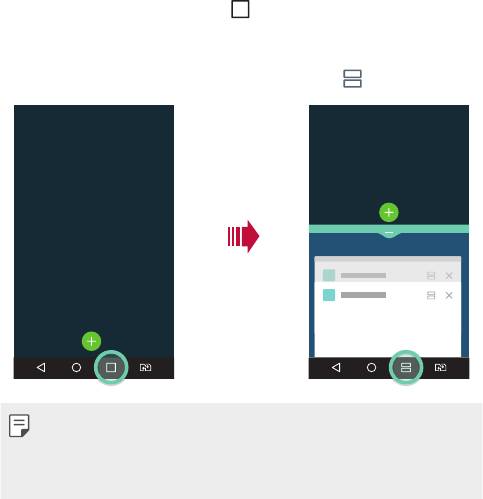
You can use two apps at the same time by separating the screen into the
multiple windows.
While using an app, touch and hold
from the Home touch buttons,
then select an app from the recently used apps list.
• You can use two apps displayed on the main screen at the same time.
• To stop the Multi window feature, touch and hold
.
• You can use this feature in an app that supports the Multi window
feature.
• The Multi window feature is not supported by some apps, including
downloaded apps.
Custom-designed Features 18
Overview screen
The Overview screen provides a preview of your recently used apps.
To view the list of recently used apps, tap
on the Home, then tap the
displayed app.
• Touch and hold an app and drag it to the top of the screen to start the
app with the Multi window
. You can also tap
at the top of each app.
QSlide
You can start apps by using QSlide to use them while other apps are
running. For example, use the calculator or calendar when a video is
playing.
When an app is running, tap
QSlide.
• This feature may not be supported by some apps.
• : Turn off the QSlide mode to switch to full-screen mode.
•
: Adjust the opacity of the QSlide window. If the QSlide window is
transparent, it will not respond to touch inputs.
•
: Close the QSlide window.
•
: Adjust the size of the QSlide window.
Custom-designed Features 19


