LG G5500 – страница 5
Инструкция к Сотовому Телефону LG G5500

OrganizerOrganizer
Phonebook
Menu 4.3
Add new
(Menu 4.3.2)
You can save phone numbers and their corresponding names in
You can add a phonebook entry using this function.
the memory of your SIM card. In addition, you can save up to 255
There are 2 memories: Phone memory and SIM memory. To select
numbers and names in the phone memory.
the memory, go to Set memory [Menu 4.3.8.1]. The phone
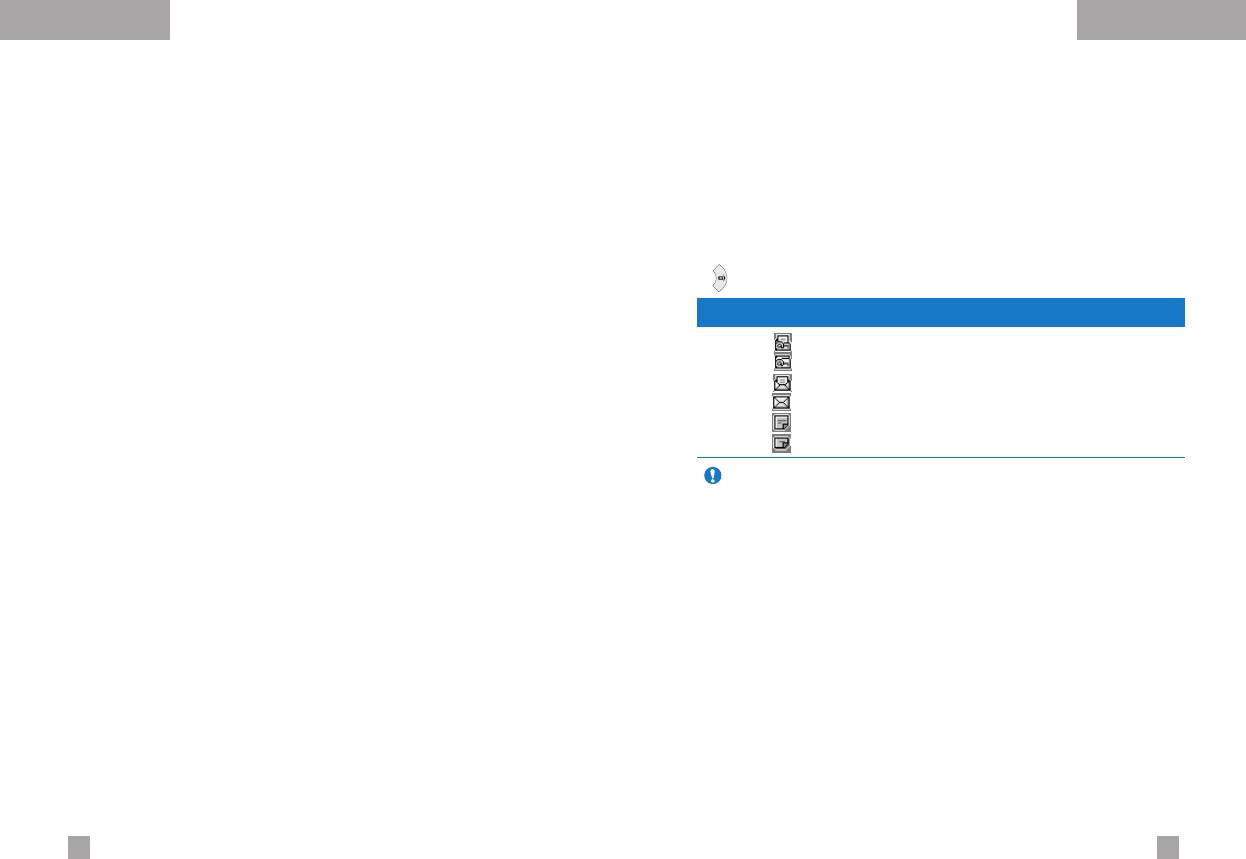
- Press the left soft key [Menu] in standby mode, then select
memory capacity is 255 entries. You can enter up to 20 characters
Organizer
→
Phonebook.
in each name in the phone memory. The SIM card memory
capacity depends on the SIM card.
- Or, press the right soft key [Names] in standby mode.
1. Open the Phonebook first by pressing the right soft key
Search
(Menu 4.3.1)
[Names] in standby mode.
2. Scroll to highlight Add new, and press [Select]
1. In standby mode, press right soft key [Names]. Select Search.
You are asked to enter a name.
3. You can add new phonebook entries to SIM memory or the
phone memory. To select the memory, go to Set memory
2. Enter the start of the name that you wish to find and press
[Menu 4.3.8.1]. (Refer to page 58.)
left soft key [Search].
• Adding new entries into SIM memory
Note You can also scroll through the phonebook from the beginning,
by pressing the left soft key [Search] directly.
You can enter a name and number, and select the required
group. (Depends on the SIM)
3. After finding the desired name, you can make a call to the
• Adding new entries into the phone memory
number by pressing the [send] key. Or press the left key
You can enter a name, numbers, E-mail address and memo, and
[Option] to use the following options.
select the required group.
• View detail: To view details of the selected name.
• Edit: Edits the name, number, and the listing group.
• Delete: Deletes the phonebook entry.
• Write text message: Use this to write a text message to the
name.
• Write multimedia message: Use this to write a multimedia
message to the name.
• Copy: Use this to copy the phonebook entry from SIM to the
phone memory or vice versa.
• Voice: Records the name of the selected phonebook entry for
voice-activated dialling.
5554

OrganizerOrganizer
Speed dials
(Menu 4.3.3)
Caller groups
(Menu 4.3.5)
You can assign any of the keys 2 to 9 with a name list entry.
There are 6 pre-defined groups, as well as one additional group
You can call directly by pressing this key for 2-3 seconds.
labelled Others, where you can create lists.
1. Open the Phonebook first by pressing the right soft key
1. Select Caller groups. Every group list will be displayed:
[Names] in standby mode.
Family, VIP, Friends, Colleague, Group 1, Group 2,
and Others.
2. Scroll to Speed dials, then press [Select].
2. Select the group name that you want to manage by pressing the
3. To add a number to Speed dials, press the left soft key [Add].
left soft key [Option]. The following submenus will be displayed
Search the name through the phonebook.
except for Others.
4. You can change or delete a speed dial number, make a call or
• Member list: Displays the member list in the group.
send a message by pressing the left soft key [Option].
• Group ring tone: Use this to select the ring tone to be used
Voice list
(Menu 4.3.4)
when you receive a voice phone call from a person in the group.
You can check all the phone numbers which have voice-activated
• Group icon: Use this to select the graphic icon to be displayed
dialling assigned to them. You can also call directly by pressing the
when you receive a call from a person in the group.
[Send] key. After selecting a phone number using up/down
• Add member: Add a member to the group.
navigation keys and press the left soft key [Option]. You can see
• Delete member: Delete a member from the group.
the following submenus.
• Rename: Assigns a new name to the group.
• Play: Plays back the voice tag assigned to the phone number.
• Change: Changes the voice tag assigned to the phone number.
Copy all
(Menu 4.3.6)
• Delete: Deletes the voice assigned to the phone number.
You can copy/move entries from the SIM card memory to the
• Call: Makes a call to the selected number.
phone memory and vice versa.
• Add new: Adds a new phone number for voice-activated
] SIM to Phone: Use this to copy the entry from the SIM Card to
dialling.
Phone memory.
• Delete all: Deletes all voice-activated dialling numbers.
] Phone to SIM: Use this to copy the entry from the Phone
memory to the SIM Card.
Note You can enter up to 10 phone numbers for voice dial.
The following options are available.
• Keep original: When copying, the original dial numbers are
kept.
• Delete original: When copying, the original dial numbers will
be erased.
5756

Organizer
Messages
Menu 5
Delete all
(Menu 4.3.7)
Press the Menu key ( ) and select Messages using
navigation keys.
You can delete all entries in SIM, Phone, and Voice list. Except for
Voice list, this function requires the security code .
Text messages
Menu 5.1
Press to return to standby mode.
Your phone receives voice mail notification messages and Short
Message Service(SMS) messages.
Settings
(Menu 4.3.8)
Voice mail and SMS are network services. Please contact your
network operator for more information.
Set memory
When the icon appears, you have received voice mail.
You can select the memory for the Phonebook feature between the
When the icon appears, you have received a new text message.
SIM and the phone. If you select Variable, when adding entry, the
If the message memory is full, a message is displayed, the
phone will ask where to save the number.
icon flashes and you cannot receive any new messages. Use the
Search by
Delete option in the Inbox menu to delete obsolete messages.
Once there is space in the message memory, any undelivered SMS
You can set the phone to search by name or number, when you
messages will be received (provided sufficient space is available).
search the Phonebook. If you select Variable, the phone will ask
how to search when you search the Phonebook.
Write message
(Menu 5.1.1)
Information
(Menu 4.3.9)
You can write and edit text messages up to 6 pages.
(approximately 918 characters)
] Service dial number (SIM dependent): Use this to view
the list of Service Dialling Numbers (SDN) assigned by your
1. Key in your message. For details on how to enter text, refer to
network operator (if supported by the SIM card). Such numbers
page 28 through 31 (Entering Text).
include the emergency, directory enquiries and voice mail
2. After you complete the message, to select the required option,
numbers.
press the left soft key [Option].
1. Select the Service dial number option.
The following options are available.
2. The names of the available services will be shown.
3. Use the up/down navigation keys to select a service. Press .
] Send to number: Enter the number or select the number
from the phonebook or the recent numbers. You can send a
] Check memory: You can check the current memory status of
message up to 5 phone numbers at a time.
the SIM card and phone memory.
Press the left soft key [Options]. The following options will be
] Own number (SIM dependent): Use this to display your
displayed.
phone number in the SIM card.
1
Send (It only shows after a phone number is entered)
2
Recent numbers
3
Search
5958
MessagesMessages
] Save to draft: Allows you to save the message so that it
Inbox
(Menu 5.1.2)
can be sent later.
Received text messages and page messages can be searched
] T9 languages: Select the language for T9 input mode from
and the contents can be viewed.
English and Russian. You can also deactivate T9 input mode
Received messages are displayed in date order.
by selecting ‘T9 off’. For further details on the T9 mode, refer
to page 28 through 30.
Press the menu key and select Messages
→
Text message
→
Inbox.
] Clear text: Erases the whole text.
Or, you can take a shortcut by pressing the right navigation key
] Exit: Allows you to exit from the Write message menu.
( ) in standby mode.
3. You can also send attachments with the message by pressing
the right soft key [Attach], while you’re entering a message.
Icon Description
] Symbol: You can attach special characters.
Read SIM message
Unread SIM message
] Picture: You can send and receive text messages that
Read message
contain pictures, known as ‘picture messages’. Several
Unread message
preset pictures are available in the phone and they can be
Read delivery report
replaced with new ones received from other sources.
Unread delivery report
] Animation: Attaching an animation in a message can be
Note SIM message refers the message saved in the SIM memory.
done through EMS (Enhanced Messaging Service).
And the network distinguishes an incoming message into the
You can select any of 15 animations in the phone.
SIM message or just message.
] Sound: If available, you can attach a sound available for a
Each received message has the following options available.
short message.
Press the left soft key [Options].
] Text template: You can use text templates already set in
] Reply: Replies to the received message.
the phone.
] Forward: Forwards a received message to other recipients.
] Phone number: You can add phone numbers in the
message.
] Return call: Calls the sender’s phone.
] Name card: You can attach your name card.
] Extract: Extracts a picture, sound, text web page or email
address from the message. These will be saved in My folder,
Phonebook, or bookmarks.
] Delete: Deletes the selected message from the Inbox.
6160

MessagesMessages
Outbox
(Menu 5.1.3)
Settings
(Menu 5.1.5)
You can view the list and contents of sent messages in this menu
This menu lets you set up default SMS information.
and can also verify if the transmission was successful.
] Message types: Sets the default message type between Text
and Voice. The network can convert the messages into the
Icon Description
selected format.
Sent SIM message
] Valid period: Sets the length of time for which your text
Sent message
messages will be saved at the SMS center while attempts are
made to deliver them to the recipient. Possible values are
The following options are available.
30 minutes, 1 hour, 6 hours, 1 day, 1 week and the maximum
authorised by your network operator.
] Forward: Forwards the current message to other recipients.
] Paper: You can insert one of 3 wallpaper images to a text
] Delete: Deletes the selected message from the Outbox.
message.
] Delivery reports: Activates or deactivates the report function.
Draft
(Menu 5.1.4)
When this function is activated, the network informs you whether
In this menu, you can see the message list saved as draft.
or not your message has been delivered.
Scroll through the list using the up/down navigation keys.
] Reply with same service: Allows the recipient of your SMS
Each draft has the following options.
message to send you a reply via your message centre, if the
] Send: Sends the selected message to other recipients.
service is provided by the network.
] Delete: Deletes the selected message.
] Message centre number: Saves or changes the number of
your SMS centre when sending text messages. You must obtain
this number from your service provider.
] Bearer setting: Selects GPRS or GSM. Contact your network
operator or service provider for information related to setting a
selected bearer, pricing and connection speed.
Delete
(Menu 5.1.6)
You can delete all messages in the message memory or delete
only read messages.
6362
MessagesMessages
Multimedia messages
(MMS)
Menu 5.2
Inbox
(Menu 5.2.2)
A multimedia message can contain text, images, and/or sound
You will be alerted when you have received messages. They will be
clips.
saved in the Inbox. You can identify each message by icons.
This feature can be used only if it is supported by your network
For details, see the icon description below.
operator or service provider. Only devices that offer compatible
multimedia message or e-mail features can receive and send
Icon Description
multimedia messages.
Read multimedia messages
Unread multimedia messages
Write
(Menu 5.2.1)
Read notified multimedia messages
Unread notified multimedia messages
1. Key in the text message. Using the right soft key, you can input
symbols, numbers and emoticons, or use T9 input mode.
If the phone has ‘No space for messages’, you can make space by
After the text message input, press the left soft key [Done].
deleting messages, media and applications.
2. Add an image and/or sound. You can move to the next section
• Timer stop: The Timer stop menu is displayed when you
using the up/down navigation.
receive a message including various pictures. Usually, the
3. You can add a slide by moving the cursor on , then pressing
pictures are sequentially displayed automatically. However, if you
the OK key or the left soft key [Select]. You can also add a slide
select this menu, you can see the next picture by pressing the left
using the right soft key [Menu].
soft key [Next] manually.
Note Up to 9 slides are affordable.
• Previous slide: Displays the previous page.
• Replay: Replays multimedia messages.
4. Press the right soft key [Menu]. The following options are
available.
• Delete message: Deletes the current message.
• Send: Supports multiple numbers and email addresses.
• Reply: Replies to the sender.
• Preview: Displays the multimedia message you wish to send.
• Reply all: Replies to all senders.
• Save: Saves the multimedia message in draft or as a template.
• Forward: Forwards the selected message to other recipients.
• Delete: Deletes the MMS message.
• Save message: Saves a multimedia message in draft form or
as a template.
• Settings: Sets the slide show duration or aligns the message
contents right, left, top or bottom.
• Save item: Extracts pictures or sounds. They will be saved in
My folder or Phonebook.
• Add Slide: Adds a slide before or after the current slide.
• Detail: Displays information about received messages; Sender’s
• Remove Slide: Deletes the selected slide.
address, Subject (only for Multimedia message), Message date &
time, Message type, Message size.
6564

MessagesMessages
Outbox
(Menu 5.2.3)
Draft
(Menu 5.2.4)
Use this to see sent messages. For each sent message, you can
Using this menu, you can preset up to five multimedia messages
see the delivery status.
that you use most frequently. This menu shows the preset
multimedia message list.
Icon Description
The following options are available.
Sent
• Send: Supports multiple member and email addresses.
• Timer stop: Usually, the pictures are in the form of an automatic
• Preview: To see the draft multimedia message.
slide show. However, if you select this menu, you can see the
• Save: Saves multimedia messages in draft form or as templates.
next picture by pressing the left soft key [Next] manually.
• Delete: Deletes the message.
• Previous slide: Displays the previous page.
• Settings: Select to set the slide duration or align the message
• Replay: Replays the current message.
contents to the right, left, top or bottom.
• Delete message: Deletes the current message.
• Add slide: Adds a slide before or after the current slide.
• Forward: Forwards the current message to other recipients.
• Remove slide: Removes the highlighted slide.
• Save message: Saves a multimedia message in draft form or
as a template.
• Save item: Saves items such as images, sound and
attachments to a message.
• Detail: Displays information about the outbox messages:
Subject (only for Multimedia message), Message date & time,
Message type, Message size.
• Reply: Replies to the current message.
• Reply all: Replies to all recipients of the selected message.
6766

MessagesMessages
Settings
(Menu 5.2.5)
Voice messages
Menu 5.3
Via this menu, you can set up the default multimedia message
This menu provides you with a quick way of accessing your voice
information.
mailbox (if provided by your network).
Before using this feature, you must enter the voice server number
The following options are available.
obtained from your network operator.
] Message title: Enter the message title.
When new voice message is received, the symbol will be
] Slide duration: Set the duration of each slide.
displayed on the screen. Please check with your network provider
] Alignment: Set the alignment of messages.
for details of their service in order to configure the handset
correctly.
] Valid period: Set the duration for keeping messages on the
network server.
Listen to voice messages
(Menu 5.3.1)
] Auto download
Once this option has been selected, simply press the left soft key
On: If you select this, messages are downloaded automatically
[OK] to listen to voice messages. You can also hold down the [1]
on receipt.
key in standby mode to listen to voice messages.
Confirm: Requires you to confirm you want to download the
message.
Voice mailbox number
(Menu 5.3.2)
Off: Defers downloading messages.
You can input and set the voice mailbox number.
] Message centre URL: Enter the address of an MMS server
to use the MMS service.
] Profiles: See page 81 for further information.
6968

MessagesMessages
Info service
Menu 5.4
Languages
(Dependent to network and subscription)
(Menu 5.4.6)
Info service messages are text messages sent by the network to
mobile phone users. They provide general information such as
This option lets you select the preferred languages. Cell broadcast
weather reports, traffic news, taxis, pharmacies, and stock prices.
messages will be displayed in the selected language. If you use all
Each type of information is associated with a number, which can be
languages supported by the phone, select Automatic at the end
obtained from the network operator. When you receive an info
of the list.
service message, a popup message will indicate a new message
receipt or the info service message will be displayed directly.
In standby mode, the following options are available when viewing
info service messages.
Receive
(Menu 5.4.1)
Use this to enable or disable the reception of broadcast messages.
Inbox
(Menu 5.4.2)
The list of received broadcast messages can be searched and the
contents viewed.
Topics
(Dependent to network and subscription)
(Menu 5.4.3)
To create new topics, press the left soft key [Option] then select
Add new. If you already have topics, you can deactivate, edit,
or delete them by using the left soft key [Options].
Alert
(Menu 5.4.4)
Set alert on or off for a new broadcast message.
Auto display
(Menu 5.4.5)
If you select this option On, all received broadcast messages will
be automatically displayed.
7170

MessagesMessages
Templates
Menu 5.5
Multimedia
(Menu 5.5.2)
There are pre-defined messages in the list. You can view and edit
• Send: Sends the multimedia template. Supports multiple
the template messages or create new messages. Two types of
numbers and email addresses.
templates are available: Text and Multimedia.
• Preview: Displays the draft multimedia message.
• Save: Saves multimedia messages in draft form or as templates.
Text
(Menu 5.5.1)
• Delete: Deletes the multimedia template.
• Please call me back.
• I’m late. I will be there at...
• Settings: Sets the timer for slide, text, or to align the message
• Where are you now?
contents right, left, top and bottom.
• I’m on the way.
• Add Slide: Adds a slide before or after the current slide.
• Top urgent. Please contact.
• I love you.
• Remove Slide: Deletes the highlighted slide.
The following options are available.
• Add Image: Use this to add an image before or after the current
image.
] Edit: Use this to write a new message or edit the selected
template message from the text template list.
• Add Sound: Adds a sound before or after the current sound.
] Delete: Deletes the selected template message from the text
template list.
] Send via text message: Use this to send the selected
template message by SMS.
] Send via multimedia message: Use this to send the
selected template message by MMS.
] Add new: Use this to create new template.
7372

Messages
TM
Java
Menu 6
Java is a technology developed by Sun Microsystems. Similar to
Name card
Menu 5.6
the way you would download the Java Applet using the standard
This option helps you to make your own name card. Key in the
Netscape or MS Internet Explorer browsers, Java MIDlet can be
name, mobile phone number, office number, Fax number, and
downloaded using the WAP enabled phone. Depending on the
E-mail address.
service provider, all Java based programs such as Java games
can be downloaded and run on a phone. Once downloaded, the
] Edit: Use this to write a new message or edit the selected name
Java program can be viewed within the Applications menu where
card.
you can select, execute, or delete. The Java program files saved in
] Delete: Use this to delete the selected name card.
the phone are in .JAD and .JAR formats.
] Send via text message: Use this to send the selected name
Note The JAR file is a compressed format of the Java program and
card by SMS.
the JAD file is a description file that includes all detailed
information. From the network, prior to download, you can view
] Send via multimedia message: Sends the selected name
all detailed file descriptions from the JAD file.
card by MMS.
Warning Only J2ME (Java 2 Micro Edition) based programs will run
in a phone environment.
Check memory
Menu 5.7
The J2SE (Java 2 Standard Edition) based programs will
only run in a PC environment.
You can check the current memory status for SMS and MMS.
Applications
Menu 6.1
Application menu displays the list of Java programs downloaded
using the WAP. All previous downloaded programs can be
selected, deleted, or viewed in detail within the Application menu.
From the list within the Application menu, the following options are
available:
] Open: Open the selected program. The list includes all Java
programs installed in the phone.
] Delete: Delete the selected program. Once deleted, you will
not be able to restore the program unless it is downloaded again
using the WAP.
] Details: Display detailed information on the selected program.
This includes the program name, program size, program
version, vendor information and the website address or the URL.
7574

Java
TM
Java
TM
Download
Menu 6.2
Note After selecting the Connect function to access the Java MIDlet
Provider’s server, you may choose one of many Java programs
When a new Java program is downloaded using the WAP, the
to download and install into your phone. Once connected to
address from which a download takes place is known as a
the server, the Go button can be pressed to view the JAD
information on a desired program. The Get button will begin
bookmark. The Java menu includes a bookmark list for
the download and install process. The download and install
downloading Java programs and this bookmark list can be viewed
process will take place simultaneously and once download is
from the Download menu. You can connect, view, edit, delete, and
complete you can immediately run the Java program. The
add new bookmarks.
installed Java program can be selected to run at a later time
from the Application menu.
] Connect: Selected address in the bookmark is used for data
connection. After successful connection, desired Java program
View information
Menu 6.3
can be downloaded from the list.
The downloaded programs using the WAP are stored in the phone
] View: Detailed information on a bookmark can be viewed such
memory. There is a maximum memory capacity in a phone and
as the address of bookmark, name of profile, and user ID
once you exceed this memory, you will not be able to store any
required for connecting to certain sites.
more programs. The View Information menu allows you to check
] Edit: Selected bookmark can be edited. Editing a bookmark is
the available memory capacity in a phone.
done in the order of URL
→
Title
→
Profile(Access Point)
→
User
ID
→
Password. When creating a new bookmark, same order is
Memory status
(Menu 6.3.1)
followed. The service provider can require user ID and
Displays maximum memory capacity and total available memory
password information, but if none is provided, no input is
information.
necessary.
] Delete: Selected bookmark is deleted. All bookmarks can be
Java version
(Menu 6.3.2)
deleted completely from the bookmark list screen. Deleted
bookmark cannot be restored so caution is required when
Displays current Java version.
deleting bookmarks.
] Add new: New bookmark is added. The same order used
during Edit bookmark applies to Add new bookmark. Select the
Add new option from the bookmark menu or when no bookmark
exists, then the Add new can be selected from the bookmark list
screen.
7776

Internet
Internet
Menu 7
Press the Menu key ( ) and select Internet using navigation
Navigating with the WAP browser
keys.
You can surf the Internet using either the phone keys or the WAP
You can access various WAP (Wireless Application Protocol)
browser menu.
services such as banking, news, weather reports and flight
information. These services are specially designed for mobile
Using the phone keys
phones and they are maintained by WAP service providers.
When surfing the Internet, the phone keys function differently to
Check the availability of WAP services, pricing and tariffs with your
phone mode.
network operator and/or the service provider whose service you
wish to use. Service providers will also give you instructions on how
Key Description
to use their services.
up/down navigation keys Scrolls each line of the content area
Please contact your network operator to open your Internet
account. To use the Web Browser, you must indicate your phone
C key Returns to the previous page
number via the Own number menu option (See page 58 for
OK key Selects options and confirms actions.
further details.).
To launch the browser in standby mode, press and hold down the
Using the WAP browser menu
key.
There are various menu options available when surfing the Wireless
Once connected, the homepage is displayed. The content
Web.
depends on the service provider.
Note The WAP browser menus may vary, depending on your
You can access any website page by entering its URL address.
browser version.
To exit the browser at any time, press the key. The phone will
return to the standby mode.
7978

InternetInternet
Home
Menu 7.1
Receive
(Menu 7.3.2)
Connect to a homepage. The homepage will be the site which is
You can choose whether or not you wish to receive push
defined in the activated profile. It will be defined by the service
messages.
provider if you have not defined it in the activated profile.
Profiles
Menu 7.4
Bookmarks
Menu 7.2
For more information, consult your network operator.
Set the current page as a new bookmark or move an established
bookmark.
Each profile has submenus as follows:
Your phone may have some pre-installed bookmarks for sites not
] Activate: Activates the selected profile.
affiliated with LG. LG does not warrant or endorse these sites.
] Settings: Use this to edit and change WAP settings for the
If you choose to access them, you should use the same security or
selected profile.
content precautions as you would with any site.
] Rename: You can change the selected profile’s name.
E-mail server
] Delete: Deletes the selected profile from the list.
• Connect: Connects to the E-mail server that you configured.
] New profile: You can add a new profile
• Edit address: Edit the E-mail address.
Note The changes using these options may affect the MMS function.
Push messages
Menu 7.3
Inbox
(Menu 7.3.1)
You can order Push messages from WAP service providers.
Push messages are notifications of, for example, news headlines
and they can contain a text message or the address of a WAP
service. For availability and subscription, contact your WAP service
provider.
Service providers can update an existing Push message every time
a new Push message is received. Messages can be updated even
if you have moved them to another folder . When Push messages
expire, they are deleted automatically.
• Information: Shows the information of received push
messages.
• Load: Connects to a specific site using the information in the
received push message.
• Delete: Deletes the selected push message.
8180

Internet
Settings
Menu 8
Press the Menu key ( ) and select Settings using navigation
Go to URL
Menu 7.5
keys.
You can connect directly to the site you want. To do this, you need
to enter a specific URL.
Alarm clock
Menu 8.1
Set the alarm to ring at a specific time. In the Alarm Clock menu,
Cache settings
Menu 7.6
the following options are available.
The information or services you have accessed are saved in the
cache memory of the phone.
On: Set the alarm time.
1. Enter the menu.
Clear cache
(Menu 7.6.1)
2. Select [On] by the left/right navigation key.
Removes all context saved in cache.
3. Enter the alarm time using the numeric keys.
Cache check
(Menu 7.6.2)
4. Using the left/right navigation keys, select one of the alarm
options: Once, Daily, Weekly, and Monthly.
Set a value whether a connection attempt is made through cache
or not.
5. Alarm melody section: select the desired alarm melody using
the left/right navigation keys.
Note A cache is a buffer memory, which is used to save data
temporarily.
Off: Deactivates the alarm.
Security certificates
Menu 7.7
A list of the available certificates is shown.
Reset profiles
Menu 7.8
You can reset profiles to return to original settings.
WAP information
Menu 7.9
The WAP browser version is displayed.
8382

Settings
Settings
Date & Time
Menu 8.2
Phone settings
Menu 8.3
This option lets you change the current time and date displayed.
Many features of your phone can be customised to suit your
preferences. All of these features are accessed via the Phone
The following options are available.
settings menu.
Set date
(Menu 8.2.1)
Display settings
(Menu 8.3.1)
Use this to enter the day, month and year. You can change the
] Wallpaper: Use this to set up the display on the LCD screen in
date format via the Date format menu option.
the standby mode.
Date format
(Menu 8.2.2)
] Menu colour: Your Phone provides you with 6 menu colour
themes. Set the menu colour by scrolling and pressing the
YYYY/MM/DD (year/month/day)
Select key.
DD/MM/YYYY (day/month/year)
] Backlight: Use this to select whether or not the phone uses
MM/DD/YYYY (month/day/year)
the backlight. A small increase in standby/talk time can be
achieved by turning the backlight off.
Set time
(Menu 8.2.3)
You set each backlight option for the keypad in the up/down
position independently.
Use this to enter the current time. You can choose the time format
via the Time format menu option.
] Contrast: Adjust the contrast of the LCD screen using the
left/right navigation keys.
Time format
(Menu 8.2.4)
Languages
(Menu 8.3.2)
24 hours
You can select the display language. English will be set if the
12 hours
language on the SIM card is not supported by the phone.
8584

SettingsSettings
Call settings
Menu 8.4
Answer mode
(Menu 8.4.2)
To change the settings for call diverting.
Select the desired mode to answer a call.
] Slide down: When the phone rings, you can answer a call
Call divert
(Menu 8.4.1)
simply by sliding down the keypad.
When this network service is activated, you can direct your
] Any key: When the phone rings, you can answer a call by
incoming calls to another number, for example, to your voice
pressing any key except the key and the right soft key ( ).
mailbox number. For details, contact your network operator.
] Only send key: You can answer a call only by pressing the
Select one of the divert options, for example, select If busy to
send key.
divert voice calls when your number is busy or when you reject
incoming calls.
Send my number
(Menu 8.4.3)
The following options are available.
This network service lets you decide whether your phone number is
All voice calls: Diverts all voice calls unconditionally.
displayed (On) or hidden (Off) from the person you are calling.
If busy: Diverts voice calls when the phone is in use.
Select Set by network to reset the phone to the setting that you
have agreed upon with your service provider.
If no reply: Diverts voice calls which you do not answer.
If out of reach: Diverts voice calls when the phone is switched
Call waiting
(Network Service)
(Menu 8.4.4)
off or out of coverage.
The network will notify you of a new incoming call while you have a
All data calls: Diverts to a number with a PC connection
call in progress. Select Activate to request the network to
unconditionally.
activate call waiting, Cancel to request the network to deactivate
All fax calls: Diverts to a number with a fax connection
call waiting, or View status, to check if the function is active or
unconditionally.
not.
] Activate: Activates the corresponding service.
Minute minder
(Menu 8.4.5)
- To voice mail: Forwards to message centre. This function
does not apply to All data calls and All fax calls menus.
When set to On, the phone will beep every minute during an
- To other number: Input the number for call diverting.
outgoing call to keep you informed of the length of the call.
- Favorite number: You can check recent five diverted
numbers.
] Cancel: Cancels the selected call divert.
] View status: You can check the status of the service.
Cancel all: Cancels all call divert settings.
8786

SettingsSettings
Voice dial
(Menu 8.4.6)
Auto redial
(Menu 8.4.7)
You can make a phone call by speaking a voice tag that has been
Select On, and your phone will make a maximum of five attempts
added to a contact card. Any spoken word(s) can be a voice tag.
to connect the call after an unsuccessful call attempt.
Before using voice-activated dialling, note that:
Phone line in use
(Menu 8.4.8)
• Voice tags are not language dependent. They are dependent on
the speaker’s voice.
This function is only used if Two-line service is supported by
• Voice tags are sensitive to background noise. Record them and
the Service Provider. Two independent phone numbers are
make calls in a quiet environment.
registered for the phone. This function provides you with the
selection the currently used phone number.
• When recording a voice tag or making a call by saying a voice
tag, the loudspeaker is in use. Hold the phone at a short distance
] Line 1: Select Line 1 as the current phone number.
away from your mouth and face so that the proximity sensor does
] Line 2: Select Line 2 as the current phone number.
not turn the loudspeaker off.
Note If you select Line 2 in the area where alternative line service is
• Very short names are not accepted. Use long enough names and
not supported, you can’t make a call.
avoid similar names for different numbers.
Closed user group
(Menu 8.4.9)
] Automatic: Use this to enter voice-activated dialling mode
whenever you slide the keypad down.
This is a network service that specifies the group of people who
] Manual: Use this to enter voice-activated dialling mode by
you can call and who can call you. For more information, contact
holding the star[*/voice] key.
your network operator or service provider. If a group index is
specified, it is used for all outgoing calls. If no group index is
Note You must say the name exactly as you said when you recorded
specified, the network will use the preferential index.
it. This may be difficult, for example, in a noisy environment or
during an emergency, so you should not rely solely upon
(A specific index is stored in the network.)
voice-activated dialling in all circumstances.
] Preset: Sets the selected CUG index.
] On: You can edit the CUG index and activate it.
] Off: Deletes the selected CUG.
8988

SettingsSettings
The following options are available:
Security settings
Menu 8.5
1
Power On
Various passwords are used to protect certain features of your
phone. Refer to page 23-24 for the various passwords.
] Enable: You are required to enter the phone password when
you switch the phone on.
PIN code request
(Menu 8.5.1)
] Disable: You do not need to enter the phone password when
you switch the phone on.
When the PIN code request feature is enabled, you must enter
your PIN each time you switch the phone on. Consequently, any
] If SIM changed: Your phone will request security code only
person who does not have your PIN cannot use your phone without
when you change your SIM card.
your approval.
2
Once
Note Before disabling the PIN code request feature, you must enter
] After entering the correct security code, the phone will lock after
your PIN.
going into the idle state. If you want to disable this phone lock,
you should enter the right security code after pressing the right
The following options are available:
soft key. If you power off in the phone lock state, when the
• Enable: You must enter the PIN each time the phone is switched
phone is next powered on, the phone is in the lock state.
on.
• Disable: The phone connects directly to the network when you
Key lock
(Menu 8.5.3)
switch it on.
This function is only available in the status of the sliding keypad up.
Phone lock
(Menu 8.5.2)
1
Automatic
] After setting up the automatic mode, then phone is in lock state
When the Phone lock feature is enabled, the phone is locked
after 25 seconds in standby mode with the sliding keypad up.
and you must enter the phone password each time the phone is
switched on.
] To deactivate key lock, you should press the left soft key
The password is factory set to 0000. To change the phone
[Unlock] plus star(*) key or slide the keypad down.
password, refer to the Change codes – Security code menu
2
Once
option [Menu 8.5.6.1]. Once the correct password has been
entered, you can use the phone until you switch it off.
] Selecting Once puts the phone immediately in the lock state in
standby mode with the sliding keypad up.
] To deactivate key lock, you should press the left soft key
[Unlock] plus star(*) key or slide the keypad down.
9190

SettingsSettings
Call barring service
(Network dependent)
(Menu 8.5.4)
Fixed dial number (FDN)
(SIM dependent)
(Menu 8.5.5)
Call barring lets you restrict the making and receiving of calls with
Use this to restrict your outgoing calls to selected phone numbers,
your phone. For this function, you need the barring password,
if this function is supported by your SIM card. The PIN2 code is
which you can obtain from your service provider.
required.
The following options are available:
The following options are available:
] All outgoing: No call can be made.
] Activate: Use this to only call phone numbers saved in the
phonebook. You must enter your PIN2 code.
] Outgoing international: International calls cannot be made.
] Disable: Allows you to call any number.
] Outgoing international except home country:
When abroad, calls can be made only to numbers within the
] Number list: Use this to view the numbers saved as fixed dial
current country and to your home country, the country where
numbers.
your home network provider is located.
Note Not all SIM cards have a PIN2. If your SIM card does not, this
] All incoming: No call can be received.
menu option is not displayed.
] Incoming when abroad: Calls cannot be received when you
Change codes
(Menu 8.5.6)
are using your phone outside your home service area.
The Change codes feature lets you change your current password
] Cancel all barrings: All call barring settings are deactivated;
to a new one. You must enter the current password before you can
calls can be made and received normally.
specify a new one.
] Change password: Use this to set and change the call
Use this to change the access codes: Security code,
barring password obtained from your service provider using this
PIN1 code, PIN2 code
option. You must enter the current password before you can
specify a new one. Once you have entered a new password,
Note PIN: Personal Identification Number
you are asked to confirm it by entering it again.
Note To use Call barring service, you must input the network
password. When calls are barred, calls may be possible to
certain emergency numbers on some networks.
9392

