LG DK478: Installation and Setup
Installation and Setup: LG DK478
Setting up the Player
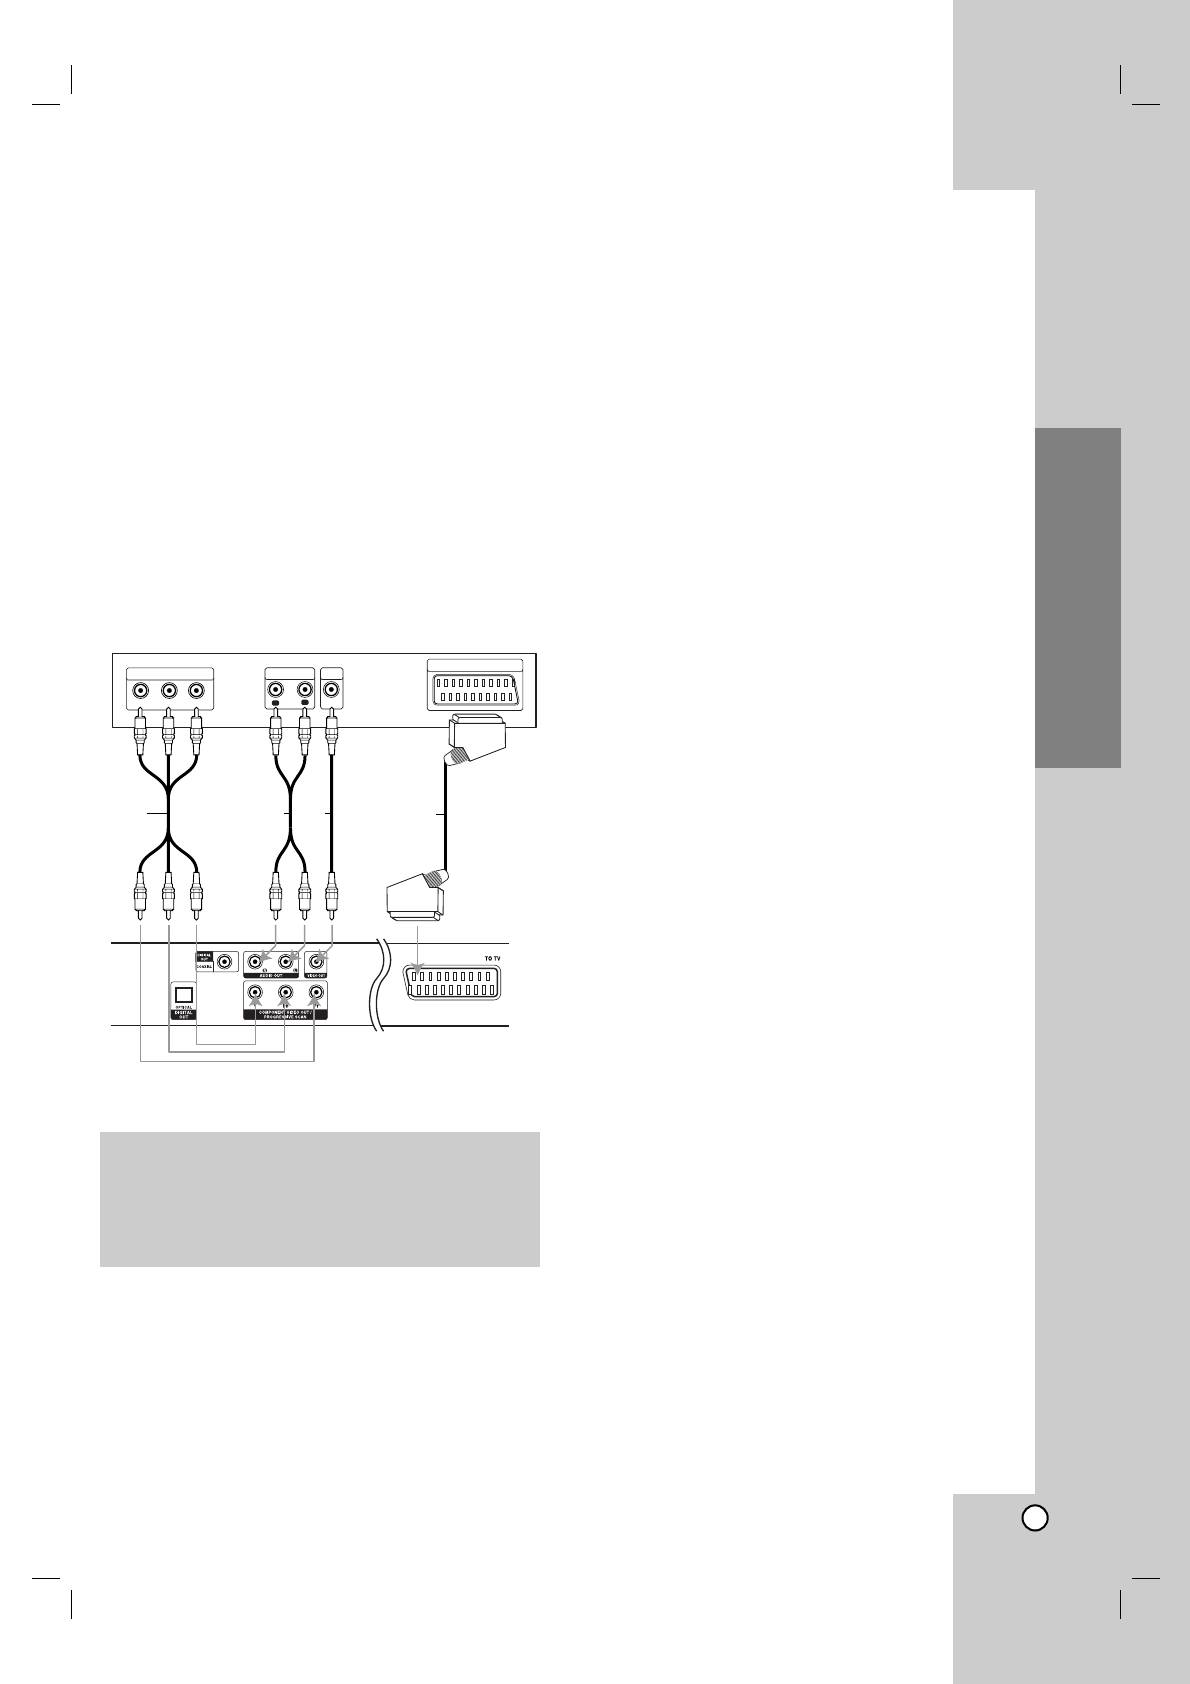
Video and Audio Connections to Your TV
The picture and sound of a nearby TV, VCR, or radio
Make sure the DVD player is connected directly to the
may be distorted during playback. If this occurs,
TV and not to a VCR, otherwise the DVD image could
position the player away from the TV, VCR, or radio, or
be distorted by the copy protection system.
turn off the unit after removing the disc.
Video: Connect the VIDEO OUT jack on the DVD
player to the video in jack on the TV using the
video cable (V).
DVD Player Connections
SCART connection: Connect the TO TV scart jack
Depending on your TV and other equipment there are
on the DVD Player to the corresponding in jacks on
various ways you can connect the player. Please refer
the TV using the scart cable (T).
to the manuals of your TV, stereo system or other
®
Component Video (Color Stream
): Connect the
devices as necessary for additional connection
COMPONENT VIDEO OUT/PROGRESSIVE
information.
SCAN jacks on the DVD Player to the
corresponding in jacks on the TV using an Y Pb Pr
cable (C).
®
Progressive Scan (ColorStream
pro):
• If your television is a high-definition or
“digital ready” television, you may take
advantage of the DVD Player’s progressive
scan output for the highest video resolution
possible.
• If your TV does not accept the Progressive
Scan format, the picture will appear
scrambled if you try Progressive Scan on
the DVD Player.
Notes:
• Set the Progressive to “On” on the setup menu for
progressive signal, see page 13.
•
Set the progressive to “Off” by removeing any disc
from the unit and close the disc tray. see that “no
disc” is displayed on the display window. Then press
STOP and hold it for five seconds before releasing it.
• Progressive scan does not work with the analog
video connections (yellow VIDEO OUT jack).
Audio Connection to Your TV:
Connect the left and right AUDIO OUT jacks of the
DVD Player to the audio left and right IN jacks on the
TV (A) using the audio cables. Do not connect the
DVD Player’s AUDIO OUT jack to the phono in jack
(record deck) of your audio system.
9
Rear of TV
SCART INPUT
COMPONENT VIDEO /
AUDIO INPUT
VIDEO
PROGRESSIVE SCAN INPUT
INPUT
Pr
Pb
Y
R
L
A VC
T
Rear of DVD player
Installation and Setup
Installation and Setup
Caution:
You must set the TV Output Select option to use
COMPONENT VIDEO OUT/PROGRESSIVE SCAN
and SCART jacks.
(See “TV Output Select” on page 13.)
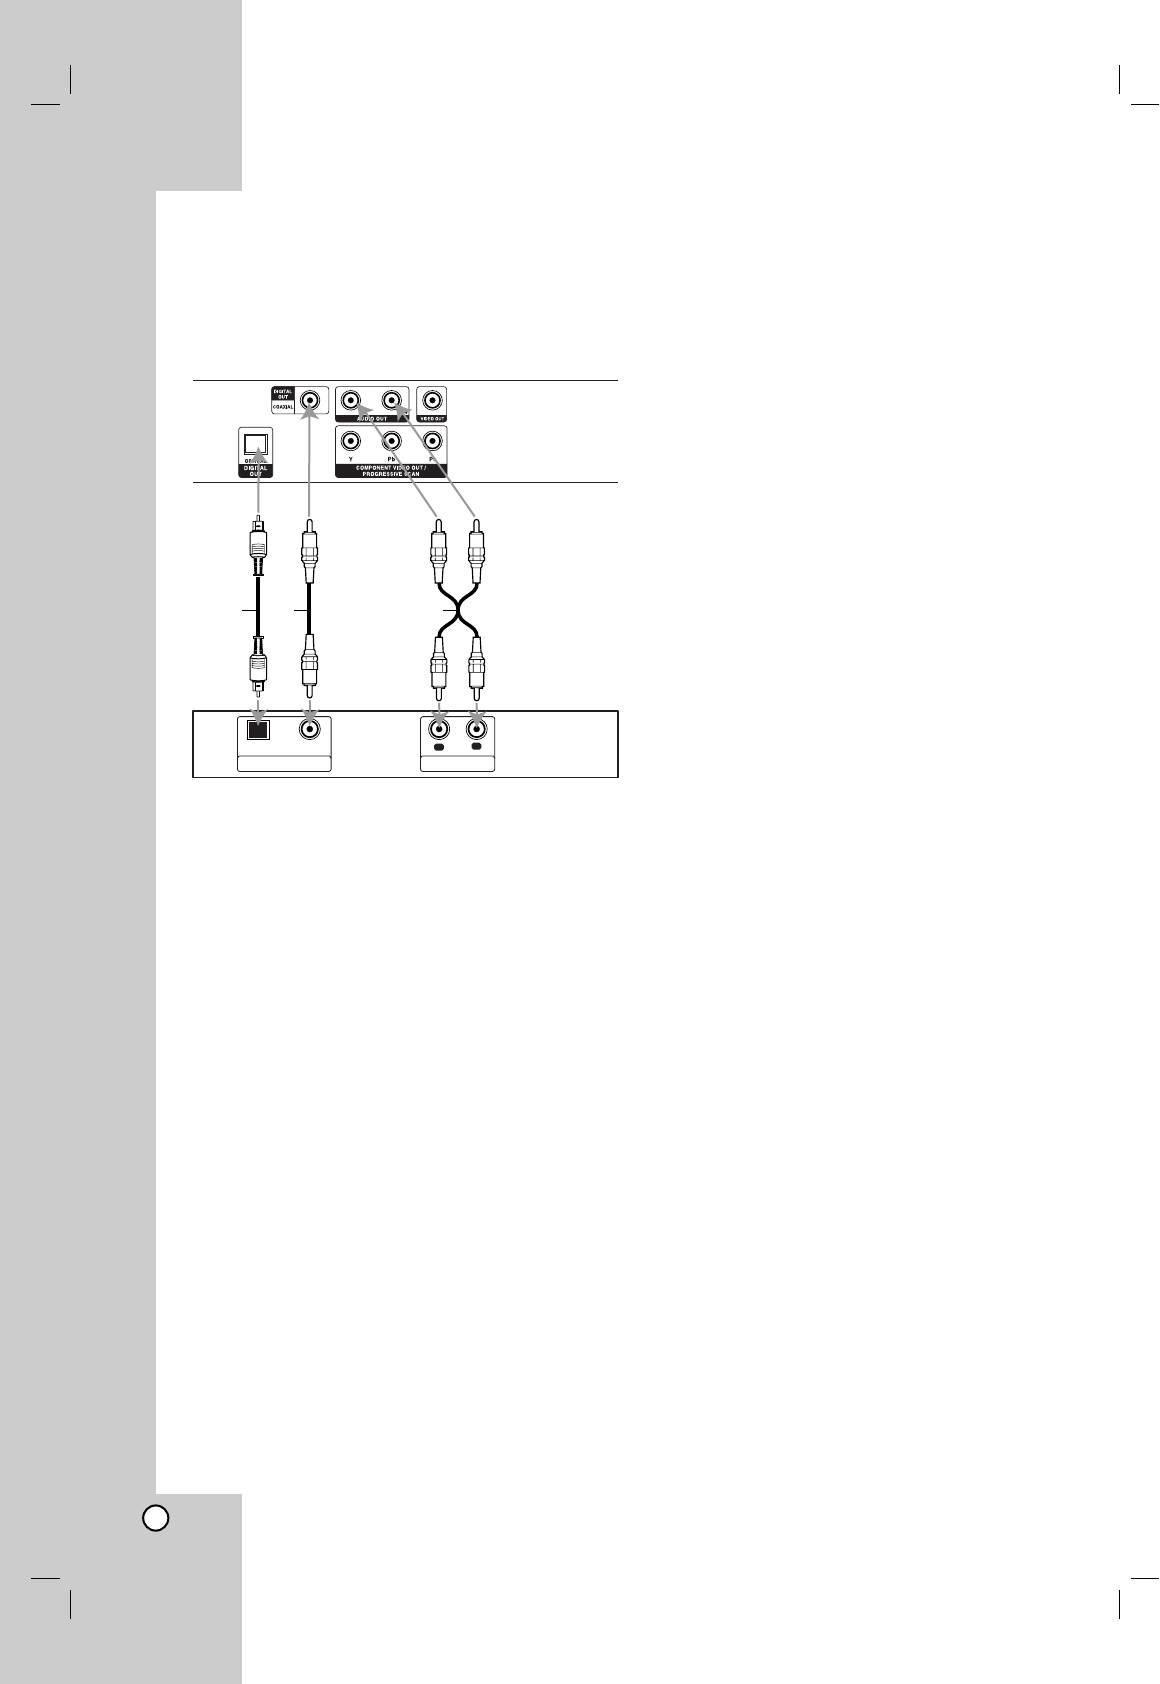
Audio Connection to Optional Equipment
Amplifier equipped with 2-channel analog stereo
or Dolby Pro Logic ll / Pro Logic: Connect the left
Connect the DVD player to your optional equipment
and right AUDIO OUT jacks on the DVD player to the
for audio output.
audio left and right IN jacks on your amplifier,
receiver, or stereo system, using the audio cables (A).
Amplifier equipped with 2-channel digital stereo
(PCM) or audio / video receiver equipped with a
multi-channel decoder (Dolby Digital™, MPEG 2,
or DTS): Connect one of the DVD Player’s DIGITAL
AUDIO OUT jacks (OPTICAL O or COAXIAL X) to the
corresponding in jack on your amplifier. Use an
optional digital (optical O or coaxial X) audio cable.
Digital Multi-channel sound
A digital multi-channel connection provides the best
sound quality. For this you need a multi-channel audio
/ video receiver that supports one or more of the
audio formats supported by your DVD player such as
MPEG 2, Dolby Digital and DTS. Check the receiver
manual and the logos on the front of the receiver.
Notes:
•
If the audio format of the digital output does not
match the capabilities of your receiver, the receiver
produces a strong, distorted sound or no sound at all.
• Six Channel Digital Surround Sound via a digital
connection can only be obtained if your receiver is
equipped with a Digital Multi-channel decoder.
• To see the audio format of the current DVD in the
on-screen display, press AUDIO.
10
Rear of DVD player
AXO
OPTICAL COAXIAL
R
L
AUDIO INPUTDIGITAL INPUT
Amplifier (Receiver)
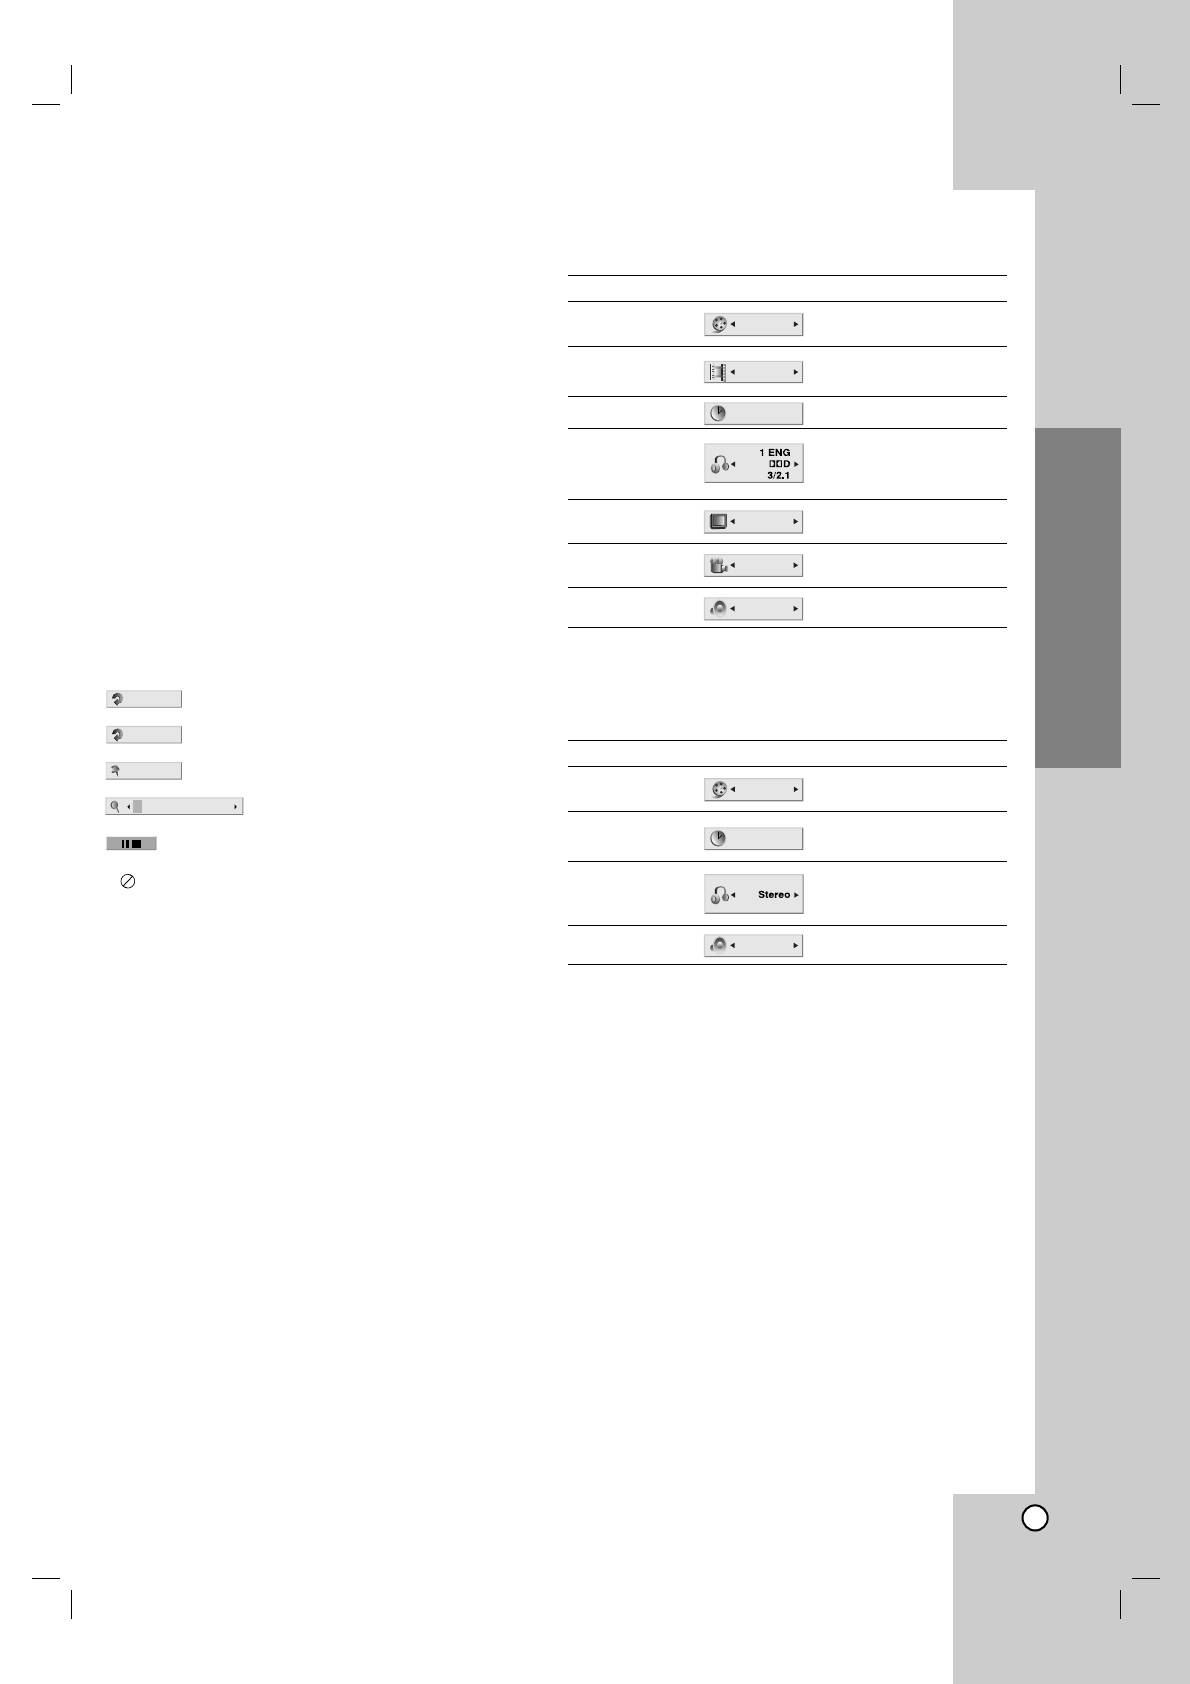
On-Screen Display
You can display the general playback status on the TV
screen. Some items can be changed using the menu.
To use the on-screen display:
1. Press DISPLAY during playback.
2. Press v / V to select an item.
The selected item is highlighted.
3. Press b / B to change the setting. You can also
use the number buttons if appropriate (e.g.
inputting the title number). For some functions,
press ENTER to execute the setting.
Notes:
• Some discs may not provide all of the features
shown below.
• If no button is pressed for 10 seconds, the on-
screen display disappears.
Playback Status/Restrictions
Repeat title
Repeat sequence
Enter a Marker
Marker Search menu
Resume play from this point
Action prohibited or not available
11
Title
A - B
#1 : 1 / 9
123456789
Items
Selection Method
b
/
B
, Numbers
Title Number
ENTER
b
/
B
, Numbers
Chapter Number
ENTER
Time search
Numbers, ENTER
Audio language
b
/
B
or
and Digital Audio
AUDIO
Output mode
b
/
B
or
Subtitle language
SUBTITLE
b
/
B
or
Angle
ANGLE
Sound
b
/
B
Example: On-Screen Display during
playing VCD
1 / 3
1 / 12
0:20:09
ABC
1 ENG
1 / 3
3D SUR
Example: On-Screen Display during
playing DVD Video
Items
Selection Method
Track Number
b
/
B
, Numbers
(or PBC mode)
ENTER
Numbers
Time search
ENTER
b
/
B
or
Audio Channel
AUDIO
Sound
b
/
B
1 / 3
0:20:09
3D SUR
Installation and Setup

Initial Settings
LANGUAGE
By using the Setup menu, you can make various
adjustments to items such as picture and sound. You
can also set a language for the subtitles and the
Setup menu, among other things. For details on each
Setup menu item, see pages 12 to 15.
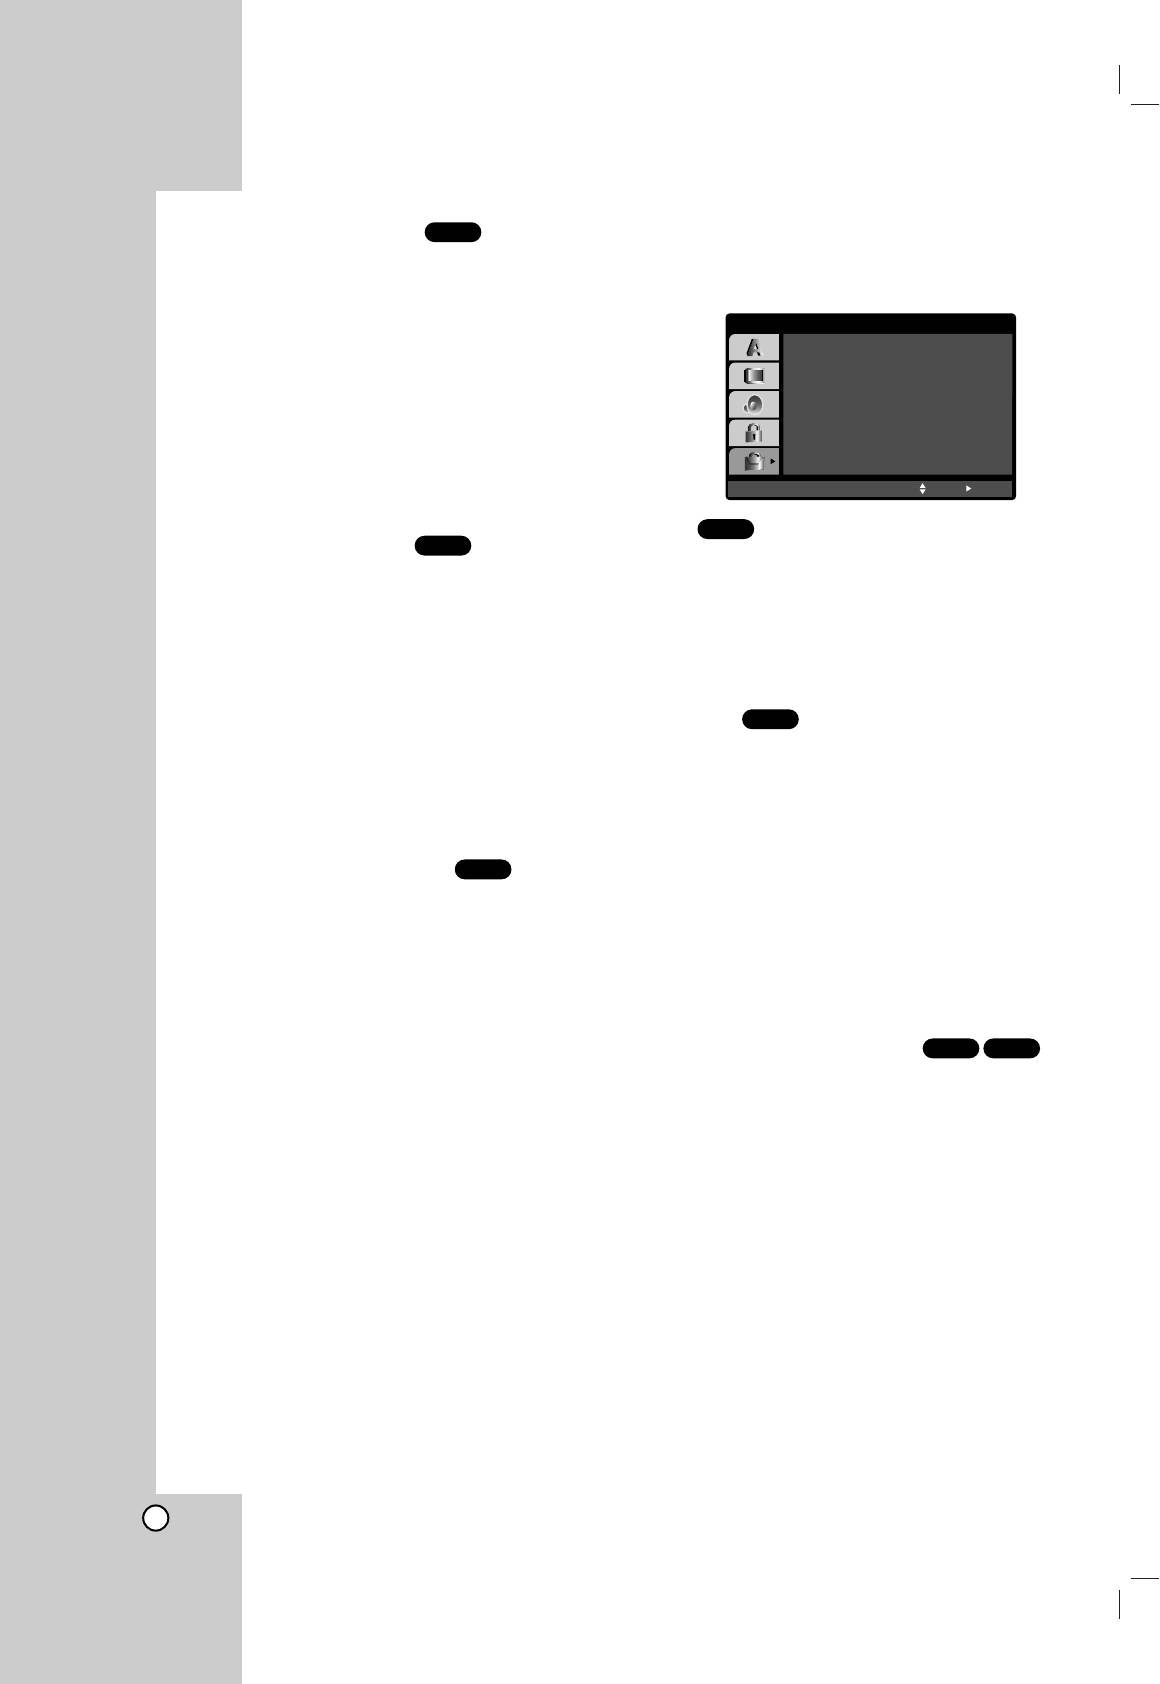
To display and exit the Menu:
Press SETUP to display the menu. A second press of
SETUP will take you back to initial screen.
Menu Language
To go to the next level:
Select a language for the Setup menu and on-screen
Press B on the remote control.
display.
To go back to the previous level:
Disc Audio / Subtitle / Menu
DVD
Press b on the remote control.
Select the language you prefer for the audio track
General Operation
(disc audio), subtitles, and the disc menu.
Original: Refers to the original language in which the
1. Press SETUP. The Setup menu appears.
disc was recorded.
2. Use v / V to select the desired option then press
Other:
To select another language, press number
B to move to the second level. The screen shows
buttons then ENTER to enter the corresponding 4-digit
the current setting for the selected item, as well as
number according to the language code list in the
alternate setting(s).
reference chapter. If you enter the wrong language code,
3. Use v / V to select the second desired option then
press CLEAR.
press B to move to the third level.
4.
Use v / V to select the desired setting then press
ENTER to confirm your selection. Some items
require additional steps.
5. Press SETUP, RETURN, or PLAY to exit the Setup
menu.
12
LANGUAGE
Menu Language
English
Disc Audio
Original
Disc Subtitle
Off
Disc Menu
Original
Move
Select
DISPLAY
Notes:
At this point the only video displaying is Component
video. If your screen goes to a black screen, your
television/display may not be compatible to
progressive scan.
In this case the player will time out after 10-12
seconds if no other keys are pressed. After the unit
times out, the player will automatically return to
standard format, and your picture will return.
4. When the confirm menu appears on your screen
TV Aspect
DVD
Cancel is highlighted as default. Use the b / B
buttons to highlight Enter.
4:3:
Select when a standard 4:3 TV is connected.
5. Pressing ENTER will set the player to Progressive
16:9: Select when a 16:9 wide TV is connected.
scan mode.
Display Mode
DVD
Caution:
Once the setting for progressive scan output is
Display Mode setting works only when the TV Aspect
entered, an image will only be visible on a progressive
mode is set to “4:3”.
scan compatible TV or monitor. If you set Progressive
Letterbox: Displays a wide picture with bands on the
Scan to On in error, you must reset the unit. First,
upper and lower portions of the screen.
remove the disc in the DVD Player. Next, press STOP
Installation and Setup
( x ) again and hold it for five seconds before
Panscan:
Automatically displays the wide picture on the
releasing it. The video output will be restored to the
entire screen and cuts off the portions that do not fit.
standard setting, and a picture will once again be
visible on a conventional analog TV or monitor.
Progressive Scan
DVD
TV Output Select
Progressive Scan Video provides the highest quality
pictures with less flickering.
Set the player’s TV Output Select options according to
If you are using the Component Video jacks for
the TV connection type.
connection to a TV or monitor that is compatible with a
YPbPr: When your TV is connected with the
progressive scan signal, set Progressive Scan to On.
COMPONENT VIDEO OUT/PROGRESSIVE SCAN
To Turn ON progressive scan:
jacks on the DVD player.
Connect component out of the DVD to the input of
RGB: When your TV is connected with the SCART
your monitor/television, set your television or monitor
(RGB signal) jack.
to Component Input.
1. Select “Progressive Scan” on the DISPLAY menu
AUDIO
then press B.
Each DVD disc has a variety of audio output options.
2. Select “On” using the v / V buttons.
Set the player’s AUDIO options according to the type
of audio system you use.
3. Press ENTER to confirm your selection.
The confirm menu will appear.
13
DISPLAY
TV Aspect
16 : 9
Display Mode
Widescreen
OffProgressive Scan
TV Output Select RGB
Move
Select
DISPLAY
TV Aspect
Display Mode
OnProgressive Scan
TV Output Select
Off
Move
ENTER Prev.
AUDIO
Dolby Digital
Bitstream
DTS
Bitstream
MPEG
PCM
Sample Freq.
48 kHz
DRC
On
Move
Select
DVD
OTHERS
Dolby Digital / DTS / MPEG
Bitstream: Select “Bitstream” if you connect the
The PBC, Auto Play and B.L.E. settings can be
DVD Player’s DIGITAL OUT jack to an amplifier or
changed.
other equipment with a Dolby Digital, DTS or
MPEG decoder.
PCM (for Dolby Digital / MPEG): Select when
connected to a two-channel digital stereo amplifier.
DVDs encoded in Dolby Digital or MPEG will be
automatically downmixed to two-channel PCM
audio.
Off (for DTS): If you select “Off”, the DTS signal is
not output through the DIGITAL OUT jack.
PBC
VCD
Sample Freq. (Frequency)
DVD
Set Playback Control (PBC) to On or Off.
If your receiver or amplifier is NOT capable of
On: Video CDs with PBC are played according to
handling 96 kHz signals, select 48 kHz. When this
the PBC.
choice is made, this unit automatically converts any 96
kHz signals to 48 kHz so your system can decode
Off: Video CDs with PBC are played the same
them.
way as Audio CDs.
If your receiver or amplifier is capable of handling 96
kHz signals, select 96 kHz. When this choice is made,
Auto Play
DVD
this unit passes each type of signal through without
You can set up the DVD Player so a DVD disc
any further processing.
automatically starts playing whenever the DVD is
Check the documentation for your amplifier to verify its
inserted.
capabilities.
If Auto Play mode is set to On, this DVD player will
search for title that has the longest playback time and
then play back the title automatically.
Dynamic Range Control (DRC)
DVD
On: Auto Play function is active.
With the DVD format, you can hear a program’s
soundtrack in the most accurate and realistic
Off: Auto Play function is not active.
presentation possible, thanks to digital audio
technology. However, you may wish to compress the
Notes:
dynamic range of the audio output (the difference
The Auto Play function may not work for some DVDs.
between the loudest sounds and the quietest ones).
This allows you to listen to a movie at a lower volume
B.L.E. (Black Level Expansion)
VCDDVD
without losing clarity of sound. Set DRC to On for this
effect.
To select the black level of playback pictures. Set your
preference and monitor’s ability.
On: Expanded grey scale. (0 IRE cut off)
Off: Standard grey scale. (7.5 IRE cut off)
Note:
The B.L.E. function works NTSC system only.
14
OTHERS
PBC
On
Auto Play
Off
OnB.L.E.
Move
Select

LOCK (Parental Control)
Password (Security Code)
You can enter or change password.
1. Select Password on the LOCK menu then press B.
2. Follow step 2 as shown left (Rating). “Change” or
“New” is highlighted.
3. Enter the new 4-digit code, then press ENTER.
Input it again to verify.
4. Press SETUP to exit the menu.
Rating
DVD
If you forget your Security Code
Some movies contain scenes that may not be suitable
for children to view. Many of these discs contain
If you forget your security code you can clear it using
parental control information that applies to the
the following steps:
complete disc or to certain scenes on the disc. Movies
and scenes are rated from 1 to 8, depending on the
1. Press SETUP to display the Setup menu.
country. Some discs offer more suitable scenes as an
2. Input the 6-digit number “210499” and the security
alternative.
code is cleared.
The parental control feature allows you to block
3. Enter a new code as described above.
access to scenes below the rating you input, thereby
preventing your children from being able to view
Country Code
DVD
Installation and Setup
material you believe is unsuitable.
Enter the code of the country/area whose standards
1. Select “Rating” on the LOCK menu then
were used to rate the DVD video disc, based on the
press B.
list in the reference chapter.
2. To access the Rating, Password and Country Code
1. Select “Country Code” on the LOCK menu then
features, you must input the 4-digit security code
press B.
you created. If you have not yet entered a security
code you are prompted to do so.
2. Follow step 2 as shown left (Rating).
Input a 4-digit code and press ENTER. Enter it
3. Select the first character using v / V buttons.
again and press ENTER to verify. If you make a
mistake before pressing ENTER, press CLEAR.
4. Shift the cursor using B button and select the
second character using v / V buttons.
3. Select a rating from 1 to 8 using the v / V buttons.
5. Press ENTER to confirm your country code
Rating 1-8: Rating one (1) has the most
selection.
restrictions and rating eight (8) is the least
restrictive.
Unlock
If you select unlock, parental control is not active
and the disc plays in full.
Notes:
If you set a rating for the player, all disc scenes with
the same rating or lower are played. Higher rated
scenes are not played unless an alternate scene is
available on the disc. The alternative must have the
same rating or a lower one. If no suitable alternative is
found, playback stops. You must enter the 4-digit
password or change the rating level in order to play
the disc.
4. Press ENTER to confirm your rating selection, then
press SETUP to exit the menu.
15
LOCK
Rating
Unlock
Password
New
Country Code
SE
Move
Select
R U


