LG G5200 red: Settings [Menu 4]
Settings [Menu 4]: LG G5200 red
Settings [Menu 4]
Accessing the Menu
4
Settings
<Press three times>
You can set the following menus for your convenience and
preferences.
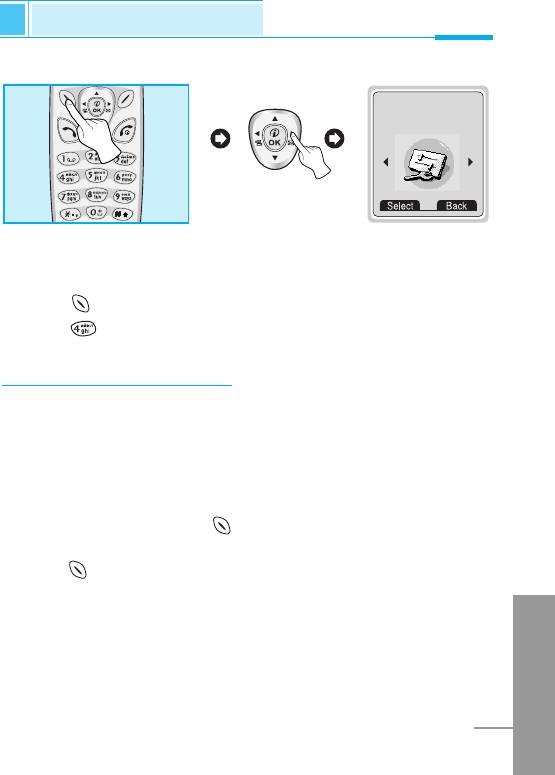
1. Press [Menu] in standby mode.
2. Press for direct access to enter Settings.
Alarm clock [Menu 4-1]
You can set the phone to alarm at a specified within this menu.
Enable [Menu 4-1-1]
You can set the time (Hour and Minute) for raising the alarm.
1. Enter the menu.
2. Select Enable by pressing [Select], and then enter the alarm
time you want.
3. Press [OK].
4. Select the repeat period: Once, Daily, Weekly, and Monthly.
5. If you set Yes in Power off alarm, the alarm signal sounds at the
ENGLISH
time you set even if the phone is turned off.
63

Settings [Menu 4]
Accessing the Menu
Disable [Menu 4-1-2]
You can cancel setting the alarm time.
1. Enter the menu.
2. Select Disable by pressing [Select].
3. “Done” message is displayed.
4. If you want to cancel, press [Yes]. If not, press [No].
Date & Time [Menu 4-2]
Date [Menu 4-2-1]
• Set date
In this menu, you can set the date of your phone.
1. Enter the menu.
2. Select Set date by pressing [Select].
3. Enter the number you want to set the date.
4. Press [OK].
• Date format
You can set the Date format in this menu.
ENGLISH
64

Accessing the Menu
Time [Menu 4-2-2]
The phone has its own clock. In this menu you can set the time and
select between the 12-hour or 24-hour time formats.
1. Enter the menu.
2. Scroll to highlight Time by pressing [Select].
• Set time:
You can set time of your phone in this menu.
1. Select Set time by pressing [Select].
2. Enter the number you want to set the time.
3. Select the AM/PM you want to set the time format by pressing
, key.
4. Press [OK].
• Time format:
Your can select time format between 12-hour or 24-hour.
1. Scroll to highlight Time format by pressing [Select].
2. Select 12 hour or 24 hour you want by pressing [Select].
Phone settings [Menu 4-3]
You can set the phone figures you want. Scroll to highlight Phone
settings menu, and then press [Select].
Display [Menu 4-3-1]
ENGLISH
• Call :
You can set the animation as making a call.
65
Settings [Menu 4]
Accessing the Menu
• Wallpaper :
You can select background picture in a standby mode.
• Internet connect :
You can set the animation as connecting Internet.
• Power on :
You can set the animation as turning on a phone.
• Power off :
You can set the animation as turning off a phone.
• Welcome note :
You can set the displayed message as turning on a phone.
• Greeting note :
If you select Yes, this menu allows you to select the standby
display. In text mode, you can edit the text.
• Backlight :
You can set the light-up duration you want whenever you press a
key.
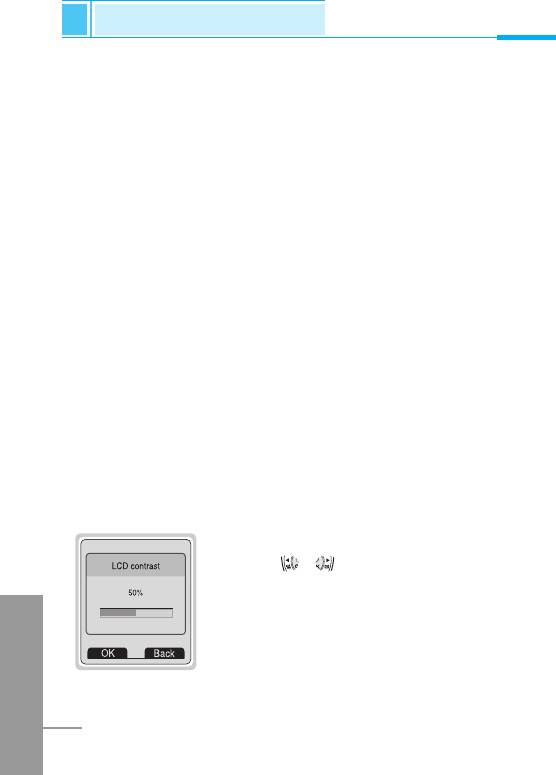
• LCD contrast
You can set the brightness of LCD you want by
pressing , .
ENGLISH
66
Accessing the Menu
Voice dial [Menu 4-3-2]
• Automatic : You can enter voice dial mode whenever you open
folder.
• Manual : You can enter voice dial mode by pressing key
for a long time.
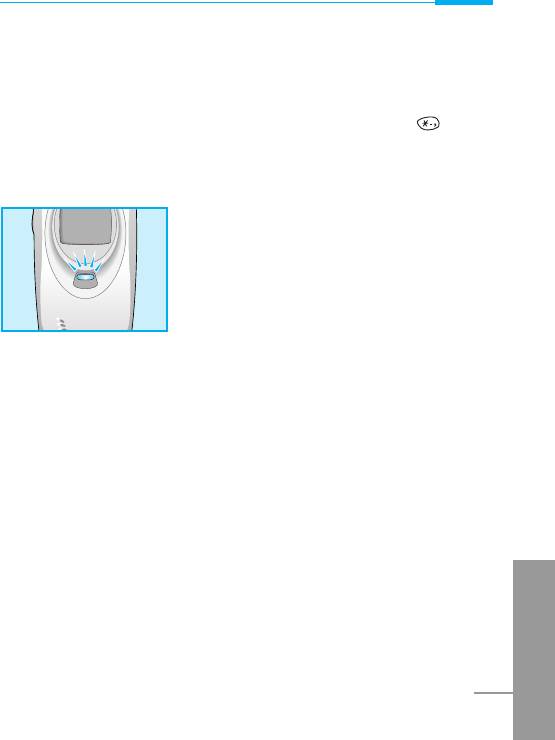
LED indicator [Menu 4-3-3]
You can check the network status through
Call indicator Light. If you are in service
area, Call Indicator Light will flicker to
Green. On the contrary, if you are in no
service area, this light will change to Red.
Furthermore, you can set the color of light
depending on Group in phonebook.
• Incoming call [Menu 4-3-3-1]
You can set the one of the colors such as red, blue, white, yellow,
magenta, green, cyan and so on.
• Standby [Menu 4-3-3-2]
You can check the network status by LED color in a standby mode.
Serial port [Menu 4-3-4]
• FAX
You can set the rate of serial port to 19200bps for using the
application between PC and fax.
ENGLISH
• Others
You can set the rate of serial port to 115200bps for using PC
application for GPRS call, data call, and PC Sync.
67

Settings [Menu 4]
Accessing the Menu
Language [Menu 4-3-5]
You can select the language will be displayed.
Call settings [Menu 4-4]
You can set the menu relevant to a call by pressing [Select] in
Setting menu.
Minute minder [Menu 4-4-1]
If you select Yes, you can check the call duration by beep sound
every minute during a call.
Answer mode [Menu 4-4-2]
• Any key [Menu 4-4-2-1]
If you select this menu, you can receive a call by pressing any key
except key.
• Folder open [Menu 4-4-2-2]
If you select this menu, you can receive an incoming call by only
opening folder.
ENGLISH
68

Accessing the Menu
Send number [Menu 4-4-3]
(network and subscription dependent)
• Yes [Menu 4-4-3-1]
If you select this, you can send your phone number to the other party.
That is, your phone number will be displayed on receiver’s phone.
• No [Menu 4-4-3-2]
If you select this, you can’t send your phone number.
Call waiting [Menu 4-4-4]
(network dependent)
If this service is Enable, you can accept a waiting (incoming) call. If this
service is Disabled, you cannot recognize the waiting (incoming) call.
• Activate [Menu 4-4-4-1]
Activating the corresponding service.
• Disable [Menu 4-4-4-2]
Deactivating the corresponding service.
• Check status [Menu 4-4-4-3]
Checking the Status of the service.
ENGLISH
69

Settings [Menu 4]
Accessing the Menu
Auto redial [Menu 4-4-5]
• Yes [Menu 4-4-5-1]
When this function is set on, your phone will make up to 10
attempts for a call after not connecting.
• No [Menu 4-4-5-2]
Your phone will not make any attempts to connect the call after not
connecting.
Select line [Menu 4-4-6]
This function is only used if Two line service supported by the
Service Provider. Two independent phone numbers are registered
for the phone. This function provides you with the selection the
currently used phone number. If this function is supported by your
service provider, the following menu will be displayed.
• Line 1 : Select Line 1 as the current phone number.
• Line 2 : Select Line 2 as the current phone number.
Next incoming [Menu 4-4-7]
(network dependent)
In case of Single Numbering Service, you can use the phone and a
connected PC to send and receive fax, data, and voice. If you select
the mode, you can receive data, fax, or voice each mode. Once you
enter this menu, you following options are displayed.
ENGLISH
• Voice
You can receive the voice call.
70

Accessing the Menu
• Data
You can receive the data call.
• Fax
You can receive the fax call.
Note
• Single numbering service means that the number of fax or
data service is identical with the number of voice service.
And, these modes depend on network feature.
CUG (Closed User Group) [Menu 4-4-8]
(network dependent)
Use this function to restrict usage of the phone to calls with numbers
that belong to certain user groups. When this function is used every
outgoing call is associated with a group index. If a group index is
specified, it is used for all outgoing calls. If no group index is
specified, the network will use the preferential index (a specific index
that is stored in the network).
A. Select : Setting the selected CUG Index.
B. Edit : Editing the CUG name and CUG Index.
C. Delete : Deleting the selected CUG.
D. Clear all : Deleting All CUG.
ENGLISH
71

Settings [Menu 4]
Accessing the Menu
Security settings [Menu 4-5]
PIN code [Menu 4-5-1]
In this menu, you can set the phone to ask for the PIN code of your
SIM card when the pone is switched on. If this function is activated,
you’ll be requested to enter the PIN code.
1. Press [Menu] in standby mode.
2. Press key for direct access or use and to enter
Settings.
3. Scroll to highlight Security settings menu.
4. Select PIN code by pressing [Select].
5. You can view the following submenus.
• Enable : Enable PIN code request.
• Disable : Disable PIN code request.
Call barring [Menu 4-5-2]
The Call barring service prevents your phone from making or
receiving certain category of calls. This function requires the call
barring password. You can view the following submenus.
• All outgoing
The barring service of all outgoing calls.
• Outgoing Intl [Outgoing international]
ENGLISH
The barring service of all outgoing international calls.
72

Accessing the Menu
• Outg. intl roam [Outgoing international when roam]
The barring service of all international outgoing calls except home
network.
• All incoming
The barring service of all incoming calls
• Inc when roam
The barring service of all incoming calls when roaming
• Cancel all barrings
You can cancel all barring service.
• Change passwd
You can change the password for Call Barring Service.
FDN setting [Menu 4-5-3] (SIM dependent)
You can restrict your outgoing calls to selected phone number. The
numbers are protected by your PIN2 code.
1. Press [Menu] in standby mode.
2. Press key for direct access or use and to enter
Settings.
3. Scroll to highlight Security settings menu.
4. Select PIN code by pressing [Select].
5. If the PIN 2 code is correct, you can view the following submenus.
ENGLISH
73

Settings [Menu 4]
Accessing the Menu
• Fixed dial num [Menu 4-5-3-1]
On : You can restrict your outgoing calls to selected phone
number.
Off : You can call without restricting phone number.
• Number list [Menu 4-5-3-2]
You can view the number list saved as Fixed dial number.
Change code [Menu 4-5-4]
You can change the access codes: PIN, PIN2, Security code.
1. Press [Menu] in standby mode.
2. Press key for direct access or use and to enter
Settings.
3. Scroll to highlight Security settings menu.
4. Select Change code by pressing [Select].
5. If you want to change the PIN/PIN2/Security code, input your
original code, and then press [OK].
6. Input new PIN/PIN2/Security code, and verify the them.
Network settings [Menu 4-6]
You can select the network which you will be registered either
automatically or manually. Usually, the selection of the network used
by the handset is automatic.
ENGLISH
Automatic [Menu 4-6-1]
The phone automatically selects network which is available in the
area.
74
Accessing the Menu
Manual [Menu 4-6-2]
The phone will find the list of available networks and show you them.
Then you can select the network which you want to use if this
network has a roaming agreement with your home network operator.
Preferred [Menu 4-6-3]
You can set a list of preferred networks the handset should attempt
to register with first, before attempting to register to any other
networks. This list is created from the handset’s predefined list of
known networks.
User define [Menu 4-6-4]
You can add entries or delete new ones from the network list. This
can even include new networks whose network codes are not known
to the handset. To do this, select and then enter the network code,
country code and network name.
Restore factory settings [Menu 4-7]
You can set the handset to the default configuration by selecting this
menu. In addition, you need Security code to activate this function.
Note
• How to use Handfree portable:
If you want to use the handsfree portable(earphone), please
the button for a long time after inserting it to the connector
ENGLISH
when incoming a call.
75
Оглавление
- ÑÎfl LJ¯ÂÈ ÅÂÁÓÔ‡ÒÌÓÒÚË
- ÄÍÒÂÒÒÛ‡˚
- ó‡ÒÚË íÂÎÂÙÓ̇
- éÔËÒ‡ÌË ä·‚˯
- àÌÙÓχˆËfl ̇ ÑËÒÔÎÂÂ
- ìÒÚ‡ÌÓ‚ÍË
- ➋
- ìÒÚ‡ÌÓ‚ÍË
- ➍
- èÓfl‰ÓÍ ‚Íβ˜ÂÌËfl ÚÂÎÂÙÓ̇
- éÒÛ˘ÂÒÚ‚ÎÂÌË Ç˚ÁÓ‚‡ Ë éÚ‚ÂÚ Ì‡ Ç˚ÁÓ‚˚
- äÓ‰˚ ‰ÓÒÚÛÔ‡
- íÂÎÂÙÓÌ̇fl ÍÌË„‡
- ëıÂχ ÏÂÌ˛
- ëÓÓ·˘ÂÌËfl [åÂÌ˛ 1]
- Ç˚ÁÓ‚˚ [åÂÌ˛ 2]
- ÄÛ‰ËÓÔÓÙ. [åÂÌ˛ 3]
- ìÒÚ‡ÌÓ‚ÍË [åÂÌ˛ 4]
- 臉ÂÒ. [åÂÌ˛ 5]
- 鄇̇ÈÁ [åÂÌ˛ 6]
- ÄÍÒÂÒÒÛ‡˚ [åÂÌ˛ 7]
- àÌÚÂÌÂÚ [åÂÌ˛ 8]
- åÂÌ˛ ÓÌ-·ÈÌ
- ä‡Í ËÒÔÓθÁÓ‚‡Ú¸ àÌÙÓχˆËÓÌÌ˚Â Ë î‡ÍÒËÏËθÌ˚ ‚˚ÁÓ‚˚
- åÂÌ˛ ‚ ıӉ ‚˚ÁÓ‚‡
- ìıÓ‰ Ë íÂıÌ˘ÂÒÍÓ ӷÒÎÛÊË‚‡ÌËÂ
- íÂıÌ˘ÂÒÍË ÍÚÂËÒÚËÍË
- Memo
- For Your Safety
- Contents
- Accessories
- Part of the Phone
- Key Description
- Display Information
- Installation
- ➋
- Installation
- ➍
- Powering On Sequence
- Making and Answering calls
- Access Codes
- Phonebook
- Menu Tree
- Menu Tree
- Messages [Menu 1]
- Call register [Menu 2]
- Profiles [Menu 3]
- Settings [Menu 4]
- Call divert [Menu 5]
- Scheduler [Menu 6]
- Fun & Tools [Menu 7]
- Internet [Menu 8]
- On line menu
- How to Use Data and Fax call
- In call Menu
- Care and Maintenance
- Technical Data

