Karcher RC 4-000 – страница 2
Инструкция к Воздушной Завесе Karcher RC 4-000

ensures that the appliance can be oper-
Description of the Appliance
ated safely and troublefree.
– The appliance should only be repaired
Function and Mode of Operation
by a qualified customer service techni-
cian.
The RoboCleaner consists of two units: a
– Switch the appliance off after every use
station and a battery-operated cleaning
and prior to every cleaning/mainte-
robot.
nance procedure.
Cleaning robot
Caution
– The appliance contains rotary brush
The mobile cleaning robot is powered by
roller; please never touch them with the
built-in rechargeable batteries. If the bat-
fingers or any other tool when the appli-
tery is charged completely, the cleaning ro-
ance is in operation!
bot can clean up to 60 minutes.
The cleaning robot is connected to the sta-
– Do not leave children unattended in the
tion via infrared. If the battery charge weak-
same room while the cleaning robot is
ens, the robot will seek out its station to get
running.
a charge. If it has to search for an extended
– Do not stand or sit on the station/the
time, the cleaning robot will shut off the
cleaning robot.
cleaning units to save energy during its
– There is a risk of tripping by the roaming
search.
cleaning robot.
The cleaning robot moves randomly, if it
– Objects may fall down if the cleaning ro-
bumps into an obstacle, it changes its di-
bot bumps into them (this also applies
rection at a random angle. Then, it goes
to objects on tables or smaller pieces of
straight ahead until it bumps into the next
furniture).
obstacle.
– The cleaning robot may get stuck in tel-
The flat design of the cleaning robot allows
ephone cables, electrical cables, table-
it to also clean the floor underneath pieces
cloths, strings, belts, etc., which can
of furniture, such as beds, sofas, cup-
lead to the dropping of objects.
boards, and wardrobes.
Tips for charging the charging station
The cleaning robot works with optical sen-
and the cleaning robot
sors that detect stairs and steps and pre-
– The charging device located on the sta-
vent the robot from falling down.
tion must only be used to power the
The cleaning robot provides 4 operating
cleaning robot.
programmes that allow him to automatically
– The batteries of the cleaning robot may
adjust to the various degrees of dirt accu-
only be charged at the station's charg-
mulation on the floor. These are controlled
ing device.
automatically by means of sensors located
– Short circuit hazard! Keep conductive
in the dirt receptacle, depending on the de-
objects (such as screwdrivers or simi-
tected degree of dirt accumulation.
lar) away from the charger contacts.
Station for cleaning robot
The station serves to charge the batteries
of the cleaning robot and to suck off the dirt
from the dirt receptacle of the cleaning ro-
bot. The dirt is collected in a filter bag (2 l).
Once the charging process is completed,
the robot autonomously leaves the station
and continues the cleaning.
– 3
21EN
20 Cover of the dirt receptacle
Operating elements
21 Dirt receptacle
Illustrations on fold-out
pages!
Preparing for start-up
Unpacking the Appliance
Station for cleaning robot
1 Transport handle, retractable
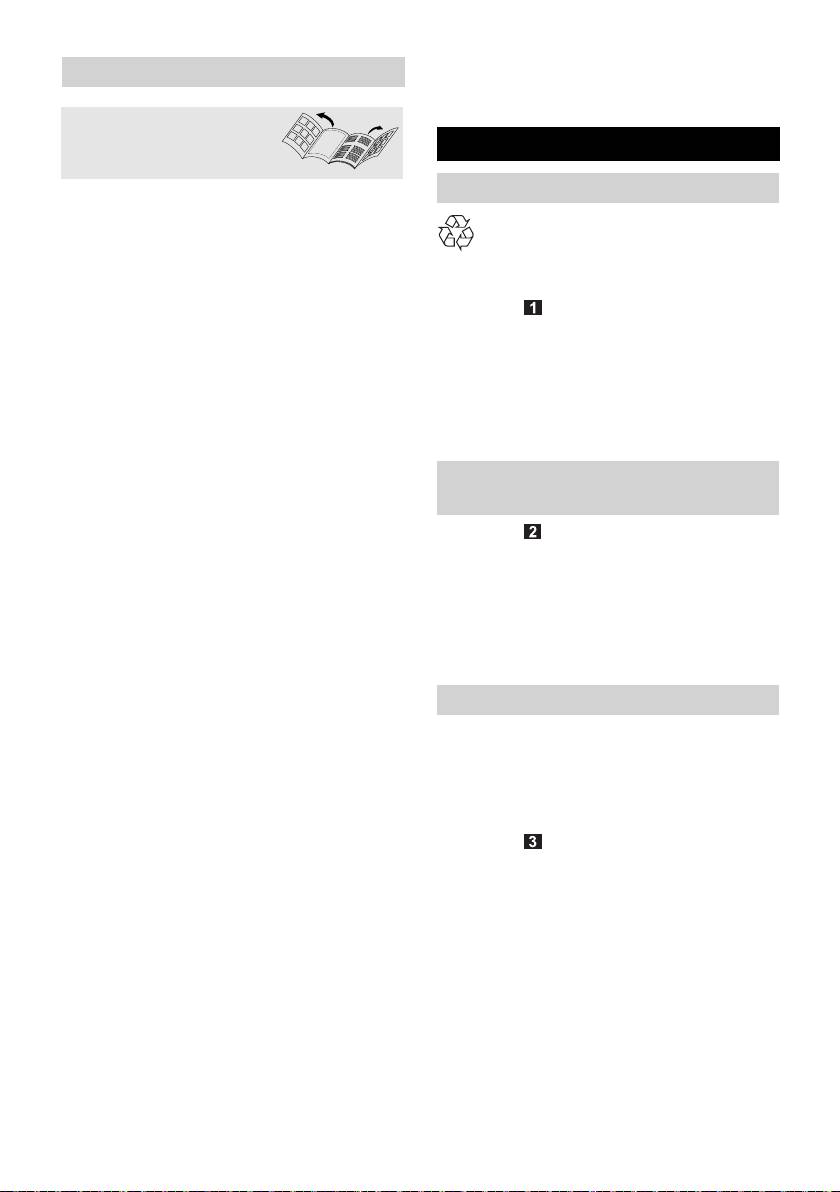
The packaging material can be recy-
2 Recessed grip to open the filter cover
cled. Please do not place the packag-
3 Operating panel of the station
ing into the ordinary refuse for disposal, but
4 ON/OFF switch of the station
arrange for the proper recycling.
Illustration
5 IR sender
When you unpack the system, check
6 Suction hole
that everything is complete.
7 Access ramp for the cleaning robot (to
If there are any missing parts or you de-
dock onto the station)
tect any transport damage when un-
8 Battery contacts
packing, please inform your dealer
9 Power cord
immediately.
Operating panel of station (3)
A Indicator lamp (green) - parking the
Installing the access ramp of the
cleaning robot
station
B “Parking the cleaning robot” button –
Illustration
ON/OFF
Hold the access ramp tilted. Insert the
C “Select cleaning duration” button
cut-outs of the station into the pins of
D Indicator lamp (green) – 3 hours of
the access ramp.
cleaning
Press the station and the access ramp
E Indicator lamp (green) – 6 hours of
downwards until the connection locks
cleaning
into place.
F Indicator lamp (green) – 9 hours of
Installation Notes for the Station
cleaning
G Indicator lamp (green) - continuous
When you select the location of the station,
cleaning
please make sure that the cleaning robot is
H Indicator lamp (red) - filter full
very likely to pass the infrared beam again
I Button "quiet mode" – ON/OFF
and again to easily find its way back to the
station.
J Indicator lamp (green) – quiet mode
Illustration
Cleaning robot
Secure the power cord in the cable
10 Button "Switch on cleaning robot“
hooks. Please make sure that the pow-
11 Button "Switch off cleaning robot“
er cord is guided through the opening in
12 LEDs
the housing.
(Green - operation / red - failure)
Note: Uncoil the power cord only to the
13 Battery contacts
required length.
14 IR receiver
Place the station on a level surface.
15 Safety bumper
16 Brush roller
17 Optical sensors (4x)
18 Battery packs (2x)
19 Locking lever dirt receptacle (2x)
22 EN
– 4

Caution:
Operation
For galleries and steps, the interior cor-
ners must be protected, in case the drive-
Preparation for cleaning
through height under the railing is higher
than 10 cm.
Caution:
Prior to using the cleaning robot, please
Connect the mains plug to a suitable
make sure that there are no obstacles,
socket.
such as on steps or thresholds.
Cleaning a single room
Obstacles can be, for example:
Illustration
– Newspapers, books, magazines, pa-
Set up the station in the room to be
per
cleaned, e.g. as shown in the illustra-
– Clothes, toys, CDs
tion.
Note: The appliance can be adjusted to
– Plastic bags
changing room sizes by means of se-
– Bottles, glasses
lecting the cleaning duration (see Chap-
– Curtains hanging down on the floor
ter “Selecting the Cleaning Duration”).
– Bathroom mats
Cleaning a complete floor
The following objects are, for example,
Illustration
not considered obstacles:
Select the site to set up the station so
– Single cables in the room
that the cleaning robot is able to reach
– Thresholds up to 1 cm high
several rooms.
– Carpet fringes that are shorter than 10
Note: Adjust the required cleaning du-
cm
ration (see Chapter "Select cleaning
Tips and Tricks
duration").
Observe the cleaning robot during the
Caution:
initial cleaning process. Obstacles in
For galleries and steps, the interior cor-
the room that cannot be overcome by
ners must be protected, in case the drive-
the appliance, should be removed
through height under the railing is higher
ahead of time. This will avoid undesired
than 10 cm.
interruptions.
Note: The cleaning robot normally passes
Clean up the room just like you would if
thresholds between rooms between 2 cm
you were vacuuming prior to using the
and 8 cm down but not up.
cleaning robot. Do not leave loose ob-
jects on the floor.
Tie up cables, strings, and curtains to
prevent the robot from pulling them
down.
If you store the appliance for more than
4 months, please make sure that the
batteries are charged completely.
If you let the cleaning robot work while
you are on the phone or watching TV,
activate the "Quiet mode" on the sta-
tion.
– 5
23EN
When cleaning a room, make sure all
Operation after a long rest period or af-
doors are closed.
ter a depleted battery
When cleaning a whole level, make
If the cleaning robot is turned on with com-
sure that the cleaning robot will not be
pletely empty batteries, the appliance is not
able to travel behind doors.
operative. Perform the following steps to
If you want to move the cleaning robot
put the appliance into operation:
to another place, it is recommended to
Illustration
turn off the robot when it is placed in the
Place the cleaning robot near the sta-
station for charging (after the evacua-
tion, and press the battery contacts of
tion of the dirt receptacle).
the robot against the battery contacts of
In order to become more familiar with the
the station for approximately
RoboCleaner, we recommend reading the
60 seconds. This will evacuate the dirt
Chapter "Frequently asked questions and
receptacle.
answers“ at the end of these instructions.
Place the cleaning robot at a distance of
Start up
50 cm in front of the station, and turn it on.
Note: The cleaning robot autonomously
Illustration
goes to the station and is charged. The
Switch on the station.
charge will take about 60 minutes.
The indicator lamp - continuous clean-
ing lights up.
Selecting the cleaning duration
Illustration
Select the cleaning duration on the station
Put the cleaning robot on the floor in
using the following table. (Basic setting:
front of the station.
continuous operation).
Illustration
Illustration
Switch on the cleaning robot.
Press the “Select cleaning duration”
Note: The cleaning robot will first travel
button until the desired cleaning dura-
to the station to empty the dirt recepta-
tion is set.
cle and to check the charging state of
Note: The indicator lamps indicate the
the batteries. If required, the batteries
selected cleaning duration.
are charged. Then, the cleaning robot
starts its cleaning run.
Selecting the cleaning duration
Indicator lamps on the cleaning robot
Press once Cleaning duration 3 hours
Green Permanent
Cleaning run
for rooms smaller than
2
light
45 m
Blinks slowly Cleaning robot is
Press twice Cleaning duration 6 hours
searching for the
for rooms between 45 and
station
2
90 m
Fast flashing Batteries are
Press three
Cleaning duration 9 hours
charged
times
for rooms between 80 and
Red See Chapter "Troubleshooting“
2
135 m
Press four
back to continuous opera-
times
tion (basic setting)
The cleaning process will start. If the selected
cleaning duration has elapsed, the cleaning
robot is emptied and charged and then
comes to a standstill in front of the station.
24 EN
– 6
Quiet mode
Parking the cleaning robot
Ideal for cleaning runs during the night or if
If the cleaning robot should terminate its work
you are at home.
after the subsequent charging process:
Illustration
Illustration
Press the "Quiet mode" button.
Press the “Parking the cleaning robot”
The indicator lamp lights up. The station
button.
empties the cleaning robot, works for 8
The indicator lamp lights up.
hours with a reduced noise level and a
Note: After its next return to the station,
reduced performance. Then, the station
the cleaning robot is emptied and
returns to normal operation.
charged. Then, the robot is turned off
and comes to a standstill in front of the
Operating Programs
station.
The cleaning robot provides of four operat-
Terminate operation / switch off
ing programmes that allow him to automat-
ically adjust to the various degrees of dirt
If you want the cleaning robot to immediate-
accumulation on the floor. The dirtier the
ly interrupt the cleaning, i.e., if you want to
floor, the more extensive the cleaning per-
move the appliance to a different location:
formed by the robot.
Illustration
The selection of the operating programme
Switch off the cleaning robot.
is automatically controlled by sensors lo-
Then, switch off the station.
cated in the dirt receptacle. The selection is
Note:
made according to the detected degree of
If you do not want to use the cleaning robot
dirt accumulation. This selection is made
for a longer period of time, allow the batter-
automatically and is not displayed.
ies to charge completely (see Chapter
If the degree of dirt accumulation has been
"Start-up").
reduced, the 1st operating programme is
Maintenance and care
selected again.
Operating Programmes of the cleaning
Caution:
robot
Turn off the station and the cleaning robot
1 Normal cleaning
before performing any maintenance work!
Robot runs according to the random
Station for cleaning robot
method at normal speed.
2 Individual spot with normal degree of
Exchanging the filter bag of the station
contamination
Robot slowly moves across the dirty
The filter bag needs to be replaced when
area.
the red indicator lamp - filter full - is illumi-
nated.
3 Individual, more contaminated spot
Illustration
Robot slowly runs forward/backwards
Open the filter cover.
across the dirty area.
Illustration
4 Extensive, very dirty area
Pull the filterbag upwards by the flap to re-
Robot runs slowly and radially across
move it from its holder. Place the filter bag
the dirty area describing a star.
into the ordinary refuse for disposal.
Spare filter bag kit: (5 filter bags, 1 mo-
tor protection filter)
Order number: 6.904-257.0
– 7
25EN
Illustration
Illustration
Push the new filter bag all the way into
Reinsert the flat filter, the flaps should
the holder.
point toward the locking lever.
Caution: Never operate the appliance
Remove, clean, replace and install the
without a filter bag!
brush roller
Close the filter cover.
Empty the dirt receptacle and open it
Exchange the motor protection filter
(refer to the description above).
Illustration
Remove the brush roller
If you have replaced the filter bag 5
Illustration
times, also exchange the motor protec-
Pull the brush roller out of the right
tion filter (included in the spare filter bag
guide.
kit).
Afterwards, pull the brush roller out of
the lateral holder.
Cleaning robot
Cleaning the brush roller
Cleaning the wheels
The dirty brush roller is automatically
cleaned during each cleaning operation in
Clean the running surfaces of the
the station. You can manually remove re-
wheels when these become dirty.
maining hairs and wrapped up threads.
Dirt particles (such as sand, etc.) can
Illustration
collect on the running surface and dam-
Use a pair of scissors to cut along the
age sensitive, smooth floor surfaces.
cutting edge of the brush roller.
Remove the wrapped up threads and
Begin all maintenance work on the
hairs.
cleaning robot with the following steps:
Replacing the brush roller
Empty the dirt receptacle; see Chapter
Replace the brush roller when its bris-
"Start-up“.
tles are worn out.
Opening the dirt receptacle:
Spare brush roller:
Rotate the cleaning robot and place it
Order number: 4.250-075.0
on a soft surface.
Illustration
Illustration
Install the brush roller
Open both locking levers of the dirt re-
Insert the brush roller first into the left
ceptacle.
holder.
Illustration
Then press the brush roller into the right
Remove the cover of the dirt recepta-
hand side holder with the hook facing
cle.
down; ensure that it locks into place.
Cleaning the flat filter
Clean dust sensors
Clean the flat filter in the cleaning robot
Empty the dirt receptacle and open it
every time you exchange the filter bag in
(refer to the description above).
the station.
Illustration
Empty the dirt receptacle and open it
Clean the dust sensors using a soft
(refer to the description above).
cloth or a soft paintbrush.
Illustration
Remove the flat filter from the dirt re-
ceptacle.
Shake out the flat filter, or clean it using
a small soft brush.
26 EN
– 8

Finish all maintenance work on the
Disposing of old device and
cleaning robot with the following steps:
battery pack
Installing the dirt receptacle cover:
The cleaning robot includes two built-in bat-
Illustration
tery packs; please remove these before
Put the cover onto the dirt receptacle.
disposing of the old appliance.
Illustration
27
Please arrange for the proper disposal
Close both locking levers.
of the old appliance.
In addition, press on the front side of
Remove battery pack and dispose
the cover to ensure the dirt receptacle
of
is closed safely.
Remove both battery packs of the
Exchanging the batteries
cleaning robot; see Chapter "Replace
Illustration
28
batteries“.
Release the two screws on the two bat-
Dispose of the batteries properly (at a
teries, and remove the old batteries.
collection site or the dealer).
Insert the new batteries, and fasten
Danger!
them with the screws.
Do not open the battery, as there is a risk
Spare battery pack (1 ea.):
of an electrical short; also, irritating or
Order number: 4.810-012.0
caustic vapors can escape.
Do not expose the battery to direct sun-
Technical specifications
light, heat or fire, there is a risk of explo-
sion.
Station for cleaning robot
Operating voltage
220 - 240 V
1~50 Hz
Cleaning power 600 W
Sound level (quiet mode) 60 (54) dB(A)
Filter bag volume 2 l
Dimensions 500 x 250 x
230 mm
Weight 5.8 kg
Cleaning robot
Battery voltage 12 V
Battery capacity 1.7 Ah
Battery type NiMH
Battery charge time 10 - 20 min
Cleaning duration per bat-
60 min
tery charge up to
Dirt receptacle volume 0.2 l
Dimensions ø 280 x 105
mm
Weight 2.0 kg
– 9
27EN
Troubleshooting
Indicator lamp displays:
Green Permanent light Normal operating state
Blinks slowly Cleaning robot is searching for the station
Fast flashing Batteries are charged
Red Fast flashing Cleaning robot is stuck
Blinks slowly Cleaning robot is dirty
Red Permanent light Contact authorised Customer Service!
Problem Display Consequence Remedy
Cleaning robot does not
Red
Cleaning robot
Move furniture if necessary.
find its way out of niches
Fast
comes to a halt.
Switch the cleaning robot
between pieces of furniture
off and remove it from in be-
tween the furniture.
Place it back on the floor
and switch it on.
Gently rising furniture Red
Cleaning robot gets
Turn off the cleaning robot
Fast
stuck and stops
and remove it from the ob-
ject on which it got stuck.
Place it back on the floor
and switch it on.
Cleaning robot got stuck
Red
Cleaning robot
Switch the cleaning robot
underneath items of furni-
Fast
comes to a halt.
off and release it.
ture
Place it back on the floor
and switch it on.
Loose objects have been
Red
Cleaning robot
Switch the cleaning robot
taken up by the brush roller
Slowly
comes to a halt.
off and turn it around.
and are now blocking the
Carefully remove the block-
brush
ing objects; loose objects
include: Toys, clothes, ...
Cleaning robot comes to a
Red
Dirt receptacle is full Empty and clean the dirt re-
halt after charging/vacu-
Slowly
ceptacle.
uming process
Red
Brush roller is too
Clean the brush roller.
Slowly
dirty
Red
Brush roller is
Carefully remove blocking
Slowly
blocked
objects from the brush roll-
er.
Red
Brush roller has not
Check the seat of the brush
Slowly
been inserted cor-
roller.
rectly
Red
Suction outlet of the
Check the suction outlet of
Slowly
station is clogged
the station and clean it, if
necessary.
28 EN
– 10
Problem Display Consequence Remedy
Cleaning robot runs une-
Green
Uneven cleaning This is normal on deep-
venly on carpets, bobs up
Perma-
piled carpets > 20 mm.
and down
nent light
Cleaning robot only runs in
Green
Only a specific area/
Clean the dust sensors us-
star-shaped pattern
Perma-
location is cleaned
ing a soft cloth or a soft
nent light
paintbrush.
Cleaning robot cannot find
Green
Station is place in an
Reposition the station, ob-
the station
Slowly
unfavourable loca-
serve installation instruc-
tion in the room
tions.
Cleaning robot does not
Green
Cleaning robot is not
Check the seating of the
dock onto the station
Slowly
vacuumed
cover of the dirt receptacle.
Place the station on a level
surface.
Install the access ramp of
the station.
Cleaning robot has ab-
– The brush roller and
Remove the brush roller
sorbed wet dirt
the flat filter in the
and the flat filter and clean
cleaning robot are
them thoroughly.
glued
Caution: Do not install a
wet filter.
Cleaning robot makes a
– Bad cleaning result Brush roller is not seated
creaking sound during the
correctly.
cleaning process
Switch the cleaning robot
off and check its seating.
Bad cleaning result – Brush roller worn Replace the brush roller.
Cleaning robot blocked in
Station:
The cleaning robot
Remove the object blocking
station
All LEDs
remains in the station
the appliance. Switch the
blink
after the charging
station off and back on.
process is complete.
Contact authorised Cus-
tomer Service!
Internal or external short
Station:
– Contact authorised Cus-
circuit of the charger con-
All LEDs
tomer Service!
tact strips
blink
– 11
29EN
CE declaration
Helpline
We hereby declare that the machine de-
Karcher (UK) Limited operate a helpline al-
scribed below complies with the relevant
lowing customers to discuss any problems
basic safety and health requirements of the
experienced with our products.
EU Directives, both in its basic design and
The helpline operates during normal busi-
construction as well as in the version put
ness hours, if you have difficulty getting
into circulation by us. This declaration shall
through, please understand that there are
cease to be valid if the machine is modified
peak periods during the day when our con-
without our prior approval.
sultants are unable to take all calls coming
in. In these circumstances we would ask
Product: Robo Cleaner
that you try to contact us again later in the
Type: RC 4.000
day.
Relevant EU Directives
2006/95/EC
The helpline number is 01295 752200,
2004/108/EC
open from 8.30am to 5.00pm Monday to
Friday.
Applied harmonized standards
EN 55014–1: 2006 + A1: 2009
It helps us if you have the model number
EN 55014–2: 1997 + A2: 2008
and data plate details to hand before mak-
EN 60335–1
ing your call.
EN 60335–2–2
Alternatively you may write or E-mail to
EN 61000–3–2: 2006 + A2: 2009
the address below:
EN 61000–3–3: 2008
Karcher (UK) Limited
EN 62233: 2008
Karcher House
Applied national standards
Beaumont Road
-
Banbury
Year of CE marking
Oxon, OX16 1TB
2004
E-mail:
info@karcher.co.uk
The undersigned act on behalf and under
the power of attorney of the company man-
agement.
CEO
Head of Approbation
Authorised Documentation Representative
S. Reiser
Alfred Kärcher GmbH Co. KG
Alfred-Kärcher-Str. 28 - 40
71364 Winnenden (Germany)
Phone: +49 7195 14-0
Fax: +49 7195 14-2212
Winnenden, 2010/12/01
30 EN
– 12

How long does it take until the robot is
Frequently Asked Questions
charged or operative?
The charging time is between 15 and
Which floor coverings is the robot suita-
60 minutes according to the charging state
ble for?
of the battery before the charging. In case
The robot can be used on all common sur-
of the initial operation, the robot certainly
faces, such as carpets and hard surfaces
has the longest charging time.
(tiles, parquetry, etc.). With respect to ex-
tremely deep-piled carpets (> 20 mm), spe-
At which speed does the robot move?
cific restrictions apply. The moving
By default, the robot runs at 20 cm per sec-
sweeping edge is automatically adjusted to
ond. If it cleans very dirty spots, the speed
different floor coverings.
is reduced by half to intensify the cleaning.
The same applies to the final approach to
Is it difficult to clean underneath pieces
the station to allow the robot to precisely
of furniture?
manoeuvre in.
No. Due to its compact and flat design the
robot is able to clean underneath pieces of
How many square meters can the robot
furniture, such as beds, sofas, and ward-
clean within one hour?
robes.
The robot can clean up to 15 qm per hour.
Many spots, in particular the frequently
How does the robot transport the ab-
used paths are cleaned repeatedly from dif-
sorbed dirt to the station?
ferent directions.
The robot is equipped with a dirt receptacle
that is regularly emptied by the station.
How does the robot know when it must
return to the station?
How is the dirt absorbed in the station?
The robot returns to the station as soon as
In the station, the dirt is collected in a con-
the battery voltage has reached a specific
ventional filter bag (2 litres).
level or if the dirt receptacle is full.
The exchange intervals are flexible and are
reported to the user in a timely manner by
How long does it take to empty the robot
means of a indicator lamp on the display.
at the station?
The process takes approximately 30 sec-
How much dirt can the robot absorb?
onds.
In case of a normal degree of soiling, the
dirt receptacle is sufficient for one hour of
Where is the robot programmed? What
cleaning. If this should not be sufficient in
do I have to pay attention to?
the individual case, the robot simply returns
The robot can only be turned on or off. You
to the station earlier, disposes of the dirt
can select the cleaning duration at the sta-
and carries on working.
tion. In addition, you can specify that the ro-
bot should not leave the station after the
How is the absorption of dirt in the robot
next approach to the station (parking func-
performed?
tion).
The dirt is swept into the dirt receptacle of
the robot by means of vacuum-supported
According to which principle does the
sweeping.
robot move?
The robot moves through the room according
Can the robot clean in the apartment /
to the random principle. If he bumps into an
house without supervision?
obstacle, it turns at any angle and then goes
Yes, this is possible without any problems.
straight until it bumps into the next obstacle.
The robot is an autonomous system and
does not require any intervention. The dirt
receptacle is emptied at the station.
– 13
31EN

a cable, may be pulled down from furniture
Which tools are present that help the ro-
(e.g. telephone). It is important to prepare
bot to cope with obstacles?
the room in such a manner that it is suitable
The robot is equipped with sensors that de-
for robots.
tect stairs and prevent the robot from falling
down.
How do pets react to the robot?
Using a special carpet fringe program the
As the robot is not noisy and does not work
robot does not get stuck in carpet fringes.
with ultrasound, problems with pets are not
Thanks to the different angles, it also finds
to be expected. The self-movement behav-
it way out of narrow corners.
iour only arises the mistrust of the pets.
What is the most efficient way to operate
What is important with respect to chil-
the robot (individual rooms, entire apart-
dren?
ment)?
The robot should not be left unattended if
It is most efficient to let the robot clean indi-
children are playing in the same room. Me-
vidual rooms, i.e. station and robot are lo-
chanical damages are likely if children sit
cated within the same room. This reduces
on the robot while it is in operation.
the searching time during the return to the
Why does the robot stop in some situa-
station, the share of the effective cleaning
tions?
time is, therefore, the highest possible.
The robot is only able to get out of tricky sit-
If you want to clean entire floors, the station
uations to a certain degree. Piled cables
should be placed at a central spot of the
can induce him to hopeless manoeuvres. In
apartment to enable the robot to easily re-
this case the robot turns off automatically
turn to the station.
after a specific period of time. The red sig-
Are corners cleaned without any prob-
nal on the robot lights up quickly.
lems (the robot is round)?
The best solution is to place the robot on a
No, but due to the continuous cleaning, the
free area and turn it off and on again. Then,
formation of dirt is substantially reduced.
it continues its cleaning run without prob-
Thus, an accumulation of dirt in corners is
lems.
effectively avoided.
How do I transport my robot properly?
What happens at stairs/steps?
You can lift the robot from the floor using
Stairs: The robot works with optical sen-
both hands, or you carry it by putting one
sors that detect half-landings and signal the
hand into the relief of the brush.
robot that it must change its direction.
What happens if the robot has swept up
Steps: The robot is able to deal with hard
wet dirt?
steps up to 10 mm and soft steps up to
As a result, the filter becomes blocked. You
20 mm in both directions.
have to remove the filter from the robot and
clean it (see Chapter "Cleaning flat filter“).
Caution:
Do not leave loose objects (e.g.: newspa-
What happens if the robot gets stuck
pers, clothing) on stairs or steps, as this
while I am not at home?
will inhibit the function of the sensors. –
Nothing can happen. The robot stops at this
Risk of falling!
point and displays the signal for being
stuck. If no more light is blinking, the batter-
Can the furniture etc. be damaged?
ies are depleted and must be recharged.
No. Damages of the items of furniture can
be excluded.
Please note, however, the lightweight and
fragile objects may be touched and moved
by the robot. Objects that are equipped with
32 EN
– 14

Table des matières
Consignes générales
Français
Consignes générales . . . . . FR . . 1
Cher client,
Utilisation conforme . . .
Lire cette notice originale avant
FR
. . 1
la première utilisation de votre
Protection de l’environnement
FR
. . 2
appareil, se comporter selon ce qu'elle re-
Garantie . . . . . . . . . . . .
FR
. . 2
quièrt et la conserver pour une utilisation ul-
Consignes de sécurité . . . . FR . . 2
térieure ou pour le propriétaire futur.
Description de l’appareil. . . FR . . 3
Utilisation conforme
Fonction et méthode de tra-
vail . . . . . . . . . . . . . . . . FR
. . 3
Le RoboCleaner se compose de deux uni-
Eléments de commande
FR
. . 4
tés ; une station et un robot de net-
Préparatifs pour la mise en ser-
toyage à accu.
vice. . . . . . . . . . . . . . . . . . . FR . . 4
Déballage de l’appareil.
Il est conçu pour le nettoyage entière-
FR
. . 4
ment automatique de la partie intérieure
Montage de la rampe d'accès
de la station . . . . . . . . . FR
. . 4
et peut être utilisé pour l'entretien auto-
nome et continu de tous les revête-
Instructions de mise en place
pour la station. . . . . . . . FR
. . 5
ments usuels de sols.
Fonctionnement . . . . . . . . . FR . . 5
Cet appareil ne doit être utilisé que pour
Préparatifs pour le nettoyage
. . 5
un usage domestique.
FR
N'utiliser le RoboCleaner que
Conseils et astuces . . .
FR
. . 5
– pour le nettoyage domestique de revê-
Mise en service. . . . . . .
FR
. . 6
tements de sol textiles et durs.
Sélection de la durée de net-
Attention : Pour éviter toute éraflure
toyage. . . . . . . . . . . . . . FR
. . 6
sur les revêtements de sol particulière-
Mode silencieux (Quiet mode)
FR
. . 7
ment sensibles (tels par ex. que le
Programmes de déplacement
FR
. . 7
marbre tendre), effectuer auparavant
Stationnement du robot de
un essai à un endroit non exposé.
nettoyage . . . . . . . . . . . FR
. . 7
Ne pas utiliser le RoboCleaner pour le
Fin de l'utilisation / mise hors
nettoyage :
circuit . . . . . . . . . . . . . . FR
. . 7
– de revêtements de sol mouillés,
Entretien et maintenance . . FR . . 8
– de salles de bain ou autres locaux hu-
Station pour robot de net-
mides,
toyage. . . . . . . . . . . . . . FR
. . 8
– d'escaliers,
Robot de nettoyage . . .
FR
. . 8
– de dessus de table et étagères,
Caractéristiques techniques FR . . 9
– de caves ou greniers,
Station pour robot de net-
toyage. . . . . . . . . . . . . . FR
. . 9
– d'entrepôts, bâtiments industriels, etc.
Robot de nettoyage . . .
FR
. . 9
– en plein air.
Éliminer l'appareil usé et l'accu-
mulateur . . . . . . . . . . . . . . . FR . 10
Le fabricant décline toute responsabilité en
Démonter la batterie et l'élimi-
cas de dommages dus à une utilisation non
ner . . . . . . . . . . . . . . . . FR
. 10
conforme ou incorrecte de l'appareil.
Service de dépannage . . . . FR . 11
Déclaration CE . . . . . . . . . . FR . 13
Questions fréquentes et ré-
ponses . . . . . . . . . . . . . . . . FR . 13
– 1
33FR

Protection de l’environnement
Consignes de sécurité
Les matériaux constitutifs de l’embal-
Il est interdit d’utiliser l’appareil dans
lage sont recyclables. Ne pas jeter
des pièces
les emballages dans les ordures ména-
– protégées par un système d’alarme ou
gères, mais les remettre à un système de
des détecteurs de mouvement,
recyclage.
– dont l’air contient des gaz inflammables
Les appareils usés contiennent des
d’essence, de fuel, de diluant de pein-
matériaux précieux recyclables les-
ture, de solvant, de pétrole ou d’alcool
quels doivent être apportés à un sys-
(risque d'explosion),
tème de recyclage. Les batteries et les
– sans surveillance dans des pièces avec
accumulateurs contiennent des subs-
un feu allumé ou des charbons ardents
tances ne devant pas être tout simplement
dans une cheminée,
jetées. Pour cette raison, utiliser des sys-
– sans surveillance, avec des bougies al-
tèmes de collecte adéquats afin d'éliminer
lumées.
les batteries et les accumylatuers.
Danger
Elimination du filtre et du sac du filtre
– L'appareil doit être raccordé unique-
Le filtre et le sac du filtre sont fabriqués en
ment au courant alternatif. La tension
matériaux recyclables.
doit être identique avec celle indiquée
S'ils ne contiennent aucune substance as-
sur la plaque signalétique de l’appareil.
pirée dont l'élimination est interdite dans
– Avant chaque utilisation, vérifier que le
les déchets ménagers, vous pouvez les je-
câble d'alimentation et le connecteur ne
ter dans les déchets ordinaires.
sont pas endommagés. Tout câble
Instructions relatives aux ingrédients
d?alimentation endommagé doit être
(REACH)
immédiatement remplacé par le service
Les informations actuelles relatives aux in-
après-vente ou un électricien agréé.
grédients se trouvent sous :
– Ne jamais saisir le connecteur secteur
www.kaercher.com/REACH
ni la prise électrique avec des mains
Garantie
humides.
– Ne pas tirer sur le câble mais unique-
Dans chaque pays, les conditions de ga-
ment au niveau du connecteur pour dé-
rantie en vigueur sont celles publiées par
brancher l'appareil de la prise
notre société de distribution responsable.
électrique.
Les éventuelles pannes sur l’appareil sont
– Tenir les films plastiques d'emballages
réparées gratuitement dans le délai de va-
hors de portée des enfants, risque
lidité de la garantie, dans la mesure où
d'étouffement !
celles-ci relèvent d'un défaut matériel ou
d'un vice de fabrication. En cas de recours
몇 Attention
en garantie, adressez-vous à votre reven-
– Cet appareil n'est pas conçu pour être
deur ou au service après-vente agréé le
utilisé par des personnes (y compris
plus proche munis de votre preuve d'achat.
des enfants) avec des capacités phy-
(Adresse au dos)
siques, sensorielles ou mentales limi-
tées ou manquant d'expérience et/ou
de connaissances, sauf si elles sont
surveillées par une personne respon-
sable de leur sécurité ou si elles en ob-
tiennent des instructions sur la manière
d'utiliser l'appareil. Les enfants doivent
34 FR
– 2

être surveillés afin de s'assurer qu'ils ne
Description de l’appareil
jouent pas avec l'appareil.
– Utiliser uniquement des accessoires et
Fonction et méthode de travail
des pièces de rechange autorisés par
KÄRCHER. Des accessoires et des
Le RoboCleaner se compose de deux uni-
pièces de rechange d’origine garantis-
tés ; une station et un robot de net-
sent un fonctionnement sûr et parfait de
toyage à accu.
l’appareil.
– L'appareil ne doit être réparé que par un
Robot de nettoyage
service après-vente autorisé.
Le robot de nettoyage mobile puise sont
– Mettre l'appareil hors service après
énergie à partir des accus rechargeables
chaque utilisation et avant chaque net-
intégrés. Avec des accumulateurs complè-
toyage/entretien.
tement chargés, le robot peut nettoyer jus-
qu'à 60 minutes.
Prudence
Le robot de nettoyage est relié par infra-
– L'appareil contient un rouleau rotatif de
rouges à la station. Lorsque l'autonomie
brosse, en aucun cas mettre les doigts
des accus diminue, il cherche sa station de
ou les outils dedans pendant qu'il est en
façon autonome pour pouvoir se recharger.
service.
Si la rechercher s'avère intensive, il coupe
– Ne pas laisser des enfants sans sur-
les groupes de nettoyage afin d'économi-
veillance avec le robot de nettoyage,
ser de l'énergie pour la poursuite de sa re-
pendant que ce dernier effectue un net-
cherche.
toyage.
Le robot de nettoyage se déplace de façon
– Ne pas se tenir ou s'assoir sur la station
aléatoire. Dès qu'il heurte un obstacle, il
ou le robot de nettoyage.
change de direction dans un angle quel-
– Risque de trébuchement dû aux allées
conque. Il continue ensuite à se déplacer
et venues du robot de nettoyage.
tout droit jusqu’au prochain obstacle.
– En heurtant des obstacles, le robot de
La construction plate du robot de nettoyage
nettoyage risque de faire tomber des
lui permet de nettoyer même sous des
objets (même ceux se trouvant sur des
meubles tels que des lit, divan et armoire.
tables ou des petits meubles).
Le robot de nettoyage est équipé de détec-
– Le robot de nettoyage risque de s’ac-
teurs optiques (protection contre la chute)
crocher dans des câbles de téléphone,
lui permettant de déceler la présence d'es-
des câbles électriques, des nappes de
caliers et de seuils et donc d’éviter de tom-
table, des fils, des ceintures etc. et pro-
ber.
voquer la chute d'objets.
Le robot de nettoyage dispose de 4 pro-
Recommandations pour le chargement
grammes de marche et peut ainsi s'adapter
de la station de rechargement et du ro-
à divers types d'encrassement du sol. Les
bot de nettoyage
programmes de déplacement sont com-
– Le dispositif de charge se trouvant sur
mandés automatiquement, en fonction du
la station est uniquement destiné à
degré d’encrassement constaté, par des
charger le robot de nettoyage.
détecteurs placés dans le collecteur de sa-
– Les accumulateurs du robot de net-
letés.
toyage ne doivent être chargés que sur
Station pour robot de nettoyage
le dispositif de charge de la station.
Dans la station, les accumulateurs du robot
– Risque de court-circuit ! Tenir les ob-
de nettoyage sont rechargés et les saletés
jets conducteurs (tels que tournevis ou
sont aspirées hors du collecteur du robot
objet analogue) à l'écart des contacts
de chargement.
– 3
35FR
de nettoyage. Les saletés sont recueillies
Robot de nettoyage
dans un sachet filtre (de 2 l).
10 Touche « mise en marche du robot de
Après le temps de charge, le robot quitte à
nettoyage »
nouveau automatiquement la station et
11 Touche « mise hors marche du robot de
poursuit son nettoyage.
nettoyage »
12 Voyants lumineux
Eléments de commande
(vert - fonctionnement / rouge - défaut)
13 Contacts de charge
Illustrations, cf. cô-
tés escamotables !
14 Récepteur infrarouge
15 Pare-chocs
16 Rouleau de brosse
Station pour robot de nettoyage
17 Détecteur de protection contre la chute
1 Poignée de transport rabattable
(4x)
2 Poignée concave pour ouvrir le cou-
18 Accus (2x)
vercle du filtre
19 Levier de verrouillage collecteur de sa-
3 Zone de commande station
letés (2x)
4 Interrupteur MARCHE/ARRÊT de la
20 Couvercle collecteur de saletés
station
21 Récipient collecteur
5 Émetteur infrarouge
6 Orifice d’aspiration
7 Rampe d’accès pour le robot de net-
Préparatifs pour la mise en
toyage (pour l’insertion dans la station)
service
8 Contacts de charge
9 Câble d’alimentation
Déballage de l’appareil
Zone de commande station (3)
Les matériaux constitutifs de l’embal-
A Témoin de contrôle (vert) - stationne-
lage sont recyclables. Ne pas jeter
ment du robot de nettoyage
les emballages dans les ordures ména-
B Touche Marche/Arrêt « Stationnement
gères, mais les remettre à un système de
du robot de nettoyage »
recyclage.
C Touche « Sélection de la durée de
Illustration
nettoyage »
Lors du déballage, contrôler si toutes
D Témoin de contrôle (vert) – 3 heures de
les pièces sont au complet.
nettoyage
Si des pièces manquent ou qu’une ava-
E Témoin de contrôle (vert) – 6 heures de
rie de transport est constatée lors du
nettoyage
déballage, informer le revendeur dans
F Témoin de contrôle (vert) – 9 heures de
les plus brefs délais.
nettoyage
Montage de la rampe d'accès de la
G Témoin de contrôle (vert) - nettoyage
station
continu
H Témoin de contrôle (rouge) – Filtre
Illustration
plein
Maintenir la rampe d’accès en position
I Touche « mode silencieux (Quiet
inclinée. Placer les encoches de la sta-
mode) » – marche/arrêt
tion sur les pivots de la rampe d’accès.
J Témoin de contrôle (vert) - mode silen-
Appuyer sur la station et la rampe d’ac-
cieux
cès jusqu’à ce que la connexion s’en-
clenche.
36 FR
– 4

Instructions de mise en place pour
Attention :
la station
Sécuriser les coins intérieurs de galeries
et de hauts d'escaliers si la hauteur de
La position de la station doit être choisie de
passage sous la rampe est supérieure à
façon à assurer que le robot de nettoyage
10 cm.
traverse plusieurs fois le rayon conducteur
Remarque : En marche, le robot de net-
infrarouge pour pouvoir retrouver sans pro-
toyage franchit normalement des seuils de
blème la station.
2 à 8 cm entre les pièces vers le bas, mais
Illustration
pas vers le haut.
Accrocher le câble d’alimentation dans
les crochets de câble en veillant à gui-
der le câble d’alimentation à travers
Fonctionnement
l’orifice du boîtier.
Remarque : ne pas dérouler le câble
Préparatifs pour le nettoyage
d’alimentation plus que nécessaire.
Placer la station sur un sol plat.
Attention :
Avant le fonctionnement du robot de net-
Attention :
toyage, veiller à ce que des obstacles ne
Sécuriser les coins intérieurs de galeries
se trouvent ni sur le sol, ni sur des esca-
et de hauts d'escaliers si la hauteur de
liers, ni sur des seuils.
passage sous la rampe est supérieure à
10 cm.
Des obstacles peuvent par exemple
Brancher le câble d’alimentation dans
être :
une prise de courant adaptée.
– des journaux, des livres, des maga-
zines, du papier
Nettoyage d’une pièce
– des vêtements, des jouets, des CD
Illustration
– des sacs en plastique
Placer la station dans la pièce à net-
– des bouteilles, des verres
toyer, par exemple comme le montre la
figure.
– des rideaux tombant sur le sol
Remarque : La sélection de la durée de
– des tapis de salle-de-bains
nettoyage permet une adaptation à des
Par contre, les objets ci-dessous ne
pièces de tailles différentes (voir le cha-
sont pas des obstacles :
pitre « Sélection de la durée de
– différents câbles dans la pièce
nettoyage »).
– seuils de portes jusqu'à 1 cm de hau-
Nettoyage d’un étage
teur
Illustration
– des franges de tapis inférieures à
Choisir l'emplacement de la station de
10 cm
manière à ce que le robot de nettoyage
Conseils et astuces
puisse facilement accéder à plusieurs
pièces.
Observer le robot de nettoyage pendant
ses premiers nettoyages. Enleve à
Remarque : Régler la durée de net-
temps les obstacles qu'il ne peut pas
toyage nécessaire (voir le chapitre
franchir dans la pièce, ceci afin d'éviter
« Sélection de la durée de
toute interruption indésirable.
nettoyage »).
Avant d'utiliser le robot de nettoyage,
rangez la pièce comme si vous deviez y
– 5
37FR
passer l'aspirateur. Ne pas laisser traî-
Témoins de contrôle sur le robot de
ner d'objets sur le sol.
nettoyage
Attacher les câbles, cordons ou rideaux
Vert Lumière per-
Parcours de net-
qui pendent, afin d'éviter qu'ils ne soient
manente
toyage
attrapés.
Clignote-
Le robot de net-
Veiller à ce que l'accu soit complète-
ment lent
toyage recherche la
ment chargé, si l'appareil n'a pas servi
station
pendant plus de 4 mois.
Régler la fonction « mode silencieux
Clignote-
Les accus sont re-
(Quiet mode) » sur la station pour ne
ment rapide
chargés
pas être dérangé pendant une conver-
Rouge Voir le chapitre « Dépannage »
sation téléphonique ou en regardant la
Mise en service après une période d'im-
télévision.
mobilisation prolongée ou un accu dé-
Pendant le nettoyage d'une pièce,
chargé
veiller à ce que toutes les portes soient
fermées.
Si le robot de nettoyage est mis en route
En nettoyant un étage, veiller à ce que
alors que les accumulateurs sont entière-
le robot de nettoyage ne puisse pas
ment vides, l’appareil ne réagit pas. Dans
passer derrière des portes.
ce cas, procéder comme suit pour mettre
Le meilleur moment pour mettre le ro-
l’appareil en route :
bot de nettoyage hors marche est lors-
Illustration
qu’il se trouve dans la station pour être
placer le robot de nettoyage sur la sta-
chargé (après l’aspiration du collecteur
tion et appuyer pendant env. 60 se-
de saletés).
condes les contacts de charge du robot
Pour se familiariser davantage avec le Ro-
contre les contacts de charge de la sta-
boCleaner, nous recommandons de lire le
tion, pour que le collecteur de saletés
chapitre « Questions et réponses fréquem-
soit aspiré.
ment posées » à la fin du présent mode
Placer ensuite le robot de nettoyage 50
d'emploi, avant de le mettre en service.
cm devant la station et le mettre en
marche.
Mise en service
Remarque : Le robot de nettoyage se
Illustration
rend automatiquement dans la station
Mettre la station en circuit.
pour y être chargé. La durée du charge-
Le témoin de contrôle Nettoyage conti-
ment est d'env. 60 minutes.
nu est allumé.
Sélection de la durée de nettoyage
Illustration
Poser le robot de nettoyage sur le sol,
Sélectionner la durée de nettoyage sur la
devant la station.
station, à l'aide du tableau ci-après. (Ré-
Illustration
glage de base : marche continue).
Mettre le robot de nettoyage en
Illustration
marche.
Appuyer sur la touche « Sélection de la
durée de nettoyage » jusqu’à ce que la
Remarque : Le robot de nettoyage se
durée de nettoyage souhaitée soit ré-
déplace toujours tout d’abord vers la
glée.
station pour vider le collecteur de sale-
tés, pour contrôler l’état de charge des
Remarque : Les témoins de contrôle in-
accumulateurs et les recharger, le cas
diquent la durée de nettoyage sélec-
échéant. Ensuite le robot de nettoyage
tionnée.
commence son parcours de nettoyage.
38 FR
– 6
letés. La sélection s'effectue automatique-
Sélection de la durée de nettoyage
ment et n'est pas affichée.
En cas de degré d’encrassement plus
En appuyant
durée de nettoyage de 3
faible, le 1er programme de déplacement
1 x
heures.
est de nouveau sélectionné.
pour des pièces infé-
2
rieures à 45 m
Programmes de déplacement du robot
de nettoyage
En appuyant
durée de nettoyage de 6
1 Nettoyage normal
2 x
heures.
Déplacement à vitesse normale selon
pour des pièces de 45 à
2
le principe aléatoire.
90 m
2 Différents endroits normalement sales
En appuyant
durée de nettoyage de 9
Déplacement lent sur l’endroit sale.
3 x
heures.
3 Différentes endroits fortement encras-
pour des pièces de 80 à
sés
2
135 m
Déplacement lent en marche avant /
En appuyant
de nouveau marche conti-
marche arrière sur l’endroit encrassé.
4 x
nue (réglage de base)
4 Vaste surface fortement encrassée
Déplacement lent en forme d’étoile
Le processus de nettoyage commence.
zur la zone encrassée.
Après écoulement de la durée de nettoyage
sélectionnée, le robot de nettoyage est vidé
Stationnement du robot de net-
et chargé sur la station, puis il reste immobile
toyage
à l’état hors circuit devant la station.
Si le robot de nettoyage doit terminer son
Mode silencieux (Quiet mode)
travail après le chargement suivant :
Idéal pour des parcours de nettoyage noc-
Illustration
turnes ou durant votre présence.
appuyer sur la touche « Stationnement
Illustration
du robot de nettoyage ».
Appuyer sur la touche « Mode silen-
Le témoin de contrôle s'allume.
cieux (Quiet mode) ».
Remarque : Après le prochain retour à
Le témoin de contrôle s'allume. La sta-
la station, le robot de nettoyage est vidé
tion vide le robot de nettoyage, travaille
et chargé. Il s’immobilise ensuite à l’état
pendant 8 heures avec réduction du ni-
hors circuit devant la station.
veau acoustisque et de performance.
Fin de l'utilisation / mise hors circuit
La station commute ensuite à nouveau
en mode de fonctionnement normal.
Si le robot de nettoyage doit immédiate-
ment interrompre le nettoyage, par ex. pour
Programmes de déplacement
changer de lieu d'utilisation :
Le robot de nettoyage dispose de quatre
Illustration
programmes de déplacement lui permet-
Mettre tout d'abord le robot de net-
tant de s’adapter automatiquement à diffé-
toyage hors circuit.
rents types d’encrassement du sol. Plus le
Mettre ensuite la station hors circuit.
sol est encrassé, plus le nettoyage est in-
Remarque :
tensif.
Si le robot de nettoyage ne doit pas être uti-
Le programme de déplacement est auto-
lisé pendant une période prolongée, re-
matiquement sélectionné, en fonction du
charger complètement ses accus
degré d’encrassement constaté, par des
auparavant (voir le chapitre « Mise en
détecteurs placés dans le collecteur de sa-
service »).
– 7
39FR

Entretien et maintenance
Commencer tous les travaux de main-
tenance sur le robot de nettoyage par
Attention :
les séquences suivantes :
Mettre la station et le robot de nettoyage
Retirer le collecteur de saletés, voir le
hors circuit avant d’effectuer toute opéra-
chapitre « Mise en service ».
tion de maintenance !
Ouvrir le collecteur de saletés :
Tourner le robot de nettoyage et le po-
Station pour robot de nettoyage
ser sur un support souple.
Remplacement du sachet filtre de la sta-
Illustration
tion
Ouvrir les deux leviers de verrouillage
du collecteur de saletés.
Le sachet filtre doit être remplacé lorsque le
Illustration
témoin de contrôle Filtre plein s'allume.
Retirer le couvercle du collecteur de
Illustration
saletés.
Ouvrir le couvercle du filtre.
Illustration
Nettoyage du filtre plat
Sortir le sachet filtre du support en tirant
Nettoyer le filtre plat dans le robot de net-
sur la languette. Éliminer le sachet filtre
toyage à chaque remplacement du sachet
dans les ordures ménagères.
filtre de la station.
Kit de sachets filtres de rechange : (5
Vider et ouvrir le collecteur de saletés
sachets filtres, 1 filtre de protection mo-
(voir la description précédente).
teur)
Illustration
Référence : 6.904-257.0
Sortir le filtre plat du collecteur de sale-
Illustration
tés.
Enfoncer le nouveau sachet filtre jus-
Secouer le filtre plat ou le nettoyer à
qu'en butée dans le support.
l'aide d’une petite brosse souple.
Attention : ne jamais utiliser l’appareil
Illustration
sans sachet filtre !
Remettre le filtre plat en place, les lan-
Fermer le couvercle du filtre.
guettes devant être dirigées vers le le-
remplacement du filtre de protection
vier de verrouillage.
moteur
Dépose / nettoyage / remplacement /
Illustration
montage de la brosse rotative
Après avoir remplacé 5 sachets filtres,
Vider et ouvrir le collecteur de saletés
remplacer également le filtre de protec-
(voir la description précédente).
tion moteur (compris dans le kit de sa-
Démontage de la brosse rotative
chets filtres de rechange).
Illustration
Robot de nettoyage
Dégager la brosse rotatife du guidage
de droite.
Nettoyage des roues
Sortir ensuite la brosse rotative du sup-
Nettoyer la circonférence de roulement
port latéral.
des roues, si elle est encrassée.
Nettoyage de la brosse rotative
Les particules de saletés (telles que le
La brosse rotative encrassée est automati-
sable, etc. par ex.) peuvent s'incruster à
quement nettoyée dans la station après
la surface de roulement et abimer les
chaque procédure de nettoyage. Des
sols lisses et sensibles.
restes de cheveux et des fils enroulés peu-
vent être éliminés manuellement.
40 FR
– 8
