Karcher HD 13-35-4 Cage: English
English: Karcher HD 13-35-4 Cage
Please read and comply with
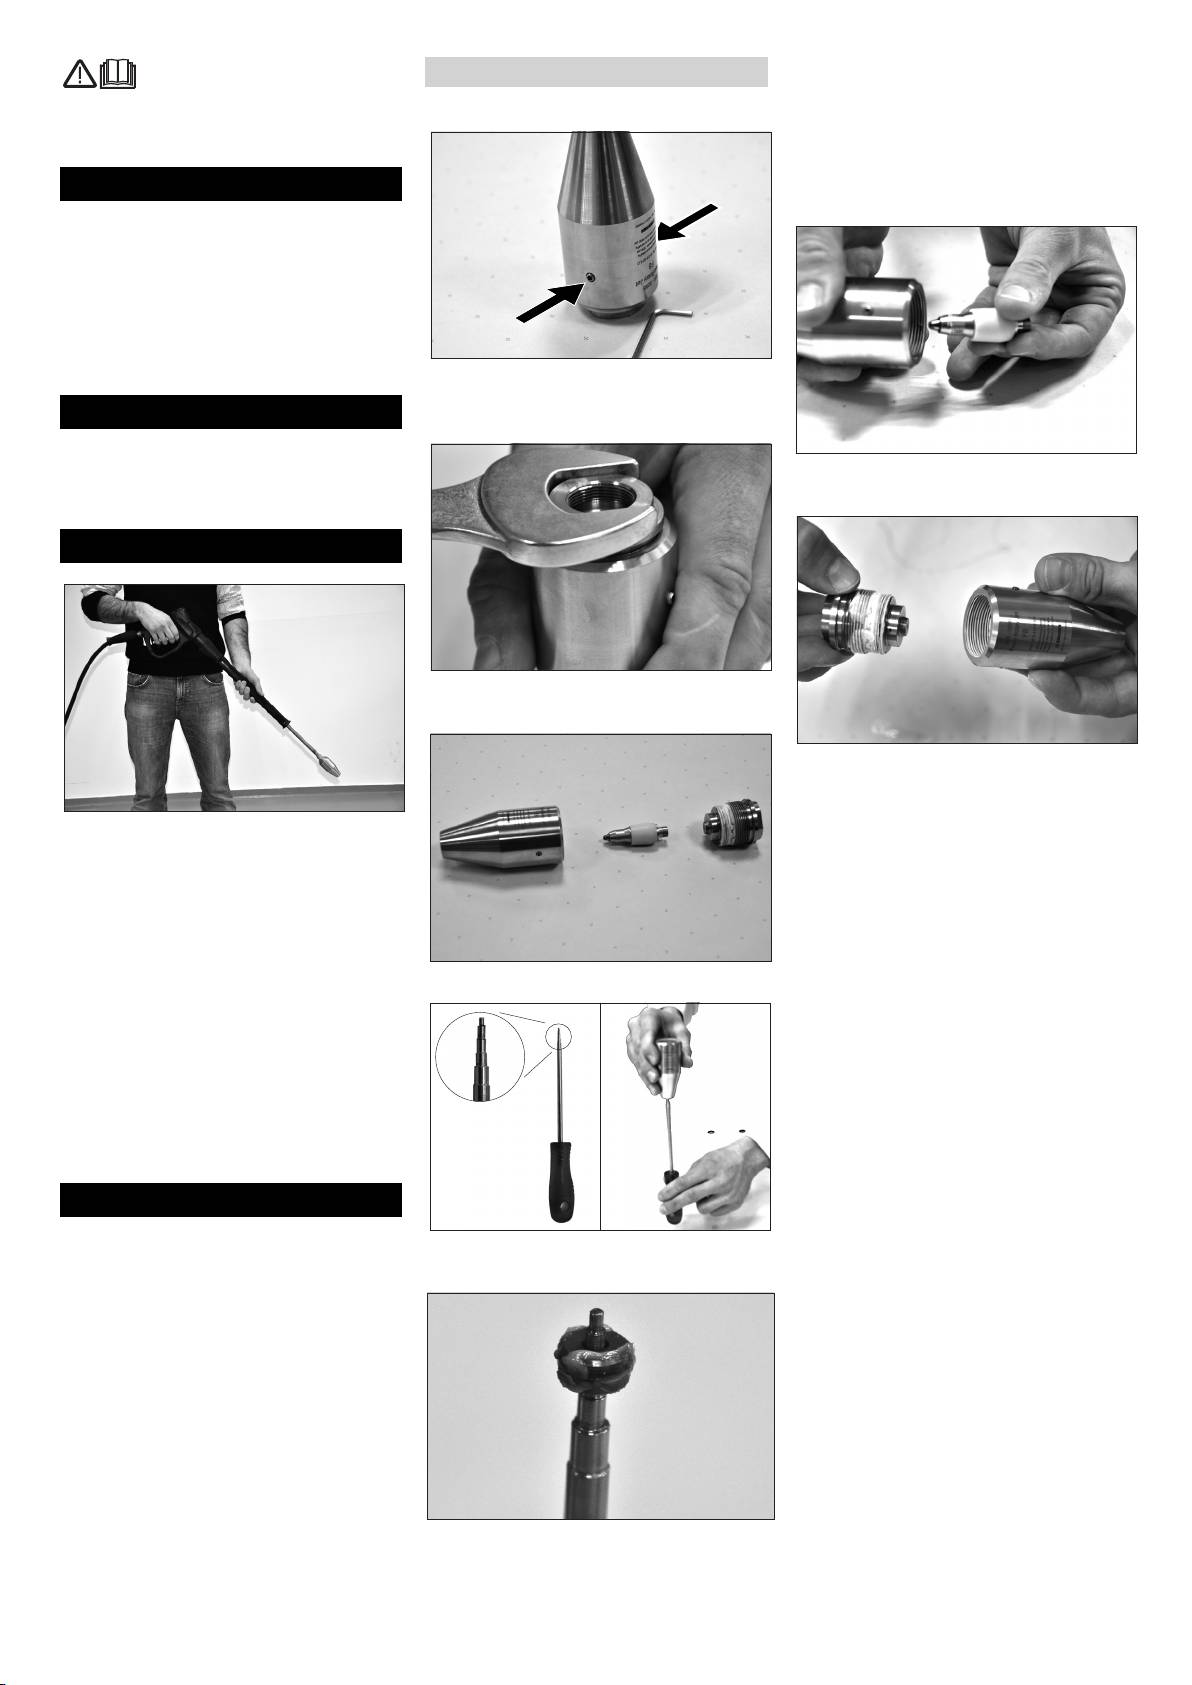
The tapered recess of the seat must
Install repair kit, replace seat
these original instructions prior
point toward the handle of the special
to the initial operation of your appliance and
English
Clean the outside of the nozzle.
tool.
store them for later use or subsequent own-
Grease the seat using silicone grease
ers.
(part no. 6.288-044.0).
Press the seat into the nozzle casing,
Safety instructions
do not pound in.
Danger!
Risk of injury due to defective appliance.
Check the faultless condition of the appli-
ance before using it. The appliance is not
fit for use if it is not in a faultless condition.
The appliance may not be modified.
Please observe the safety instructions of
Unscrew both threaded pins until about
your high-pressure cleaner.
2 thread lines protrude from the nozzle
Proper use
casing.
The nozzle is intended for use with high
pressure cleaners
Carefully insert the rotor into the nozzle
The water pressure indicated on the out-
casing and align with the seat.
side of the nozzle must not be exceeded.
Operation
Point the nozzle downward and open
the casing (key width 27).
Grease the thread on the drive cover
with grease (part no. 6.288-079.0).
Point the nozzle downward, align the
When opening the hand spray gun,
rotor in the seat and screw the drive
point the spray lance with the nozzle
cover in fingertight.
downward to prevent wear on the noz-
Tighten the threaded pins.
zle.
Begin the cleaning work with a nozzle
distance of 20 to 30 cm.
Determine the most favourable nozzle
Remove the rotor.
distance by slowing approaching the
cleaning object.
Protect the nozzle from contamination
during work breaks - do not leave it in
the water.
After your work is done, clean the noz-
zle on the inside and outside, dry and
grease it.
Store the nozzle in a dry place.
Maintenance
Maintenance tasks are required for:
Press the seat out using special tools
– uneven or no rotation
(part no. 6.025-233.0).
– poor spray pattern
Place the new seat on top of the special
tool.
