Electrolux NPX 6 SENSOMATIC: CHAPTER CHAPTER
CHAPTER CHAPTER: Electrolux NPX 6 SENSOMATIC
49
49
BROWSER/DATABASE
CHAPTER
CHAPTER
A DJ’s most important asset, beyond the gear he uses, is his collection of music. Without
a wealth of top-notch tracks in his arsenal, a DJ is not equipped to dominate a dance
floor. Anyone who has been DJing for even a short while will have amassed a decent
collection of songs, and finding those songs quickly is the job of Torq’s Browser and
Database.
The Browser is very similar to the navigation methods employed by your computer’s
9
1
operating system. The Browser will allow you to explore the contents of all your
hard drives (internal and external), connected MP3 players (such as iPods), and audio
CDs. You can then add music folders to the Torq Database in order to search for
songs using keywords or sorting techniques, which makes finding your music much
easier than thumbing through CD wallets or crates of vinyl. Torq also supports the
building of playlists which will allow you to pre-select a series of songs to use in a later
performance—and Torq will even document all of the songs you play in a set for later
review (the Session Playlist).
This section will show you how to navigate your hard drive(s) using the Torq Browser,
and how to add folders containing music files to the Database. It will also explain how to
search for particular songs, how to organize songs by categories for easier viewing, and
how to manage playlists.
Browser Pane
The Browser pane is located on the
bottom left of the Torq interface. It
allows you to navigate drives, folders,
and playlists through an easy-to-use file
structure.
The Browser contains three standard
headings: Database, Playlists, and your
local Music folder (called “Music” on
Mac and “My Music” on PC) which
are shown at the top of the Browser
pane. The Browser will also contain a
listing of each drive connected to your
system—those drives will be listed by their names (for example, “C:” or “Macintosh
HD”). Finally, all connected media players will have an entry along with any
inserted CDs.
Navigation in the Browser follows a few simple rules:
1. To view any songs contained in a folder, click on the folder’s name. If the folder
contains music files, those files will be displayed in the File List to the right
of the Browser pane. If Torq cannot identify any playable music files in the
selected folder, the list will be blank.
2. To view any sub-folders, click the plus sign (+) next to a folder. A list will
appear below the parent folder showing all available sub-folders. To close this
list, click the (–) in front of the parent folder.
English
English
Torq 1.5 User Guide Chapter 1
Torq 1.5 User Guide Chapter 9
50
50
Database
The Database is the first item displayed in the Browser pane. The Database is simply a collection of file folders located
throughout your computer system (even on external disk drives) used to make locating and organizing you music more
efficient. Once a folder is added to the Database, the songs it contains will be listed in the File List whenever you click
on the Database heading. If you have multiple folders assigned to the Database, all the files in all folders will be listed
simultaneously in the File List. Therefore, to use the Database efficiently, you’ll only want to assign folders that contain
music you’d like
to spin.
< Adding Folders to Database
To add a music folder to the Database:
1. Use the browser to search for a folder.
2. Right-click on the folder you want
to add.
3. Choose “Add to database” from the pop-up menu.
4. The folder will then be assigned to the Database (you
can click the “+” in front of Database to see this new
folder listed beneath it).
5. Now, when you click on Database, the contents of
the folder you just assigned will be listed in the File List.
< Adding Multiple Folders
You may find that one folder will contain many folders that you’d like to add to the Database. A great example
of this is when your music is automatically sorted by a program like Apple iTunes. Typically, there will be a folder
for each artist in your collection, and each of these folders will contain individual folders for each album by that
artist. Therefore, if you want to add all the music by this particular artist to the Database, you actually need to
add all of the individual album folders.
To make this easier, Torq includes an option for adding folders, including their subfolders, to the Database:
1. Use the Browser to locate the folder containing the sub-folders you want to add.
2. Right-click (CTRL-click on Mac) the folder and select “Add folder to Database Recursively.” Torq will
automatically add the folder, along with all its sub-folders, to the Database.

Torq 1.5 User Guide Chapter 1
Torq 1.5 User Guide Chapter 9
51
51
< Adding Folders from Your OS
If you’d prefer, you can add folders to the Database by dragging them from your operating system into the Torq
Browser. You can do this using either Explorer for Windows or Finder for Mac.
1. Find your desired folders using the tools of your operating system (Explorer or Finder).
2. Click and drag the folder from the operating system into the Browser.
3. Release the mouse button and the folder will be added to the Database.
✓ Note: You can also include the subfolders by holding the Alt key while dragging the folder into the Database.
< Searching Specific Database Folders
Clicking on the Database heading will display every song contained in the Database in the File List to the right of
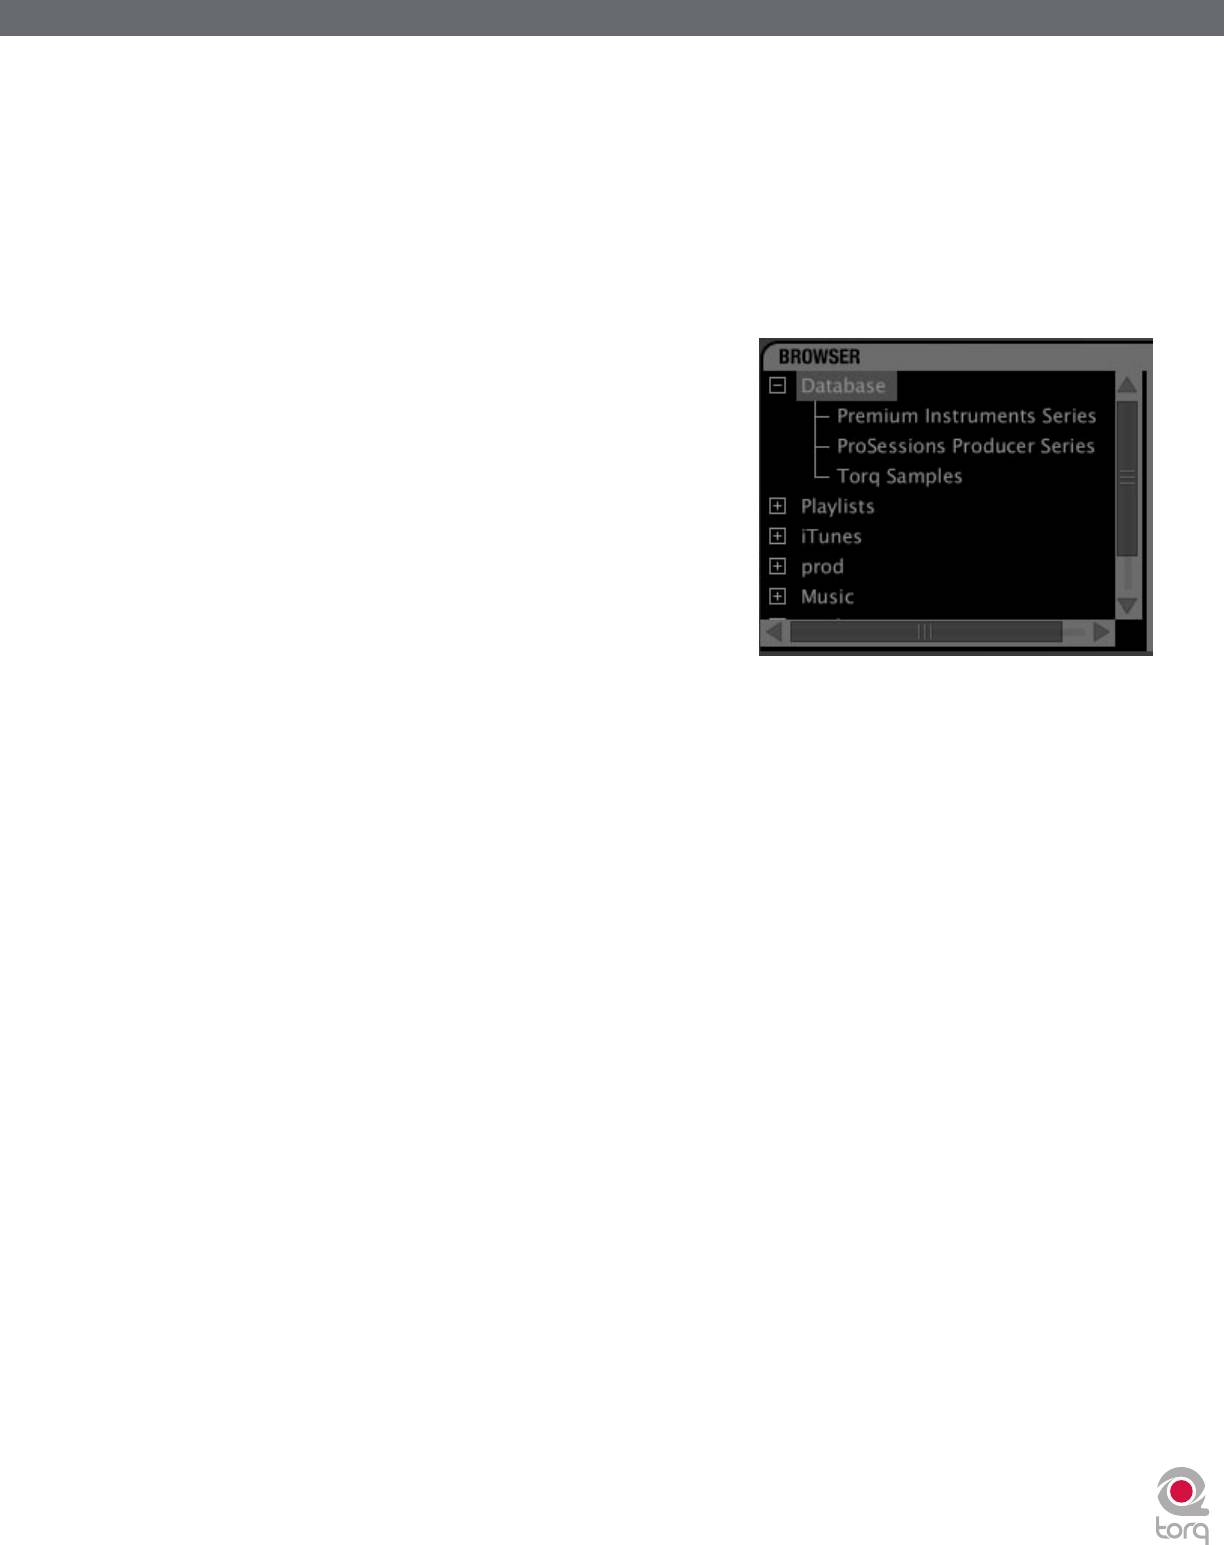
the Browser window. If you would like to confine your search to only a particular folder within the Database:
1. Click the (+) in front of the Database heading. The list will expand to show all of the folders contained in
the Database.
2. Click on one of the folders. The File List will be updated to only show the songs contained in that specific
folder.
< Removing Folders from Database
There are two ways to remove folders from the Database. You can either search through the folders currently
listed within the Database and remove them, or you can locate the original folders on your hard drives to
remove them.
To remove folders directly from the Database:
1. Click the plus sign next to the Database. This will drop down a list of all folders assigned to the Database.
2. When you have found the folder you want to delete, right-click it.
3. Choose “Remove from database” from the pop-up menu. The folder will then be removed from the
Database while the original audio files will still remain on your hard drives.
To remove folders from the Browser:
1. Use the Browser to locate the original folder on your computer.
2. Right-click the folder to display the pop-up menu.
3. Click “Remove from Database” to remove this folder only. If the folder contains sub-folders that are part
of the Database, they will remain in the Database.
4. Click “Remove from Database Recursively” to remove this folder, along with all of its sub-folders, from the
Database.

Torq 1.5 User Guide Chapter 1
Torq 1.5 User Guide Chapter 9
52
52
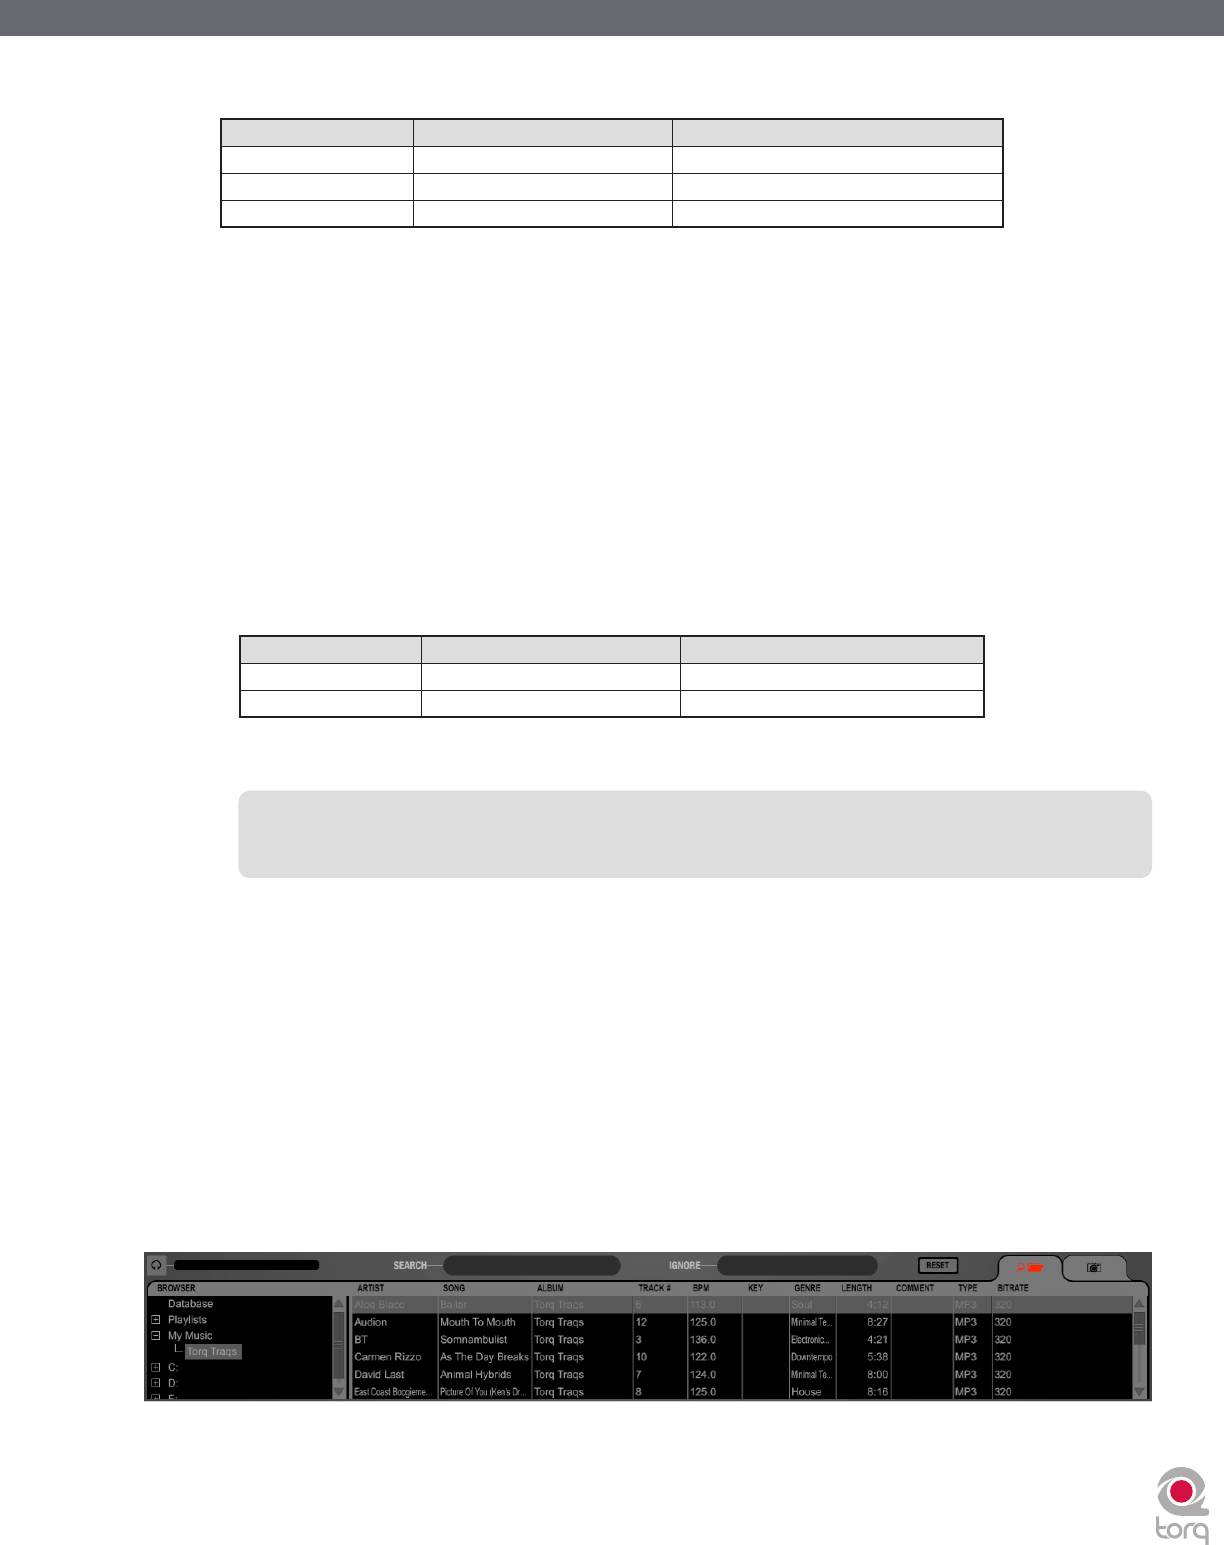
File List
The window to the right of the Browser pane is called the File List. If you have selected a source in the Browser that contains
music (such as the Database or an individual folder), the songs contained therein will be listed here. The File List not only shows
you the name of the song, but also shows the artist name, album name, track number, genre, and other fields contained within
the song’s ID3 tag. These additional categories can help you find song with greater efficiency.
✓ Note: While ID3 tags will support storage of the information listed above, it is common to find music files with some (if not all)
of the ID3 fields blank. Even if the music file does not contain information for all categories, you are still able to fill in the missing
info by hand in order to aid in searching through your files.
Editing Fields
Torq will extract the relevant song information from the file’s ID3 tag in order to populate the fields of the File List as
described above. You are free to edit the information shown in the File List simply by double-clicking a field, typing in new
data and hitting Enter.
It is important to note that Torq does not update the song’s ID3 tag with your edits. Instead, your edited fields are
stored in a special file with the same name as the song, but with the extension “.tqd” at the end. This is the Torq Data
file. By saving your edits to the TQD file, Torq can save your changes much faster (changing an ID3 tag requires re-writing
the entire audio file, something that could affect system performance during live use). Additionally, the audio file could
become corrupted during the re-write process. So, Torq leaves your precious music files untouched by saving data to the
TQD file.
Loading Songs into the Decks
To load a song from the File List into one of Torq’s Decks, you have a couple options.
< Click and Drag
1. Click and hold on the desired song in the File List. It will become highlighted.
2. While continuing to hold the mouse button, drag the song up into either of Torq’s Decks.
3. Once the song is over your desired Deck, release the mouse button and the track will be loaded into
the Deck.
✓ Note: You can also drag the song onto the Scrolling Waveforms. Dragging the track onto the top waveform will
load it into Deck A at the left. Dropping the track on the lower waveform will load it into Deck B at the right.
< Function Keys
1. Click on the desired song in the File List. It will become highlighted.
2. Press F1 to load the song onto Deck A or press F2 to load the song onto Deck B.
✓ Note: If using a Mac laptop computer, you may need to hold the Fn key while pressing the function keys in
order for these features to work.
Unloading Songs from the Decks
If you wish to unload a song from a Deck, hold Shift while pressing F1 (for Deck A) or F2 (for Deck B).
Torq 1.5 User Guide Chapter 1
Torq 1.5 User Guide Chapter 9
53
53
Sorting the List
There are fourteen categories that can be displayed across the top of the File List window: Artist, Song, Album, Track #
(Track Number), BPM (Beats Per Minute), Key, Genre, Length, Comment, File Type, Bitrate, Label, Year and Filename.
These categories are taken from the ID3 tags of your music files or, in the case of song length and BPM, calculated as part
of Torq’s file analysis. An ID3 tag is a standard format for storing additional information within a music file.
You can resize the width of any of these columns simply by clicking and dragging left and right on any of the vertical lines
separating the columns. Additionally, you can re-order the arrangement of the columns by clicking and dragging the
column name to a new position (the column name will turn white while doing this). If you wish, you can also hide certain
columns from view by right-clicking on a category name and choosing which items to display from the pop-up menu.
You can sort the contents of the File List by clicking on any one of the categories at the top of the window. For example,
if you click the “Album” category, the File List will be sorted alphabetically (A to Z) by Album name. If you click “Album”
again, the order will be reversed (Z to A). You could also click on the BPM column to sort all your songs by their BPM.
This can be very useful when looking for songs of a similar BPM.
Click the Reset button to return to the default sort order.
✓ Note: The Filename column is available in the event that the music you’re trying to use does not contain an ID3 tag (such
as AIFF and WAV formats) or does not have the proper text filled in. Here, the actual name of the file (as it exists on your
hard drive) will be shown.
Searching the List
The simplest method for searching is to type a keyword (or keywords) into the Search field above the Database/Browser:
1. Click the Database heading in the Browser pane to select it.
2. Click in the Search field and type in your search term(s). Terms can include an artist’s name, a song title,
BPM, etc.
3. As soon as you start typing, Torq will begin searching the Database for the letters you have typed. There is no
need to hit the Enter key on your keyboard.
4. When you stop typing, you’ll have a list of all files that contain the search term in one of its fields.
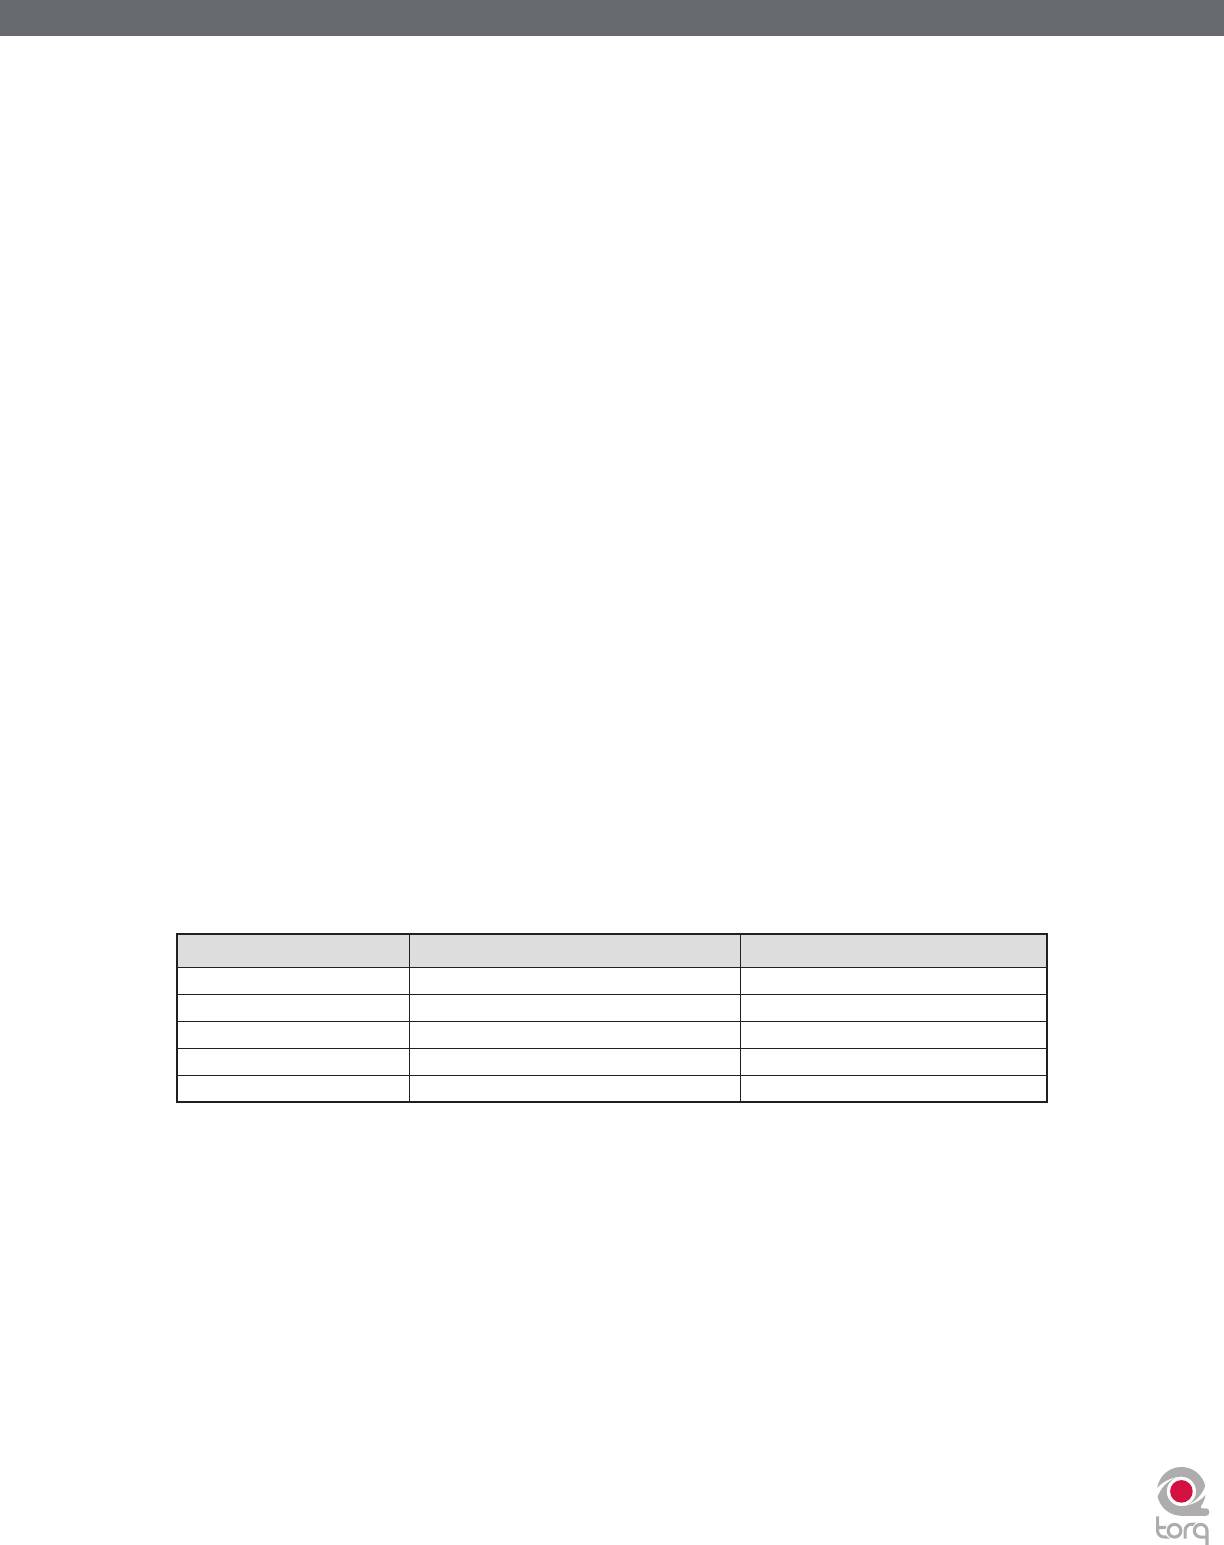
For example, if you type the word “love” into the search field, Torq could return the following results:
Artist
4
Song Album
Deee-Lite Power of Love World Clique
Jennifer Love Hewitt Can’t Stand in the Way of Love Let’s Go Bang
Love and Rockets Angels and Devils Express
Madonna I’d Rather Be Your Lover Bedtime Stories
Sade Flow Lover’s Rock
< Search Categories
As you can see, the above search worked—it found songs that contained the word “love” in any category.
However, this may not be quite what you were looking for. You may have actually wanted files with “love” in the
song’s name only. To search for such titles, you’ll need to confine the scope of the search to the Song category
only.
To confine a search to a particular category:
1. Hold down the SHIFT key and click a category name. The category name will turn red.
2. Torq will refine its search results and only show songs that contain your search term within the selected
field.
3. You can hold SHIFT and click additional categories if you wish (i.e. you can select Song and Album
simultaneously).
4. SHIFT-clicking a selected category will de-select it.
Torq 1.5 User Guide Chapter 1
Torq 1.5 User Guide Chapter 9
54
54
Using our example above, confining the search to the Song category would yield the following results:
Artist
4
Song Album
Deee-Lite Power of Love World Clique
Jennifer Love Hewitt Can’t Stand in the Way of Love Let’s Go Bang
Madonna I’d Rather Be Your Lover Bedtime Stories
Now, only the songs with “love” in their titles are shown.
< Ignore Field
Torq offers another method for refining your searches by means of the Ignore field. Here, you’ll enter terms
that you want Torq to omit from the search results. The Ignore command will only be applied to the currently
selected categories (explained above).
To omit terms from the search results:
1. Click to put a cursor in the Ignore Field.
2. Type in the term you would like to filter out of the search.
3. Torq will display only the songs that contain the information required in the Search field while omitting the
songs that fit the criteria of the Ignore field.
Again, using the example above, entering the term “Lover” into the Ignore field will return the following list:
Artist
4
Song Album
Deee-Lite Power of Love World Clique
Jennifer Love Hewitt Can’t Stand in the Way of Love Let’s Go Bang
You’ll see that, as a result, “I’d Rather Be Your Lover” has been removed from the list.
4
Note: Reference to artists and bands is for informational purposes only and does not imply an endorsement
or sponsorship of Torq by such artists or bands.
< Reset Button
When you are done with your search and are ready to begin a new one, press the Reset button. This will clear
the Search and Ignore fields as well as deselect any categories that had been previously selected.
Playlists
While many DJs will perform “off-the-cuff” without any previous rehearsal or forethought, other DJs will “pre-program”
their sets, either due to the complexity of the set or simply as a method for remembering vital songs (this can be helpful
for wedding or party DJs who take requests).
Torq features Playlists to help you organize and store lists of songs. You can create and manage multiple Playlists, each
with as many songs as you like. Each Playlist can then be edited by adding or deleting tracks, or by rearranging their order
within the Playlist.

Torq 1.5 User Guide Chapter 1
Torq 1.5 User Guide Chapter 9
55
55
< Creating New Playlists
To start, you must create a new Playlist as follows:
1. Right-click (CTRL-click on Mac) on the Playlists heading in the Browser and choose “New Playlist” from the
pop-up menu.
2. A new Playlist titled “Empty Playlist” will appear below the Playlist heading (click the plus sign in front of
Playlists in order to see this list).
✓ Note: If there is already an “Empty Playlist” in the list, a number will be appended to the name to
differentiate it from the other(s), i.e. “Empty Playlist 1.”
< Rename Playlist
1. Right-click (CTRL-click on Mac) on your desired Playlist and choose “Rename Playlist” from the
pop-up menu.
2. Type in the new name you would like to give the Playlist and hit the Enter key on your computer keyboard.
3. The Playlist will display its new name.
< Deleting a Playlist
1. Right-click (CTRL-click on Mac) on the Playlist and choose “Delete Playlist” from the pop-up menu.
2. The Playlist will be removed from the list in Torq. It will still be on your computer, however, stored in the
“Deleted Playlists” folder. These Playlists will be kept for up to 30 days, then permanently deleted.
< Duplicating a Playlist
If you like a particular Playlist and would like to build a new one based upon it, you can duplicate (or copy) it for
future modification.
1. Right-click (CTRL-click on Mac) the Playlist you would like to duplicate and choose “Duplicate Playlist”
from the pop-up menu.
2. A duplicate of the selected playlist will be created and displayed underneath it.
3. A number will be added to the name of the Playlist to differentiate it from the original. Of course, you can
rename this Playlist using the method described above.
< Adding Songs to a Playlist
Once you have created and selected a Playlist, you’ll begin adding files to it using the following procedure:
1. Using the Browser or Database, locate the song (or songs) you’d like to add to the Playlist.
2. Right-click (CTRL-click on Mac) the song name(s) and select “Add to Playlist” from the pop-up menu.
3. The song(s) will be added to the bottom of the Playlist.
< Removing Songs from a Playlist
You can remove songs from a Playlist as follows:
1. Right-click (CTRL-click on Mac) the song in the Playlist you wish to delete.
2. Select “Remove from Playlist” from the pop-up menu.
3. Torq will remove the song from the Playlist, but the song will remain in the Torq Database (it will not be
deleted from your computer).
< Reordering Songs in a Playlist
The order in which your songs are displayed in the Playlist can be changed.
1. Click and drag the song up or down in the list.
2. If you drag the song on top of another existing song, releasing the mouse button will cause the song to be
inserted above the song in the list.

Torq 1.5 User Guide Chapter 1
Torq 1.5 User Guide Chapter 9
56
56
< Activating a Playlist
When you select a Playlist, Torq runs a quick scan of your computer’s drives to ensure all the audio files
referenced by the Playlist are present on the computer. If Torq cannot locate one or more of the songs from the
Playlist (possibly because the drive containing the song is no longer connected to the computer, or the source
file has been deleted), a pop-up dialog will appear with the following message: “Cannot find one or more of the
files used in this Playlist. What would you like to do?” You will then have a choice of clicking one of the following
buttons.
» Ignore: Clicking this button will allow the Playlist to load, however all missing songs will be displayed in
red in the File List window.
» Auto-scan: Clicking this button will cause Torq to search all hard drives connected to your computer
in an attempt to find the missing file(s). If a file is found with the same name but in a different location,
another dialog box will appear with the following message: “Would you like to use this file for [name of
missing file]?”
1. By choosing “Yes,” Torq will use the file and automatically assume that the rest of the missing files will
also be in this same folder. Once found, these files will automatically be loaded. If the other missing
files are not in this location, Torq will continue searching the computer until another file is found.
2. Choosing “No” will allow the search to continue for another possible file in a different location.
3. If the search completes without finding the proper file, a dialog box will appear with the following
message: “Cannot find [name of missing file].” When you click “OK” Torq will display the file in red in
the File List, indicating that the song cannot be played. If there are other files to search for, the search
process will continue.
» Manual: Clicking this button will open a standard operating system dialog box that will allow you to manually
search for the audio file on your hard drive(s). Although you are searching for a specific missing file, it is
possible to select any audio file to be used in its place. If you choose a file that is different than the missing file
shown in the File List, the ID3 tag info for the new file will be shown (in the Playlist) in place of the original
song.
< Saving a Playlist
All playlists created using Torq are automatically saved to your local harddrive. These playlists can be opened by
any application that supports the .m3u playlist format.
5
• Torq playlist location, Windows XP
:
C:\Documents and Settings\[username]\Application Data\M-Audio\Torq\Playlists
5
• Torq playlist location, Windows Vista
:
C:\Users\[username]\AppData\Roaming\M-Audio\Torq\Playlists
• Torq playlist location, Mac:
~/Library/Application Support/M-Audio/Torq/Playlists
5
On Windows Vista and Windows XP systems, the playlists are located within hidden folders. You
will need to change your Folder Options > View settings to make these hidden folders visible before
you can access the playlist files.
Windows XP: From “My Computer” click on the Tools menu, select Folder Options, click
on the “View” tab and then select “Show hidden files and folders” from the list of options.
Windows Vista: From the Windows Control Panel, select Appearance and Personalization,
Folder Options, click on the “View” tab and then select “Show hidden files and folders.”
Torq 1.5 User Guide Chapter 1
Torq 1.5 User Guide Chapter 9
57
57
< Loading a Playlist
Torq can import Playlists created by other programs if they conform to the .m3u file format. To load one of
these Playlists:
1. Right-click (CTRL-click on Mac) the Playlist’s heading in the Browser pane.
2. Select “Load Playlist” from the pop-up menu.
3. A standard dialog box will open, allowing you to locate and select a Playlist.
4. Once selected, the Playlist will be imported into Torq and Torq will begin checking for the necessary files
(explained above).
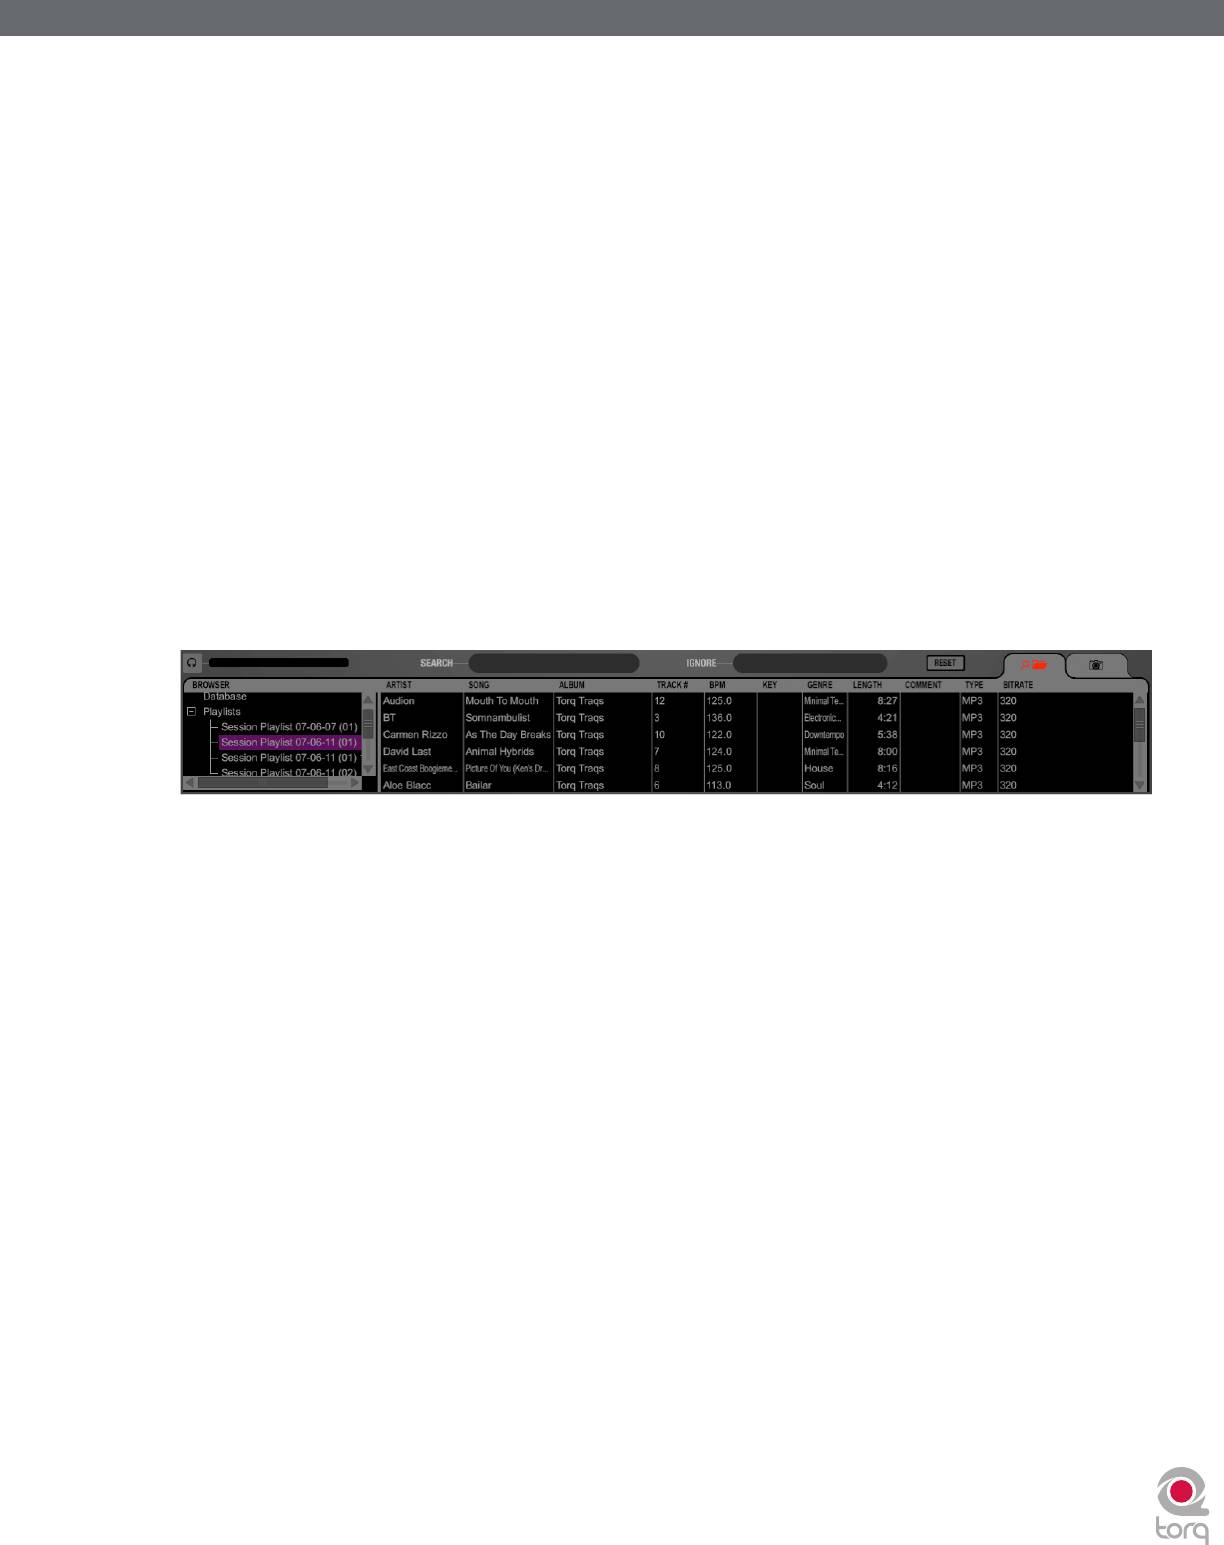
Session Playlist
The Session Playlist is an automatic Playlist that keeps track of every song you’ve played since you launched Torq. This is
handy when you need to see if you’ve played a song already, or if you need to reference a list of what you played at a
previous gig.
An empty Session Playlist is created each time you launch Torq. It is named “Session Playlist YY-MM-DD” where YY-MM-
DD represents the year, month, and day of the Playlist, respectively. Each song you load into a Deck will automatically be
added to the bottom of the Session Playlist.
✓ Note: If a Playlist already exists with the current date, a number will be appended to differentiate it.
✓ Note: Torq will only store Session Playlists for the last 30 days. Any Session Playlists that are older than 30 days will be
automatically deleted in order to keep your hard drive from becoming overpopulated with Playlists.
< Rename the Session Playlist
If you find that you’d like to permanently keep a Session Playlist, all you have to do is rename it. Once renamed,
the Playlist will be moved from the pool of Session Playlists and be kept with your normal Playlists. To do this:
1. Right-click (CTRL-click on Mac) on the Session Playlist and choose “Rename” from the pop-up menu.
2. Type in a new name for the Playlist and press Enter.
3. The Playlist will be saved. If you renamed the current Session Playlist, a new Session Playlist will be created
that will track all songs played from that point onward.
< Deleting Session Playlists
You can delete the Session Playlists using the same method for deleting standard Playlists. If you delete the
current Session Playlist, a new one will be created that will track all songs played from that point forward.
Torq 1.5 User Guide Chapter 1
Torq 1.5 User Guide Chapter 9
58
58
iTunes
iTunes is a free media player available from Apple for both Mac and Windows computers (www.itunes.com). It provides
an excellent way to download, organize, and rip music as well as interfacing with Apple’s famous portable media player,
the iPod.
Torq can interface with iTunes, providing you instant access to your entire collection of music and playlists without having
to manually add folders to the Database. Furthermore, any updates or changes that you make to your iTunes Library or
Playlists will automatically be reflected in Torq.
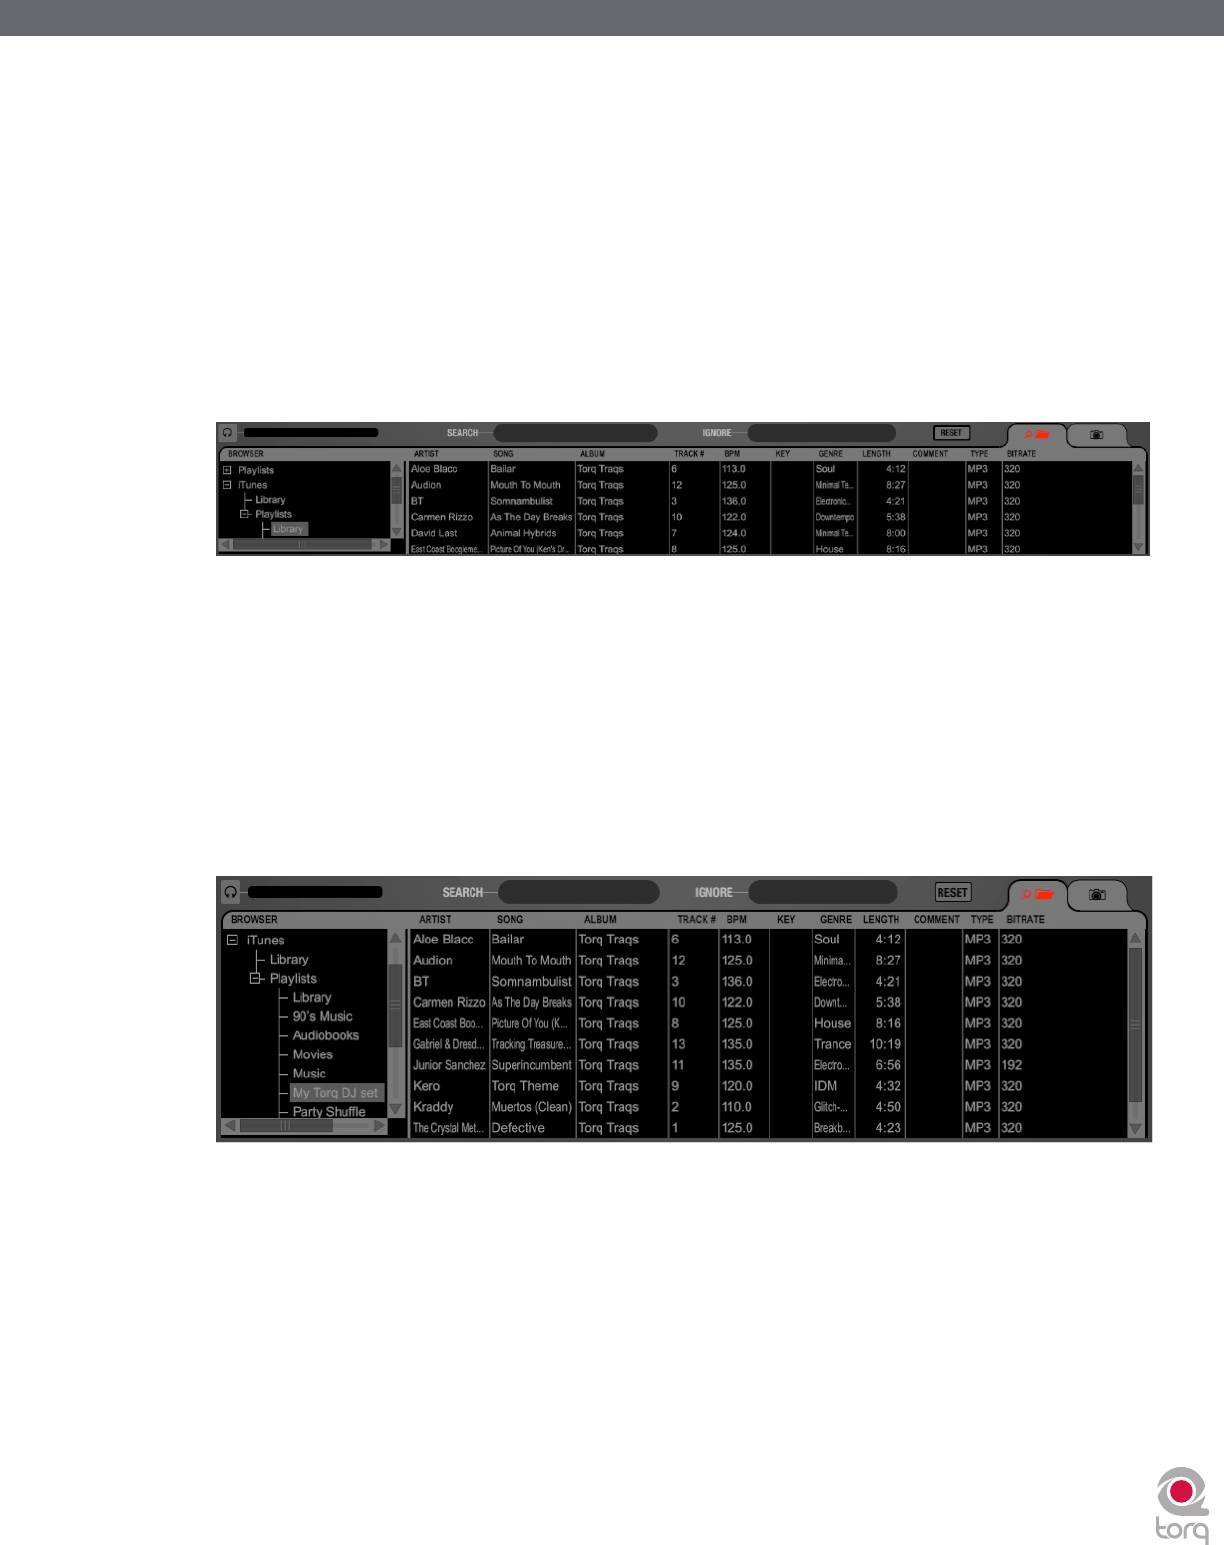
< Library
The iTunes Library is the entire collection of music and videos currently managed by iTunes. You can browse and
search the iTunes Library by clicking the plus sign in front of the iTunes heading in the Browser, then clicking the
Library heading. The contents of the Library will be shown in the File List.
✓ Note: If you have an especially large iTunes Library, it may take a moment for Torq to read the entire contents of
the Library the first time you select it in a Torq session.
Once you’ve clicked the Library heading, you can search and sort the Library contents in the same manner as the
Database (described earlier).
< Playlists
iTunes also supports the creation and editing of playlists, but they are a different format from the .m3u format
used by Torq. Not to worry—Torq can still access these playlists through the iTunes heading in the Browser.
Simply click the plus sign in front of Playlists to view them. Click on an individual Playlist to see its contents in the
File List.
< Searching iTunes with the Database
Torq can also automatically add the contents of the iTunes Library to the Database. That way, when you click the
Database heading in the Browser, you’ll get the files from all folders assigned to the Database as well as all files
within the iTunes Library. To enable this feature:
1. Open the Preferences.
2. Click the Misc tab.
3. Next to “Search iTunes Library with Database,” select “Yes.”
4. Close the Preferences.
5. Torq will now include the contents of the iTunes Library when you click the Database heading.
Torq 1.5 User Guide Chapter 1
Torq 1.5 User Guide Chapter 9
59
59
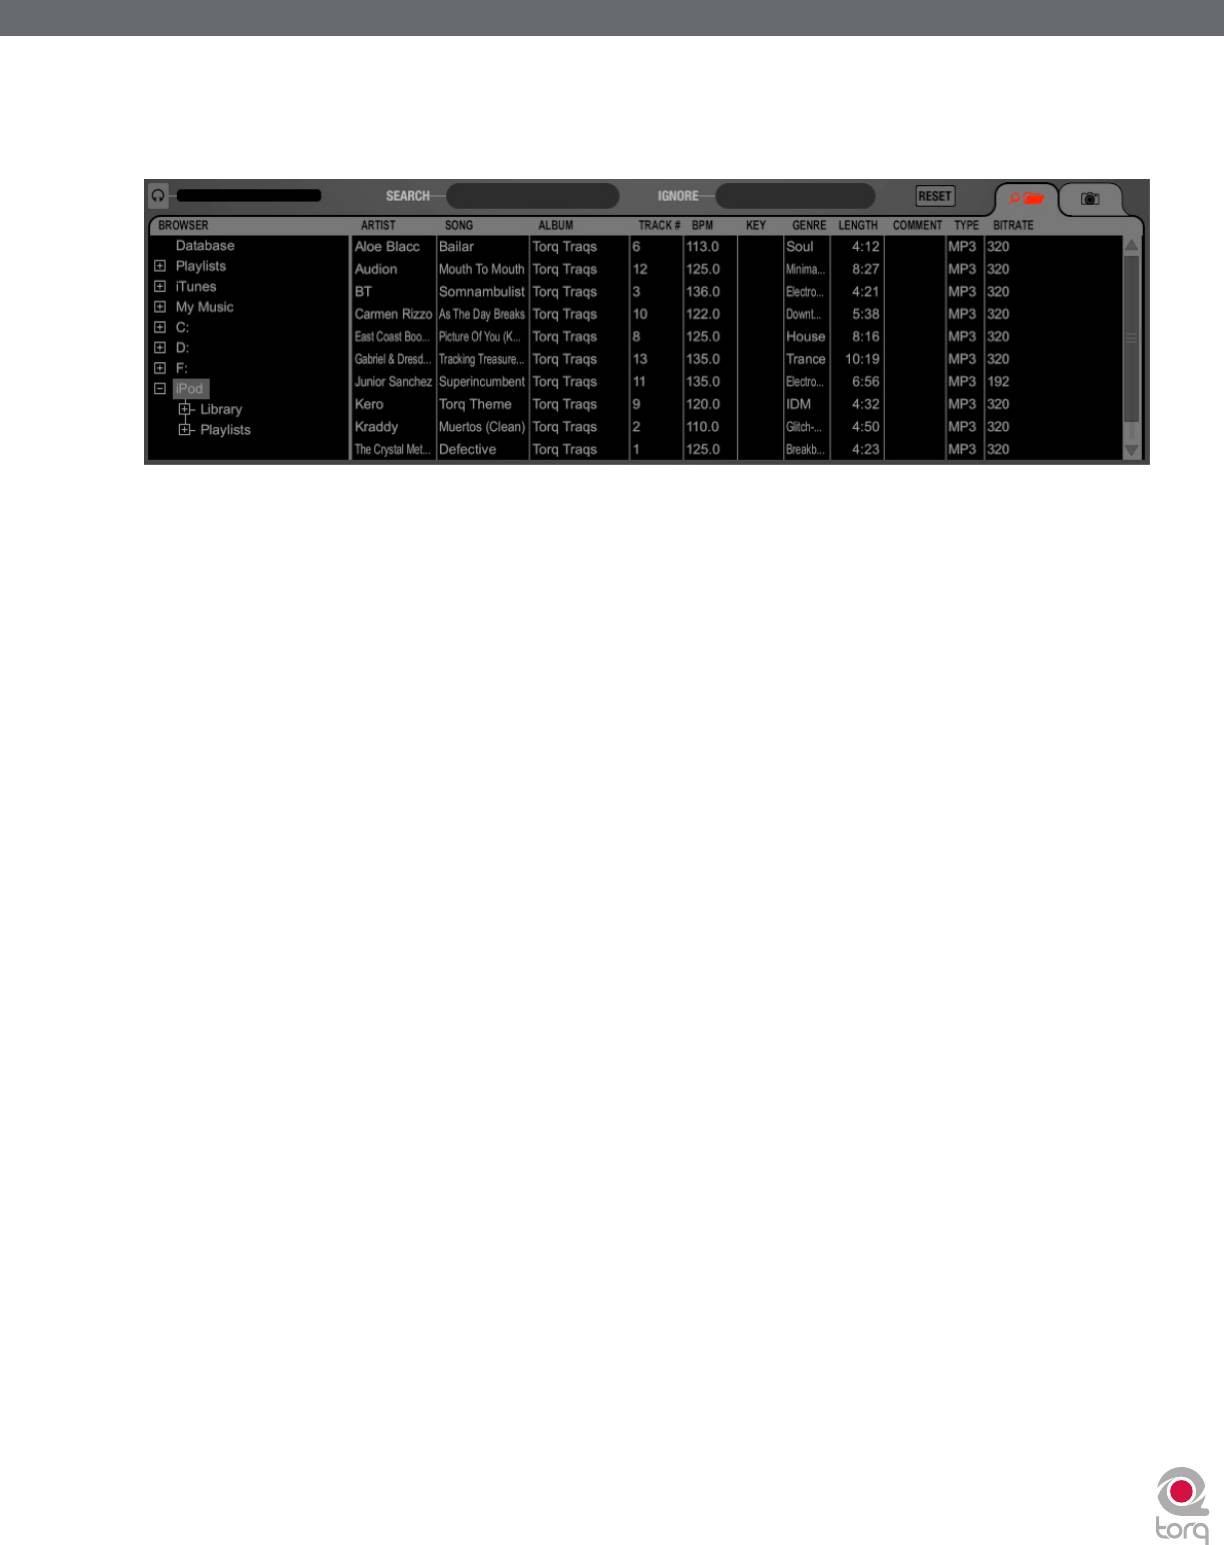
iPods
Torq also allows direct access to the contents of any connected iPod (excluding the iPod Shuffle, iPod touch, and iPhone
models). When an iPod is connected, it will be listed in the Browser window.
Like the iTunes Library above, the contents of the iPod can be searched using the Library or Playlist headings. You can
also include the contents of the iPod in the Database by doing the following:
1. Open the Preferences.
2. Click on the Misc tab.
3. Next to “Search iPod With Database,” select “Yes.”
4. Close the Preferences.
5. Torq will now include the songs from the iPod the next time you click the Database heading.
✓ Note: If using an iPod with a large collection of audio files, it may take Torq a moment to download the entire music
list the first time you try to access it during a Torq session.
Also keep in mind that Torq streams the music directly off the iPod. You cannot disconnect the iPod until you are done
playing any music contained on it.
Drives
Torq can also search any hard drives connected to your computer, whether they are internal hard drives or external
ones. Every drive available to the system will be listed in the Browser by name. Click the plus sign in front of the drives
to explore the contents of the drives. You can add folders from external drives to the Database using the same methods
described earlier.
Audio CDs
Torq can also play music from audio CDs inserted into your computer’s CD drives. Click on the Audio CD heading in the
Browser to choose an audio track from the CD.
Because Torq must rip the audio from the CD into a temporary file on your computer, it will take longer for the song to
be ready to play after loading it onto a Deck. This increased load time is normal.


