Electrolux NPX 6 SENSOMATIC: CHAPTER CHAPTER
CHAPTER CHAPTER: Electrolux NPX 6 SENSOMATIC

23
23
WAVEFORM DISPLAY
CHAPTER
CHAPTER
One of the most prominent features of the Torq user interface is the Scrolling
Waveform Display, which takes up a decent amount of real estate above the Mixer and
Effect Racks. Unlike the smaller Overview Waveforms found in each Deck, the Scrolling
Waveforms only show a few seconds of the current song before and after the current
play position. The song in Deck A (on the left) is shown at the top of the Scrolling
Waveform display. Deck B (on the right) is shown at the bottom of the window. While
4
1
the Now Line moves from left to right within the smaller Overview Waveform Display as
a Deck plays, the Now Line remains fixed in the Scrolling Waveform window while the
waveforms move behind it.
Information Shown on Display
So what purpose do these Scrolling Waveforms serve, other than looking really
cool? Answer: They offer you a way to visualize the alignment and synchronization
of the two Decks as well as providing some other important information:
Waveform
By looking at the audio waveform itself, you can see where the beats are in the
song. These sharp hits (transients) typically look like long, thin spikes in the
waveform. In the picture below, you can see the heavy bass drum beats of both
songs in the Scrolling Waveforms.
When the drums stop, you’ll notice that the tall spikes go away. This is how you
can tell if a breakdown or slow section of the song is approaching. By the same
token, you’ll also be able to see where the drums come back in again.
English
English
Torq 1.5 User Guide Chapter 1
Torq 1.5 User Guide Chapter 4
24
24
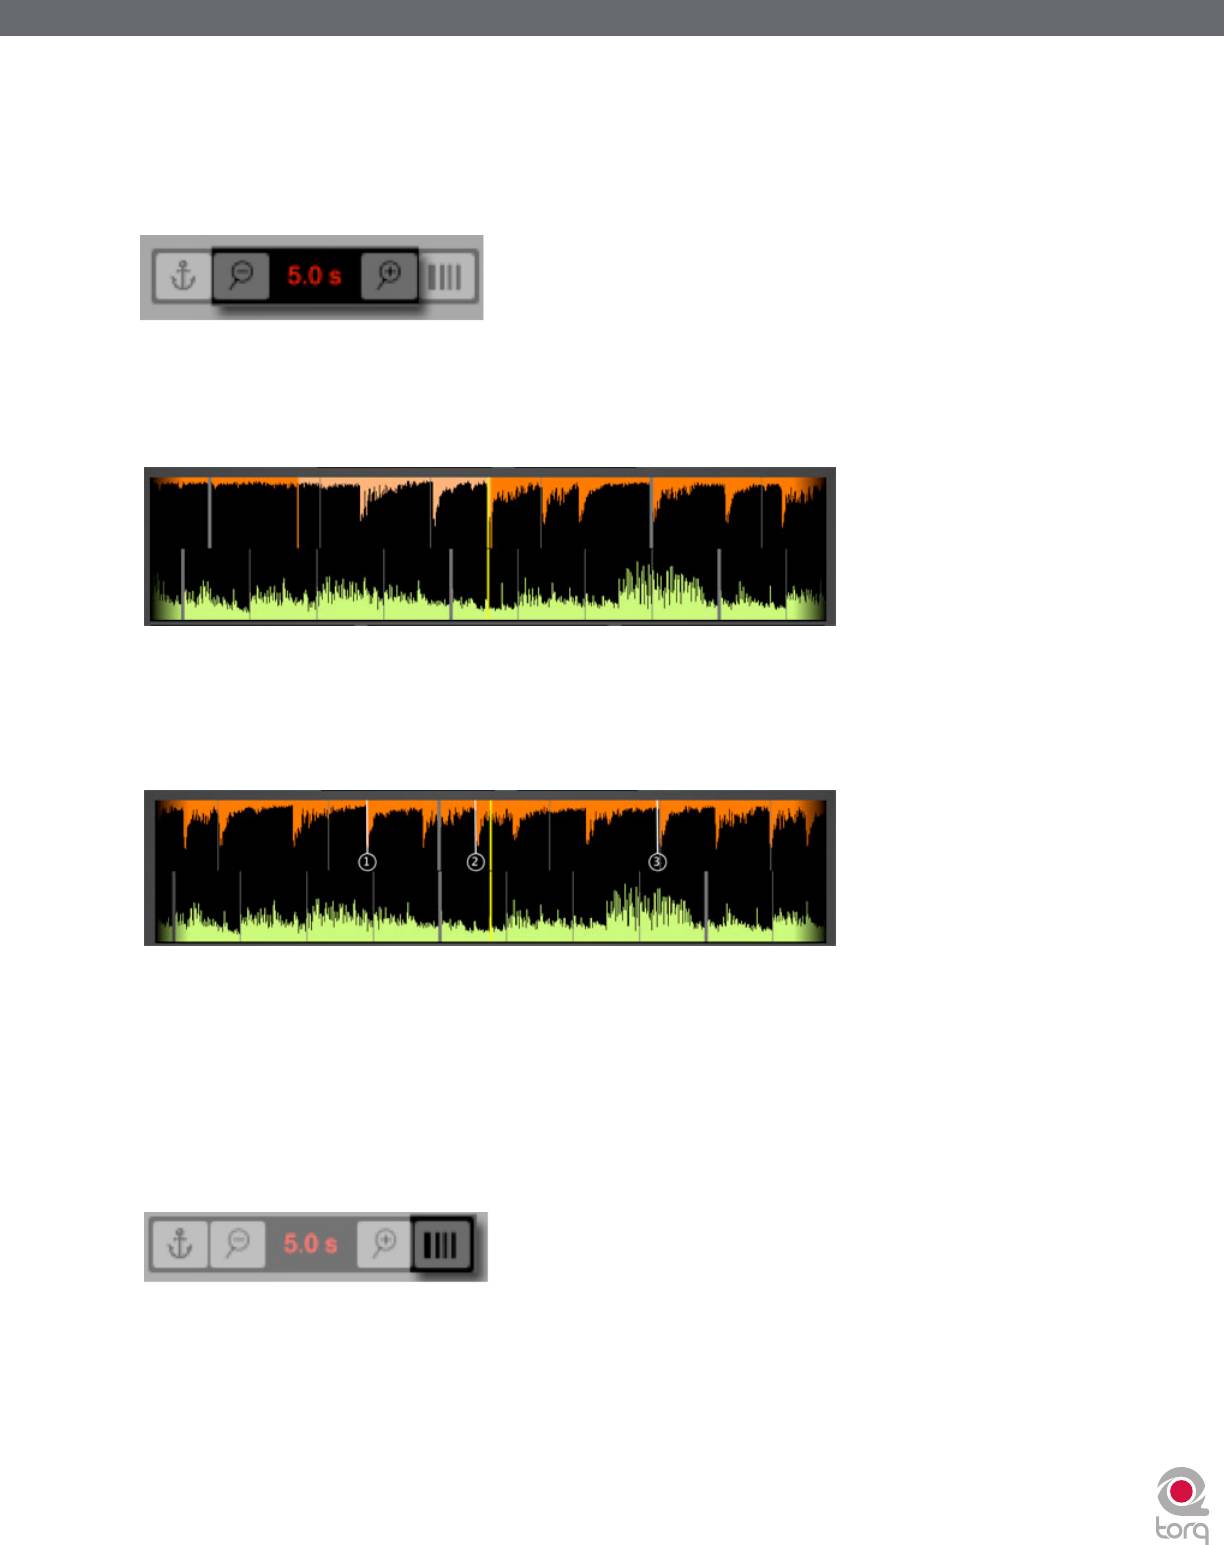
Zoom
At times, you may find yourself wanting to “zoom in” to the Scrolling Waveform Display to match beats more precisely
or to “zoom out” in order to see more of each track. Use the magnifying glass icons directly above the display to do this.
The magnifying glass button on the left zooms out while the button on the right zooms in. The total amount of time (in
seconds) from the left edge to the right edge of the Scrolling Waveform Display is listed between the two buttons.
Loop Points
The Loop Points of the song (set with the Loop In/Out buttons or the QuickCue buttons) will be shown on the
Waveform. The looped area of the music will appear in a lighter shade compared to the rest of the waveform.
Cue Points
If you’ve used the Cue button or QuickCue buttons to place various Cue Markers in the song, you will see them here.
The QuickCue markers have numbers attached to them (corresponding to the assigned QuickCue button) and the
standard Cue Point appears as an orange line.
Phase Grid
Torq superimposes a Phase Grid over the Scrolling Waveforms to indicate the location of the beats in a song. The thicker
lines in the Phase Grid indicate the locations of the downbeats in the music. Torq will attempt to position the Phase Grid
in the proper location as part of the analysis when loading a song into a Deck. Torq uses the position of the Phase Grid to
properly synchronize the song.
If you would like to turn the Phase Grid lines off, click the “Hide Phase Grid” button located above the waveform display
(next to the zoom controls).
Torq 1.5 User Guide Chapter 1
Torq 1.5 User Guide Chapter 4
25
25
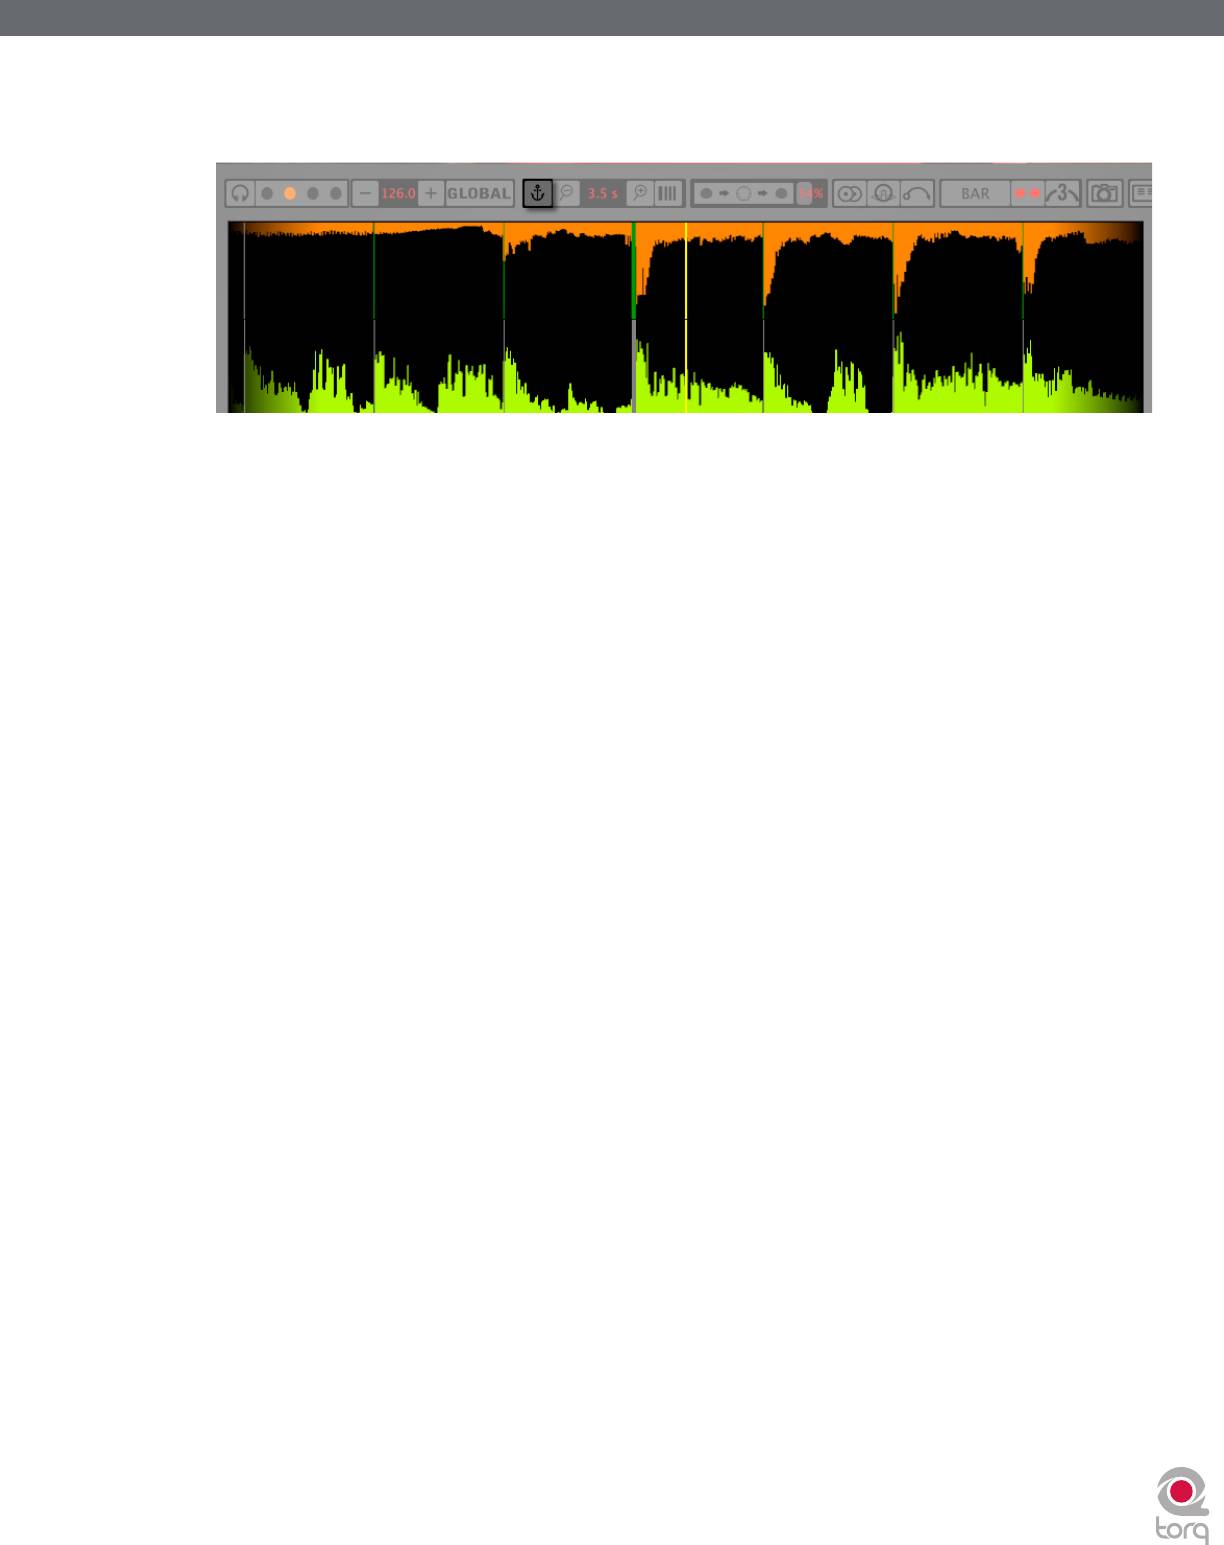
Tempo Anchors
In addition to its automatic BPM detection features, Torq provides you with another alternative for BPM matching that
becomes an indispensable tool when working with songs that include tempo changes or fluctuations (Torq’s automatic
beat detection is designed to work with songs that have a constant tempo). Using Tempo Anchors, you can manually
specify the location of beats within a song thus allowing Torq to follow the tempo of any song even if it speeds up or
slows down in the middle. Editing Tempo Anchors is a more involved process and should therefore only be used in the
event that none of the normal methods yield the proper results.
Tempo Anchors are edited within the Scrolling Waveform window and should be done at the highest zoom factor so you
can place the Anchors accurately. Furthermore, this is more of an “off-line” process—you should prepare a song with
Tempo Anchors before trying to play it to an audience. Torq will save the Tempo Anchors in the TQD file so that you will
only have to do this once for any particular song.
To properly add Tempo Anchors to a song:
1. Play the song.
2. Use the Tap Tempo feature to determine the approximate tempo while the song plays. This is very important
since this will get the Phase Grid close to the proper position leaving only minor edits for you to do later.
3. Stop the song and rewind back to the beginning.
4. Hold SHIFT and drag the Phase Grid so that the downbeat (the thicker line) is aligned with the first visible beat
of the song. This will ensure that the Phase Grid starts at the right location—you will only need to use Tempo
Anchors to fix issues where the Phase Grid drifts out of alignment.
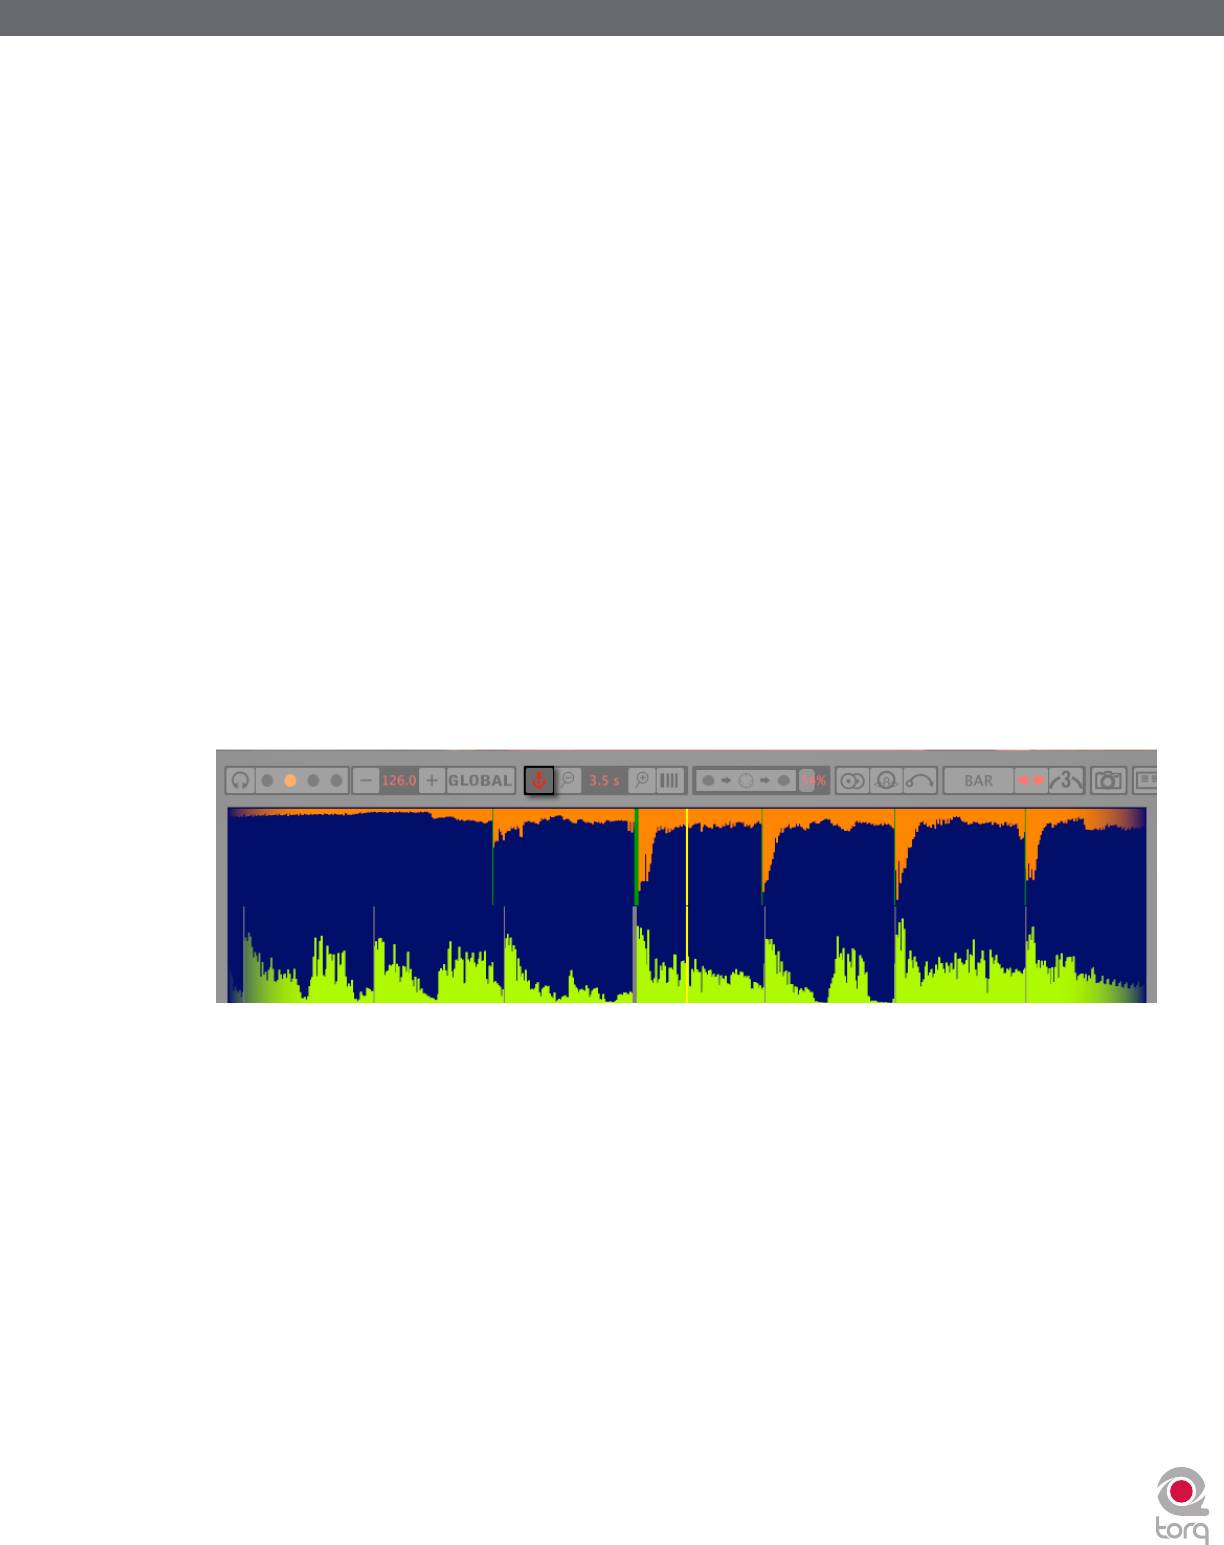
5. Click the Tempo Anchor button in the Toolbar. The background of the Scrolling Waveforms will turn blue
indicating that Anchor Edit is active.
6. Now, search through the song looking for places where the Phase Grid no longer aligns with the beats of the
music. When you find one that is out of alignment, double-click it. The line will change from grey to green
indicating that the grid line has been turned to a Tempo Anchor.
7. Now that the grid line has been converted to a Tempo Anchor, you can now move it left or right until it aligns
with the beat. Simply click-and-drag the Anchor to set it to a new location.
8. Repeat steps 6 and 7 until all of the tempo anomalies have been accounted for. When complete, every grid line
and Tempo Anchor should visually align with the beats in the song.
Torq 1.5 User Guide Chapter 1
Torq 1.5 User Guide Chapter 4
26
26
9. Click the Anchor icon again to exit Anchor Edit mode. The Scrolling Waveforms will revert to their original
color.
10. Now, when you play the song, it will play with a constant tempo (the tempo variations will be removed)
Some will say that editing Tempo Anchors is more of an art than a science. Indeed, there are other techniques
that can be used other than the steps listed above which will give the same results. As you edit more and more
songs, you’ll learn which techniques are best for various types of music. Here are a few other methods that can
assist with Tempo Anchors:
1. Tap Tempo Anchors. If you try using Tap Tempo when Anchor Edit is on, each tap will place a Tempo
Anchor at that location. If you’re working with a song that has lots of tempo changes (such as older music
that was not recorded to a click track) this can be very advantageous. Just tap along with the music and the
Phase Grid will be pretty close to where it needs to be. You can then manually adjust any of the Tempo
Anchors that need it.
2. Use fewer Tempo Anchors. While you could surely turn every single grid line into a Tempo Anchor, this is
usually not necessary. Often, long sections of a song will have a consistent tempo. In these cases, it’s usually
enough to place a Tempo Anchor at the beginning and another at the end of that section. All the grid lines
will distribute themselves evenly between the Tempo Anchors.
3. Fixing corrupted audio files. From time to time, you may notice that a song seems perfectly in sync then
suddenly falls out of sync. This can be due to corruptions within the audio file. Torq will skip over sections
of data that are corrupted and will continue to play the remainder of the song. Every time Torq skips over
corrupted data, it will make the Phase Grid look like it has shifted to the right. In cases like this, you can
use Tempo Anchors to adjust the tempo only where the jump occurs. Simply make two Tempo Anchors—
one right before the jump and one right after. Drag the second Anchor to the left until it is aligned with the
beat. All of the grid lines to the right of the last Anchor will shift as well so the remainder of the song will
then be in alignment (unless there is another corruption).
Torq 1.5 User Guide Chapter 1
Torq 1.5 User Guide Chapter 4
27
27
Playback Manipulations
The Waveform Display allows you to manipulate the song playback in a variety of ways using your mouse. The method of
control differs depending on the control type you have selected for the Deck (Vinyl/CDJ/Hybrid).
Vinyl Mode
With this mode selected, using the mouse on the waveform will work in a similar fashion to using your hand on a
turntable.
1. Click and hold the mouse on the waveform. Playback will stop, as if you have placed your hand on a record to
stop it.
2. Continue holding the mouse button, then drag the mouse left and right. This will scrub, or “scratch,” the song.
3. Releasing the mouse button will cause the Deck to play the song back from the current location.
Hybrid Mode
With Hybrid mode active, the waveform will respond exactly like the CDJ mode while the Deck controls (Play/Pause,
Cue, etc.) behave like Vinyl Mode.
1. Click and hold on the waveform. The music will continue to play
2. While holding on the mouse button, drag the mouse left. The playback tempo will be momentarily increased,
making the waveform scroll a little faster to the left.
3. Now hold and drag the mouse to the right. Playback will remain going forward, but the tempo will be slowed
slightly, resulting in a waveform that still scrolls right to left, but at a slower rate.
4. As soon as you stop dragging, playback will return to its original tempo even if you are still holding the
mouse button.
CDJ Mode
With this mode selected, the waveform will not be “scratched” with the mouse. Instead, mouse movements will simply
nudge the music ahead or behind by a small amount.
1. Click and hold on the waveform. The music will continue to play
2. While holding on the mouse button, drag the mouse left. The playback tempo will be momentarily increased,
making the waveform scroll a little faster to the left.
3. Now hold and drag the mouse to the right. Playback will remain going forward, but the tempo will be slowed
slightly, resulting in a waveform that still scrolls right to left, but at a slower rate.
4. As soon as you stop dragging, playback will return to its original tempo even if you are still holding the
mouse button.


