Electrolux NPX 6 SENSOMATIC: CHAPTER CHAPTER
CHAPTER CHAPTER: Electrolux NPX 6 SENSOMATIC
11
11
DECKS
CHAPTER
CHAPTER
When DJing, everything begins with the Decks.
The Decks will play the music that you’ll mix and
effect using all the tools in Torq. Traditionally, a DJ’s
decks will be turntables or CD players. Therefore,
the Decks in Torq have been designed to emulate
both turntables and CD players, as well as offering a
3
1
special hybrid mode only possible with software.
Displays
Each Deck has various informational displays
throughout the interface. These are mostly for
relaying information to you, such as which song is
playing, how long it’s been playing, and how much
time is remaining.
Song Name
At the top of the Deck is the name of the
current song. The name is taken from the song
category (seen in the File List). If there is no
song name listed in the File List, the name of
the actual file will be shown instead.
Artist Name
Below the Song Name is the Artist Name. Like
the Song Name, above, this field will be empty
if there is no entry in the Artist category of
the file.
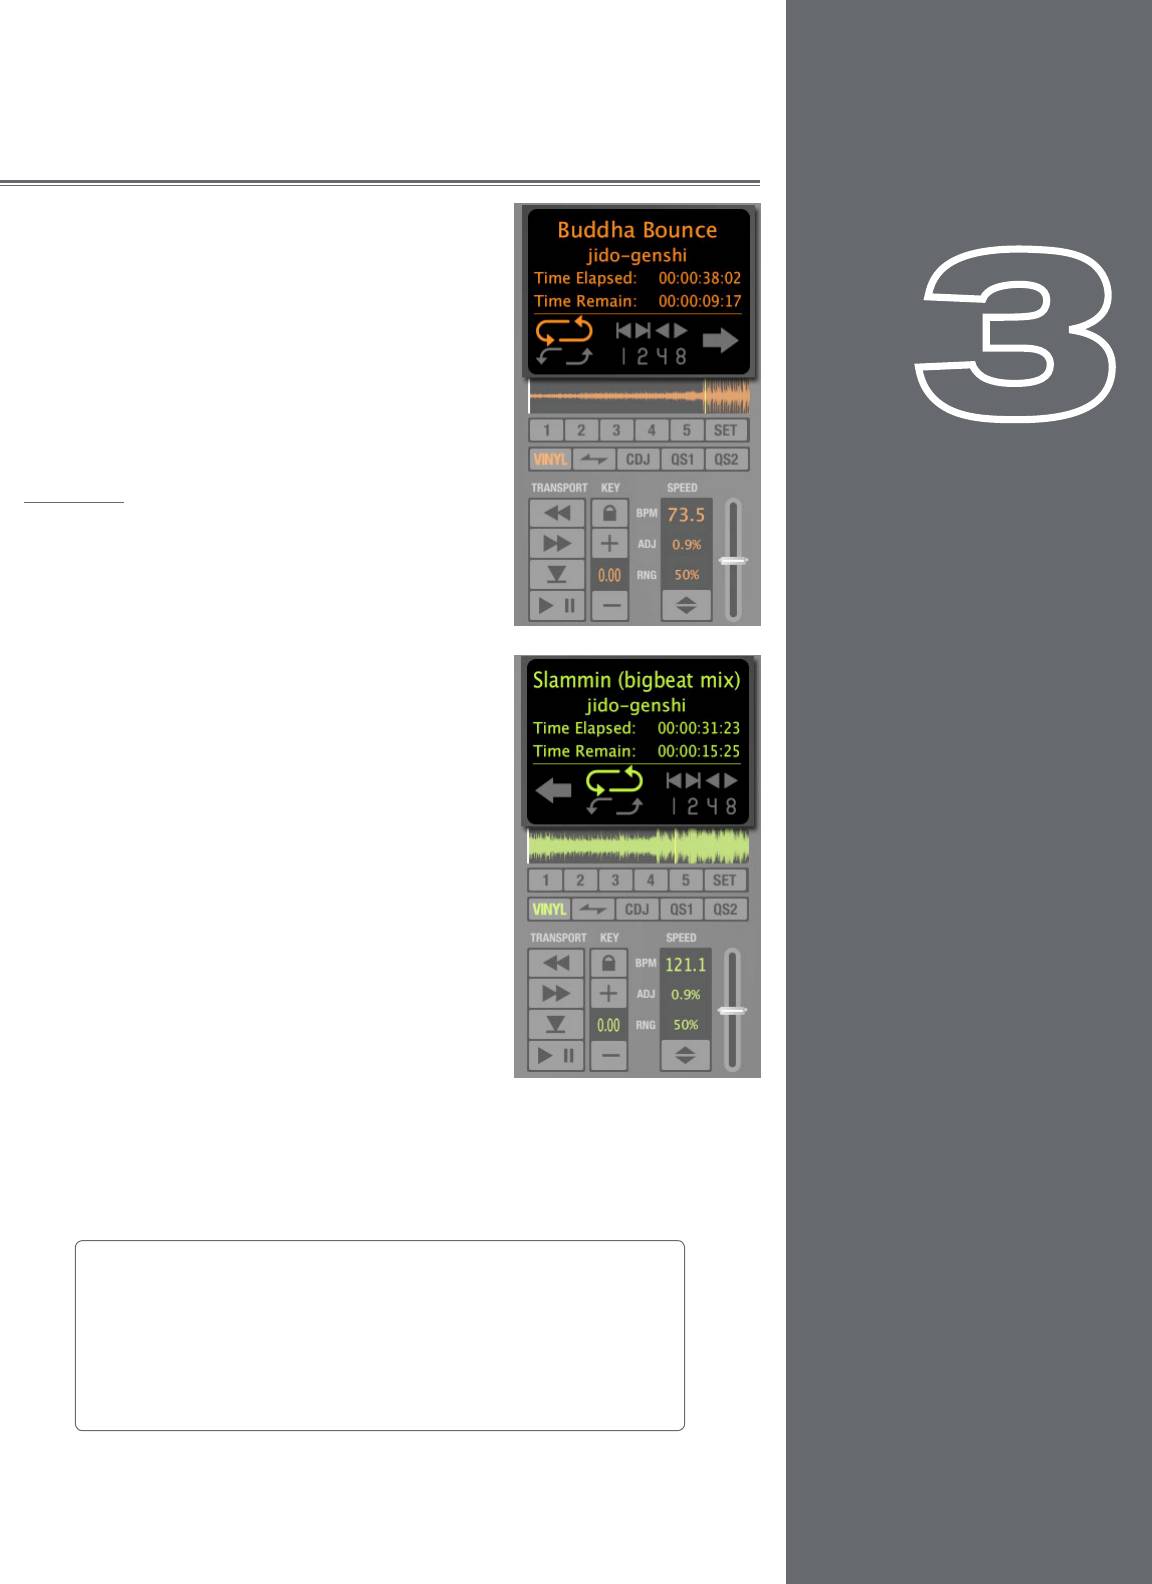
Time Elapsed
This is the current location of the song, marked by the yellow Now Line in the
Overview Waveform Display. The Time Elapsed is expressed in hours/minutes/
seconds/frames (30 fps). When the Current Position Marker is at the beginning of
the song, the Time Elapsed will be 0:0:0.0.
Instant Doubles
Using the mouse, you can click and drag the song name from one Deck to the
other. Doing this will copy the song to the other Deck and will match playback
locations and speed, thus allowing you to juggle the two songs. This function can
also be triggered using the computer keyboard or an external MIDI controller.
Please see Chapter 15 “MIDI Tab” for information on making these assignments.
English
English

Torq 1.5 User Guide Chapter 1
Torq 1.5 User Guide Chapter 3
12
12
Time Remain
This field indicates how much time is left before the song ends. At the beginning of the song, the Time Remaining will be
the same as the entire length of the song. When the Deck is playing, the Time Remaining will count down.
✓ Note: The Overview and Scrolling Waveform displays will begin to flash red when there is less than 30 seconds remaining
in the song. This is to notify you that you’d better get ready with another song to play!
Overview Waveform
Each Deck includes an Overview Waveform display which shows a miniaturized version of the song’s waveform in its
entirety. This display serves several purposes:
1. It allows you to see where the breaks and builds are in a song before they happen.
2. The yellow Now Line indicates your current location within the song.
3. White QuickCue points and green Tempo Anchors (described later) will be superimposed over this waveform.
4. You can click anywhere in this waveform and playback will jump to that location.
Controls
As mentioned before, the purpose of the Deck is to play a music file, similar to how iTunes
or WinAmp plays files on your computer. However, in the scope of DJing, things don’t stop
there. A DJ needs to be able to control the playback of the music with greater detail, such
as changing the speed and/or key of the song, looping sections of audio, and jumping to
other locations within the song. This allows the DJ to match tempos of various songs during
a mix, or to re-arrange the song (in essence, creating a live remix of the song). The Torq
Decks accomplish these tasks using the controls described below.
Play/Pause
Songs are played and stopped by clicking the Play/Pause button. Simply load a song
into the Deck and press Play/Pause to start it. Press Play/Pause again to pause
the music.
✓ Note: When you pause the music, the song will not return to the beginning—it
will stay in the same location as when you stopped it. If you want to return to the
beginning, use the Seek controls described below.
Seek
The Seek buttons are used to skip forward or backward through the song, allowing you to find certain points (or beats)
within the song from which you can start playing.
1. If you click briefly on the Forward or Backward buttons, the music will jump only slightly in that direction.
2. If you click and hold one of these buttons, Torq will scroll through the song, going faster and faster as long as you
hold the button. Scrolling will stop when you release the button.
3. To jump to either the beginning or end of the song, hold the Shift key while clicking Seek buttons.
Torq 1.5 User Guide Chapter 1
Torq 1.5 User Guide Chapter 3
13
13
Cue
The Cue button will establish a primary Cue Point within a song. A Cue Point is a reference position within the track
that you can jump to instantly, rather than having to seek through the track to find it. Typically, a DJ will set the Cue
Point where the beat begins in a song. It is visible (in orange) within the Waveform Display. The Cue button abides by the
following rules:
1. If a song is playing, pressing the Cue button will make the song jump to the Cue Point and will pause there.
2. If Cue is pressed and held again, the music will begin playing from the Cue Point. The music will stop playing
when the Cue button is released and the song will jump back to the Cue Point.
3. If a song is paused in a location different from the Cue Point, pressing the Cue button will set the Cue Point to
the current location.
4. If you hold SHIFT and press Cue, a Cue Point will be placed at the current location, even if the song is already
playing.
5. If you hold Cue and press the Play/Pause button, the music will continue to play after you release both buttons.
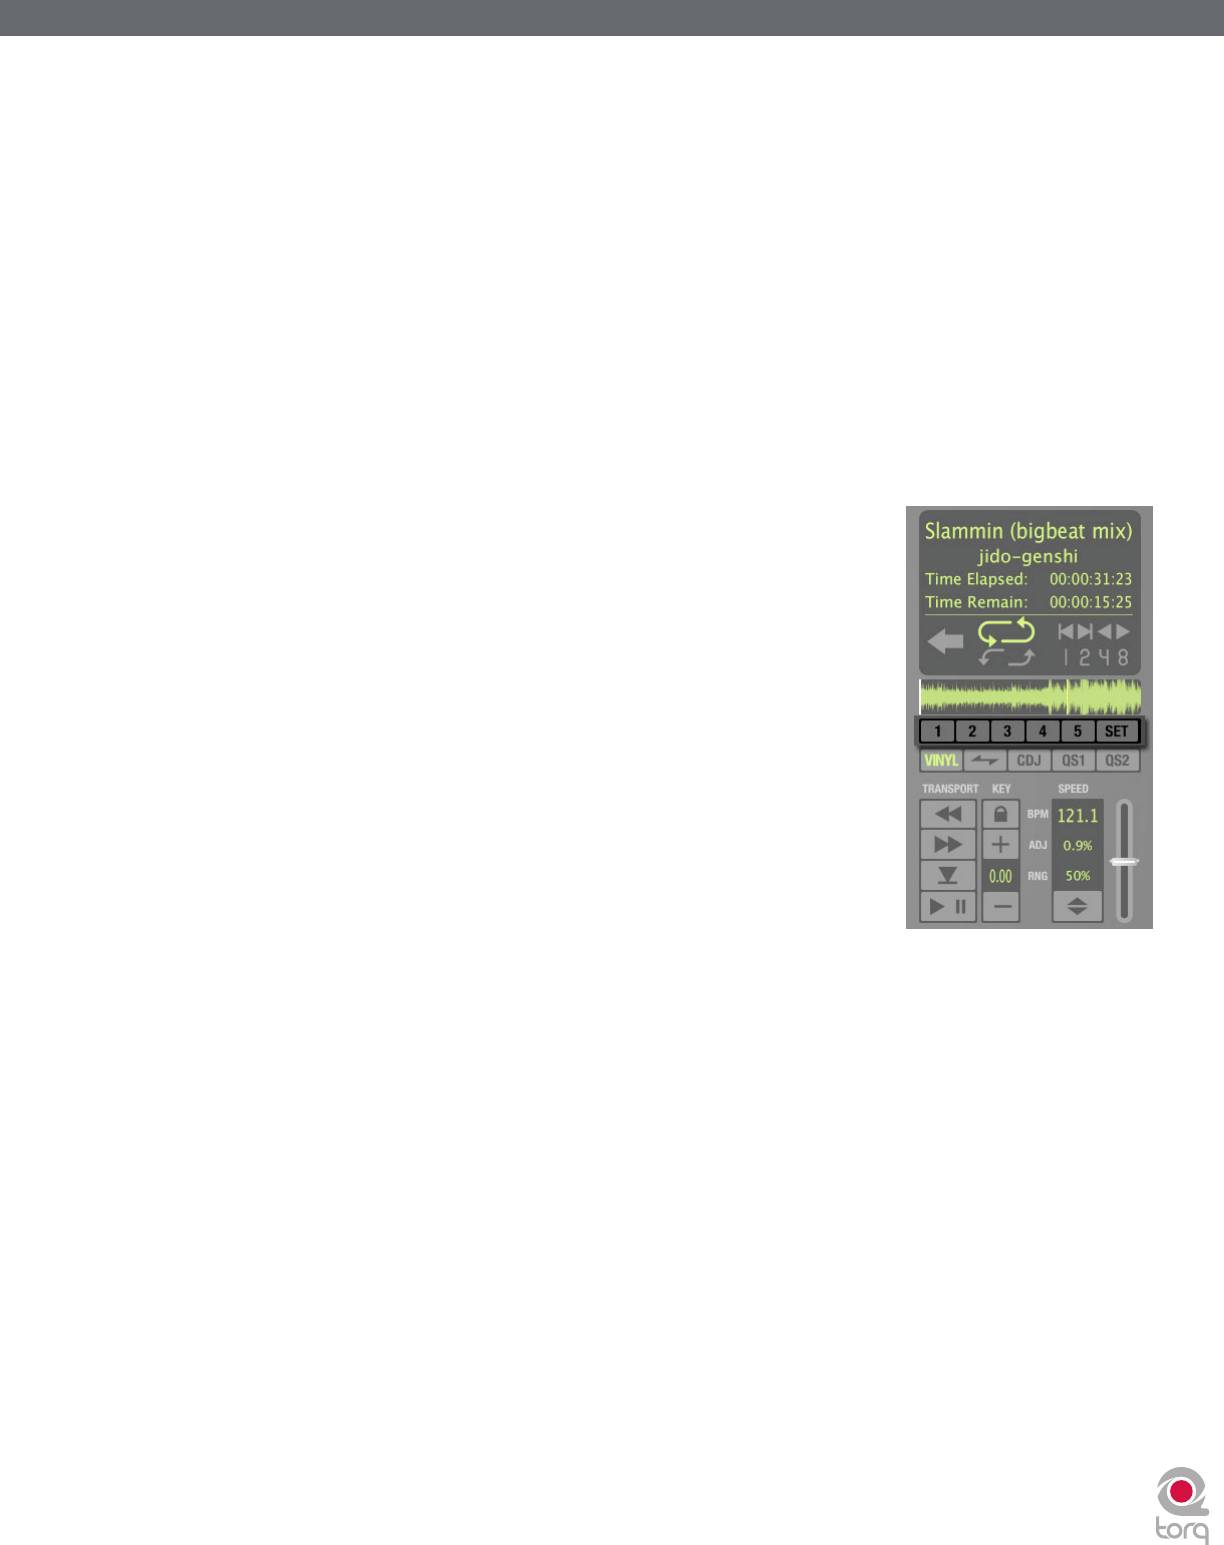
QuickCue
In addition to the primary Cue Point described above, Torq allows you to set up to
five QuickCue Points in a song that are assigned to the QuickCue buttons below the
Overview Waveform display. These buttons can then be used to quickly jump between
the various QuickCue points. Torq will save the locations of the five QuickCue points
with each song so they will be available the next time you play the song.
< Setting QuickCues
There are a few different ways to set QuickCue Points, but all methods
deliver the same results.
1. Click the Set button, then click one of the QuickCue buttons. A
QuickCue Point will be set at the current location (this can be done
while the Deck is playing or paused). When added, the QuickCue will
be visible in the Overview Waveform display.
2. Hold the Shift key while clicking one of the QuickCue buttons. Again,
the QuickCue Point will be set to the Now Line, whether the Deck
is playing or not. When added, the QuickCue will be visible in the
Overview Waveform display.
✓ Note: If Quantize is turned on in Torq’s Toolbar, new QuickCue points will be aligned to the nearest 16th-note in
a song.
✓ Note: If you try to assign a QuickCue to a button that is already set to a particular location, the old
QuickCue location will be overwritten in favor of the new one.
< Playing QuickCues
Once you’ve set a couple QuickCue Points, all you have to do is click on the desired QuickCue button and
the Deck will immediately jump to this new location and begin playing. If you set your QuickCue Points at key
positions within the song, you can immediately jump to different sections on-the-fly, such as jumping ahead to a
chorus or back to the intro.
✓ Note: If you reposition playback using one of the QuickCue buttons while Looping is activated, playback will jump
to the new location. Torq will then automatically place the Loop In Marker at that point and will place the Loop Out
Marker in a position to maintain the same loop length in use prior to pressing the QuickCue button.
< Clearing QuickCues
If you’d like to clear all of the QuickCues in a song, hold the Shift button while clicking the Set button. Torq will
ask if you really want to do this—click Yes to complete the procedure.

Torq 1.5 User Guide Chapter 1
Torq 1.5 User Guide Chapter 3
14
14
Deck Mode
In order for Torq to feel familiar to all types of DJs, the Decks can be operated in one of three different modes.
< Vinyl Mode
Vinyl Mode will make the Deck behave as if it was a turntable. This means:
1. Pressing Play/Pause to pause playback will cause audio to stop, just like pressing stop on a turntable.
2. Clicking and dragging on the Scrolling Waveform will have audible results, like scratching a record.
< CDJ Mode
CDJ mode will make the Deck behave as if it was a CDJ player. In use:
1. Pressing Play/Pause to pause playback will cause the Deck to stop and begin repeating a small section of
audio. The repeating section corresponds to the position where playback will resume when you press
Play/Pause again.
2. While the audio is repeating, you can click and drag on the Scrolling Waveform to move the start
location—you’ll hear the repeating audio slice change as you do this. Press the Cue button to set the Cue
Point to this location and the repeating audio slice will stop.
3. Clicking and dragging on the Scrolling Waveform while the Deck is playing will not stop audio. Instead,
you’ll be able to drag left or right to offset the playback speed of the track. This will allow you to align the
track against the other Deck when beat-matching.
< Hybrid Mode
Hybrid mode provides a blend of the CDJ and Vinyl control modes:
1. Pressing Play/Pause to pause playback will cause audio to stop, just like in Vinyl mode.
2. While paused, clicking and dragging on the Scrolling Waveform will have audible results, like scratching in
Vinyl mode.
3. When playback is active, clicking and dragging on the Scrolling Waveform will not stop audio. Instead, you’ll
be able to drag left or right to offset the playback speed of the track like in CDJ mode. This will allow you
to align the track against the other Deck when beat-matching.

Torq 1.5 User Guide Chapter 1
Torq 1.5 User Guide Chapter 3
15
15
Looping
Technology is always evolving, thus DJing is always evolving. With the introduction of DJ CD players, DJs gained many
new exciting capabilities that were unavailable to them when working within the confines of vinyl records. One of those
features is looping, which is merely the act of repeating a section of a song.
The creative aspect of DJing suggests that a simple trick such as looping can be exploited in a variety of ways. Indeed, you
can use looping to “remix” a song by changing the arrangement—extending your favorite parts of the song. You can also
use looping as a “safety net” allowing the end of a song to play infinitely, giving you more time to mix into the next song.
Looping can also be used to isolate a section of the song, such as the breakbeat, for layering on top of other songs.
Torq offers you two different ways to loop audio. You can specify the start and end points of the loop manually, or you
can capture loops of a specific length using the QuickLoop buttons. Furthermore, Torq will help you make the perfect
loop every time by automatically matching your loop points to the tempo of the song.
< Loop In/Out
Looping an entire song doesn’t have much benefit for a DJ, so Torq allows you to move the Loop Markers by
using the Loop In and Loop Out buttons:
1. Load a song into a Deck and press Play. The song will begin to play.
2. When playback reaches the beginning of the section you want to loop, click the Loop In button. This will
place a Loop In Marker at the Now Line (shown as a yellow marker line in the scrolling and overview
waveforms) and the song will continue to play. If the Quantize button is on, Loop In marker will snap to the
beginning of the nearest 16th-note in the song’s waveform.
3. When playback reaches the end of the section you want to loop, click the Loop Out button. This will place
a Loop Out Marker at the Now Line, which will also snap to the nearest 16th-note (this behavior can be
changed in the Preferences). At the same time, the Loop On/Off button will automatically be activated
causing playback to jump back to the Loop In Marker. The music will now loop between these two points
indefinitely.
4. When you’re finished looping this section of the song, you can click the Loop On/Off button to turn it off.
Now, when playback reaches the Loop Out Marker, it will simply pass it and proceed playing the rest of
the song.
✓ Note: If you reposition playback using one of the QuickCue buttons while Looping is activated, playback will
jump to the new location. Torq will then automatically place the Loop In Marker at that point and will place
the Loop Out Marker in a position to maintain the same loop length in use prior to pressing the QuickCue
button.
< Loop Out Preference
By default, Torq will always quantize the position of the Loop Out marker to a location that results in a quantized
16th-note length from the position of the Loop In marker. This requires that you press the Loop Out marker
within a 16th-note of where you want the loop to end. Torq has a second Loop Out mode that will make it
easier to achieve even loops without having to press the Loop Out button with 16th-note accuracy:
1. Open Torq’s Preferences and click on the Behaviors Tab.
2. Switch the Loop Out mode from “16th” to “Smart” and close the preferences.
Now, when you press Loop Out, Torq will place the Loop Out marker at a position that is a multiple of 2 in
length from the Loop In marker. In other words, Torq will only allow you to make loops with the lengths
of 1 beat, 2 beats, 4 beats (1 bar), 2 bars, 4 bars, 16 bars, etc.
< Loop On/Off
The Loop button will indicate whether Torq is looping audio or not. Whenever this button is illuminated, Torq
will be looping something, whether triggered with one of the QuickLoop buttons or set manually with the Loop
In and Loop Out buttons. Click this button to toggle looping on and off.

Torq 1.5 User Guide Chapter 1
Torq 1.5 User Guide Chapter 3
16
16
< QuickLoop
More often than not, a DJ will loop audio that is an even number of beats or bars. That is, they will loop a single
bar (four beats) or two bars (eight beats), or may do micro-loops of only one or two beats. Instead of having
to quickly press the Loop In and Loop Out buttons to create loops of these lengths, Torq provides one-button
access to these loops via the QuickLoop buttons.
» Using QuickLoops
The QuickLoop buttons allow you to instantly loop a section of a song by a preset length. By default, each
of the four buttons represents a different bar length; one bar, two bars, four bars, and eight bars. Simply
press one of these buttons at the beginning of the section you want to loop and Torq will automatically
place the Loop In and Loop Out Markers in the appropriate locations:
1. Load a song into a Deck and press play.
2. Press the QuickLoop button labeled “1.” The Loop button will be switched on and the Loop In
Marker will immediately be placed at the Now Line. Furthermore, the Loop Out Marker will be
placed exactly one bar later and the song will begin looping a perfect bar.
3. To turn the loop OFF, click the Loop button. Playback will now proceed beyond the Loop
Out Marker.
» QuickLoop Size Preference
As mentioned above, the default loop lengths for the four QuickLoop buttons are one bar, two bars, four
bars, and eight bars. The QuickLoop Size preference allows you to change the QuickLoop buttons to beat
values instead of bar values:
1. Open the Torq Preferences menu and click on the Behaviors tab.
2. Click the arrow next to QuickLoop Size option and choose “Beat” from the drop-down list.
3. Click the “X” to close the Preferences window.
Now, when you use the QuickLoop buttons as described above, you’ll find that they capture loops of
one beat, two beats, four beats, and eight beats in size.
» Changing QuickLoop Lengths
Along with being able to capture loops of a specific size, the QuickLoop buttons also allow you to change
the size of the loops after they have been made. Torq has two methods for changing QuickLoop lengths
which are selected from the Preferences:
1. Open the Torq Preferences menu and click on the Behaviors tab.
2. Locate the QuickLoop Mode item—you’ll see that it has two settings: “Cut and Grow” and “Direct.”
Cut and Grow is the default behavior and was the only behavior available prior to Torq 1.5--use this setting
to preserve the Torq 1.0 workflow. When this mode is selected, each additional press of a QuickLoop
button will cut the current loop length in half. For example, if you press QuickLoop 4, Torq will grab a 4
bar loop. Pressing QuickLoop 4 again will result in a 2 bar loop. Press it again and you’ll get a 1 bar loop. If
you hold SHIFT while pressing the QuickLoop button, the loop will grow in size—doubling in length with
each press of the button.
Direct mode resembles the behavior found on some DJ CD players. When selected, the QuickLoop
buttons will become divisors once a loop has been captured. For example, pressing the QuickLoop 4
button will capture a 4 bar loop. Pressing QuickLoop 2 will now divide the loop length by 2 resulting in
a 2-bar loop (4 bars / 2 = 2 bars). Pressing QuickLoop 4 will result in a 1-bar loop (4 bars / 4 = 1 bar).
Pressing QuickLoop 1 will reset the loop back to its original length (4 bars / 1 = 4 bars).
» Pre-Loop
You can also reverse the behavior of the QuickLoop buttons by holding Shift when you create a loop. If
you do this, Torq will place the Loop Out marker at the current playback location and will set the Loop In
marker at the indicated number of Bars or Beats (depending on the QuickLoop Size preference) before the
playback location. Using this feature, you can loop sections of audio that just played. For example, to repeat
the last 2 bars of music that played, hold Shift and press/click QuickLoop 2.
Torq 1.5 User Guide Chapter 1
Torq 1.5 User Guide Chapter 3
17
17
Speed Slider
Torq’s Decks are each equipped with a Speed
Adjust slider for the purpose of beat-matching
songs. This slider behaves just like the pitch
adjusters found on DJ turntables and CD players.
As you move this slider, the neighboring ADJ
display will show how much the song’s speed is
being altered (expressed as a percent where 0%
is the original speed of the song) and the BPM
display will change to show the new tempo of the
song.
For those not familiar with these controls, your
first impression may be that the slider is working
backward since the speed of the song will
increase as you move the slider down on screen.
However, this is the proper behavior for pitch
controls found on DJ turntables and CD players.
It makes sense if you consider the following:
The pitch adjust slider on a turntable is mounted flat on the surface of the turntable’s housing. Therefore, when you use
the slider, you either push it away from you or pull it towards you. When a song is going too fast, you push the slider
away from yourself, just as if you put out your hand in a “slow down” motion. If you need the song to go faster, you pull
the slider toward you, similar to how you would gesture towards yourself if you wanted someone to move quickly. After
a few hours of practice, this “backward” response will feel natural.
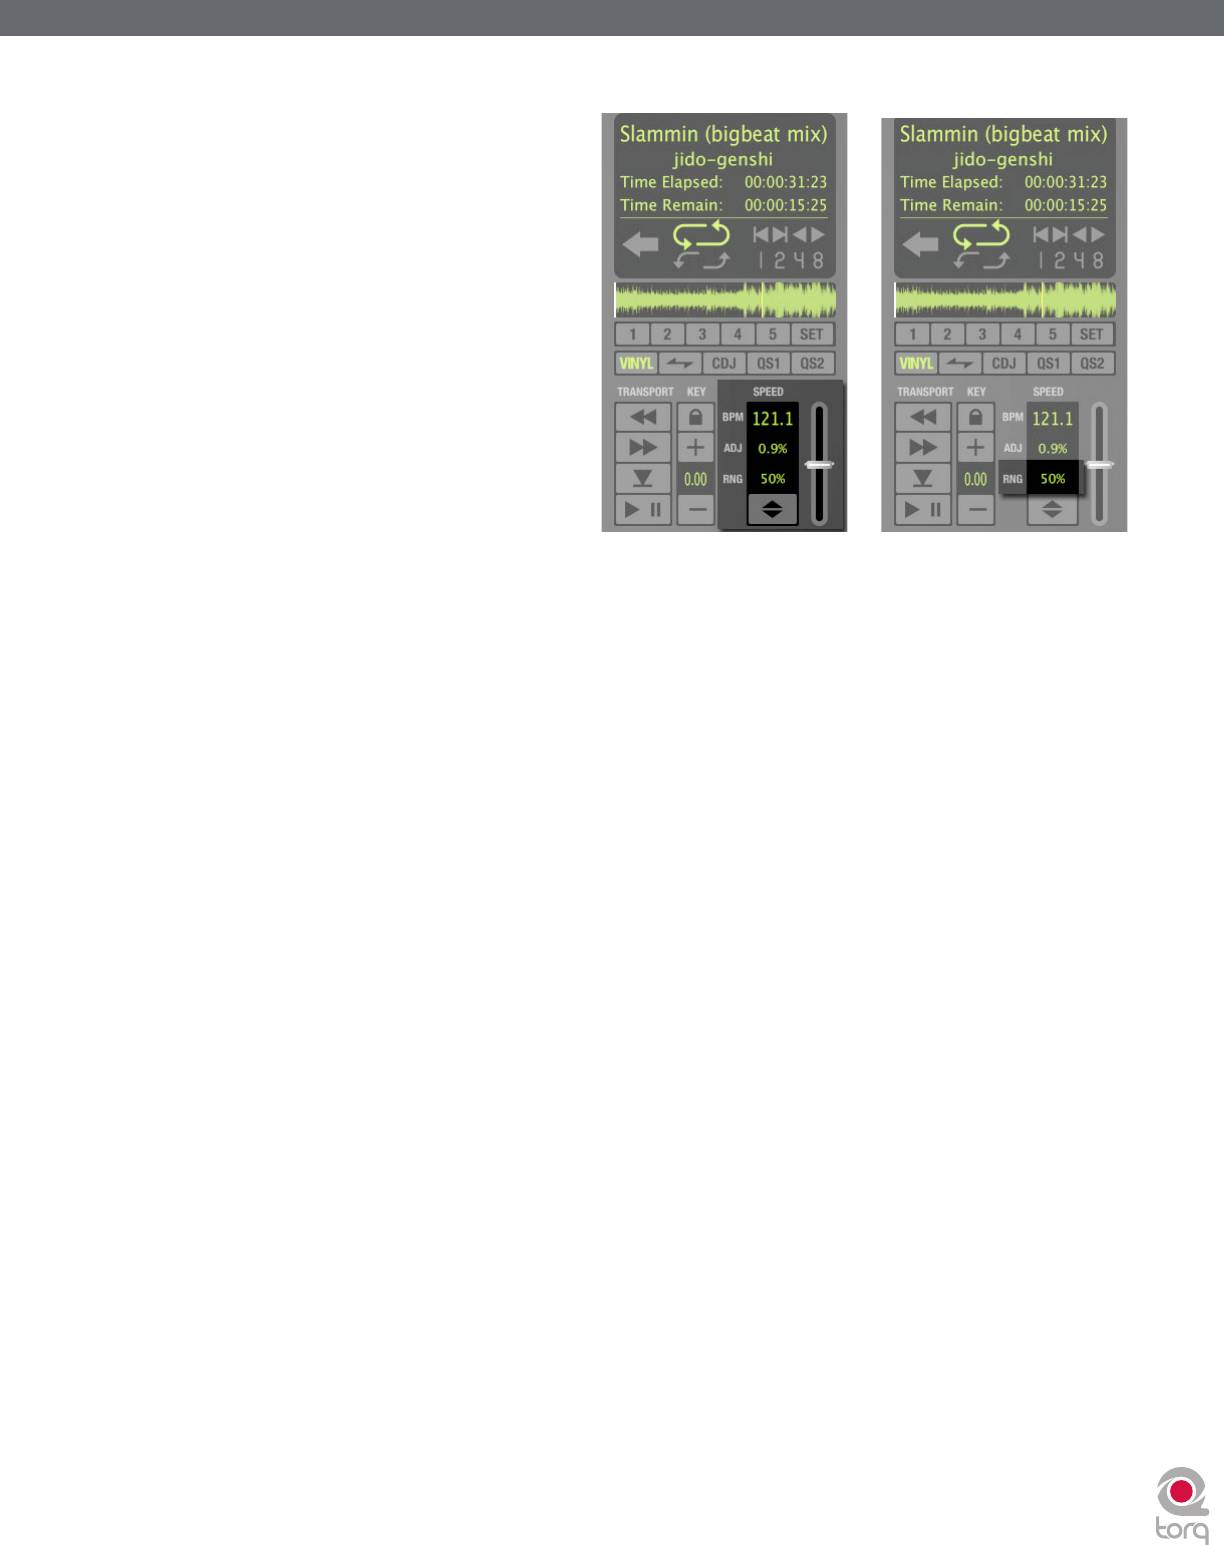
< Slider Range
By default, the range of the Speed Adjuster is +/- 8%. That means that if you move the slider to either of its
extremes, you’ll only get an 8% change in the speed of the song. To the left of the Speed Adjuster is a display
showing the current range setting for the slider:
You can change the range of the Speed Adjuster by clicking on this range display. Each time you click, the range
will advance to the next highest setting. The order is: 8%, 10%, 20%, 50%, then 100%. When you click the display
again, the range will “wrap around” back to 8%. You’ll only need to increase the range when you’re trying to
match two songs with very different tempos, or when you want to perform an extreme speed change as a special
effect (especially effective when the range is set to 100%).
Most experienced DJs will simply match the tempos of two songs by hand using the Speed Adjust slider, which
is a perfectly acceptable method of matching songs (indeed, this is the way it’s been done for decades). Since it
requires a lot of practice to hear when one song is playing faster or slower than another, those new to DJing will
benefit from some of the extra features built into Torq. Such features include automatic beat detection, BPM
displays, scrolling waveform displays, and automatic synchronization.
Torq 1.5 User Guide Chapter 1
Torq 1.5 User Guide Chapter 3
18
18
< BPM Display
Tempo is a measurement of the speed of a song and is normally expressed as Beats Per Minute (BPM). As the
BPM increases, the speed of the song increases. In order for two songs to be mixed together with their beats
aligned, the two songs will need to be playing at the same tempo. This is why Torq’s Decks are equipped with
Speed Sliders. In the event that you are trying to mix two songs with different tempos (which happens more
often than not), you will need to use the Speed Sliders to match the tempo of the new song to the tempo of the
current song.
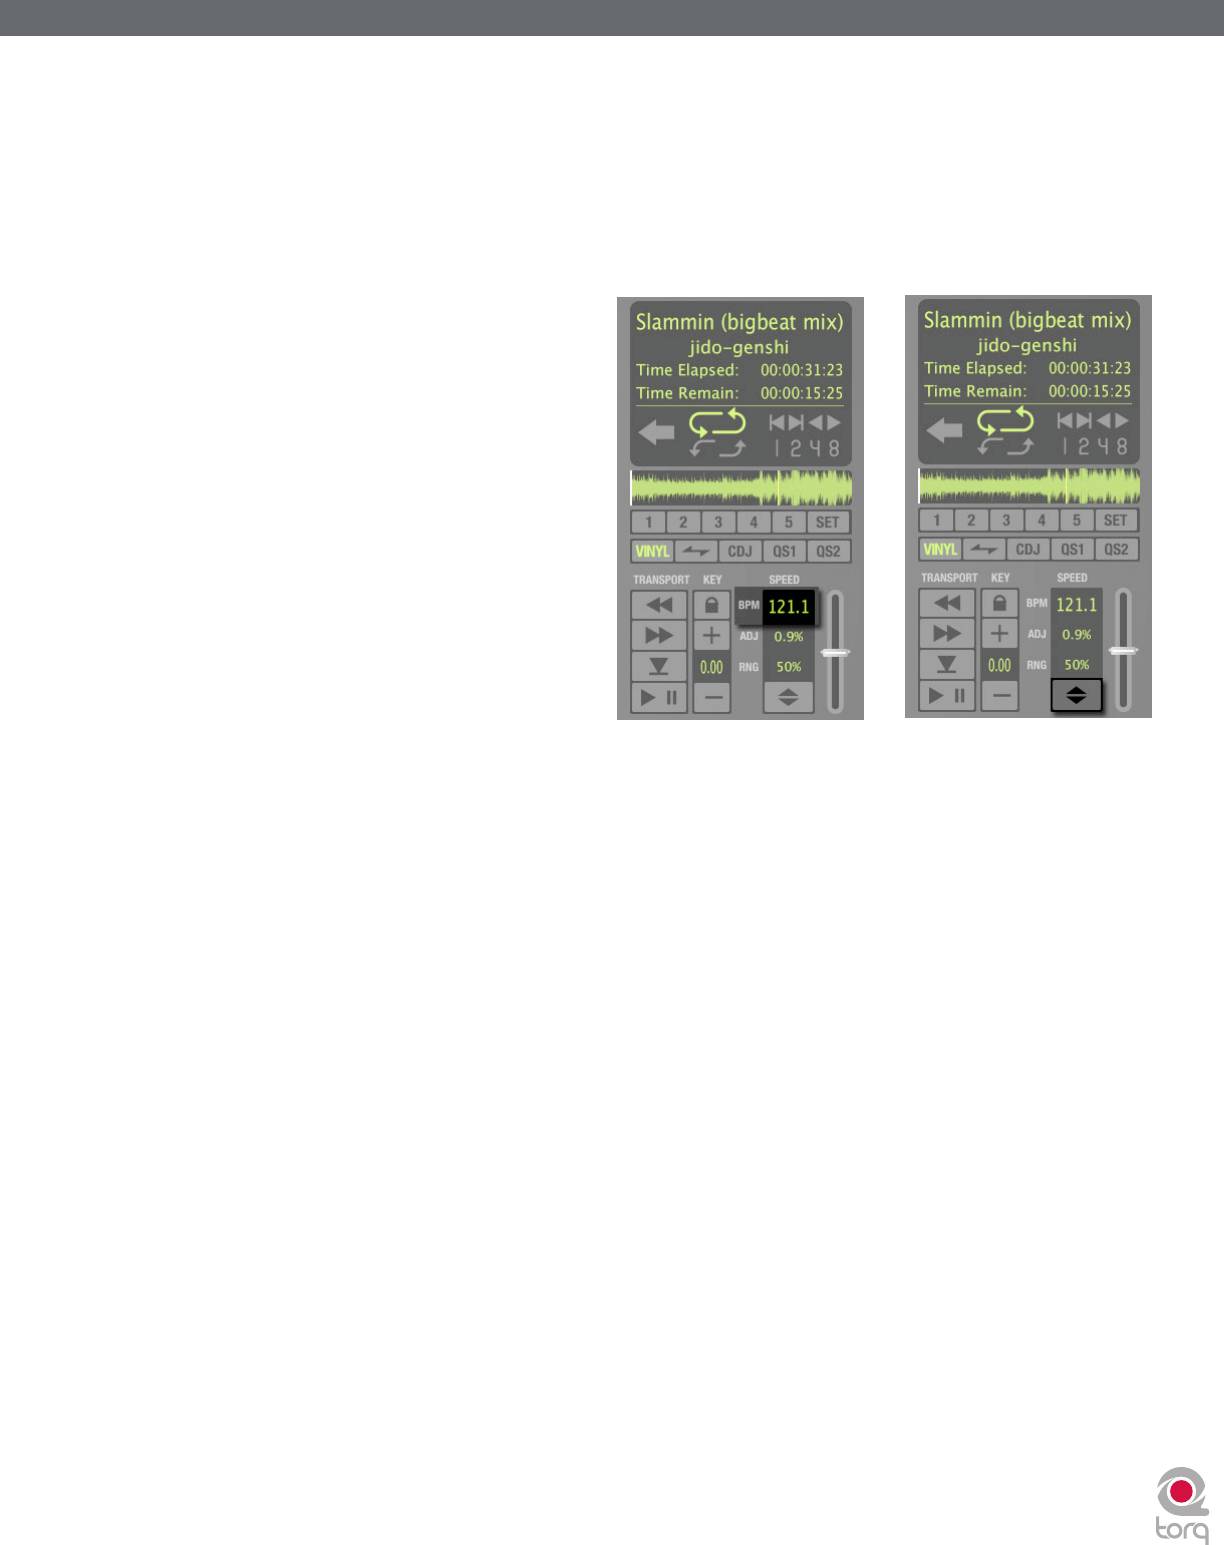
» Automatic BPM Detection
Any time you load a new track into
a Deck, Torq will analyze it and
attempt to determine the tempo
of the song. For most dance music,
Torq will be able to determine the
tempo accurately. Once scanned,
the tempo of the song will be shown
in the BPM display for the Deck,
which is located just to the left of
the Speed Adjust slider.
✓ Note: Determining the tempo
of a song is a complicated
process for a computer. While
Torq’s beat-detection system will
usually provide accurate results
when set to its default settings, some types of complex music can confuse the beat-detection system resulting
in incorrect tempos. To increase the accuracy of the beat-detection in these cases, you can specify the type
of music you’ll be using in the Preferences menu thus limiting the tempo range used by the beat-detection
system. Be sure your selection matches the type of music you’re trying to analyze. If you have “Drum & Bass”
selected as your style and attempt to analyze a trip-hop track, Torq will give you the wrong tempo. You can
then change the music type and re-analyze the song if needed.
The BPM shown here is a “living value”—it will change when you alter the speed of the song with the
Speed Adjuster. This is extremely helpful when trying to synchronize two songs since you’ll be able to
match the tempos of the two songs just by matching the BPM values shown in the displays.
» Double/Halve Button
When Torq incorrectly identifies the tempo of a song, it will often return a result that is a multiple of the
actual tempo. This occurs frequently when using Drum & Bass tracks with tempos in the neighborhood of
174 BPM. Torq may think that the tempo of the song is 87 BPM or 116 BPM. When this happens, you can
quickly adjust the tempo using the Double/Halve button.
This button works by applying a multiplication factor to the current BPM. The first time you press
this button, the up arrow will light and the tempo of the current song will be multiplied by 1.5 (the
multiplication factor will be shown in the Tooltip). If the song was detected as 116 BPM, it will now show
174 BPM (116 BPM x 1.5 = 174 BPM). The second time you press this button, the multiplication factor will
increase to 2. If the song had been detected as 87 BPM, it would now show 174 BPM (87 BPM x 2 = 174
BPM. The multiplication factor will continue to increase in .5 steps each time this button is pressed.
This button can also be used to divide the current BPM by the same amounts on the occasion that Torq
detects a BPM higher than it should be. Simply hold the SHIFT button when pressing the Double/Halve
button to move downward through the sequence of factors. If you decrease the factor to a point where
the new BPM is less than the detected BPM, the down arrow will be lit on the button.

Torq 1.5 User Guide Chapter 1
Torq 1.5 User Guide Chapter 3
19
19
» Manual Tempo Adjustment
As mentioned above, Torq can determine the tempo of most dance music. Some music, however, is too
complex or not repetitive enough for Torq to detect the tempo with precision. Fortunately, you can help
Torq to determine the proper tempo through a number of different methods. The appropriate method will
be based on the type of tempo correction you’re trying to achieve.
» Tap Tempo
On rare occasions, Torq will determine an incorrect tempo that has no direct relation to the actual tempo
(not a fraction or multiple). At times like this, you’ll want to use the Tap Tempo feature to determine the
tempo of the song while it plays.
1. While the song is playing, click on the BPM display with each beat that you hear.
2. The BPM display will update the BPM to reflect the timing of the taps you performed.
3. The more taps you provide, the more precise the calculation will become.
✓ Note: If at any time you wish to revert back to the automatically determined tempo, hold the Shift key
while clicking on the BPM display. This will also clear any Tempo Anchors if any have been created. Tap
Tempo cannot be used if there are Tempo Anchors in a song.
» BPM Entry
If you happen to know the BPM of the song, you can manually enter it into the BPM display, thus overriding
the tempo detected by Torq.
1. Hold the Shift key and double-click on the BPM display.
2. Type in a new BPM value from your computer keyboard and press Enter.
3. The new BPM will then be set for the song.
✓ Note: If at any time you wish to revert back to the automatically determined tempo, hold the Shift key
while clicking on the BPM display. This will also clear any Tempo Anchors if any have been created.
» Tempo Anchors
Torq provides you with another alternative in the event that none of the above methods provide an
accurate BPM for the song, or when the song contains tempo changes. Torq will allow you to create a
custom tempo map for a song employing a feature called Tempo Anchors. Please see the Tempo Anchors
section in the next chapter for details.

Torq 1.5 User Guide Chapter 1
Torq 1.5 User Guide Chapter 3
20
20
Key
The Key Adjust is used to raise or lower the key (pitch) of a song without changing the tempo. This is useful when
attempting to match the melodies of songs in both Decks during a mix, known as key-matching. You can adjust the key of
a song with the Key Adjust buttons or by dragging the up or down on the Key Display.
< Fine Tuning
1. Click and hold the mouse cursor over the Key Display number.
2. Drag the mouse up or down. The number will adjust in increments of one cent.
✓ Note: To reset the key transposition to 0, hold down the Shift key on your computer keyboard and click on either
of the Key Adjust buttons’ Key Displays. If you have adjusted the key in finer increments, the key will be reset to 0,
however the fraction will remain. For example, if the key is 4.23, resetting will make it 0.23.
< Key/Speed Lock
The Decks in Torq have the special ability to change the playback speed of the song without changing the pitch
of the song (this is known as time-compression and time-expansion). This means you don’t have to worry about
music changing pitch as you beat-match. However, if you would like to disable this feature and essentially lock the
Key and Speed of the music together, turn on the Key/Tempo Lock button. With this on, the music will behave
like a regular vinyl record (slowing down the music will make the music drop in pitch).
< MIDI Slider/Knob Control
MIDI control of the Key Adjust is different from other controls in Torq. You can assign a knob or slider to the
Key Adjust, or you can assign keys on your MIDI keyboard—the behavior of the Key Adjust is dependent on
your control method.
1. Make sure that your MIDI keyboard or control surface has been properly installed and is configured to
work with Torq. Please see chapter 6 for more information about configuring your external MIDI hardware
to control Torq.
2. Right-click (CTRL-click, Mac) on the Key Display; it will turn red indicating that it’s waiting for an
assignment.
3. Move a MIDI knob or slider on your MIDI controller. This will automatically assign the knob or slider to the
Key Adjust.
4. The Key will be adjustable in one-semitone steps.
5. MIDI CC value 64 equals + 0 semitones. This generally means when the knob or slider of your MIDI
controller is at center position, the Key will be at 0.
< MIDI Button Control
1. Make sure that your MIDI keyboard or control surface has been properly installed and is configured
to work with Torq. Please see chapter 6 for more information about configuring your external MIDI
hardware to control Torq.
2. Right-click (CTRL-click, Mac) on the [+] Key Adjust button. It will turn red indicating that it’s waiting for an
assignment.
3. Press a button on your MIDI controller to assign it to the [+] Key Adjust button.
4. Right-click (CTRL-click, Mac) on the [-] Key Adjust button. It will turn red indicating that it’s waiting for an
assignment.
5. Press a button on your MIDI controller to assign it to the [-] Key Adjust button.
6. Now that your buttons are assigned, press the button assigned to [+]. The Key will move up one semitone.
7. Now press both buttons simultaneously.
8. The Key Adjust will return to 0.

Torq 1.5 User Guide Chapter 1
Torq 1.5 User Guide Chapter 3
21
21
< MIDI Keyboard Control
1. Make sure that your MIDI keyboard or control surface has been properly installed and is configured
to work with Torq. Please see chapter 6 for more information about configuring your external MIDI
hardware to control Torq.
2. Right-click (CTRL-click, Mac) on the Key Display. It will turn red indicating that it’s waiting for an
assignment.
3. Press a key on your MIDI keyboard. This key will automatically be assigned as the “root key” of the Torq
Key Adjust.
4. If you press a MIDI key that is 1 semitone ABOVE the root key, the Deck’s Key will be changed to +1
(semitones).
5. If you press a MIDI key that is 2 semitones BELOW the root key, the Deck’s Key will be changed to -2
(semitones).
6. The range of Key transposition is plus or minus (+/-) 12 semitones. This makes it possible to control the
Key Adjust of both Decks using a single MIDI controller keyboard, as long as the keyboard has enough keys
to make up four (4) octaves.
✓ Note: Torq will allow notes from the same controller and same MIDI channel to be used as long as the root
keys are at least two octaves apart.
< External Control
When using external Vinyl or CD control, Torq will preserve the pitch of the music even if you change the speed
of the turntable or CD player. When you scratch, Torq will disable time-stretching and will re-enable it when
you let the music play again. If you want Torq to respond like a true vinyl record, turn on the Key/Speed Lock
button so that key and speed are locked together. You will then hear pitch changes when altering the speed of
the turntable or CD player.
Sync Button
The Sync button provides an automatic method of synchronizing the beat and BPM of one Deck to the other or the
Global Tempo. When you engage Sync on a Deck (the Sync icon is on), it will change that Deck’s tempo to match the
other Deck or Global Tempo. Furthermore, when you press Play, Torq will align the song to the phase of the other Deck
or Global Tempo. Essentially, the Synced Deck will be “slaved” to the other Deck (which would be the “master”).
Sync will remain active until you turn it off by clicking the Sync button again. While Sync is active, the Deck will be
affected by tempo changes made to the opposite Deck or Global Tempo. If you slow down the “master” Deck, the
“slaved” Deck will also slow down in kind. If you attempt to scratch or re-align the “slaved” Deck, Torq will automatically
snap it back into alignment to match the phase of the “master” Deck.
Tempo Master
Torq also has the ability to use a Deck as a Tempo Master for the entire program. Simply hold SHIFT while pressing the
Sync button on a Deck. When doing this, you’ll see that the Sync button starts to flash, indicating that it is the Tempo
Master. Additionally, the Global Tempo will be activated and will follow the tempo of the Deck. With a Deck set as the
Tempo Master, all other aspects of the program will follow its tempo even if there are tempo changes (set with Tempo
Anchors). Looped samples will follow the Deck. The opposite Deck will also follow if its Sync button is turned on.
When you turn Sync off on a Deck, it will keep the tempo setting allowing the song to keep playing in time with the other
Deck. However, Torq will no longer attempt to keep the two Decks in sync if you make changes to them. Torq will no
longer snap the songs back into alignment if you move one of them, nor will Torq continue to match tempos if you change
them.
✓ Note: Setting a Deck as a Tempo Master is the only way to hear the original timing of the song after adding Tempo
Anchors.

Torq 1.5 User Guide Chapter 1
Torq 1.5 User Guide Chapter 3
22
22
Nudge Buttons
If you’re not taking advantage of Torq’s ability to keep tracks aligned using Sync, you can do it manually using the Nudge
buttons. If you hear a song become ahead or behind the other, the Nudge buttons will allow you to push the song back
into alignment by creating a small change to the playback speed of the song. If the song is ahead of the beat, press the
right Nudge button to slow it down. You’ll see the waveforms of the two songs move in relation to each other. Release
the Nudge button once the songs are aligned properly and the original playback speed will be restored.
✓ Note: The behavior of the Nudge buttons can be reversed in the Preferences if you prefer the song to speed up when
pressing the right Nudge button.
Offset Buttons
Sometimes when mixing two songs together, you may find that the beats are aligned with each other, yet the two songs
are still out of phase. This is most obvious when one song is offset by one beat, causing the snare drums of the tracks to
be out of alignment. The Offset buttons can be used to correct this. Pressing these buttons will make the Current Song
Position jump forward or back by one beat-length.
✓ Note: : If you have the Sync Mode set to “Bar” in the Preferences/Toolbar, the Offset buttons will have no effect when the
Deck’s Sync button is on. This is because Torq will counteract a one-beat offset when set to Bar mode. If you want to offset
the music by one beat when Sync is on, you’ll need to offset the Phase Grid (which is explained later in the section titled
“Synchronization”), or switch Sync Mode to “Beat.”


