Electrolux NPX 6 SENSOMATIC: CHAPTER CHAPTER
CHAPTER CHAPTER: Electrolux NPX 6 SENSOMATIC

32
32
EXTERNAL CONTROL
CHAPTER
CHAPTER
One of Torq’s greatest features is the ability to use external sources to control the
playback of your song files. In particular, you can use the Torq Control Vinyl or Torq
Control CDs to provide the familiar tactile sensation of DJing with traditional turntables
and/or CD decks. Torq also allows you to use external MIDI hardware to control nearly
any feature within the application.
The Control Vinyl and Control CD system works by using vinyl records and compact
6
1
discs imprinted with special control signals. You’ll play these control signals on your
turntables and/or CD players and feed that signal into any professional audio interface
that has four inputs (with phono preamplifiers on each input if you are using turntables)
such as the M-Audio Conectiv. Torq will listen to those audio signals and will use the
encoded information to control the playback of the Decks.
Enabling Vinyl/CD Control
1. Connect the outputs of your first turntable or CD player to inputs 1/2 of your
audio interface. If the interface has a “Line/Phono” input selector switch, be
sure to set it to “Phono” if using turntables, or “Line” if using CD players (or
turntables with built-in preamps).
English
English
INPUT BGROUND INPUT A
OUTPUT BOUTPUT A
Line Phono
Line Phono
Turntable
or CD Player
2. Connect the outputs of your second turntable or CD player to inputs 3/4 of
your audio interface. Again, you’ll need to set its input selector switch as
described above.
Using Torq with only one turntable or CD player:
The connection diagram on this page assumes you have a traditional
DJ setup two CD players or turntables. However, Torq has a
special “AMPutate Mode” that allows you to control both decks
using only one turntable or CD player. This mode is described
later in this chapter.
Torq 1.5 User Guide Chapter 1
Torq 1.5 User Guide Chapter 6
33
33
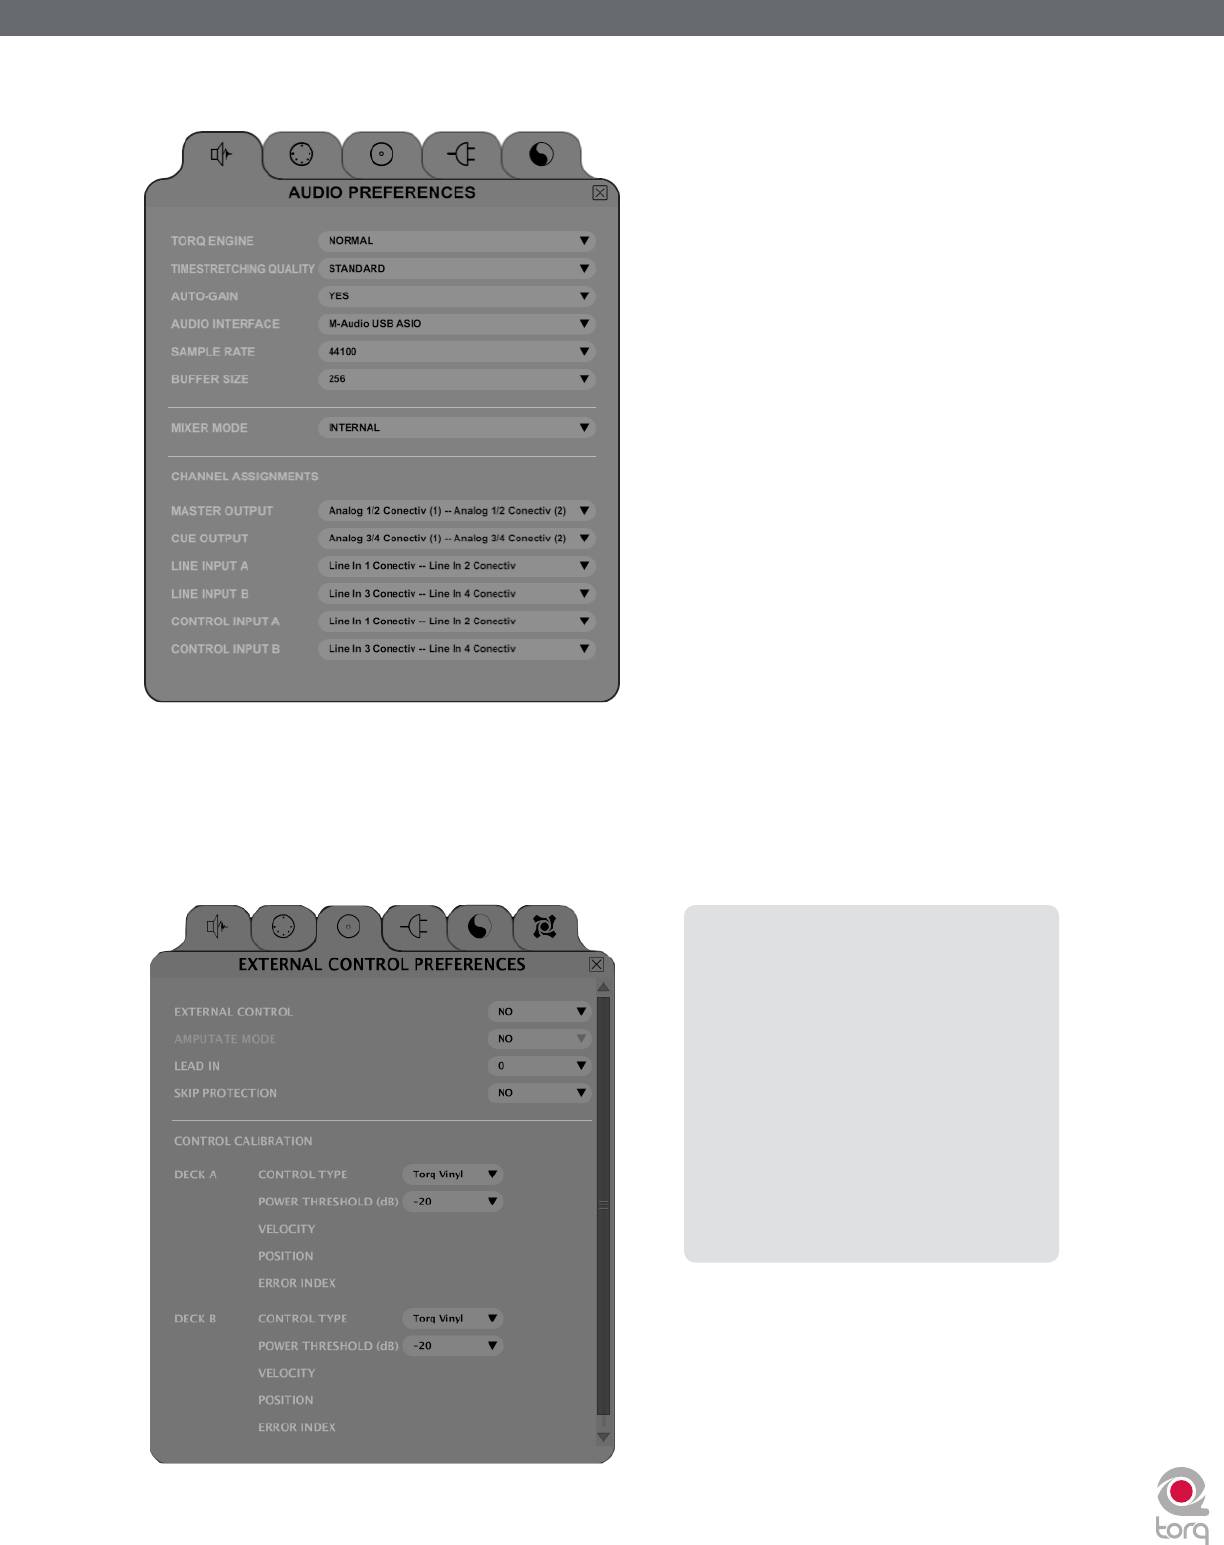
3. Open Torq’s Preferences and select the Audio tab.
4. Make sure your audio interface is selected in the “Audio Interfaces” drop-down menu.
5. Click the Control Input A drop-down menu and choose “input 1 -- input 2”.
6. Click the Control Input B drop-down menu and choose “input 3 -- input 4”.
7. Now click the “External Control” tab.
Note:
An additional tab appears
on the right side of the Preferences
window when certain M-Audio
products (such as the Xponent
DJ controller) are being used in
conjunction with Torq. This tab
contains parameters relating specifically
to the operation of the connected
M-Audio device. To learn more about
the contents of this additional tab, refer
to your new hardware’s User Guide.
Torq 1.5 User Guide Chapter 1
Torq 1.5 User Guide Chapter 6
34
34
8. The first option enables External Control. Click the drop-down menu and select “Yes”.
9. The next step requires you to select the type of control signals you’ll be using for each Deck. If you’ll be using the
Torq Control Vinyl records, select “Torq Vinyl” for the Control Type. If you’ll be using the Torq Control CDs, select
“Torq CD” for the Control Type. Since this selection is independent for each Deck, you can use any combination of
vinyl and CD control that you’d like.
✓ Note: If you own the Ms. Pinky Interdimensional Wrecked System, you can use those vinyl records to control Torq.
Select “Gen1”, “Gen2”, or “Gen3” corresponding to the generation of records you own. Torq currently supports
generations 1 through 3.
10. The playback of the Decks will now be controlled by the incoming control signals you have selected.
✓ Note: You can also enable and disable the External Control system by clicking the External Control button in
Torq’s Toolbar.
External Control Calibration
While terms such as “digital vinyl” are sometimes used to describe vinyl control systems such as the one used in Torq, the truth
is that the system is still analog. There are “digits” encoded in the analog domain on the Torq Control Vinyls and CDs and those
digits are transferred to Torq by analog means through the inputs of your audio interface.
Because of this, the control system is subject to certain environmental and physical variables that can influence its performance.
The system is very robust and compensates for many of these factors, allowing a wide range of variance between equipment to
yield identical control response. This means the equipment you already own (turntables, cartridges, styli, CD players, etc.) is
probably sufficient for use with Torq’s external control system.
M-Audio has diligently tested the control system using a wide variety of equipment from different manufacturers, but not every
possible combination of gear could be tested. While unlikely, it is possible that there could be problems with components in
your DJ setup that might render the control system inoperable. When this happens, the Control Calibration displays on the
External Control Preferences tab will be your first place to look in order to diagnose the problem.
Control Type
If the external control system is enabled but doesn’t seem to be working, first check the Control Type settings for each
Deck before you tear out all the wiring in your DJ rig. If you have the wrong Control Type selected, Torq will not react
in the proper manner to the control signals. Once you’ve verified the setting here, you can continue diagnosing your
problem.
Velocity and Position
When the external control system is operating properly, it provides three vital pieces of information to Torq’s Decks:
the speed and direction of the Control Vinyl or Control CD as well as the current position on the record or CD. The
Velocity display shows a number that indicates both speed and direction at the same time. When the Velocity is 0, the
record or CD is stopped (or the needle has been lifted off the record). If the number is 1.0, that means the vinyl record
is running forward at normal speed (when using the Torq Control Vinyls, this refers to 33 1/3 RPM playback on the
turntable). When the number is -1.0, it means the record or CD is running backwards at normal speed (33 1/3 RPM). As
you manipulate the record or CD by hand or with their pitch adjusters, you’ll see the Velocity display change immediately
to reflect the movements.
The Position display shows a number that Torq uses to calculate the playback position for the audio file loaded into the
Deck. When the record or CD is playing forward, this number will increase—it will decrease if the record or CD is
playing backwards. You’ll also notice that this number will jump whenever you lift the needle off the record and place it
in another location (known as a “needle drop”). This is what allows Torq to play back a song just as if it was pressed right
into the Control Vinyl or Control CD.

Torq 1.5 User Guide Chapter 1
Torq 1.5 User Guide Chapter 6
35
35
< Reversed Playback Direction
If you find that Torq seems to be responding backwards to the Control Vinyls or CDs, take a look at the Velocity
display. If the number shown is negative while the control source is playing forward, it could mean that the audio
cables connecting the turntable or CD player to your interface are backwards. Swap the left and right plugs on
the back of the audio interface and the problem should be fixed.
< Erratic Playback Position
If Torq seems to be jumping around to random locations in the song during playback, take a look at the Position
display. This number should be rapidly growing larger as the control source plays. If this number looks like it’s
counting erratically, this is most likely due to damaged control records (which is normal after extended use). This
could also be due to poor stereo separation in the turntable’s needle or preamp. This is especially common with
very old needles. To fix this, purchase a replacement vinyl record, replace your stylus, or purchase one of the
recommended styli/cartridges listed at the end of this manual.
< Erratic Velocity Values
A turntable is a very sensitive piece of equipment. It can take the smallest vibrations and amplify them into
audible sound. That’s what’s happening when you play a record—the grooves in the record vibrate the stylus
as they play and those vibrations are translated to audio. The problem with turntables, though, is that they
cannot distinguish between what is an intentional vibration caused by the moving grooves in the record and
an unintentional vibration picked up through the body of the turntable. For example, if you kick the table the
turntable is on, that “thump” will be transferred through the turntable up through the needle and translated into
sound.
What this means, in terms of the External Control system, is that vibrations and other unintentional noise can
“contaminate” the control signals being read from the records. When this happens, the noise can temporarily
throw off the ability of Torq to track the records.
In order to help minimize this problem, Torq has a setting called “Power Threshold” with various level settings.
The idea is to set this value above any of the extraneous noise such that Torq will only focus on the louder
control signals from the records. Here’s how to set this level properly:
1. Open the External Control Preferences and enable External Control.
2. Place the needle of your turntable on the Control Vinyl, but leave the turntable stopped.
3. Lower the Power Threshold to -40 and look at the Velocity value for the deck.
4. If the Velocity is showing random values even though the turntable is stopped, that means the Power
Threshold is too low—Torq is picking up noise and interpreting it as a control signal.
5. Increase the Power Threshold by 5dB and look at the Velocity value again. If you still see random Velocity
values, raise the Power Threshold another 5dB.
6. Eventually, you’ll reach a point where the Velocity stays at 0.00. This is the optimal setting for the Power
Threshold.
7. Please note that, if you’re in a noisy environment that does not have good physical isolation of the
turntables (to prevent external vibrations from being picked up by the stylus), you may need to raise the
Power Threshold setting a little higher to filter out the additional noise in the room.

Torq 1.5 User Guide Chapter 1
Torq 1.5 User Guide Chapter 6
36
36
Error Index
If you’ve checked your audio cable connections and have also replaced your turntable’s needles yet still experience
problems, take a look at the Error Index displays. These displays will be showing a number typically between 0.15 and
1.50, which is perfectly normal. If the number is above 2.0, it will turn red, indicating that there is too much noise in the
audio signal for Torq to properly track position and velocity. Try cleaning the record using a high quality vinyl cleaning
system. Too much dirt on the record can cause errors in the tracking process.
A high Error Index can also be caused by wear and tear on the Control Vinyl. Each time a record is played, it is slightly
damaged, especially if the tracking weight of the needle is very heavy. After repeated use, the control signal may become
distorted and unreadable. Simply flip over the Control Vinyl to the second side or purchase a replacement record from
the M-Audio Webstore (www.m-audio.com).
If the output level of your stylus/cartridge is too low, this can also result in high Error Index readings. Try replacing your
stylus/cartridge with one of the recommended models at the end of this manual for a higher output level.
Standard Mode
When you enable External Control, Torq will be in Standard mode. In this mode, one control source is assigned to each Deck.
You will need two sources (2 turntables, 2 CD players, or one of each) in order to control the two Decks in Torq. This is just
like using traditional hardware to DJ.
When using Standard mode, you have two control styles to choose from—Absolute mode and Relative mode—which are
explained below.
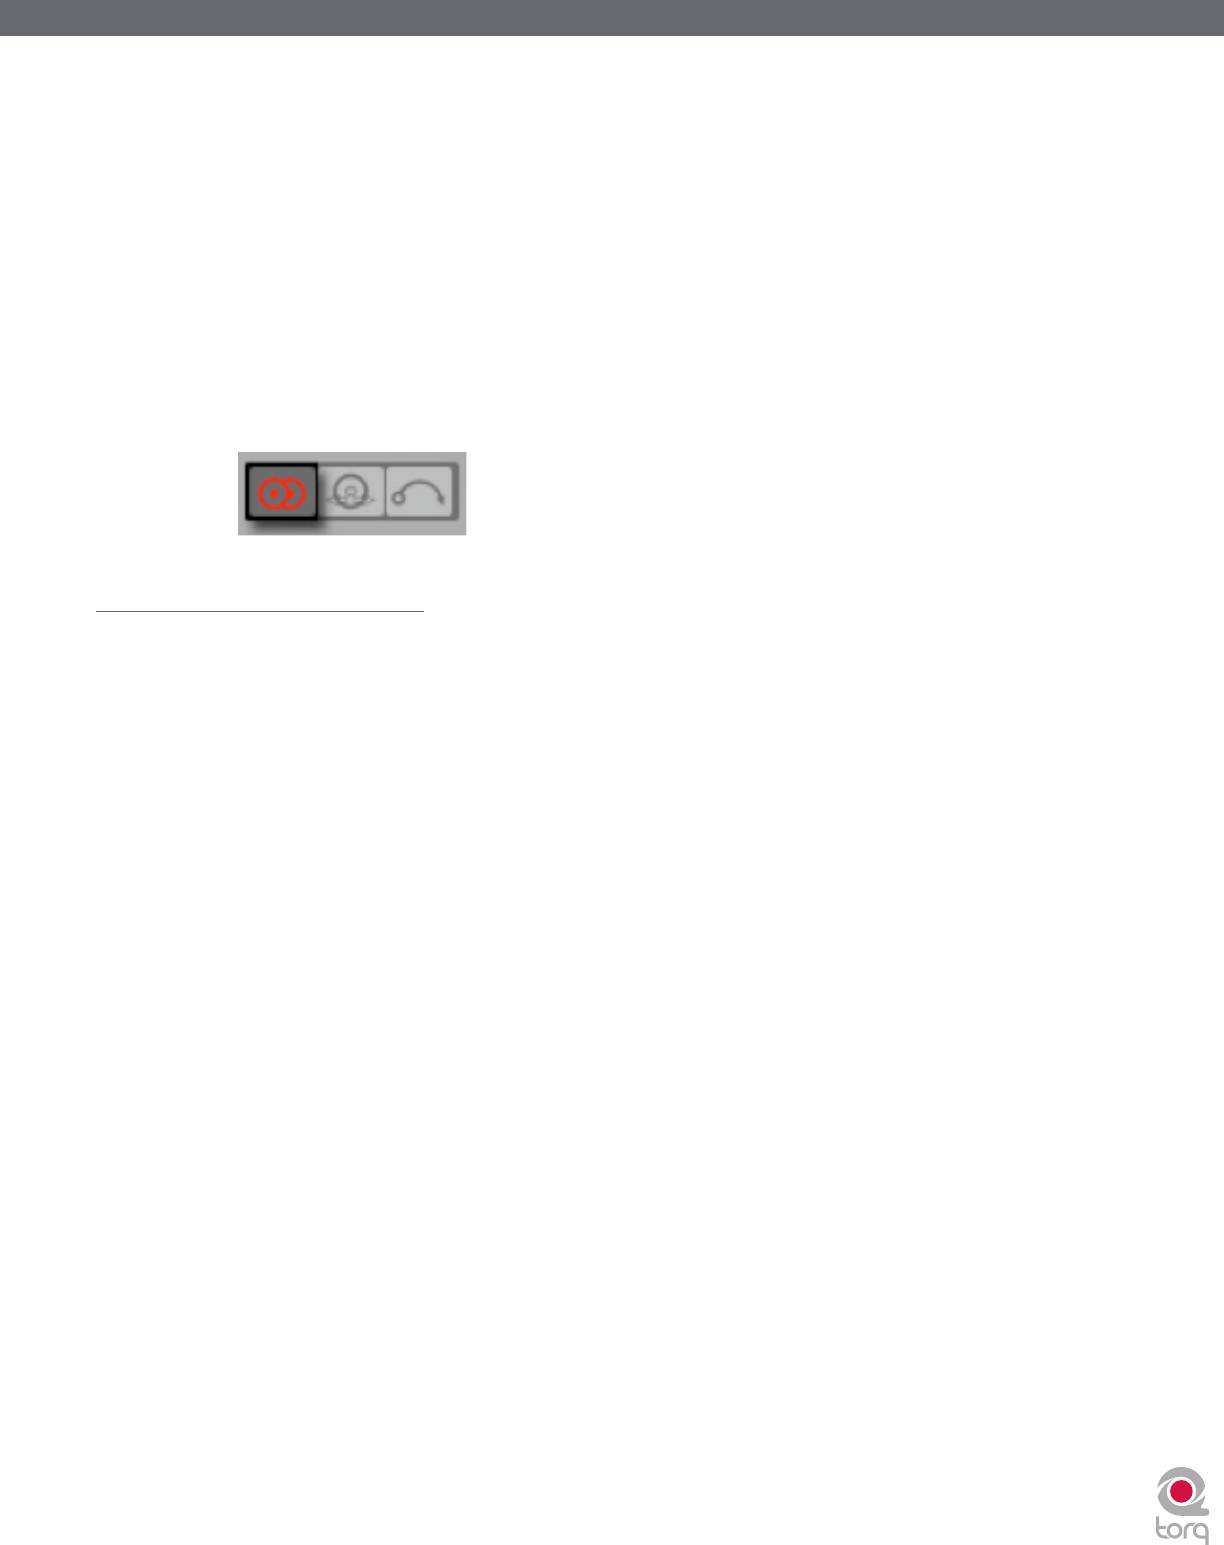
Absolute Mode
This is the default control style when in Standard mode and is indicated by the [>|<] icon on what was previously the Play/
Pause button on the Decks. Absolute mode means that Torq will be following the position of the external control source.
This is most apparent when using the Control Vinyls—you can lift the needle and place it in different locations on the
record and Torq’s Decks will follow this position. If you place the needle at the beginning of the record (or rewind the
Control CD back to the beginning of a track), the song in the Deck will also jump back to the beginning.
This mode is obviously the mode that will recreate the sensation of using CDs and Vinyl with the greatest detail. You
will be able to control playback position from your turntables or CD players without having to interact with the Torq
interface.
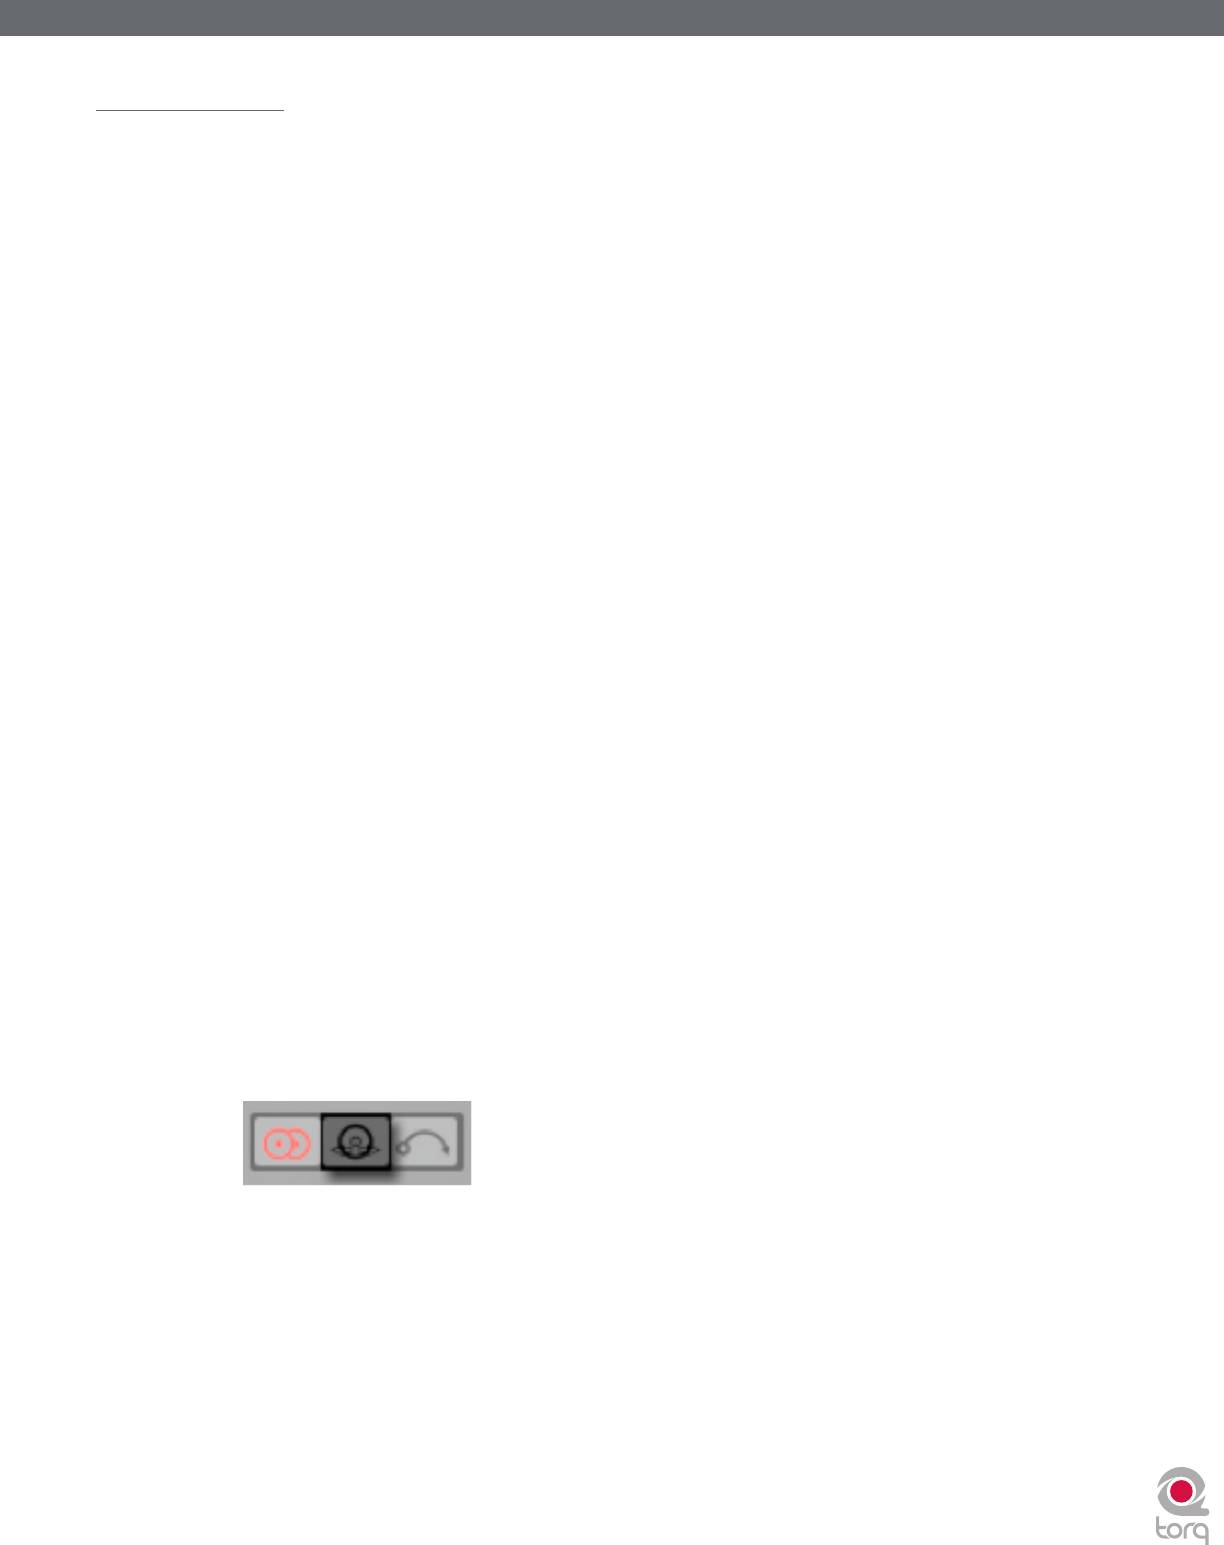
Relative Mode
In contrast, Relative mode will ignore the playback position of the Control Vinyl or Control CD. Torq will only monitor
the direction and speed of the control source. To enable Relative mode on a Deck, click the Absolute mode button—its
icon will change to [<|>] indicating that Relative mode is now active (click the button again to toggle back to Absolute
mode).
You’ll now notice that placing the needle in different locations on the record will have no effect on the music—playback
will resume from the point it left off as soon as the needle touches the record again.
Even though the playback position of the Control Vinyl or Control CD is not affecting the playback position of the song
on the Deck, the speed and direction of the control source will still continue to work. You can change the playback speed
using the pitch adjusters on your turntables or CD players and the playback speed of the Deck will follow. You can even
scratch like normal. The added benefit is that, should the needle skip a groove while you’re scratching, you won’t lose the
sound you were using. You can continue to scratch the same location of the audio file even if the needle keeps skipping.
✓ Note: While there will be no audible change in music playback when switching a Deck from Absolute mode to Relative
mode, there is a chance that the playback position could jump to an unanticipated position when switching from Relative
mode back into Absolute mode. This is due to the fact that, while using the features of Relative mode, the playback position
of the Deck and the actual location of the control source could fall out of sync (for example, if you loop the song on the
Deck, the song will no longer proceed forward but the location of the control source will continue to play forward). When
you switch back to Absolute mode, Torq will immediately jump to the position indicated by the control source...this could
even be a position after the song has ended! Therefore, be extremely careful when toggling back to Absolute mode. Only
do so if (1) you know the location of the song and control source are still in sync or (2) you mute the Deck before switching
over, thus preventing any jumps from being heard by your audience.
Torq 1.5 User Guide Chapter 1
Torq 1.5 User Guide Chapter 6
37
37
AMPutate Mode
While exploring the depths of Torq, you will repeatedly run into scenarios that would not be possible with traditional DJ
hardware—techniques that can only be achieved through the flexible power of computer technology. Torq’s AMPutate mode is
a perfect example of this—it allows you to DJ using only one turntable or CD player. Wait, what? DJing has always been about
two turntables and a mixer, right? When using AMPutate mode, it still is, but one of the turntables is “virtual.”
The idea behind AMPutate mode is that you generally need to manipulate only one song at a time when DJing. One song will
be playing freely (the one your audience is dancing to) while you play with the other turntable in order to match tempos and
find the perfect starting place for the next song. Once tempos are matched and the time is right, you’ll start the song and apply
small adjustments to it in order to keep it in sync while mixing it in. Once the song is fully mixed in and the previous song is
over, your need for manipulating the song will be over. At that point, you’d put a new record on the other turntable and begin
the process of cueing and beat-matching.
Deck Control
AMPutate mode allows you to control one of Torq’s Decks with a single Control Vinyl or Control CD while the other
Deck operates in Hybrid or CDJ mode. To enable AMPutate mode:
1. Open the Preferences and click on the External Control tab.
2. Ensure that External Control is enabled. If not, turn it on now by selecting “Yes” in its drop-down menu.
3. With External Control enabled, you’ll also be able to enable AMPutate mode by selecting “Yes” in its
drop-down menu.
4. AMPutate will use the control source chosen for Control Input A on the Audio Preferences tab. Check your
selection on this tab to make sure you have selected your desired control source.
5. Close the Preferences.
6. Load a track onto Deck A and click the Vinyl button (located right below the QuickCue buttons).
7. Deck A will now be under external control.
8. Start your turntable or CD player. Deck A will begin to play like normal.
9. Now, load a track onto Deck B and click its Vinyl button. You’ll notice that Deck A will automatically switch to
Hybrid or CDJ control (whichever mode you used last) and will continue to play! At the same time, the external
control source will now be controlling Deck B.
10. You can swap external control back and forth as you please and the music will remain playing on both Decks at
all times.
✓ Note: You can also enable and disable AMPutate Mode using the AMPutate button in Torq’s Toolbar.
So you can see that swapping external control is as simple as clicking the Vinyl button on the Deck you wish
to control (you could assign MIDI notes or keys on your computer’s keyboard to the Vinyl buttons, too). If the
external control source is stopped when you switch control to the other Deck, it will remain stopped. If the
control source was playing when you switch control to the other Deck, it will remain playing.
✓ Note: Because the AMPutate system allows you to swap control between two independent Decks, the Decks are
forced into Relative mode to prevent any undesirable jumps in playback position when toggling control. Therefore,
when using AMPutate mode, you will use the on-screen controls (Fast Forward, Rewind, Overview Waveform,
QuickCues, etc.) to set the playback position of the song—needle drops will not work.

Torq 1.5 User Guide Chapter 1
Torq 1.5 User Guide Chapter 6
38
38
BPM Matching
So how does one go about doing a DJ set with only one turntable? It is a little different than doing it in Standard mode,
primarily due to the fact that you must use Torq’s on-screen Speed sliders to match tempos as opposed to using the pitch
sliders on your turntable or CD player.
Try it out: Click Vinyl on a Deck and start the external control source. While the song is playing, move the Deck’s on-
screen Speed slider. Sure enough—the playback speed of the song changes, just as if you’d moved the pitch slider on the
actual turntable or CD player.
The reason for requiring the use of the on-screen controls lies in the fact that external control can be toggled back and
forth between the Decks at will. Any time you do this, you’ll want the Decks to keep their previous tempos. If the tempo
of a Deck changed when swapping external control, the mix would suddenly fall wildly out of sync.
Therefore, the speed of the Control Vinyl or Control CD must remain constant—Torq will scale the playback rate as
appropriate based on the setting of the Decks’ Speed sliders. If you change the speed of the control source, you’ll find
that the Decks suddenly change speed any time you toggle external control.
There is, however, one unique advantage to this setup: you can make use of Torq’s automatic beat-matching! Instead
of manually moving the on-screen Speed slider with the mouse or MIDI Control, you can simply click the Deck’s Sync
button and it’s Speed slider will be moved to match the tempo of the other Deck. Click the Sync button again to turn it
off, and the Deck will remain at the proper speed waiting for the external control signal to begin. All you have to do then
is start the music at the right time and keep it in alignment during the mix via external control. This makes the process of
preparing the next track much faster.
Runout Protection
Since there is only about 12 minutes of usable control signal on each side of the Control Vinyls or on each track of the CD,
it is possible that the song you are controlling could exceed the length of control signal available on the record or CD. This is
extremely common when using Relative mode since the needle or CD position could be halfway through when you start the
next track.
In order to prevent the music from stopping abruptly if the control signal runs out on the record or CD, Torq features Runout
Protection which essentially disables External Control when the record or CD reaches the last 30 seconds of its signal. When
this happens, the song’s waveform will start to flash yellow and the song on the Deck continue to play. You will now be able
to take the needle off the record and place it back at the beginning without Torq stopping the music (the same is true for the
CD—you can jump back to the beginning of the track without stopping the music). Once Torq reads a few seconds of signal
from the new location, the flashing will stop and Torq will re-engage External Control allowing you to scratch and manipulate
like normal.
✓ Note: If you are currently in Absolute mode when the last 30 seconds of control signal are reached, Torq will automatically
switch the Deck into Relative mode when it engages the Runout Protection. The Deck will remain in Relative mode after you
reset the record or CD, thus preventing the music from jumping to an unexpected location when external control is enabled
again.
MIDI Control
While the Torq Control Vinyl and Control CDs offer a great way to control song playback on the Decks, there are still plenty
of other features in Torq that would surely feel good under the fingertips. For that purpose, Torq provides the option of MIDI
control for nearly every button, knob, and slider on the interface. Since MIDI is a common protocol shared between all types of
musical gear, you can use almost anything capable of generating MIDI note or CC messages to control Torq—they do not need
to be specialized DJ controllers. This will offer you a way to experiment with different control methods when DJing, such as
using an M-Audio Trigger Finger to control samples or an M-Audio Axiom 25 keyboard to control effects and pitches.
Torq 1.5 User Guide Chapter 1
Torq 1.5 User Guide Chapter 6
39
39
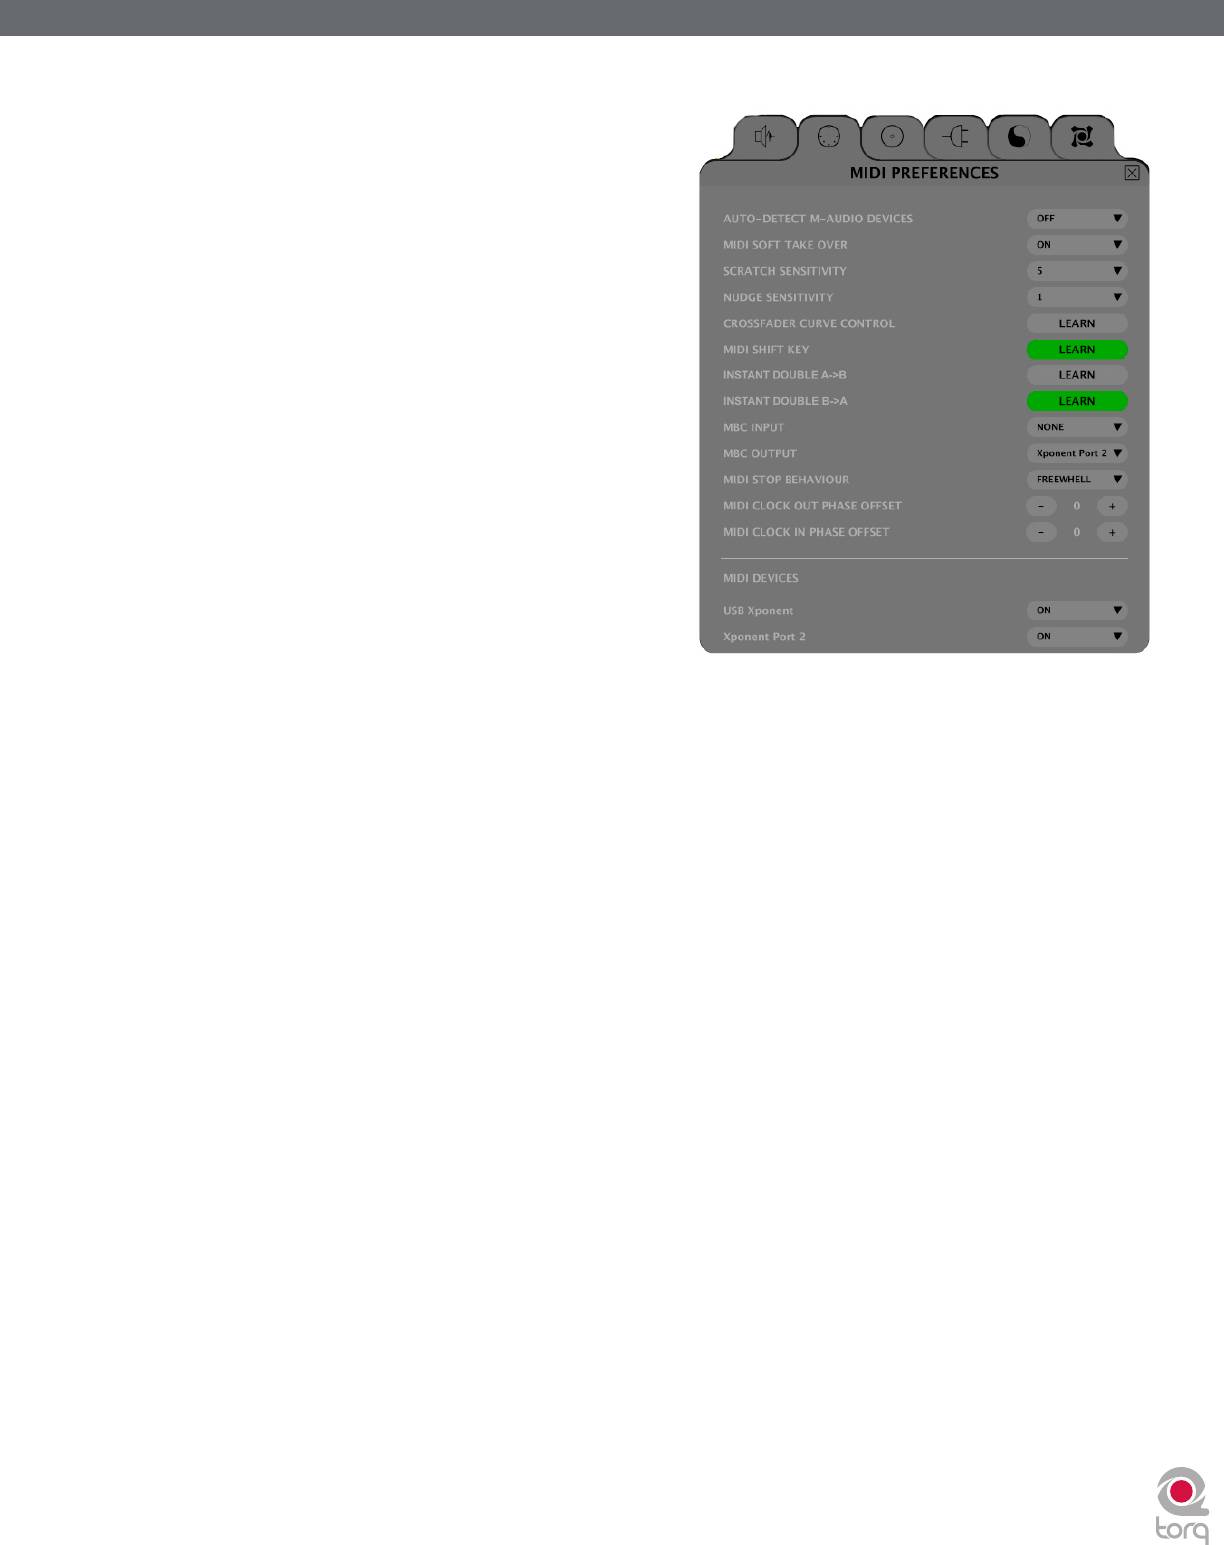
< MIDI Preferences
The second tab of the Preferences contains the MIDI
options. At the bottom of this tab is a list of all the
available MIDI input devices on your computer. Each
device has a “Yes/No” option to enable or disable it.
Set the MIDI device to “Yes” if you wish to use it to
control Torq. Otherwise, set the device to “No” and
Torq will ignore it (allowing you to use it to control
a different application, such as when ReWired into
another host program).
Once you have enabled a MIDI Input, you will be able
to use it to control Torq by means of MIDI Learn,
which will be described next.
< MIDI Learn
Every musician approaches their craft from a slightly
different direction. DJing is no different. That is why
Torq is basically a blank slate when run for the first
time—there are no pre-set control assignments for
any of the buttons, knobs, or sliders seen on screen
for you to memorize. Instead, you get to assign the
most important controls for you to whatever MIDI
controls make the most sense to you.
» Creating a MIDI Assignment
Torq uses a simple MIDI Learn scheme to make assigning controls on your MIDI controllers a breeze:
1. Right-click (CTRL-click on Mac) the button, knob, or slider you wish to control via MIDI. The control
will be highlighted in red indicating that Torq is standing by.
2. Move the desired control on your MIDI controller. That is, move the knob or slider you want to use
or press the button/key you wish to use.
3. Torq will intercept the incoming MIDI message and will instantly assign it to the control. The red
highlight will disappear and the MIDI control will be active.
» Clearing a MIDI Assignment
If you’ve assigned a MIDI control using MIDI Learn and you wish to clear the assignment, simply right-click
(CTRL-click on Mac) the desired control in Torq, then press the Delete key on your computer’s keyboard.
Any assignments for the control will be erased.
» Changing MIDI Assignment
If you assign a MIDI knob, for example, to the Low EQ in the Mixer, you can assign it to the Mid EQ by
simply right-clicking (CTRL-click on Mac) the Mid EQ knob and moving the MIDI Knob. Doing so will
clear the assignment to the Low EQ knob and the MIDI control will now be mapped to the Mid EQ knob.
This allows you to use a small controller for Torq since you can continually reassign its controls without
worrying about what the previous assignments were.

Torq 1.5 User Guide Chapter 1
Torq 1.5 User Guide Chapter 6
40
40
< Keyboard Learn
You can also use your computer’s keyboard to control elements of the Torq interface using the same method
as MIDI Learn above. Simply right-click (CTRL-click for Mac) on a control on screen, then press a key on your
keyboard. That key will then be assigned to the selected control. The same method for changing and clearing
MIDI assignments described above also works for keyboard assignments.
< Assigning Buttons to Knobs or Sliders
If you so desire, you can assign a MIDI button/key or a key on your computer’s keyboard to a knob or slider
in Torq’s interface. When doing this, pressing the MIDI button or key will cause the knob or slider’s value to
toggle between an assignable minimum and maximum value. For example, assign the “X” key on your computer
keyboard to the Low EQ knob. Turn up the EQ to +6 using the mouse, then press the “X” key on your keyboard.
The EQ will jump to 0. Press “X” again, and the EQ will jump back up to +6.
< Assigning Knobs or Sliders to Buttons
Conversely, you could assign a MIDI knob or slider to one of Torq’s buttons. When doing this, the button will
turn on anytime the knob or slider is turned past its halfway point (outputting a MIDI value greater than 64). The
button will turn back off when the knob or slider is moved lower than its halfway point.


