Electrolux NPX 6 SENSOMATIC: CHAPTER CHAPTER
CHAPTER CHAPTER: Electrolux NPX 6 SENSOMATIC
67
67
EFFECTS
CHAPTER
CHAPTER
Effects are devices that alter an audio
signal. These alterations can range
from subtle to extreme and can be
a great source of creative fun within
Torq.
Each Deck can be processed
13
1
individually with multiple effects, and
that is the purpose of the Effect Racks.
The Effect Racks are located between
each Deck and the Mixer and will
house up to three effects from Torq’s
built-in library as well as one external
VST effect. This means you can be
using up to eight effects within your
mix at the
same time.
Controls
The controls for the built-in and external VST effects are basically the same and will be
described here. The VST effects have some additional controls and considerations of
which to be aware, and these will be covered in the next chapter.
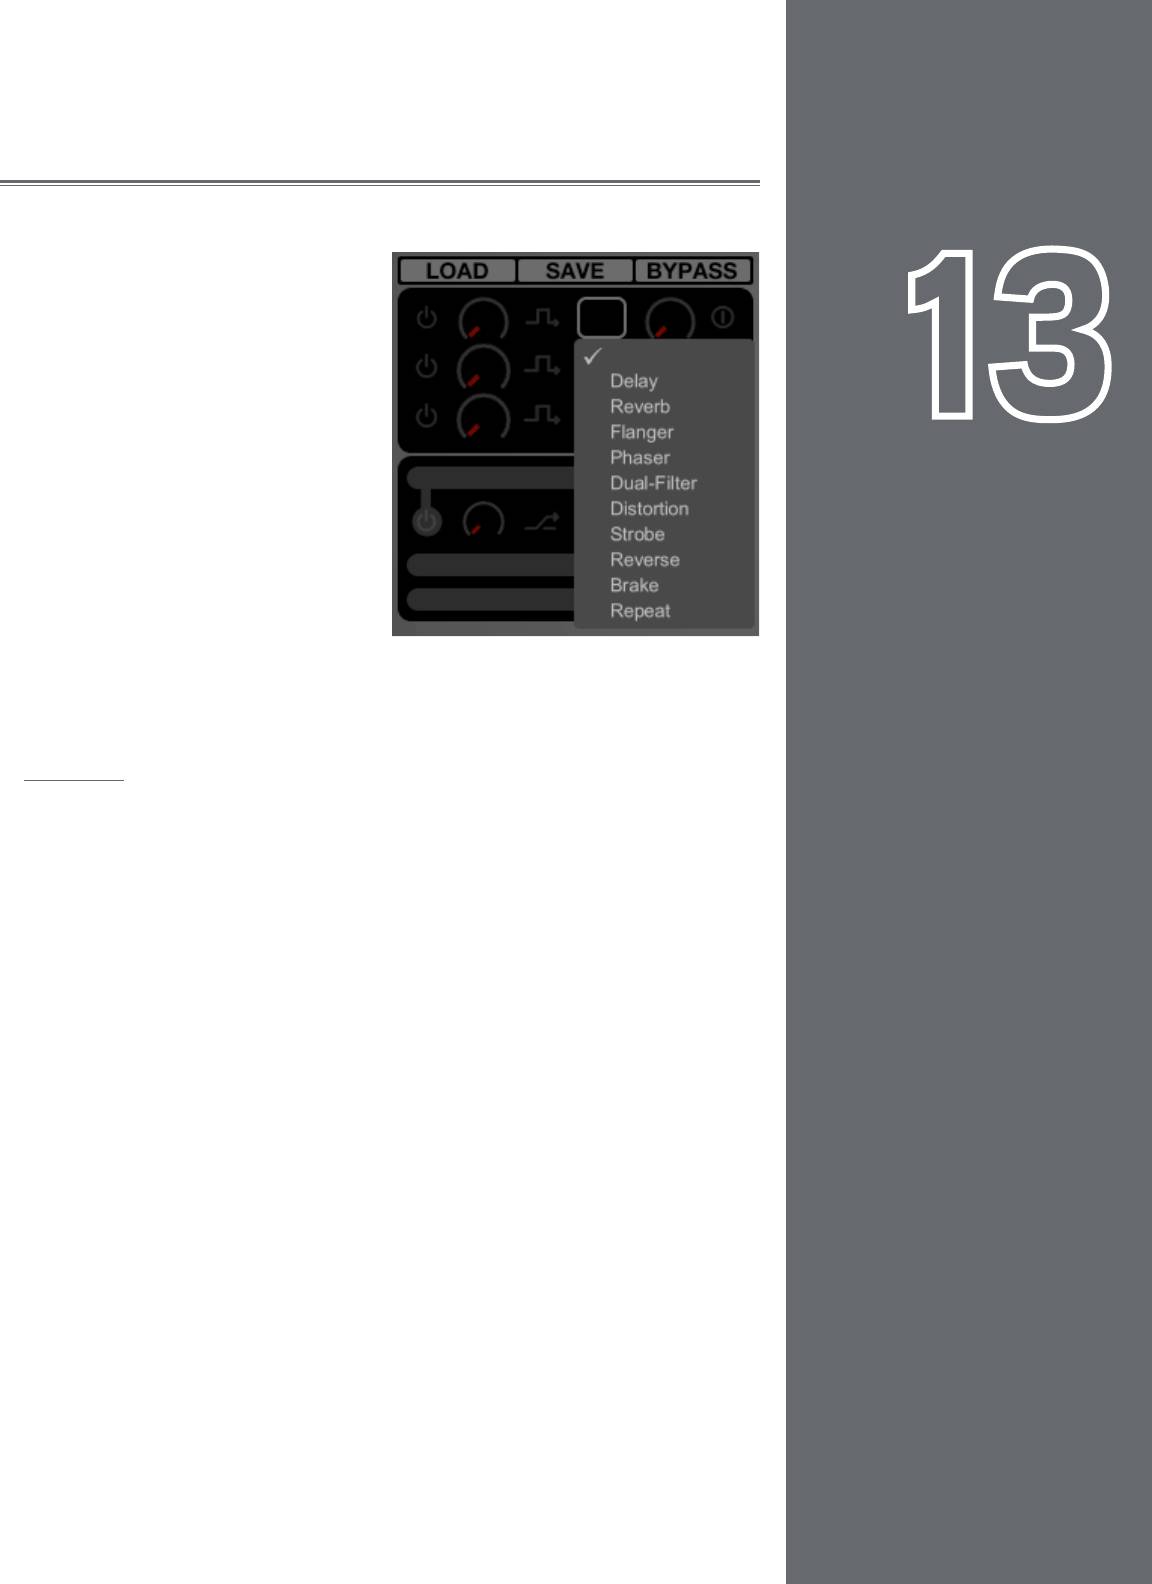
Effect Slot
To begin using effects, you need to select an effect for use in one of the Effect
Slots. Each slot can hold one effect which you’ll choose from a list:
1. Click on an empty Effect Slot. A pop-up list of available effects will appear.
2. Click on one of the effect names from the list to load it into the slot.
When loaded, an icon will appear in the Effect Slot representing which
effect is
in use.
3. To remove an effect, choose the “blank” effect at the top of the pop-up list.
Enable Button
Before you can use an effect, you must turn it on, and that’s the purpose of the
Enable button. By default, this button will be off whenever you load a new effect.
This allows you to set the effect the way you desire before you use it in your mix.
✓ Note: Some of the effects don’t utilize the Enable button and will function in a
different way (which is outlined in the various effect sections later in this manual).
English
English
Torq 1.5 User Guide Chapter 1
Torq 1.5 User Guide Chapter 13
68
68
Mix Knob
The functionality of the Mix knob differs depending on the status of the neighboring Routing button:
» When the Routing Button is set to Insert/Chain—the Mix knob will adjust the wet/dry mix of the effect. When
the Mix knob is all the way to the left, only the original audio signal will be heard (no effect). When the Mix knob
is all the way to the right, only the output of the effect will be heard, thus becoming a full insert effect. When the
knob is at 12 o’clock, an even 50/50 mix of dry signal and wet effect will be created.
» When the Routing Button is set to Send—the knob will act as an effect send amount. When the Mix knob is
all the way to the left, no amount of the signal will be sent to the effect. As you begin to rotate the Mix knob
clockwise, signal will be sent to the effect and you will begin to hear the results of the effect in your mix. When
the Mix knob is all the way to the right, you’ll actually be boosting the signal to the effect, so the effect output
can be louder than the source audio.
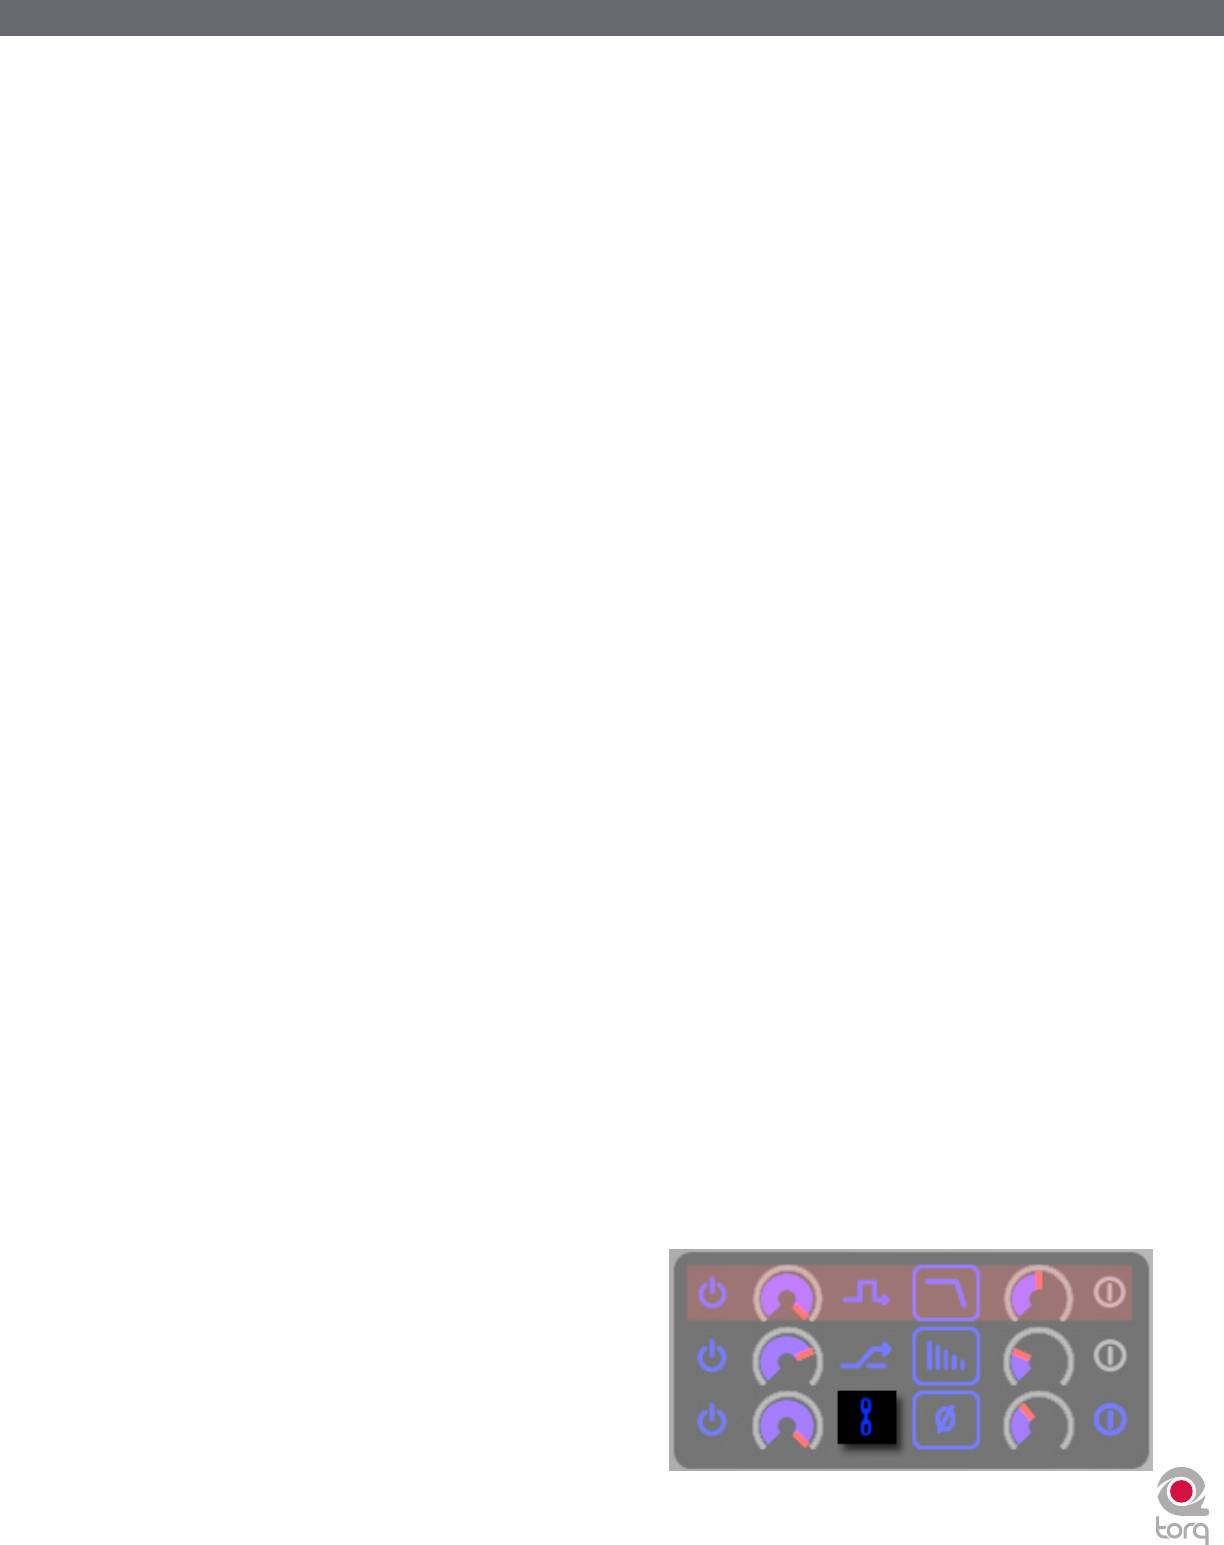
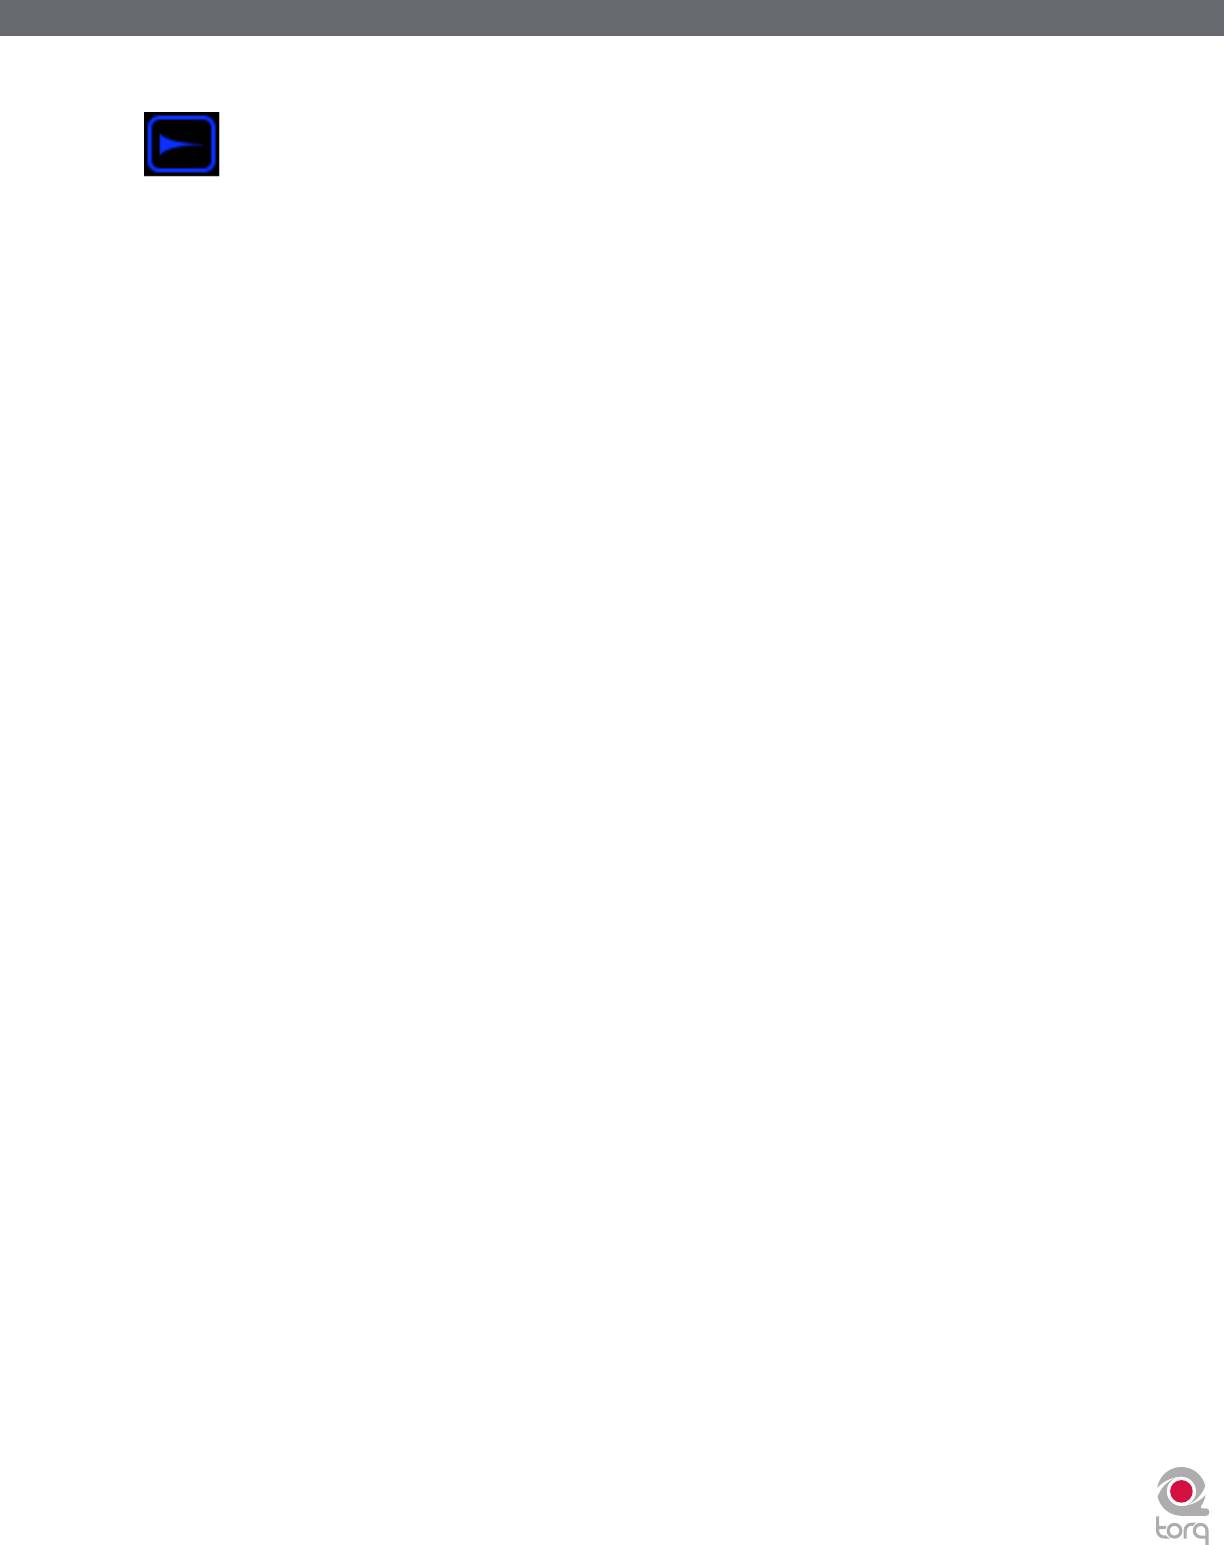
Routing Button
When using effects, there are basically two different configurations that can be used: Insert and Send. An Insert Effect is
one that’s designed to be “inserted” between the Deck and the Mixer. The audio from the Deck can be fully processed
and replaced by the effect. Examples of effects that are typically used as inserts include Distortion, Dual-Filter, Phaser,
Flanger, Repeat, Strobe and Reverse.
Send Effects, by contrast, are not designed to completely replace the audio being processed in the way Insert effects do.
When using a Send Effect, the intention is to blend the sound of the effect back with the original music. The effects that
are typically used as Sends are Reverb and Delay. When using these effects, you typically want to add Reverb or add a
Delay to the music that is already playing. Therefore, think of Insert Effects as replacing your sound while Send Effects add
to your sound.
Each time you click the Routing Button, it will toggle its state between Insert and Send. When loading an effect, Torq will
automatically set the Routing Button to the mode most appropriate for the effect (i.e. the Reverb will be loaded in Send
mode while the Dual-Filter will be loaded in Insert mode).
In Torq 1.5, it is now also possible to create Chains with the Send Effects. This allows you to take the output of the Send
Effect and process it further with more Insert Effects. For example, you can take the output of the Delay and feed it
through the Phaser to create psychedelic echo patterns.
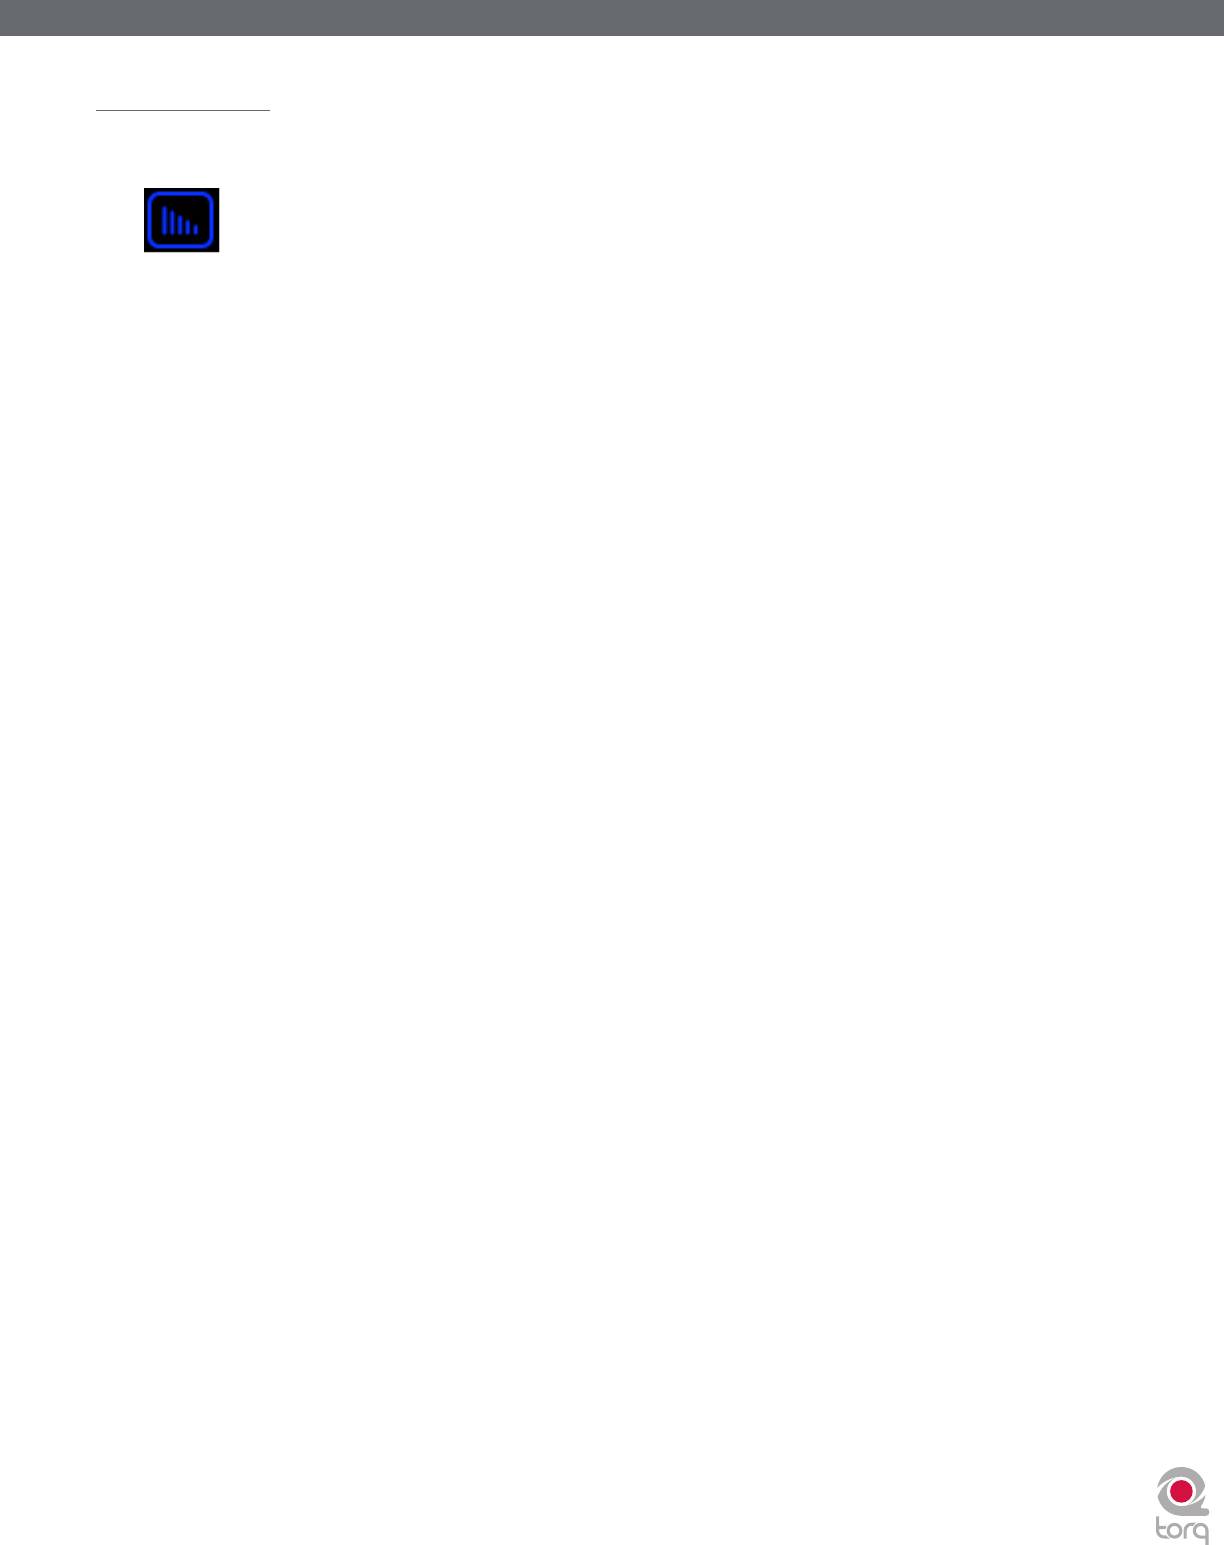
A Chain will automatically be created when you place an Insert Effect below a Send Effect in the rack. Instead of seeing
the normal Insert icon, you’ll see a Chain icon indicating that the effect is chained to the one above it. This indicates that
the effect is taking its audio from the output of the effect above it.
✓ Note: With this new effect routing, it is only possible to create an Insert Effect if the Effect is placed above any other Send
effect in the Rack. All Insert Effects placed below a Send Effect will be chained to that Send Effect. Also note that, when
using Chain mode, the output of Send effects will be sent to the Crossfader, meaning that the tail ends of effects (such as
delays and reverbs) will still be heard after turning down the Channel Volume fader. However, moving the Crossfader away
from the channel will silence both the music and the effects.
Tweak Knob
Effects are fun because you can alter their qualities while
you use them, such as changing the length of a Reverb or
Delay, or to change the intensity of a Phaser or Flanger. To
keep things simple and easy to manage, Torq provides one
knob, the Tweak knob, for parameter control on each effect.
Because effects alter audio in different ways, the function of
this knob will change depending on which effect is loaded
in the slot. These functions are listed in the Built-In Effect
reference in this manual.

Torq 1.5 User Guide Chapter 1
Torq 1.5 User Guide Chapter 13
69
69
Tweak Button
The Tweak button works in the same way as the Tweak knob—it will toggle the state of a parameter in the selected
effect. Like the Tweak knob, the exact function of the Tweak button will depend on which effect you’re using. The
functions are listed in the Built-In Effect reference.
Saving Effect Racks
When you start getting deeper into the effects, you’ll begin creating multi-effects—effect chains of more than one plug-in.
You’ll find that you can get some jaw-dropping sounds when using multiple effects at the same time, and some of those
combinations may be worth saving for later use. You can save the entire state of an Effect Rack, including which effects
are in use as well as their settings, using the Save button at the top of the Rack:
1. Configure your Rack as desired and click the Save button at the top of the Rack. A standard Save dialog box will
appear.
2. Type a name for the file and choose a location on your hard drive to store it and click OK. The file will be saved
as a preset, containing all information regarding the Effect Rack configuration.
Loading Effect Racks
Obviously, if you can save the settings of an Effect Rack, you can recall them, too. That is accomplished with the Load
button at the top of the Rack.
1. Click the Load Rack button. A standard dialog box will appear.
2. Browse to the location on your hard drive in which the Effect Rack configuration file is stored, select the file, and
click OK. The file will load all Effects in your Rack configuration exactly as you saved them.
✓ Note: Loading an Effect Rack will discard all effects currently in the Rack. If you have a combination you like,
make sure to save it before you load in another configuration.
Bypassing the Effects
When using multiple effects at the same time, you may want to turn them on or off all at once (instead of clicking each
effect’s Enable button). Clicking the Bypass button at the top of the Rack will do just that—the audio from the Deck will
bypass the Effect Rack and will be sent straight to the Mixer. Click the button again to disengage the bypass.
Clearing all Effects
To clear all effects in a rack, hold the Shift button while clicking the rack’s Bypass button.
Torq 1.5 User Guide Chapter 1
Torq 1.5 User Guide Chapter 13
70
70
Built-In Effects
The following is an explanation of the 10 built-in effects in Torq:
Delay
Delay is the technical term for what the Delay effect does, but you’ll probably like to think of this effect as an “echo.”
Essentially, the Delay effect listens to the incoming audio, holds on to it for a predetermined amount of time, then spits
it back out. When the Delay output is blended in with the audio, it sounds like an echo. Furthermore, you can feed the
Delay output back to its input again, causing echoes of the echoes (also known as Feedback).
DJs typically use Delays to fill up space during a break in a song (the last couple of beats before the break can be echoed)
or to stretch out the ending of a song by letting it echo and slowly fade away. Because of the tempo-synced nature of
Torq’s Delay effect, you’ll also be able to add rhythmic variance by layering echoes that are perfectly timed to the music.
< Enable Button
Deactivating this button stops the Delay effect. The output of the Delay will stop immediately when the effect is
turned off.
< Mix Knob / Routing Button
When the Routing button is set to “Send,” the Mix knob will control the amount of audio from the Deck to feed
into the Delay. When the knob is fully counterclockwise, no signal will be sent into the Delay so you will not
hear any echoes. As you begin to turn up the Mix knob, you’ll begin to hear the echoes from the Delay.
When the Routing button is set to Insert, turning up the Mix knob will cause the output of the Delay effect to
replace the sound from the Deck. This is a subtle difference that won’t be noticeable until you do one of the
following:
1. When you turn the Mix knob beyond its 12 o’clock position, the sound from the Deck will begin to fade
away, leaving only the sound of the Delay.
2. If you quickly turn the Mix knob back to 0, you will cut off any remaining echoes before they can be heard.
The Delay effect will load with the Routing button set to Send mode since this is the typical routing for a Delay.
< Tweak Knob
Use this button to change the Delay time of the effect. The Delay’s time will be set to match the rate at which
you tap this button. The maximum delay time is two bars and the minimum time is 1/16-note (1/16 of a bar). The
operation of this button is governed by a few rules:
1. When fully counterclockwise, feedback will be disabled.
2. When the knob is turned up to three quarters of the maximum, the feedback will be 100% (i.e. the delay
will never fade away).
3. When the knob is turned past three quarters, the feedback will be increased beyond 100%, allowing the
delay to get louder with each time it is repeated.
< Tweak Button
Use this button to change the Delay time of the effect. The Delay’s time will be set to match the rate at which
you tap this button. The maximum delay time is two bars and the minimum time is 1/16-note (1/16 of a bar). The
operation of this button is governed by a few rules:
1. Torq will determine the tempo within only two taps. This allows you to change the delay time very quickly,
even while the Delay is already active.
2. Since Torq knows the tempo of the song playing on the Deck, the delay time you tap using the Tweak
button will automatically be adjusted to match a note value at the current tempo. For example, if the song
BPM is 120, and you tap a tempo that is interpreted as 122 BPM, the delay time will be set to 120 BPM
(quarter-note delay). If you tap a tempo that is read as 158 BPM, the delay tempo will be rounded up to
160, which is a dotted-eighth.
Torq 1.5 User Guide Chapter 1
Torq 1.5 User Guide Chapter 13
71
71
Reverb
Reverb is the phenomenon in which sound bounces off the walls within a room, creating hundreds (thousands?) of echoes
that cannot be individually identified by the human ear. The total result of all these echoes is a wide and ethereal sound
that can add a nice touch of space to your mix.
The most obvious characteristic of a Reverb is how long it lasts. This is referred to as the Reverb Time and is the only
adjustable parameter in Torq’s Reverb effect.
< Enable button
This button enables and disables the Reverb effect. If this button is switched off while the Reverb is active, the
sound of the Reverb will be cut off.
< Mix Knob and Routing Button
When the neighboring Routing button is set to Send mode, the Mix knob will set the amount of signal fed into
the Reverb processor. This signal will then be blended with the original signal from the Deck, making it sound like
the Reverb was added to the song.
When the Routing button is set to Insert mode, the Mix knob will adjust the Dry/Wet balance of the Reverb.
The difference is that the audio generated by the Reverb will replace the original song as you turn this knob up.
By default, the Reverb effect will load with the Routing button set to Send mode since this is the typical way to
use a Reverb. However, feel free to experiment with Insert mode—you can create ambient textures that can be
interesting to blend into your mix.
< Tweak Knob
This knob controls the Reverb time. When fully counterclockwise, the Reverb will be extremely short, similar to
the sound heard in a small shower stall. As you turn this knob clockwise, the Reverb will become longer until it
sounds similar to a huge cathedral.
< Tweak Button
Pressing this button will “freeze” the Reverb. When activated, the Reverb will stop accepting audio input from
the Deck and will feed back on itself instead. The result is a reverb that “hangs” or “stalls” indefinitely. When you
turn Freeze off, the Reverb will begin accepting input signals again, and the current “frozen” reverb will fade away
following the current Reverb Time. This can be another interesting way to fill up space during a break or to add
emphasis to a hit in the song.
Torq 1.5 User Guide Chapter 1
Torq 1.5 User Guide Chapter 13
72
72
Flanger
A Flanger is a common effect found in most effect processors. Flanging grew from a studio trick where engineers
would play identical material on two tape decks, then make slight changes to the play speed of the two tape machines
by dragging their hand on the flanges of the tape reels. The result is a “wooshing” sound that can be compared to a jet
flyover.
< Enable Button
Naturally, this button turns the Flanger on and off.
< Mix Knob and Routing Button
Unlike the two effects discussed so far, the Flanger works best with the Routing button set to Insert mode. This
allows you to completely replace the original audio signal with the flanged version (by turning this knob fully
clockwise) in order to emphasize the effect.
✓ Note: The effect will still work in Send mode, but it will be less pronounced.
< Tweak Knob and Button
The function of the Flanger’s Tweak knob is determined by the state of the Tweak button:
» When the Tweak button is off, the Flanger will be in Manual mode. The Tweak knob will then control the
delay time of the Flanger. When the knob is counterclockwise, the Flange effect will be very tight. As the
knob is turned clockwise, the effect will become more dramatic and metallic in nature.
» If the Tweak button is on, the Flanger will be in Automatic mode. In this mode, the delay time for
the Flanger will be adjusted automatically. The Tweak knob will then set the rate of the automatic
adjustment—turning the knob clockwise will increase the modulation rate.
Phaser
A Phaser is a somewhat mellower version of the Flanger. Like the Flanger, a Phaser works on the principle of mixing two
identical audio sources together. However, unlike a Flanger, the timing difference between the two audio sources is very
small. The result is that some of the frequencies in the song will be removed or “cancelled out.” Some people describe
this sound as a “wind tunnel” effect.
< Enable Button
This button will turn the effect on and off.
< Mix Knob and Routing Button
Like the Flanger effect above, the Phaser works best with the Routing button set to Insert mode. This allows you
to completely replace the original audio signal with the phased version (by turning this knob fully clockwise) in
order to emphasize the effect.
✓ Note: The effect will still work in Send mode, but it will be less pronounced.
< Tweak Knob and Button
The function of the Phaser’s Tweak knob is determined by the state of the Tweak button:
» When the Tweak button is off, the Phaser will be in Manual mode. The Tweak knob will then control the
phase of the effect.
» If the Tweak button is on, the Phaser will be in Automatic mode. In this mode, the phase will be adjusted
automatically. The Tweak knob will then set the rate of the automatic adjustment—turning the knob
clockwise will increase the modulation rate.

Torq 1.5 User Guide Chapter 1
Torq 1.5 User Guide Chapter 13
73
73
Dual-Filter
A coffee filter is designed to stop coffee grounds while allowing water to pass through. Audio filters work in a similar
fashion: they prevent particular frequency ranges within an audio signal from passing through the effect. Filters come in a
variety of flavors and Torq features three of the most popular types: Low-Pass, High-Pass, and Band-Pass. The names of
these filters are descriptive of what they do. A Low-Pass filter, for example, will only allow low frequencies (bass tones)
to pass through—it will remove the high-frequency (treble) content from the audio signal. A High-Pass filter works the
other way: it allows the treble to pass through while bass is removed. A Band-Pass filter is essentially a High- and Low-
Pass filter put together: it will remove high and low frequencies from the audio signal, only allowing a narrow band of
frequencies to pass.
The most important parameter for a filter is its Cutoff Frequency. It determines the frequency where a filter will begin
to stop frequencies. For example, when using a Low-Pass filter with a cutoff frequency of 1kHz, frequencies below 1kHz
will pass through the filter unaffected while the frequencies above 1kHz are reduced or removed. While there are other
parameters that also affect the behavior of a filter, Cutoff Frequency is the parameter that you’ll be controlling in Torq.
< Enable button
This button will turn the Dual-Filter on and off.
< Mix Knob and Routing Button
The Dual-Filter is designed to be used as an Insert effect. For this reason, the Routing button will automatically
switch to Insert mode whenever you load this effect. Then, the Mix knob will serve as a Dry/Wet adjustment
which you will want to leave fully clockwise (so you only hear the output of the Dual-Filter).
< Tweak Button
The Tweak button is used to set the filter mode for the Dual-Filter effect. When this button is off, the two
filters (High-Pass and Low-Pass) will be adjusted only one at a time. When you turn this button on, the High-Pass
and Low-Pass filters will be linked, thus creating a Band-Pass filter where both filters are adjusted simultaneously.
< Tweak Knob
This knob will adjust the Cutoff Frequencies of the filters.
» When the Tweak button is off, the knob will behave as follows:
1. Placing the knob at 12 o’clock will result in the audio passing through the Dual-Filter unaffected.
2. Turning the knob counterclockwise from 12 o’clock will begin to lower the Cutoff Frequency of the
Low-Pass filter. You will hear the music become dull and muffled as you turn this down to the point
where you’ll only hear low bass rumbles.
3. Turning the knob clockwise from the 12 o’clock position will begin to raise the Cutoff Frequency of
the High-Pass filter. You will hear the music become more thin and brittle as you do this until only
the highest of the high frequencies remain.
» When the Tweak button is on, the Tweak knob will merely control the center frequency of the Band-Pass
filter. As you turn the knob down (counterclockwise), you’ll hear the high frequencies become muffled
while you begin to hear more of the bass.

Torq 1.5 User Guide Chapter 1
Torq 1.5 User Guide Chapter 13
74
74
Distortion
Distortion, by definition, is the altering of a signal. In practical terms, it refers to feeding audio into a device so loudly that
it exceeds the dynamic range of the device. The result is a fairly raunchy noise that, at times, can be exactly what you’re
looking for. This is known as Overdrive Distortion, and is one of the two types of distortion possible with the Distortion
effect.
The other type of distortion available in Torq is Sample Rate Reduction. When an audio file has its sample rate lowered,
it looses the ability to accurately reproduce high-frequency sounds. Instead of sounding soft and muffled like a Low-Pass
filter, the Sample Reducer will sound grainy and harsh.
< Enable button
This button turns the Distortion on and off.
< Mix Knob and Routing Button
Like the Dual-Filter above, the Distortion is designed to be used as an Insert effect. The Routing button will
switch to Insert mode automatically any time you load the Distortion effect. You should also turn the Mix knob
fully clockwise so that you can only hear the output of the distortion (if you blend the distorted signal with the
original signal, the distortion will be less pronounced).
< Tweak Button
This button is used to set the operating mode of the Distortion. When the button is off, the Distortion is in
Overdrive mode. When the button is on, the Distortion will be in Sample Rate Reduction mode.
< Tweak Knob
» When set to Overdrive mode, the Tweak knob will increase the volume of the signal being fed into
the distortion. When the knob is fully counterclockwise, the input signal is not boosted and therefore
undistorted. As you turn this knob clockwise, the volume will begin to increase. At a certain point, you’ll
start to hear the audio become distorted. You can leave the knob here for a subtle distortion, or you can
continue to turn it clockwise in order to push the distortion into really nasty realms.
» When set to Sample Rate Reducer mode, the Tweak knob will control the output sample rate. When the
knob is fully counterclockwise, there is no sample rate reduction, so the audio will be undistorted. As you
turn the knob clockwise, the sample rate will be lowered. The high frequencies will be the first to exhibit
signs of distortion. As you continue turning the knob, the distortion will move lower and lower into the
frequency range of the audio until all that remains is low-sample junk.
Torq 1.5 User Guide Chapter 1
Torq 1.5 User Guide Chapter 13
75
75
Strobe
Just about anyone who has been to a dance club in the last 20 years has experienced a strobe light. Those are the super-
bright lights that flash really quickly. They have the effect of making everyone look like they’re in “stop motion”—the flash
is so fast that you can’t see movement anymore.
Torq’s Strobe effect will create a similar stop-motion effect, but it will do it to audio. The Strobe will essentially mute and
unmute the audio at a rate that you can control. The rate can be as slow as one bar (2 beats unmuted followed by 2 beats
muted) or as fast as 1/64-note.
< Enable Button
Turns the Strobe effect on and off.
< Mix Knob and Routing Button
Because the Strobe effect is designed to mute the audio from a Deck, it needs to be used as an Insert effect.
Therefore, the Routing Button will be set to Insert mode whenever you load this effect.
The Mix knob will control the Dry/Wet mix of the effect. In use, this will control the depth of the Strobe effect.
Since the Strobe effect is muting the signal that passes through it, setting the Mix knob at 50% will result in 50%
of the signal still being present whenever the Strobe is muting. Therefore, you can use this knob to adjust the
intensity of the Strobe.
< Tweak Knob
This knob changes the rate of the Strobe. A tooltip will appear whenever you adjust this knob to show the
current rate (expressed in note values).
< Tweak Button
Activating this button reverses the behavior of the Strobe—what was normally muted will be unmuted and
vice versa.
Reverse
Reversing the playback direction of a song can be a fun party gimmick (you and your friends can look for hidden
messages “backmasked” in the song). However, it can be a useful DJ technique for adding emphasis, and it can also
be used to “censor” profanity (as heard on the radio). The traditional method for reversing playback is to actually
reverse the rotation of the turntable. This has a couple of inherent problems. First, the turntable can’t change direction
immediately—it must slow down to a stop then speed back up in the opposite direction. This can make reversing
playback seem sluggish. Additionally, if the song is playing backwards, it will no longer be in the proper location when you
resume normal playback. For example, if you reverse playback as a way to add emphasis one bar before the chorus in a
song, you’ll find that playback is now two bars before the chorus when you resume normal playback.
Torq overcomes these shortcomings by implementing reversed playback as an effect rather than as a function of the
Deck. By doing so, you can reverse playback instantaneously—there is no lag due to the turntable changing directions.
Furthermore, since this is an effect, the song on the Deck will continue to play normally (the waveform will continue to
scroll in the forward direction) thus keeping the play position correct as you switch the Reverse effect on and off.
< Enable Button
When using the Reverse effect, this button is always on and cannot be turned off.
< Mix Knob and Routing Button
The Mix knob has no function. The effect is routed as an Insert effect by default.
< Tweak Knob
The Tweak knob has no function.
< Tweak Button
This button will turn the Reverse on and off. This button is momentary, meaning you have to keep holding it
while the song plays backwards. When you release the button, normal playback will resume.
Torq 1.5 User Guide Chapter 1
Torq 1.5 User Guide Chapter 13
76
76
Brake
As mentioned above, turntables don’t respond instantly to changes in speed or direction. When you press Stop on
a turntable, it takes a moment for the turntable to slow down and reach a complete stop. This is due the weight and
momentum of the turntable—two factors that don’t exist in the virtual world of Torq. Still, some DJs like the sound of a
turntable slowing down to a stop, and creating that sound is the purpose of Torq’s Brake effect.
Like the Reverse effect above, the Brake effect does not actually stop the playback of the song on the Deck. Instead, it
just simulates the sound of the song slowing down while the song continues to play normally (as seen by the scrolling
waveform). Because the song keeps playing, you can use the Brake effect to create the “slow-to-stop” sound, then bring
the music back in on the next downbeat (which is impossible with real turntables or CD players).
< Enable Button
This button will be on at all times—it cannot be turned off.
< Mix Knob and Routing Button
The Mix knob sets the wet/dry mix of the effect--turn this knob fully clockwise for the proper sound. The Brake
effect is automatically configured as an Insert effect.
< Tweak Knob
This knob will set the Brake time. As you turn this knob clockwise, the Brake time will become longer.
< Tweak Button
Press this button to engage the Brake effect. The music will slow to a stop. Press the button again to resume
normal playback.
Repeat
This effect can be used to create the granular “hyper-repeats” heard in lots of today’s dance music. All you have to do is
trigger the effect and play with the loop length to get instant results. Here’s how it works:
< Enable Button
Engaging this button will start the effect. The Repeat will remain active until this button is turned off again.
< Mix Knob and Routing Button
The Mix knob will set the wet/dry mix of the Repeat effect. Turn the knob fully clockwise to hear only the
repeated audio. While the audio is repeating, you can use the Mix knob to fade the original music back in if you
wish. The effect will automatically be configured as an Insert effect when loaded.
< Tweak Knob
This knob sets the size of the audio slice being repeated. A tooltip will appear showing the current slice length
whenever you move this knob. The repeated slices will always be quantized to the current tempo.
< Tweak Button
When you press this button, it will “re-seed” the Repeat effect. In other words, the effect will begin repeating a
new section of audio whenever you press the button, as if you’d instantaneously turned the effect off and back
on again.
Torq 1.5 User Guide Chapter 1
Torq 1.5 User Guide Chapter 13
77
77
VST Effects
The 10 built-in effects provided with Torq cover a wide range of effects typically used by DJs—many DJs will never need more
than these built-in effects. Others, however, will want to explore the possibilities of additional effects. For this reason, Torq
allows you to use third-party plug-ins that adhere to the VST standard (referred to as “VST plug-ins”).
The amount of third-party VST effects available on the market today is staggering. The variety can range from top-of-the-line
audio mastering plug-ins to simple devices made by someone in their spare time. As a result, your mileage with VST plug-ins
will vary.
Latency
Another potential drawback from using VST plug-ins is latency. Latency is the observed lag between when you trigger an
event or action on the computer and when you finally hear the results. When running without any VST plug-ins, Torq’s
latency is nearly undetectable—Torq will respond to scratches, button presses, and knob tweaks immediately.
Some VST plug-ins, however, must perform very complex calculations on the audio. Sometimes, these calculations require
that the plug-in buffer the audio so that it can process it in large chunks. In these cases, the plug-in will fill its buffer with
some audio sent from Torq. It will then process the audio and send it to an output buffer. Once the output buffer is filled,
the audio is sent back to Torq. This process, while extremely fast, can still manifest itself as a perceived lag in response
time. And, as you can see, this phenomenon is beyond the control of Torq (the latency is created by the plug-in, not
Torq).
If you find that a VST plug-in you’re using is creating latency, you can try to find a similar-sounding plug-in with minimal
latency, or simply try to “play ahead” and anticipate the latency. While some other programs feature “Plug-in Delay
Compensation,” such a system would not work with Torq because the program is entirely real-time (the music and effects
are not preset or programmed).
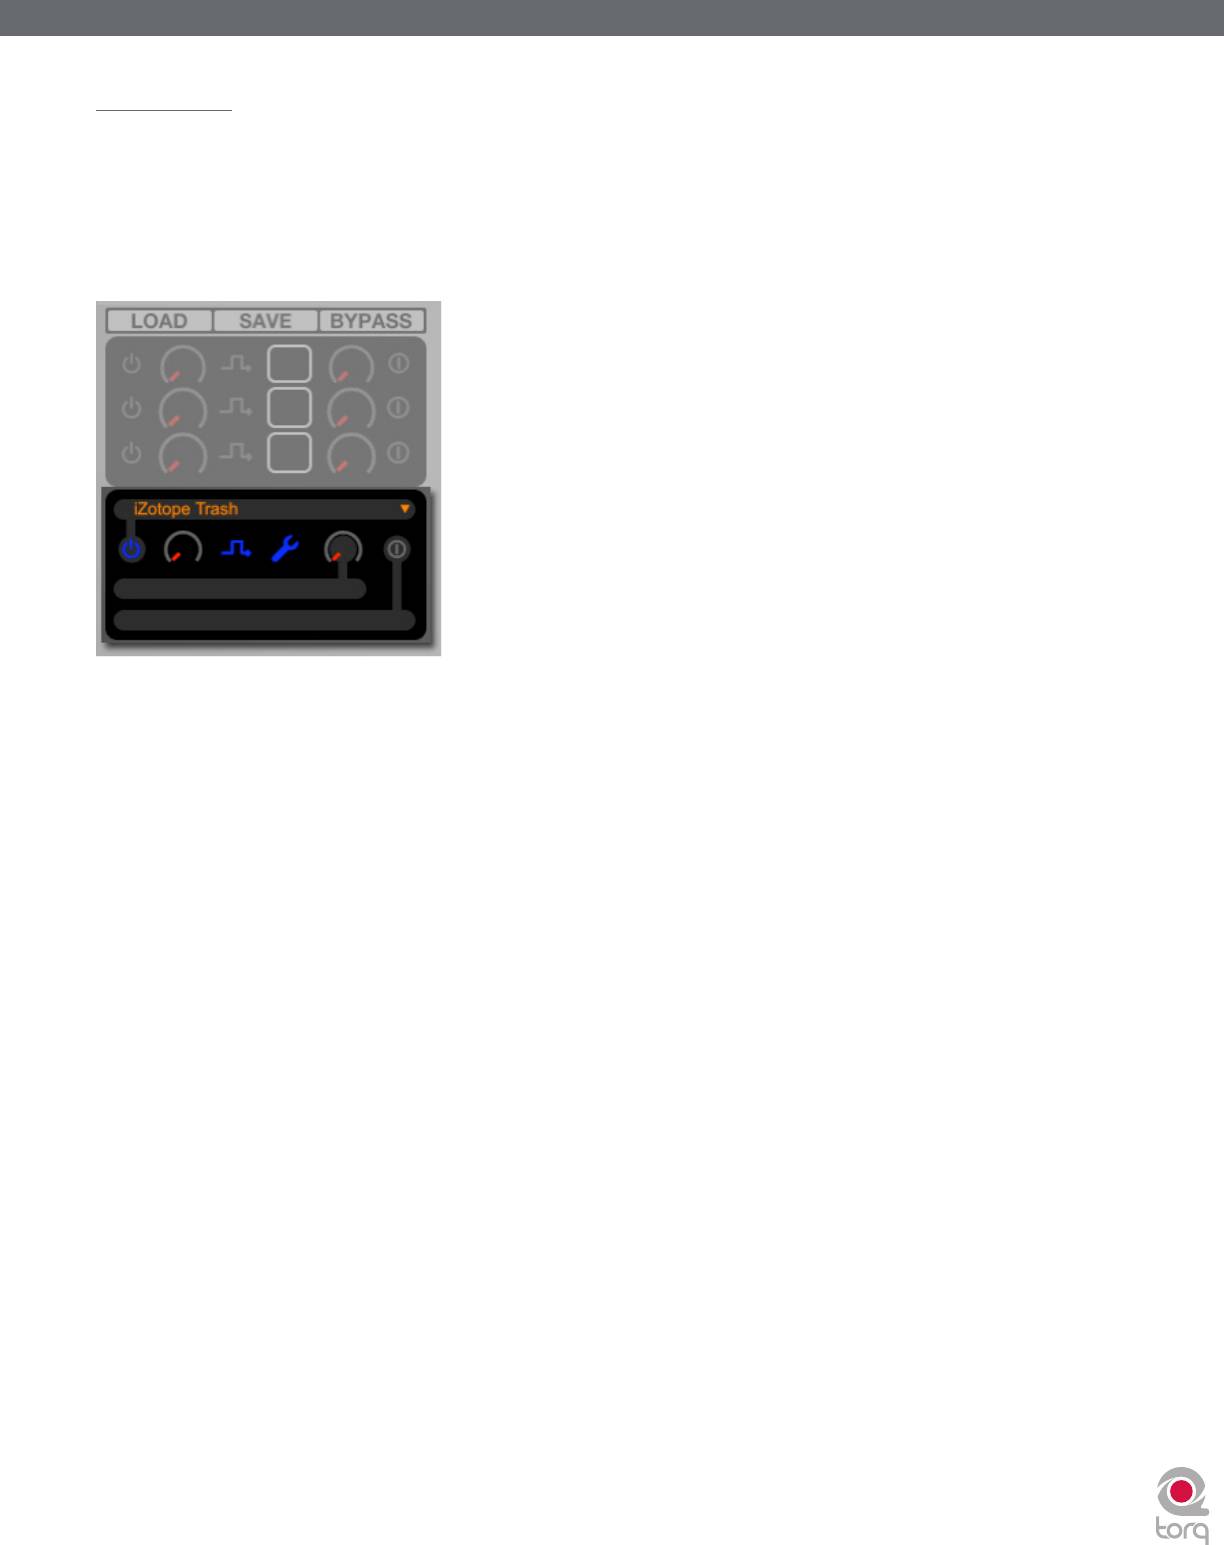
Selecting Effects
To begin using a VST, you’ll need to select one from the list of available VSTs:
1. Click on the top window in the VST section of the Effect Rack. A pop-up menu will appear showing all valid VSTs
in the selected VST folder (see Plug-in Preferences).
2. Click on the name of a VST. It will be loaded immediately and the VST’s graphic interface will open and float over
the Torq interface.
3. To close the window, click the close icon in the window’s title bar or click the Wrench icon in the Effect Rack.
4. To open the same VST interface again, click the Wrench icon again.
✓ Note: At the top of the VST drop-down menu list, you will see a “blank” plug-in as an option. If you select it, no VST
will be loaded into the Slot (any current VST will be unloaded).

Torq 1.5 User Guide Chapter 1
Torq 1.5 User Guide Chapter 13
78
78
Assigning Controls
It’s fun to tweak effects using knobs and buttons—VST effects are no exception. However, before you start messing with
the Tweak knob and button, you’ll need to assign a function to them. Unlike Torq’s 10 built-in effects, the VST Effect you
choose to use will probably have more than two parameters to play with. You can always adjust these parameters within
the VST Effect’s editor window. To gain MIDI control, however, you must assign one of the VST Effect’s parameter to the
Tweak knob or button (which you can control via MIDI). It’s a two-part process as outlined below:
1. Load a VST Effect. Its editor window will pop up when loaded.
2. Right-click on the Tweak knob in Torq’s interface. It will turn red indicating that it standing by for assignment.
3. Using the mouse, move a control in the VST Effect’s editor window. This could be a knob, slider, or button.
4. When you move the control, Torq will catch it and assign it to the Tweak knob. Moving the Tweak knob will now
operate the assigned VST parameter.
5. To assign a MIDI control to the Tweak knob, follow the usual procedure of right-clicking then moving your
desired MIDI control.
6. Once complete, the MIDI control will operate the VST parameter.
7. The same procedure above can be used for assigning a VST parameter to the Tweak button.
Once the assignments are made as described above, Torq will remember those assignments whenever you load that
VST Effect in the future.
✓ Note: : When running Torq in full-screen mode, clicking on the Torq interface will cause Torq to move to the
foreground and your VST Effect to move to the background, effectively being obscured from view. To bring the VST
Effect back to the front, click on the Wrench icon in the VST Effect slot or click the effect’s Taskbar/Dock icon.
VST Crash Guard
A plug-in works by inserting small bits of programming code into another program (in this case, you’ll be inserting an
effect processing plug-in into Torq). This can be problematic since some VSTs are made with little to no external testing
at all (and they may not have been tested with Torq specifically). Granted, it’s usually the free VST plug-ins found on
the web that lack the testing imposed by other professional plug-ins. These dirty plug-ins can be some of the most
experimental and creative offerings out there, which is why you may still want to try them.
Obviously, it would be completely unacceptable for Torq to crash right in the middle of a gig because of a little VST
plug-in. The music must keep playing at all times. For that reason, Torq has been designed with VST Crash Guard, which
is a system that will allow Torq to stay running even if an error should occur in the VST plug-in, causing it to crash. If
this occurs, Torq will detect the crash and will quickly bypass the offending plug-in to keep the music going. When this
happens, you can either attempt to re-load the plug-in (in hopes that it will reset and become functional again) or you can
remove the plug-in and try another. Either way, Torq’s got your back and will keep the music flowing.
VST Preset Management
Just like you can save the built-in Effect Rack, you can also save the settings for a VST plug-in. Some plug-ins will manage
their own presets from within the GUI. In these cases, you’ll need to consult the plug-in’s user manual to learn how to
use the presets.
Other VST plug-ins will rely on the host application (Torq, in this case) to manage their presets. In this case, you’ll need
to use the Preset Management tools (save and load) that appear above the plug-in’s GUI.


