Electrolux NPX 6 SENSOMATIC: CHAPTER CHAPTER
CHAPTER CHAPTER: Electrolux NPX 6 SENSOMATIC
65
65
MASTER OUTPUT
CHAPTER
CHAPTER
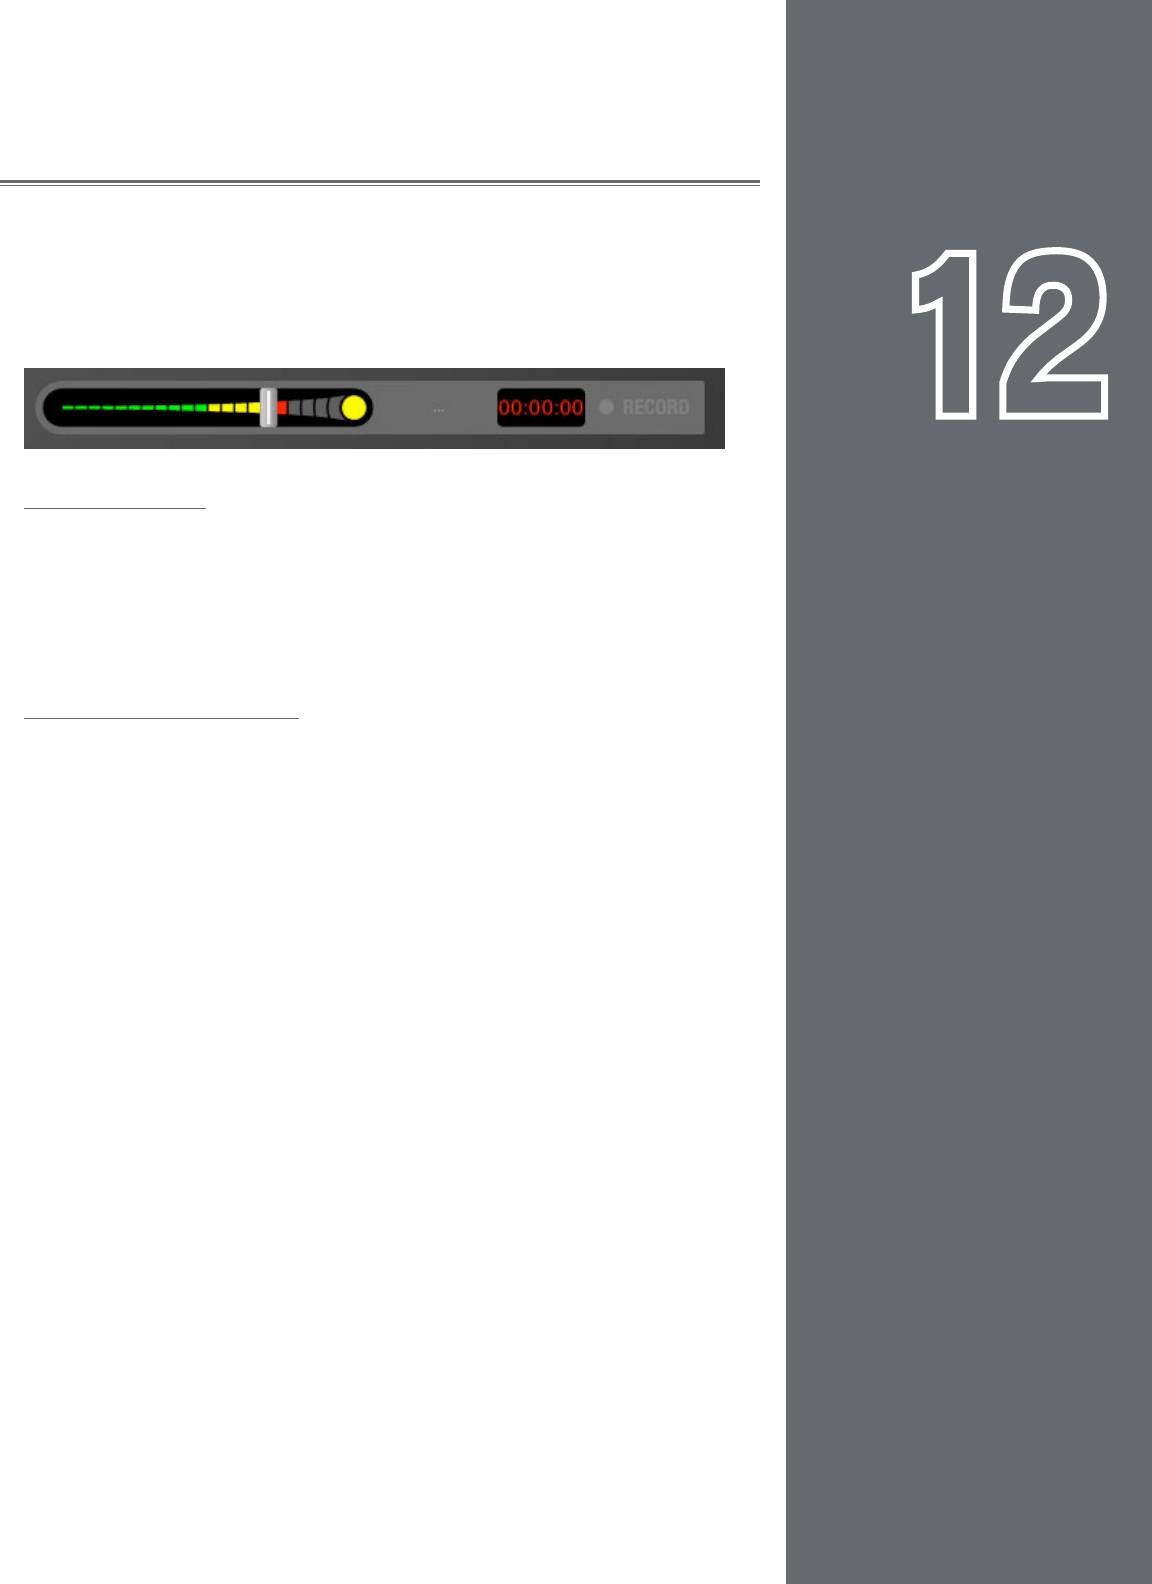
The Master Output is the last step in Torq’s audio signal flow before the music goes
out to your audience. It contains a Master Level slider, a Master Level meter, a Master
Limiter, as well as an Audio Recorder. All of these controls are located below the right
Deck in a neat, horizontal arrangement.
12
1
Volume Control
As you may assume, the Master Volume slider controls the overall output of Torq’s Main
Outputs. This slider is also used to set the level of the Torq File Recorder (explained
later in this manual). Unlike the Channel Volume faders, the Master Volume slider is on
its side—moving the slider to the right will increase the output volume while moving to
the left will decrease it.
Level Meter and Limiter
The Master Level meter shares the same space as the Master Volume slider. You’ll see
the meter moving behind the slider while music is playing.
Since Torq is a digital audio system, it has a limited amount of headroom (dynamic range).
Whenever your mix exceeds the headroom, clipping (distortion) normally occurs. To
prevent this undesired sound, Torq features a Limiter on the Master Output which will
keep the Main Outputs from clipping.
Whenever the yellow circle (located at the right edge of the Master Volume meter)
lights, the Limiter is protecting the system against clipping. It does this by quickly
reducing the volume any time the Master Volume exceeds the maximum headroom. A
limiter is not foolproof, though—you’ll want to be sure that you aren’t triggering the
limiter all the time. If the volume of your mix is too loud, the limiter will reduce the
volume all the time, and this will sound strange. If you find that the yellow indicator is on
most of the time during your mix, you should turn down the Master Volume slider so
your mix doesn’t constantly peg the limiter. To make up for the reduced volume, turn up
the volume on the house sound system.
English
English

Torq 1.5 User Guide Chapter 1
Torq 1.5 User Guide Chapter 12
66
66
Master Recorder
The Master module also includes a Recorder which allows you to record and save your mix as an audio file as you perform it.
You can then take your recorded mix and burn it onto a CD or distribute it as a Podcast, for example.
The process of recording your mix is extremely simple. You start by choosing a name for your mix and a location on your hard
drive for saving it. Then, you mix! When you’re done, press Stop and your file will be ready to go.
Filename
To set the filename for your recording:
1. Click the Filename button (which looks like “...” when no name is set). A dialog box will open.
2. Select the destination folder for your recording, then give it a name and press enter. The dialog box will close and
your new filename will be shown on the Filename button.
✓ Note: The sample rate of the recorded file will match the sample rate currently selected in the Audio tab of the
Preferences.
Setting the Record Level
The Master Volume slider will control the level of your recording. You’ll want to set this slider as high as possible without
constantly triggering the limiter (it’s OK if you trigger the limiter every once in a while). If you set the Master Volume
slider too low, your mix will be recorded quietly and will therefore have less fidelity.
✓ Note: Changes made to the Master Volume slider will be committed to your recording, even while you’re in the middle of
your mix.
Recording
Now that you have set the filename and recording level, you can begin recording:
1. Click the Record button. It will light up to indicate that recording has commenced. You’ll also see the Record
Time window begin to count the length of the recording.
2. Perform your mixing magic as you normally would.
3. Press the Record button again to stop the recording and save the file.


