Electrolux NPX 6 SENSOMATIC: CHAPTER CHAPTER
CHAPTER CHAPTER: Electrolux NPX 6 SENSOMATIC
46
46
SNAPSHOTS
CHAPTER
CHAPTER
By now, you’ve surely noticed that Torq has many features designed to make DJing
easier. Automatic tempo-detection and beat-matching allow you, the DJ, to spend your
time doing other things rather than manually keeping two tracks in sync. For example,
you can remix the song using loops and QuickCues, tweak the sound using effects and
EQ, and add samples to the mix. The sheer quantity of options available to you easily
exceeds the number of fingers you have on your hands, so controlling all these features
8
1
simultaneously can become a challenge. Torq’s innovative Snapshot system allows you
to overcome these obstacles by allowing you to perform multiple tasks with the simple
push of a button
or two.
A Snapshot is very much like it sounds—a virtual picture of settings within Torq. You
can configure the controls and effects in Torq as you like, then save all those settings
in a Snapshot that you can recall instantaneously. Torq enables you to make a virtually
unlimited list of Snapshots, all with unique control parameters, and sort them in the
Snapshot list—this list becomes an arsenal of your best tricks, which you can use at any
time.
Snapshot List
If you press the Tab key on your keyboard or click the Camera tab , the Database
and Browser will be replaced with the Snapshot List. The list has multiple columns, like
the File List, and each row represents one Snapshot. Press the Tab key again (or click the
Browser tab) to return to the Database and Browser.
Creating a Snapshot
To create a new Snapshot, simply click the New Snapshot button above the Snapshot
list or the New Snapshot button located in Torq’s Toolbar. Torq will immediately create
a new Snapshot entry and the name will be highlighted so that you can type in a proper
name for the Snapshot. Type in something you can remember and press Enter. You can
always rename the Snapshot by double-clicking its name and typing in a new one.
English
English
Torq 1.5 User Guide Chapter 1
Torq 1.5 User Guide Chapter 8
47
47
Masking a Snapshot
Each Snapshot you create contains the settings of almost every component in Torq. A Snapshot will remember the Key setting
of a Deck, the EQ settings in the Mixer (including the state of the EQ Kills), the channel gains and volumes, the Crossfader
position, and the contents and settings of the built-in Effect Racks (VST effects are not saved in the Snapshots). You can
therefore have a Snapshot that will update all of these parameters at once, if you wish.
More often than not, however, you’ll want to only override a portion of your current settings using a Snapshot. For example,
you may want to recall the settings of one effect rack while leaving all other settings (channel volumes, EQs, etc.) as they
currently are. This is the purpose of masking, which allows only particular portions of the Snapshot to be used.
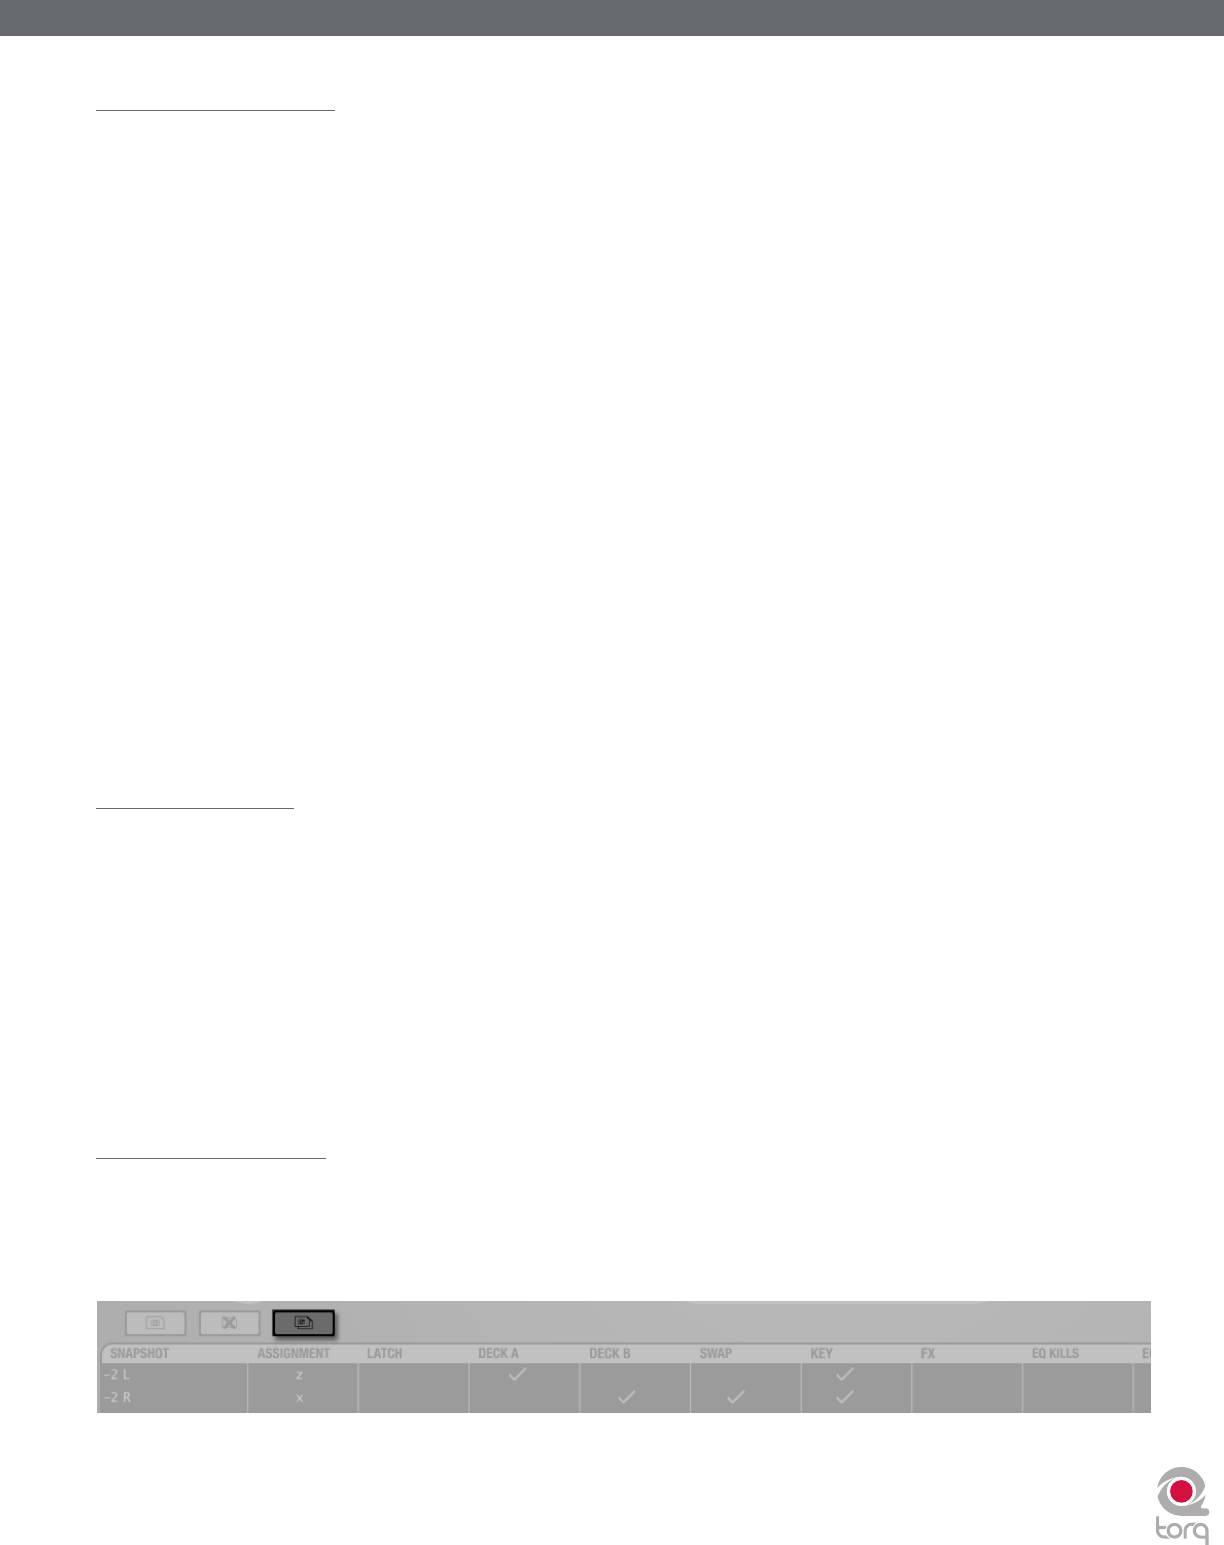
Each column in the Snapshot List corresponds to certain portions of the Torq interface. You’ll find columns for Deck A and
Deck B, Key, FX, EQ Kills, EQ knobs, Crossfader, and channel volumes. When you create a new Snapshot, these columns will
be blank. As a result, nothing will happen when you trigger the Snapshot.
The way to enable the Snapshot is to place check boxes in these columns to indicate what portions of the interface you’d like
the Snapshot to control. If you put a check box in the Deck A column, the Snapshot will use the information for the left side of
the interface. You can check Deck B instead if you wish the Snapshot to only affect the right side of the interface. Check them
both and the entire interface can be updated with the Snapshot.
Once you’ve selected which Deck(s) should be controlled by the Snapshot, place additional check boxes in the columns
corresponding to the parameters you’d like to control. For example, if you check the Deck A and EQ knobs columns, only the
EQ knobs on the left side of the mixer will be updated when the Snapshot is triggered. Any other settings (the current key of
the song, any effects in the Effect Racks, etc.) will remain unchanged. If you were to also check the EQ Kills and Key columns,
the Deck’s Key setting will be updated by the Snapshot, along with the EQ Kills, too. Checking all of the columns and all
parameters within the Snapshot will override the current settings. When you release the Snapshot, all previous settings will be
restored.
Using Snapshots
The second column in the Snapshot list is labeled Assignment and contains the name of the current keyboard key or MIDI note
assigned to the Snapshot. When you make a new Snapshot, this column will be blank. Simply right-click (CTRL-click on Mac)
on the empty field and the message “Press a key...” will appear, indicating that Torq is waiting for your key assignment. Press a
key on your computer’s keyboard, or trigger a MIDI note on your external controller, and Torq will immediately bind it to the
Snapshot. Right-click again to assign a different key, if you wish. Now, the Snapshot will be activated any time you press the
assigned key.
✓ Note: Because of the large amount of Snapshots you may create while using Torq, you can to use modifier keys when making
assignments. For example, you can assign the W key, SHIFT+W, CTRL+W, and ALT+W to different Snapshots—you can even
use multiple modifiers, like CTRL + SHIFT + W.
Duplicate Snapshot
Click on a Snapshot in the list to select it, then click the Duplicate Snapshot button (the third button from the left). Another
Snapshot will appear in the list, but this one will contain an exact copy of the parameters from the previously selected
Snapshot. You can give the duplicate a new name, then select different masking parameters to make the Snapshot behave
differently. Assign a different key to this Snapshot, and you can fire off either with ease.

Torq 1.5 User Guide Chapter 1
Torq 1.5 User Guide Chapter 8
48
48
Swapping Snapshots
Frequently, you may find that a Snapshot set up for Deck A would be useful for Deck B or vice versa. For example, you may
have created a Snapshot that loads a Delay effect while also killing the Low EQ on Deck A. Torq allows you to swap the left and
right assignment of Snapshots to do this easily.
To start with, duplicate the Snapshot as described above—a copy of the Snapshot will appear in the list. Give this new Snapshot
a new name (i.e. if the original Snapshot was called “HP Delay A”, you might rename it to “HP Delay B”). Once you’ve created
the new duplicate, place check marks in the Swap and Deck B columns and remove the checkmark from the Deck A column.
This will essentially take any assignments made to Deck A and now apply them to Deck B when using this Snapshot.
Delete Snapshot
The third button above the Snapshot list is the Delete Snapshot button. Select a Snapshot from the list then click this button to
delete it.
Momentary vs. Latching Behavior
By default, a Snapshot will only be active as long as you hold the assigned key. As soon as you release the key, the Snapshot is
deactivated and all previous settings are restored. This is excellent for simply “punching in” little tweaks and effects that you
only use for a few moments at a time.
If you place a check box in the “Latch” column of the Snapshot list, the Snapshot will become active when you press the
assigned key and will remain active even after you release the key. When you press the same key again, the Snapshot will be
turned off. This mode allows you to recall a setting that you may want to leave active for a while, such as a special stutter
pattern that you created using multiple Strobe effects.
Polyphonic Snapshots
On top of all this, you can trigger multiple Snapshots at a time. You can, for example, trigger one Snapshot that cuts the bass
and boosts the treble on Deck A while triggering another that detunes the track on Deck B.
You’ll notice that whenever you activate a Snapshot, its check boxes in the Snapshot List will light up, indicating that those
parameters are being controlled by the Snapshot. On the occasion that you trigger another Snapshot that has conflicting
settings (both Snapshots you’re triggering have FX checked, for example), the last Snapshot you triggered will take precedence.
You’ll note that the green check mark in the FX column of the first Snapshot will turn red, indicating that the parameter
is overridden by the other Snapshot. As soon as you deactivate the second Snapshot, the red check will turn green again,
indicating that the parameter in the first Snapshot is in use again.


