Electrolux ENG2913AOW: 5. CARE AND CLEANING
5. CARE AND CLEANING: Electrolux ENG2913AOW
ENGLISH 27
• the maximum quantity of food which
ment, can possibly cause the skin to be
can be frozen in 24 hrs. is shown on
freeze burnt;
the rating plate;
• it is advisable to show the freezing in
• the freezing process takes 24 hours.
date on each individual pack to enable
No further food to be frozen should be
you to keep tab of the storage time.
added during this period;
• only freeze top quality, fresh and thor-
4.5 Hints for storage of frozen
oughly cleaned, foodstuffs;
food
• prepare food in small portions to enable
it to be rapidly and completely frozen
To obtain the best performance from this
and to make it possible subsequently to
appliance, you should:
thaw only the quantity required;
• make sure that the commercially frozen
• wrap up the food in aluminium foil or
foodstuffs were adequately stored by
polythene and make sure that the
the retailer;
packages are airtight;
• be sure that frozen foodstuffs are trans-
• do not allow fresh, unfrozen food to
ferred from the foodstore to the freezer
touch food which is already frozen, thus
in the shortest possible time;
avoiding a rise in temperature of the lat-
• not open the door frequently or leave it
ter;
open longer than absolutely necessary;
• lean foods store better and longer than
• once defrosted, food deteriorates rap-
fatty ones; salt reduces the storage life
idly and cannot be refrozen;
of food;
• do not exceed the storage period indi-
• water ices, if consumed immediately af-
cated by the food manufacturer.
ter removal from the freezer compart-
5. CARE AND CLEANING
CAUTION!
Do not pull, move or damage any
Unplug the appliance before car-
pipes and/or cables inside the
rying out any maintenance opera-
cabinet.
tion.
Never use detergents, abrasive
powders, highly perfumed clean-
This appliance contains hydrocar-
ing products or wax polishes to
bons in its cooling unit; mainte-
clean the interior as this will dam-
nance and recharging must there-
age the surface and leave a
fore only be carried out by author-
strong odour.
ized technicians.
Clean the condenser (black grill) and the
compressor at the back of the appliance
5.1 Periodic cleaning
with a brush. This operation will improve
The equipment has to be cleaned regular-
the performance of the appliance and
ly:
save electricity consumption.
• clean the inside and accessories with
Take care of not to damage the
lukewarm water and some neutral
cooling system.
soap.
• regularly check the door seals and wipe
Many proprietary kitchen surface cleaners
clean to ensure they are clean and free
contain chemicals that can attack/dam-
from debris.
age the plastics used in this appliance.
For this reason it is recommended that
• rinse and dry thoroughly.
the outer casing of this appliance is only
cleaned with warm water with a little
washing-up liquid added.
28
www.electrolux.com
After cleaning, reconnect the equipment
to the mains supply.
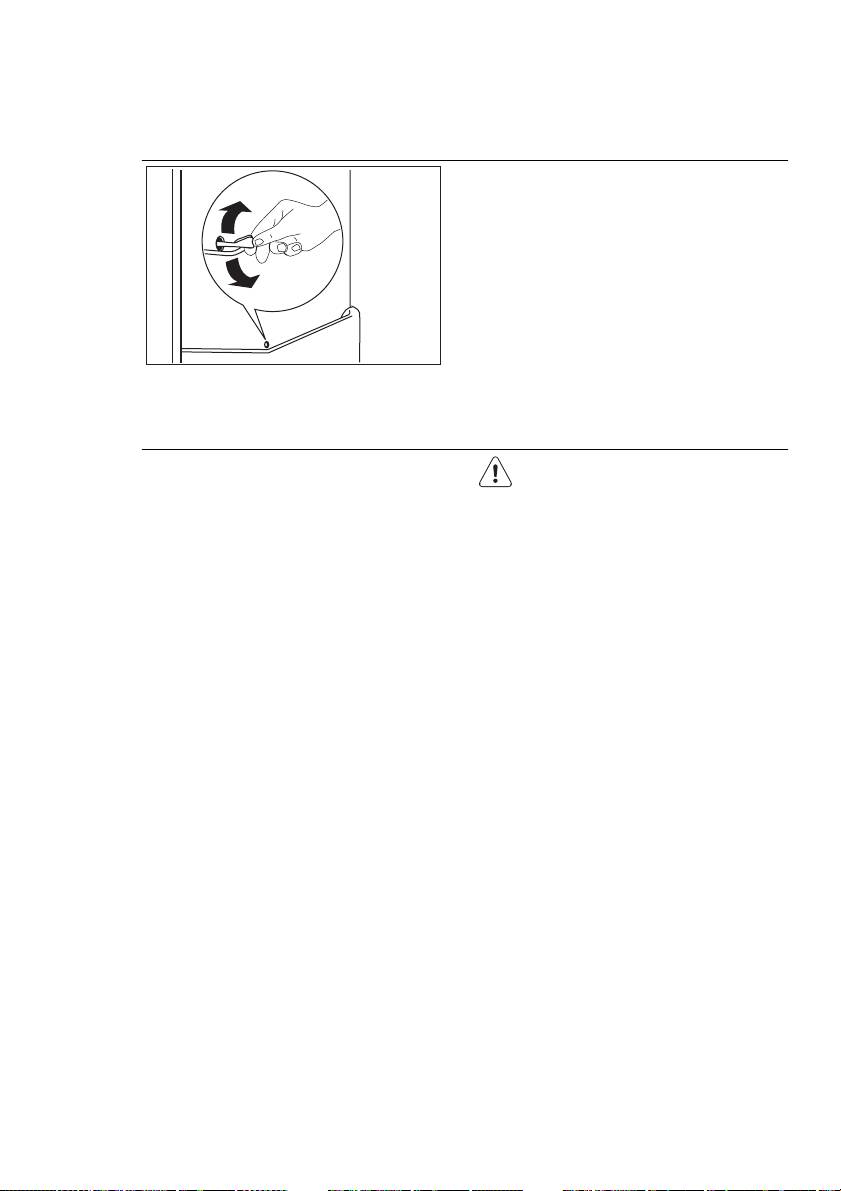
5.2 Defrosting of the refrigerator
Frost is automatically eliminated from the
evaporator of the refrigerator compart-
ment every time the motor compressor
stops, during normal use. The defrost wa-
ter drains out through a trough into a spe-
cial container at the back of the appli-
ance, over the motor compressor, where
it evaporates.
Periodically clean the defrost water drain
hole in the middle of the refrigerator com-
partment channel to prevent the water
overflowing and dripping onto the food in-
side. Use the special cleaner provided,
which you will find already inserted into
the drain hole.
About 12 hours prior to defrost-
5.3 Defrosting the freezer
ing, set the Temperature regulator
A certain amount of frost will always form
toward higher settings, in order to
on the freezer shelves and around the top
build up sufficient chill reserve for
compartment.
the interruption in operation.
Defrost the freezer when the frost layer
reaches a thickness of about 3-5 mm.
ENGLISH 29
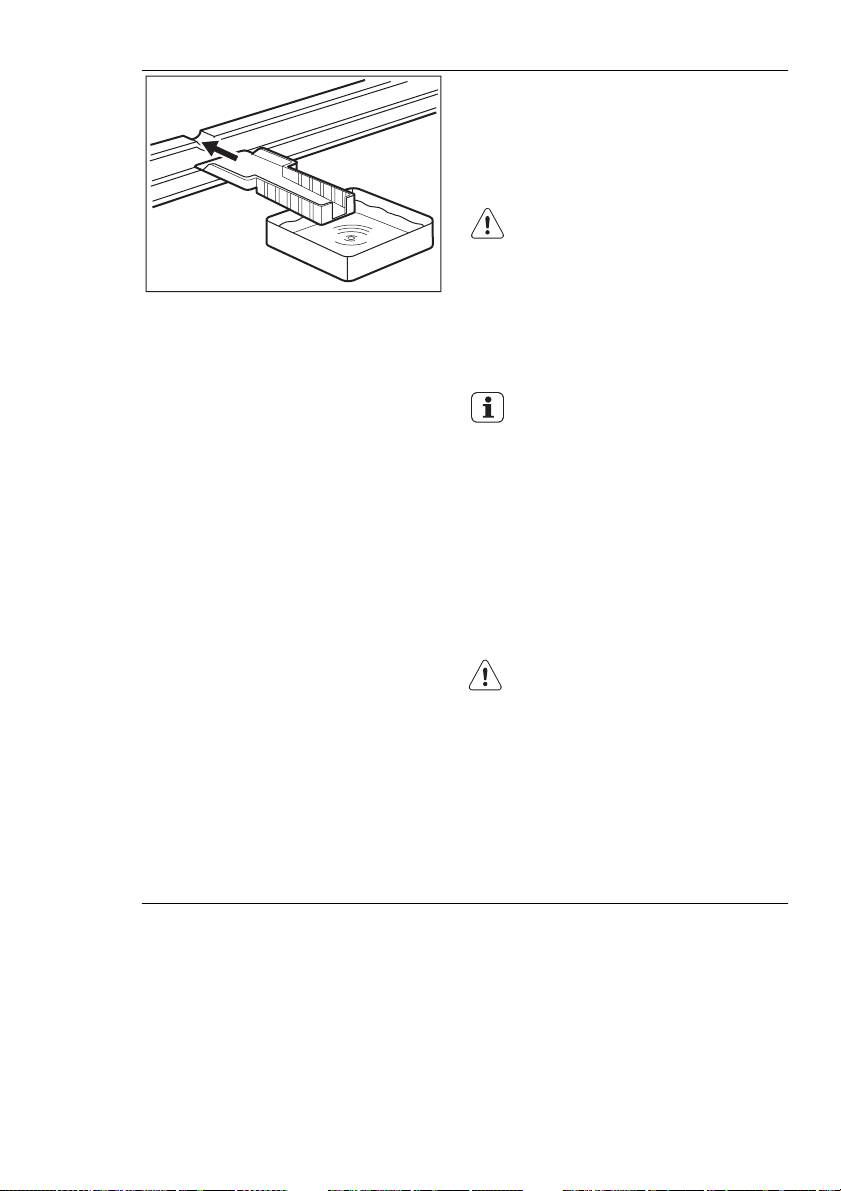
To remove the frost, follow the instruc-
tions below:
1.
Switch off the appliance.
2.
Remove any stored food, wrap it in
several layers of newspaper and put it
in a cool place.
CAUTION!
Do not touch frozen goods with
wet hands. Hands can freeze to
the goods.
3.
Leave the door open and insert the
plastic scraper in the appropriate
seating at the bottom centre, placing
a basin underneath to collect the de-
frost water.
In order to speed up the defrost-
ing process, place a pot of warm
water in the freezer compartment.
In addition, remove pieces of ice
that break away before defrosting
is complete.
4.
When defrosting is completed, dry
the interior thoroughly and keep the
scraper for future use.
5.
Switch on the appliance.
6.
After two or three hours, reload the
previously removed food into the
compartment.
Never use sharp metal tools to scrape off
frost from the evaporator as you could
damage it.
Do not use a mechanical device or any ar-
tificial means to speed up the thawing
process other than those recommended
by the manufacturer.
A temperature rise of the frozen food
packs, during defrosting, may shorten
their safe storage life.
• leave the door/doors ajar to prevent un-
5.4 Periods of non-operation
pleasant smells.
When the appliance is not in use for long
If the cabinet will be kept on, ask some-
periods, take the following precautions:
body to check it once in a while to pre-
•
disconnect the appliance from elec-
vent the food inside from spoiling in case
tricity supply
of a power failure.
• remove all food
• defrost (if foreseen) and clean the appli-
ance and all accessories
Оглавление
- OBSAH
- 1. BEZPEČNOSTNÍ POKYNY
- 2. OVLÁDACÍ PANEL
- 3. DENNÍ POUŽÍVÁNÍ
- 4. UŽITEČNÉ RADY A TIPY
- 5. ČIŠTĚNÍ A ÚDRŽBA
- 6. CO DĚLAT, KDYŽ...
- 7. INSTALACE
- 8. ZVUKY
- 9. TECHNICKÉ ÚDAJE
- 10. POZNÁMKY K OCHRANĚ ŽIVOTNÍHO PROSTŘEDÍ
- CONTENTS
- 1. SAFETY INSTRUCTIONS
- 2. CONTROL PANEL
- 3. DAILY USE
- 4. HELPFUL HINTS AND TIPS
- 5. CARE AND CLEANING
- 6. WHAT TO DO IF…
- 7. INSTALLATION
- 9. TECHNICAL DATA
- INHALT
- 1. SICHERHEITSHINWEISE
- 2. BEDIENFELD
- 3. TÄGLICHER GEBRAUCH
- 4. PRAKTISCHE TIPPS UND HINWEISE
- 5. REINIGUNG UND PFLEGE
- 6. WAS TUN, WENN …
- 7. MONTAGE
- 8. GERÄUSCHE
- 9. TECHNISCHE DATEN
- СОДЕРЖАНИЕ
- 1. УКАЗАНИЯ ПО БЕЗОПАСНОСТИ
- 2. ПАНЕЛЬ УПРАВЛЕНИЯ
- 3. ЕЖЕДНЕВНОЕ ИСПОЛЬЗОВАНИЕ
- 4. ПОЛЕЗНЫЕ СОВЕТЫ
- 5. УХОД И ОЧИСТКА
- 6. ЧТО ДЕЛАТЬ, ЕСЛИ ...
- 7. УСТАНОВКА
- 9. ТЕХНИЧЕСКИЕ ДАННЫЕ
