Olympus DS-3500: Advanced operations
Advanced operations: Olympus DS-3500
Playback will continue until the
- Partial erasing is not possible
end of the file or until the partial
on parts of files with a Verbal
erase ending point is confirmed.
comment on them.
- Files are inside a locked SD card.
Advanced operations
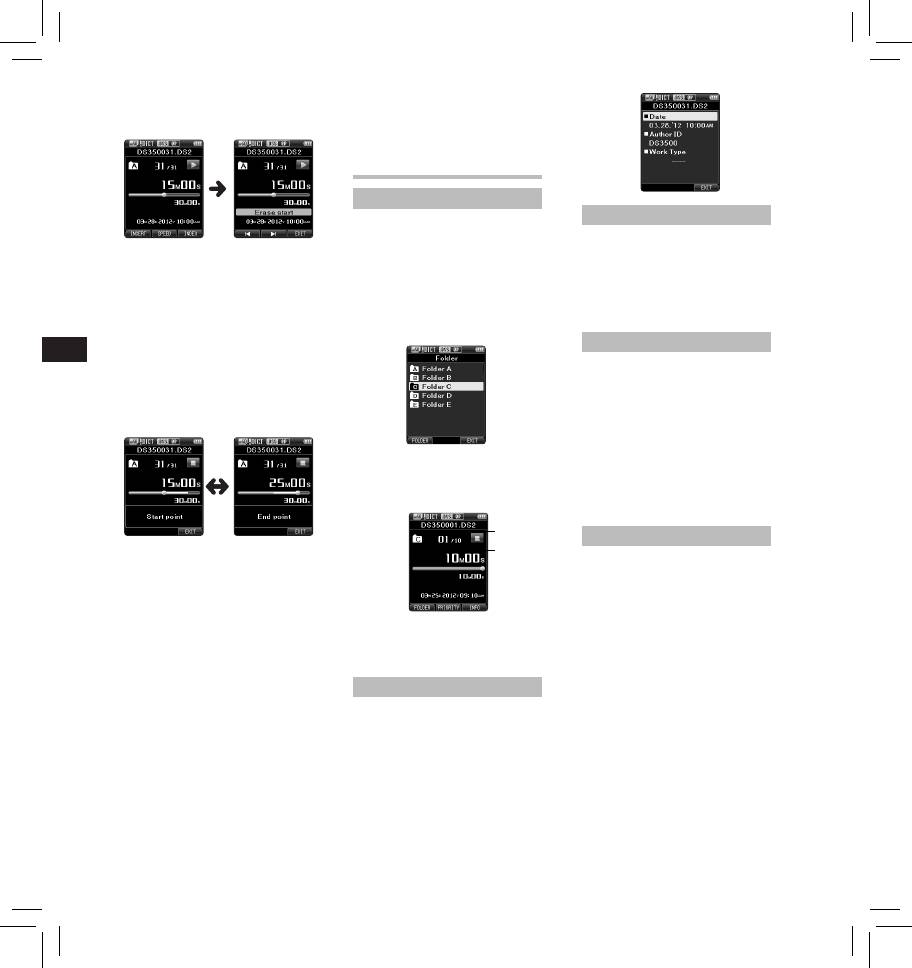
Selecting folders and files
Device lock function
Changing folders:
Access to the recorder can be
1 While the recorder is in stop mode,
restricted by using the Device Lock
press the
F1
(
FOLDER
) button.
3 In the position you want to end
function. Password authentication
• The folder list screen will be
partial erase, press the
ERASE
can be safer for your data in case the
displayed.
button again.
recorder is lost.
2 Press the
+
,
–
or
F1
(
FOLDER
)
• The erase starting point (time)
The password can be set by using the
set in step 2 and the ending
button to select the folder, then
ODMS software.
point (time) set in this step will
press the
OK/MENU
button.
EN CS DA DE ES FR NL PL RU SV
be displayed alternatively for 8
Setting the Author ID and Work Type
seconds.
Every file recorded on the recorder
• If you let the playback continue
will include the Author ID and Work
until the end of the file, or in
Type as part of its header information.
case of a Verbal comment before
To create multiple Author IDs and
it, that will be considered the
Work Types on the recorder, use the
ending point of the partial erase.
bundled ODMS software to create
and upload a data list (list of Author
IDs and Work Types) to the recorder.
Selecting a file:
For more details, refer to the online
help for ODMS software.
1 While the file is being displayed,
By default the Author ID is set to
press the 9 , 0 button.
“DS3500”.
a
Verbal Comment
b
4 Press the
ERASE
button to confirm
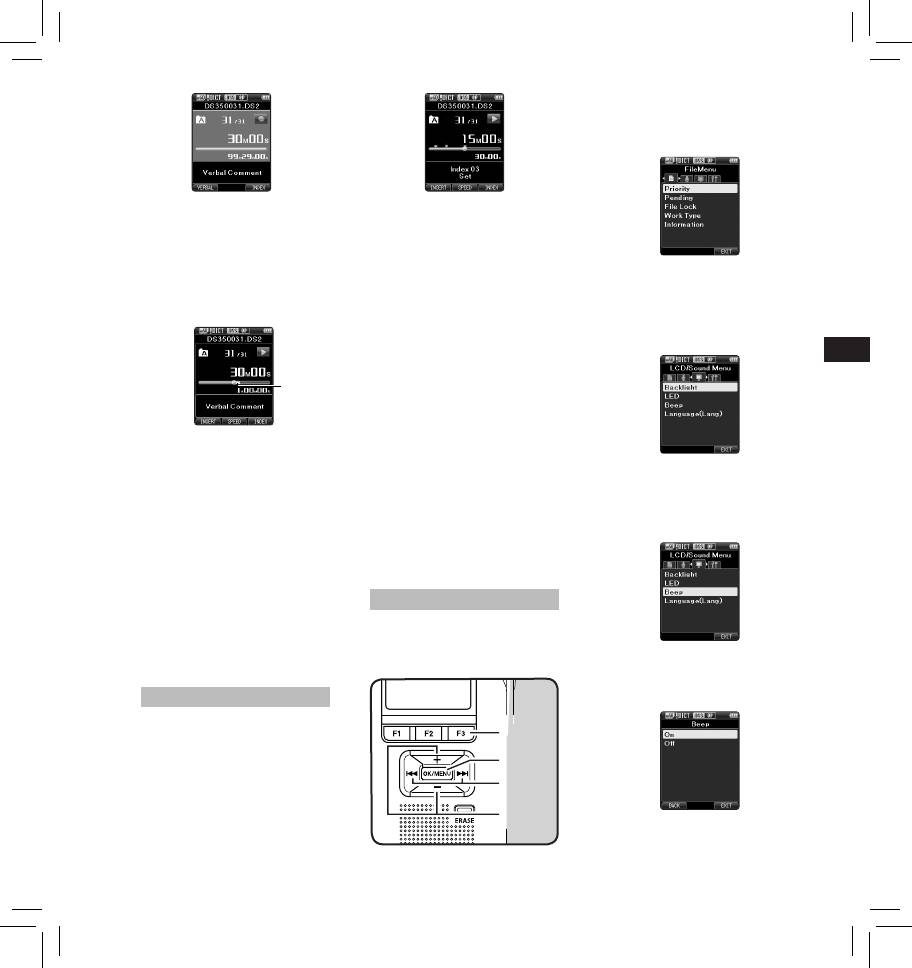
Verbal comments are useful to
append vocal instructions while
the erasure.
recording.
• The display changes to [ Partial
It is possible to search and playback
erasing ! ] and erasing will start.
Verbal comments using the ODMS
• When [ Partial erase completed. ]
and DSS Player software. Verbal
appears on the display, partial
a Total number of recorded files in
comments are also useful to give
erase is complete.
the folder
instructions to transcriptionists.
Notes
b Current file number
• Verbal comments can be set on DS2
• If the ERASE button is not
files only.
pressed within 8 seconds after the
Displaying file information
Setting a Verbal Comment
[ Start point
] and [ End point ] are
alternately displayed, the recorder
1 While the recorder is in recording
The recorder can display a variety of
will revert to stop status.
information related to the current
mode, press and hold the
F1
• An erased file cannot be restored.
file.
(
VERBAL
) button.
• The erasing process may take up to
1 Select the file containing the
• Data recorded while pressing
10 seconds. Do not interrupt this
information to display.
the F1 ( VERBAL ) button will be
process or data may be damaged.
2 Press the
F3
(
INFO
) button.
recorded as Verbal Comment.
• Files cannot be partially erased in
• The following information will
the following cases.
be displayed:
- MP3 file is selected.
[ Date ] [ Author ID ] [ Work Type ]
- Files are locked.
10
Locating a Verbal Comment
Locating an index mark
2 When playing back a file, press and
2 While playing back a file, press and
hold the 9 or 0 button.
hold the 9 or 0 button.
• The recorder stops for 1 second
• The recorder stops for 1 second
when it reaches the Verbal
when it reaches the index mark.
Comment.
• The verbal comment part has a
Clearing an index mark
different color.
1 Select a file in which index marks
you want to erase are contained.
2 Press the 9 or 0 button to
EN CS DA DE ES FR NL PL RU SV
select the index mark to erase.
3 While the index number appears
a
for approximately 2 seconds on the
display, press the
ERASE
button.
• The index mark is erased.
Notes:
• Up to 32 index marks can be set
within a DS2 file.
• Up to 16 index marks can be set
within MP3 and PCM files.
• When a file is locked or set to read-
only, or when the SD card is locked,
index mark cannot be erased.
• If the recorder has been set to DSS
Classic mode, index marks are
limited to a maximum of 16 for each
file.
How to use the menu
Items in menus are categorized by
tabs, so select a tab first and move to
a desired item to quickly set it. You
can set each menu item as follows.
Index marks
Index marks can be placed into a file
during recording or playback. Index
marks are used to provide a quick
and easy way to identify important or
significant parts within the file.
Setting an index mark
1 While the recorder is in recording
mode or in playback mode, press the
F3 (INDEX)
button.
11
7
7
1,4,6
1, 4 , 6
2
2
3, 5
3, 5
1 While the recorder is in stop mode,
press the
OK/MENU
button.
• The menu will appear on the
display.
2 Press the 9 or 0 button to
move to the tab that contains the
item you want to set.
• You can change the menu display
by moving the settings tab cursor.
a Verbal Comment part
Clearing a Verbal Comment
3 Press the
+
or
−
button to move to
1 When playing a Verbal Comment,
the item you want to set.
press the
ERASE
button.
• Move to the menu item you want
2 Press the
+
button to select
to set.
[
Clear
], then press the
OK/MENU
button.
Notes:
• Up to 32 Verbal comments can be
set within a file.
• When a file is locked or set to read-
only, or when the SD card is locked,
Verbal comments cannot be erased.
• When the recorder has been set to
DSS Classic mode, it is not possible
to record Verbal Comments.
4 Press the
OK/MENU
button.
• Move to the setting of the
selected item.
Оглавление
- Introduction
- Getting started
- Basic operations
- Advanced operations
- Menu items
- Managing files on your PC
- Other information
- Technical assistance and support
- Úvod
- Začínáme
- Základní obsluha
- Pokročilá obsluha
- 1,4,6 1, 4 , 6
- Položky nabídky
- Správa souborů v počítači
- Další informace
- Technická pomoc a podpora
- Introduktion
- Kom godt i gang
- Grundlæggende betjening
- Avanceret betjening
- Menupunkter
- Filhåndtering på din pc
- Øvrige oplysninger
- Teknisk hjælp og support
- Einführung
- Allgemeines
- Grundlegende Bedienung
- Erweiterte Anleitung
- Menüpunkte
- Verwalten von Dateien
- Zusätzliche Informationen
- Technische Hilfe und Support
- Introducción
- Para empezar
- Operaciones Básicas
- Funciones avanzadas
- Elementos del menú
- Administración de
- Otra información
- Asistencia y ayuda técnica
- Introduction
- Préparatifs
- Opérations de base
- Opérations avancées
- Eléments de menu
- Gestion des fichiers sur
- Autres informations
- Assistance technique et soutien
- Inleiding
- Aan de slag
- Basisbewerkingen
- Geavanceerde bewerkingen
- Menuopties
- Bestanden beheren op uw PC
- Overige informatie
- Technische bijstand en ondersteuning
- Wprowadzenie
- Pierwsze kroki
- Podstawowe operacje
- Zaawansowane operacje
- Pozycje menu
- Zarządzanie plikami na
- Inne informacje
- Wsparcie techniczne
- Введение
- Начало работы
- Основные операции
- Расширенные операции
- Пункты меню
- Управление файлами в
- Прочая информация
- Техническая помощь и обслуживание
- Introduktion
- Komma igång
- Grundläggande funktioner
- Avancerade funktioner
- Menyalternativ
- Hantera filer på din PC
- Övrig information
- Teknisk hjälp och support
- Olympus Service Department


