Pioneer VSX-1025-K – page 4
Manual for Pioneer VSX-1025-K
Table of contents
- IMPORTANT VENTILATION CAUTION
- Flow of settings on the receiver
- Chapter 1: Before you start Checking what’s in the box Loading the batteries Installing the receiver
- Chapter 2: Controls and displays Front panel
- Controls and displays02
- Display
- Controls and displays02
- Remote control
- Controls and displays02
- Chapter 3: Connecting your equipment Rear panel
- Connecting your equipment03
- Connecting your equipment 03 Determining the speakers’ application
- Connecting your equipment03
- Placing the speakers Some tips for improving sound quality
- Connecting the speakers
- Installing your speaker system
- Bi-amping your speakers Bi-wiring your speakers
- Selecting the Speaker system
- About the audio connection About the video converter
- Connecting your TV and playback components
- Connecting your equipment03 About HDMI
- Connecting your DVD player with no HDMI output
- Connecting your TV with no HDMI input
- Connecting a satellite/cable Connecting a HDD/DVD receiver or other set-top box recorder, VCR and other video sources
- Connecting other audio components
- Connecting AM/FM antennas
- MULTI-ZONE setup
- Connecting Optional Bluetooth ADAPTER
- Connecting to the network Connecting an HDMI-equipped through LAN interface component to the front panel input
- Connecting to the front panel video terminal
- Connecting a USB device Connecting a USB device for Advanced MCACC output
- Connecting an IR receiver Operating other Pioneer components with this unit’s sensor
- Plugging in the receiver
- Chapter 4: Basic Setup Changing the OSD display language (OSD Language) Automatically conducting optimum sound tuning (Auto MCACC)
- Basic Setup04
- Basic Setup 04
- Basic Setup04 Problems when using the Auto MCACC Setup The Input Setup menu
- Input function default and possible settings
- Chapter 5: Basic playback Playing a source
- Playing an iPod
- Basic playback05 Finding what you want to play Switching the iPod controls
- Playing back audio files stored on a Playing a USB device USB memory device
- Basic playback controls
- About playable file formats Music files Photo files
- Listening to the radio
- Saving station presets Listening to station presets Naming station presets
- An introduction to RDS
- Bluetooth ® ADAPTER for Wireless Enjoyment of Music
- Basic playback05 Listening to music contents of a Bluetooth wireless technology device with your system
- Listening to Internet radio stations
- Basic playback05
- Chapter 6: Listening to your system
- Listening to your system06
- Listening in stereo
- Using Front Stage Surround Using Stream Direct Advance
- Selecting MCACC presets Choosing the input signal
- Better sound using Phase Control
- Chapter 7: Control with HDMI function Making Control with HDMI connections
- HDMI Setup
- Before using synchronization About synchronized operations
- Setting the PQLS function
- Cautions on the Control with HDMI function
- Chapter 8: Using other functions Setting the Audio options
- Setting What it does Option(s)
- Setting What it does Option(s)
- Setting the Video options
- Setting What it does Option(s)
- Switching the speaker terminals Using the MULTI-ZONE controls
- Making an audio or a video recording MULTI-ZONE remote controls
- Dimming the display Reducing the level of an analog signal Checking your system settings Using the sleep timer
- Resetting the system Default system settings
- Chapter 9: Controlling the rest of your system Operating multiple receivers Setting the remote to control other components
- Selecting preset codes directly Programming signals from other remote controls
- Erasing one of the remote control button settings
- Resetting the input assignment Direct function of one of the input function buttons
- Multi operation and System off
- Controlling the rest of your system09
- Clearing all the remote control settings Controlling components
- Button(s) TV TV (Monitor) BD/DVD HDD/DVR VCR SAT/CATV
- Controlling the rest of your system 09 Button(s) LD
- Chapter 10: The Advanced MCACC menu Making receiver settings from the Advanced MCACC menu
- Automatic MCACC (Expert)
- The Advanced MCACC menu10
- The Advanced MCACC menu 10
- The Advanced MCACC menu10 Manual MCACC setup
- The Advanced MCACC menu 10
- The Advanced MCACC menu10 Standing Wave
- Acoustic Calibration EQ Adjust
- Using Acoustic Calibration EQ Professional
- The Advanced MCACC menu 10
- Checking MCACC Data
- Standing Wave Output MCACC data Acoustic Cal EQ
- Data Management
- The Advanced MCACC menu 10 Clearing MCACC presets
- Chapter 11: The System Setup and Other Setup menus Making receiver settings from the System Setup menu Manual speaker setup
- The System Setup and Other Setup menus 11 Speaker system setting
- Speaker Setting
- The System Setup and Other Setup menus 11 Speaker Distance Channel Level
- Network Setup menu
- The System Setup and Other Setup menus 11
- The Other Setup menu
- The System Setup and Other Setup menus 11 Remote Control Mode Setup
- Chapter 12: Additional information Power Symptom Remedy
- Symptom Remedy No sound Symptom Remedy
- Symptom Remedy Other audio problems Symptom Remedy
- Symptom Remedy
- Video Symptom Remedy
- Settings Symptom Remedy
- Professional Calibration EQ graphical output Symptom Remedy Display Symptom Remedy
- Symptom Remedy Remote control Symptom Remedy
- HDMI Symptom Remedy
- Symptom Remedy Important information regarding the HDMI connection
- USB interface Symptoms Causes Remedies
- ADAPTER PORT Symptom Remedy Internet radio Symptoms Causes Remedies
- Symptoms Causes Remedies
- About iPod Surround sound formats
- Auto Surround, ALC and Stream Direct with different input signal formats Stereo (2 channel) signal formats
- Preset code list
- Additional information12
- Additional information 12
- DVD
- BD DVR (BDR, HDR) VCR
- Satellite Set Top Box
- Additional information 12
- Additional information12 Satellite Set Top Box (SAT/PVR Combination)
- Cable Set Top Box Cable Set Top Box (Cable/PVR Combination) CD CD-R Laser Disc Player Cassete Deck Digital Tape MD
- Specifications
- Cleaning the unit
Listening to your system 06
English
Selecting MCACC presets
Choosing the input signal
•Default setting: MEMORY 1
On this receiver, it is possible to switch the
input signals for the different inputs as
If you have calibrated your system for different
3
1
described below.
listening positions
, you can switch between
settings to suit the kind of source you’re
• Press , then press
SIGNAL SEL
Deutsch
listening to and where you’re sitting (for
to select the input signal corresponding to
example, watching movies from a sofa, or
the source component.
playing a video game close to the TV).
Each press cycles through the options as
follows:
• While listening to a source, press
, then press
MCACC
.
• AUTO – The receiver selects the first
Français
Press repeatedly to select one of the six
available signal in the following order:
2
MCACC presets
. See Data Management on
HDMI; DIGITAL; ANALOG.
page 98 to check and manage your current
• ANALOG – Selects an analog signal.
settings.
• DIGITAL – Selects an optical or coaxial
digital signal.
Italiano
4
• HDMI – Selects an HDMI signal.
5
• PCM – For PCM input signals.
The
receiver selects the first available signal in
the following order: HDMI; DIGITAL.
Nederlands
HDMI is not assigned by default. To select an
HDMI signal, conduct the input setup
procedure (see The Input Setup menu on
page 42).
When set to DIGITAL, HDMI or AUTO (only
selected DIGITAL or HDMI), the indicators
Español
light according to the signal being decoded
(see Display on page 11).
61
En
Note
1 Different presets might also have separate calibration settings for the same listening position, depending on how
you’re using your system. These presets can be set in Automatically conducting optimum sound tuning (Auto MCACC)
on page 39 or Automatic MCACC (Expert) on page 87, either of which you should have already completed.
2 • These settings have no effect when headphones are connected.
• You can also press / to select the MCACC preset.
RECEIVER
3 • This receiver can only play back Dolby Digital, PCM (32 kHz to 192 kHz), DTS (including DTS 96/24) and WMA9 Pro
digital signal formats. The compatible signals via the HDMI terminals are: Dolby Digital, DTS, WMA9 Pro, PCM (32
kHz to 192 kHz), Dolby TrueHD, Dolby Digital Plus, DTS-EXPRESS, DTS-HD Master Audio and SACD.
• You may get digital noise when an LD, CD, DVD or BD player compatible with DTS is playing an analog signal. To
prevent noise, make the proper digital connections (page 30) and set the signal input to DIGITAL.
• Some DVD players don’t output DTS signals. For more details, refer to the instruction manual supplied with your
DVD player.
4 When the HDMI audio output parameter is set to THROUGH, the sound will be heard through your TV, not from this
receiver.
5 • This is useful if you find there is a slight delay before AUTO recognizes the PCM signal on a CD, for instance.
• When PCM is selected, noise may be output during playback of non-PCM sources. Please select another input
signal if this is a problem.
RECEIVER
VSX-1020_SYXCN.book 61 ページ 2010年3月12日 金曜日 午前9時10分

Listening to your system06
Better sound using Phase
Control
This receiver’s Phase Control feature uses
phase correction measures to make sure your
sound source arrives at the listening position
in phase, preventing unwanted distortion and/
or coloring of the sound.
Phase Control technology provides coherent
sound reproduction through the use of phase
1
matching
for an optimal sound image. The
default setting is on and we recommend
leaving Phase Control switched on for all
sound sources.
• Press , then press
PHASE CTRL
(
PHASE CONTROL
) to switch on phase
correction.
The PHASE CONTROL indicator on the front
panel lights.
62
En
Note
VSX-1020_SYXCN.book 62 ページ 2010年3月12日 金曜日 午前9時10分
RECEIVER
1 • Phase matching is a very important factor in achieving proper sound reproduction. If two waveforms are ‘in phase’,
they crest and trough together, resulting in increased amplitude, clarity and presence of the sound signal. If a crest
of a wave meets a trough, then the sound will be ‘out of phase’ and an unreliable sound image will be produced.
• The PHASE CONTROL feature is available even when the headphones are plugged in.
• If your subwoofer has a phase control switch, set it to the plus (+) sign (or 0°). However, the effect you can actually
feel when PHASE CONTROL is set to ON on this receiver depends on the type of your subwoofer. Set your subwoofer
to maximize the effect. It is also recommended you try changing the orientation or the place of your subwoofer.
• Set the built-in lowpass filter switch of your subwoofer to off. If this cannot be done on your subwoofer, set the cutoff
frequency to a higher value.
• If the speaker distance is not properly set, you may not have a maximized PHASE CONTROL effect.
• The PHASE CONTROL mode cannot be set to ON in the following cases:
– When the PURE DIRECT mode is switched on.
– When the HDMI audio output parameter is set to THROUGH in Setting the Audio options on page 68.

VSX-1020_SYXCN.book 63 ページ 2010年3月12日 金曜日 午前9時10分
Control with HDMI function 07
Chapter 7:
English
Control with HDMI function
Synchronized operations below with a Control
with HDMI-compatible Pioneer TV or Blu-ray
Making Control with HDMI
Deutsch
disc player or with a component of another
connections
make that supports the Control with HDMI
You can use synchronized operation for a
functions are possible when the component is
connected TV and up to six (VSX-1020/VSX-1025
connected to the receiver using an HDMI
model: BD, HDMI 1 to 5 (front panel))/four
cable.
(VSX-920 model: BD, HDMI 1 to 3) other
Français
• The receiver’s volume can be set and the
components.
sound can be muted using the TV’s remote
Be sure to connect the TV’s audio cable to the
control.
audio input of this unit.
• The receiver’s input switches over
For details, see Connecting your TV and
automatically when the TV’s channel is
playback components on page 25.
changed or a Control with HDMI-
Italiano
compatible component is played.
Important
• The receiver’s power is also set to standby,
when the TV’s power is set to standby.
• When connecting this system or changing
connections, be sure to switch the power
off and disconnect the power cord from
Nederlands
Important
the wall socket.
• With Pioneer devices, Control with HDMI
After completing all connections, connect
functions are referred to as “KURO LINK”.
the power cords to the wall socket.
• You cannot use this function with
• After this receiver is connected to an AC
components that do not support Control
outlet, a 2 second to 10 second HDMI
with HDMI.
initialization process begins. You cannot
Español
• We do not guarantee this receiver will work
carry out any operations during
with Pioneer Control with HDMI-
initialization. The HDMI indicator on the
compatible components or components of
display unit blinks during initialization,
other makes that support the Control with
and you can turn this receiver on once it
HDMI function. We do not guarantee that
has stopped blinking.
all synchronized operations will work with
• To get the most out of this function, we
components of other makes that support
recommend that you connect your HDMI
the Control with HDMI function.
component not to a TV but rather directly to
®
• Use a High Speed HDMI
cable when you
the HDMI terminal on this receiver.
want to use the Control with HDMI
• While the receiver is equipped with six (VSX-
function. The Control with HDMI function
1020/VSX-1025 model: BD, HDMI 1 to 5
may not work properly if a different type of
(front panel))/four (VSX-920 model: BD,
HDMI cable is used.
HDMI 1 to 3) HDMI inputs, the Control
• For details about concrete operations,
with HDMI function can only be used with
settings, etc., refer to also the operating
up to three DVD or Blu-ray disc players or
instructions for each component.
up to three DVD or Blu-ray disc recorders.
63
En
Control with HDMI function07
6 Select the ‘
Control Mode
’ setting you
HDMI Setup
want.
Choose whether you want to enable HDMI
You must adjust the settings of this receiver as
for all linked functions or the PQLS function
well as the connected Control with HDMI-
only. However, Display Power Off will
compatible components in order to make use
activate the settings set forth in step 7 below.
of the Control with HDMI function. For more
information see the operating instructions for
• ALL – Enabled for all linked functions.
each component.
• PQLS – Enabled only for the PQLS
1 Press , then press
Home Menu
.
function. When PQLS is selected, link
functions other than the PQLS function
2 Select ‘
System Setup
’, then press
ENTER
.
may not work properly. If you wish to use
3 Select ‘
Other Setup
’, then press
ENTER
.
all link functions, select ALL.
7 Select the ‘
Display Power Off
’ setting
you want.
If the TV’s power is turned off while using the
Control with HDMI function, the receiver’s
power is also turned off (all power off
function). This function can be disabled.
• YES – The all power off function is enabled.
The receiver’s power turns off together with
the TV’s power.
This function only works when the input
for a component connected to the
receiver by Control with HDMI is
4 Select ‘
HDMI Setup
’, then press
ENTER
.
selected or when watching the TV.
5 Select the ‘
Control
’ setting you want.
• NO – The all power off function is disabled.
Choose whether to set this unit’s Control with
The receiver’s power is not affected when
HDMI function ON or OFF. You will need to set
the TV’s power is turned off.
it to ON to use the Control with HDMI
function.
8 When you’re finished, press
HOME MENU
.
You will return to the Home Menu.
When using a component that does not
support the Control with HDMI function, set
this to OFF.
• ON – Enables the Control with HDMI
function. When this unit’s power is turned
off and you have a supported source begin
playback while using the Control with
HDMI function, the audio and video
outputs from the HDMI connection are
output from the TV.
• OFF – The Control with HDMI is disabled.
Synchronized operations cannot be used.
When this unit’s power is turned off, audio
and video of sources connected via HDMI
are not output.
64
En
RECEIVER
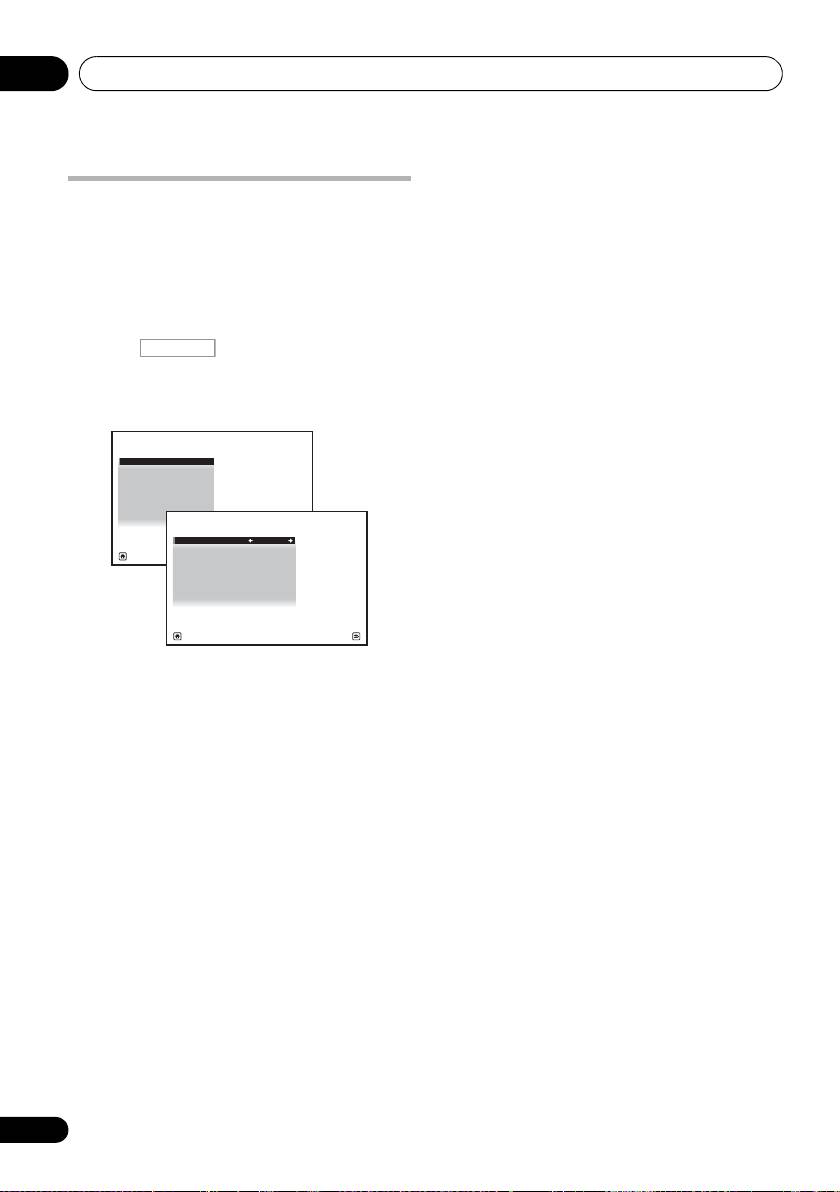
4e.Other Setup
A/V RECEIVER
1. HDMI Setup
2. Volume Setup
3.
Remote Control Mode Setup
4.
Flicker Reduction Setup
5. Pairing Bluetooth Device
Exit Return
4e1.HDMI Setup
A/V RECEIVER
Control : ON
Control mode : ALL
Display Power Off : YES
Exit Finish
VSX-1020_SYXCN.book 64 ページ 2010年3月12日 金曜日 午前9時10分

VSX-1020_SYXCN.book 65 ページ 2010年3月12日 金曜日 午前9時10分
Control with HDMI function 07
• When in the synchronized amp mode, the
English
Before using synchronization
synchronized amp mode is canceled if an
operation that produces sound from the TV
Once you have finished all connections and
is performed from the TV’s menu screen,
settings, you must:
etc.
1 Put all components into standby mode.
• When the TV’s power is set to standby, the
Deutsch
2 Turn the power on for all components,
receiver’s power is also set to standby.
with the power for the TV being turned on
(Only when the input for a component
last.
connected to the receiver by HDMI
connection is selected or when watching
3 Choose the HDMI input to which the TV is
the TV.)
connected to this receiver, and see if video
• The receiver’s input switches
Français
output from connected components displays
automatically when the Control with
properly on the screen or not.
HDMI-compatible component is played.
4 Check whether the components
• The receiver’s input switches
connected to all HDMI inputs are properly
automatically when the TV’s channel is
displayed.
switched.
Italiano
• The synchronized amp mode remains in
About synchronized
effect even if the receiver’s input is
switched to a component other than one
operations
connected by HDMI.
The Control with HDMI-compatible
The operations below can also be used on
Nederlands
component connected to the receiver operates
Pioneer Control with HDMI-compatible TVs.
in sync as described below.
• When the receiver’s volume is adjusted or
• From the menu screen of the Control with
the sound is muted, the volume status is
HDMI-compatible TV, set audio to be
displayed on the TV’s screen.
played through this receiver, and the
receiver will switch to the synchronized
• When the OSD language is switched on
Español
amp mode.
the TV, the receiver’s language setting also
switches accordingly.
• When in the synchronized amp mode, you
can adjust the receiver’s volume or mute
the sound using the TV’s remote control.
• When in the synchronized amp mode, the
synchronized amp mode is canceled when
the receiver’s power is turned off. To turn
the synchronized amp mode back on, set
audio to be played through the receiver
from the TV’s menu screen, etc. This
receiver will power up and switch to the
synchronized amp mode.
• When the synchronized amp mode is
canceled, the receiver’s power turns off if
you were viewing an HDMI input or a TV
program on the TV.
65
En

Control with HDMI function07
About connections with a product of
Setting the PQLS function
a different brand that supports the
PQLS (Precision Quartz Lock System) is a
Control with HDMI function
digital audio signal transfer control technology
The synchronized operations below can be
using the Control with HDMI function. It offers
used when the receiver’s Control with HDMI
higher-quality audio playback by controlling
function is connected to a TV of a brand other
audio signals from the receiver to a PQLS
than Pioneer that supports the Control with
compatible player, etc. This enables removing
HDMI function. (Depending on the TV,
jitter that has a negative effect on the quality of
however, some of the Control with HDMI
the sound and is generated upon
functions may not work.)
transmission.
• When the TV’s power is set to standby, the
This receiver supports the “PQLS 2 ch Audio”
receiver’s power is also set to standby.
that is only activated when playing an audio CD
(Only when the input for a component
(CD-DA).
connected to the receiver by HDMI
connection is selected or when watching
This function is activated when Control is set
1
the TV.)
to ON.
• The sound of TV programs or an external
• Press , then press
PQLS
to
input connected to the TV can also be
select the PQLS setting.
output from the speakers connected to the
The setting is displayed on the front panel
receiver. (This requires connection of an
display.
optical digital cable, etc., in addition to the
• PQLS
AUTO – PQLS is enabled. A
HDMI cable.)
precision quartz controller in this receiver
The synchronized operations below can be
eliminates distortion caused by timing
used when the receiver’s Control with HDMI
errors (jitter), giving you the best possible
function is connected to a player or recorder of
digital-to-analog conversion from audio CD
a brand other than Pioneer that supports the
sources when you use the HDMI interface.
Control with HDMI function.
This is valid as an HDMI function for PQLS-
• When playback starts on the player or
compatible players.
recorder, the receiver’s input switches to
• PQLS
OFF – PQLS is disabled.
the HDMI input to which that component is
connected.
See the Pioneer website for the latest
information on the models of non-Pioneer
brands and products that support the Control
with HDMI function.
66
En
Note
1 • If a listening mode other than AUTO SURROUND, ALC, DIRECT, PURE DIRECT or STEREO is selected while the
PQLS effect is enabled, the PQLS effect is disabled.
• When this receiver is connected by HDMI cable to a Pioneer player that is compatible with the PQLS function via
HDMI connection and a CD is played or HDMI reauthentication is performed (the HDMI indicator blinks), the PQLS
effect is enabled and the listening mode is set to AUTO SURROUND if a listening mode other than AUTO
SURROUND, ALC, DIRECT, PURE DIRECT or STEREO is selected.
RECEIVER
VSX-1020_SYXCN.book 66 ページ 2010年3月12日 金曜日 午前9時10分

VSX-1020_SYXCN.book 67 ページ 2010年3月12日 金曜日 午前9時10分
Control with HDMI function 07
English
Cautions on the Control with
HDMI function
• Connect the TV directly to this receiver.
Interrupting a direct connection with other
amps or an AV converter (such as an HDMI
Deutsch
switch) can cause operational errors.
• Only connect components (Blu-ray disc
player, etc.) you intend to use as a source
to the HDMI input of this receiver.
Interrupting a direct connection with other
Français
amps or an AV converter (such as an HDMI
switch) can cause operational errors.
• When Control is set to ON, the HDMI Input
in The Input Setup menu on page 42 is
automatically set to OFF.
Italiano
• When the receiver’s Control is turned ON,
even if the receiver’s power is in the
standby mode, it is possible to output the
audio and video signals from a player via
HDMI to the TV without producing sound
from the receiver, but only when a Control
Nederlands
with HDMI-compatible component (Blu-ray
disc player, etc.) and compatible TV are
connected. In this case, the receiver’s
power turns on and the power and HDMI
indicators light.
Español
67
En
Using other functions08
Chapter 8:
Using other functions
Setting the Audio options
There are a number of additional sound
1 Press , then press
AUDIO
settings you can make using the AUDIO
PARAMETER
.
PARAMETER menu. The defaults, if not stated,
2Use
/
to select the setting you want to
are listed in bold.
adjust.
Depending on the current status/mode of the
Important
receiver, certain options may not be able to be
selected. Check the table below for notes on
• Note that if a setting doesn’t appear in the
this.
AUDIO PARAMETER menu, it is
unavailable due to the current source,
3Use
/
to set as necessary.
settings and status of the receiver.
See the table below for the options available for
each setting.
4 Press
RETURN
to confirm and exit the
menu.
68
En
RECEIVER
VSX-1020_SYXCN.book 68 ページ 2010年3月12日 金曜日 午前9時10分
Setting What it does Option(s)
MCACC
Selects your favorite MCACC preset memory when multiple preset
M1. MEMORY 1 to
(MCACC preset)
memories are saved. When an MCACC preset memory has been
M6. MEMORY 6
renamed, the given name is displayed.
Default:
M1. MEMORY 1
EQ
Switches on/off the effects of EQ Pro. ON
(Acoustic
a
OFF
Calibration EQ)
S-WAVE
Switches on/off the effects of Standing Wave Control. ON
(Standing Wave)
OFF
DELAY
Some monitors have a slight delay when showing video, so the
0.0 to 10.0 (frames)
(Sound Delay)
soundtrack will be slightly out of sync with the picture. By adding
1 second = 25
a bit of delay, you can adjust the sound to match the presentation
frames (PAL)
of the video.
Default: 0.0
MIDNIGHT Allows you to hear effective surround sound of movies at low
MID/LDN OFF
volumes.
MIDNIGHT ON
LOUDNESS Used to get good bass and treble from music sources at low
LOUDNESS ON
volumes.
b
Applies the treble and bass tone controls to a source, or bypasses
BYPASS
TONE
them completely.
(Tone Control)
ON
c
Adjusts the amount of bass. –6 to +6 (dB)
BASS
Default: 0 (dB)
VSX-1020_SYXCN.book 69 ページ 2010年3月12日 金曜日 午前9時10分
Using other functions 08
Setting What it does Option(s)
English
c
Adjusts the amount of treble. –6 to +6 (dB)
TREBLE
Default: 0 (dB)
S.RTRV
With the Sound Retriever function, DSP processing is used to
d
OFF
(Sound Retriever)
compensate for the loss of audio data upon compression,
ON
improving the sound’s sense of density and modulation.
Deutsch
DNR
May improve the quality of sound in a noisy source (for example,
OFF
(Digital Noise
video tape with lots of background noise) when switched on.
ON
Reduction)
DIALOG E
Localizes dialog in the center channel to make it stand out from
OFF
(Dialog
other background sounds in a TV or movie soundtrack. By moving
FLAT
Enhancement)
from UP1 through UP2 and UP3 up to UP4, you can make the
Français
e
sound source seem to relocate upwards.
UP1/UP2/UP3/UP4
DUAL
Specifies how dual mono encoded Dolby Digital soundtracks
CH1 – Channel 1 is
(Dual Mono)
should be played. Dual mono is not widely used, but is sometimes
heard only
necessary when two languages need to be sent to separate
CH2 – Channel 2 is
channels.
heard only
Italiano
CH1 CH2
–
Both
channels heard from
front speakers
DRC
Adjusts the level of dynamic range for movie soundtracks
f
AUTO
(Dynamic Range
optimized for Dolby Digital, DTS, Dolby Digital Plus, Dolby
MAX
Nederlands
Control)
TrueHD, DTS-HD and DTS-HD Master Audio (you may need to use
this feature when listening to surround sound at low volumes).
MID
OFF
LFE
Some audio sources include ultra-low bass tones. Set the LFE
0dB/ –5dB/ –10dB/
(LFE Attenuate)
attenuator as necessary to prevent the ultra-low bass tones from
–15dB/ –20dB
distorting the sound from the speakers.
OFF
The LFE is not limited when set to 0 dB, which is the
Español
recommended value. When set to –5 dB, –10 dB, –15 dB or –20
dB, the LFE is limited by the respective degree. When OFF is
selected, no sound is output from the LFE channel.
g
Brings out detail in SACDs by maximizing the dynamic range
0 (dB)
SACD GAIN
(during digital processing).
+6 (dB)
h
Specifies the routing of the HDMI audio signal out of this receiver
AMP
HDMI
(amp) or through to a TV. When THROUGH is selected, no sound
(HDMI Audio)
THROUGH
is output from this receiver.
A. DELAY
This feature automatically corrects the audio-to-video delay
OFF
(Auto delay)
between components connected with an HDMI cable. The audio
ON
delay time is set depending on the operational status of the
display connected with an HDMI cable. The video delay time is
i
automatically adjusted according to the audio delay time.
69
En

VSX-1020_SYXCN.book 70 ページ 2010年3月12日 金曜日 午前9時10分
Using other functions08
Setting What it does Option(s)
j
Provides a better blend of the front speakers by spreading the
0 to 7
C. WIDTH
center channel between the front right and left speakers, making
(Center Width)
Default: 3
it sound wider (higher settings) or narrower (lower settings).
(Applicable only
when using a center
speaker)
j
Adjusts the depth of the surround sound balance from front to
–3 to +3
DIMENSION
back, making the sound more distant (minus settings), or more
Default: 0
forward (positive settings).
j
Extends the front stereo image to include the surround speakers
OFF
PANORAMA
for a ‘wraparound’ effect.
ON
k
Adjusts the center image to create a wider stereo effect with
0 to 10
C. IMAGE
vocals. Adjust the effect from 0 (all center channel sent to front
(Center Image)
Defaults:
right and left speakers) to 10 (center channel sent to the center
(Applicable only
Neo:6 MUSIC: 3
speaker only).
when using a center
Neo:6 CINEMA: 10
speaker)
EFFECT Sets the effect level for the currently selected Advanced Surround
10 to 90
or ALC mode (each mode can be set separately).
Defaults: 50
(90 for EXT.STEREO
only)
H.GAIN
Adjusts the output from the front height speaker when listening in
LOW
(Height Gain)
DOLBY PLIIz HEIGHT mode. If set to HIGH, the sound from the
MID
top will be more emphasized.
HIGH
V.SB
When you’re not using surround back speakers, selecting this
OFF
(Virtual Surround
mode allows you to hear a virtual surround back channel through
ON
Back)
your surround speakers. You can choose to listen to sources with
no surround back channel information, or if the material sounds
better in the format (for example, 5.1) for which it was originally
encoded, you can have the receiver only apply this effect to 6.1
l
encoded sources like Dolby Digital EX or DTS-ES.
V.HEIGHT
When you’re not using front height speakers, selecting this mode
OFF
(Virtual Front
allows you to hear a virtual front height channel through your front
ON
m
Height)
speakers.
a.When EQ OFF is selected, the MCACC indicator does not light.
b.This setting is only displayed when the listening mode is Stereo, Auto surround (STEREO) or SOUND RETRIEVER AIR.
c.The adjustment can be made only when TONE is set to ON.
d.With the iPod/USB, INTERNET RADIO or ADAPTER PORT input function, by default S.RTRV is set to ON.
e.UP1 to UP4 can be selected only when the front height speaker is connected. The presence or absence of effects
depends on the listening mode.
f. The initially set AUTO is only available for Dolby TrueHD signals. Select MAX or MID for signals other than Dolby
TrueHD.
g.You shouldn’t have any problems using this with most SACD discs, but if the sound distorts, it is best to switch the
gain setting back to 0 dB.
h.•The HDMI Audio setting cannot be switched while performing synchronized amp mode operations.
• The synchronized amp mode must be turned on in order to play the receiver’s HDMI audio and video input signals
from the TV with the receiver’s power in the standby mode. See About synchronized operations on page 65.
70
En
Using other functions 08
i. This feature is only available when the connected display supports the automatic audio/video synchronizing capability
English
(‘lipsync’) for HDMI. If you find the automatically set delay time unsuitable, set A. DELAY to OFF and adjust the delay
time manually. For more details about the lipsync feature of your display, contact the manufacturer directly.
j. Only when listening to 2-channel sources in Dolby Pro Logic IIx Music/Dolby Pro Logic II Music mode.
k.Only when listening to 2-channel sources in Neo:6 MUSIC/CINEMA mode.
l. • You can’t use the Virtual Surround Back mode when the headphones are connected to this receiver or when any of
the stereo, Front Stage Surround Advance or Stream Direct modes is selected.
• You can only use the Virtual Surround Back mode if the surround speakers are on and the SB setting is set to NO
Deutsch
or if Front Bi-Amp or ZONE 2 is selected at Speaker System.
• The Virtual Surround Back mode cannot be applied to sources that do not have surround channel information (only
when listening in some formats of Dolby TrueHD, DTS-HD or DTS Express mode).
m.• You can’t use the Virtual Front Height mode when the headphones are connected to this receiver or when any of
the stereo, Front Stage Surround Advance or Stream Direct modes is selected.
• You can only use the Virtual Front Height mode if the surround speakers are on.
• The Virtual Front Height mode cannot be applied to sources that do not have surround channel information (only
Français
when listening in some formats of Dolby TrueHD, DTS-HD or DTS Express mode).
Setting the Video options
There are a number of additional picture
1 Press , then press
VIDEO
settings you can make using the VIDEO
PARAMETER
.
Italiano
PARAMETER menu. The defaults, if not stated,
2Use
/
to select the setting you want
are listed in bold.
to adjust.
Depending on the current status/mode of the
Important
receiver, certain options may not be able to be
selected. Check the table below for notes on
Nederlands
• Note that if an option cannot be selected
this.
on the VIDEO PARAMETER menu, it is
unavailable due to the current source,
3Use
/
to set as necessary.
setting and status of the receiver.
See the table below for the options available
1
for each setting.
4Press
RETURN
to confirm and exit the
Español
menu.
71
En
Note
VSX-1020_SYXCN.book 71 ページ 2010年3月12日 金曜日 午前9時10分
RECEIVER
Setting What it does Option(s)
a
Converts video signals for output from the MONITOR OUT jacks
ON
V. CONV
(including HDMI OUT connector) for all video types (see page 24).
(Digital Video Conversion)
OFF
b
Specifies the output resolution of the video signal (when video
AUTO
RES
(Resolution)
input signals are output at the HDMI OUT connector, select this
PURE
according to the resolution of your monitor and the images you
480p/576p
wish to watch).
720p
1080i
1080p
1 • All of the setting items can be set for each input function.
• Setting items other than V. CONV can only be selected when V. CONV is set to ON.

VSX-1020_SYXCN.book 72 ページ 2010年3月12日 金曜日 午前9時10分
Using other functions08
Setting What it does Option(s)
c
Specifies the aspect ratio when analog video input signals are
THROUGH
ASP
(Aspect)
output at the HDMI output. Make your desired settings while
NORMAL
checking each setting on your display (if the image doesn’t match
your monitor type, cropping or black bands appear).
d,e,f
This setting optimizes the picture for film material when the video
AUTO
PCINEMA
output is set to progressive. Usually set to AUTO; but try
(PureCinema)
ON
switching to OFF if the picture appears unnatural.
OFF
Additionally, certain PAL movie videos (576i, 25 frames/second
STB video output or DVD disc playback, etc.) that contain film
progressive material cannot be recognized as such by this
receiver. In such instances, if you choose ON, PureCinema mode
is activated.
d,f
Adjusts the motion and still picture quality when video output is
–4 to +4
P.MOTION
(Progressive Motion)
set to progressive.
Default: 0
d
Adjusts the amount of noise reduction (NR) applied to the Y
0 to +8
YNR
(brightness) component.
Default: 0
d
Adjusts how sharp edges appear. –4 to +4
DETAIL
Default: 0
d,g
Adjusts the sharpness of the high-frequency (detailed) elements
–4 to +4
SHARP
in the picture.
(Sharpness)
Default: 0
d
Adjusts the overall brightness. –6 to +6
BRIGHT
(Brightness)
Default: 0
d
Adjusts the contrast between light and dark. –6 to +6
CONTRAST
Default: 0
d,h
Adjusts the red/green balance. –6 to +6
HUE
Default: 0
d
Adjusts saturation from dull to bright. –6 to +6
CHROMA
(Chroma Level)
Default: 0
a.If the video picture deteriorates when this settings is switched ON, switch it OFF.
b.• When set to a resolution with which the TV (monitor) is not compatible, no picture is output. Also, in some cases
no picture will be output due to copyright protection signals. In this case, change the setting.
• When AUTO is selected, the resolution is selected automatically according to the capacity of the TV (monitor)
connected by HDMI. When PURE is selected, the signals are output with the same resolution as when input (see
About the video converter on page 24).
• When a display is connected by HDMI, if this is set to something other than PURE and 480i/576i analog signals are
input, 480p/576p signals are output from the component output terminals.
• The AUTO setting is not displayed for HDMI inputs.
c.• If the image doesn’t match your monitor type, adjust the aspect ratio on the source component or on the monitor.
• This cannot be set when the resolution is set to PURE.
• The NORMAL setting is only displayed when 480i/p or 576i/p analog video signals are being input.
d.This setting is only displayed when 480i or 576i analog video signals are being input.
e.If the picture does not display properly when ON is selected, select AUTO or OFF.
f. This setting is valid for component outputs and HDMI output.
g.This setting is not valid for HDMI output.
h.This setting is not displayed for component inputs.
72
En

Using other functions 08
English
Switching the speaker terminals
Using the MULTI-ZONE controls
If you selected Speaker B at Speaker system
The following steps use the front panel
setting on page 101, you can switch between
controls to adjust the sub zone volume and
speakers using the SPEAKERS button. If you
select sources. See MULTI-ZONE remote
selected Normal(SB/FH), Normal(SB/FW),
controls on page 74.
Deutsch
Front Bi-Amp or ZONE 2, the button will
1Press
MULTI-ZONE ON/OFF
on the front
simply switch your main speaker terminals on
panel.
or off. The options below are for the Speaker B
1
Each press selects a MULTI-ZONE option:
setting only.
• ZONE 2 ON – Switches the MULTI-ZONE
•Use
SPEAKERS
on the front panel to
feature on
Français
select a speaker terminal setting.
• MULTI ZONE OFF – Switches the MULTI-
As mentioned above, if you have selected
ZONE feature off
Normal(SB/FH) or Normal(SB/FW), the
button will simply switch your main speaker
The MULTI-ZONE indicator lights when the
terminals (A) on or off.
MULTI-ZONE control has been switched ON.
Press repeatedly to choose a speaker terminal
2Press
MULTI-ZONE CONTROL
on the
Italiano
option:
front panel.
2
• SPA – Sound is output from the A-
• When the receiver is on,
make sure that
speaker terminals (up to 7 channels
any operations for the sub zone are done
(including surround back channels),
while ZONE 2 shows in the display. If this
depending on the source).
is not showing, the front panel controls
Nederlands
affect the main zone only.
• SPB – Sound is output from the two
speakers connected to the B-speaker
3Use the
INPUT SELECTOR
dial to select
terminals. Multichannel sources will not be
the source for the sub zone.
heard.
For example, ZONE 2 CD-R sends the source
• SPAB – Sound is output from the A-
connected to the CD-R inputs to the sub room
speaker terminals (up to 5 channels,
Español
(ZONE 2).
depending on the source), the two
•If you select TUNER, you can use the tuner
speakers connected to the B-speaker
controls to select a preset station (see
terminal, and the subwoofer. The sound
Saving station presets on page 51 if you’re
from B-speaker terminals will be the same
3
unsure how to do this).
as the sound from the A-speaker terminals
(multichannel sources will be downmixed
• VSX-920 model only: iPod/USB and
to 2 channels).
INTERNET RADIO function cannot be
selected for the MULTI-ZONE feature.
• SP (off) – No sound is output from the
speakers.
73
En
Note
VSX-1020_SYXCN.book 73 ページ 2010年3月12日 金曜日 午前9時10分
1 • The subwoofer output depends on the settings you made in Manual speaker setup on page 100. However, if SPB
is selected above, no sound is heard from the subwoofer (the LFE channel is not downmixed).
• All speaker systems (except Speaker B connections) are switched off when headphones are connected.
2 If the receiver is in standby, the display is dimmed, and ZONE 2 DVD for example shows in the display.
3 The tuner cannot be tuned to more than one station at a time. Therefore, changing the station in one zone also
changes the station in the other zone. Please be careful not to change stations when recording a radio broadcast.

Using other functions08
4 When
Speaker System
is set to
ZONE 2
,
use the
MASTER VOLUME
dial to adjust the
Making an audio or a video
1
volume for the sub zone.
recording
5 When you’re finished, press
MULTI-ZONE
You can make an audio or a video recording
CONTROL
again to return to the main zone
from the built-in tuner, or from an audio or
controls.
video source connected to the receiver (such
3
You can also press MULTI-ZONE ON/OFF on
as a CD player or TV).
the front panel to switch off all output to the
Keep in mind you can’t make a digital
2
sub zone.
recording from an analog source or vice-versa,
so make sure the components you are
MULTI-ZONE remote controls
recording to/from are hooked up in the same
way (see Connecting your equipment on
Set the MULTI-ZONE operation switch to
ZONE 2
page 15 for more on connections).
to operate the corresponding zone.
Since the video converter is not available when
The following table shows the possible MULTI-
making recordings (from the video OUT jacks)
ZONE remote controls:
make sure to use the same type of video cable
for connecting your recorder as you used to
connect your video source (the one you want to
record) to this receiver. For example, you must
connect your recorder using Component video
if your source has also been connected using
Component video.
For more information about video connections,
see Connecting a HDD/DVD recorder, VCR and
other video sources on page 29.
1 Select the source you want to record.
Use the input function buttons (or INPUT
SELECT).
2 Prepare the source you want to record.
Tune to the radio station, load the CD, video,
DVD etc.
3 Prepare the recorder.
Insert a blank tape, MD, video etc. into the
recording device and set the recording levels.
74
En
Note
VSX-1020_SYXCN.book 74 ページ 2010年3月12日 金曜日 午前9時10分
Button What it does
Switches on/off power in the sub zone.
INPUT
Use to select the input function in
SELECT
the sub zone.
Input
Use to select the input function
function
directly (this may not work for some
buttons
functions) in the sub zone.
MASTER
Use to set the listening volume in the
a
VOLUME
sub zone.
+/–
MUTE
Mutes the sound or restores the
sound if it has been muted (adjusting
a
the volume also restores the sound).
a.You can only use this button when Speaker System
is set to ZONE 2.
1 The volume levels of the main and sub zone are independent.
2 • You won’t be able to switch the main zone off completely unless you’ve switched off the MULTI-ZONE control first.
• If you don’t plan to use the MULTI-ZONE feature for a while, turn off the power in both the sub and main rooms so
that this receiver is in standby.
3 • The receiver’s volume, Audio parameters (the tone controls, for example), and surround effects have no effect on
the recorded signal.
• Some digital sources are copy-protected, and can only be recorded in analog.
• Some video sources are copy-protected. These cannot be recorded.

Using other functions 08
Refer to the instructions that came with the
English
recorder if you are unsure how to do this. Most
Dimming the display
video recorders set the audio recording level
You can choose between four brightness
automatically—check the component’s
levels for the front panel display. Note that
instruction manual if you’re unsure.
when selecting sources, the display
automatically brightens for a few seconds.
4 Start recording, then start playback of the
Deutsch
source component.
• Press , then press
DIMMER
repeatedly to change the brightness of the
front panel display.
Reducing the level of an analog
signal
Français
Checking your system settings
The input attenuator lowers the input level of
Use the status display screen to check your
an analog signal when it’s too strong. You can
current settings for features such as your
use this if you find that the OVER indicator
current MCACC preset.
lights often or you can hear distortion in the
1
sound.
1 Press , then press
STATUS
to
Italiano
check the system settings.
• Press , then press
A.ATT
to
These appear on the front panel display.
switch the input attenuator on or off.
The front panel display shows each of the
following settings for three seconds each:
Using the sleep timer
Nederlands
The sleep timer switches the receiver into
standby after a specified amount of time so you
can fall asleep without worrying about the
receiver being left on all night. Use the remote
control to set the sleep timer.
• Press , then press
SLEEP
Español
repeatedly to set the sleep time.
2 When you’re finished, press
STATUS
again to switch off the display.
• You can check the remaining sleep time at
any time by pressing SLEEP once. Pressing
repeatedly will cycle through the sleep
2
options again.
75
En
Note
RECEIVER
1 The attenuator isn’t available with digital sources, or when using the Stream Direct (ANALOG DIRECT) modes.
2 • You can also switch off the sleep timer simply by switching off the receiver.
• The sleep timer is valid for all zones. If any zone is on, the sleep timer continues functioning.
RECEIVER
30 min
60 min
90 minOff
VSX-1020_SYXCN.book 75 ページ 2010年3月12日 金曜日 午前9時10分
RECEIVER
RECEIVER
Input Source
↓
Sampling Frequency
↓
MCACC preset
↓
ZONE 2 input

VSX-1020_SYXCN.book 76 ページ 2010年3月12日 金曜日 午前9時10分
Using other functions08
Setting Default
Resetting the system
DIsplay Power Off YES
Use this procedure to reset all the receiver’s
DSP
settings to the factory default. Use the front panel
Power On Level LAST
controls to do this. Set
MULTI-ZONE
to
OFF
.
Volume Limit OFF
• Disconnect the iPod and USB memory
Mute Level FULL
device from the receiver beforehand.
Phase Control ON
1 Switch the receiver into standby.
Sound Retriever ON
(iPod/USB, INTERNET
RADIO, ADAPTER PORT
2 While holding down
ENTER
on the front
function)/
panel, press
STANDBY/ON
.
OFF (Other functions)
The display shows RESET NO .
Sound Delay 0.0 frame
Dual Mono CH1
3 Select ‘
RESET
’ using
PRESET /
, then
press
ENTER
on the front panel.
DRC AUTO
The display shows RESET? OK.
SACD Gain 0 dB
LFE Attenuate 0 dB
4 Press ENTER to confirm.
Auto delay OFF
OK
appears in the display to indicate that the
Digital Safety OFF
receiver has been reset to the factory default settings.
Effect Level 90 (EXT.STEREO)/
• Note that all settings will be saved, even if
50 (Other modes)
the receiver is unplugged.
2 PL II Music Options Center Width:3
Dimension:0
Default system settings
Panorama:OFF
Setting Default
Neo:6 Options Center Image:
Digital Video Conversion ON
3 (Neo:6 MUSIC)/
10 (Neo:6 CINEMA)
SPEAKERS A
Listening Mode
AUTO SURROUND
Speaker System Normal(SB/FH)
(All Inputs)
(2 ch/multi ch)/
Speaker Setting Front: SMALL
STEREO (Head phones)
Center: SMALL
See also Setting the Audio options on page 68 for
FH/FW: SMALL
other default DSP settings.
Surr: SMALL
SB: SMALLx2
MCACC
SW: YES
MCACC Position Memory
M1: MEMORY 1
Surround Position IN REAR
Channel Level (M1 to M6) 0.0 dB
Crossover 80 Hz
Speaker Distance
3.00m
X-Curve OFF
(M1 to M6)
DIMMER Medium bright
Standing Wave
ATT of all channels/
(M1 to M6)
filters: 0.0 dB
Inputs
SWch Trim: 0.0 dB
See Input function default and possible settings on
EQ Data (M1 to M6)
All channels/bands: 0.0 dB
page 43.
EQ Trim: 0.0 dB
HDMI
HDMI Audio Amp
Control ON
Control Mode ALL
76
En
Controlling the rest of your system 09
Chapter 9:
English
Controlling the rest of your
system
Deutsch
However, there are cases where only certain
Operating multiple receivers
functions may be controllable after assigning
the proper preset code, or the codes for the
Up to four receivers can be operated discretely
manufacturer in the remote control will not
using this receiver’s remote control when
Français
work for the model that you are using.
using multiple receivers, provided they are of
the same model as this receiver. The receiver to
If you can’t find a preset code that matches the
be operated is switched by inputting the preset
component you want to control, you can still
code to set the remote control setting.
teach the remote individual commands from
another remote control (see
Programming
• Set the remote modes on the receivers
Italiano
signals from other remote controls
on page 78).
before using this function (see Remote
Control Mode Setup on page 107).
Note
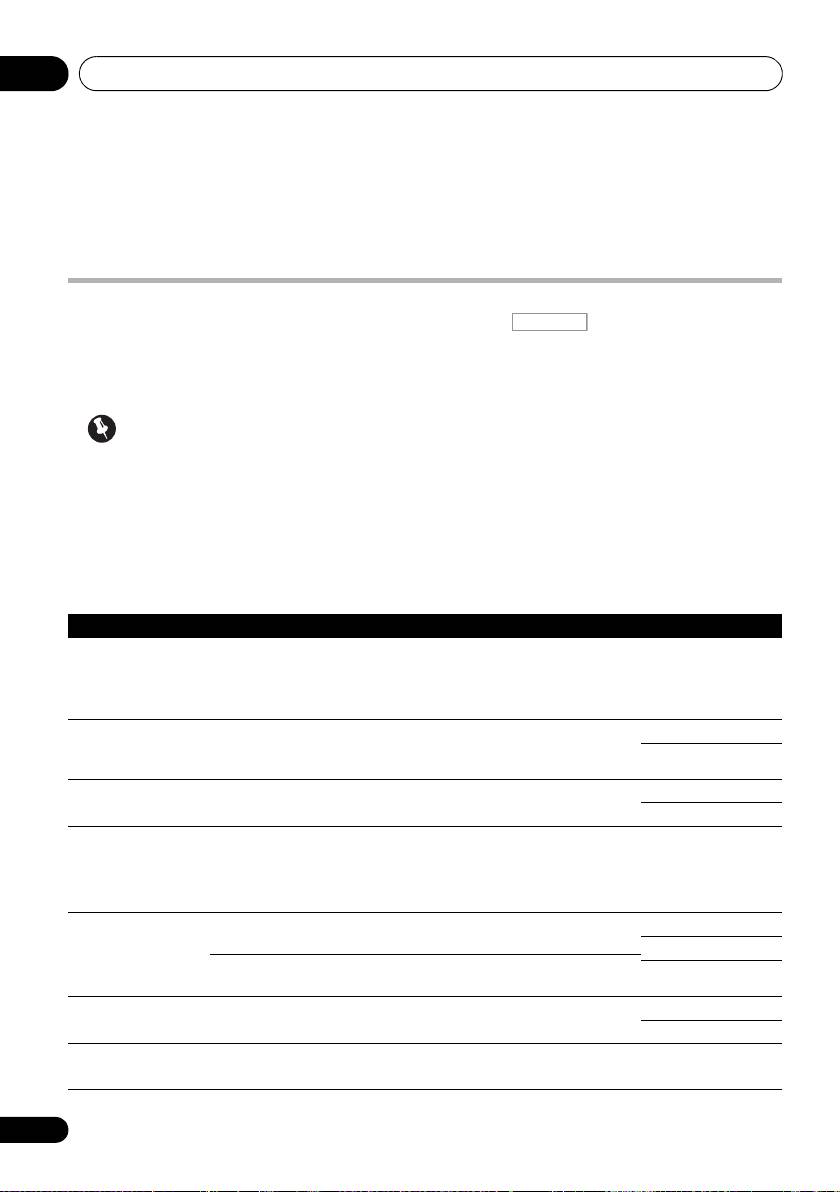
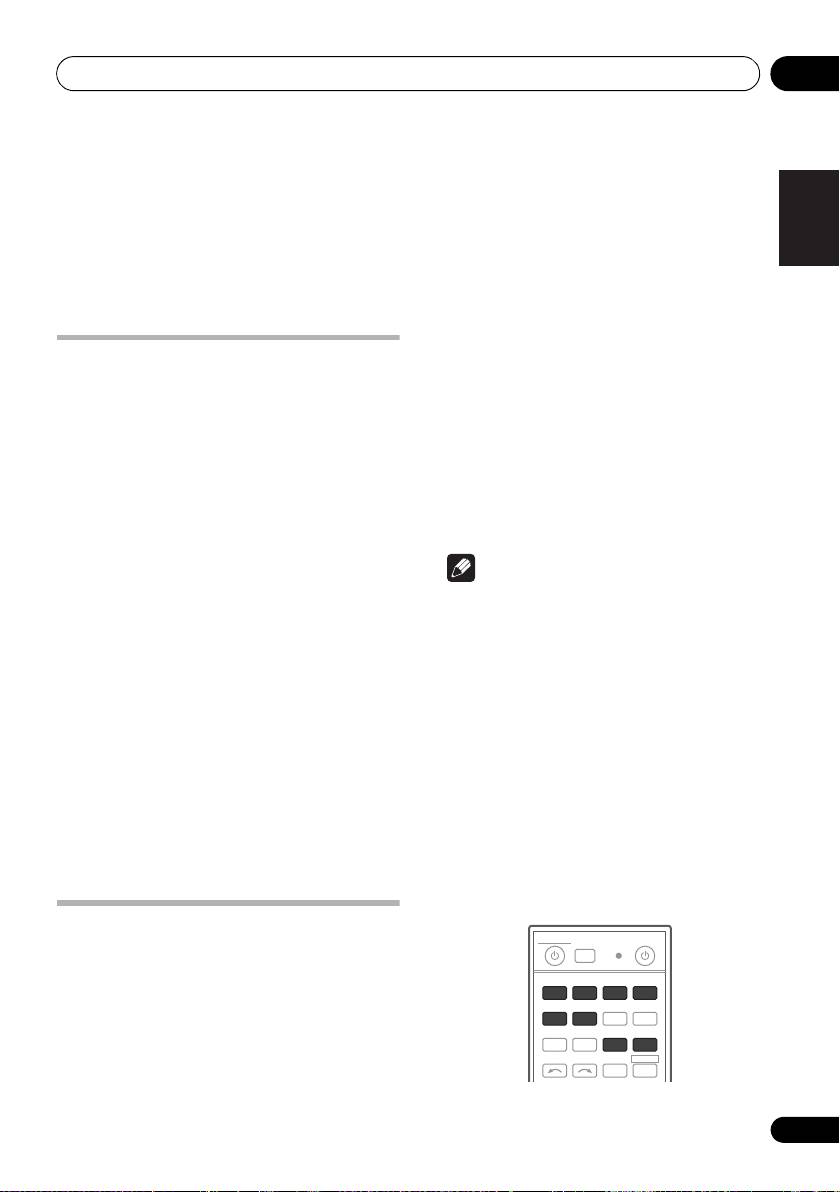
1 Press and hold
R.SETUP
, then press “4”
for three seconds.
• You can cancel or exit any of the steps by
The LED flashes continuously.
pressing R.SETUP.
Nederlands
• To cancel the preset setup mode press
• After one minute of inactivity, the remote
R.SETUP.
automatically exits the operation.
• For greater convenience, assign the TV
2 Press the number button for the receiver
connected to the MONITOR OUT terminal
(“
Receiver 1
” to “
Receiver 4
”) you wish to
to the TV CTRL button, and assign your
operate.
Español
satellite/cable receiver or set-top box
For example, to operate “Receiver 2”, press “2”.
connected to the TV input terminal to the
If the LED lights for one second, the setting has
TV input button. If a single device is
been successfully completed.
connected to both terminals, that device
When the preset code is input, the LED flashes
should be assigned to both the TV CTRL
three times to indicate that the setting has
and TV input buttons.
failed.
• Devices may be assigned to the following
input function buttons.
Setting the remote to control
other components
Most components can be assigned to one of
the input function buttons (such as DVD or
CD) using the component’s manufacturer
preset code stored in the remote.
77
En
MULTI
SOURCERECEIVER
OPERATION
R.SETUP
BD DVD
DVR/BDR HDMI
CDTV
ADAPTERNET RADIO
iPod
USB TUNER VIDEO TV CTRL
INPUT
SELECT ZONE 2
RECEIVER
VSX-1020_SYXCN.book 77 ページ 2010年3月12日 金曜日 午前9時10分

Controlling the rest of your system09
Selecting preset codes directly
Programming signals from other
remote controls
1 Press and hold
R.SETUP
, then press “1”
for three seconds.
If the preset code for your component is not
The LED flashes continuously.
available, or the available preset codes do not
operate correctly, you can program signals
• To cancel the preset setup mode press
from the remote control of another component.
R.SETUP.
This can also be used to program additional
2 Press the input function button for the
operations (buttons not covered in the presets)
1
component you want to control.
after assigning a preset code.
When assigning preset codes to TV CONTROL,
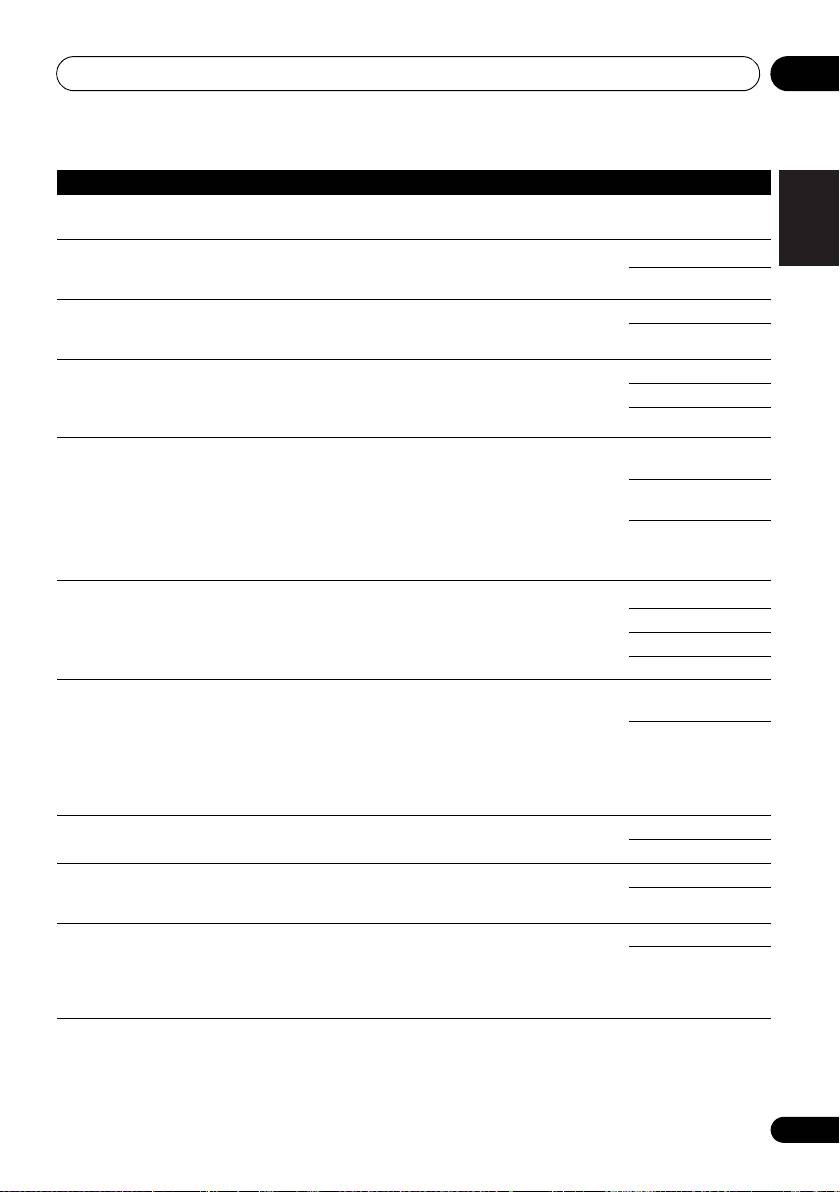
Certain buttons represent operations that
press TV CTRL here.
cannot be learned from other remote controls.
The LED blinks once and flashes continuously.
The buttons available are shown below:
3 Use the number buttons to enter the 4-
digit preset code.
See Preset code list on page 123.
If the LED lights for one second, the setting has
been successfully completed.
When the preset code is fully input, the LED
flashes three times to indicate that the setting
has failed. If this happens, enter the 4-digit
preset code again.
4 Repeat steps 2 through 3 for the other
components you want to control.
To try out the remote control, switch the
component on or off (into standby) by pressing
SOURCE. If it doesn’t seem to work, select
the next code from the list (if there is one).
5Press
R.SETUP
to exit the preset setup
mode.
1 Press and hold
R.SETUP
, then press “2”
for three seconds.
The LED flashes continuously.
• To cancel the preset setup mode press
R.SETUP.
2 Press the input function button for the
component you want to control.
The LED blinks once and flashes continuously.
78
En
Note
MULTI
SOURCERECEIVER
OPERATION
R.SETUP
BD DVD
DVR/BDR HDMI
CDTV
ADAPTERNET RADIO
iPod
USB TUNER VIDEO TV CTRL
INPUT
SELECT ZONE 2
RECEIVER
MASTER
INPUT
VOLUME
TV CONTROL
CH
VOL
MUTE
1 The remote can store about 120 preset codes from other components (this has been tested with codes of Pioneer
format only).
AUDIO
VIDEO
PARAMETER
PARAMETER
LIST
TUNE
TOOLS
TOP MENU
T.EDIT
BAND GUIDE
PRESET
ENTER
PRESET
PTY
SEARCH
RETURN
HOME
MENU
TUNE
iPod CTRL
PGM
MENU
HDD DVD
PHASE
CTRL STATUS
TV
/
DTV MPX PQLS
S.RETRIEVER
MIDNIGHT
AUDIO
213
SIGNAL SEL
MCACC SLEEP
INFO
546
DISP
CH
LEVEL A.ATT DIMMER
79
8
D.ACCESS
CLASS
CH
/
CLR
0
ENTER
AUTO
/
ALC
/
DIRECT
STEREO
STANDARD ADV SURR
LISTENING MODE
VSX-1020_SYXCN.book 78 ページ 2010年3月12日 金曜日 午前9時10分
Controlling the rest of your system 09
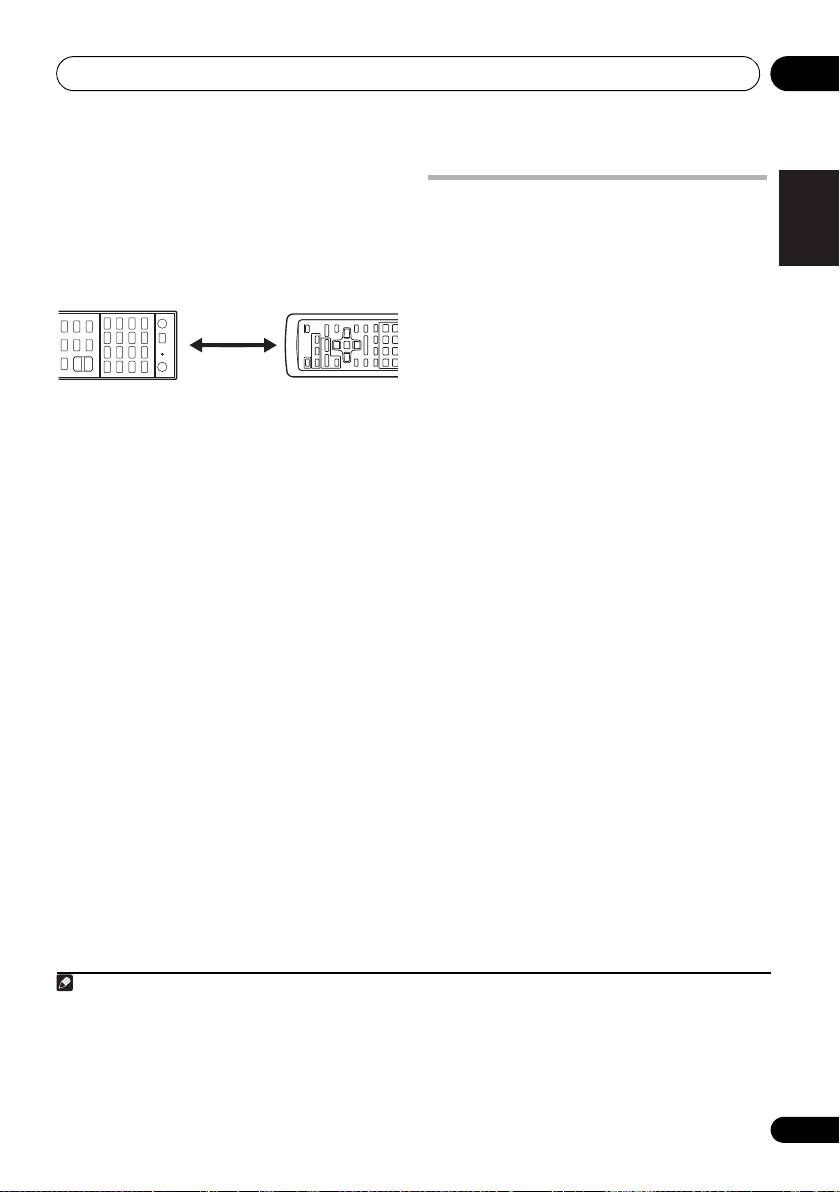
3 Point the two remote controls towards
English
each other, then press the button that will be
Erasing one of the remote
doing the learning on this receiver’s remote
control button settings
control.
This erases one of the buttons you have
The LED blinks once and flashes continuously.
programmed and restores the button to the
• The remote controls should be 3 cm apart.
factory default.
Deutsch
1 Press and hold
R.SETUP
, then press “7”
for three seconds.
The LED flashes continuously.
• To cancel the preset setup mode press
R.SETUP.
Français
2 Press the input function button
4 Press the corresponding button on the
corresponding to the command to be erased,
other remote control that is sending (teaching)
then press
ENTER
.
the signal to this receiver’s remote control.
The LED flashes once.
If the LED lights for one second, the setting has
1
Italiano
been successfully completed.
3 Press and hold the button to be erased
for three seconds.
5 To program additional signals for the
If the LED lights for one second, the erasing
current component repeat steps 3 and 4.
has been successfully completed.
To program signals for another component,
exit and repeat steps 2 through 4.
4 Repeat step 3 to erase other buttons.
Nederlands
6 Press
R.SETUP
to exit the programming
5Press
R.SETUP
to exit the erasing mode.
mode.
Español
79
En
Note
1 • Note that interference from TVs or other devices will sometimes result in the remote control learning the wrong
signal.
• Some commands from other remote controls cannot be learned, but in most cases the remotes just need to be
moved closer together or farther apart.
• If the LED flashes for five seconds, it means the memory is full. See Resetting the input assignment of one of the
input function buttons above to erase a programmed button you’re not using to free up more memory (note that some
signals may take more memory than others).
3 cm
This receiver’s
Other remote
remote control
control
VSX-1020_SYXCN.book 79 ページ 2010年3月12日 金曜日 午前9時10分

VSX-1020_SYXCN.book 80 ページ 2010年3月12日 金曜日 午前9時10分
Controlling the rest of your system09
Resetting the input assignment
Direct function
•Default setting: On
of one of the input function
You can use the direct function feature to
buttons
control one component using the remote
This procedure resets the input assignment
control while at the same time using your
preset at the remote control’s input function
receiver to play a different component. This
button, restoring the default.
could let you, for example, use the remote
control to set up and listen to a CD on the
1 Press and hold
R.SETUP
, then press “9”
receiver, and then use the remote control to
for three seconds.
rewind a tape in your VCR while you continue
The LED flashes continuously.
to listen to your CD player.
• To cancel the preset setup mode press
When direct function is on, any component you
R.SETUP.
select (using the input function buttons) will be
2 Press and hold the input function button
selected by both the receiver and the remote
corresponding to the command to be erased
control. When you turn direct function off, you
for three seconds.
can operate the remote control without
If the LED lights for one second, the erasing
affecting the receiver.
has been successfully completed.
1 Press and hold
R.SETUP
, then press “5”
for three seconds.
The LED flashes continuously.
• To cancel the preset setup mode press
R.SETUP.
2 Press the input function button for the
component you want to control.
3 Press “1” (On) or “0” (Off) to switch the
direct function mode.
If the LED lights for one second, the setting has
been successfully completed.
If the LED flashes three times, the setting has
failed.
4 Press
R.SETUP
to exit the setup.
80
En
