Pioneer KRL-46V: Initial auto installation
Initial auto installation: Pioneer KRL-46V
Table of contents
- Contents
- Important Safety Precautions
- Remote control unit
- Controlling other equipment using the supplied remote control unit Presetting manufacture codes Manufacture codes STB DVD
- DVR VCR BD VCR
- Using with other equipment (STB) Using with other equipment (VCR)
- Using with other equipment (DVD/DVR)
- Trademarks
- TV (Front view) TV (Rear view)
- Preparation Supplied accessories Attaching the stand unit
- Preparation Inserting the batteries Using the remote control unit
- Installation precautions
- Quick guide Initial installation overview
- Before turning on the power
- Initial auto installation
- Watching TV Daily operation
- EPG (Electronic Programme Guide) EPG Overview Useful settings for using EPG
- Selecting a programme using EPG
- Timer recording using EPG Cancelling the timer recording
- Teletext Using the MHEG-5 application (UK only)
- Connecting external devices Introduction to connections
- HDMI connection Component connection S-VIDEO/VIDEO connection
- SCART connection Controlling devices with SCART using i/o link.A
- Speaker/amplifier connection
- Inserting a smart card
- HDMI CONTROL Controlling HDMI devices using HDMI CONTROL
- HDMI CONTROL connection HDMI CONTROL Setup
- Operating an HDMI CONTROL device
- Menu operation What is the HOME MENU?
- Basic adjustment Picture Settings
- Sound Settings Power Save Settings
- Channel Settings
- Analogue channel settings
- Password/Parental lock settings Language Settings (language, subtitle, multi audio)
- Useful Viewing functions Selecting the picture size
- Other picture and audio settings
- Display Settings
- Other useful features Setting when using external devices Additional features
- Connecting a PC Connecting a PC Displaying a PC image on the screen
- Selecting input resolution
- RS-232C port specifications
- PC compatibility chart RS-232C command list
- Appendix Troubleshooting
- Updating your TV via DVB-T Reset Identification
- Specifications
- End of life disposal
Quick guide
Initial auto installation
When the TV is powered on for the first time after
purchase, the initial auto installation wizard appears.
Follow the menus and make the necessary settings
one after another.
Press a on the TV.
The initial auto installation wizard appears.
Setting the OSD language.
English
Italiano
Svenska
Press a/b/c/d to select the desired language,
and then press ENTER.
Setting the country (Location of the TV).
Austria A B/G
Finland
FIN
B/G
Greece GR B/G
Press a/b/c/d to select your country or area,
and then press ENTER.
This setting screen only appears during the first
installation.
Starting channel search.
Analogue SearchDigital Search
The TV searches for, sorts and stores all the
receivable TV stations according to their settings
and the connected aerial.
To abort the initial auto installation in progress, press
6 (RETURN).
NOTE
If you turn off the power on the TV after performing step 4,
the initial auto installation wizard does not appear. The auto
installation function allows you to execute the installation
again from the “Setup” menu (Page 32).
The initial auto installation wizard will go off if you leave
the TV unattended for 30 minutes before searching for
channels in step 5.
1
•
Checking signal strength and
2
channel strength
If you install a DVB-T aerial for the first time or relocate
it, you should adjust the alignment of the aerial to
receive a good reception while checking the antenna
setup screen.
Press h and the “HOME MENU” screen
displays.
Press a/b to select “Setup”.
Press a/b to select “Antenna Setup-DIGITAL”,
and then press ENTER.
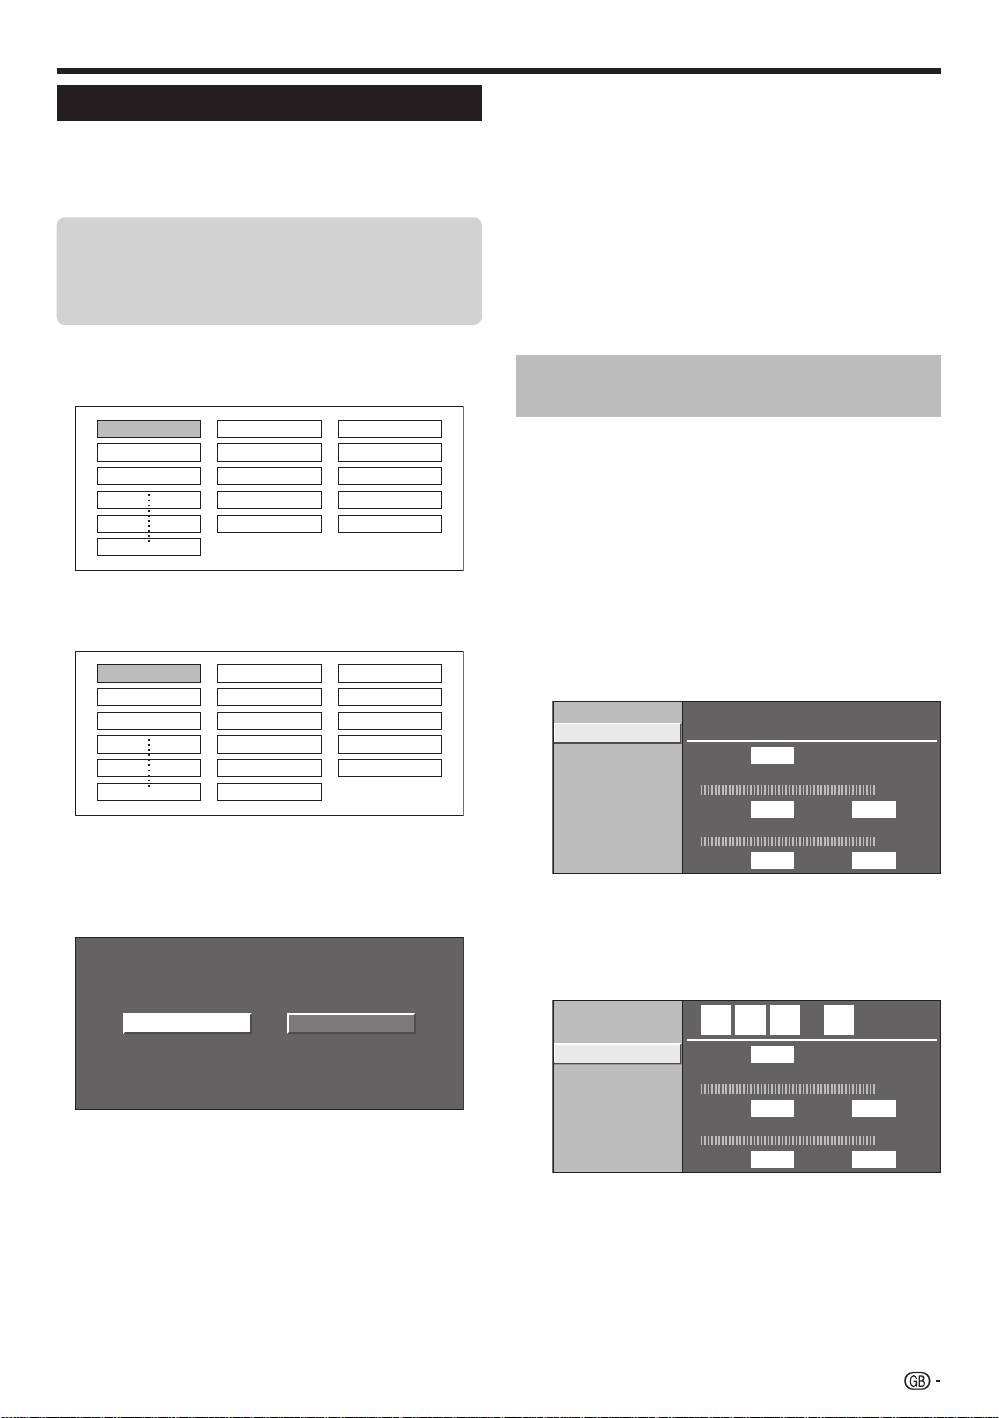
3
Checking signal strength
Press a/b to select “Signal Strength”.
•
4
Press c/d to select “Digital Search” or
“Analogue Search”, and then press ENTER.
•
If you want to search for more broadcasts, execute
“Additional Search” from the “Programme Setup”
menu (Pages 32 and 33).
•
To watch both analogue broadcasts and digital
broadcasts, you should perform the channel search
setting for each format.
EXAMPLE
•
If you execute “Digital Search” in the initial auto
installation wizard, you should perform “Analogue
Search” from “Auto Installation” under the “Setup”
menu.
Supply Voltage
Signal Strength
Channel Strength
CH No. 21
Signal Strength
Current Max.0
0
Quality
Current Max.0 0
Checking channel strength
Press a/b to select “Channel Strength”, and
then press ENTER.
You can input a specified frequency band using the
0–9 numeric buttons.
Supply Voltage
4 7 4 . 0
MHz
Signal Strength
Channel Strength
CH No. 21
Signal Strength
Current Max.0
0
Quality
Current Max.0 0
5
•
•
Confirm the following before turning
on the power
E
Is the aerial cable connected?
•
E
Is the AC cord plugged in?
1
2
3
E
E
•
4
Position and align the aerial so that the
maximum possible values for “Signal Strength”
and “Quality” are obtained.
NOTE
•
The values of “Signal Strength” and “Quality” indicate when
to check the appropriate alignment of the aerial.
15
KRL46V_GB.indd 15 2008/07/09 14:08:44
