Pioneer KRL-46V: Channel Settings
Channel Settings: Pioneer KRL-46V
Table of contents
- Contents
- Important Safety Precautions
- Remote control unit
- Controlling other equipment using the supplied remote control unit Presetting manufacture codes Manufacture codes STB DVD
- DVR VCR BD VCR
- Using with other equipment (STB) Using with other equipment (VCR)
- Using with other equipment (DVD/DVR)
- Trademarks
- TV (Front view) TV (Rear view)
- Preparation Supplied accessories Attaching the stand unit
- Preparation Inserting the batteries Using the remote control unit
- Installation precautions
- Quick guide Initial installation overview
- Before turning on the power
- Initial auto installation
- Watching TV Daily operation
- EPG (Electronic Programme Guide) EPG Overview Useful settings for using EPG
- Selecting a programme using EPG
- Timer recording using EPG Cancelling the timer recording
- Teletext Using the MHEG-5 application (UK only)
- Connecting external devices Introduction to connections
- HDMI connection Component connection S-VIDEO/VIDEO connection
- SCART connection Controlling devices with SCART using i/o link.A
- Speaker/amplifier connection
- Inserting a smart card
- HDMI CONTROL Controlling HDMI devices using HDMI CONTROL
- HDMI CONTROL connection HDMI CONTROL Setup
- Operating an HDMI CONTROL device
- Menu operation What is the HOME MENU?
- Basic adjustment Picture Settings
- Sound Settings Power Save Settings
- Channel Settings
- Analogue channel settings
- Password/Parental lock settings Language Settings (language, subtitle, multi audio)
- Useful Viewing functions Selecting the picture size
- Other picture and audio settings
- Display Settings
- Other useful features Setting when using external devices Additional features
- Connecting a PC Connecting a PC Displaying a PC image on the screen
- Selecting input resolution
- RS-232C port specifications
- PC compatibility chart RS-232C command list
- Appendix Troubleshooting
- Updating your TV via DVB-T Reset Identification
- Specifications
- End of life disposal
Basic adjustment
Power Control
No Operation Off
Setup
The TV will automatically enter standby mode if no
Programme Setup
operations are performed during the time span you set
(“30min.” or “3hr.”).
•
Five minutes before the TV enters standby mode, the
Digital Setting
remaining time displays every minute in the lower-left
You can reconfigure the DTV service settings
corner of the screen.
automatically or manually.
Power Control
Additional Search
Ecology
Use this menu to add new services automatically after
auto installation has been completed.
When set to “Yes”, the TV activates the following
Manual Search
power saving mode.
Add new services within a specified frequency band.
•
“RLS” set to “On” (Page 30).
Enter the frequency using 0–9 numeric buttons.
•
“Standby Mode” set to “Mode2” (Page 38).
You can perform “Manual Search” with a service number
•
“No Signal Off” set to “Enable” (Page 31).
only when the five Nordic countries have been selected in
•
“No Operation Off” set to “3hr.” (Page 32).
the country setting.
Power Control
Manual Adjust
Sleep Timer
Configure various settings for each service using the
Colour (Red/Green/Yellow/Blue) buttons.
Allows you to set a time when the TV automatically
enters standby mode.
NOTE
•
Select “Off” to cancel the sleep timer.
•
When the time has been set, countdown automatically
starts.
•
Five minutes before the preset of time expires, the
remaining time displays each minute in the lower-left corner
of the screen.
Channel Settings
Auto Installation
Setup
Auto Installation
The TV automatically detects and stores all available
services in your area. This function also allows you to
perform the channel setting for digital and analogue
individually and reconfigure the settings after the initial
auto installation has been completed.
After selecting “Yes” on the screen, you can set
language and channel search the same as in the
initial auto installation. Follow steps 2, 4 and 5
on page 15.
NOTE
•
You cannot set the country setting in “Auto Installation” in
the “Setup” menu. If you want to reconfigure the country
setting, automatically execute initial auto installation after
executing “Reset” from the “Setup” menu.
•
The current country setting is displayed on the screen.
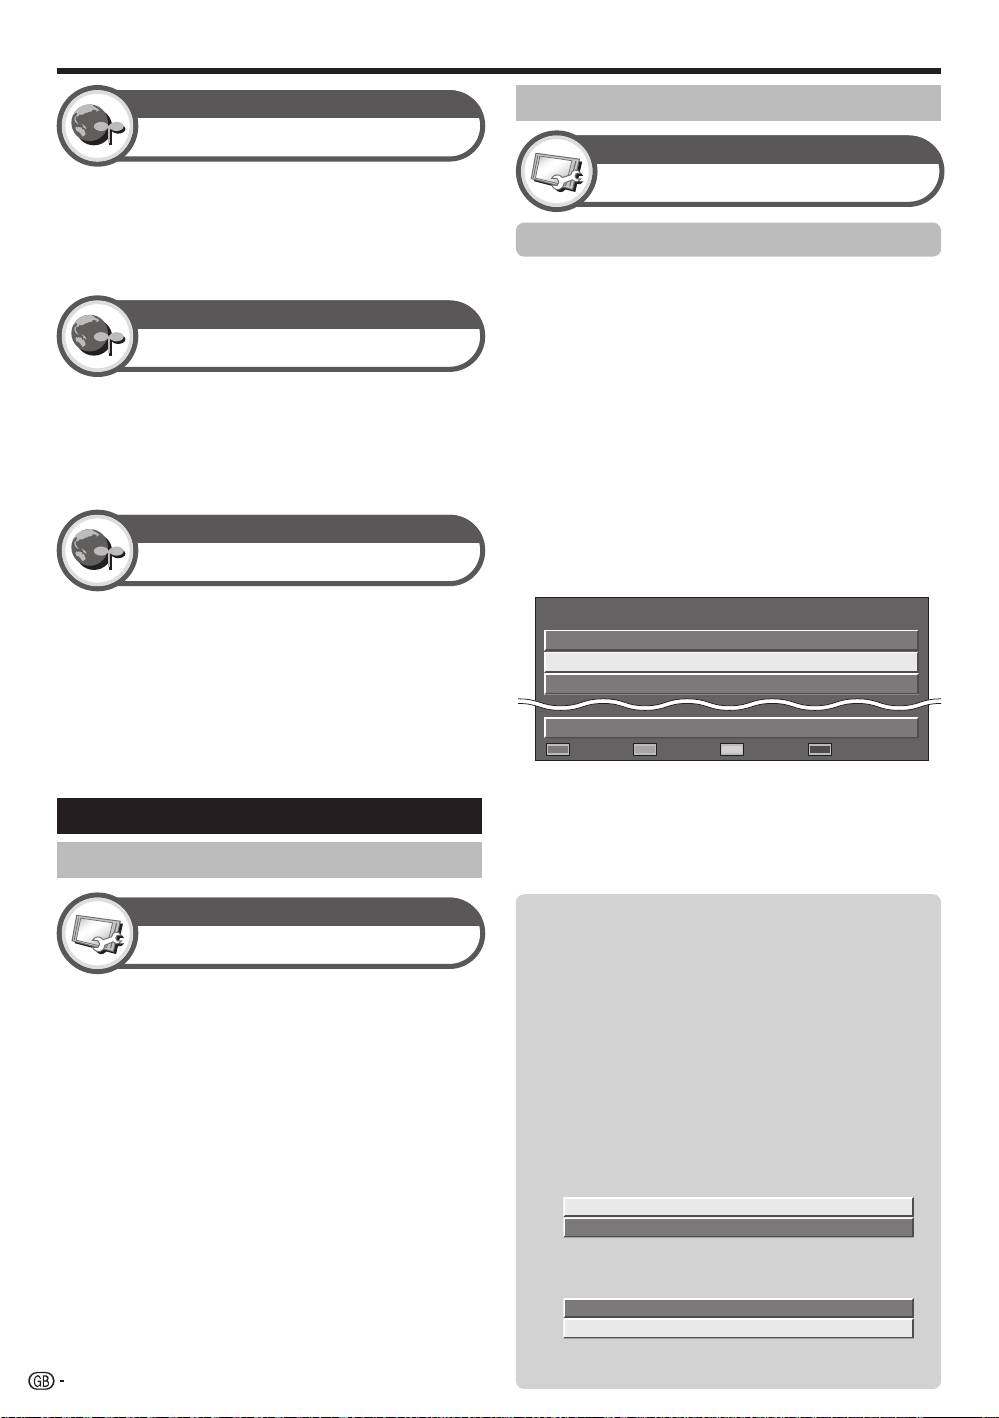
Service
Service
CH
EPG
Old
Lock
No.
Name
Skip
Skip
LCN
DTV 993
SIT 3
DTV 994 ✔ ✔ SIT 2
DTV 995 ✔ SIT 1
DTV 999 HD Monosco
: Lock : CH Skip : EPG Skip : Sort
Digital channel settings
E
E
•
•
E
1
Press a/b to select the desired service.
2
Press the colour button on the remote control unit
corresponding with the item you want to reconfigure.
•
The 4 mark indicates the operation is set to on. Each
time the colour button is pressed, you can switch the
corresponding operation on/off.
Buttons for Manual Adjust operation
Lock: Press Red button.
When the service is locked, you must enter your PIN
whenever you tune to the service.
CH Skip: Press Green button.
Services with a 4 mark are passed over when pressing
Pe/f on the TV or remote control unit.
EPG Skip: Press Yellow button.
Services with a 4 mark are passed over in the Electronic
Programme Guide (EPG).
Sort: Press Blue button.
The item position of services can be sorted.
Press a/b to select the service whose item
position you want to move, and then press ENTER.
32
DTV 994 ✔ ✔ SIT 2
DTV 995 ✔ SIT 1
Press a/b to move it to the desired position,
and then press ENTER.
DTV 994
SIT 1
✔
DTV 995
SIT 2
✔ ✔
1
2
3
Repeat steps 1 and 2 until all desired service
items are sorted.
KRL46V_GB.indd 32 2008/07/09 14:09:01
