Pioneer KRL-46V: Connecting a PC Connecting a PC Displaying a PC image on the screen
Connecting a PC Connecting a PC Displaying a PC image on the screen: Pioneer KRL-46V
Table of contents
- Contents
- Important Safety Precautions
- Remote control unit
- Controlling other equipment using the supplied remote control unit Presetting manufacture codes Manufacture codes STB DVD
- DVR VCR BD VCR
- Using with other equipment (STB) Using with other equipment (VCR)
- Using with other equipment (DVD/DVR)
- Trademarks
- TV (Front view) TV (Rear view)
- Preparation Supplied accessories Attaching the stand unit
- Preparation Inserting the batteries Using the remote control unit
- Installation precautions
- Quick guide Initial installation overview
- Before turning on the power
- Initial auto installation
- Watching TV Daily operation
- EPG (Electronic Programme Guide) EPG Overview Useful settings for using EPG
- Selecting a programme using EPG
- Timer recording using EPG Cancelling the timer recording
- Teletext Using the MHEG-5 application (UK only)
- Connecting external devices Introduction to connections
- HDMI connection Component connection S-VIDEO/VIDEO connection
- SCART connection Controlling devices with SCART using i/o link.A
- Speaker/amplifier connection
- Inserting a smart card
- HDMI CONTROL Controlling HDMI devices using HDMI CONTROL
- HDMI CONTROL connection HDMI CONTROL Setup
- Operating an HDMI CONTROL device
- Menu operation What is the HOME MENU?
- Basic adjustment Picture Settings
- Sound Settings Power Save Settings
- Channel Settings
- Analogue channel settings
- Password/Parental lock settings Language Settings (language, subtitle, multi audio)
- Useful Viewing functions Selecting the picture size
- Other picture and audio settings
- Display Settings
- Other useful features Setting when using external devices Additional features
- Connecting a PC Connecting a PC Displaying a PC image on the screen
- Selecting input resolution
- RS-232C port specifications
- PC compatibility chart RS-232C command list
- Appendix Troubleshooting
- Updating your TV via DVB-T Reset Identification
- Specifications
- End of life disposal
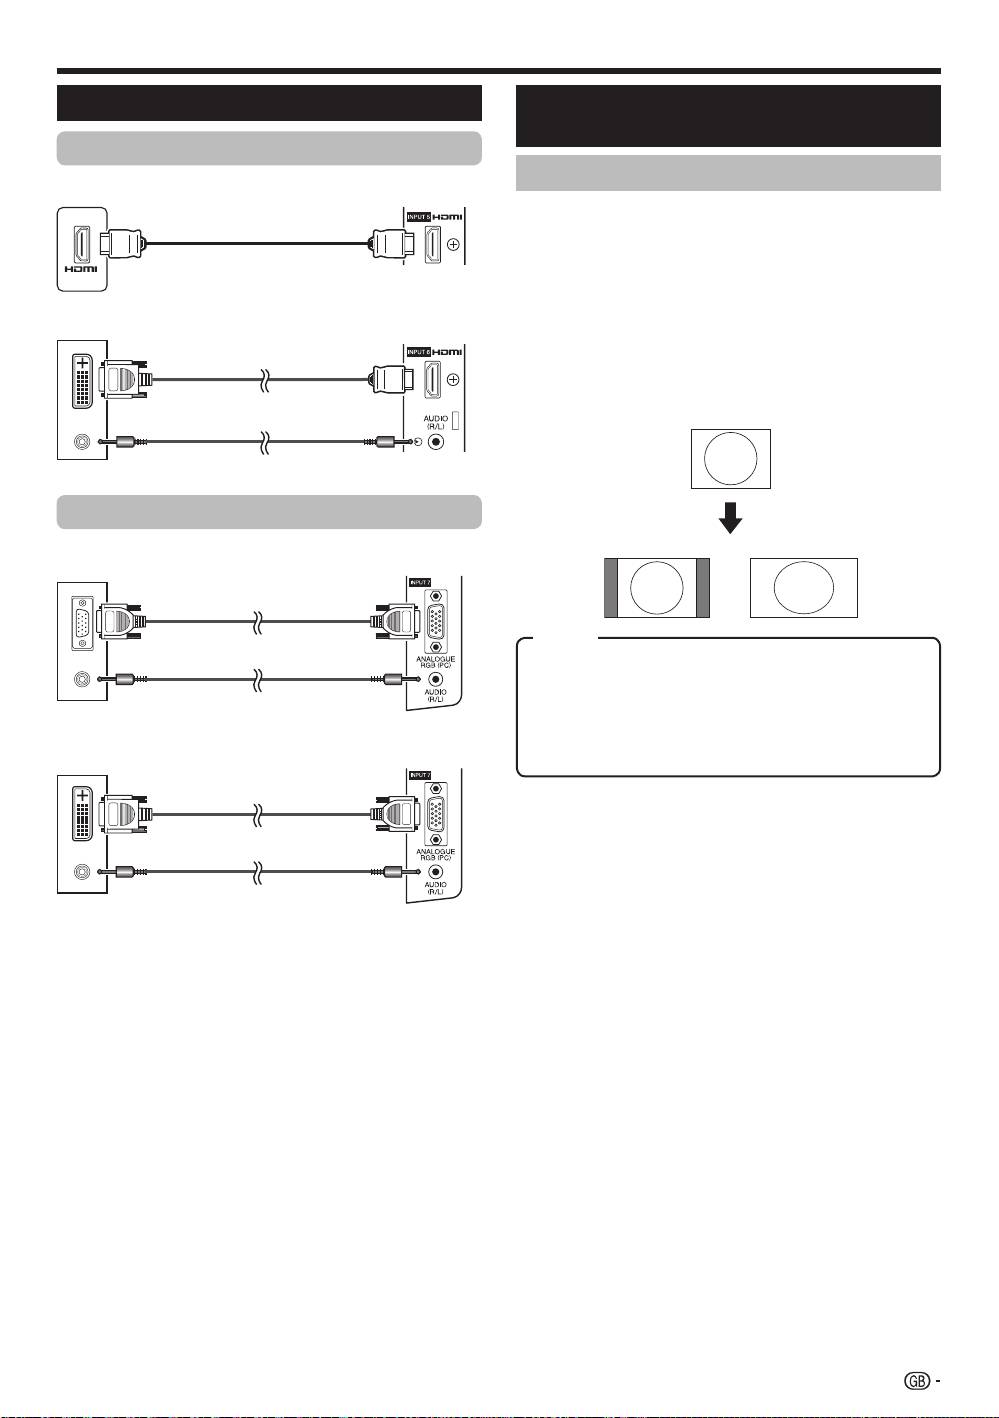
Connecting a PC
Connecting a PC
Displaying a PC image on the
screen
HDMI Connection
Selecting the picture size
PC
INPUT 4 or 5
You can select the picture size.
HDMI-certified cable
1
Press SCREEN S
IZE.
•
The SCREEN SIZE menu displays.
2
Press SCREEN SIZE or a/b to select a
desired item on the menu.
PC
INPUT 6
NOTE
DVI/HDMI cable
•
Connect the PC before making adjustments.
•
Selectable picture size may vary with input signal type.
EXAMPLE
ø 3.5 mm stereo minijack cable
Analogue Connection
4:3 FULL
INPUT 7PC
RGB cable
Item
FULL: An image fully fills the screen.
CINEMA:
For 14:9 letterbox pictures. Bars may appear
ø 3.5 mm stereo minijack cable
on the top and bottom with some programmes.
4:3: Keeps the original aspect ratio in a full screen display.
Dot by Dot: Displays an image with the same number of
PC
INPUT
7
pixels on the screen.
DVI/RGB conversion cable
NOTE
•
Refer to page 35 for AV signals (480i/480p/576i/576p/
720p/1080i/1080p). The ANALOGUE RGB (PC) terminal
(INPUT7) is not compatible with 480i/576i/1080p signals.
ø 3.5 mm stereo minijack cable
NOTE
•
The PC input terminals are DDC1/2B-compatible.
•
Refer to page 42 for a list of PC signals compatible with
the TV.
•
A Macintosh adaptor may be required for use for some
Macintosh computers.
•
When connecting to a PC, the input signal type is
automatically detected except 1,024 g 768 and 1,360 g
768 signals. Refer to Selection input resolution on page
40.
39
KRL46V_GB.indd 39 2008/07/09 14:09:06
