Asus V2-PH1: Removing the side cover and front panel assembly Installing a CPU
Removing the side cover and front panel assembly Installing a CPU: Asus V2-PH1
Table of contents
- Front panel features Rear panel features
- Internal components Selecting the voltage
- Removing the side cover and front panel assembly Installing a CPU
- To install a CPU:
- English
- Installing the CPU fan and heatsink assembly
- Installing a DIMM Installing an expansion card
- Installing storage drives
- Removing the bay covers and reinstalling the front panel assembly and side cover
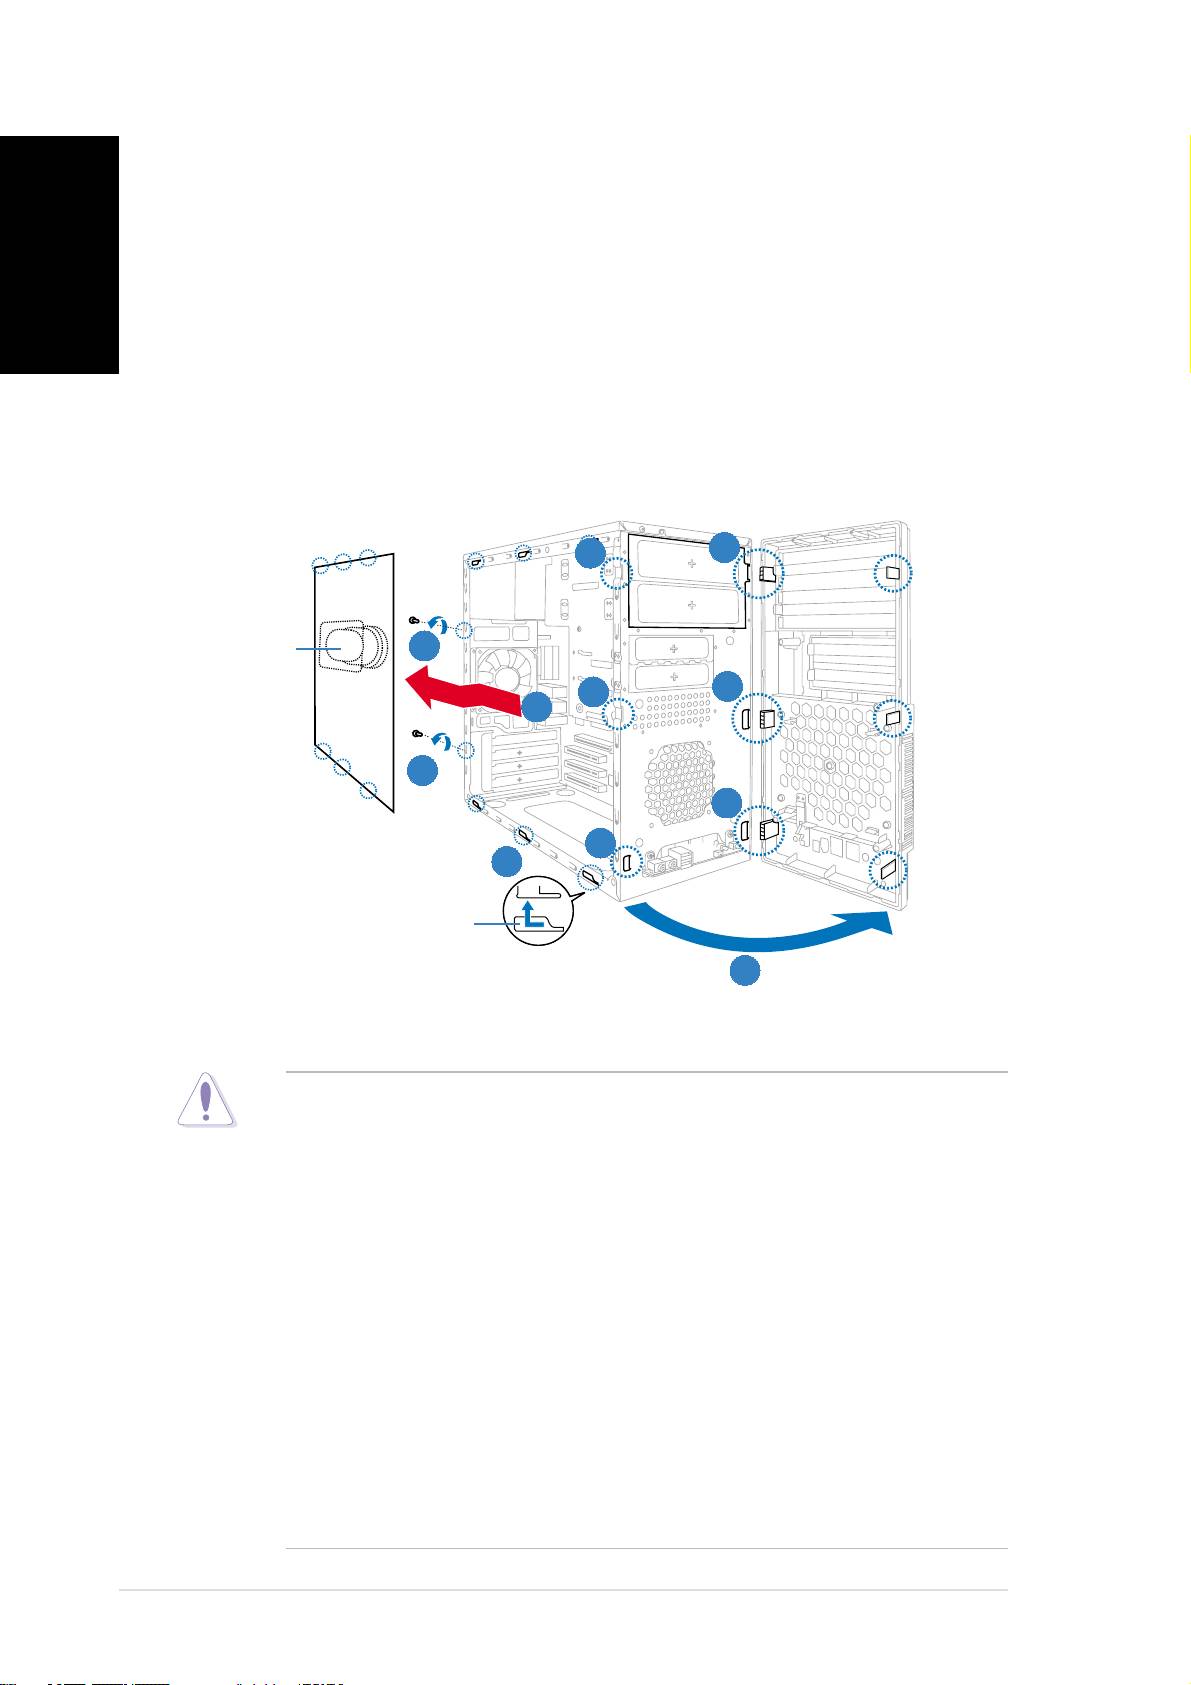
Removing the side cover and
front panel assembly
English
1. Remove the cover screws on the rear panel.
2. Pull the side cover toward the rear panel until its hooks disengage
from the chassis tab holes. Set the side cover aside.
3. Locate the front panel assembly hooks, then lift them until they
disengage from the chassis.
4. Swing the front panel assembly to the right, until the hinge-like tabs
on the right side of the assembly are exposed.
5. Remove the front panel assembly, then set aside.
33
44
44
4
33
3
Air ductAir duct
Air ductAir duct
Air duct
11
11
1
44
44
4
33
33
3
22
22
2
11
11
1
44
44
4
33
33
3
22
22
2
Chassis tab holesChassis tab holes
Chassis tab holesChassis tab holes
Chassis tab holes
33
33
3
Installing a CPU
®
®
• Your boxed Intel
Pentium
4 LGA775 processor package should
come with installation instructions for the CPU, heatsink, and the
retention mechanism. If the instructions in this section do not match
the CPU documentation, follow the latter.
•
Check your motherboard to make sure that the PnP cap is on the
CPU socket and the socket contacts are not bent. Contact your
retailer immediately if the PnP cap is missing, or if you see any
damage to the PnP cap/socket contacts/motherboard components.
ASUS will shoulder the cost of repair only if the damage is shipment/
transit-related.
•
Keep the cap after installing the motherboard. ASUS will process
Return Merchandise Authorization (RMA) requests only if the
motherboard comes with the cap on the LGA775 socket.
• The product warranty does not cover damage to the socket
contacts resulting from incorrect CPU installation/removal, or
misplacement/loss/incorrect removal of the PnP cap.
44
44
4
Quick installation guideQuick installation guide
Quick installation guideQuick installation guide
Quick installation guide
