Asus V2-PH1: English
English: Asus V2-PH1
Table of contents
- Front panel features Rear panel features
- Internal components Selecting the voltage
- Removing the side cover and front panel assembly Installing a CPU
- To install a CPU:
- English
- Installing the CPU fan and heatsink assembly
- Installing a DIMM Installing an expansion card
- Installing storage drives
- Removing the bay covers and reinstalling the front panel assembly and side cover
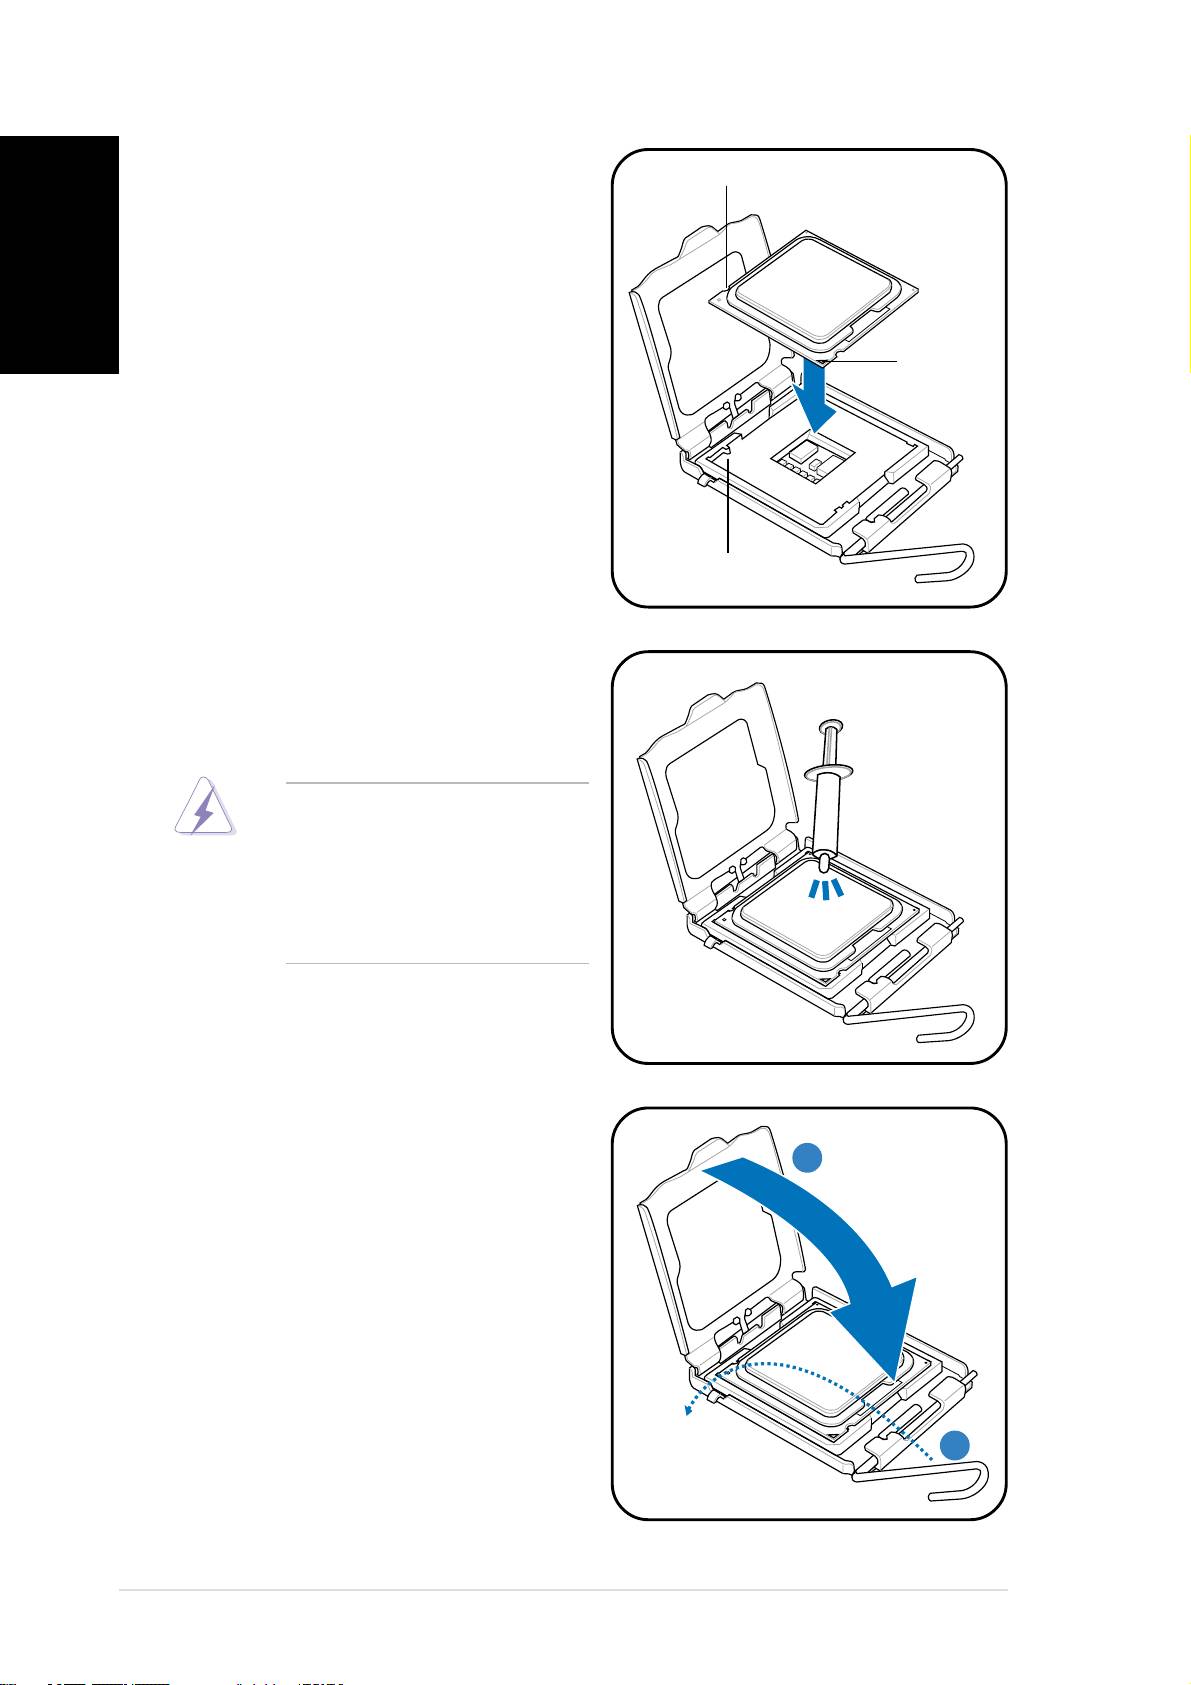
5. Position the CPU over the
CPU notchCPU notch
CPU notchCPU notch
CPU notch
English
socket, making sure that the
gold triangle is on the
bottom-left corner of the
socket then fit the socket
alignment key into the CPU
notch.
GoldGold
GoldGold
Gold
triangletriangle
triangletriangle
triangle
markmark
markmark
mark
Alignment keyAlignment key
Alignment keyAlignment key
Alignment key
6. Apply Thermal Interface Material
on the CPU before reinstalling
the heatsink and fan assembly.
DO NOT DO NOT
DO NOT DO NOT
DO NOT eat the Thermal
Interface Material. If it gets
into your eyes or touches
your skin, make sure to wash
it off immediately, and seek
professional medical help.
7. Close the load plate (A), then
push the load lever (B) until it
AA
AA
A
snaps into the retention tab.
BB
BB
B
66
66
6
Quick installation guideQuick installation guide
Quick installation guideQuick installation guide
Quick installation guide
