Asus V2-PH1: Installing the CPU fan and heatsink assembly
Installing the CPU fan and heatsink assembly: Asus V2-PH1
Table of contents
- Front panel features Rear panel features
- Internal components Selecting the voltage
- Removing the side cover and front panel assembly Installing a CPU
- To install a CPU:
- English
- Installing the CPU fan and heatsink assembly
- Installing a DIMM Installing an expansion card
- Installing storage drives
- Removing the bay covers and reinstalling the front panel assembly and side cover
Installing the CPU fan and heatsink assembly
®
®
®
®
The Intel
Pentium
4/Intel
Pentium
D LGA775 processor requires a
specially designed heatsink and fan assembly to ensure optimum thermal
condition and performance.
®
®
English
• When you buy a boxed Intel
Pentium
4 processor, the package
includes the CPU fan and heatsink assembly. If you buy a CPU
®
separately, make sure that you use only Intel
-certified
multi-directional heatsink and fan.
®
®
• Your Intel
Pentium
4 LGA775 heatsink and fan assembly comes in
a push-pin design and requires no tool to install.
If you purchased a separate CPU heatsink and fan assembly, make sure
that a Thermal Interface Material is properly applied to the CPU heatsink
or CPU before you install the heatsink and fan assembly.
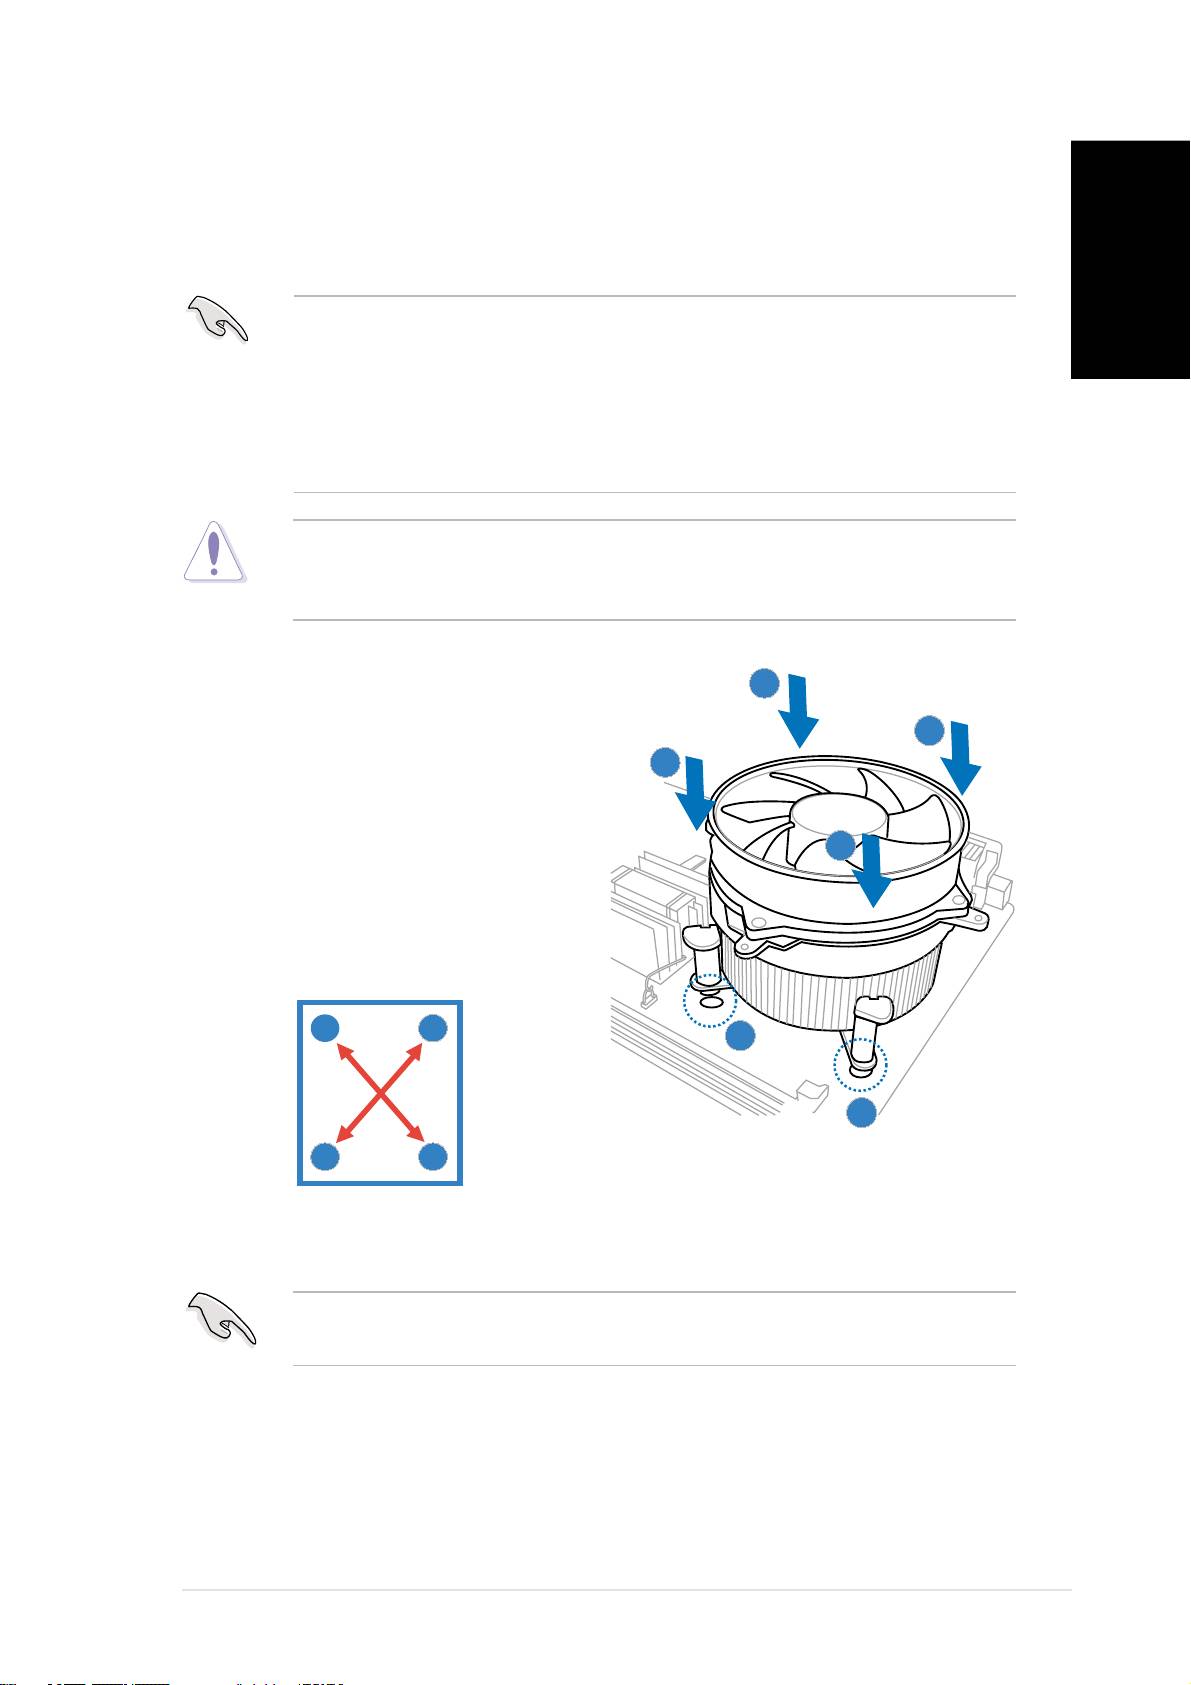
To install the CPU heatsink and fan:
AA
AA
A
1. Place the heatsink on top of the
BB
BB
B
installed CPU, making sure that
BB
BB
B
the four fasteners match the
holes on the motherboard.
AA
AA
A
2. Push down two fasteners at a
time in a diagonal sequence to
secure the heatsink and fan
assembly in place.
A
B
11
11
1
11
11
1
B
A
3. When the fan and heatsink assembly is in place, connect the CPU fan
cable to the connector on the motherboard.
Do not forget to connect the CPU fan connector! Hardware monitoring
errors can occur if you fail to plug this connector.
Quick installation guideQuick installation guide
Quick installation guideQuick installation guide
Quick installation guide
77
77
7
