Asus P5W: B. CPU overheated
B. CPU overheated: Asus P5W
Table of contents
- Chapter 1: Quick Start 1.1 Installing the CPU
- 1.1.2 AMD AM2 Socket
- 1.2 Installing the heatsink and fan
- For Intel-certied heatsink:
- For AMD-certied heatsink:
- 1.3 Installing a DIMM 1.4 Installing the motherboard
- Chapter1: QuickStart
- 1.5 Installing the power supply unit
- 1.6 Installing an expansion card
- 1.7 Installing disk drives
- 1.7.2 SATA optical disk drive
- 1.7.3 Floppy disk drive
- 1.7.4 PATA hard disk drive
- Notes for installing PATA hard disk drive
- 1.7.5 SATA hard disk drive
- 1.8 Front panel cables
- ASUS Q-Connector 1.9 Connecting the ATX power
- Power connectors
- 1.10 Peripheral devices and accessories
- 1.11 Startingupforthersttime Troubleshooting
- Chapter 2: Manage/update BIOS 2.1 AFUDOS utility
- ASUS Motherboard installation guide
- 2.2 Award BIOS Flash Utility
- ASUS Motherboard installation guide
- Saving the current BIOS le
- 2.3 ASUS Update utility Installing ASUS Update
- Updating the BIOS through the Internet
- Updating the BIOS through a BIOS le
- Chapter 3: Troubleshooting 3.1 Troubleshooting for Motherboard DIY 3.1.1 Basic troubleshooting
- B. CPU overheated
- 3.2 Other common troubles
- 3.2.1 No power
- 3.2.2 Failure to boot-up; No screen display 3.2.3 Failure to enter the operating system
- 3.2.4 FAQs
- Chapter 4: Computer care tips
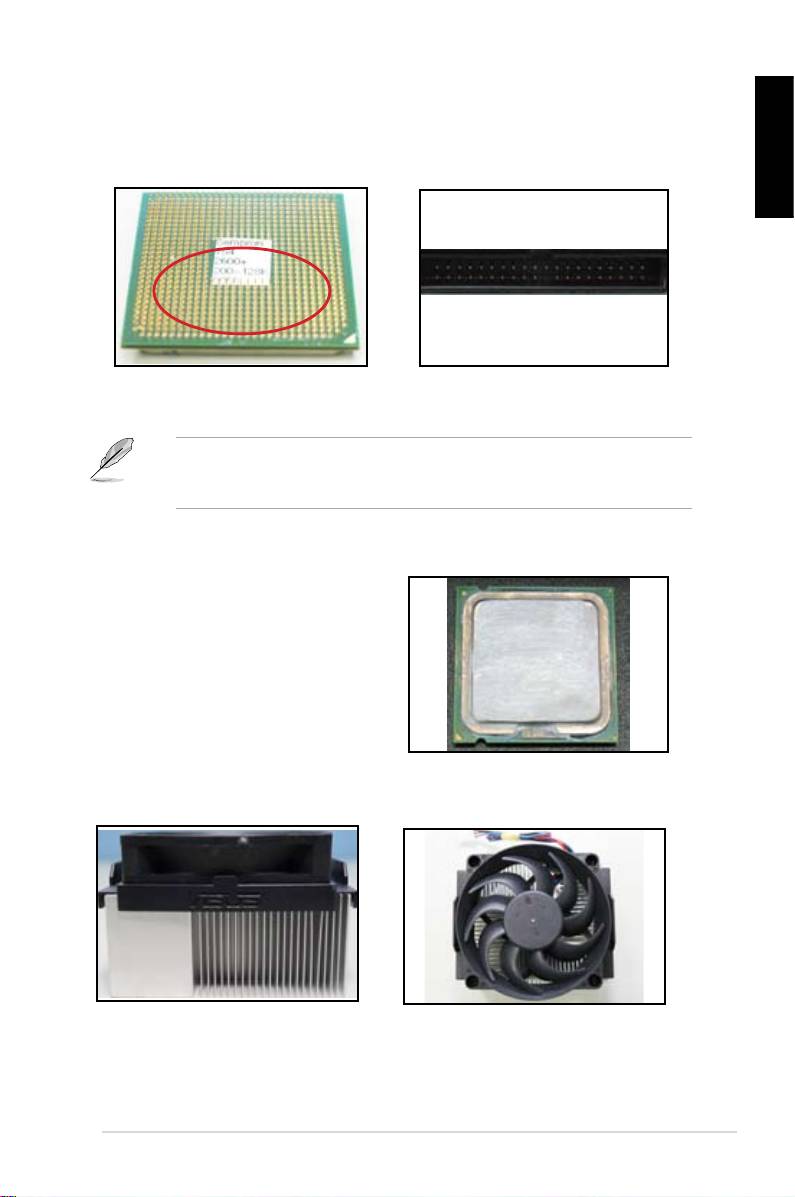
3. Makesurethereisnobrokenorbendedpinsonyourconnectorpinsor
CPU pins. A broken and bended pin will cause the component malfunction.
Contactyourretailerforfurthersupport.
English
AMD CPU gold pins
Connector pins
Ifthebrokenorbendedpinsarecausedafterthepurchase,yourretailer
mayaskforreparingcharge.SometimesthebrokenorbendedpinsareNOT
REPAIRABLE.
B. CPU overheated
1. WipecleantheCPUsurfacewiththe
cleancloth.Applyseveraldropsof
thermal paste to the exposed area
of the CPU that the heatsink will be
in contact with. Make sure that it is
spreadinaneventhinlayer.
CPU surface
2. Make sure there is no contaminants on the heatsink and fan.
Side view of heatsink and fan
Top view of heatsink and fan
3. Follow the instructions of heatsink and fan manufacturers to clean the
contaminants that will slow down the fan rotation.
ASUS Motherboard installation guide
33
