Zanussi FJS 974 N: Installation
Installation: Zanussi FJS 974 N
Installation
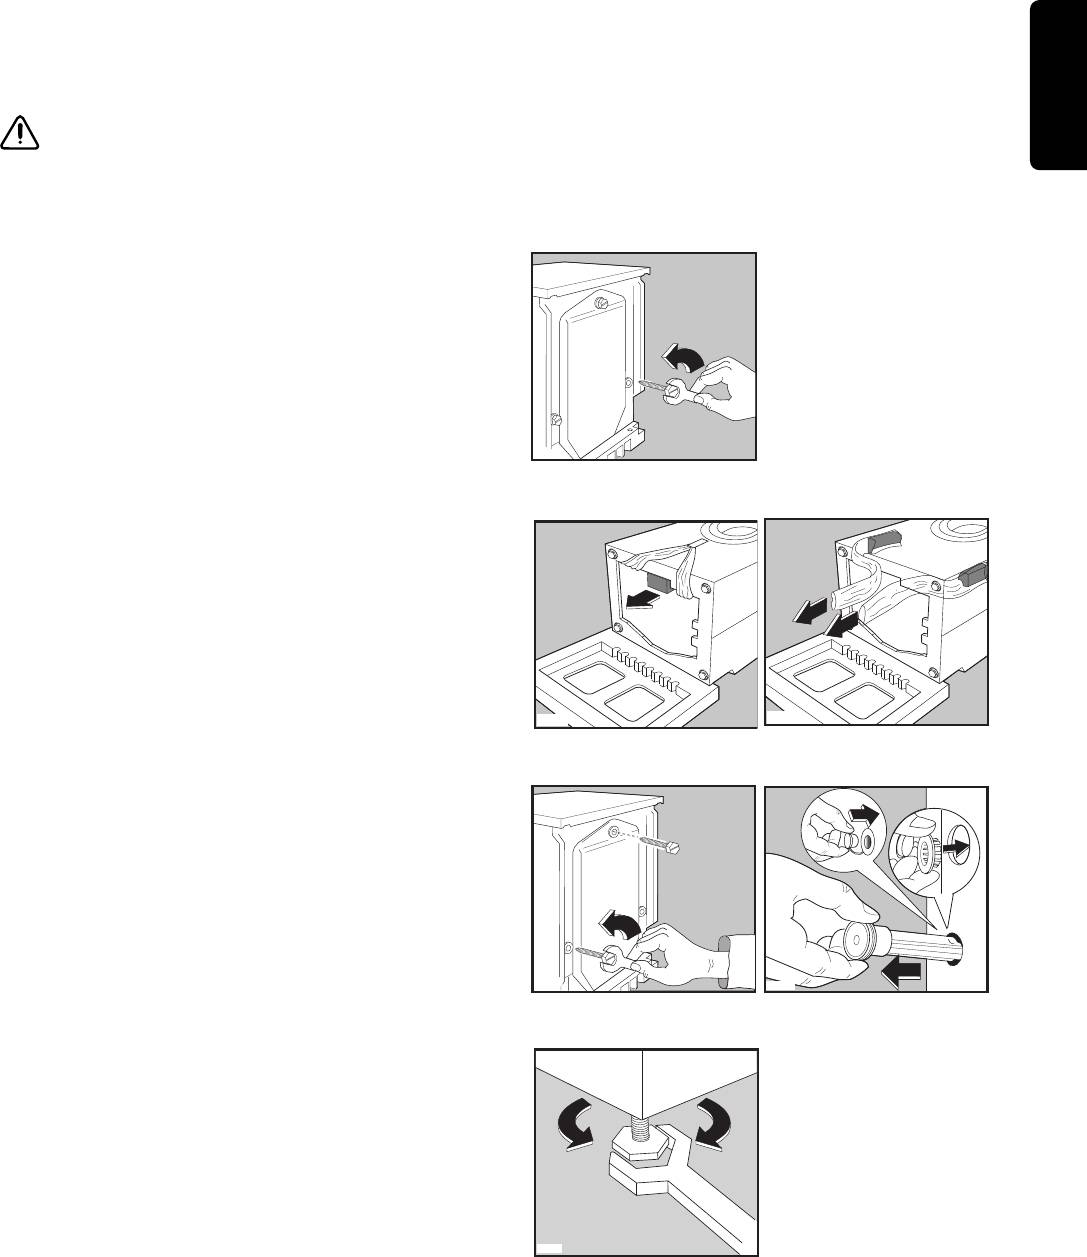
Transit devices
All transit bolts and packing must be removed
ENGLISH
before using the appliance.
You are advised to keep all transit devices so that
they can be refitted if the machine ever has to be
transported again.
1. Using a spanner, unscrew and remove the rear
right-hand bolt.
2. Lay the machine on its back, taking care not to
squash the hoses. This can be avoided by placing
one of the corner packing pieces between the
machine and the floor.
3. Remove the polystyrene block from the underside
of the machine.
4. Release the two plastic bags by removing the
adhesive strip.
Carefully remove the right-hand bag (1) then the
left-hand bag (2) by pulling them towards the
centre of the machine.
5. Set the machine upright and remove the two
remaining bolts from the back.
6. Pull out the three plastic pegs from the holes into
which the bolts were fitted.
7. Plug the open holes with the plugs which you will
find on the back of the machine.
Positioning
Install the machine on a flat hard floor.
Make sure that air circulation around the machine is
not impeded by carpets, rugs etc. Check that the
machine does not touch the wall or other kitchen
units.
Carefully level by screwing the adjustable feet in or
out. Never place cardboard, wood or similar materials
under the machine to compensate for any unevenness
in the floor.
7
P0255
P0234
2
1
P0233
P0256
P0020
P1051
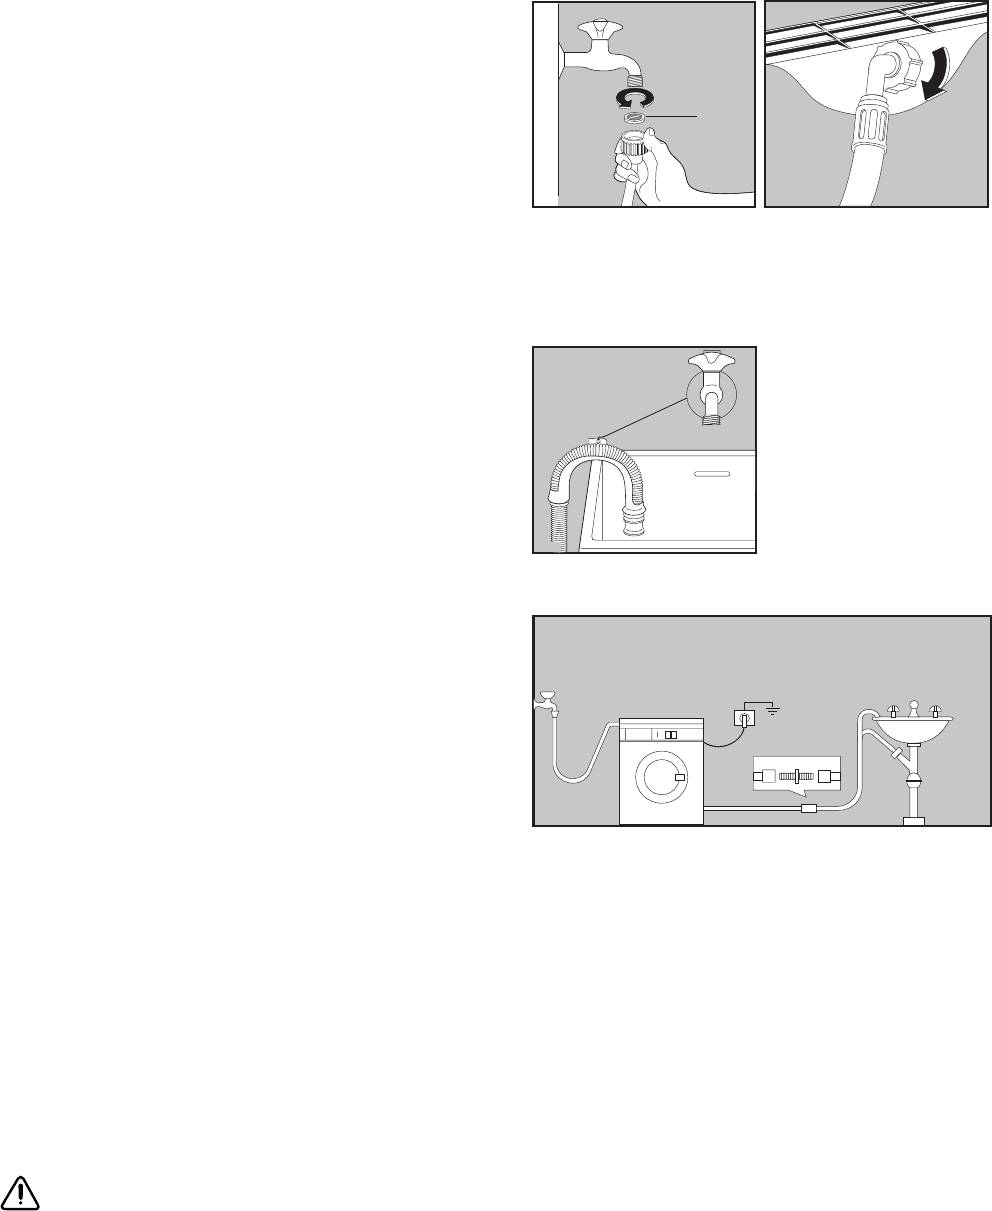
Water inlet
Connect the water inlet hose to a tap with a 3/4"
thread after having inserted the small filter “A”
supplied with the machine.
The other end of the inlet hose which connects to the
machine can be turned in any direction. Simply loosen
the fitting, rotate the hose and retighten the fitting,
making sure there are no water leaks.
The inlet hose must not be lengthened. If it is too short
and you do not wish to move the tap, you will have to
purchase a new, longer hose specially designed for
this type of use.
Water drainage
The end of the drain hose can be positioned in three
ways:
Hooked over the edge of a sink using the plastic
hose guide supplied with the machine. In this case,
make sure the end cannot come unhooked when the
machine is emptying.
This could be done by tying it to the tap with a piece
of string or attaching it to the wall.
In a sink drain pipe branch. This branch must be
above the trap so that the bend is at least 60 cm
above the ground.
Directly into a drain pipe at a height of not less than
60 cm and not more than 90 cm.
The end of the drain hose must always be ventilated,
i.e. the inside diameter of the drain pipe must be
larger than the outside diameter of the drain hose.
The drain hose must not be kinked. Run it along the
floor; only the part near the drainage point must be
raised.
Electrical connection
This machine is designed to operate on a 220-230 V,
single-phase, 50 Hz supply.
Check that your domestic electrical installation can
take the maximum load required (2.2 kW), also taking
into account any other appliances in use.
Connect the machine to an earthed socket, in
accordance with current wiring regulations.
The manufacturer declines any responsibility
for damage or injury through failure to comply
with the above safety precaution.
Should the appliance power supply cable
need to be replaced, this should be carried
out by our Service Centre.
8
A
P0003
P0022
P0023
P0021
Оглавление
- Content
- Warnings
- Discarding
- Technical specifications
- Installation
- Your new washing machine
- Use
- Programme table
- Maintenance
- Something not working?
- SoderΩanie
- Ukazaniå po bezopasnoj ™kspluatacii maßiny
- éı‡Ì‡ ÓÍÛʇ˛˘ÂÈ Ò‰˚
- Tehni©eskie dannye
- Ustanovka
- Opisanie maßiny
- Opisanie paneli upravleniå
- Programmy stirki
- Uhod za maßinoj i ©istka
- Esli maßina ne rabotaet


