Kenwood MG470: Program timer
Program timer: Kenwood MG470
AUX component : Make the required
Program timer
preparation for playback by connect-
(PROG.1, PROG.2)
ing an AUX component.
Be also sure to set the timer for the
The program timer can store the timer oper-
AUX source component connected
ating hours and its contents so the timer
operation can be activated or deactivated as
to the AUX IN jacks.
required any time. The program timer can
be activated on any time.
2
Press the MENU key.
Timer playback using program
3
Rotate the VOLUME/MULTI-CON-
timer
TROL knob so that "TIMER SET?"
Use the following procedure to play the se-
is displayed, then press the SET
lected source at the selected time period.
key.
カ
サ
1
ア
2
ABC
3
DEF
タ
ナ
ハ
4
GHI
5
JKL
6
MNO
TITLE INPUT
4
Rotate the VOLUME/MULTI-CON-
マ
ヤ
ラ
7
PRS
8
TUV
9
WXY
TRACK EDIT
ワオン
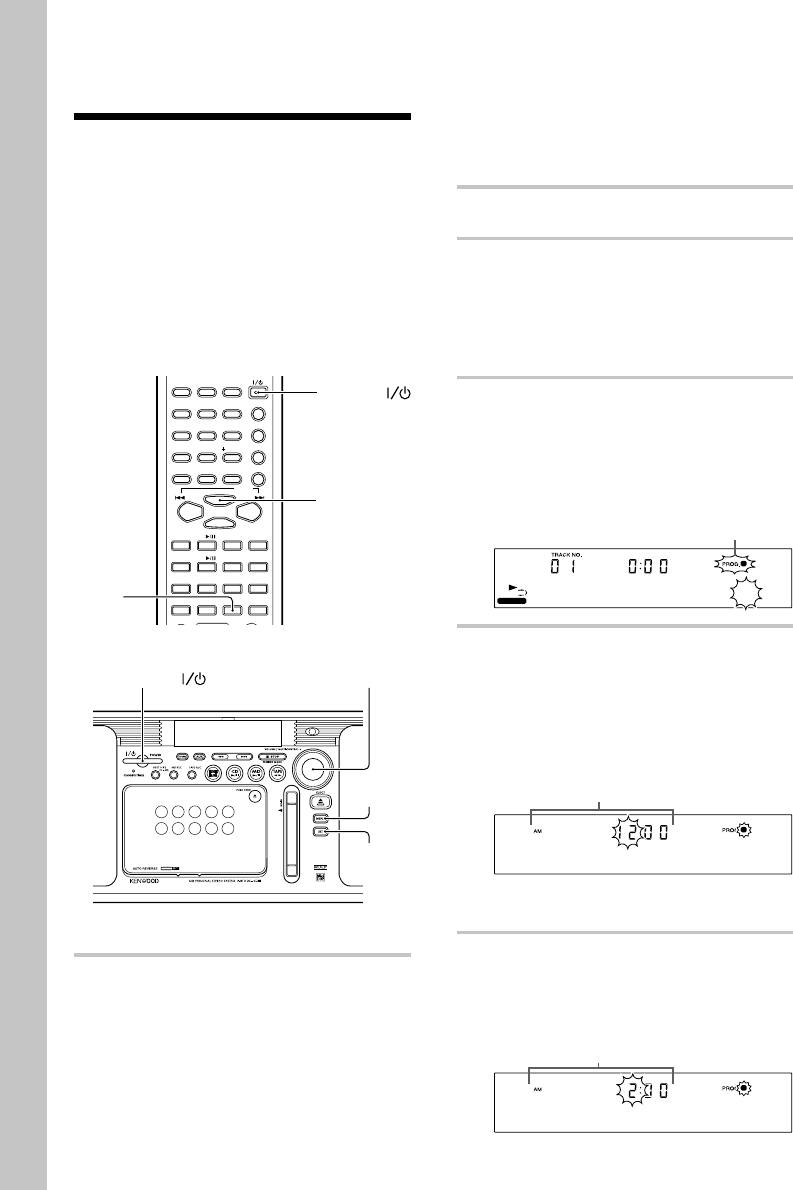
TROL knob so that "PROG.1 SET?"
0
QZ
10
記号
REPEAT
or "PROG.2 SET?" is displayed,
then press the SET key.
ENTER
1
1
7
TAPE
2
3
TAPE EQ.
1
EX. BASS
PROG.1 S T?
E
5
Select the time to start timer play-
back (ON time).
Rotate the VOLUME/MULTI-CON-
TROL knob
to select the figure of hour,
then press the SET key.
Timer ON time
1
ON TIME
Also select the figure of minute in the
same way as above.
7 Setting
6
Select the time to stop timer play-
1
Make preparations according to
back (OFF time).
the source to be played.
Set in the same way as the ON time.
CD : Load a CD.
MD : Load an MD.
1
Tape : Load a cassette tape.
Radio : Preset stations (Page 8).
OFF TIME
EN
56
POWER
POWER
RANDOM
PGM
SPACE
CHARAC.
CLEAR/DELETE
SET
P.CALL
SET
TUNING
TUNING
DOWN
UP
FM/AMCD
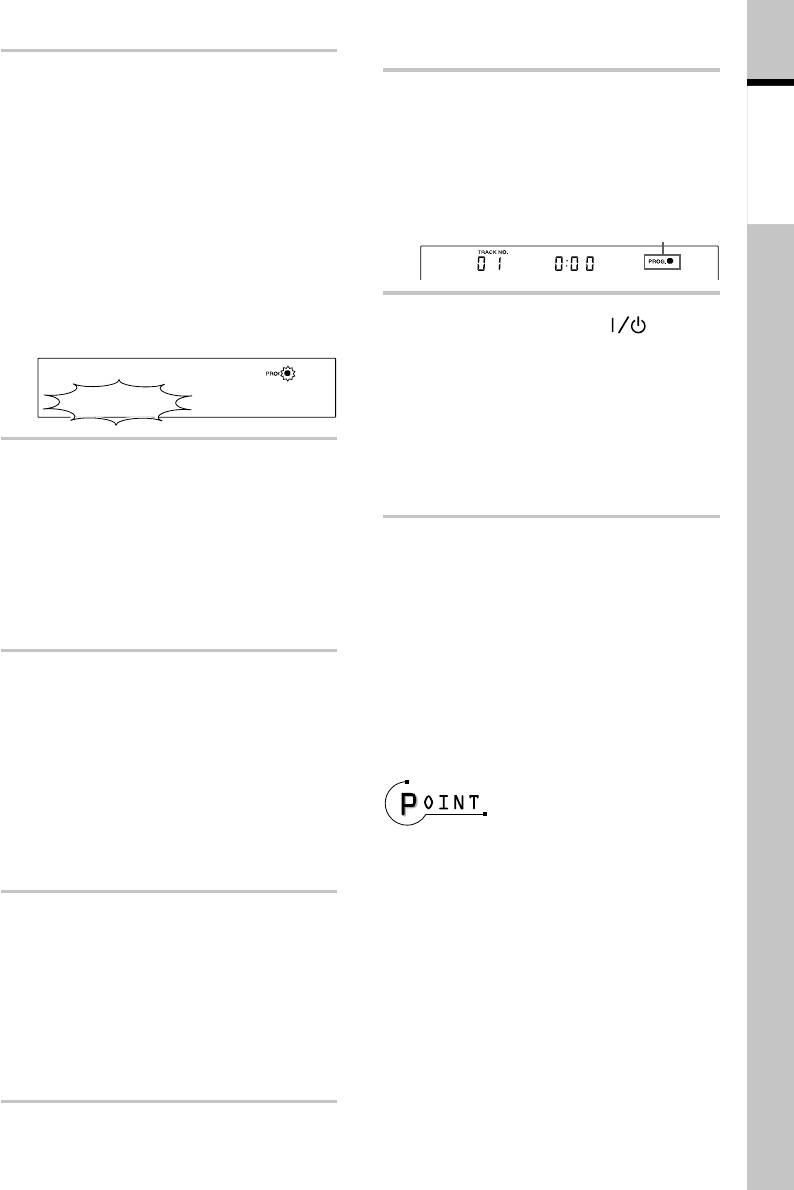
Program No. lit
MDSTOP
AUTO/MANU
MD O.T.E.
DISPLAY
TIME DISPLAY
TAPE O.T.E.
TIMER
SOUND TONE TIMER
SLEEP
VOLUME /
POWER
MULTI-CONTROL
MENU
SET
APE T
Timer OFF time
7 Execution
7
Rotate the VOLUME/MULTI-CON-
!
Press the TIMER key on the re-
Application
TROL knob
to select "PLAY" or "AI
section
mote repeatedly until the pro-
PLAY", then press the SET key.
gram number to be executed
"PLAY" : The source will played at
the adjusted volume before enter-
("PROG.
1
" or "PROG.
2
" or
ing the STANDBY mode.
"PROG.
12
") is lit.
Program No. lit
Timer
"AI PLAY" : The listening volume in-
1
creases gradually from the start of
timer playback until it reaches a cer-
tain level.
@
Press the POWER key to
Display when "PLAY" is selected
switch the power off to the
1
STANDBY mode.
PLAY
The STANDBY/TIMER indicator lights
in green.
The program timer is activated and
8
Rotate the VOLUME/MULTI-CON-
playback will start when the set ON
TROL knob
to select the music
time comes.
source to be input, then press the
SET key.
To cancel program timer :
The input source can be selected from
Press the TIMER key on the remote re-
"CD", "MD", "TAPE", "TUNER" (radio) and
peatedly until "PROG.1" or "PROG.2" or
"AUX"(AUX component).
"PROG.12" turns off.
9
To listen to radio broadcasting,
To check or change the timer setting :
Rotate the VOLUME/MULTI-CON-
Restart the procedure from step 1 again.
TROL knob to select the preset
number of the desired station,
then press the SET key.
This operation is not required when an
÷ Be sure to adjust the time of the day (page 7)
input source other than "TUNER" is
before using the timer functions.
selected.
÷ The program timer cannot be used for pro-
gram playback of CD or MD.
÷ PROG.1 and PROG.2 should be set so that
0
Rotate the VOLUME/MULTI-CON-
their operating periods do not overlap. Leave
TROL knob to adjust the listening
at least 1 minute of interval between the two
programs.
volume.
÷ Even when the program timer is canceled,
The source will be played at the ad-
previously made setting is stored in memory
justed volume.
and remains until new timer information is
set the next time.
This step is not required when "AI
÷ When the STANDBY/TIMER indicator is
PLAY" is selected.
blinking in green, the timer setting or clock
setting is erroneous. Check and correct them
as required (pages 7 & 56 to 57).
EN
57
Timer recording using program
2
Perform steps
2
to
6
of "Timer
timer
playback using program timer"
The audio of TUNER (radio) or AUX (AUX
component) started by the timer playback
(page 56).
at the set time can be recorded onto an MD
or tape during timer playback.
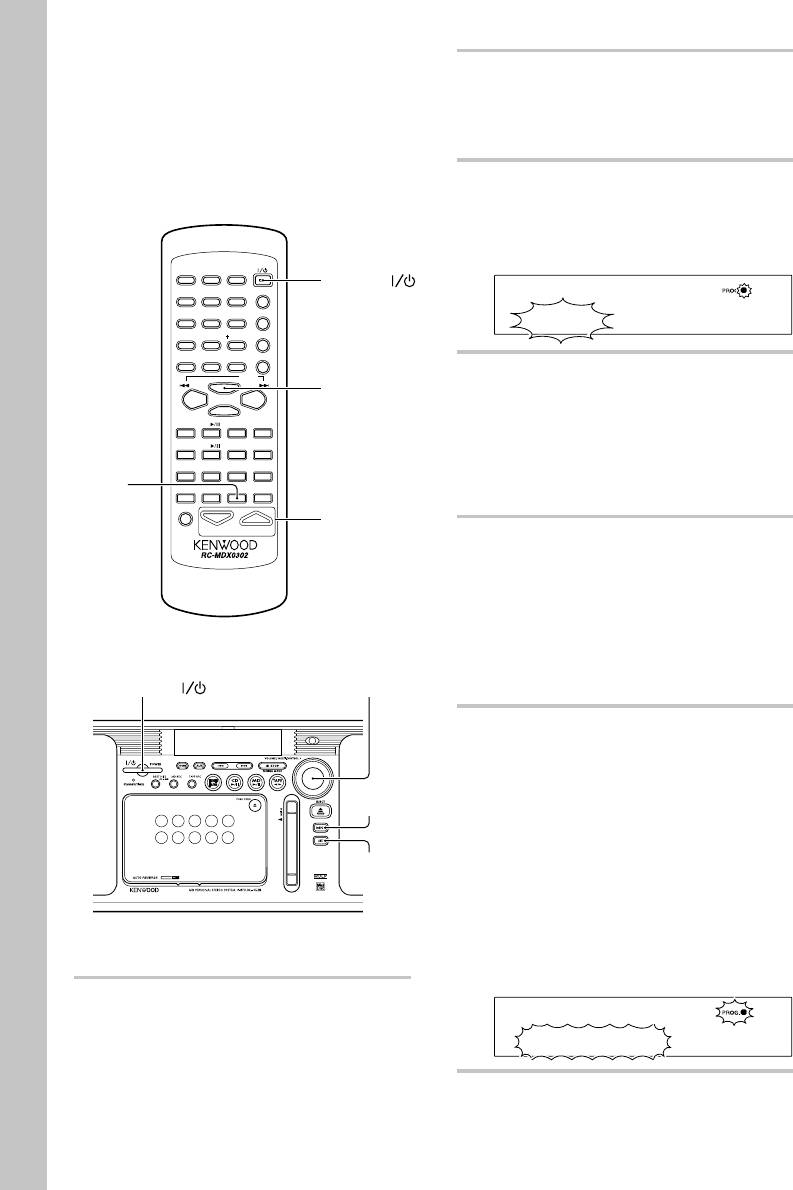
3
Rotate the VOLUME/MULTI-CON-
TROL knob to select "REC", then
press the SET key.
POWER
カ
サ
1
ア
2
ABC
3
DEF
POWER
タ
ナ
ハ
1
4
GHI
5
JKL
6
MNO
TITLE INPUT
マ
ヤ
ラ
7
PRS
8
TUV
9
WXY
TRACK EDIT
REC
RANDOM
ワオン
0
QZ
10
記号
PGM
REPEAT
SPACE
CHARAC.
CLEAR/DELETE
SET
P.CALL
SET
4
Rotate the VOLUME/MULTI-CON-
ENTER
TUNING
TUNING
DOWN
UP
TROL knob to select "TUNER" or
1
FM/AMCD
1
7
MDSTOP
TAPE
2
3
TAPE EQ.
"AUX", then press the SET key.
AUTO/MANU
MD O.T.E.
DISPLAY
TIME DISPLAY
TAPE O.T.E.
"TUNER": Radio
TIMER
SOUND TONE TIMER
SLEEP
"AUX" : AUX input source
VOLUME
MUTE
VOLUME
5
To record a radio station, rotate
the VOLUME/MULTI-CONTROL
knob to select preset station to be
recorded, then press the SET key.
If "AUX" is selected, this operation is
VOLUME /
POWER
MULTI-CONTROL
not necessary.
6
Rotate the VOLUME/MULTI-CON-
TROL knob to select "MD REC"or
MENU
"TAPE REC", then press the SET
key.
SET
APE T
"MD REC" : The input audio is re-
corded onto an MD
"TAPE REC" : The input audio is re-
corded onto a tape.
7 Setting
Display when "MD REC" is selected
1
Make preparation for recording.
1
MD : See steps 1 and 3 in "Record-
MD REC
ing CD onto MD" (page 20).
Tape : See steps 1, 3 to 5 of "Re-
cording CD onto TAPE" (pages 22
& 23)
EN
58
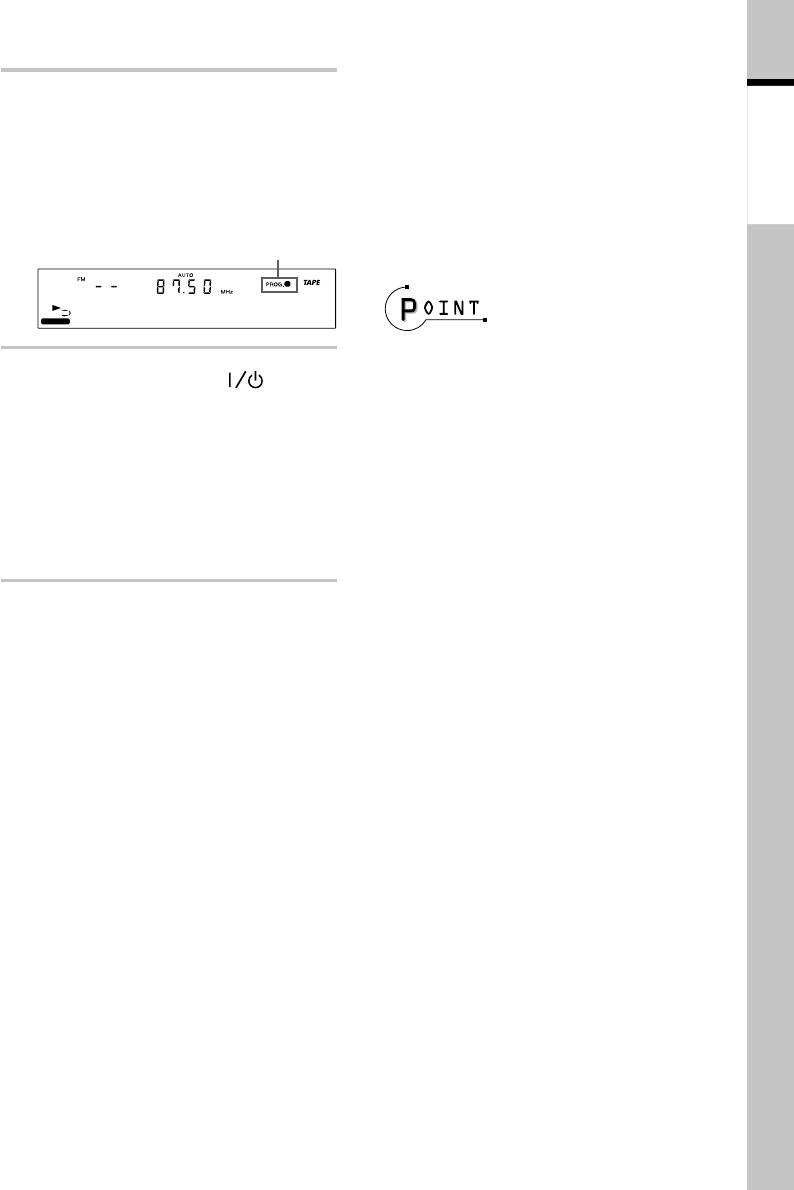
7 Execution
To cancel program timer :
Press the TIMER key on the remote re-
7
Press the TIMER key on the re-
peatedly until "PROG.1" or "PROG.2" or
Application
section
mote repeatedly until the pro-
"PROG.12" turns off.
gram number to be executed
("PROG.
1
" or "PROG.
2
" or
To check or change the timer setting :
"PROG.
12
") is lit.
Restart the procedure from step 1 again.
Timer
Program No. lit
1
EX. BASS
TUNER
÷ Be sure to adjust the time of the day (page 7)
before using the timer functions.
8
Press the POWER key to
÷ PROG.1 and PROG.2 should be set so that
their operating periods do not overlap. Leave
switch the power off to the
at least 1 minute of interval between the two
STANDBY mode.
programs.
÷ The speakers do not output audio during
The STANDBY/TIMER indicator lights
timer recording.
in green.
÷ Even when the program timer is canceled,
The program timer is activated and re-
previously made setting is stored in memory
cording will start when the set ON time
and remains until new timer information is
set the next time.
comes.
÷ When the STANDBY/TIMER indicator is
blinking in green, the timer setting or clock
setting is erroneous. Check and correct them
as required (pages 7 & 58).
EN
59
Оглавление
- Before applying power
- Contents
- System connection
- Adjusting the present time
- Presetting radio stations
- Playback of CD
- Playback of MD
- Playback of TAPE
- Receiving broadcast stations
- Playing audio input from AUX component
- Recording CD onto MD (MD O.T.E.)
- Recording CD onto TAPE (TAPE O.T.E.)
- Displayed information
- Adjusting the tone
- Adjusting the AUX input Muting the audio tempo- level rarily (MUTE)
- Playing CD or MD tracks
- Repeating a CD or MD Playing a CD or MD in a (REPEAT) random (RANDOM)
- Stereo LP modes
- Setting the recording mode
- High-speed recording of
- Recording onto MD
- Recording onto TAPE
- Recording CD tracks onto
- Recording MD tracks onto
- Recording only the first
- Editing the MD titles
- Moving one track
- Moving several tracks at a time
- Combining tracks
- Dividing a track
- Erasing a track
- Erasing several tracks at
- Canceling editing
- Waking up to the timer
- Program timer
- Sleep timer (SLEEP) Auto power save (A.P.S.)
- Important items
- In case of difficulty
- Display message list
- Specifications
- Controls and indicators
